How to Make a Junk Journal from Scratch


That pile of clothing tags, ticket stubs, and old receipts on your dresser does not have to go in the trash. If you have looked up how to make a junk journal from scratch and found nothing but lace and pressed flowers, I hear you.
I wanted one that looked like it belonged next to a pair of worn boots, not on a craft fair table.
This guide walks you through building a sturdy, cloth-covered junk journal from a cereal box, an old flannel shirt or pair of jeans, and paper you already own.
By the end, you will have a hand-sewn book with 48 pages, a fabric cover, and a cord tie that wraps it shut. Use it for outfit notes, travel tickets, or a record of every shirt you have worn out.
The method works because each part does one job. Cardboard gives the cover a backbone. Fabric makes it tough. A three-hole stitch holds the pages without fancy tools.
Plan on about 2 hours of hands-on time and 1 hour of drying. No sewing machine. No special paper. Clear off a table and pull that box out of the recycling.
- 1 cereal box or thin cardboard, at least 12½ × 9 in
- 1 fabric scrap, 14½ × 11 in (old flannel shirt, denim, or canvas)
- White PVA glue or Mod Podge
- 1-inch foam brush or old paintbrush
- 1 sheet kraft or patterned paper, 12 × 8½ in, for lining
- 30-inch leather cord or an old bootlace
- Wax paper and 3–4 heavy books
- 12 sheets of mixed paper, 8½ × 11 in (printer paper, grocery bags, old maps)
- Ruler and pencil
- Sharp scissors or a craft knife
- Butter knife or an empty ballpoint pen, for scoring
- Awl or a large thumbtack
- Large-eye needle
- 2½ yards waxed thread or embroidery floss
- Glue stick and 2 binder clips
- Clothing tags, envelopes, and ticket stubs for decorating
- Sort your junk into three piles
- Cut the cover from a cereal box
- Score two fold lines down the middle
- Glue fabric over the outside of the cover
- Press the cover flat for one hour
- Line the inside of the cover
- Fold your pages into three signatures
- Punch sewing holes with a paper template
- Sew each signature to the spine
- Glue pockets and tags onto the pages
- Tie a cord closure to finish your junk journal
Sort your junk into three piles

A junk journal is only as good as the scraps you feed it. Spread everything on a table and split it three ways: stiff pieces for the cover, flat sheets for pages, and small odd bits for decorating. Throw out anything greasy or damp, since both ruin glue. The chart below shows where each scrap belongs.
| Scrap | Where to Find It | Use It For |
|---|---|---|
| Cereal box | Kitchen recycling | Cover base |
| Old flannel shirt or jeans | Back of the closet | Cover fabric, pockets |
| Printer paper | Desk drawer | Writing pages |
| Brown grocery bag | Under the sink | Pages, cover lining |
| Old maps, receipts, tickets | Glovebox, wallet | Page accents |
| Envelopes | Junk mail | Pockets |
| Clothing hang tags | New shirts and jeans | Tags, bookmarks |
Cut the cover from a cereal box

Open the box flat on your table. Measure a rectangle 12½ inches wide and 9 inches tall, then cut it out with sharp scissors or a craft knife pulled along a metal ruler.
That size leaves a ¼-inch border around your pages, which keeps their edges from fraying when the journal rides in a bag.
(No cereal box? A thin shipping box works. Skip anything thicker than ⅛ inch, because thick board fights the fold.)
Score two fold lines down the middle
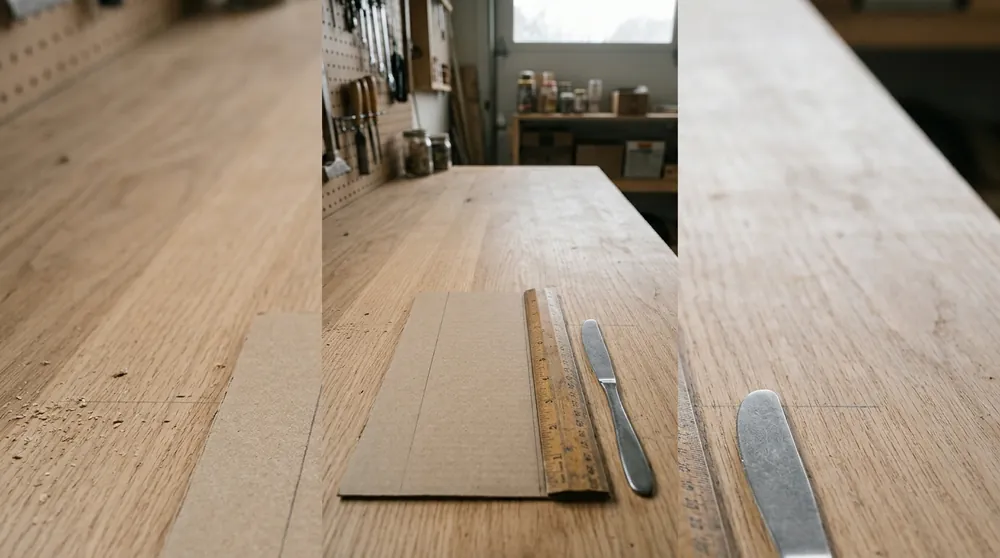
Why bother? Cardboard cracks when you fold it without a guide. A pressed groove gives it a clean hinge. Mark 5¾ inches and 6¾ inches from the left edge, at both the top and the bottom. Connect each pair with your ruler.
Press a butter knife or an empty ballpoint pen hard along both lines. Fold the cover on each line and open it back up. That 1-inch strip in the middle is your spine.
Glue fabric over the outside of the cover

An inch of extra fabric on every side is what lets you wrap the edges. Cut your fabric to 14½ × 11 inches and lay it face down.
Brush a thin coat of glue over one side of the cardboard and press it glue side down onto the center of the fabric. Smooth it from the spine outward with your palm. To wrap the edges:
Subscribe to DIY Craft Bloom
Get updates on the latest posts and more from DIY Craft Bloom straight to your inbox.
- Snip each fabric corner off at an angle, about ¼ inch from the cardboard tip.
- Brush glue along one inside edge of the board.
- Fold that fabric flap over and press it flat.
- Repeat on the other three edges.
The back panel of an old flannel shirt is the best scrap for this. It is the biggest flat piece, with no buttons, pockets, or seams in the way. Denim works too, but pick thin, worn denim so the corners fold neatly.
Too much glue soaks through the fabric and leaves dark stains that will not wash out. Your brush should leave a thin, shiny layer, not white puddles. If glue shows on the front, blot it right away with a dry paper towel.
Press the cover flat for one hour

Wet glue makes cardboard bow. Lay the open cover flat with wax paper above and below it, then stack 3 or 4 heavy books on top. Leave it for 1 hour. If a corner lifts when you check, add a dot of glue, clamp it with a binder clip, and give it 15 more minutes.
Line the inside of the cover

If the raw fabric edges bug you, this step hides them. Cut your lining paper to 12 × 8½ inches, which is ¼ inch smaller than the cover on every side.
A flattened grocery bag works if you have no patterned paper. Rub glue stick over the whole back of the sheet, not only the edges. Line it up so the border is even all the way around.
Smooth it from the center outward with an old gift card to push out air bubbles. Once it is down, refold the cover along both spine lines.
Fold your pages into three signatures
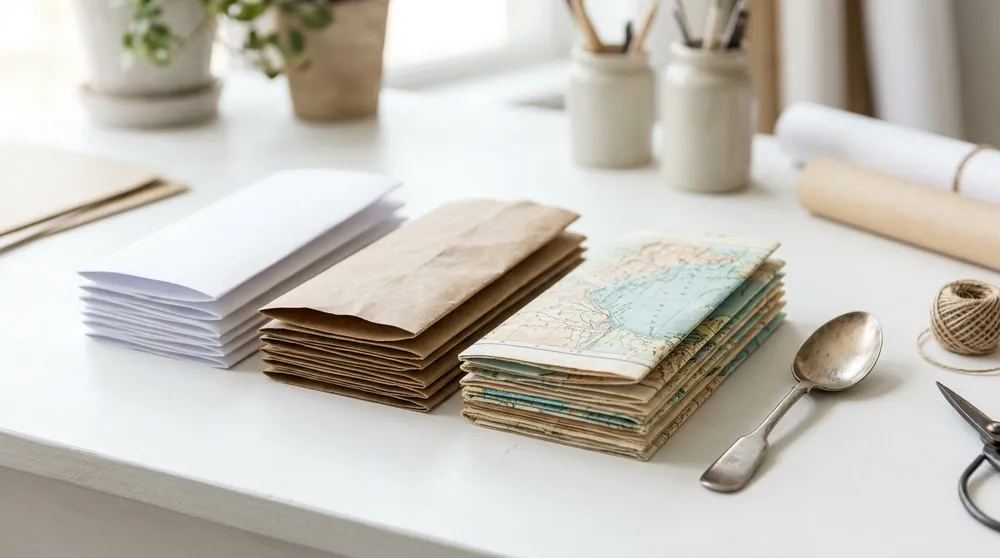
A signature is a small stack of folded sheets that gets sewn in as one unit. Mix your paper types and make 3 stacks of 4 sheets each. Trim anything bigger than 8½ × 11 inches first.
Fold each stack in half together so it measures 5½ × 8½ inches, and run the back of a spoon along the fold to sharpen it. Keep thick paper like grocery bags to 1 sheet per stack, or the fold will gape. You now have 48 pages.
Punch sewing holes with a paper template

Measure carefully here, because a wrong hole shows forever. Cut a strip of scrap paper 8½ inches long. Mark it at 1 inch, 4¼ inches, and 7½ inches from one end.
Open a signature to its center, lay the strip in the fold, and push your awl through each mark. Repeat for all three signatures.
On the spine, draw three lines down its length at ¼, ½, and ¾ inch across. Set the template ¼ inch below the top edge on each line and punch through from the outside.
Put a folded towel or an old magazine under your work before you punch. Hold the paper beside the hole, never in front of the point. An awl that slips goes straight into a fingertip.
Sew each signature to the spine

Thirty inches of thread is enough for one signature. Start with the middle signature on the middle row of spine holes, using the three-hole pamphlet stitch:
- From inside the signature, push the needle out through the center hole and the spine. Leave a 3-inch tail inside.
- Go back in through the top hole.
- Inside, pass over the center hole and push out through the bottom hole.
- Come back in through the center hole, on the other side of the long stitch from your tail.
- Tie both ends in a tight double knot around the long stitch and trim them to ½ inch.
Sew the other two signatures to the outer rows the same way.
Subscribe to DIY Craft Bloom
Get updates on the latest posts and more from DIY Craft Bloom straight to your inbox.
No waxed thread? Pull embroidery floss across an unlit candle 2 or 3 times. The wax stops tangles and helps the knot grip.
Glue pockets and tags onto the pages
This is where the journal starts to feel like yours. Cut an envelope in half and glue it to a page along three sides to make a pocket.
Tuck clothing hang tags inside, or punch a hole in each tag and tie it in with leftover thread.
The back pocket from a worn pair of jeans makes a sharp pocket for the inside back cover. Cut around it with ½ inch of extra fabric and attach it with PVA glue, not glue stick.
Decorate every other page, not every page. Each add-on makes the book thicker, and too many will stop it from closing flat. Leave blank pages for writing.
Tie a cord closure to finish your junk journal

If you own an old bootlace, you own a closure. Poke a hole through the center of the back cover, ¾ inch in from the outer edge, and widen it with a pencil tip. Thread the cord from outside to inside.
Tie a fat double knot on the inside so it cannot pull through. Wrap the cord twice around the closed book and tie it off on the front.
| If This Happens | Try This |
|---|---|
| The journal will not close flat | Pull off the bulkiest add-on. Next time, make the spine 1¼ inches wide. |
| Bubbles under the fabric | Prick the bubble with a pin and press it down with a gift card while the glue is still wet. |
| Thread keeps knotting | Run it over candle wax and use pieces no longer than 30 inches. |
| Pages stick out past the cover | Trim the long edge with a craft knife and ruler, ⅛ inch at a time. |
| Holes tear in grocery-bag paper | Put a strip of clear tape along the inside fold before you punch. |
| Glue stain shows on the front | Cover it with a fabric patch or a glued-on clothing tag. It will look planned. |
It is a handmade notebook built from recycled paper, packaging, and scraps instead of new supplies. Every page can be a different paper, and that mix is the whole point.
No. Slip a thick elastic hair tie into the center fold of each signature and around the outside of the spine. It holds a light journal well, but stitched pages last longer.
PVA glue or Mod Podge for fabric and pockets. Glue stick for paper on paper. Skip hot glue, because it leaves lumps under fabric.
Yes. Go up to 5 signatures, widen the spine to 1½ inches, and punch one extra row of holes for each new signature.
Thin leather from an old jacket works well. Use fabric glue instead of PVA, and skip the corner folds if the leather is too stiff to bend.
- Cereal box, 12½ × 9 in
- Fabric, 14½ × 11 in
- Lining paper, 12 × 8½ in
- 12 sheets mixed paper
- PVA glue, glue stick
- Awl, needle, 2½ yd thread
- 30-in cord or bootlace
- Tags, envelopes, scraps
- Sort scraps into 3 piles
- Cut cover 12½ × 9 in
- Score at 5¾ and 6¾ in
- Glue fabric, wrap edges
- Press 1 hour
- Glue in lining
- Fold 3 signatures of 4 sheets
- Punch holes at 1, 4¼, 7½ in
- Pamphlet stitch each signature
- Add pockets and tags
- Tie on cord closure
You built a real book with your own hands. Cover, pages, stitches, all of it.
Now you know how to make a junk journal from scratch, and every worn-out shirt and ticket stub has somewhere to go.
For your next one, try a denim cover with a button closure.
Save this pin so the steps are here when you start journal number two.