16 Newspaper Craft Ideas That Cost You Nothing

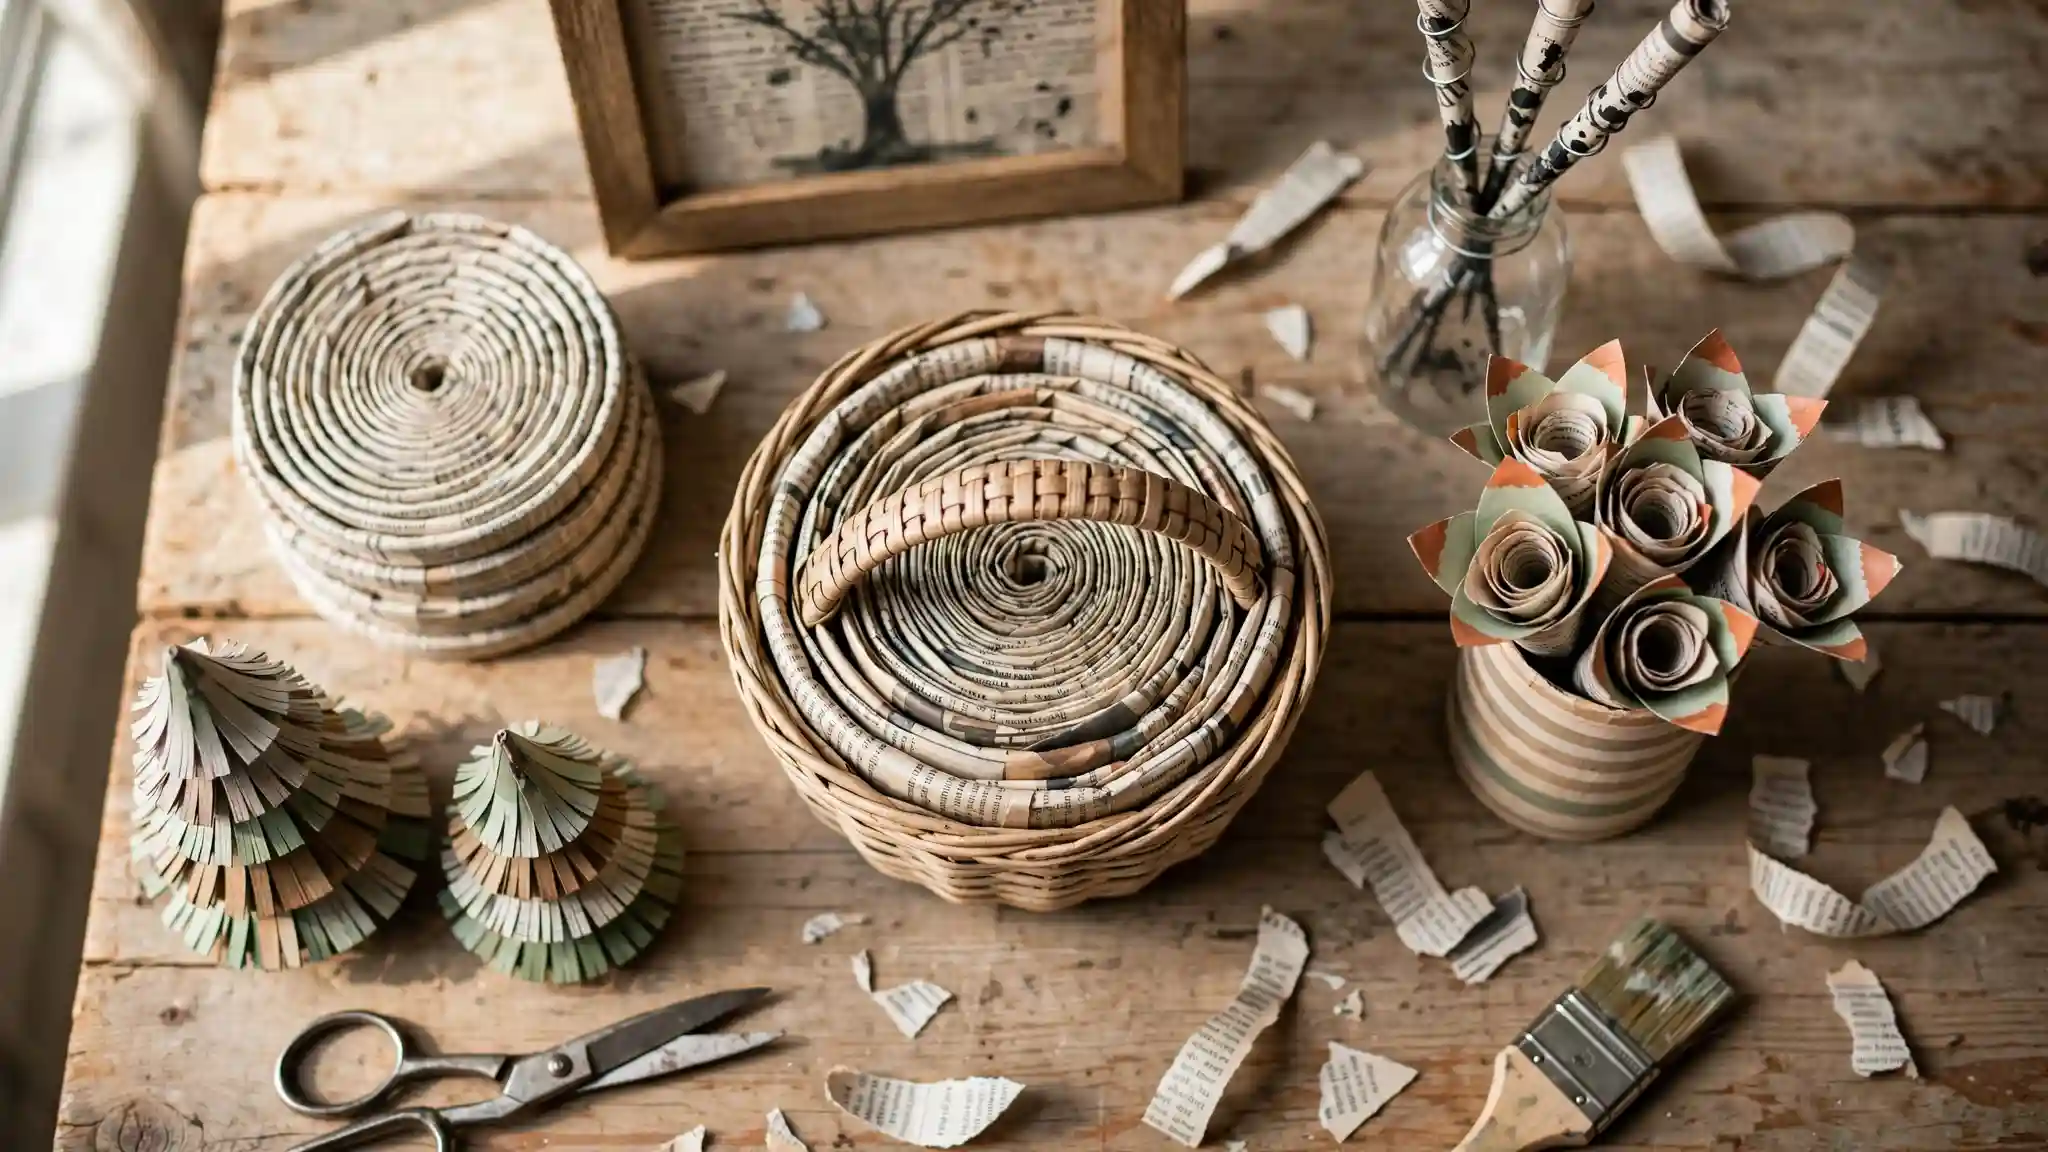
Most people toss the newspaper the second they finish reading it, but a stack of old pages can turn into some of the most textured, budget-friendly decor in the house.
From coiled baskets to framed wall art, newspaper craft ideas have a way of looking far more expensive than the materials actually cost, especially once ink, print columns, and stray headlines become part of the design instead of something to hide.
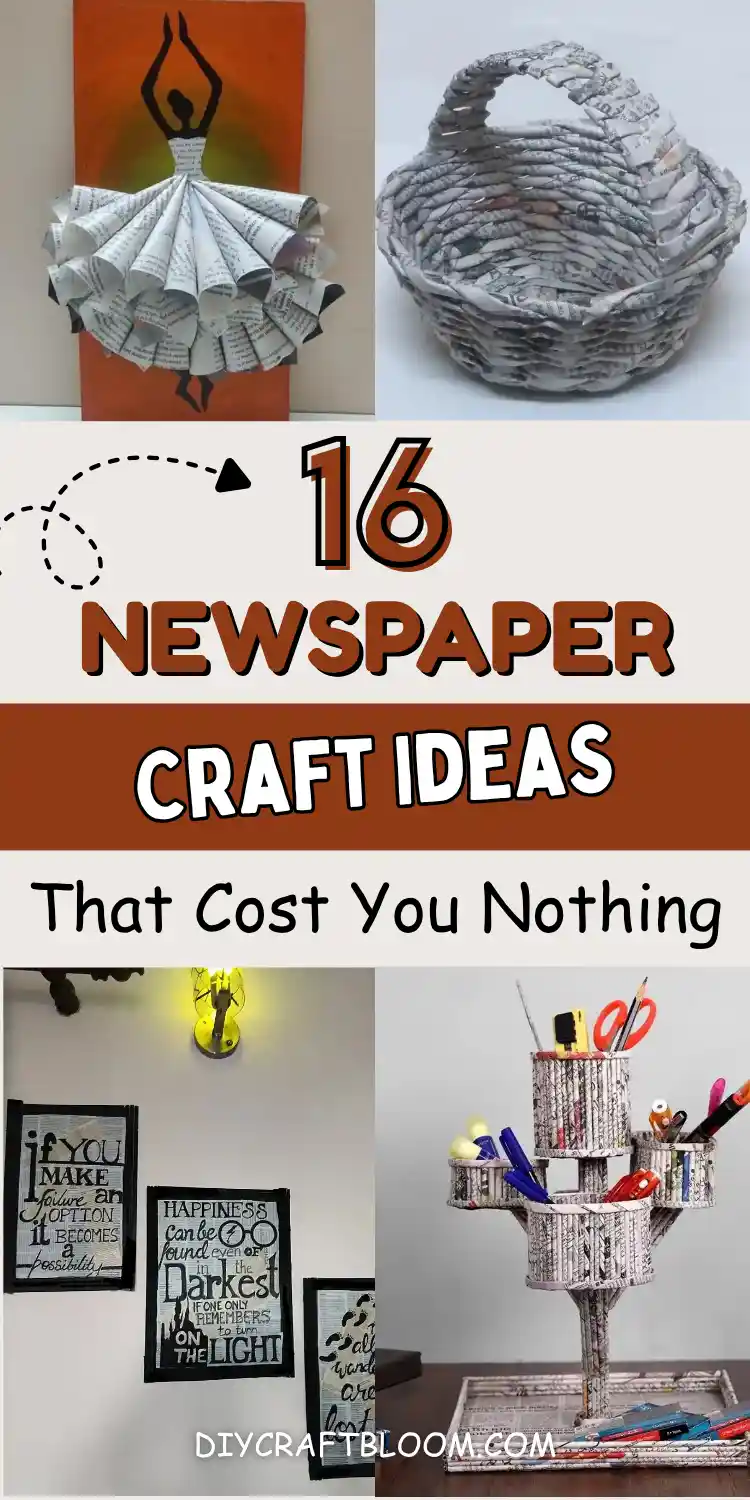
This list covers everything from quick weekend projects to pieces that take real patience, so there is something here whether you have one free afternoon or a whole weekend to fill.
What ties every idea together is texture. Rolled, coiled, torn, folded, or twisted, newspaper behaves differently depending on how it is handled, and that range is exactly what makes this list worth scrolling through.
A few projects lean structural, like woven baskets and desk organizers built to hold real weight.
Others stay purely decorative, like framed silhouettes and painted flowers that let the print peek through on purpose.
Save the ones that fit your space, and keep the rest of your recycling bin handy, because chances are you will want to try more than one.
16 Newspaper Craft Ideas
1. A Coiled Newspaper Basket With a Sturdy Handle
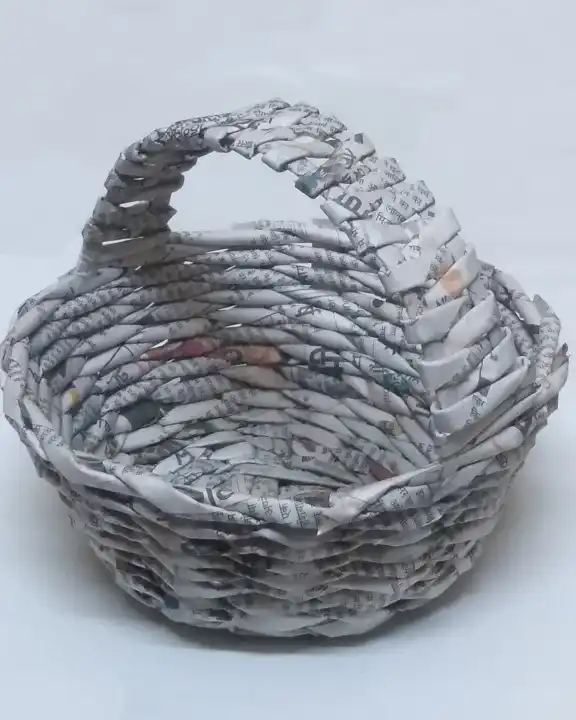
This basket proves newspaper can hold real weight and real shape when you roll it right.
Every strip gets twisted into a tight paper “rope” first, then coiled around and around into a bowl shape before the handle gets woven on top using the same technique.
A few things make this one work so well:
Each strip is rolled into a firm tube before weaving, which is what gives the basket its wicker like texture instead of a flat, papery look.
The bottom starts flat and small, then each new round of rolled paper is glued on top, widening slowly until the sides curve up into a bowl.
The arched handle is built from thicker, doubled up rolls so it can be lifted without bending or snapping.
2. A Painted Silhouette Paired With a Rolled Paper Tutu
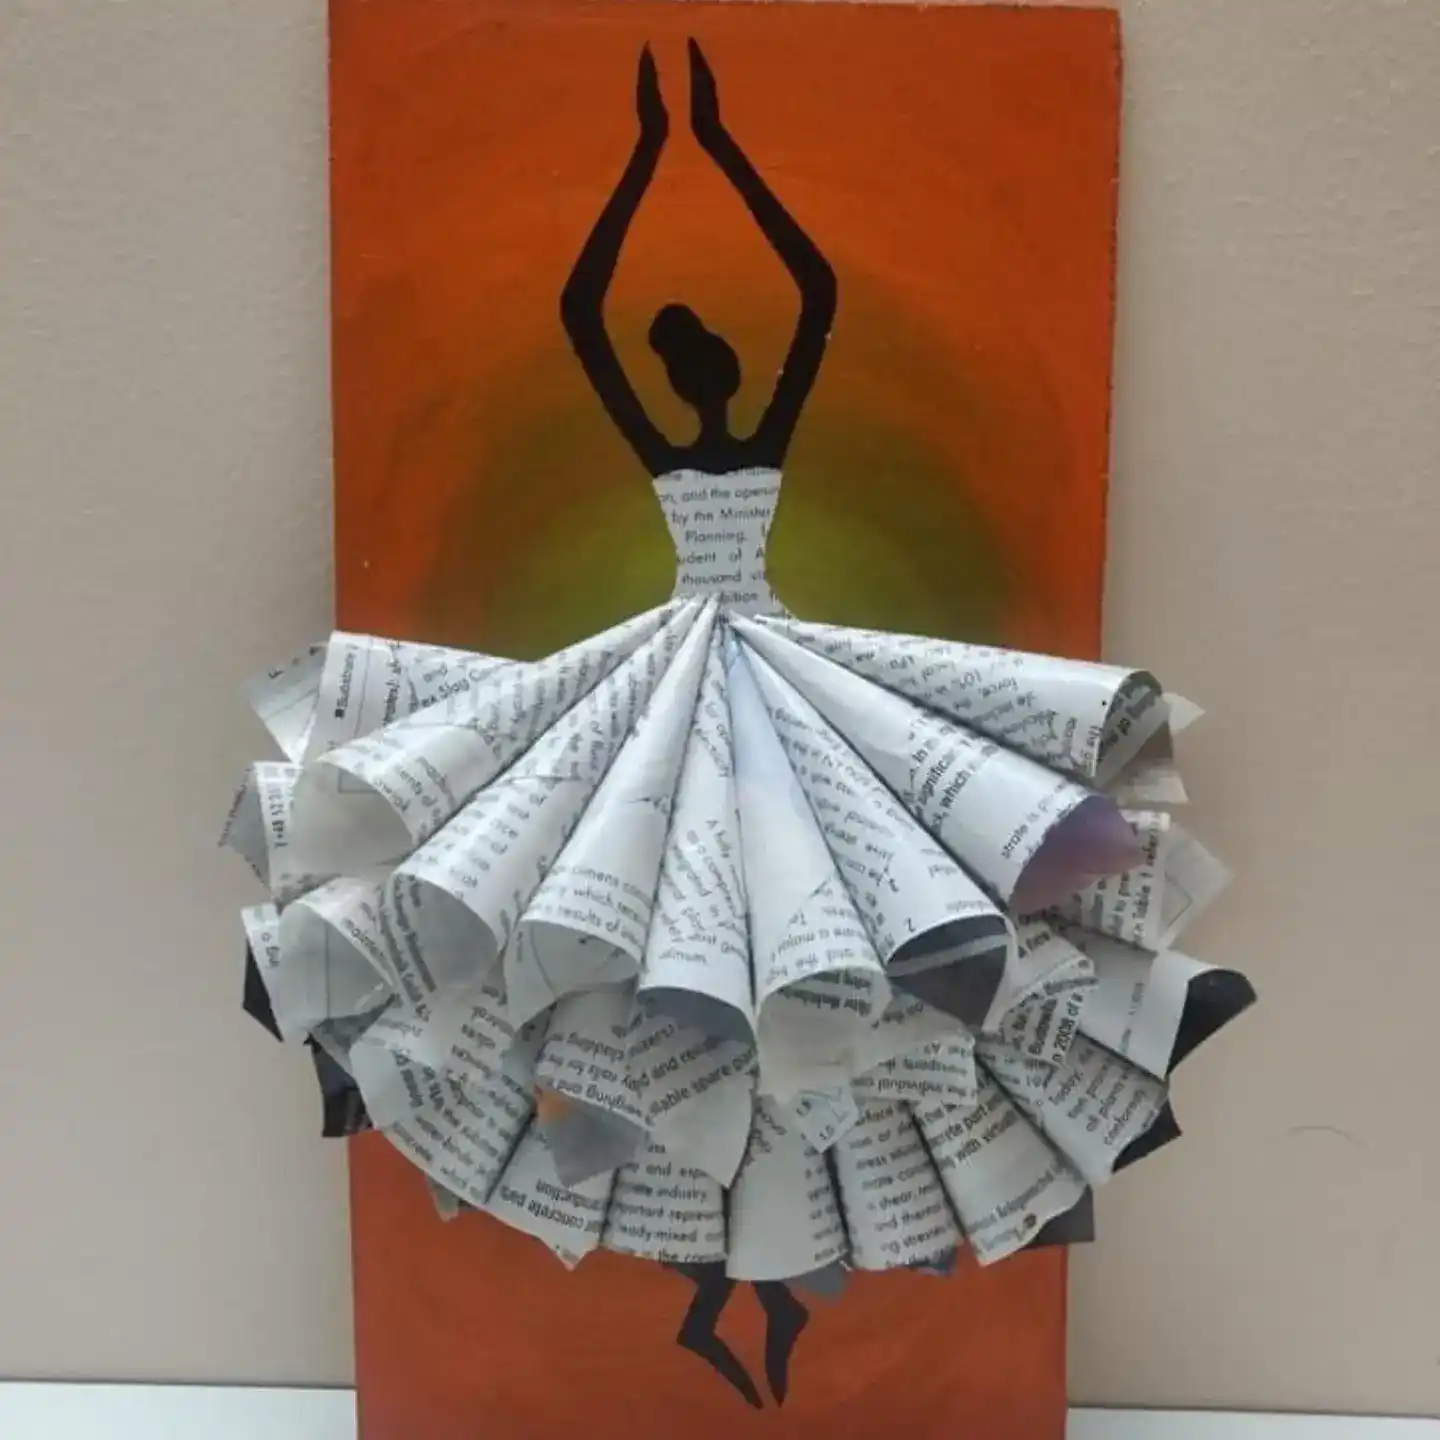
A silhouette does the heavy lifting in this piece, and the newspaper only shows up where it matters most.
The dancer’s arms, head, and legs are cut from solid black card and mounted on a bold orange and gold painted background, so the eye reads the pose instantly.
Then the skirt takes over. Dozens of small newspaper cones, each rolled from a single strip and pinned or glued at the point, fan out into a full, dimensional tutu that actually casts shadows on the wall.
The text on the paper stays visible on purpose. Instead of hiding the print, the craft leans into it, letting stray words and columns become part of the texture of the fabric.
It is a good project for anyone who already has a paper cutting habit and wants a reason to use up old newsprint instead of throwing it out.
Dozens of tiny paper cones read as one soft, moving skirt from across the room.
3. A Multi-Tiered Desk Organizer Built on a Rolled Paper Frame
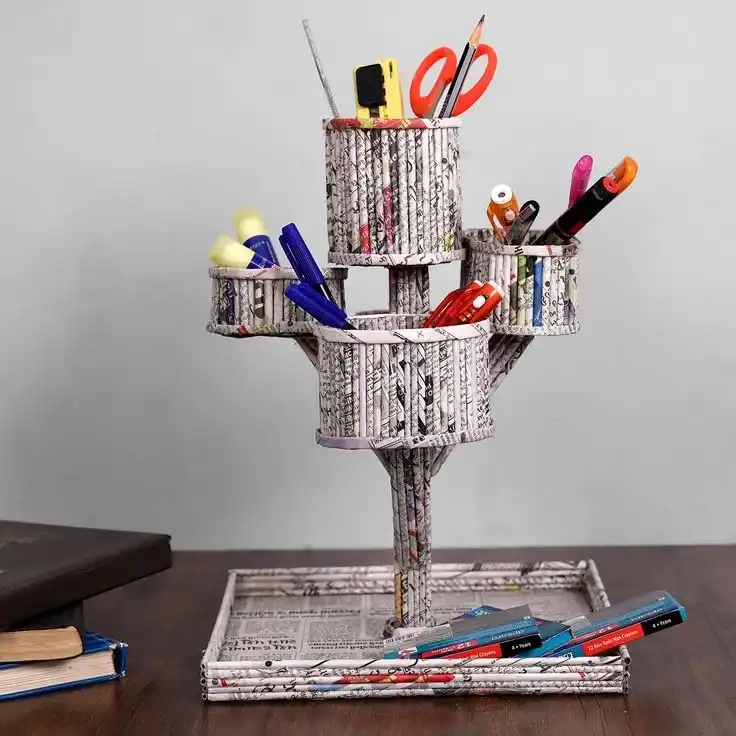
Four small rolled newspaper cylinders sit at different heights around one tall center post, all anchored into a flat woven tray base.
It turns a stack of old papers into a real desk tool, with separate cups for pens, scissors, glue, and highlighters instead of one messy jar.
The center post does double duty as both the tree trunk and the structural support holding every level in place.
What makes this one stand out from a basic pen cup project:
- Multiple heights keep small items and tall items from crowding each other
- The tray base catches loose caps, clips, and eraser bits before they roll off the desk
- Thin cardboard rings, wrapped in rolled newspaper, hide the raw edges of each cup
4. Framed Newsprint Pages Turned Into Hand-Lettered Wall Quotes
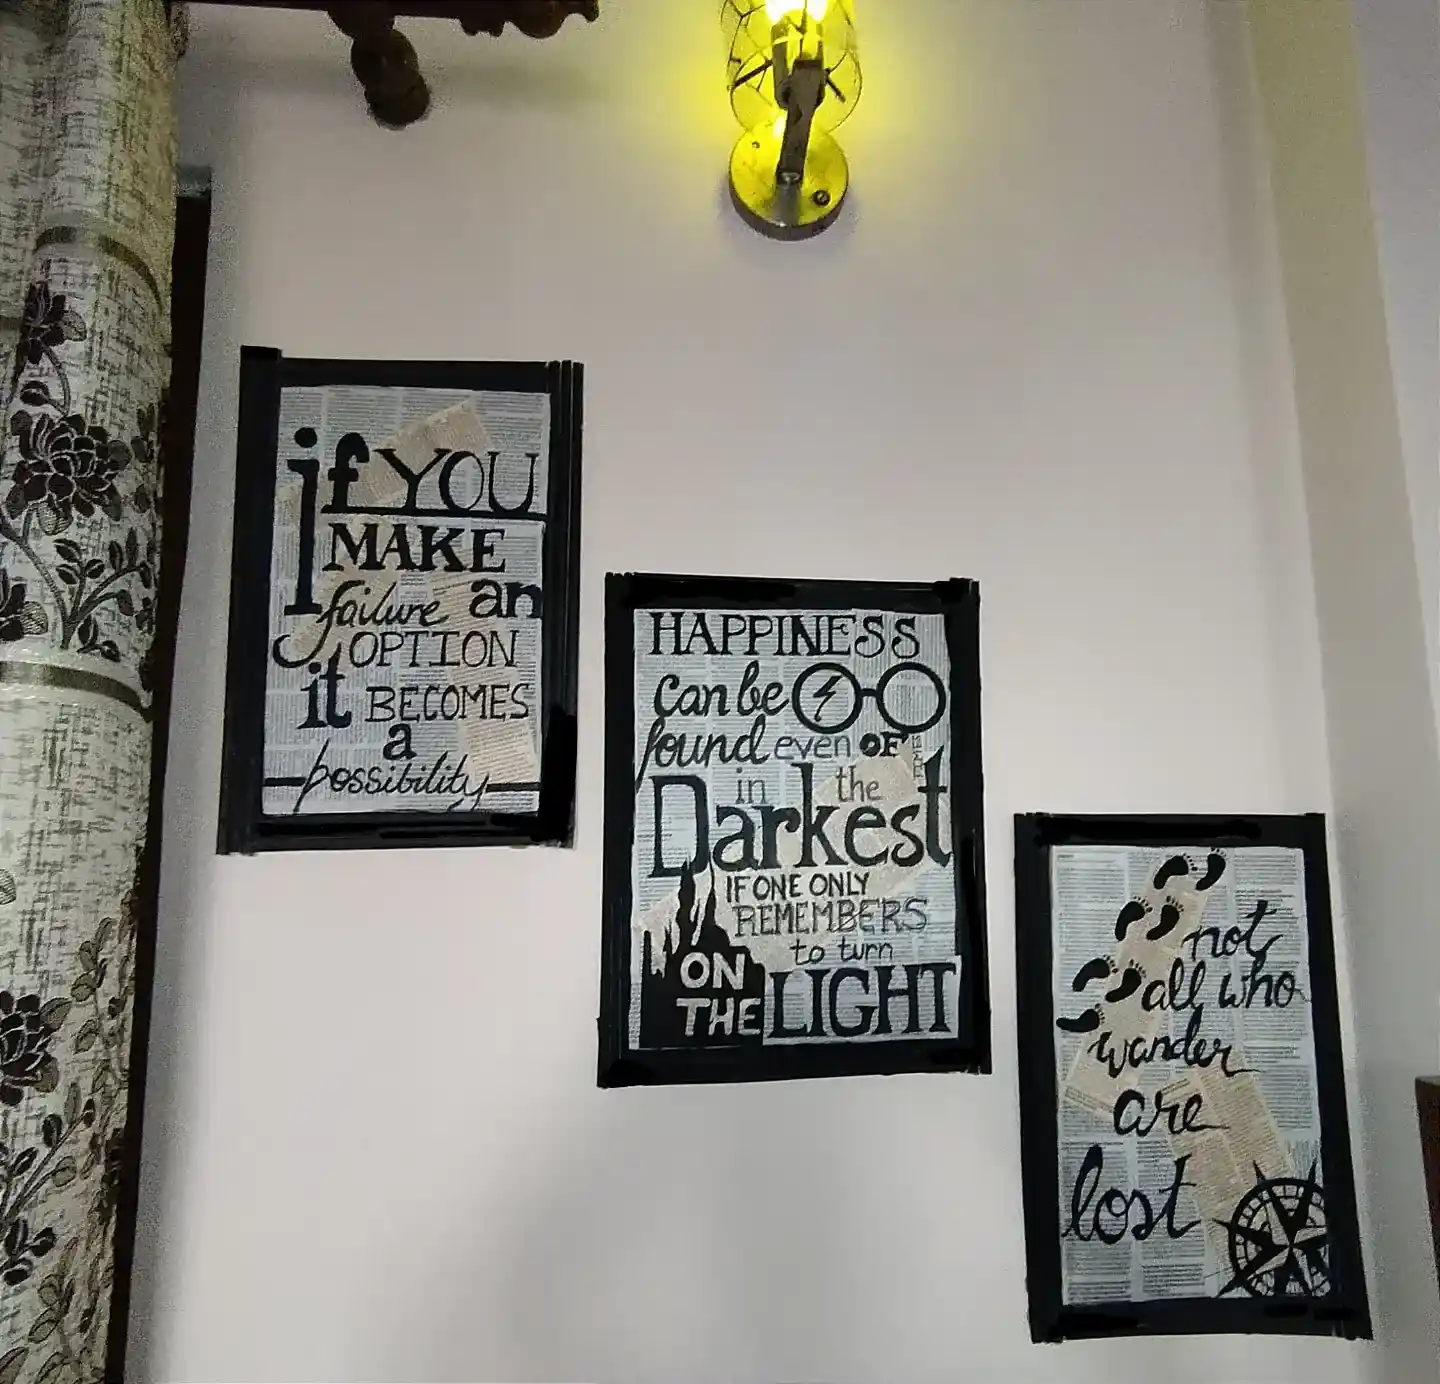
Not every newspaper project needs paper cones or coiling. Sometimes the newsprint just becomes the background.
Here, whole sheets of used newspaper are mounted flat inside simple black frames, then bold hand-lettered quotes are painted or inked right over the print.
The busy little columns of text stay visible around the edges, giving each piece texture and a lived-in, bookish feel that a plain white background would not have.
Grouped as a set of three on one wall, the pieces read like a mini gallery instead of a single poster.
A few small doodled icons, like glasses, footprints, or a compass, get tucked into the lettering to match each quote’s theme, which keeps the eye moving between frames instead of settling on just one.
- Choose short quotes so the lettering stays large and easy to read from across a room
- Keep the frame color and size consistent across the set so it reads as one collection
- Let a few original print lines peek through unpainted for contrast and texture
5. A Folded Newspaper Puppy With Floppy Paper Ears
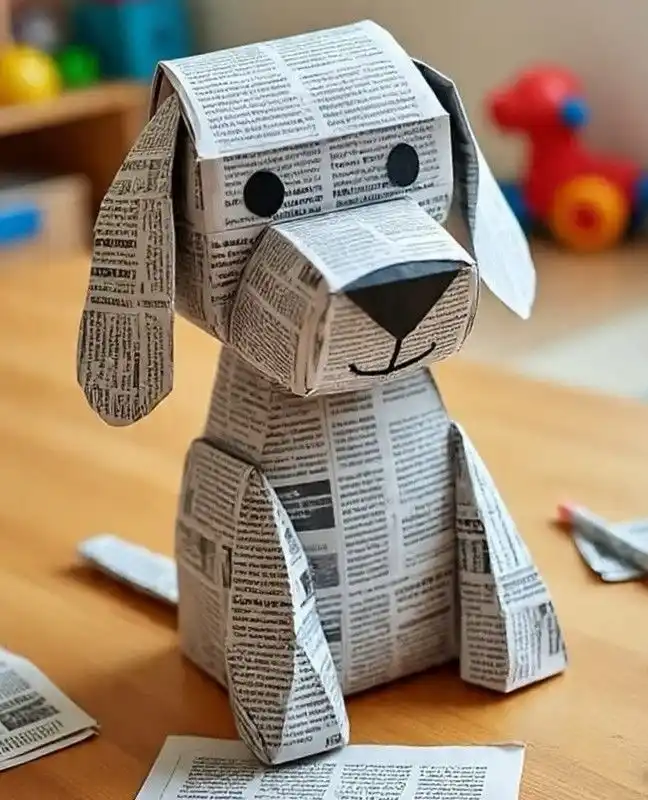
Kids gravitate toward this one first, and it is easy to see why. The whole body is built from simple folded and glued newspaper boxes stacked and joined at the joints, no wire or glue gun needed for the main shape.
Long triangular ears are cut separately and taped on so they hang and move a little instead of sitting stiff against the head.
The black felt tip details do most of the personality work. A rounded snout, two dot eyes, and a curved smile turn a folded paper box into something that actually reads as a dog from across the room.
This is a strong pick if you are crafting with kids since the folds are basic box folds, not tight coiled rolls, and mistakes are easy to hide under more newspaper.
6. A Rolled Newspaper Flower Bouquet Framed in Black
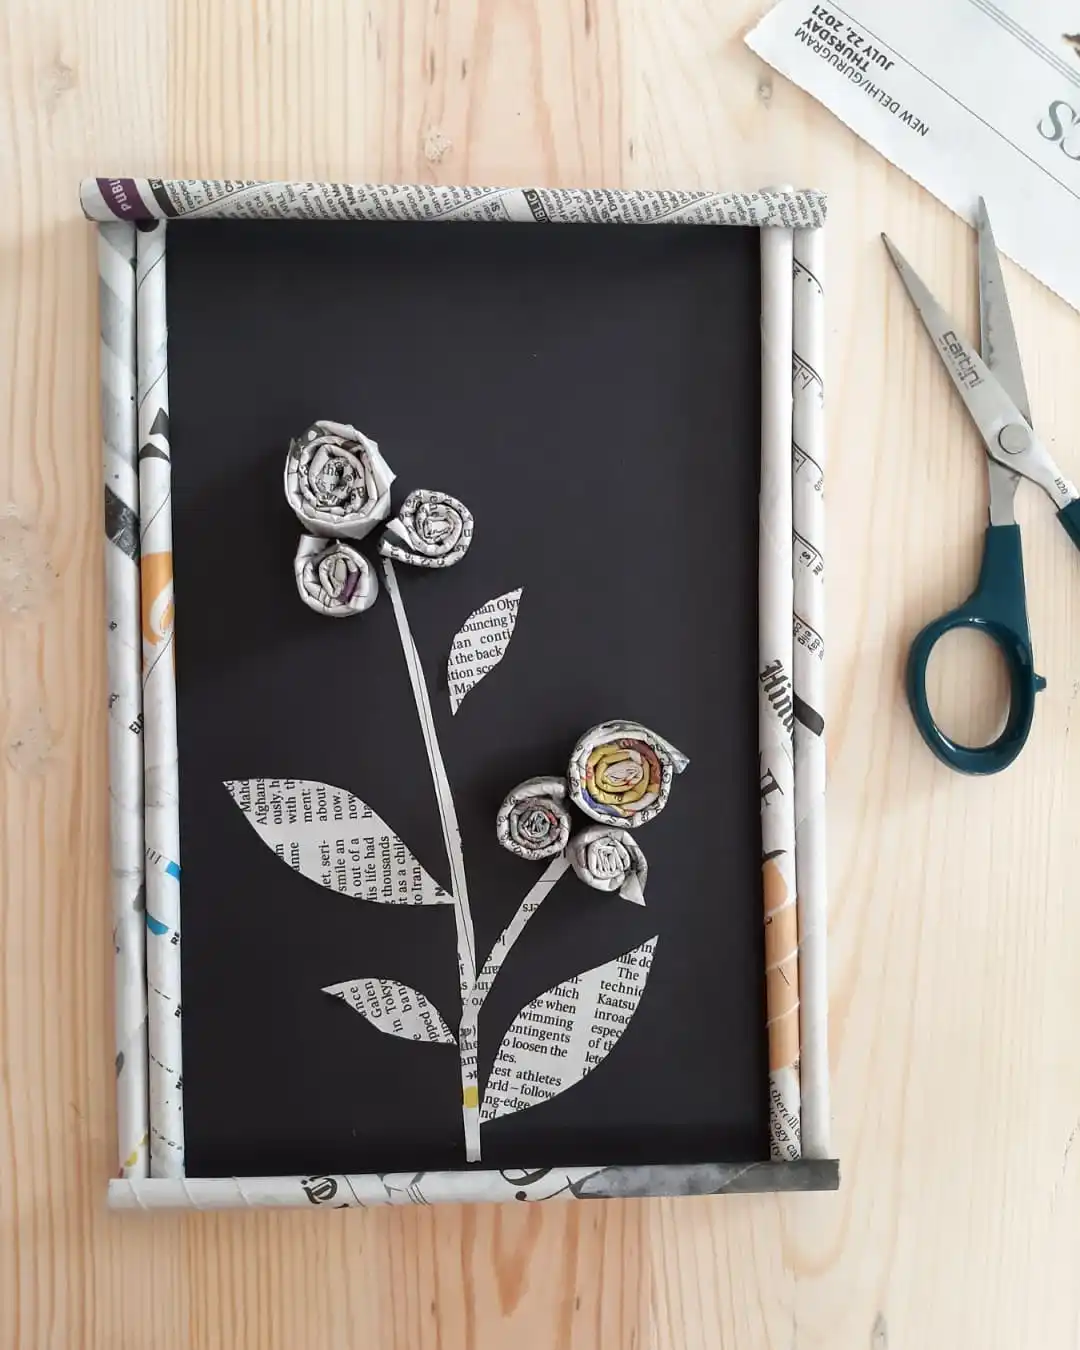
Black card makes all the difference here. Set against a solid dark background, two little rose clusters made from tightly rolled newspaper strips practically glow, and the paper stems and cut leaf shapes read as crisp silhouettes instead of getting lost.
Each rose starts as a long strip rolled from one end, pinched and twisted slightly as it goes so the center stays tight while the outer edges loosen into petals.
Subscribe to DIY Craft Bloom
Get updates on the latest posts and more from DIY Craft Bloom straight to your inbox.
The frame gets the same newspaper treatment as the flowers. Strips are wrapped around thin cardboard or dowel edges and glued along the border, so even the frame itself carries the theme instead of looking store bought.
A few rolled petals pick up faint color from old magazine inserts, which adds a soft blush without any paint.
- Roll each petal loosely and pinch the base tight so the flower does not unravel
- Cut leaves from plain newsprint pages so the small columns of text show through
- Wrap the frame edges last, after the black backing is glued down and dry
7. A Yarn-Outlined Cat Collage Cut From Torn Newspaper Scraps
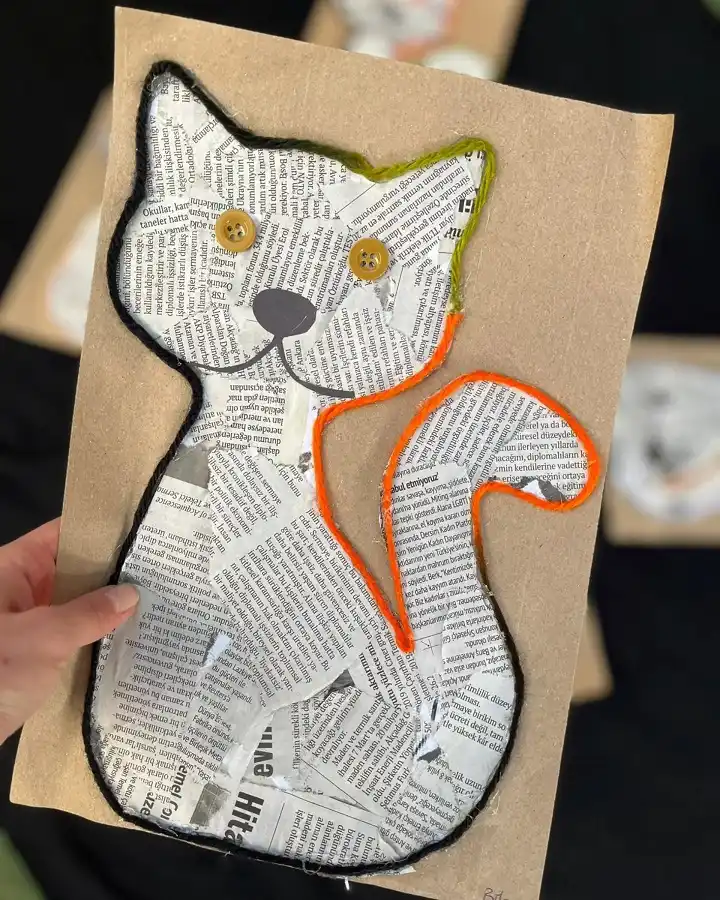
This one skips rolling and folding entirely and works more like a paper mosaic.
A cat shape is drawn onto cardboard, then filled in edge to edge with small torn pieces of newspaper glued flat, so the body becomes a patchwork of headlines and columns instead of one clean sheet.
The outline is what pulls the shape together. Green and orange yarn gets glued right over the torn paper edges to trace the ears and tail, giving the flat collage a hand-stitched, almost embroidered look.
Two mismatched buttons stand in for eyes, and a simple cut paper nose and a few stitched whiskers finish the face.
The cardboard backing stays exposed around the edges on purpose, framing the cat like a rustic postcard rather than covering the whole board.
- Tear the newspaper instead of cutting it for a softer, less uniform edge
- Glue paper down first and let it dry flat before adding the yarn outline
- Pick yarn colors that contrast with the newsprint so the shape reads clearly
Tear paper into small, irregular pieces for texture.
Let glue dry fully before adding the yarn outline.
Skip cutting perfectly straight paper edges.
Skip thin yarn, it disappears against busy newsprint.
8. Layered Paper Flowers With Painted Edges, Standing in a Striped Newspaper Vase
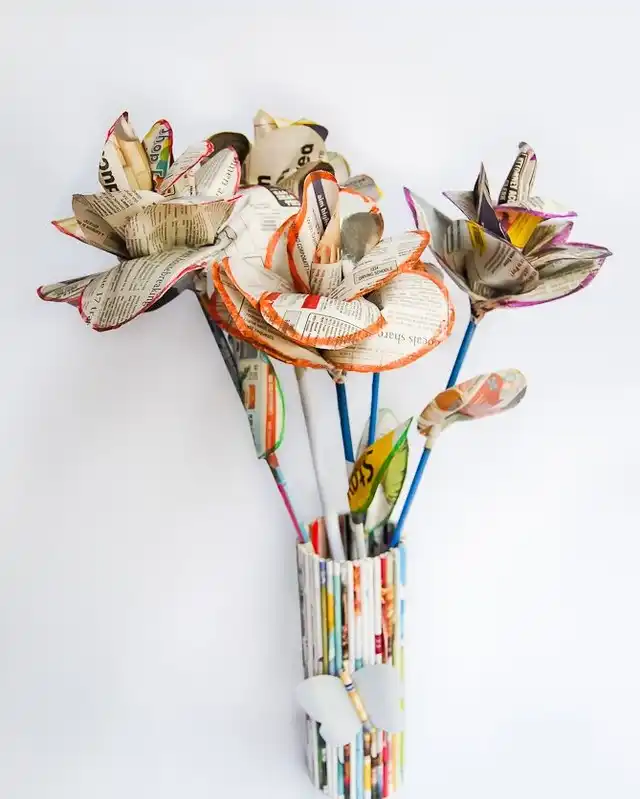
This bouquet leans into color instead of avoiding it. Each flower is built from several layers of cut newspaper petals, stacked and glued so the flower has real depth instead of sitting flat.
The edges of each petal get a quick line of paint, orange, pink, or purple, which turns plain newsprint into something that reads as an actual flower shape from across a room.
Thin wire or skewer stems get wrapped in colorful paper and pushed through the center of each bloom to hold everything upright.
The vase deserves its own credit. Instead of plain grey newsprint, this one uses strips cut from colorful magazine pages, rolled and lined up side by side so the vase itself looks striped, almost like a hand painted ceramic piece.
Trace and cut two or three petal shapes per flower, each layer a bit smaller than the one before.
Run a thin line of craft paint along each petal edge and let it dry fully before assembly.
Glue the layers together at the center, offsetting each one, then push a wrapped stem through the middle.
9. A Painted Silhouette Gallery Mounted Over Full Newspaper Pages
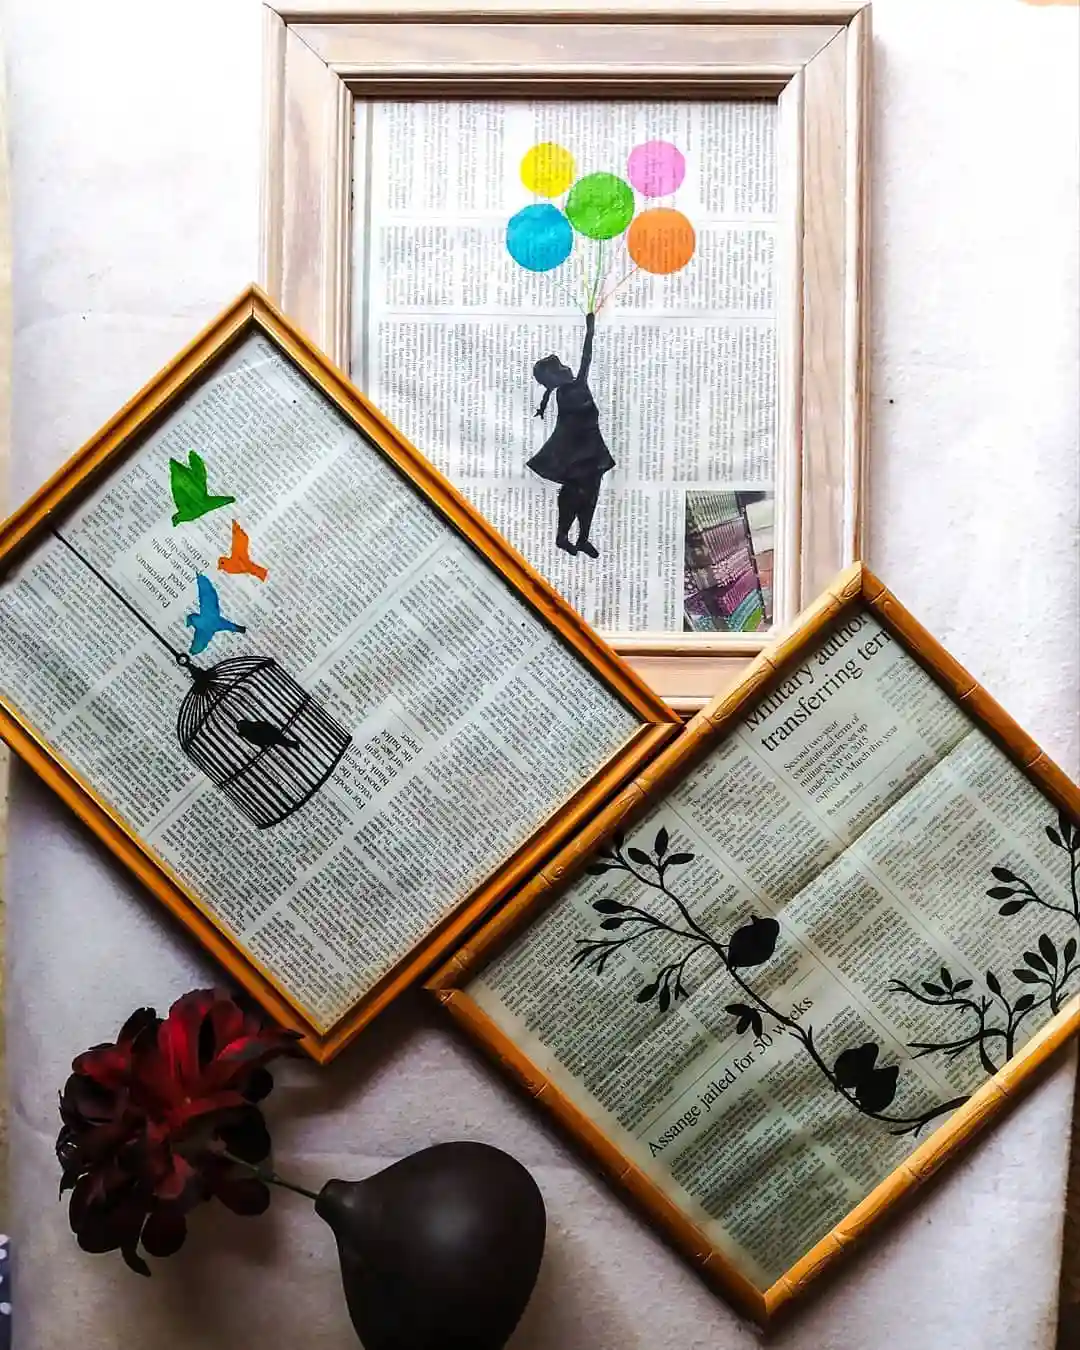
Three framed pieces here treat the newspaper as a canvas rather than a craft material.
Whole broadsheet pages are trimmed to fit standard wood frames, and then a single painted or cut silhouette gets placed on top, a girl lifted by balloons, a birdcage with escaping birds, a branch with small birds perched on it.
Nothing gets rolled, folded, or built. The whole effect comes from restraint: one simple image, one color story, and acres of newsprint left completely untouched around it.
Hanging the frames at mismatched angles, two tilted into diamonds and one square, keeps the grouping from looking like a matched print set.
It reads more like an art collection someone assembled over time, which suits the secondhand, well-loved feel of the newsprint itself.
| Balloon Girl Frame | Birdcage Frame |
|---|---|
| Full color balloons painted straight onto the newsprint. | Black cage silhouette with three colored birds breaking free. |
| Hung straight in a plain wood frame. | Hung tilted at a diamond angle for contrast. |
| Mood: light and whimsical. | Mood: a little wistful, freedom themed. |
10. A Layered Comic-Section Dahlia With Dozens of Rolled Petals
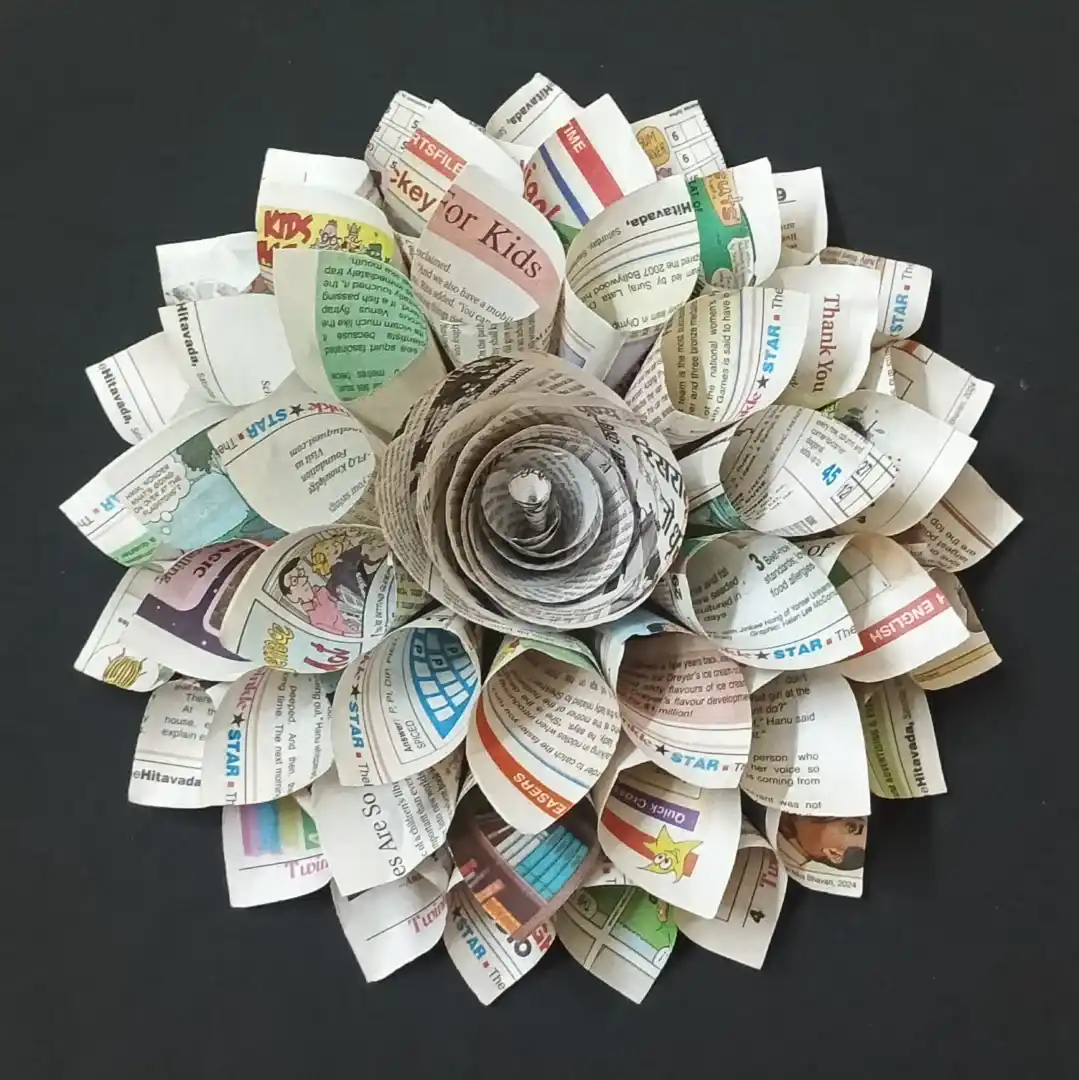
This is the showstopper flower on the list, and it earns that spot through sheer petal count.
Instead of a few large petals, dozens of small cone shaped rolls get glued in tight, overlapping rings, starting with a tightly coiled center and fanning out into wider, looser rolls toward the edge.
That layering is what gives it the dense, dahlia-like fullness rather than the flatter look of a five or six petal flower.
Color placement matters more here than in most newspaper crafts.
The maker clearly picked pages with colored headlines and comic strips on purpose, then arranged them so bursts of red, blue, and yellow scatter across the petals instead of clumping in one spot.
Set against solid black, every petal edge stays crisp and the whole piece reads as one bold shape from a distance.
- Mount it on black or dark backing so the pale newsprint stands out sharply
- Save the most colorful newspaper scraps for the outer petal ring, where they get noticed first
- Build from the center out, gluing each new ring slightly lower than the last for that layered dome shape
Cut your petal cones from the comics and colored ad pages first and set them aside, so you are not hunting for color scraps midway through gluing.
11. Fringed Newsprint Cones Stacked Into a Trio of Tabletop Trees
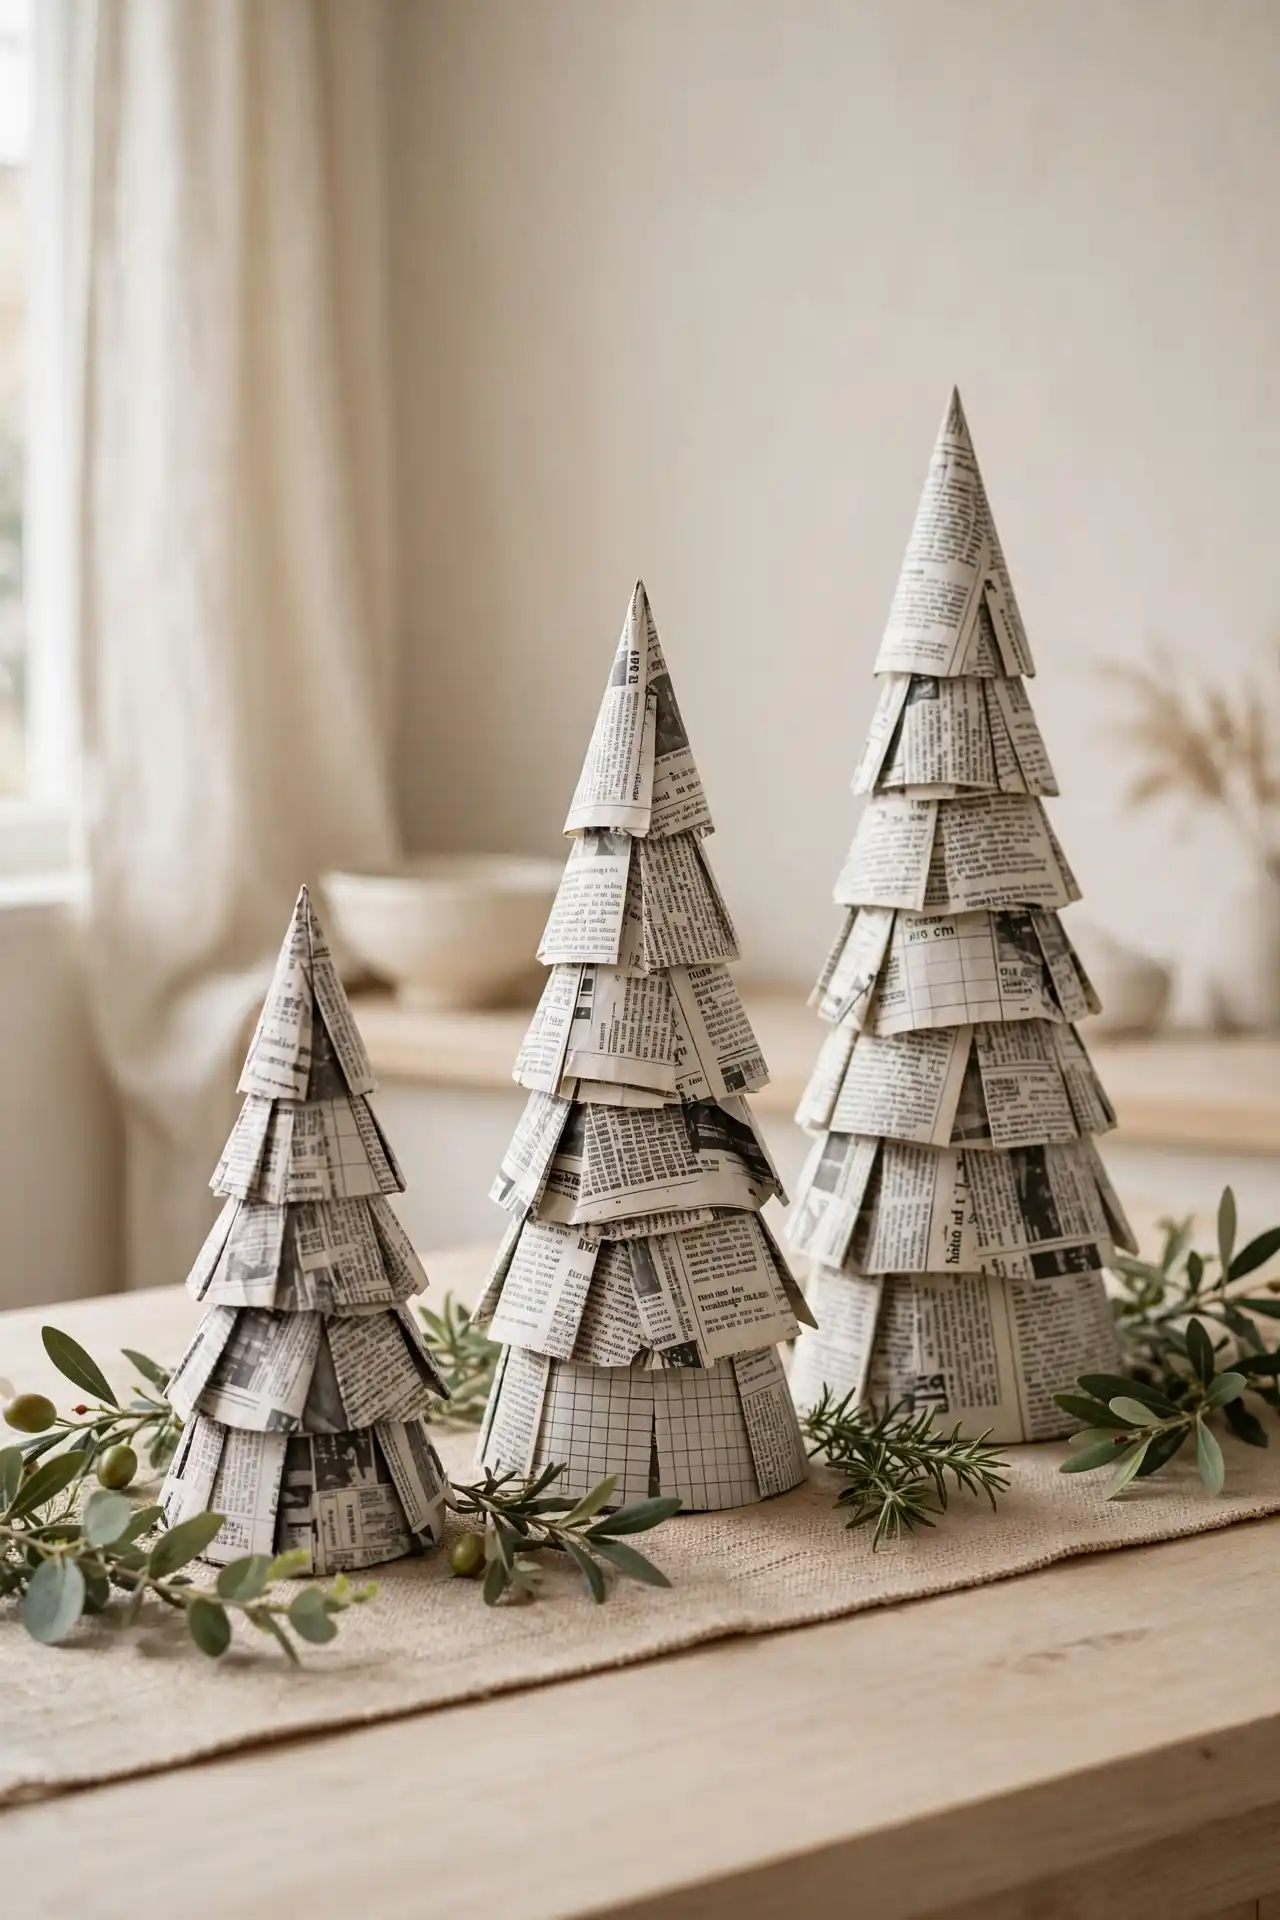
Three different heights turn one simple technique into a whole centerpiece.
Each tree starts as a plain paper cone, then gets wrapped in tiered bands of newspaper, with the bottom edge of every band snipped into small fringed strips before it is glued on.
Layer after layer of fringe stacks upward, mimicking pine branches, and the cone shrinks in width as it climbs so the top ends in a clean, bare point.
Mixed newsprint sections keep the trio from feeling monotone.
Subscribe to DIY Craft Bloom
Get updates on the latest posts and more from DIY Craft Bloom straight to your inbox.
Classified ad grids, dense text columns, and photo heavy pages all show up across the three trees, so even in plain black and white, the surface never looks flat or repetitive.
Real greenery tucked around the bases, rosemary sprigs and small leaf branches, softens the paper texture and pulls the whole grouping into decor territory instead of a school project.
A quiet detail worth noticing: the fringe gets shorter and tighter near the top of each tree and looser near the base, which is what keeps the silhouette looking like a real conifer instead of a plain stacked cone.
Tighter fringe near the top, looser fringe near the base, gives paper cones a real tree silhouette.
12. A Woven Newspaper Storage Bin Finished With Real Craft Supplies
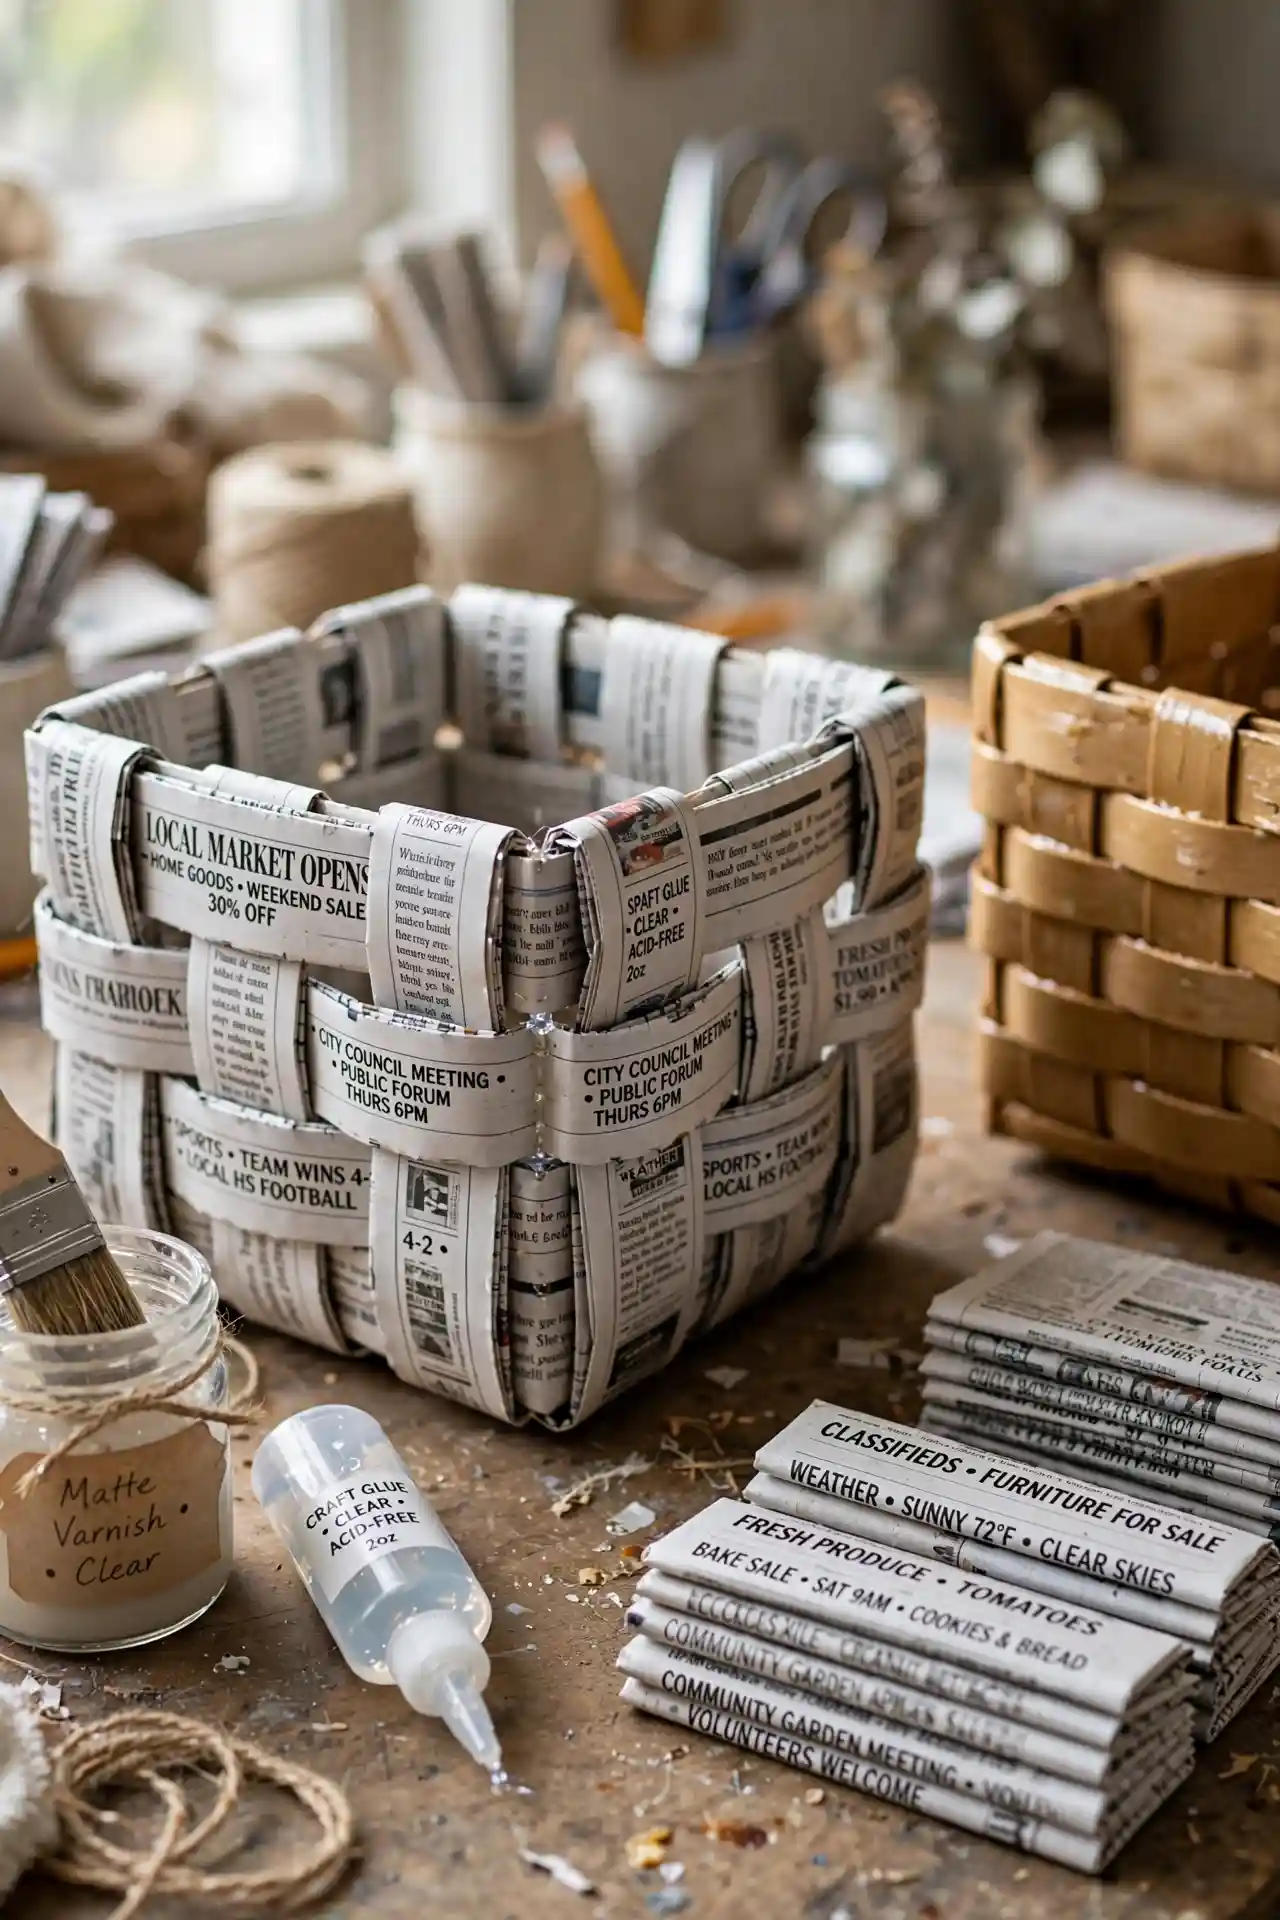
Flat folded newspaper strips get folded lengthwise first, so each one becomes a sturdy flat band instead of a floppy sheet, then those bands weave over and under each other in a simple basket weave, the same over-under pattern used for a real wicker basket.
Headlines and small ad blocks land right on the front of the finished bin, giving it a look closer to reclaimed packaging than craft paper.
What separates this from a quick weekend weave is the finishing step.
A clear acid-free glue holds the corners tight, and a coat of matte varnish seals the whole surface so the newsprint stops picking up fingerprints and stays sturdy enough for daily use, not just display.
Set next to a traditional wicker basket, the woven newspaper version holds its own in shape and structure, proving the technique works at real storage-bin scale, not just as a small trinket box.
- Fold each strip in half lengthwise before weaving so the edges do not fray
- Weave a few extra rows at the top and fold them inward to create a finished rim
- Seal with matte varnish once dry so the bin can handle daily handling
Loose folded newspaper strips, ready to weave, headlines facing out.
A varnished, structured storage bin sturdy enough for daily use.
13. A Torn Newsprint Collage Sealed Under Streaks of White Wash
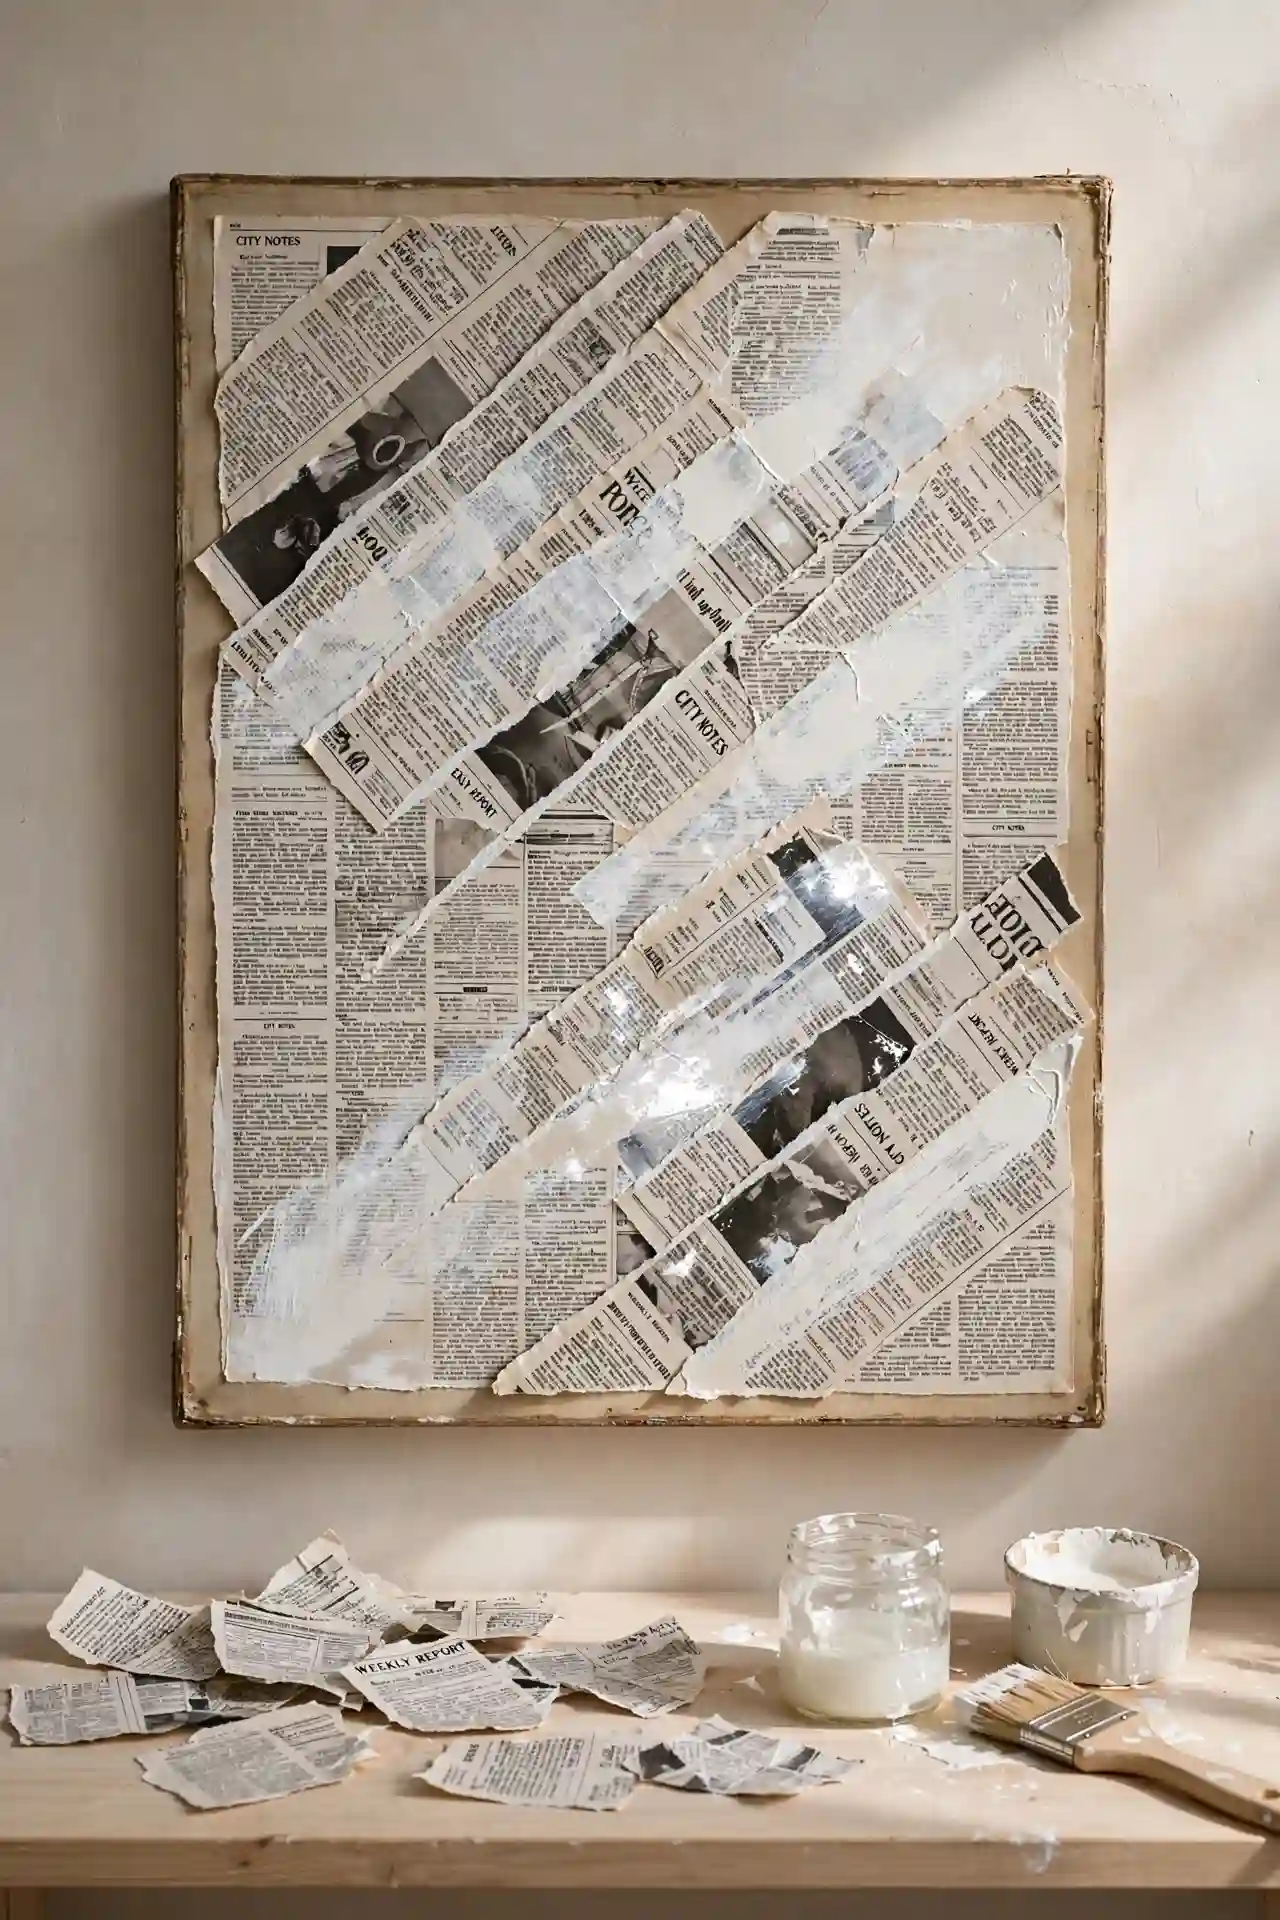
Decoupage carries this whole piece. Long diagonal strips of newspaper, some torn, some cut clean, get layered edge to edge across a canvas until barely a gap of blank space shows through.
Once the glue sets, thinned white paint gets dragged across the surface in loose diagonal streaks, letting some columns of text stay sharp while others fade almost to nothing under the wash.
The diagonal direction is what keeps this from reading as a random pile of scraps.
Every strip runs the same tilted angle, so even with dozens of different headlines and photo fragments overlapping, the piece has one clear visual line pulling the eye from corner to corner.
It sits closer to abstract wall art than a typical craft project, which makes it an easy fit for a living room or entryway rather than a kids’ shelf.
Mod podge or a thinned white craft glue works for both the base layer and the final seal coat, so this project needs surprisingly few supplies for how finished it looks.
14. Twisted Newspaper Cord Coiled Flat Into a Set of Matching Coasters
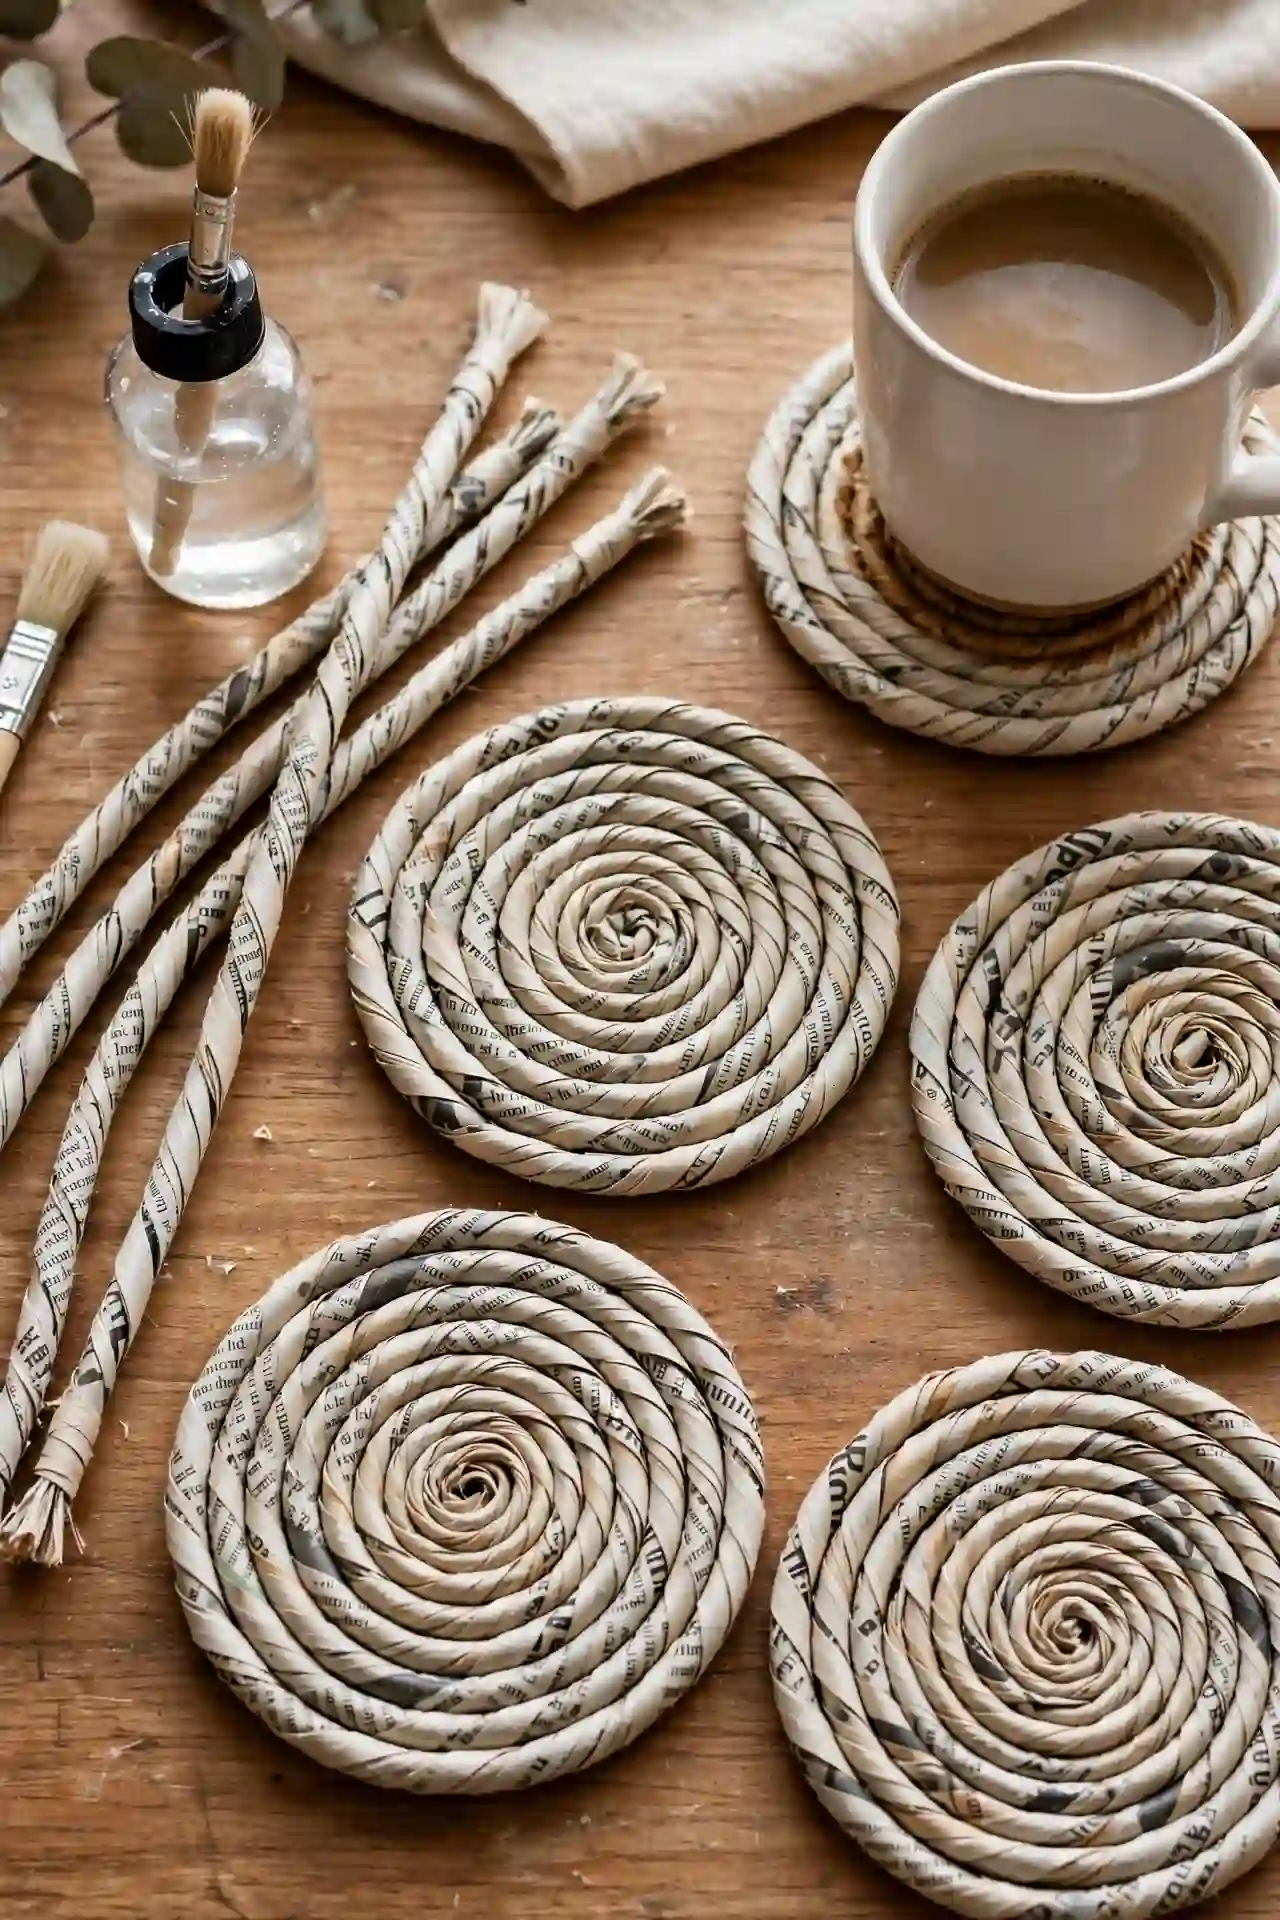
This one starts the same way the earlier woven basket did, by twisting long strips of newspaper into thin, rope-like cords, but here the technique goes flat instead of upward.
Each cord gets coiled from the center outward in a tight spiral, glued as it goes so the rings stay pressed close with no visible gaps between rounds.
The result reads almost like a rattan trivet, right down to the slightly frayed, natural looking ends left loose on a few finished cords.
Making a full matching set is easier than it looks once the twisting is done, since the same length of cord just gets coiled to the same final diameter each time.
A protective coat keeps them functional under an actual hot mug rather than just decorative, letting one cord thickness double as both a coaster and a small trivet depending on how tightly it gets wound.
- Twist the cord tight and even before coiling, loose spots show up as flat gaps once dry
- Glue every half turn as you coil so the spiral does not spring loose while drying
- Seal with a food-safe or heat-resistant coating if the coasters will sit under hot drinks
15. Ink-Stained Newspaper Strips Spiral-Wrapped Around Thin Wire Stems
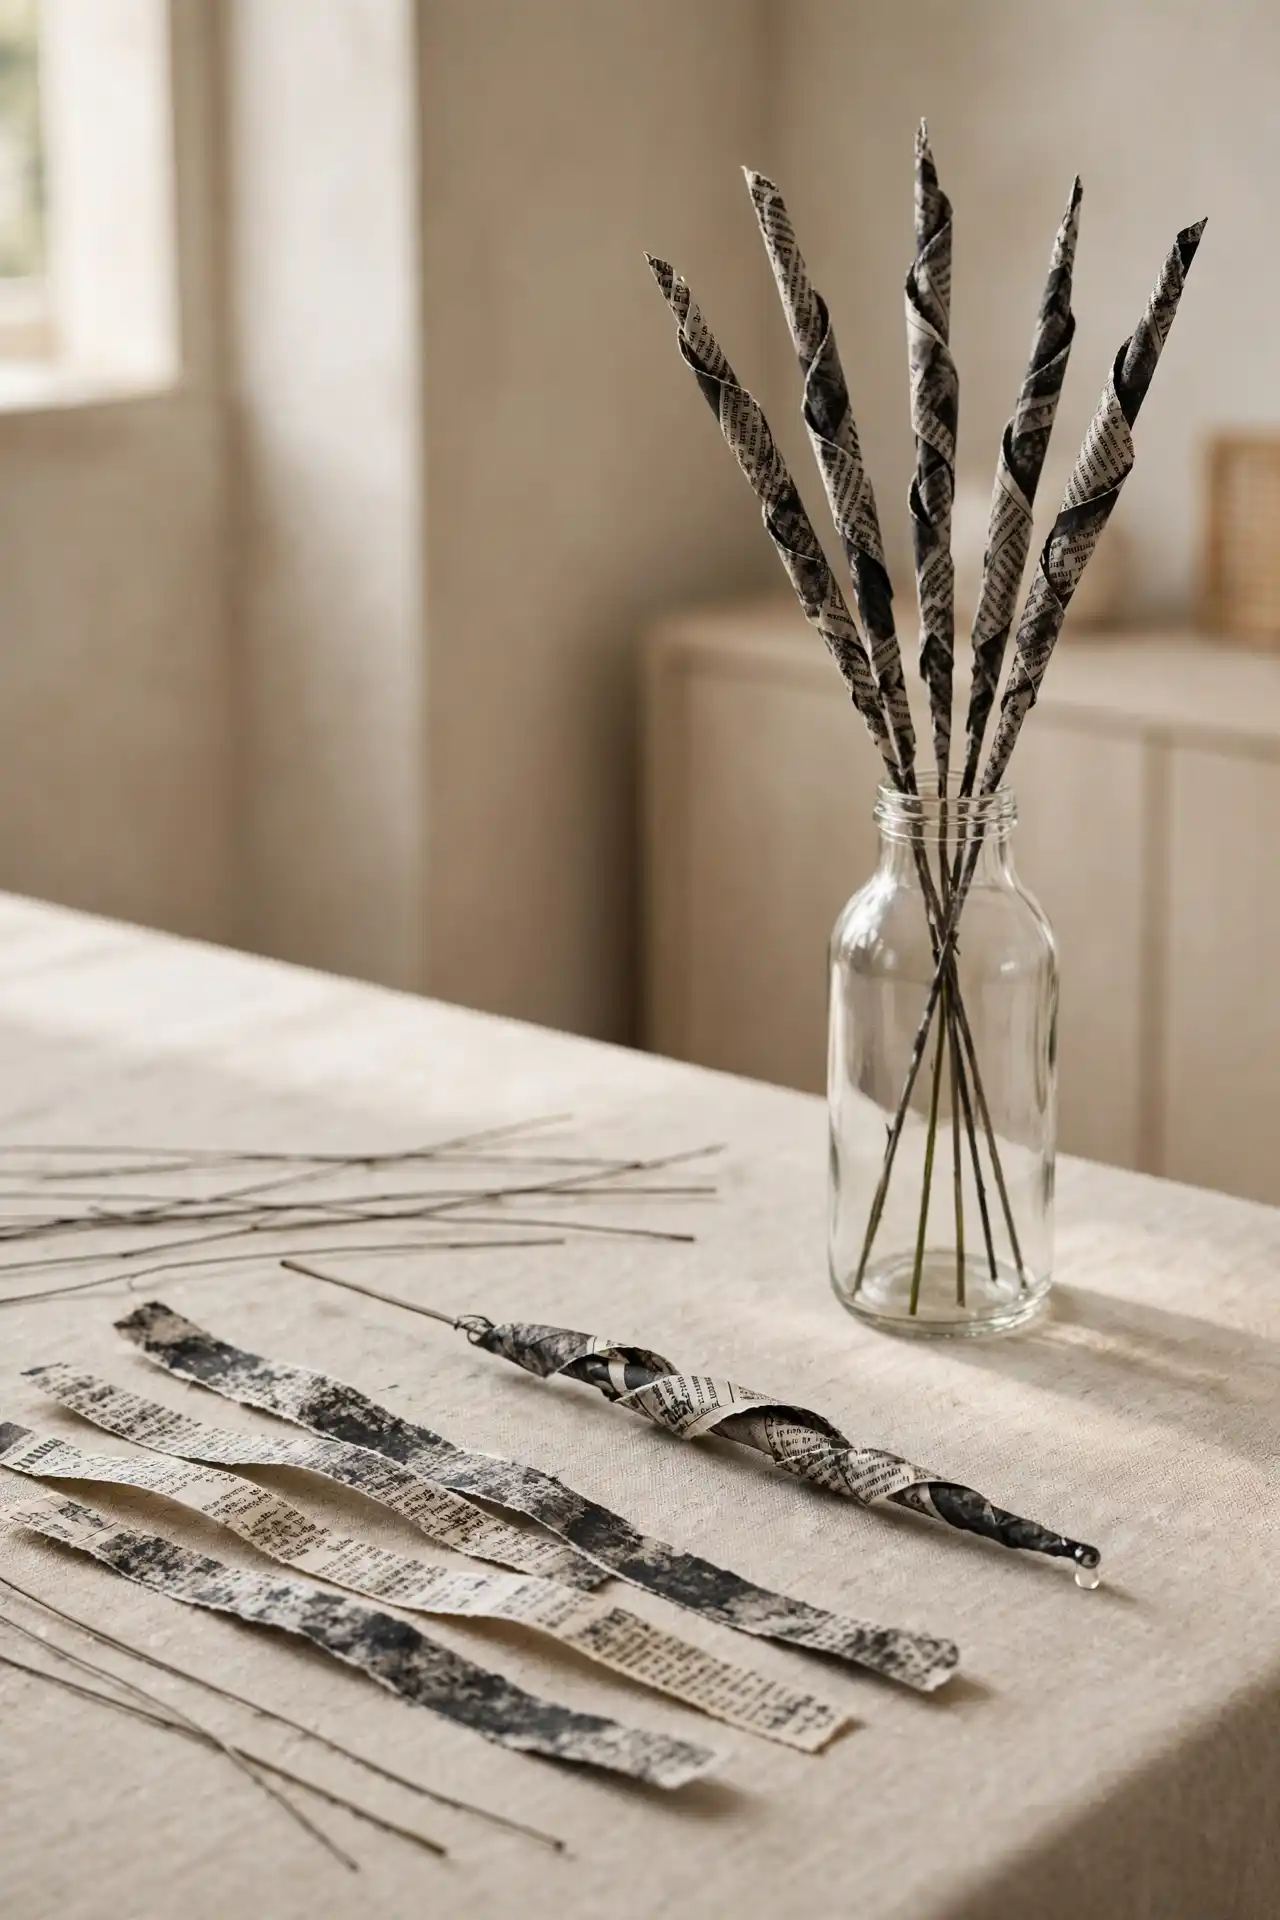
This is the most minimal entry on the list, and that restraint is exactly the point.
A single strip of newspaper, torn with a slightly rough edge, gets wound in a tight diagonal spiral around one bare floral wire, glued down at the tip to keep the point sharp.
No paint, no folding, no cutting into shapes. The ink itself does the visual work here, smudged and mottled across the strip so the finished stem looks aged rather than freshly made.
Standing bare in a clear glass bottle, five or six of these wrapped stems read almost like dried pampas grass or wheat stalks.
The exposed wire ends showing through the water are left on purpose instead of hidden, which keeps the whole arrangement feeling raw and unfinished in a good way.
Anyone who wants a newspaper project that skips gluing bulk or building shape, and just wants something quiet for a shelf, will get the most mileage out of this one.
16. A Lampshade With a Decoupaged Newspaper Band Around the Base
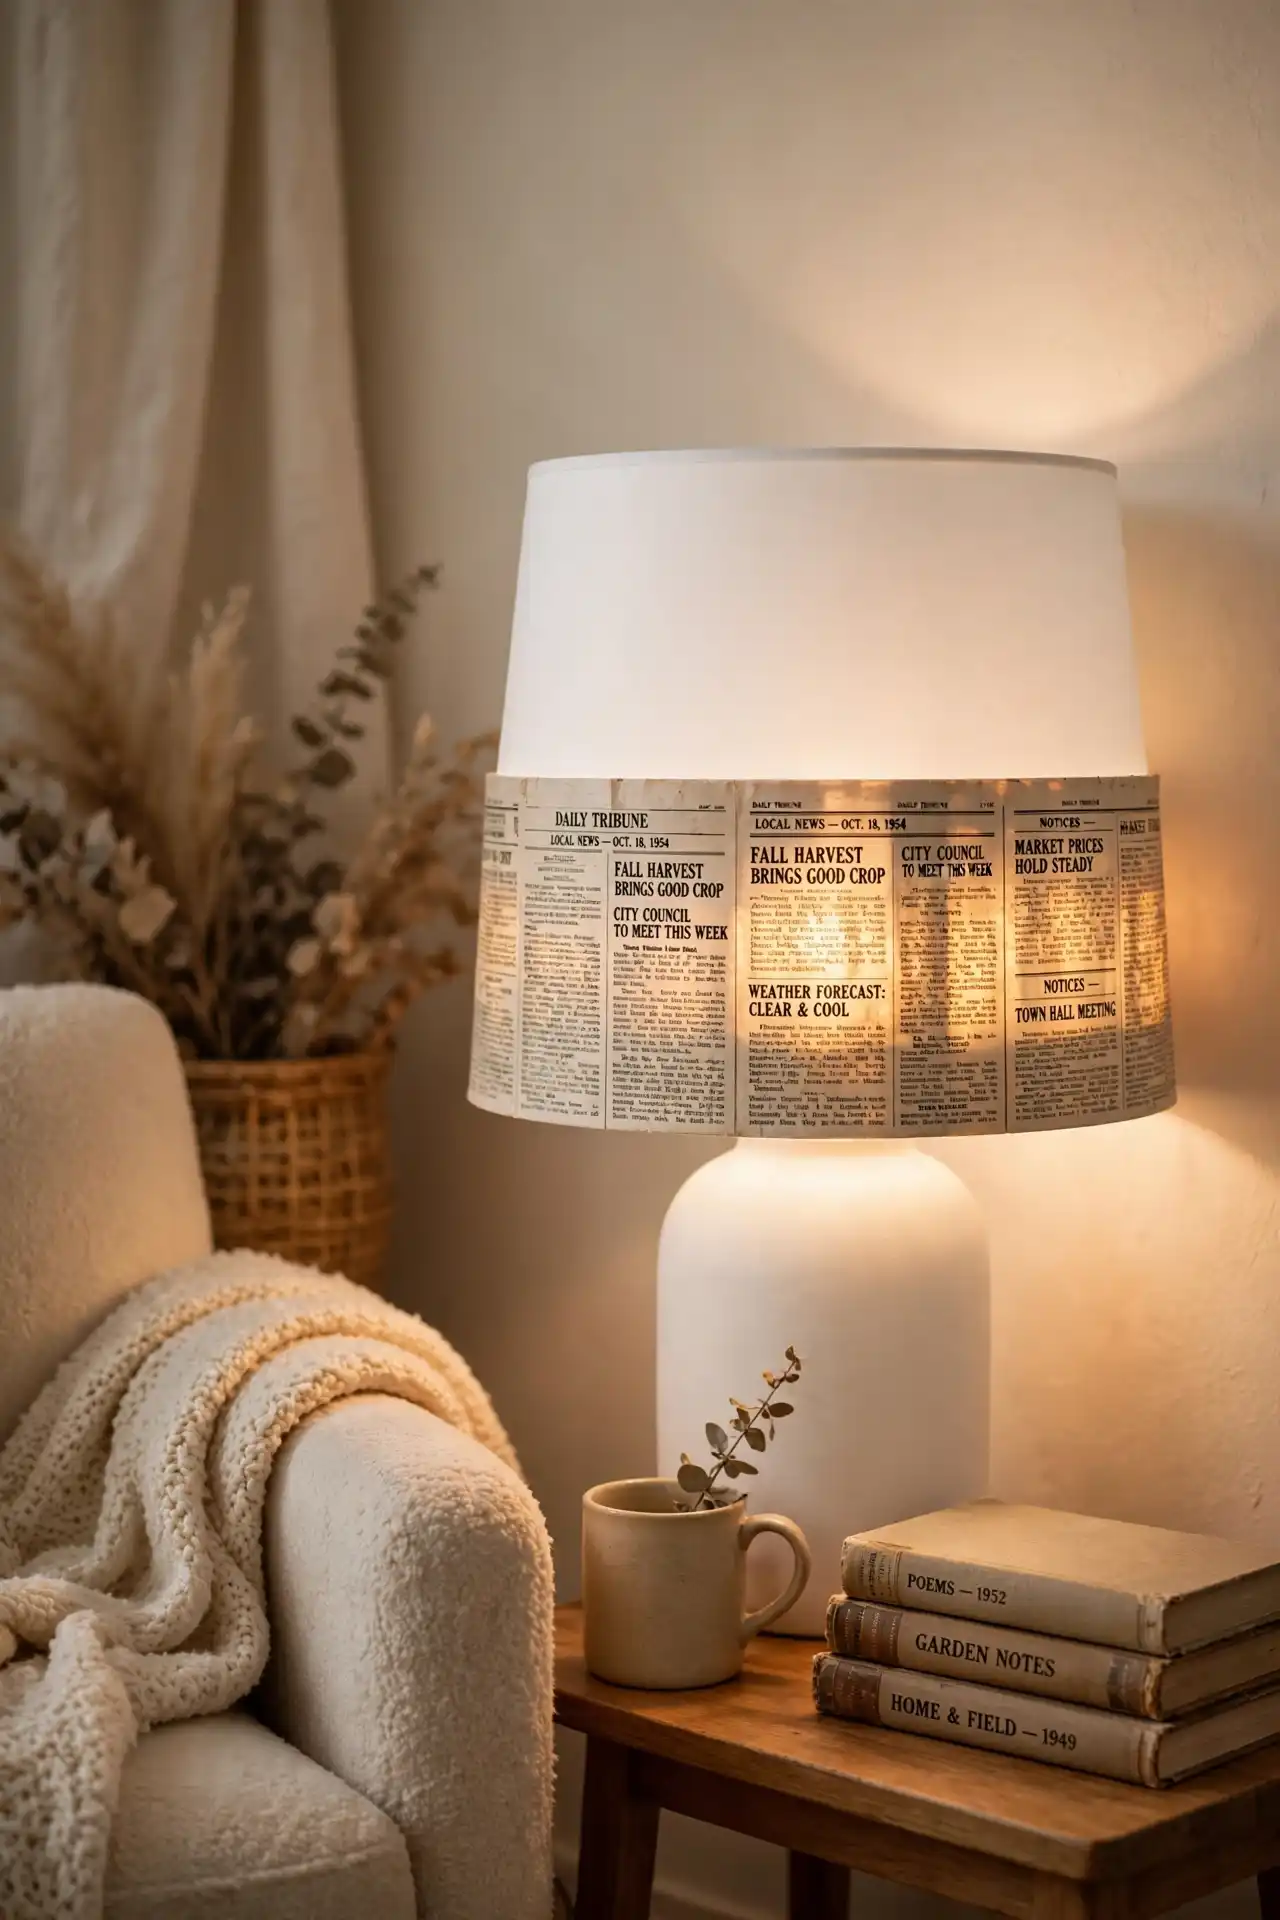
Rather than covering an entire shade, this project keeps the newspaper to a single horizontal band low on a plain white lampshade, cut from a full sheet and wrapped around so the print faces out evenly all the way around.
The plain fabric above the strip stays untouched, which keeps the lamp glowing bright and soft at the top while the newsprint band below stays lit from behind just enough to make the tiny headlines glow instead of going dark and flat.
Choosing a page with visible dated headlines, rather than plain classifieds or grid pages, gives this project a specific charm the others on this list do not have.
It turns a generic lamp into something that looks like it belongs to a particular year, which pairs naturally with the stack of old hardcover books and worn ceramic mug staged next to it.
Conclusion
Sixteen ideas, and still barely a dent in what a stack of old newspaper can become.
Some of these will take you an afternoon, a couple will take real patience, but none of them need anything you cannot pick up at a craft store for a few dollars.
Start with whichever one matches something you already have on hand, a bare lampshade, an empty frame, a pile of papers headed for recycling, and go from there.
Save this for the next time you want fresh newspaper craft ideas to try.