13 Polymer Clay Earring Ideas

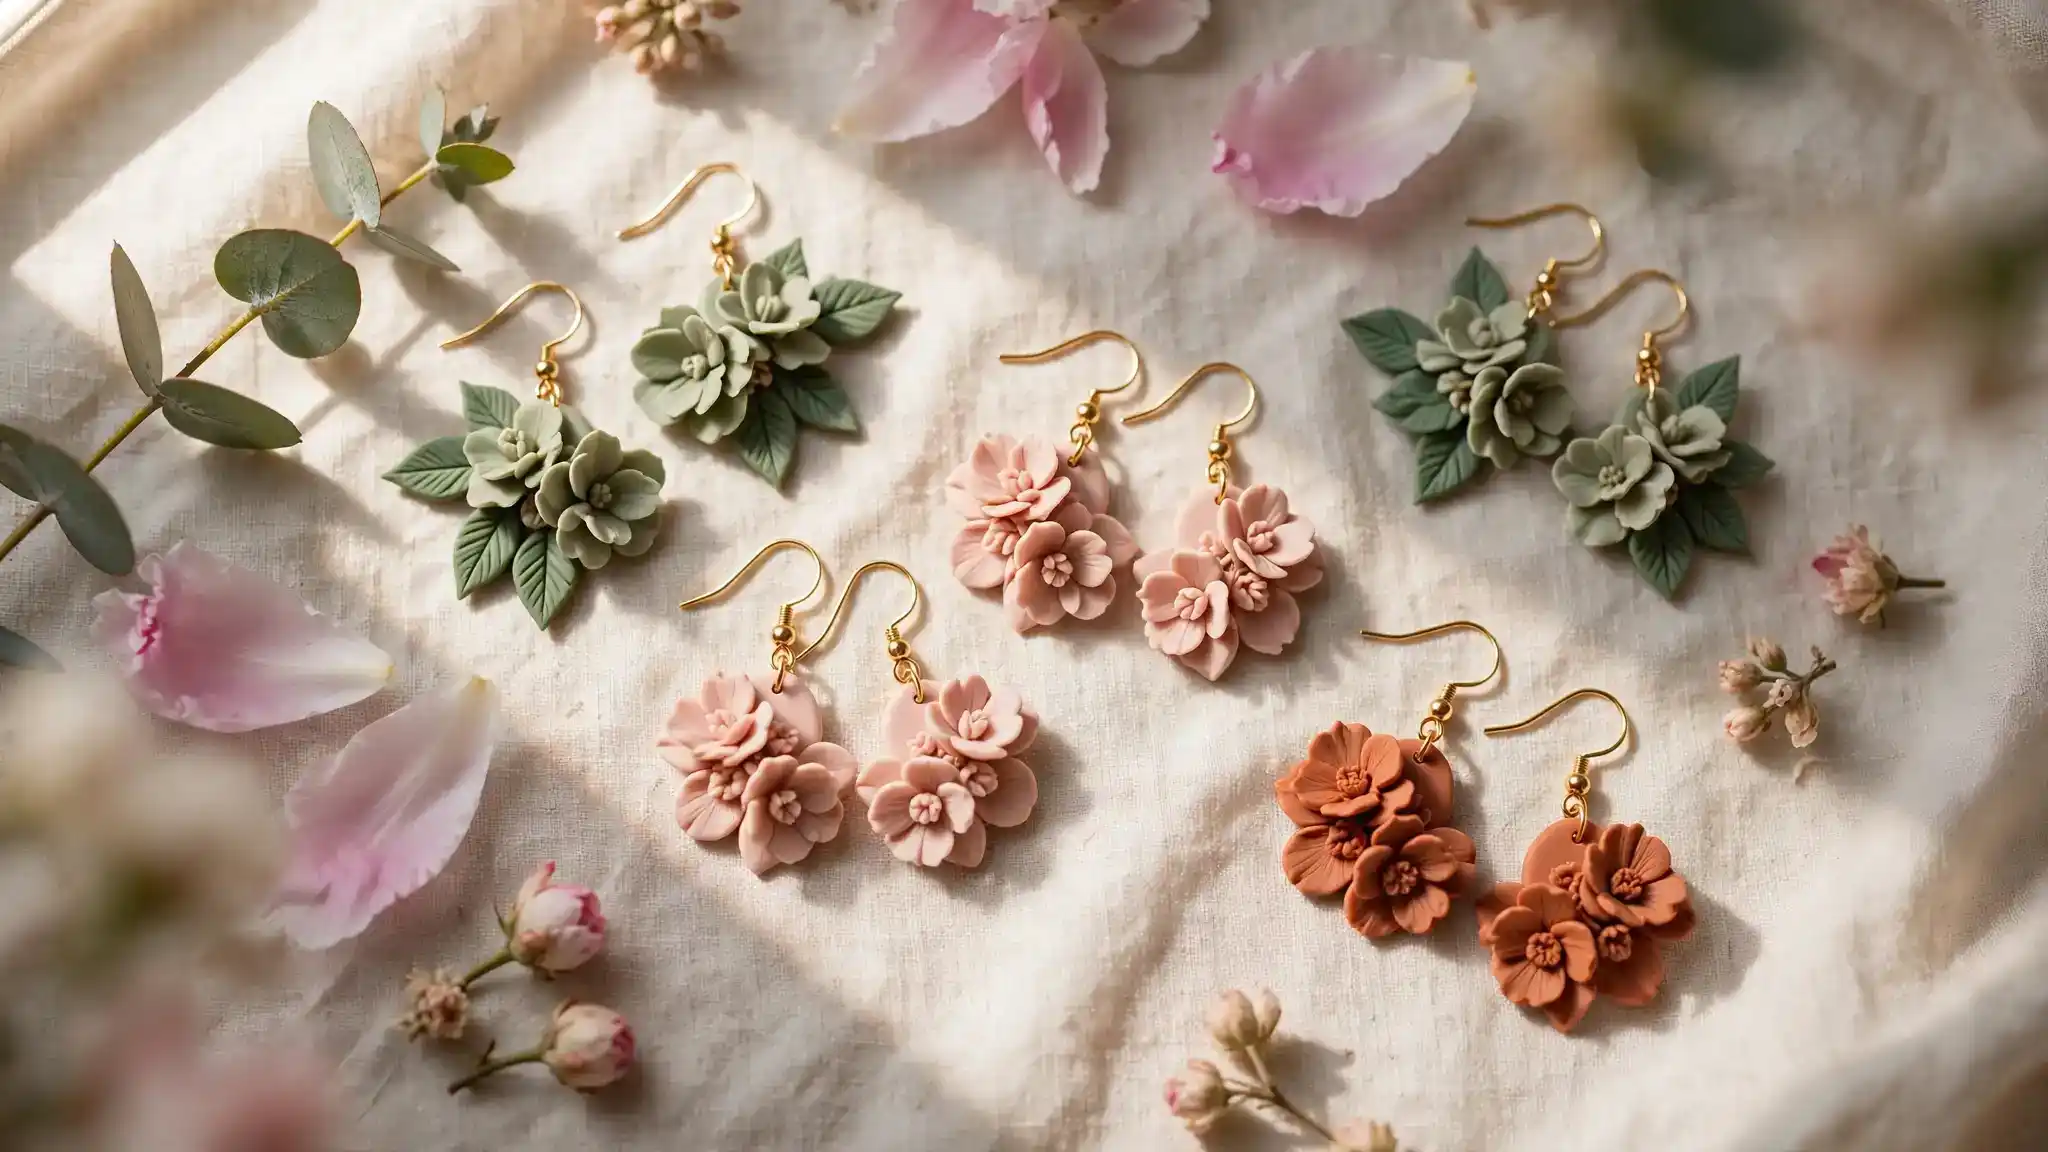
Polymer clay earrings diy projects live and die on the details, and after going through thirteen real pairs, a pattern showed up fast: the earrings that get saved and screenshotted the most are never the simplest ones, but they aren’t the fussiest either.
They’re the pairs that pick one strong idea, a painted scene, a texture trick, an unexpected base color, and commit to it instead of piling on every technique at once.
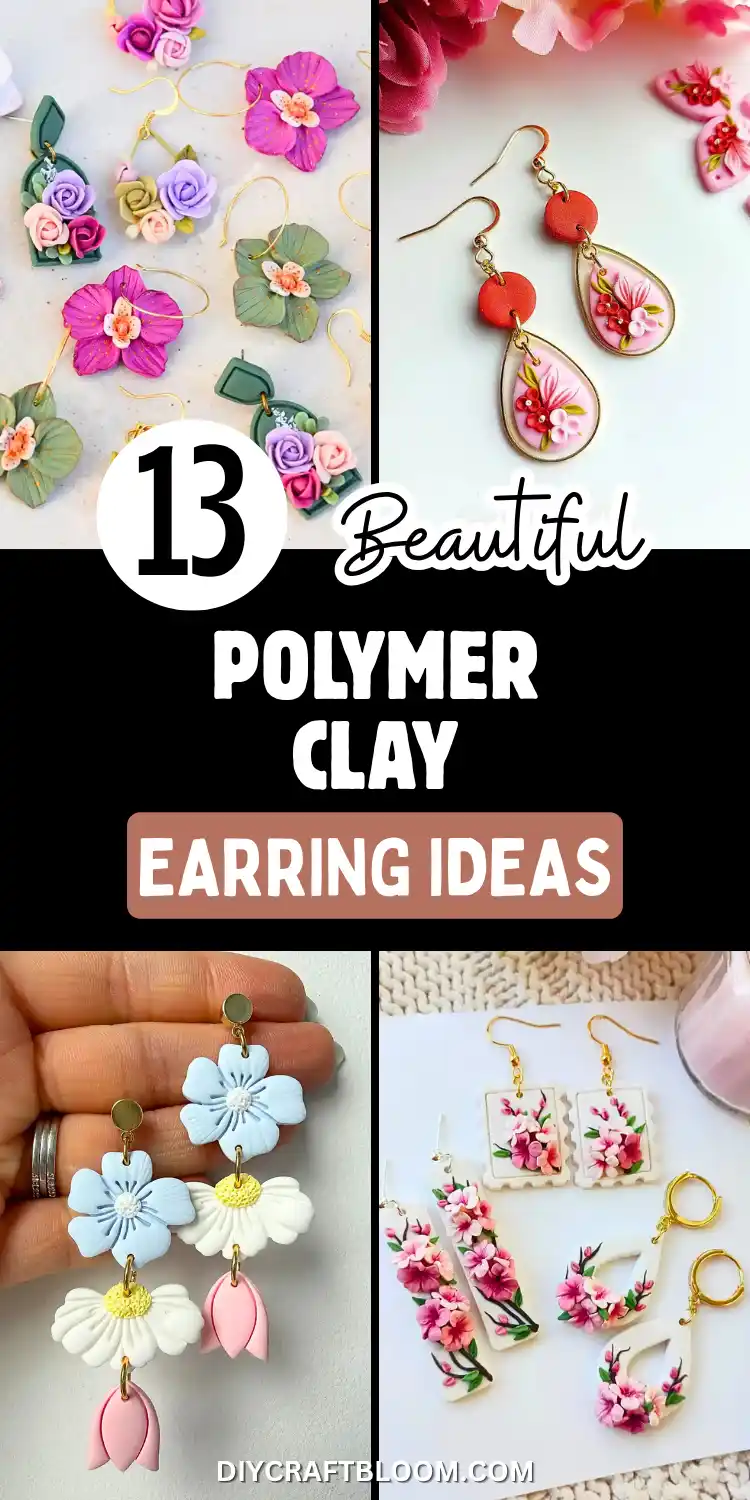
This roundup pulls together a genuinely wide range, from a hand painted lily set in a gold bezel frame to a full miniature potted plant scene, from a stacked three flower dangle to a navy base that breaks away from the usual cream and blush palette everyone reaches for first.
There’s a scalloped postage stamp design borrowed from an unlikely place, a honeybee charm with lace-textured wings, and a Monet-style water lily pair that proves painted backgrounds can hold their own against sculpted florals.
Whether you’re just starting with a basic flower cutter or ready to try texture stamps and layered petals, there’s a project here at your skill level.
Here are thirteen polymer clay earrings diy ideas worth trying next.
13 Polymer Clay Earring Ideas
1. Painted Lily Teardrop Earrings in a Gold Bezel Frame
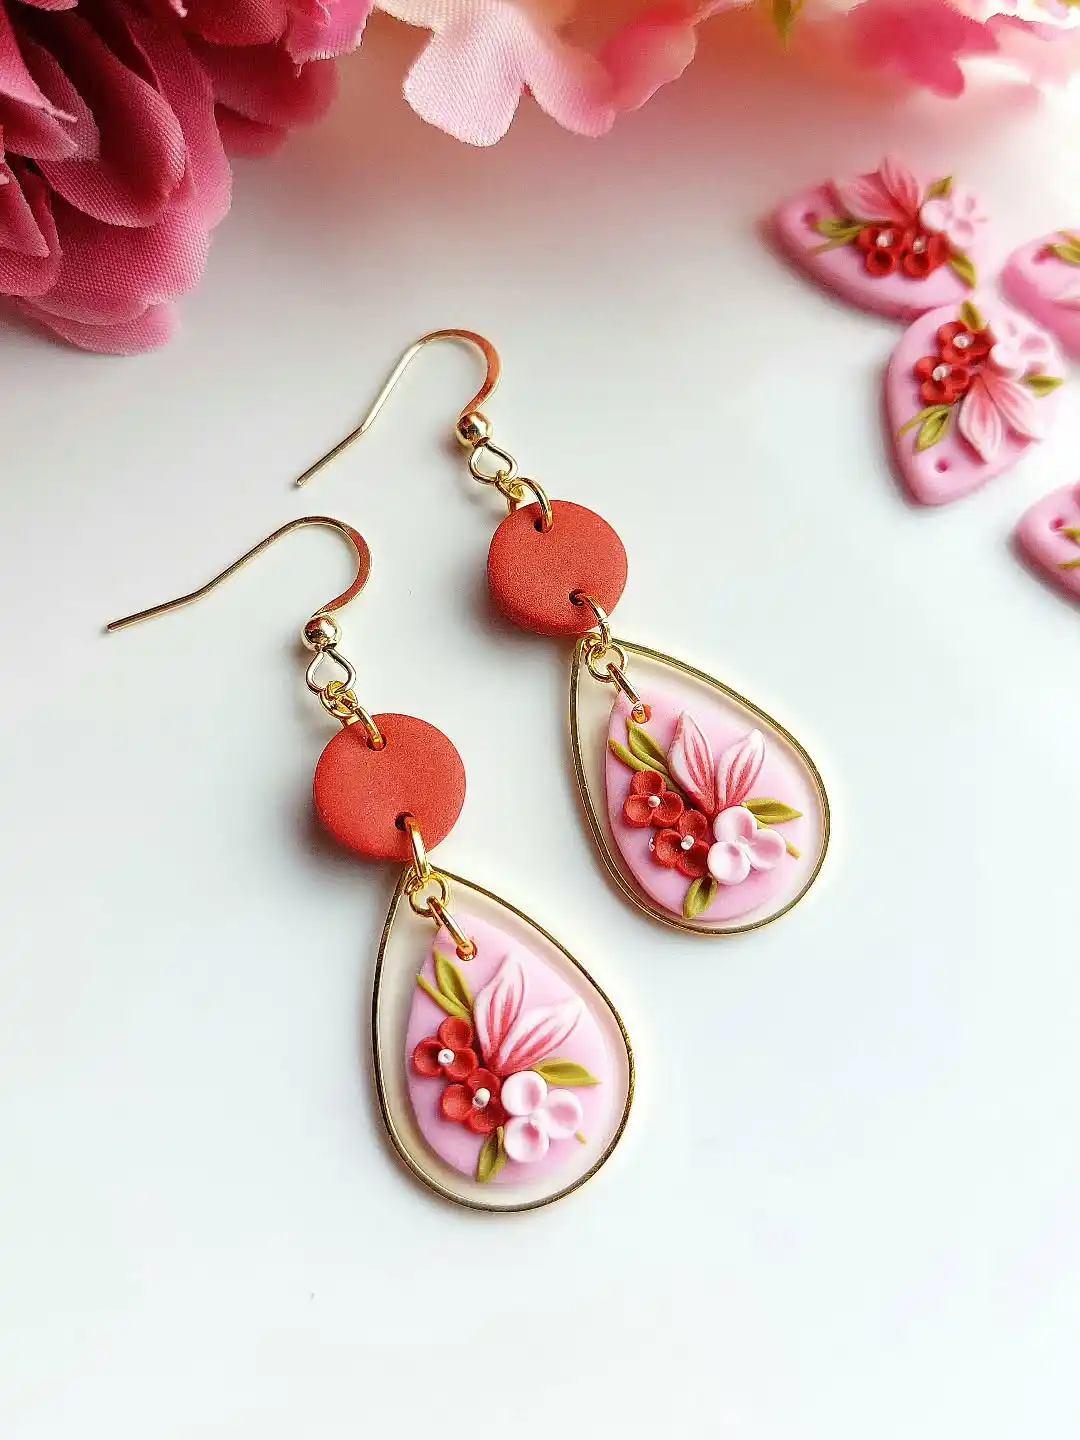
Terracotta discs connect to gold teardrop bezels here, and the flowers inside are flat-painted rather than raised, which gives the whole earring a lighter, almost porcelain feel next to bulkier sculptural styles.
A cluster of long pink lily petals anchors each teardrop, with tiny red five-petal blossoms and soft white buds filling in around the base, all set against a blush pink background that peeks through the gold frame.
What stands out about this pair:
The flat painting technique means thinner earrings that sit closer to the ear and weigh less than raised floral styles.
The gold bezel frame does double duty, both protecting the clay edge and giving the earring a finished, jewelry-store look.
Two-tier construction (disc plus teardrop) adds movement without adding bulk.
2. Scalloped Fan-Shaped Earrings with a Freshwater Pearl Drop
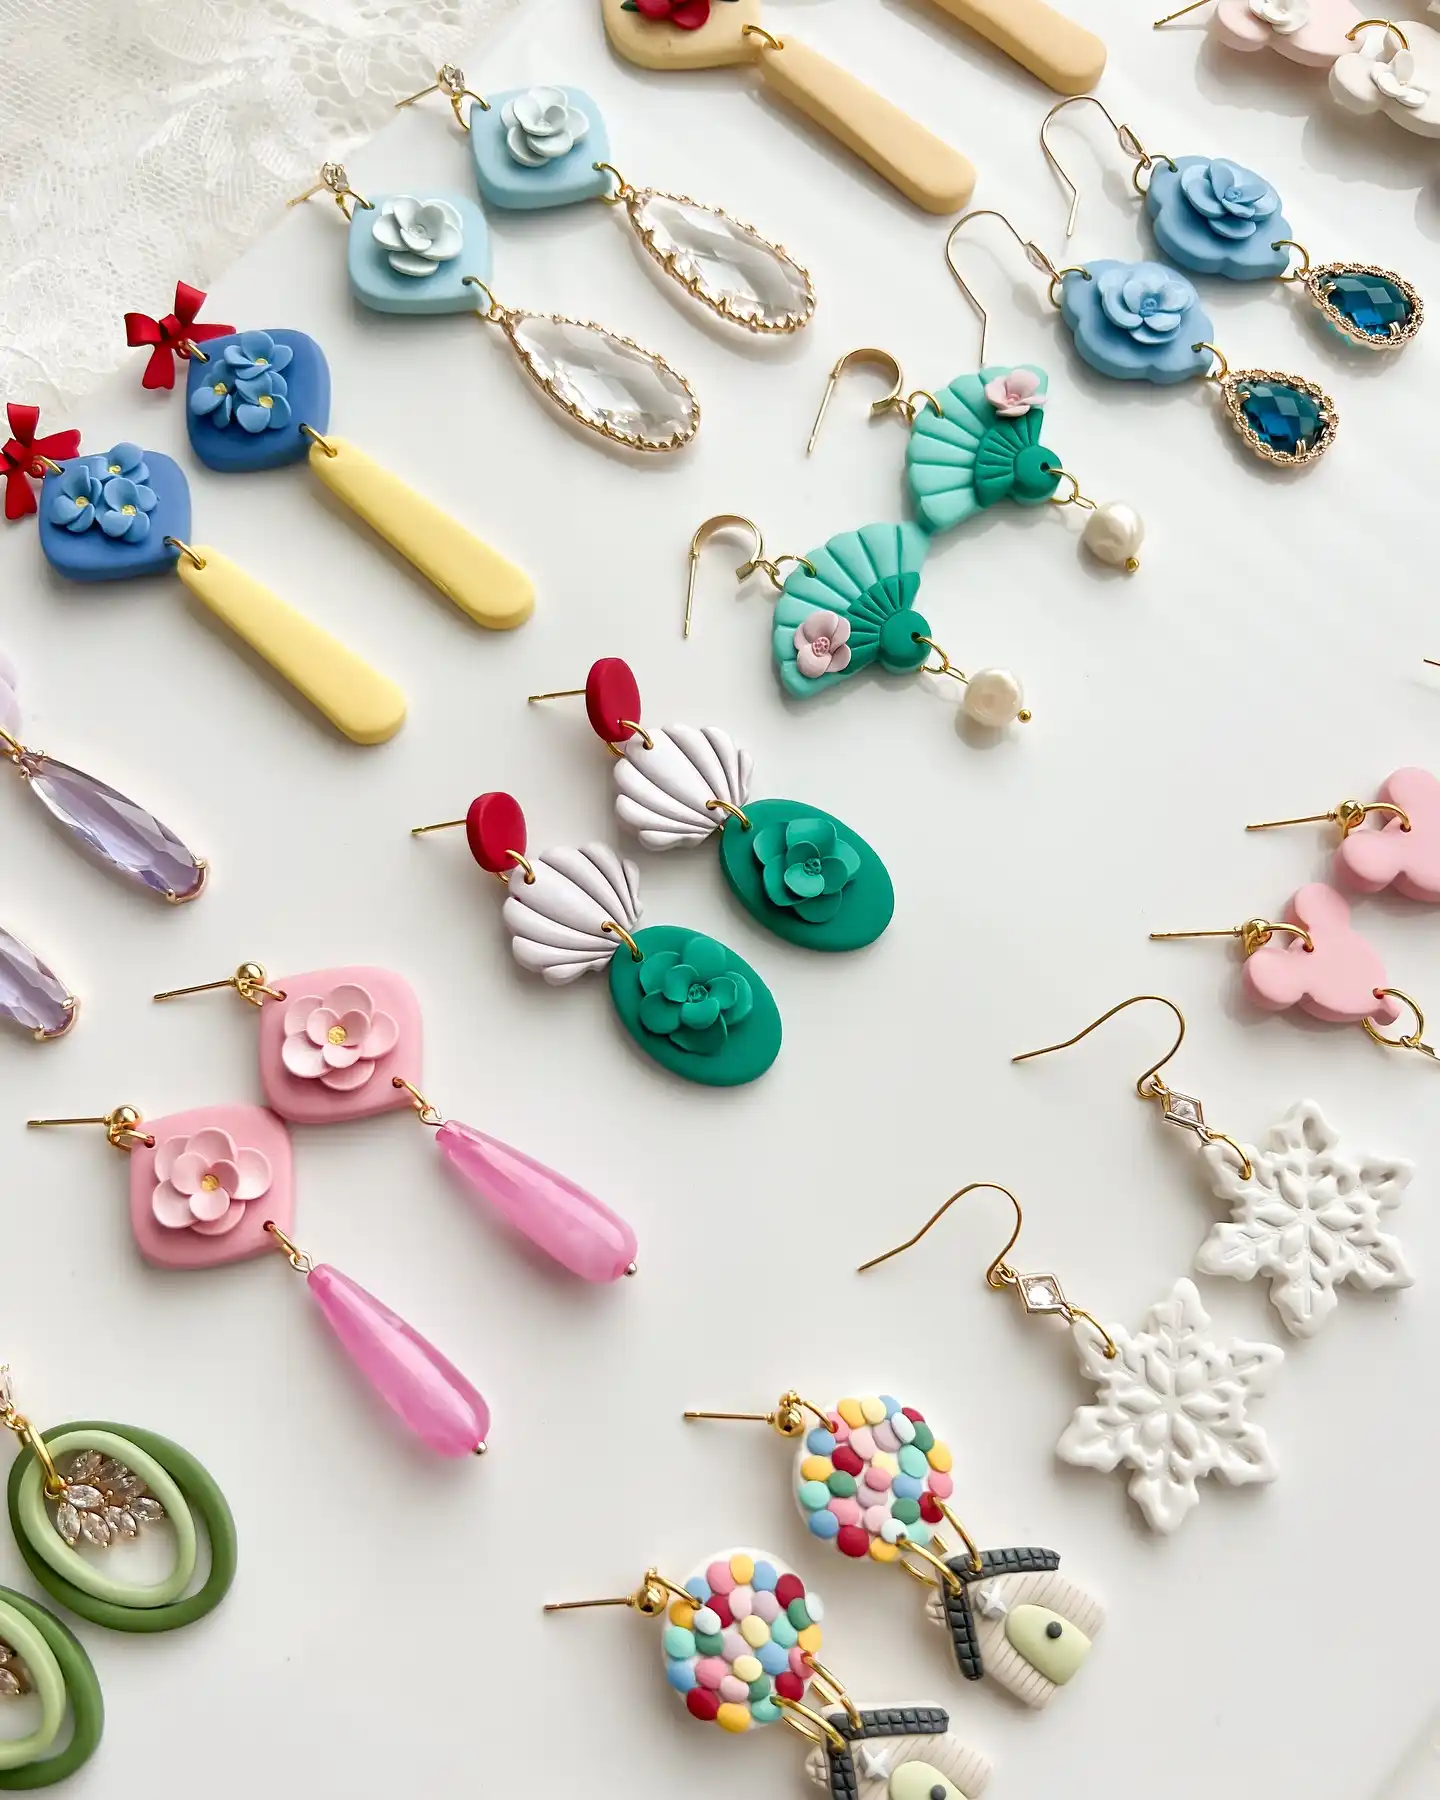
Scalloped fan shapes rarely show up in clay tutorials, which is exactly what makes this pair worth borrowing from.
Two stacked fan silhouettes in soft mint sit one above the other, each edge cut into clean ridges rather than a smooth curve, with a small pink blossom tucked at the center seam and a single pearl swinging free below.
The color stays quiet on purpose so the shape does all the work.
What makes this one work:
Scallops instead of a plain curve add texture and shadow.
Two linked fans of different sizes read as one continuous shape.
One bead at the bottom keeps the matte clay from feeling too flat.
3. Vintage Postage Stamp Earrings with Cherry Blossom Branches
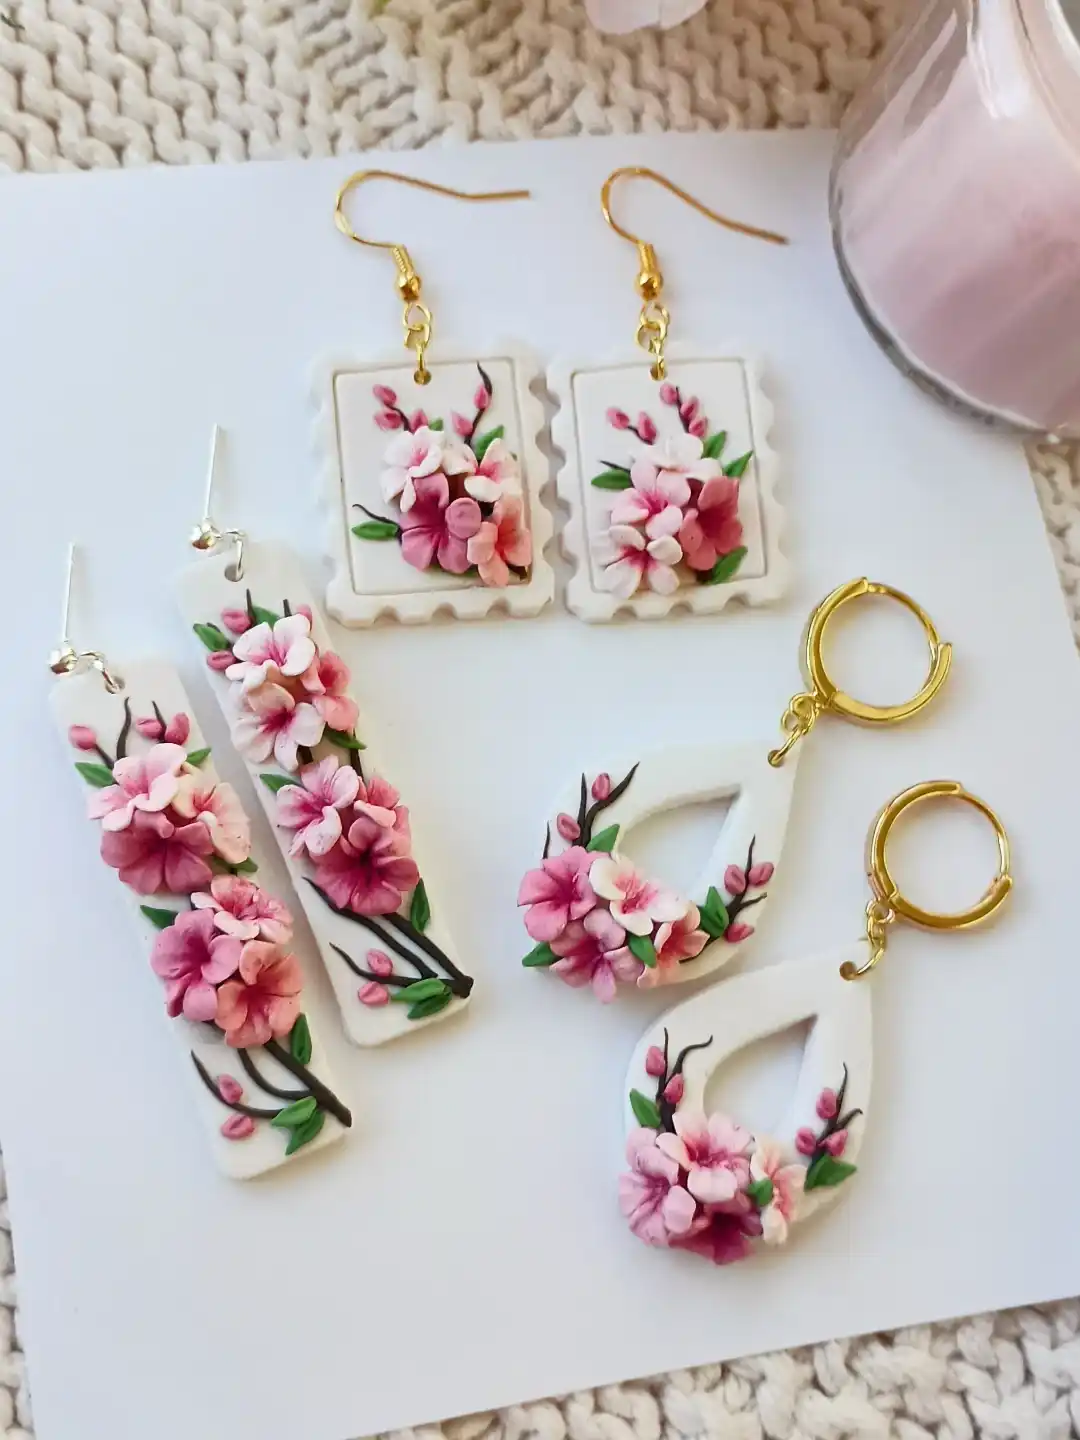
The scalloped edge here mimics an old postage stamp, and it is that detail, not just the flowers, that makes this pair feel collectible instead of generic.
A white clay rectangle framed by a thin raised border and tiny stamp-style scallops holds a hand painted cherry blossom branch, dark thin stems curving upward into clusters of pink and white five-petal blooms with soft green leaves worked in between.
A short paragraph tip box, then the visual, since this one leans more on technique than on a list of features:
Cut the scalloped stamp edge with a small round cutter pressed halfway into the clay along all four sides before adding any floral detail, so the border stays crisp and even once the branch is built on top.
4. Oversized Orchid Hoop Earrings in a Single Bold Bloom
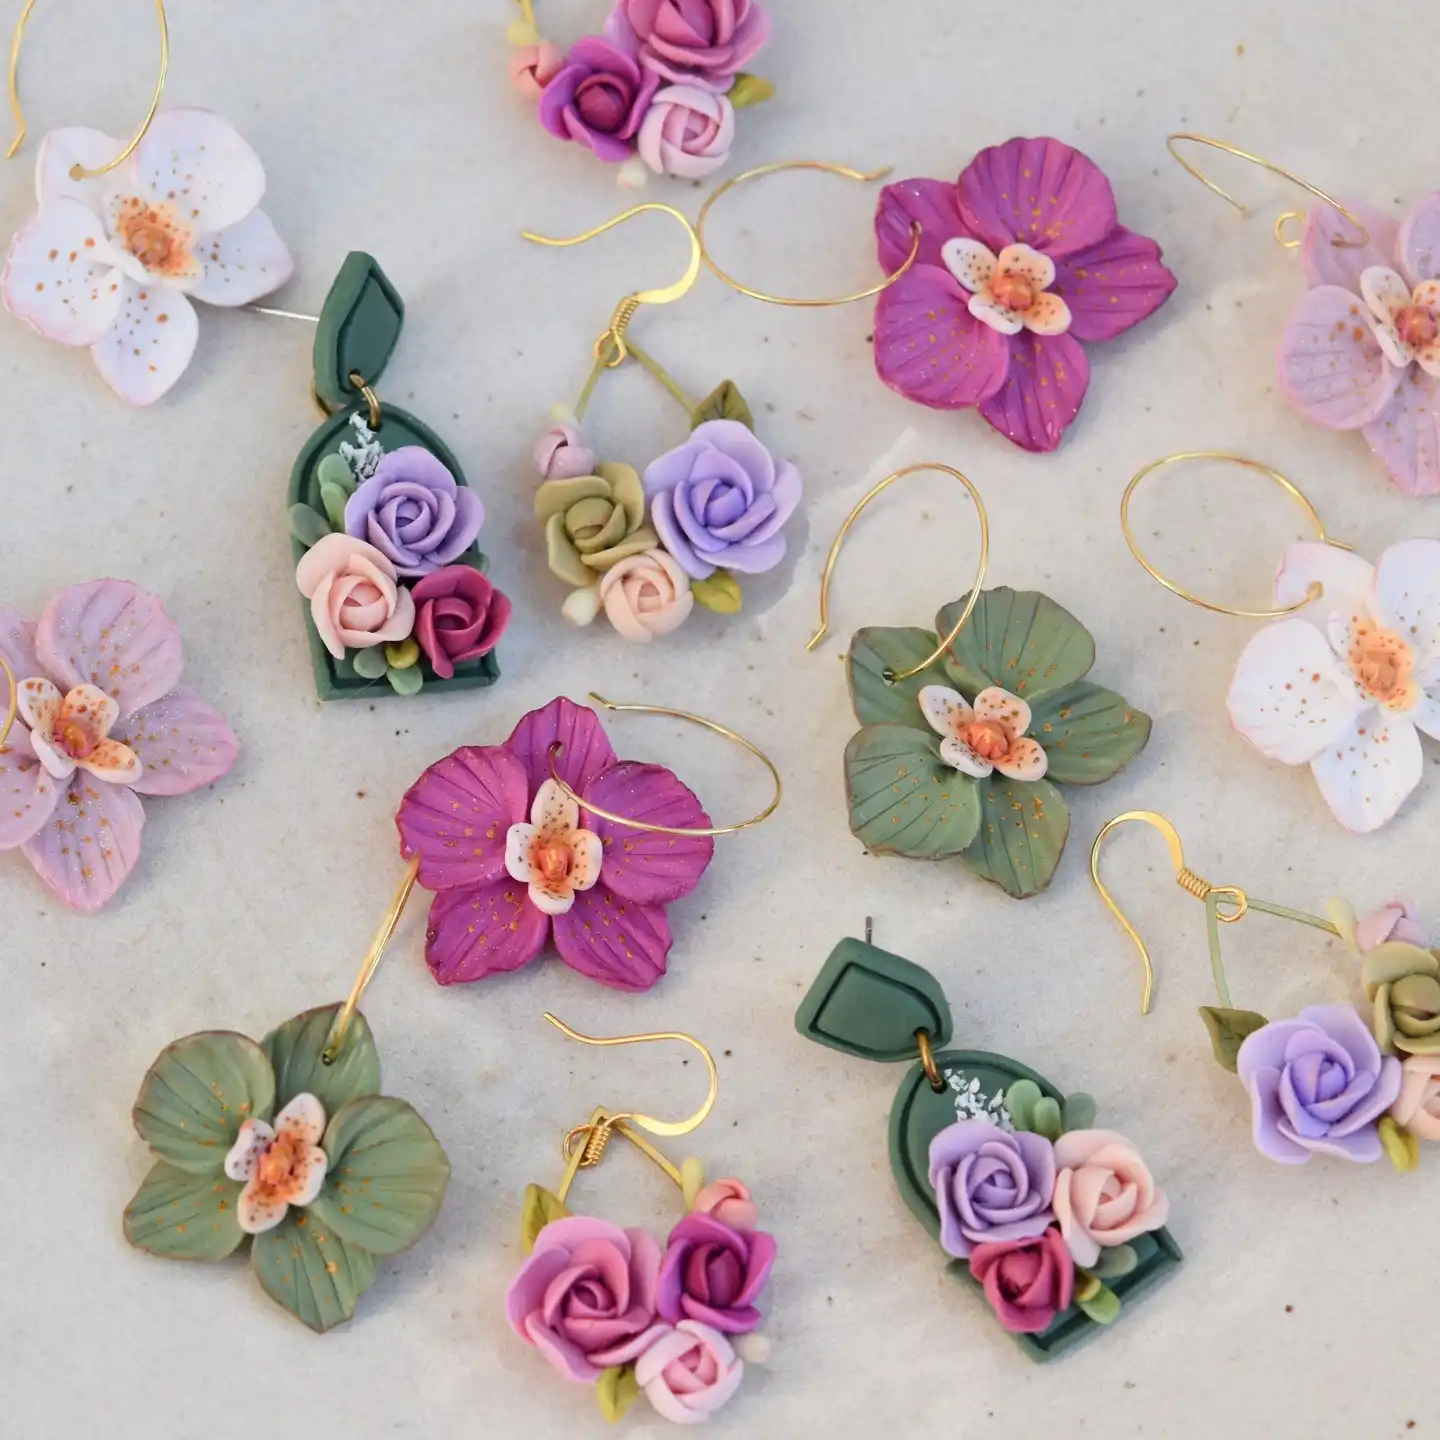
Giant orchid blooms sit directly on thin gold wire hoops in this set, no backing plate, no cluster, just one large sculpted flower doing all the visual work.
The petals are shaped with visible vein lines and a slightly ruffled edge, and the center gets a speckled, freckled treatment in a contrasting color that mimics how real orchids are marked.
Subscribe to DIY Craft Bloom
Get updates on the latest posts and more from DIY Craft Bloom straight to your inbox.
Because the hoop wire threads straight through the top petal, the flower appears to float rather than hang from a jump ring.
Two colorways show up in this same photo, and they wear very differently:
| Soft white orchid | Magenta orchid |
|---|---|
| Pale petals with rose gold speckling, soft and bridal. | Deep magenta petals with gold flecking, bold and statement. |
| Pairs with neutral or pastel outfits. | Works as a standalone focal piece on plain clothing. |
| Better for daytime or subtle occasions. | Better for evening, when the earring sets the outfit’s tone. |
5. Three-Tier Stacked Flower Dangles, Blue Blossom to Daisy to Tulip Bud
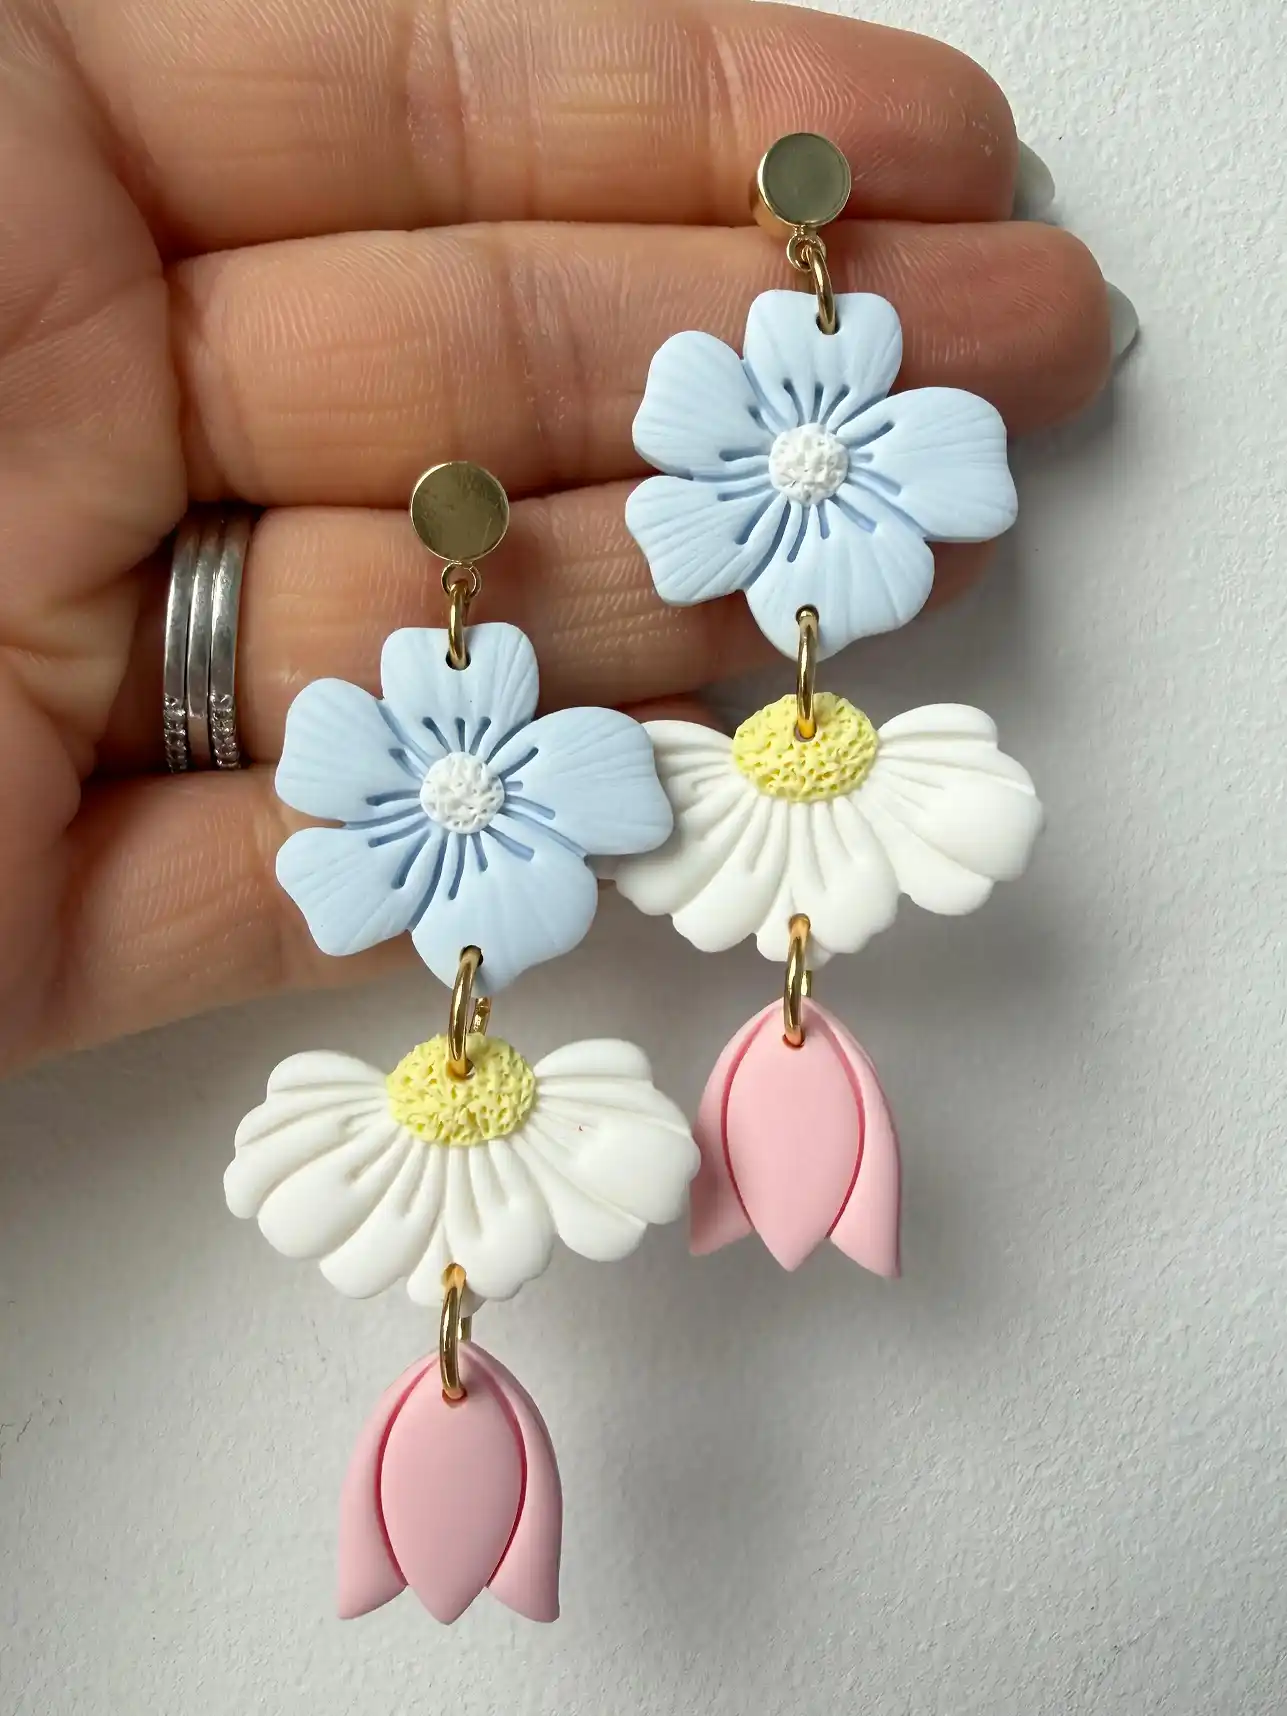
Stacking is the whole trick with this pair.
Instead of one flower per earring, three separate clay pieces link top to bottom on small gold jump rings:
A five-petal blue blossom with a textured white center at the top, a fuller white daisy with a yellow pollen-textured middle in the second slot, and a closed pink tulip bud finishing the bottom.
Each piece is cut with deep vein lines pressed into the petals, which is what keeps a flat clay shape from reading flat once it is cured.
The formula for this one is simple to copy even if you only have a few cutters on hand.
6. Wood-Capped Autumn Wreath Hoops with Mini Pinecones and Pumpkins
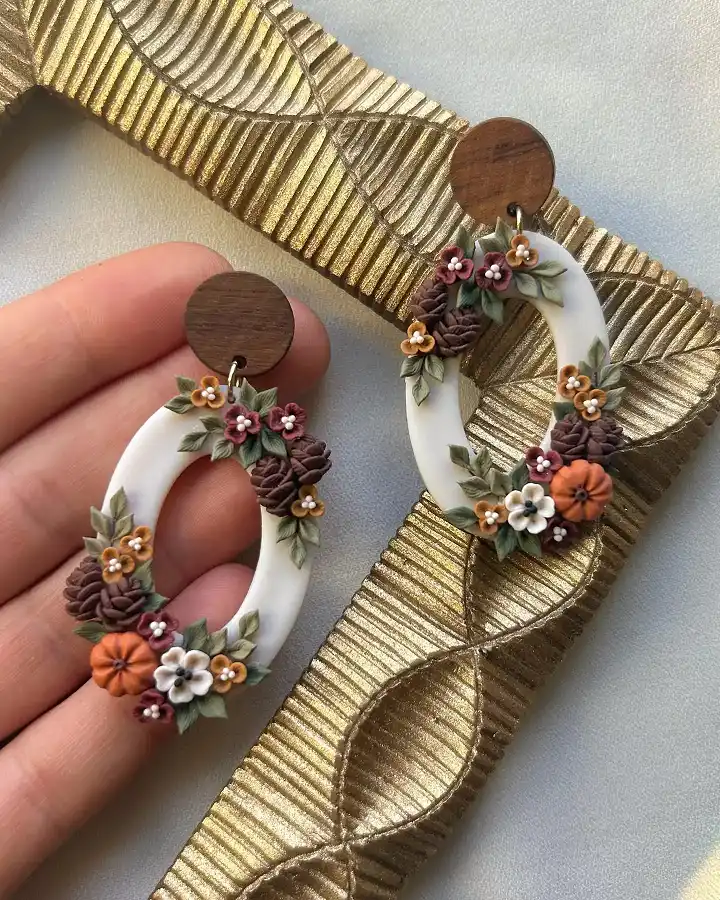
Round wood discs sit at the top of these instead of the usual gold or clay circle, and that single swap changes the whole feel, giving the pair an earthy, natural anchor before the wreath even comes into view.
Below each disc hangs an open oval ring, wrapped almost entirely in miniature florals:
Clusters of tiny pinecones, small orange pumpkins, rust colored mums, and cream blossoms tucked between sage leaves, leaving just enough of the open center bare to keep the earring from feeling too heavy.
- Wood disc top instead of metal or clay, works especially well for fall and winter releases
- Open oval base means less clay overall, so the wreath detail carries more visual weight per gram
- Mixed elements (pinecones, pumpkins, flowers) read as a cohesive wreath instead of a random cluster because they share one warm color family
7. Miniature Potted Geranium Scene Earrings
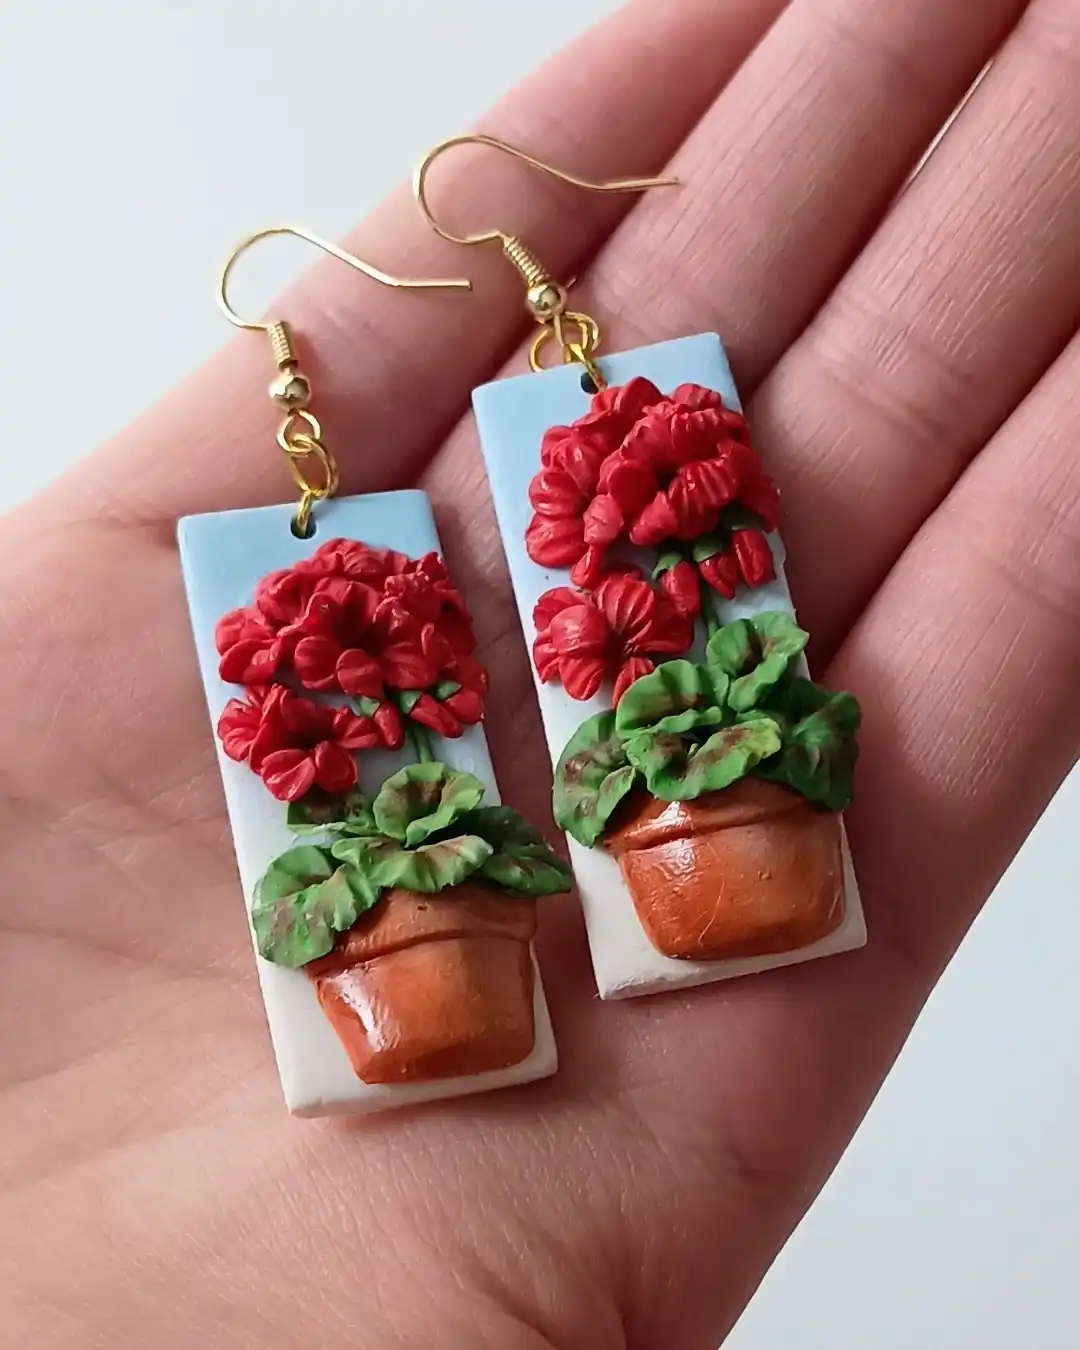
Potted geraniums, painted in full miniature detail, turn this rectangular clay tag into a tiny still life rather than a simple floral motif.
A sky blue background sets off the terracotta pot at the bottom, its clay built with visible highlights and shading so it reads as glazed ceramic, while a dense cluster of ruffled red blooms and mottled green leaves fills the top two thirds of the piece.
The scene format, background plus subject plus container, is a different approach from every floral pair covered so far, since it paints an entire object instead of an isolated flower.
Paint the pot with two shades so it looks glazed, not flat.
Layer the blooms in clusters so no single flower stands alone.
Don’t leave the background flat white, it makes the scene look unfinished.
Don’t crowd every inch, the plain pot base needs to breathe.
8. Dark Navy Vine Earrings with Jasmine Blossoms and a Pearl Drop
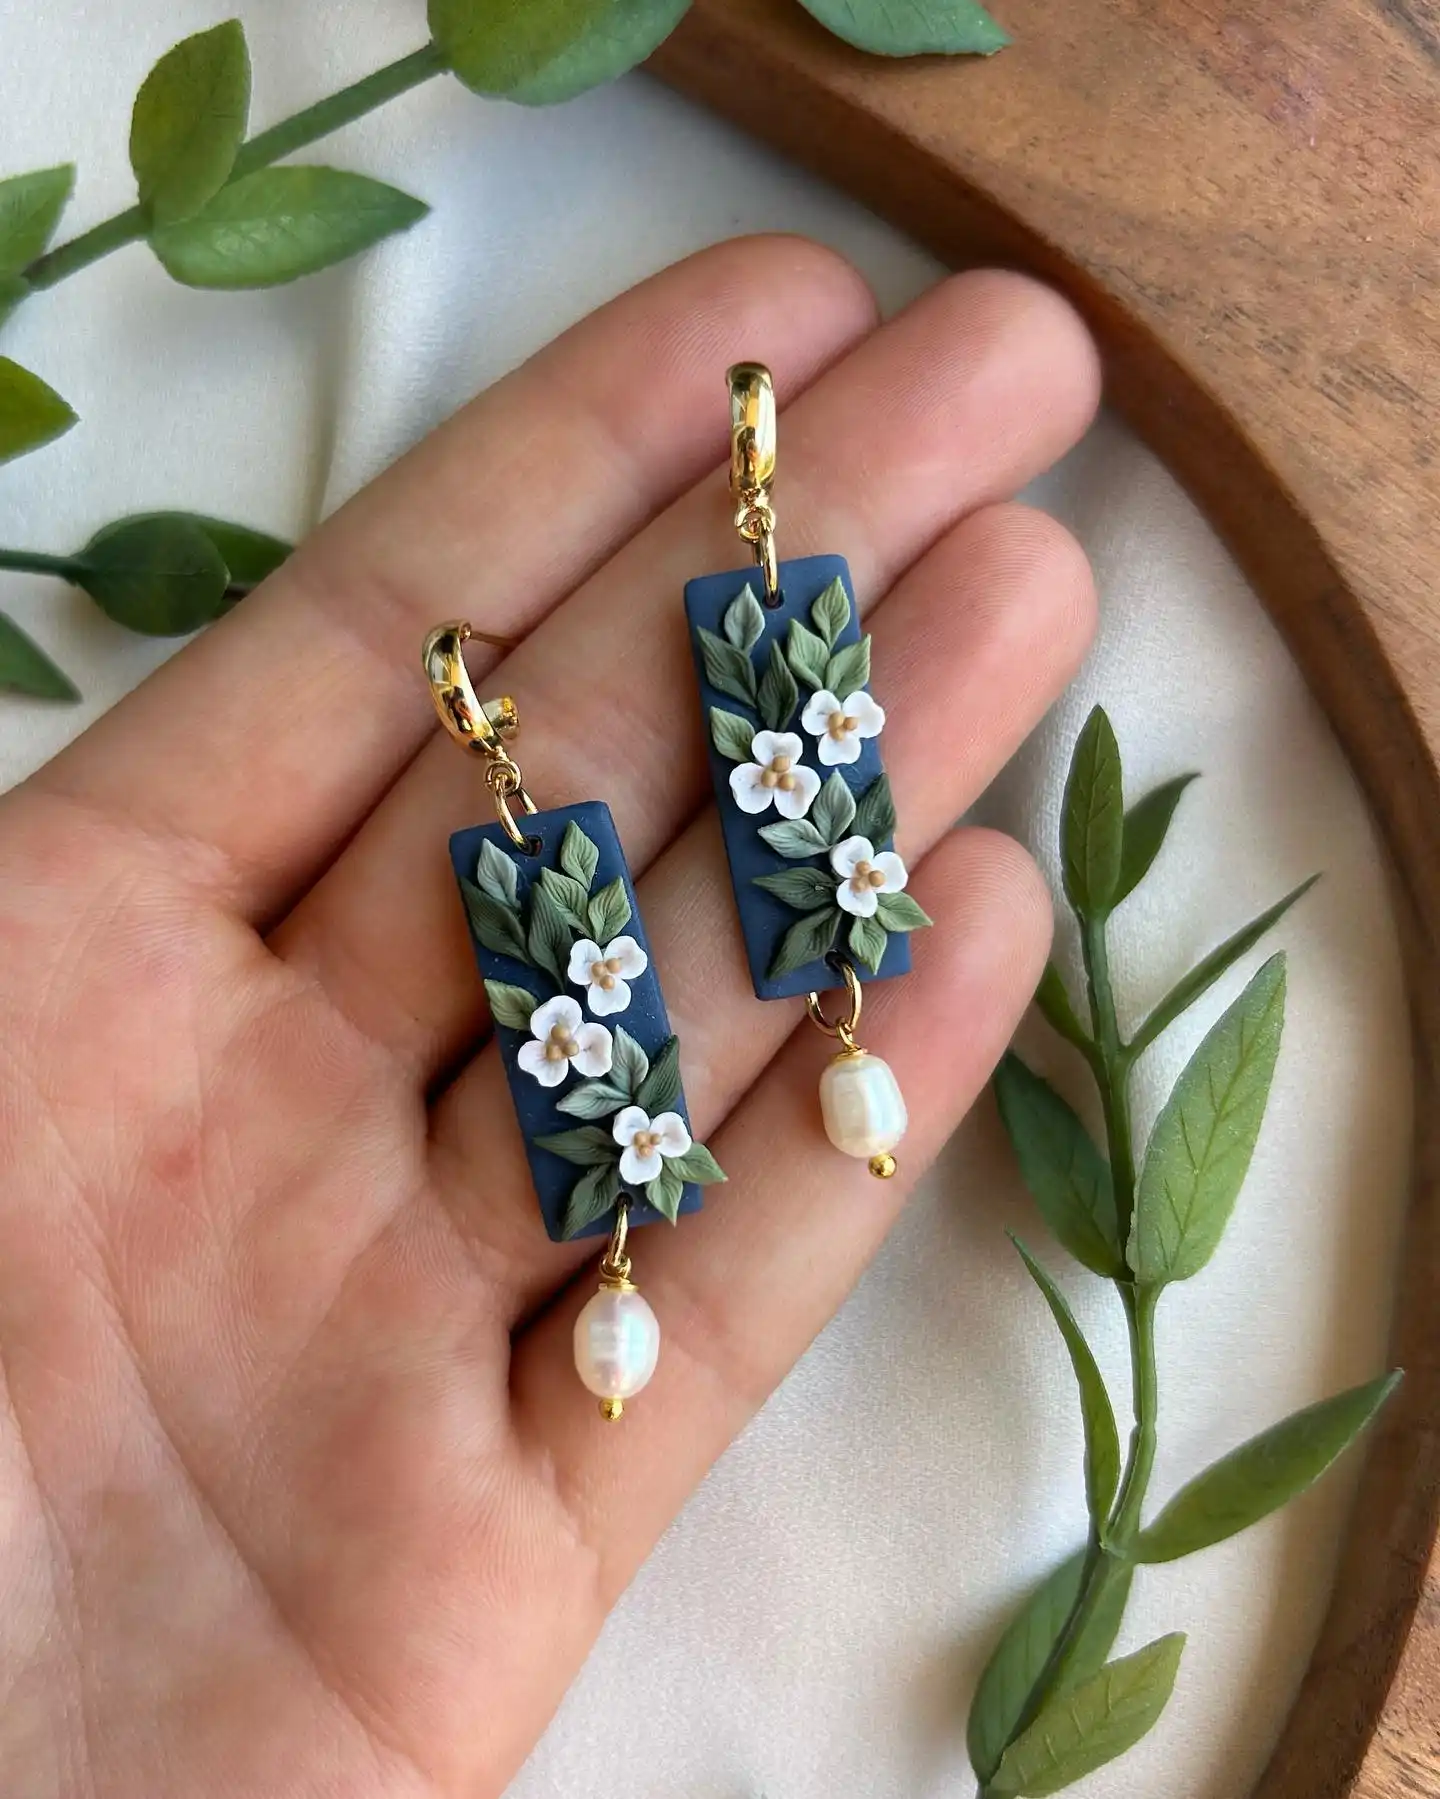
Nearly every pair covered so far uses a pale or cream base, so this navy rectangle stands out just by flipping that choice.
Trailing green vine leaves climb the length of the dark clay tag in a diagonal S-curve, with small five-petal white jasmine blossoms and tiny gold centers scattered along the vine.
A single freshwater pearl hangs below on a short gold link, and a chunky gold hoop finding sits at the top instead of a fish hook, giving the whole earring a heavier, more finished silhouette.
9. Monet-Style Water Lily Pond Earrings with Painted Textured Water
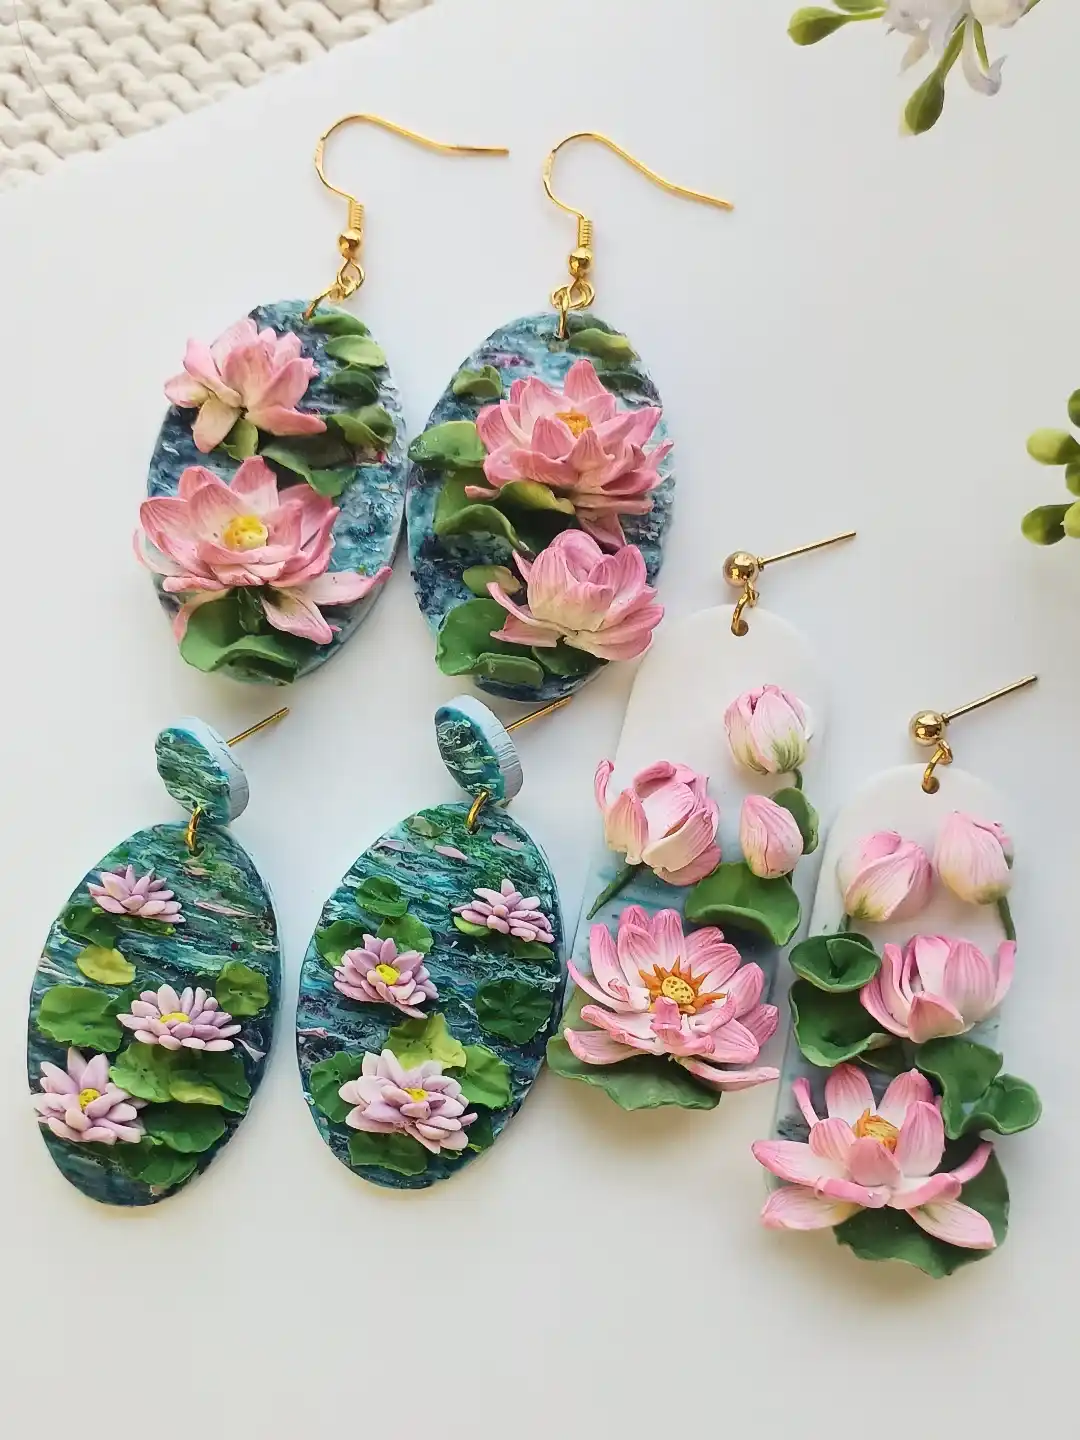
Painted water textures set these apart from the sculpted florals covered so far.
The oval clay base is brushed in overlapping shades of teal and blue, dragged and layered so it genuinely reads as moving pond water rather than a flat wash, and sculpted lotus blooms rise up from it in soft pink with a yellow center, surrounded by rounded lily pad leaves.
The same photo also shows a lavender colorway using tiny star-shaped water lilies instead of the larger lotus, so the technique clearly scales to different flower sizes without losing the pond effect.
Blend the water background with a dry brush and two or three shades of blue before it fully cures, then add the sculpted lotus and lily pads on top once the base has firmed up, so the flowers stay crisp against a soft, blended backdrop.
10. Honeybee Charm Earrings with Lace-Wing Detail and a Bow Topper
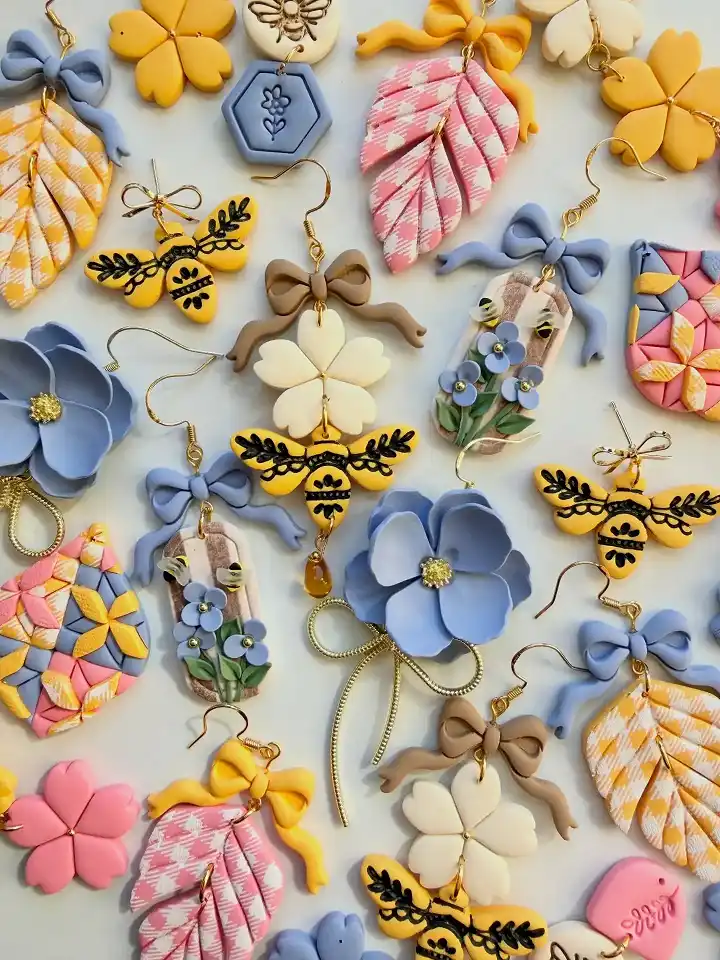
Bees appear nowhere else in this list, and the striking part of this pair is the wing texture, thin black lines pressed into the mustard yellow body so the wings read as lace rather than plain clay.
Subscribe to DIY Craft Bloom
Get updates on the latest posts and more from DIY Craft Bloom straight to your inbox.
A pastel bow sits above the bee as a hanger, then a small five-petal cream flower dangles below on a jump ring, so the whole earring tells a tiny story top to bottom: bow, bee, blossom.
A soft pastel loop that doubles as the hanging point, softening the whole piece.
Lace-textured wings and fine black stripe lines make the focal piece.
A small dangling flower balances the design and keeps it from feeling too literal.
11. Layered Sunflower Petals with a Woven Brown Center
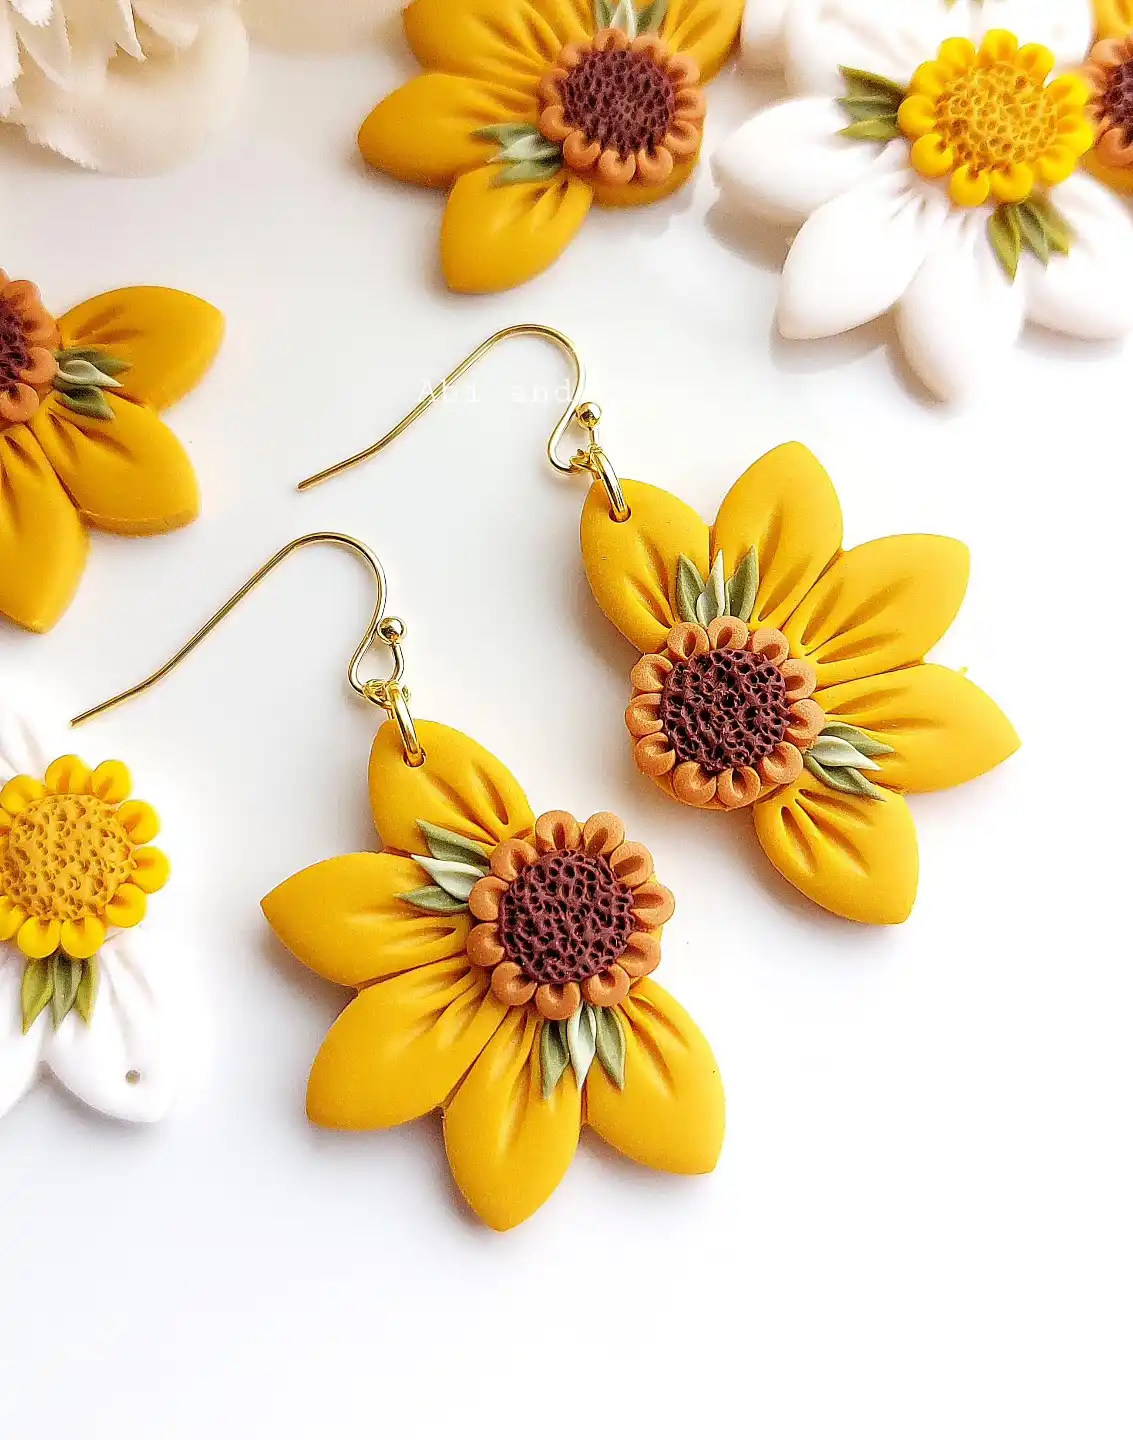
Six long yellow petals fan out from a densely textured center, each petal shaped with a deep center crease so it curls slightly at the edges instead of lying flat against the ear.
The center is where the real work sits: a woven, basket-like texture in deep brown surrounded by a ring of small burnt orange florets, mimicking how an actual sunflower seed head looks up close.
Tiny sage leaves peek out from behind the bottom petals as the only cool tone in an otherwise warm, saturated design.
If you’re weighing this design against something simpler for your polymer clay earrings diy list, here’s an honest read on what it takes:
12. Tiny Painted Scenes Under Glass, Like Wearable Storybook Pages

These earrings are doing something most polymer clay pieces don’t even attempt: full miniature paintings, sealed under a glossy dome and set into carved baroque frames.
One pair holds a swan gliding past a stone gazebo.
Another holds a tiny pirate ship under a crescent moon. That’s the idea worth stealing here, treating each earring like a two inch canvas instead of a flat cutout.
The gold bezel wire and the ornate white resin frames do a lot of the heavy lifting.
They borrow from vintage cameo jewelry, so even a simple painted scene reads as elegant instead of crafty.
Notice how the busier pairs, the mermaid tail and the ship, lean on a teardrop charm dangling below for extra movement, while the quieter garden scenes stay still and let the painting carry the whole piece.
13. Mix and Match Stacks, the Fall Floral Formula Everyone’s Using
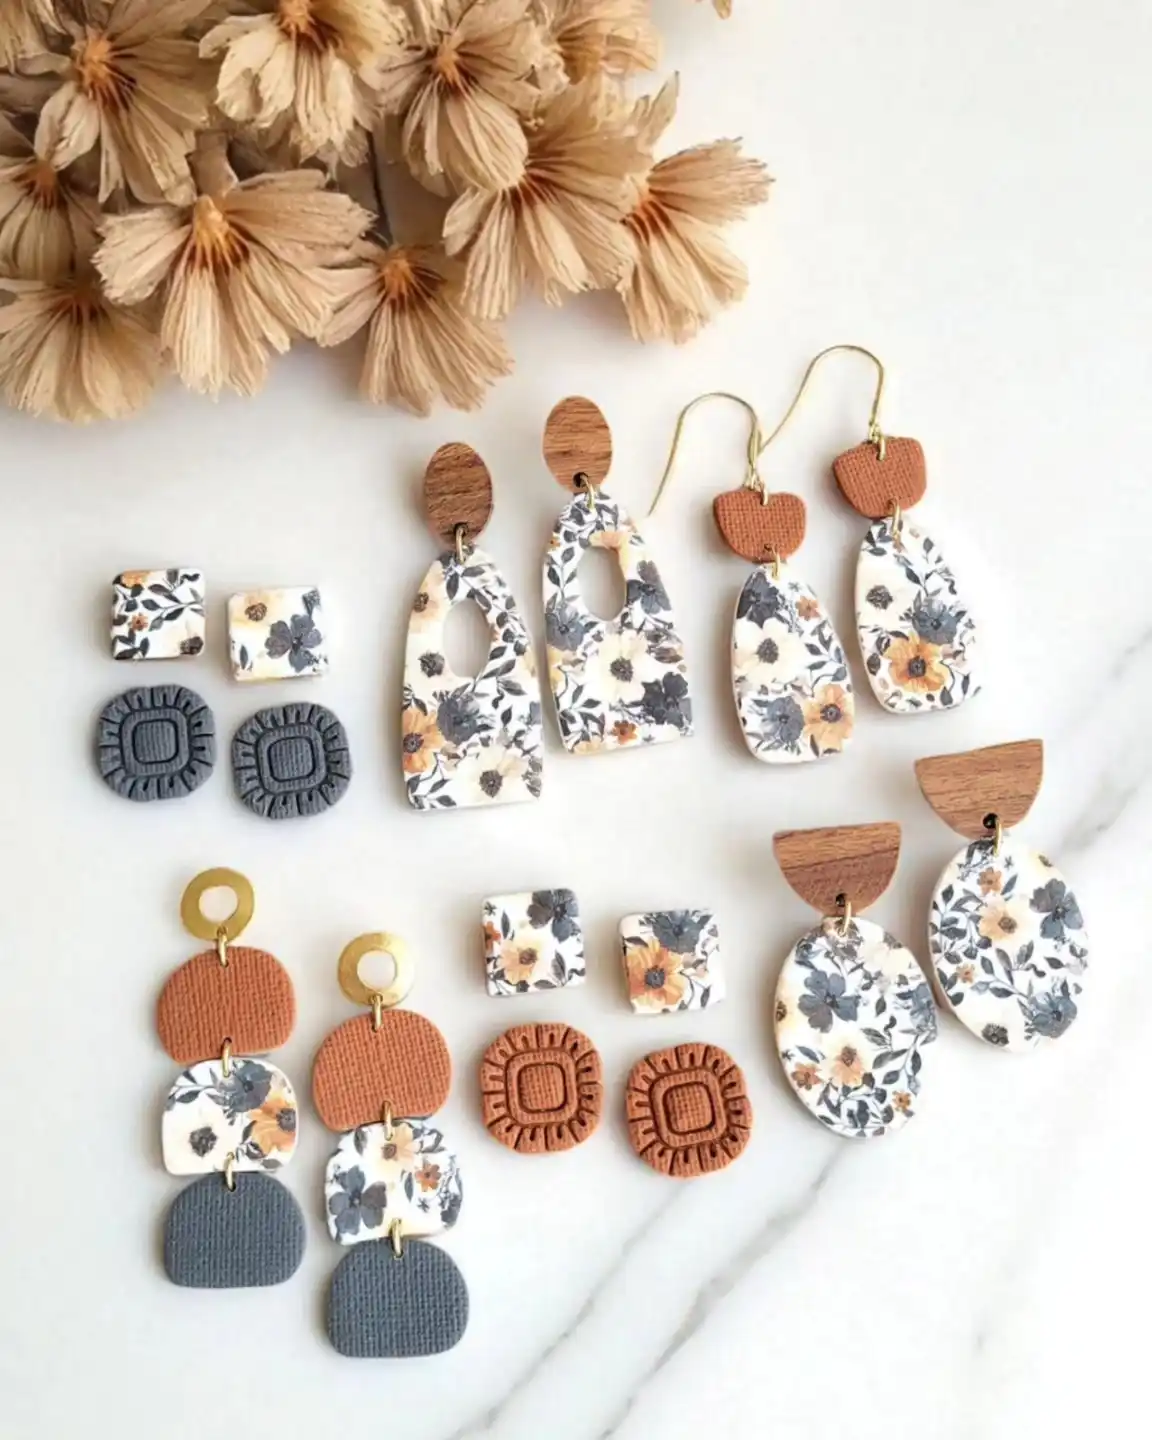
Look at how many different earrings come out of the same handful of building blocks.
A floral transfer print shows up as a teardrop, a rounded arch, an oval, and a tiny stud, while solid clay shapes in rust, slate grey, and warm wood fill in around it.
That’s the real idea in this photo, not one single earring but a modular system you can rebuild over and over with new shape combinations.
The wood and rattan style toppers are doing quiet work here too.
They keep the palette grounded so the floral print doesn’t feel too busy, and they let you swap a plain floral dangle for something with more texture without touching the color story at all.
Conclusion
Thirteen ideas, and still only a fraction of what polymer clay can do once petals, paint, and texture come together.
What ties every pair in this list is restraint: one strong technique per earring, executed with care, rather than every trick crammed into a single design.
Start small if you’re new, maybe a basic layered flower or a painted scene, then work your way toward the stacked dangles and textured centers once your hands get used to the clay.
Keep a few of these open on your phone next time you’re at the craft table and short on ideas.
Save this pin for the next slow afternoon you want to spend at the clay table, and come back to it whenever you need a fresh direction for your polymer clay earrings diy projects.