14 Resin Keychain Ideas for Beginners

Resin keychains are one of those crafts that look far more complicated than they actually are, and once you try a few, you start noticing just how many directions you can take a single pour.
Some of the best resin keychain ideas start with something as simple as a pressed daisy sealed in a clear circle, while others build up layers of glitter, gold leaf, or dozens of tiny shells packed into a letter shape.
What ties them all together is that none of them require fancy equipment, just a mold, some resin, and whatever small objects you want frozen inside.
In this roundup you’ll find florals, name tags, ocean themes, moody two-tone pieces, and a few charm clusters that mix multiple resin pieces on one ring.
Some ideas are genuinely beginner friendly, like a single flower in a plain circle, while others take a bit more patience, like layering pearls at different depths or engraving a matched set.
Whether you’re making these for yourself, for gifts, or to sell, there’s something here worth trying with your next pour. Save this list before you start mixing.
Creative Resin Keychain Ideas & Inspiration
Resin Keychain Designs
Beginner-friendly pours for flawless crafts & gifts
Pressed Botanical Molds
A single bloom sitting slightly off center in a clear circle mold. The trick to beginner florals is using one hero flower and leaving lots of clear space so the resin shines.
Scalloped Name Bezels
A deep teal base framed by a coin-like scalloped edge, which easily hides pour imperfections. Once you batch pour the bases, personalize them with gold foil names.
Two-Tone Masculine Split
A deep black and burgundy split blending naturally in a rectangle mold. Ensure colors are mixed to the same consistency to maintain the split, and finish with a domed glossy top coat.
Layered Charm Clusters
Skip the single focal point. Pair a simple resin letter with thread tassels and tiny companion charms. This shifts the focus from complex pouring techniques to accessory styling.
1. Pressed Daisy Keychain in a Clear Circle Mold
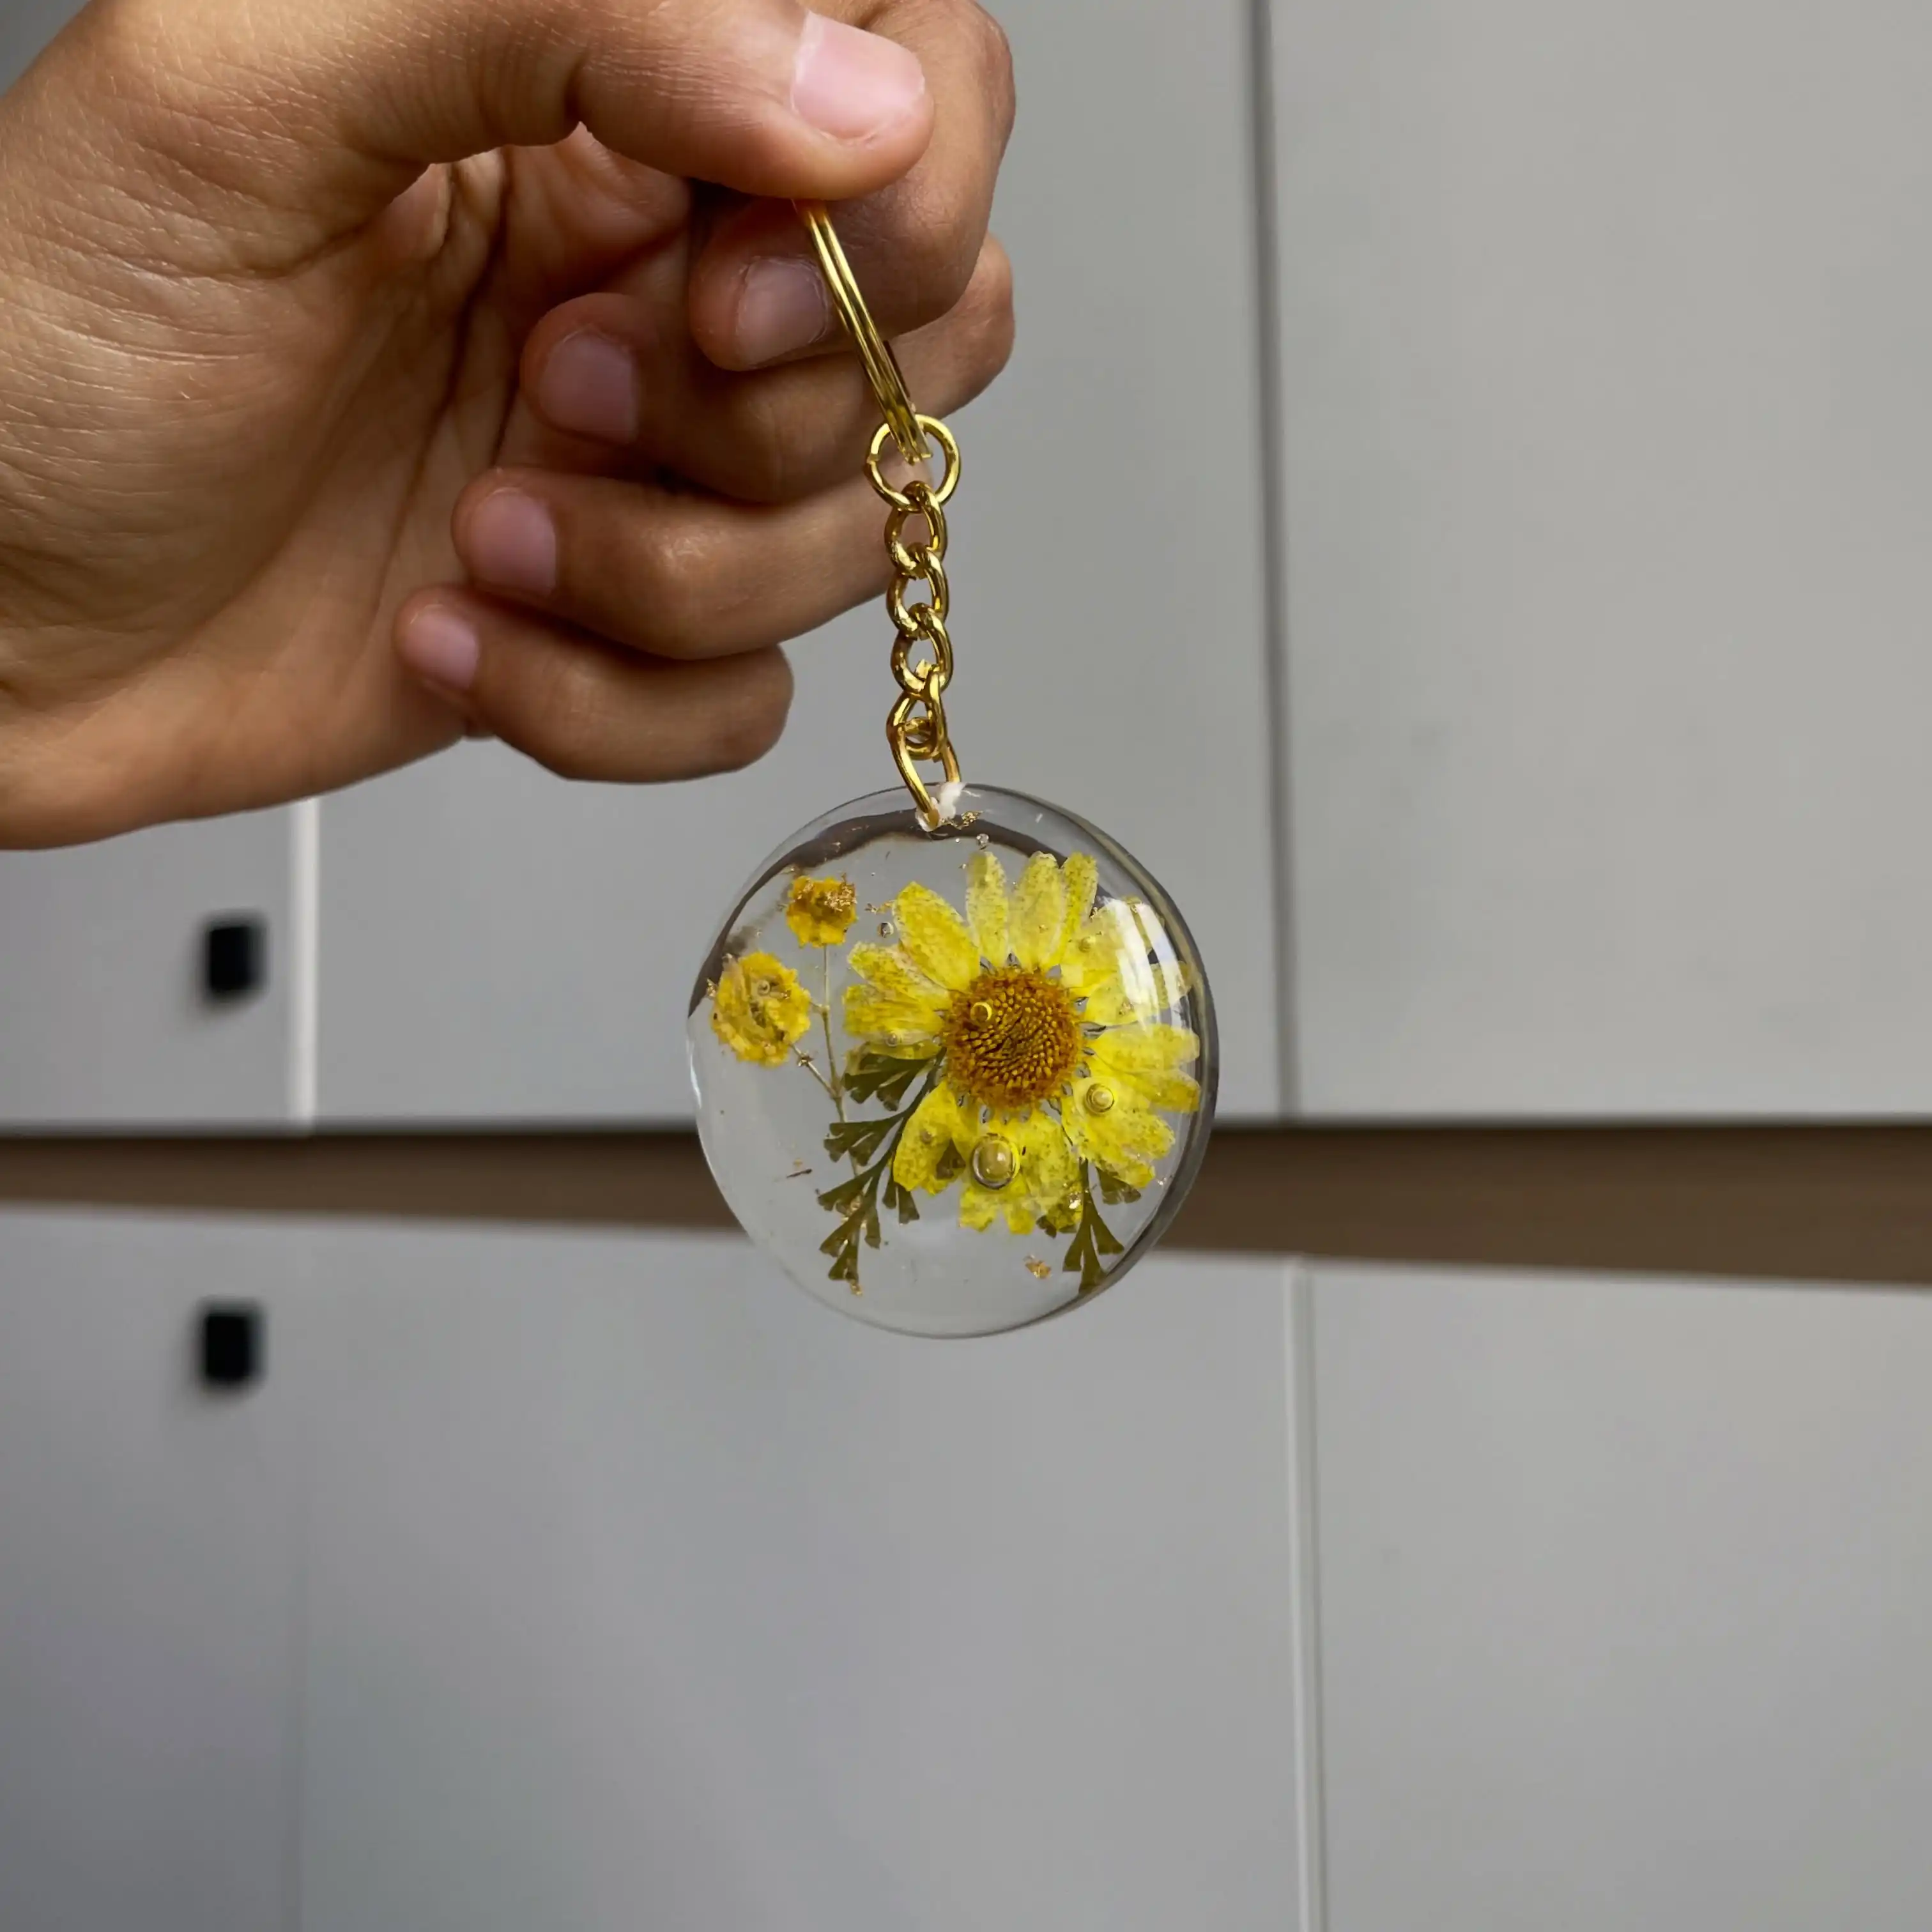
A single dried daisy does most of the work here. The bloom sits slightly off center in a clear round mold, with a smaller companion flower and a few feathery green stems filling the empty space to the left.
Nothing about it feels crowded, and that’s the trick with beginner florals: one hero flower, a couple of small fillers, and lots of clear space around them so the resin itself gets to shine.
The gold jump ring and chain add a nice warm contrast against the yellow petals, and tiny air bubbles caught near the stems actually read as a design feature instead of a flaw. If you’re nervous about your first pour, this layout forgives a lot.
2. Personalized Name Keychains with a Scalloped Gold Bezel
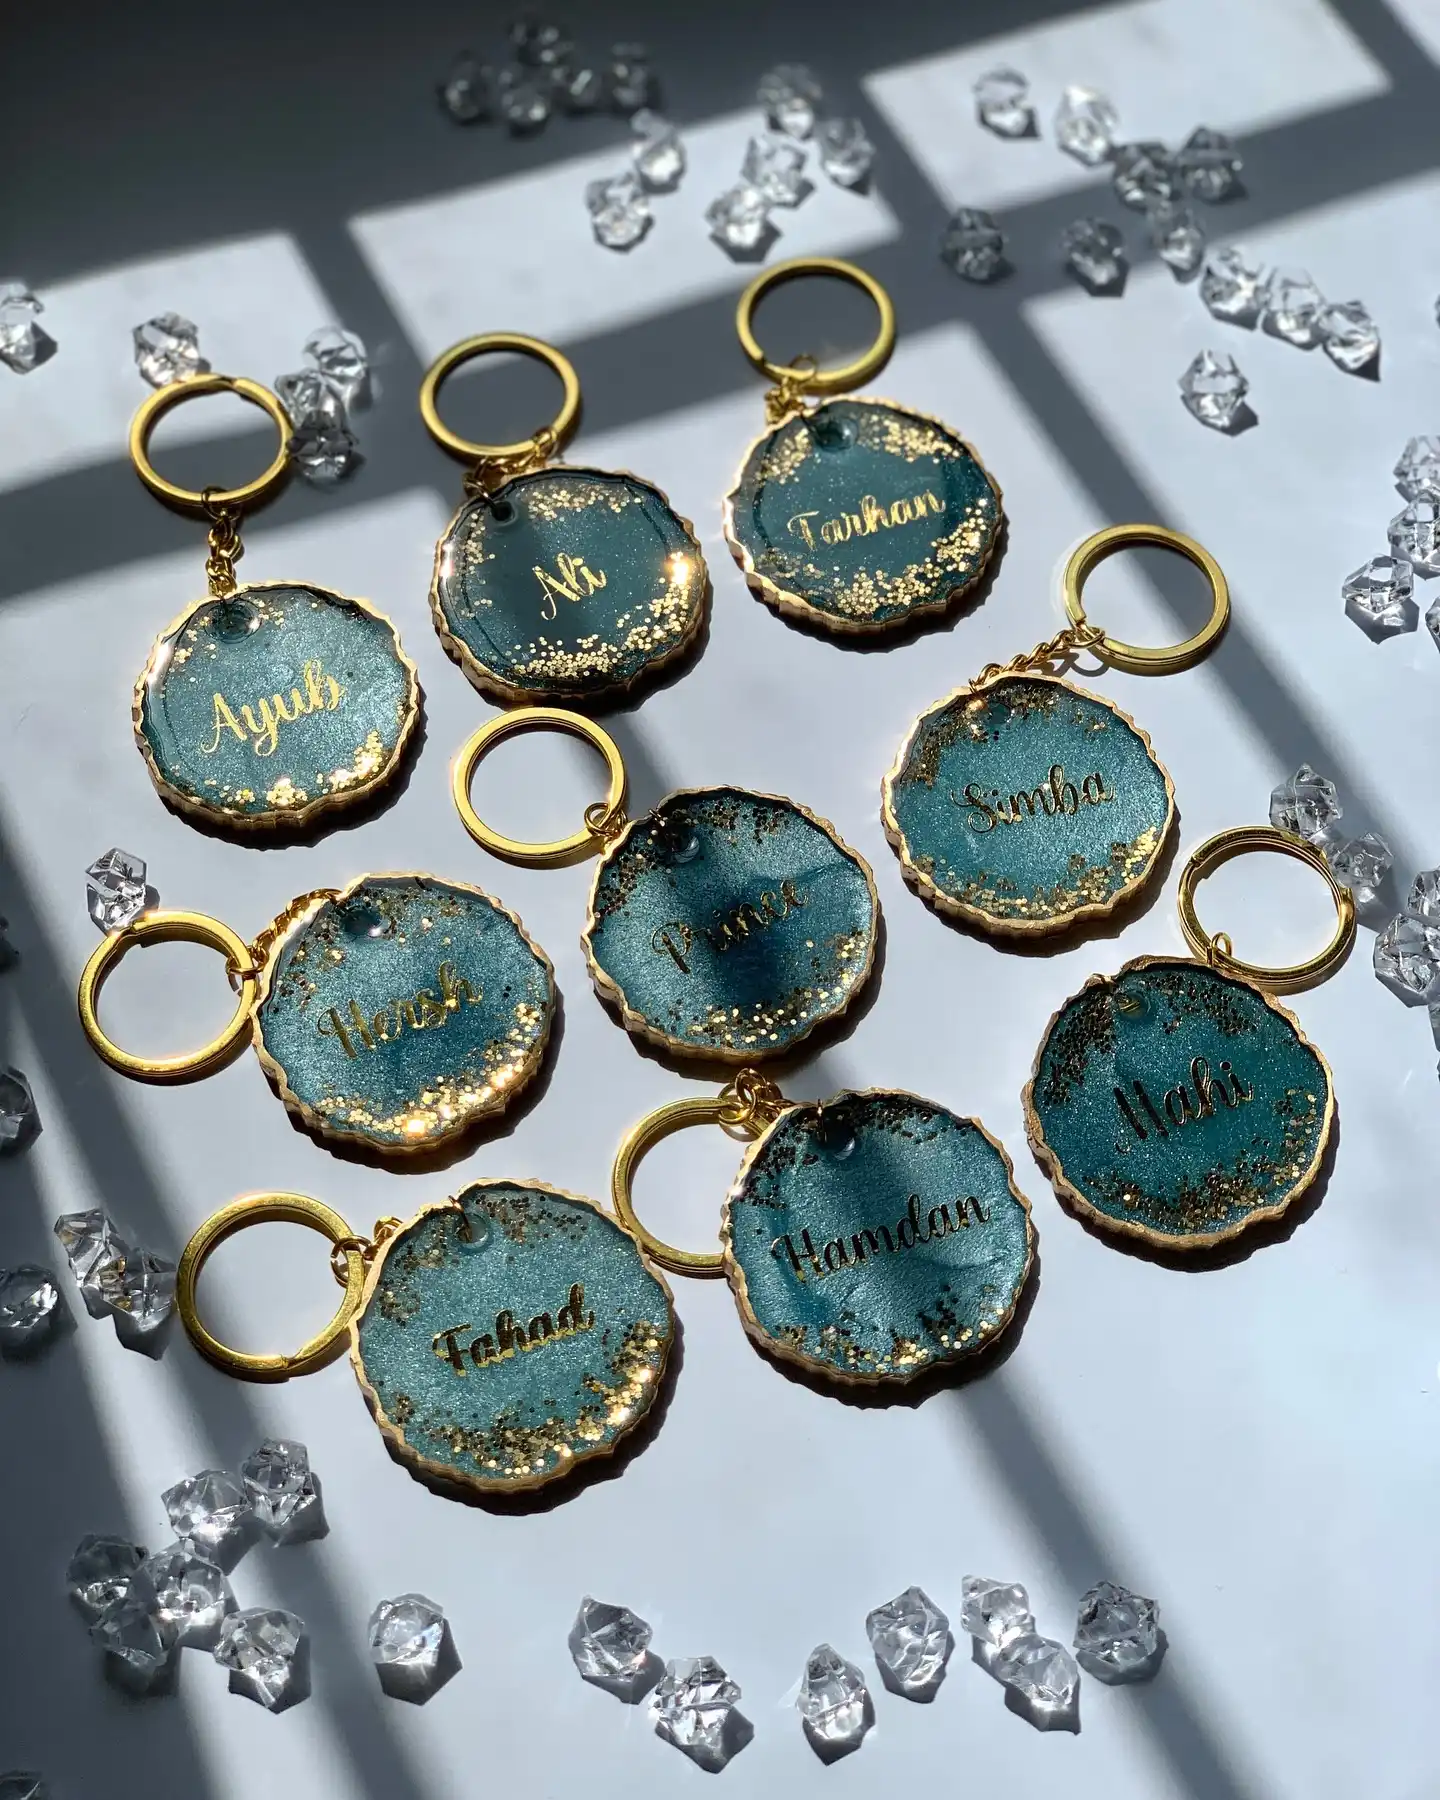
Nine keychains, nine different names, and the same repeatable formula underneath. Each one uses a deep teal resin base flecked with gold glitter, poured into a scalloped mold that mimics a coin edge, then finished with a gold foil name stamped or pressed into the surface.
The scalloped edge alone makes these look far more finished than a plain circle, and it hides small pour imperfections along the rim better than a smooth edge does.
What makes this idea work for gifting is the repeat factor.
Once you’ve got the color and glitter ratio dialed in, you can batch pour a dozen bases in one sitting and personalize each one separately, which makes it a strong choice for wedding favors, birthday party gifts, or a small custom order business.
3. Two-Tone Rectangle Keychain with a Gold Monogram
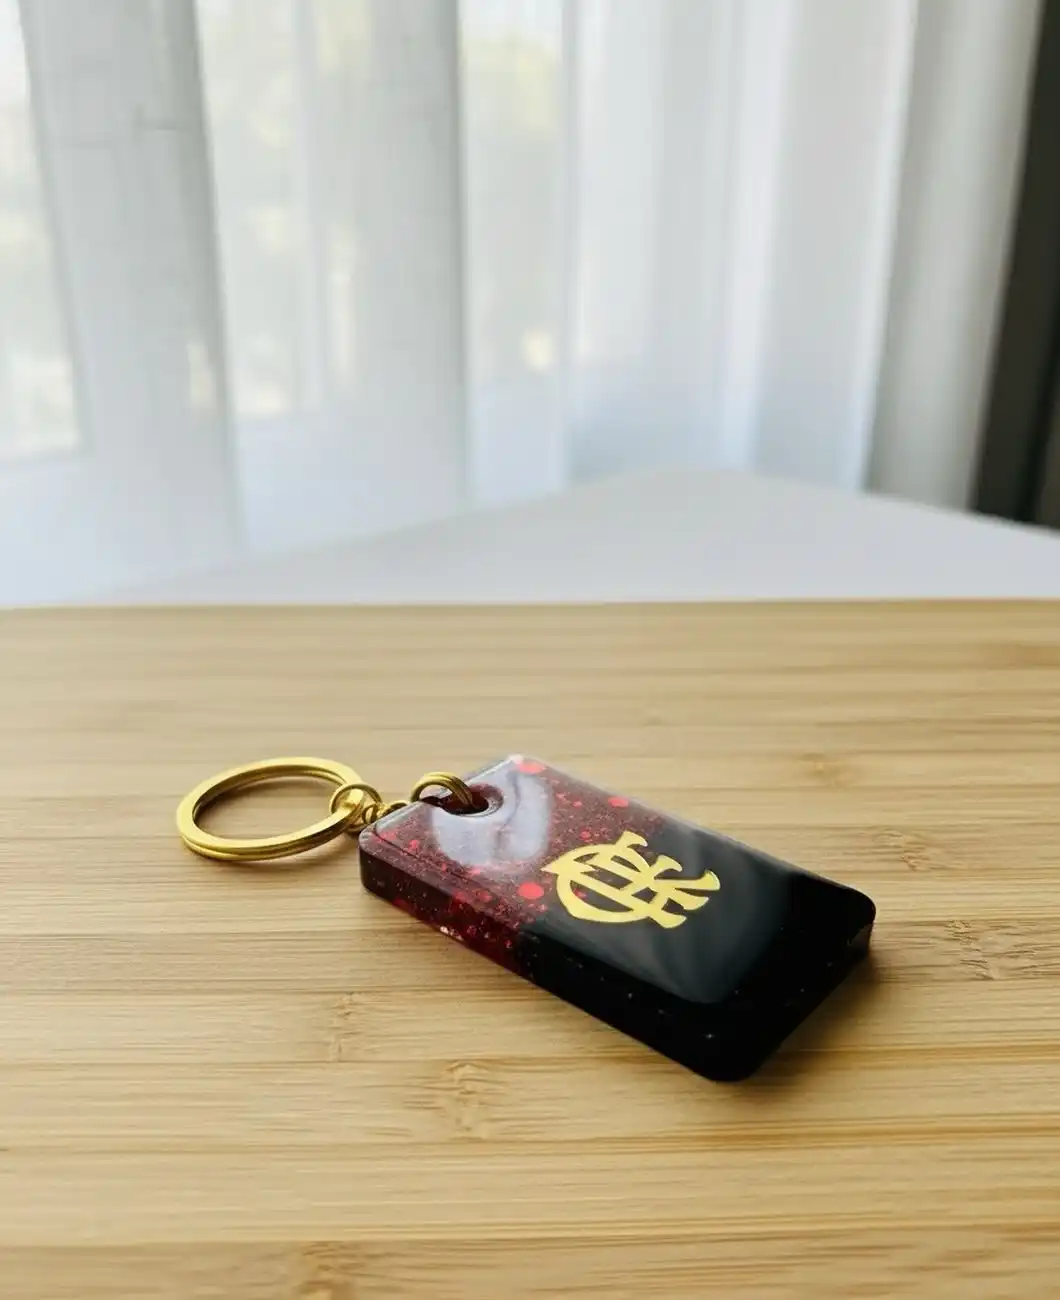
This one leans masculine on purpose. A rectangular mold splits into two zones, a deep black side and a burgundy red side flecked with fine glitter, and they blend into each other instead of forming a hard line.
Right in the center sits a gold monogram charm, pressed flat into the resin so it reads clean from every angle once the top layer cures glossy.
A few things worth noting for beginners:
- The color split is the whole design, so pour slowly and let the two shades meet naturally rather than mixing them
- A domed top coat is what gives it that polished, almost stone-like shine
- A flat gold charm or letter works better here than glitter alone, since it gives the eye somewhere to land
If your two resin colors are too similar in thickness, they can swirl together and lose that clean two-tone split. Mix each color to the same consistency before pouring.
4. Letter-Shaped Keychain Filled with Tiny Shells
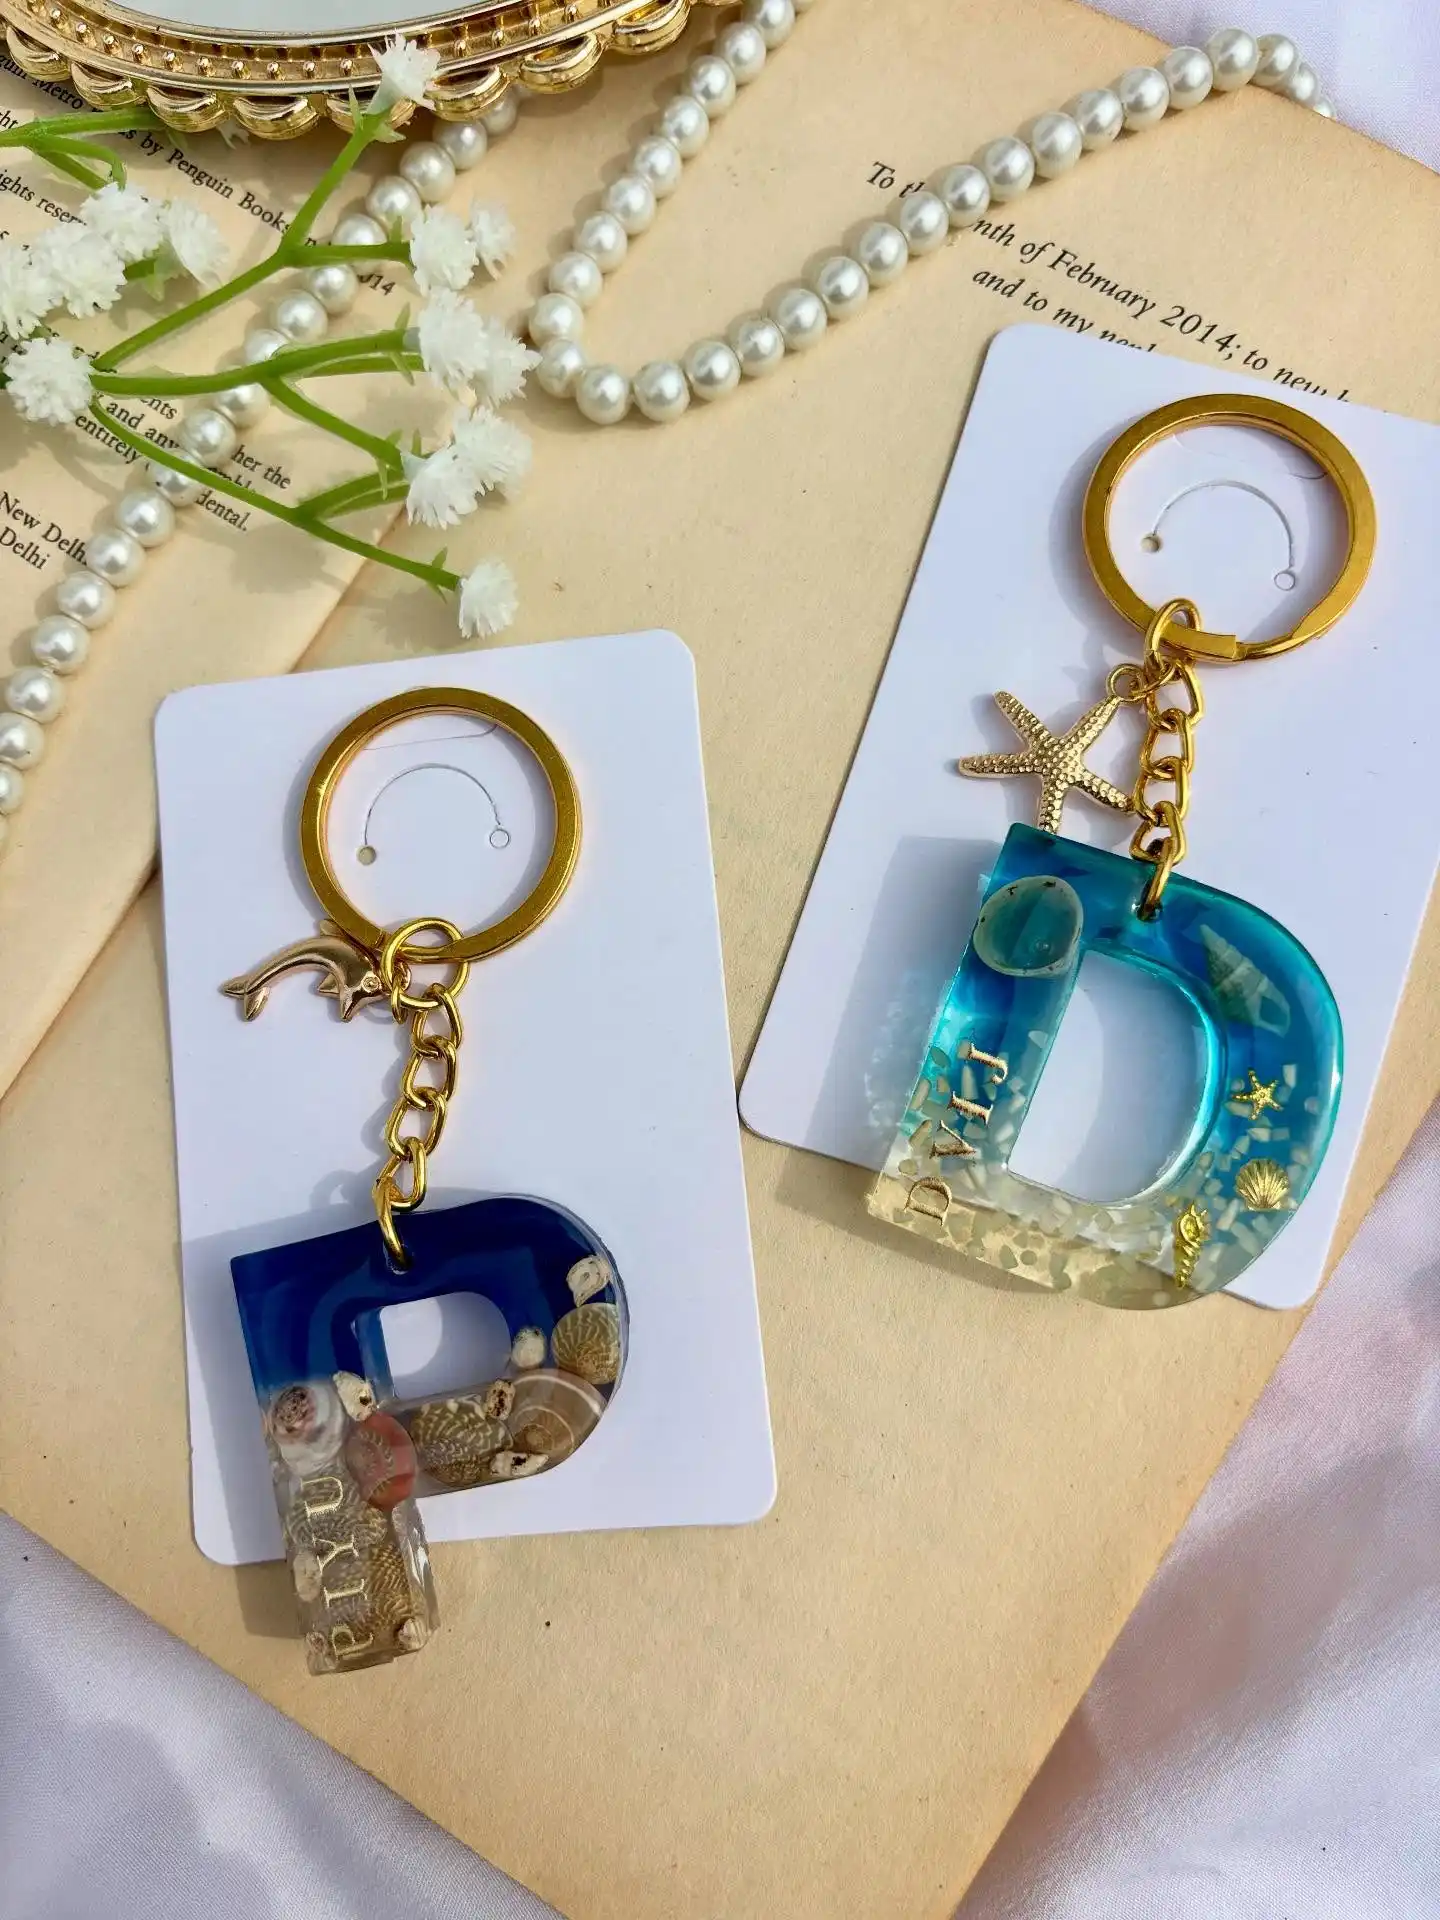
Instead of a plain circle or square, this idea uses a large open letter mold, here shaped like a D, as the entire keychain.
Inside the letter, tiny real shells and sand-like chips are layered into blue tinted resin, so it looks like a little slice of beach trapped inside the shape.
One version uses a deep ocean blue at the top fading into clear at the bottom, and the other version stays lighter throughout with gold shell charms and a starfish charm hanging above it.
A dolphin charm and a starfish charm both hang from the keyring on separate pieces, echoing the ocean theme without repeating it.
This is a great gift idea for anyone with a beach vacation coming up, since you can personalize it with their actual initial.
Subscribe to DIY Craft Bloom
Get updates on the latest posts and more from DIY Craft Bloom straight to your inbox.
5. Gold Leaf and Silhouette Keychain in Deep Plum Resin
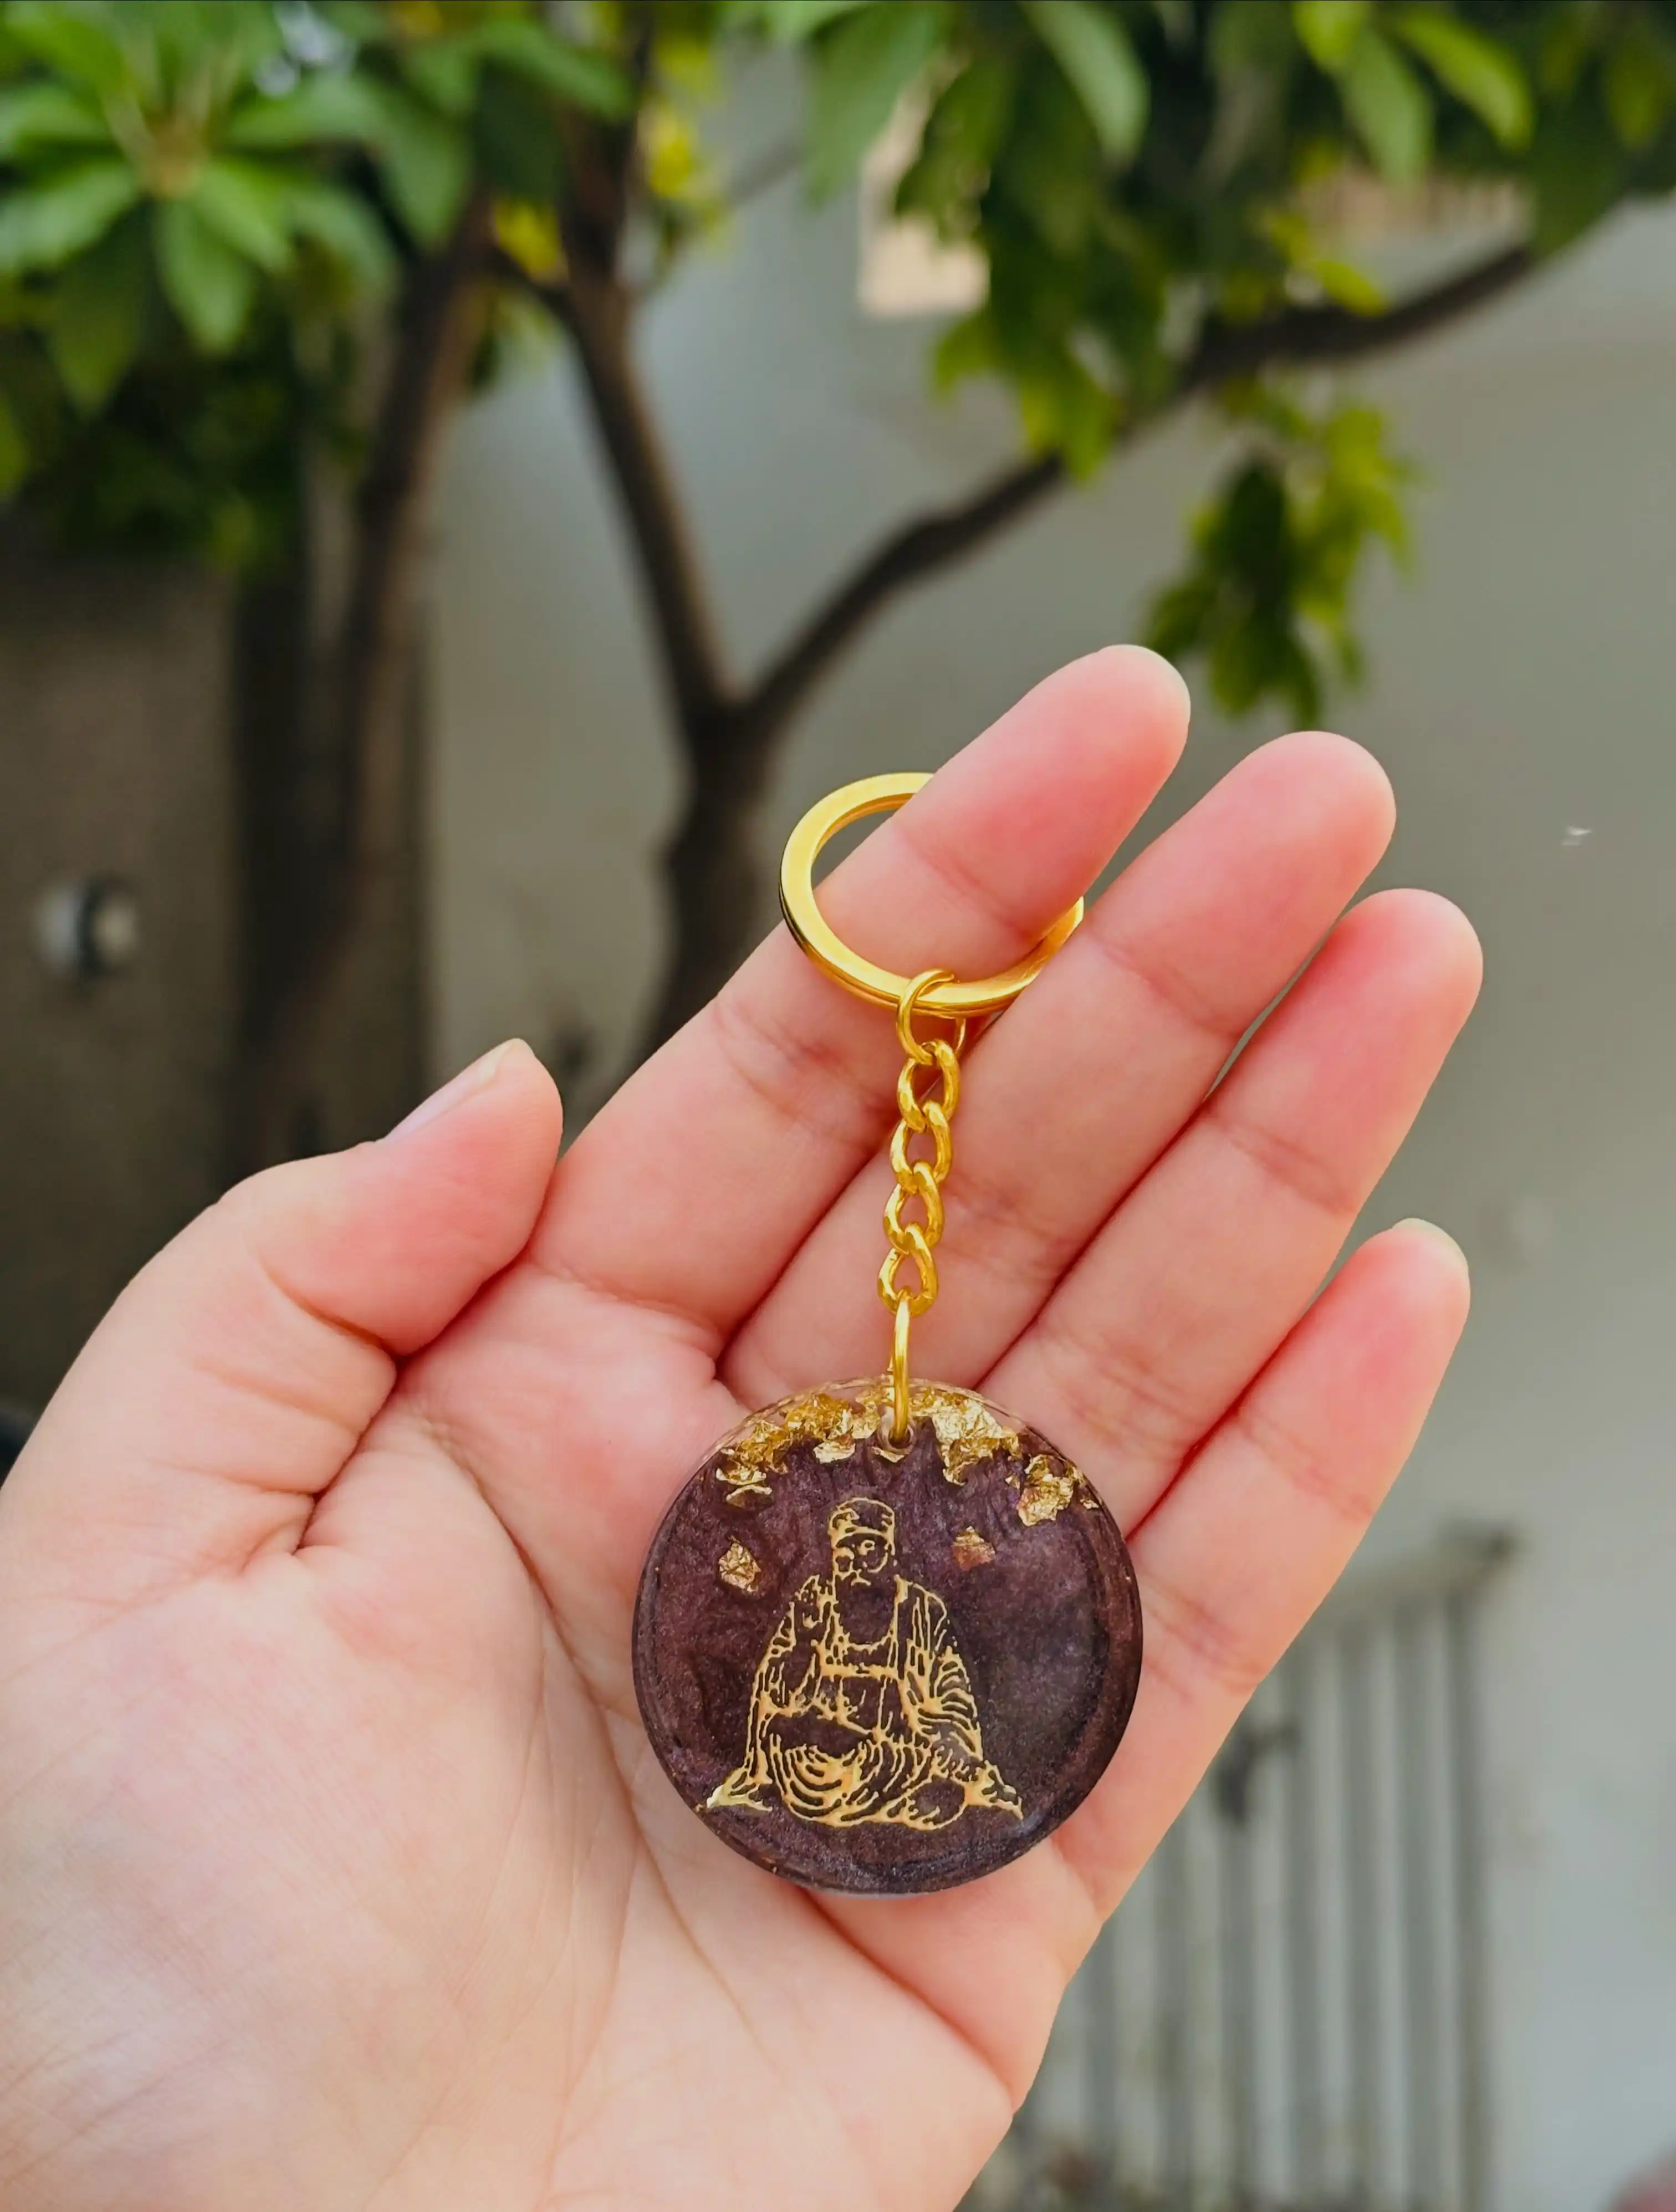
Gold leaf flakes scattered across the top of a colored resin base is one of the easiest ways to make a keychain look expensive without much extra effort.
Here the color is a deep plum, almost eggplant, and the gold sits loose near the top edge like it drifted in during the pour instead of being placed by hand.
Below it, a fine gold silhouette, a seated robed figure, sits engraved or printed into the resin itself.
This combo works because the dark background makes the gold pop without competing colors getting in the way.
It’s also a good one to try once you’re past your first few pours, since layering foil and a transfer image takes a bit more control than a single flower drop.
6. Layered Charm Cluster with a Pink Resin Letter
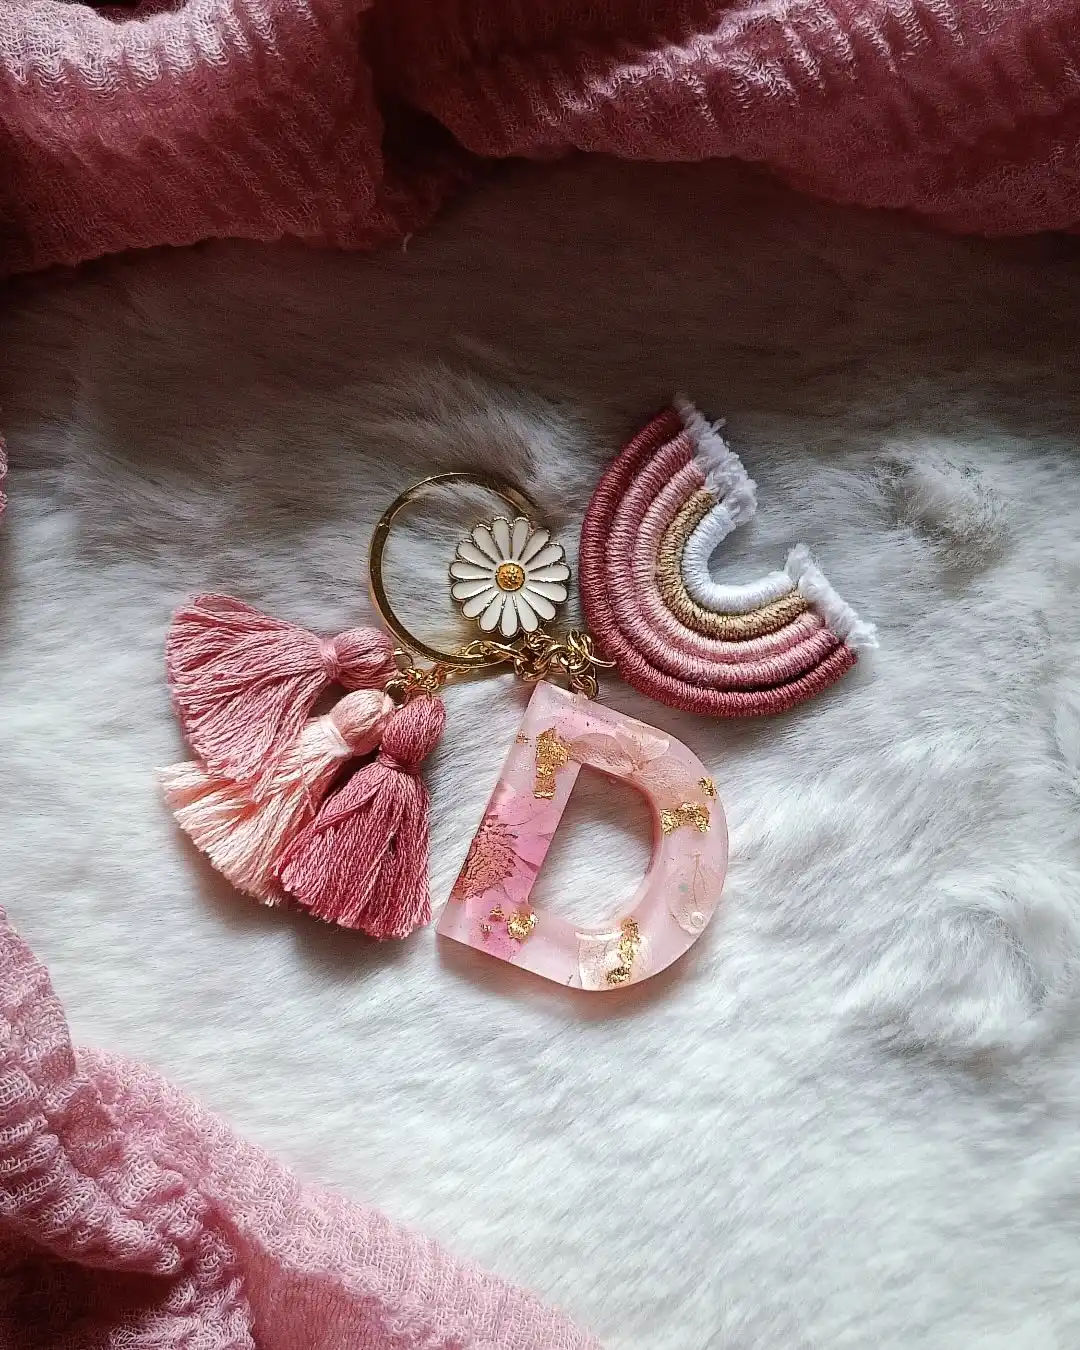
This one skips the single-focal-point approach entirely.
Instead, three separate charms hang off the same ring: a pair of thread tassels in shades of pink, a small woven rainbow charm, and a blush pink resin letter with gold leaf and a hint of dried flower pressed inside.
A tiny white daisy charm sits at the very top where the ring splits, tying the whole cluster together in one color story.
The lesson here isn’t really about resin technique, it’s about styling. Your resin letter doesn’t have to carry the whole design on its own.
Pair it with a couple of complementary charms and suddenly it looks like a finished accessory instead of a single craft piece.
7. Pastel and Pearl Name Discs with a Tiny Crown Charm
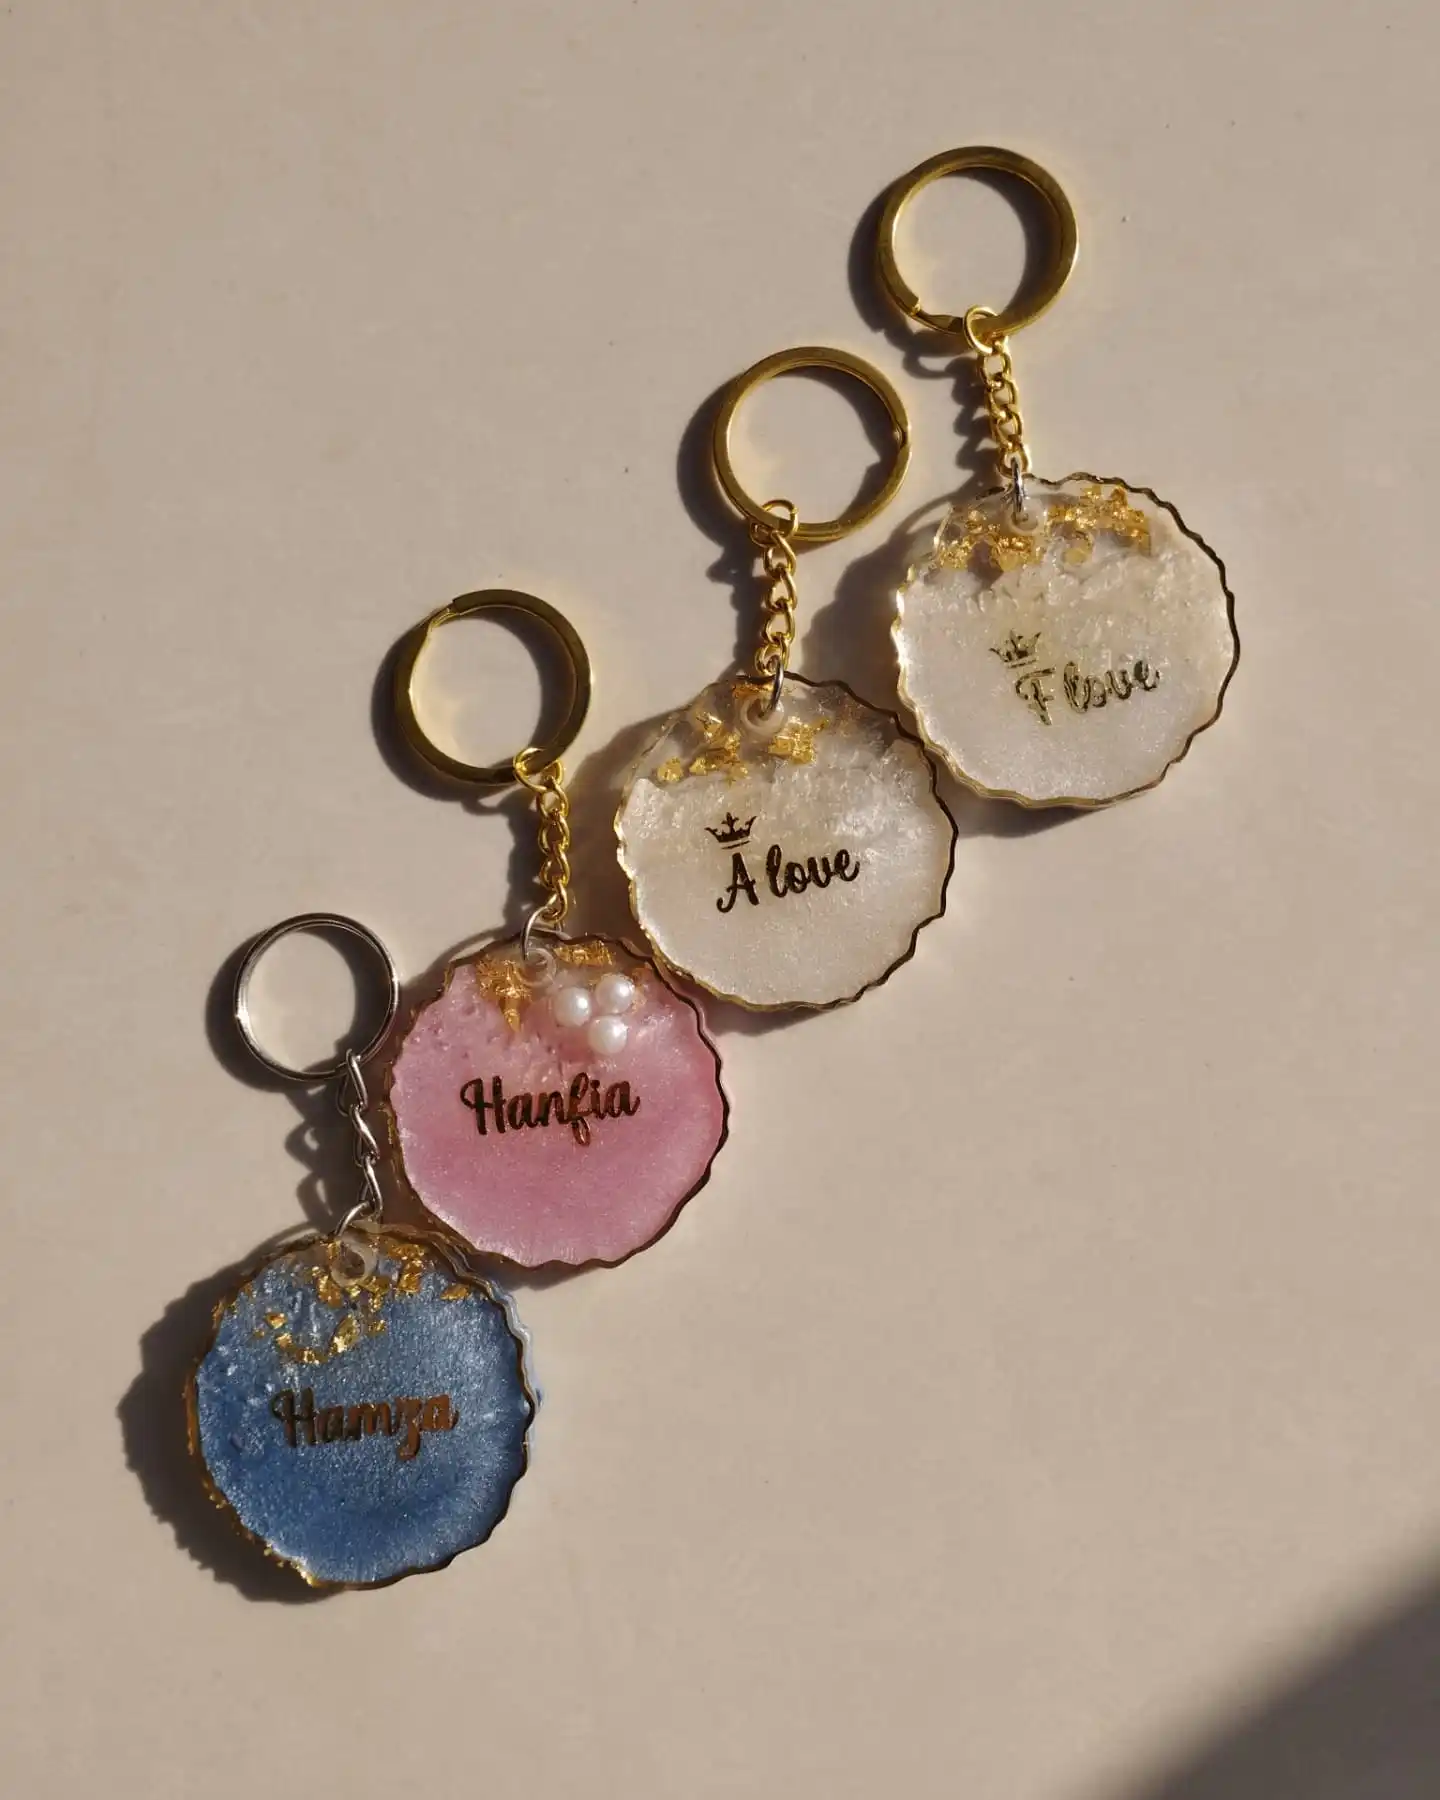
Four keychains here, but two clear color families. A soft pink and a dusty blue disc each carry someone’s name in a simple script, with small gold foil flecks scattered near the top edge and three tiny pearl beads pressed into the pink one for extra texture.
The other pair goes pearlescent white with a small crown icon stamped above each name, giving them a slightly more formal, gift-worthy feel than the colored versions.
Notice the small stuff: pearl beads only appear on one disc, not all four, and the crown icon only shows up on the white pair.
Little details like that keep a batch of similar keychains from feeling identical, even when they share the same mold and edge style.
8. Two-Wing Butterfly Mold with Chunky Holographic Glitter
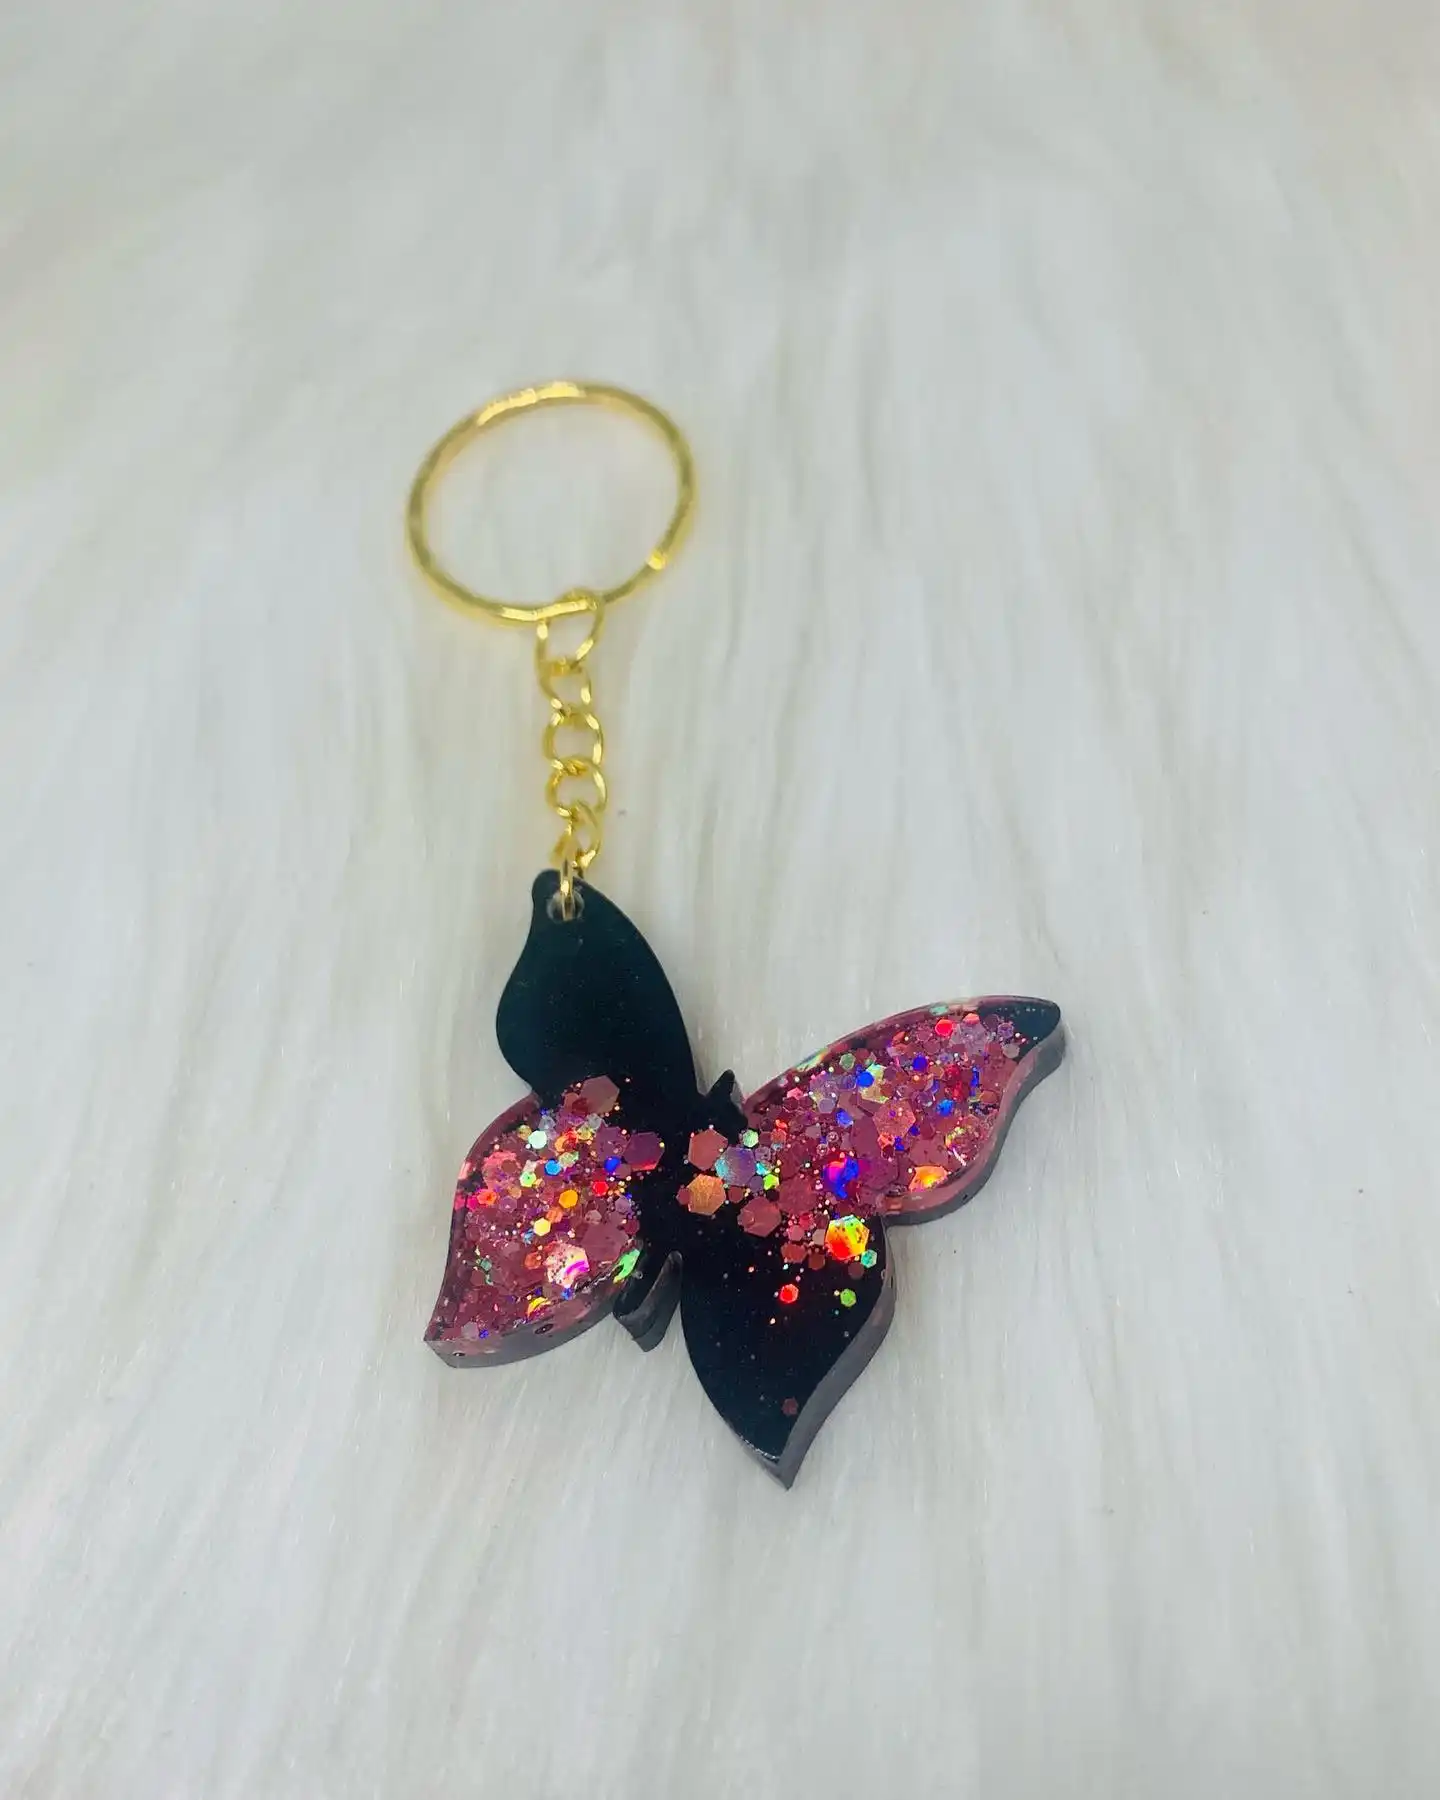
Black resin forms the top and bottom wings, while the two side wings get filled with a heavy mix of holographic glitter in pink, gold, and rainbow-flecked pieces.
The contrast between the flat black sections and the loaded glitter sections is what sells this shape, since a butterfly cut entirely from one glitter mix would just look busy instead of intentional.
This is a good project for using up mixed glitter from your craft stash, the kind with different shapes and sizes jumbled together, since a dense cluster like this hides the fact that the pieces don’t match.
Load glitter heavy on just two of the four wings for contrast.
Mix glitter sizes and shapes together for texture.
Don’t spread glitter evenly across all four wings.
Don’t skip the black base layer, it’s what makes the glitter pop.
9. Solid Black Letter Paired with a Clear Botanical Bar
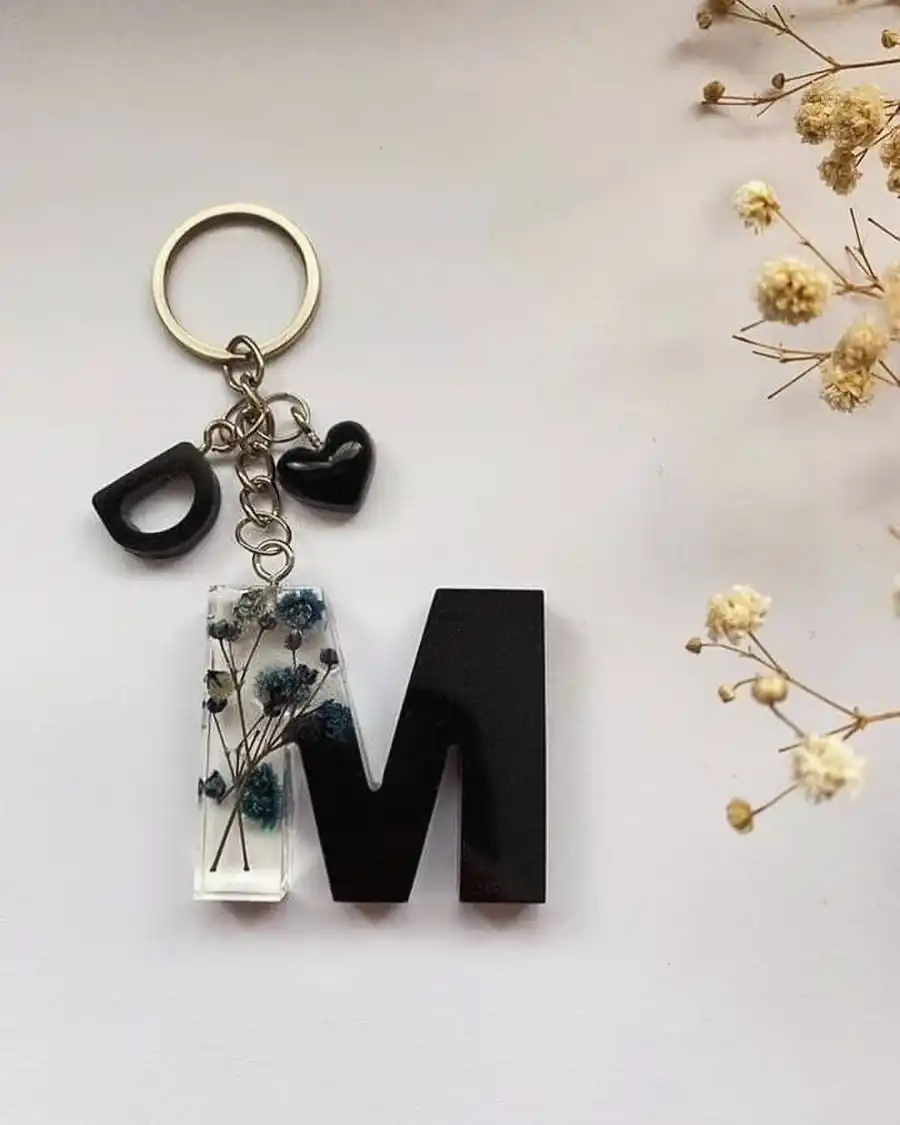
This design splits the work between two separate resin pieces instead of cramming everything into one mold.
The letter M is poured solid in opaque black with a slight shimmer, giving it a clean, almost jewelry-like finish.
Right next to it hangs a slim clear rectangle bar filled with dried baby’s breath in dusty blue and cream tones, floating mid-pour so the stems don’t sink to the bottom.
Two tiny charms, a black heart and a black teardrop, finish off the top of the chain. Because the letter has zero texture or fillers, it acts as a visual anchor, while the botanical bar carries all the detail.
That balance is worth remembering any time you’re combining more than one resin piece on a single ring.
| Letter piece | Botanical bar |
|---|---|
| Solid opaque black resin | Clear resin with dried florals |
| No fillers, smooth pour | Baby’s breath in blue and cream |
| Acts as the visual anchor | Carries all the texture and detail |
10. Heart Mold Packed with Pressed Daisies and Pearl Clusters
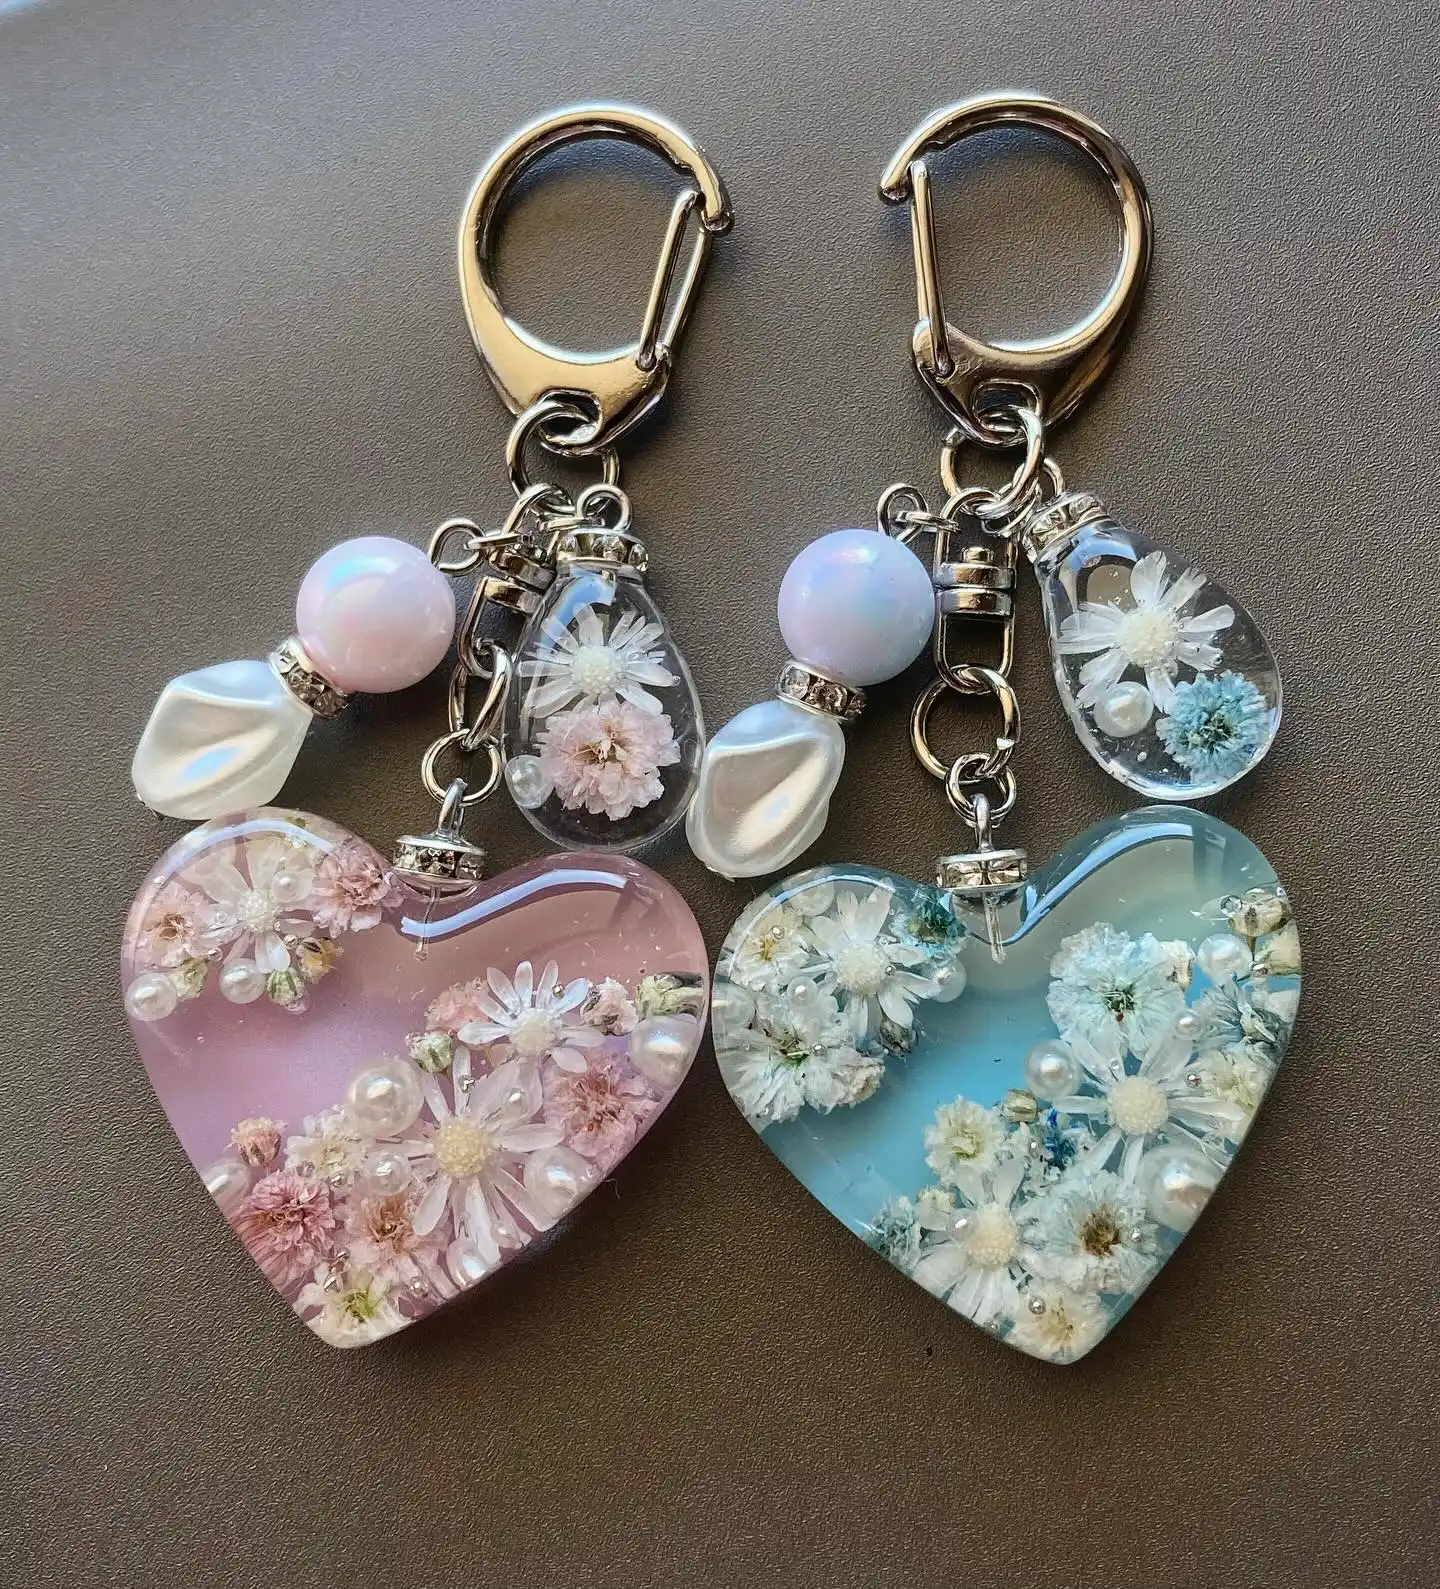
Two heart-shaped keychains, one blush pink, one soft aqua, each crammed full of tiny pressed white daisies and small pearl beads pushed in at different depths so the flowers look layered instead of flat.
Subscribe to DIY Craft Bloom
Get updates on the latest posts and more from DIY Craft Bloom straight to your inbox.
A dangling glass teardrop bead filled with its own mini floral scene hangs above each heart, alongside an iridescent round bead and a puffy pearl chip, so the whole piece reads as jewelry rather than a simple keychain.
Three things make this one read as advanced rather than beginner-friendly:
Daisies overlap edge to edge, which takes practice to arrange before the resin sets.
The teardrop bead is its own small pour, made ahead and wired onto the main chain.
Pearls sit at different depths in the resin, added in stages between pours.
11. Star-Shaped Keychain with a Cloudy Coral Texture and Jingle Bells
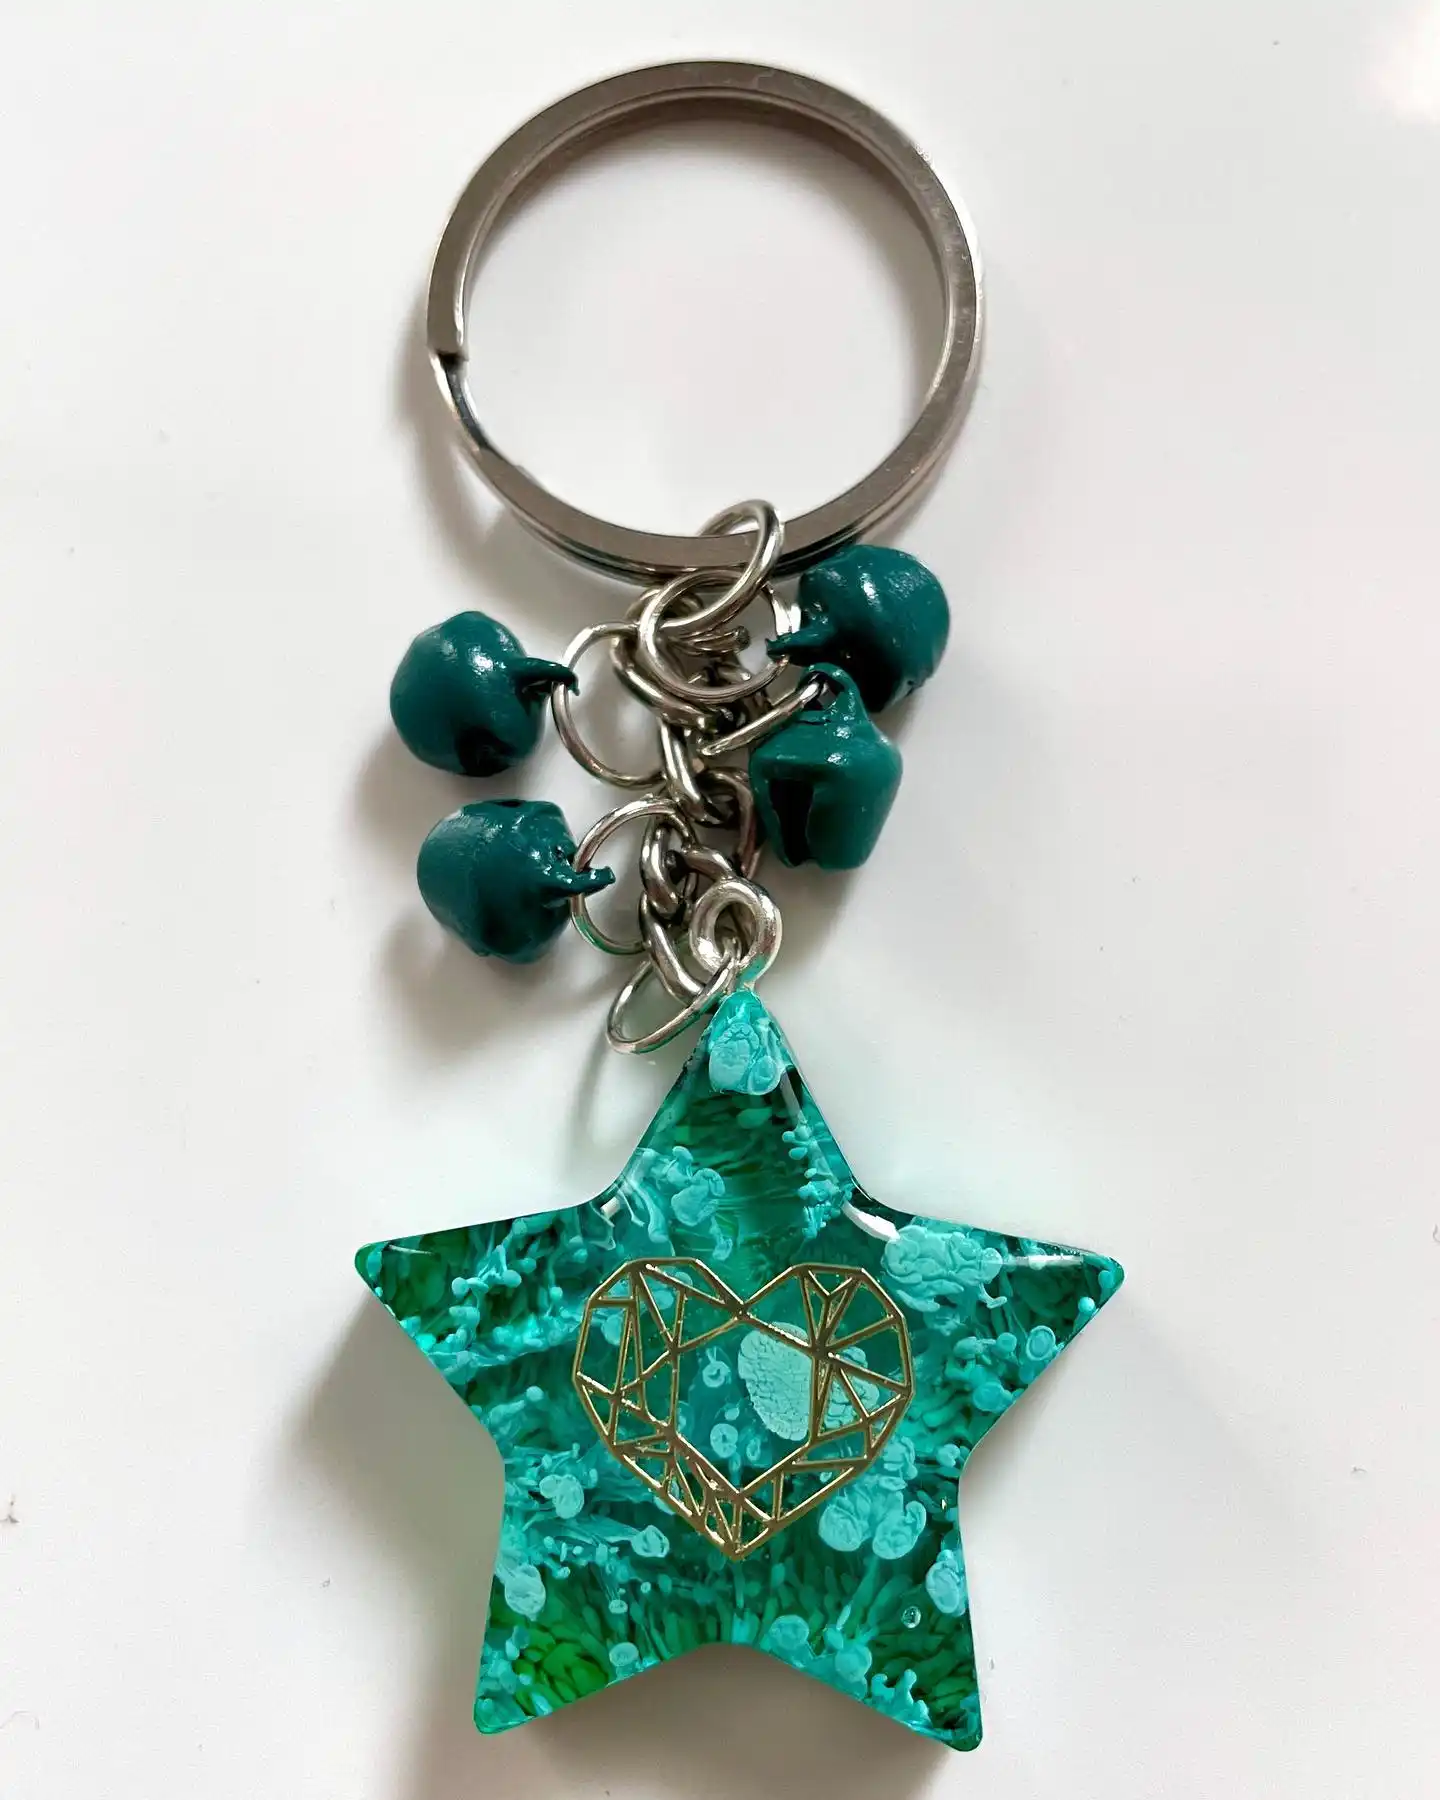
This one goes bold on shape and texture instead of clear inclusions. A five-point star mold is filled with mixed shades of green and teal resin, swirled to create a mottled, almost coral-reef look with soft cloudy patches breaking up the color.
A thin gold wire heart charm sits pressed into the center, giving the eye one calm focal point in the middle of all that texture.
Four small teal jingle bells hang off the ring above the star, adding both a playful sound element and a visual echo of the star’s own color.
If your resin swirls tend to come out muddy instead of marbled, sticking to two or three closely related shades, like this piece does, keeps the effect looking intentional rather than accidental.
Two or three related shades swirled together read as marbled. Five random colors just read as muddy.
12. Mixed Wildflower Medley in a Scalloped Resin Disc
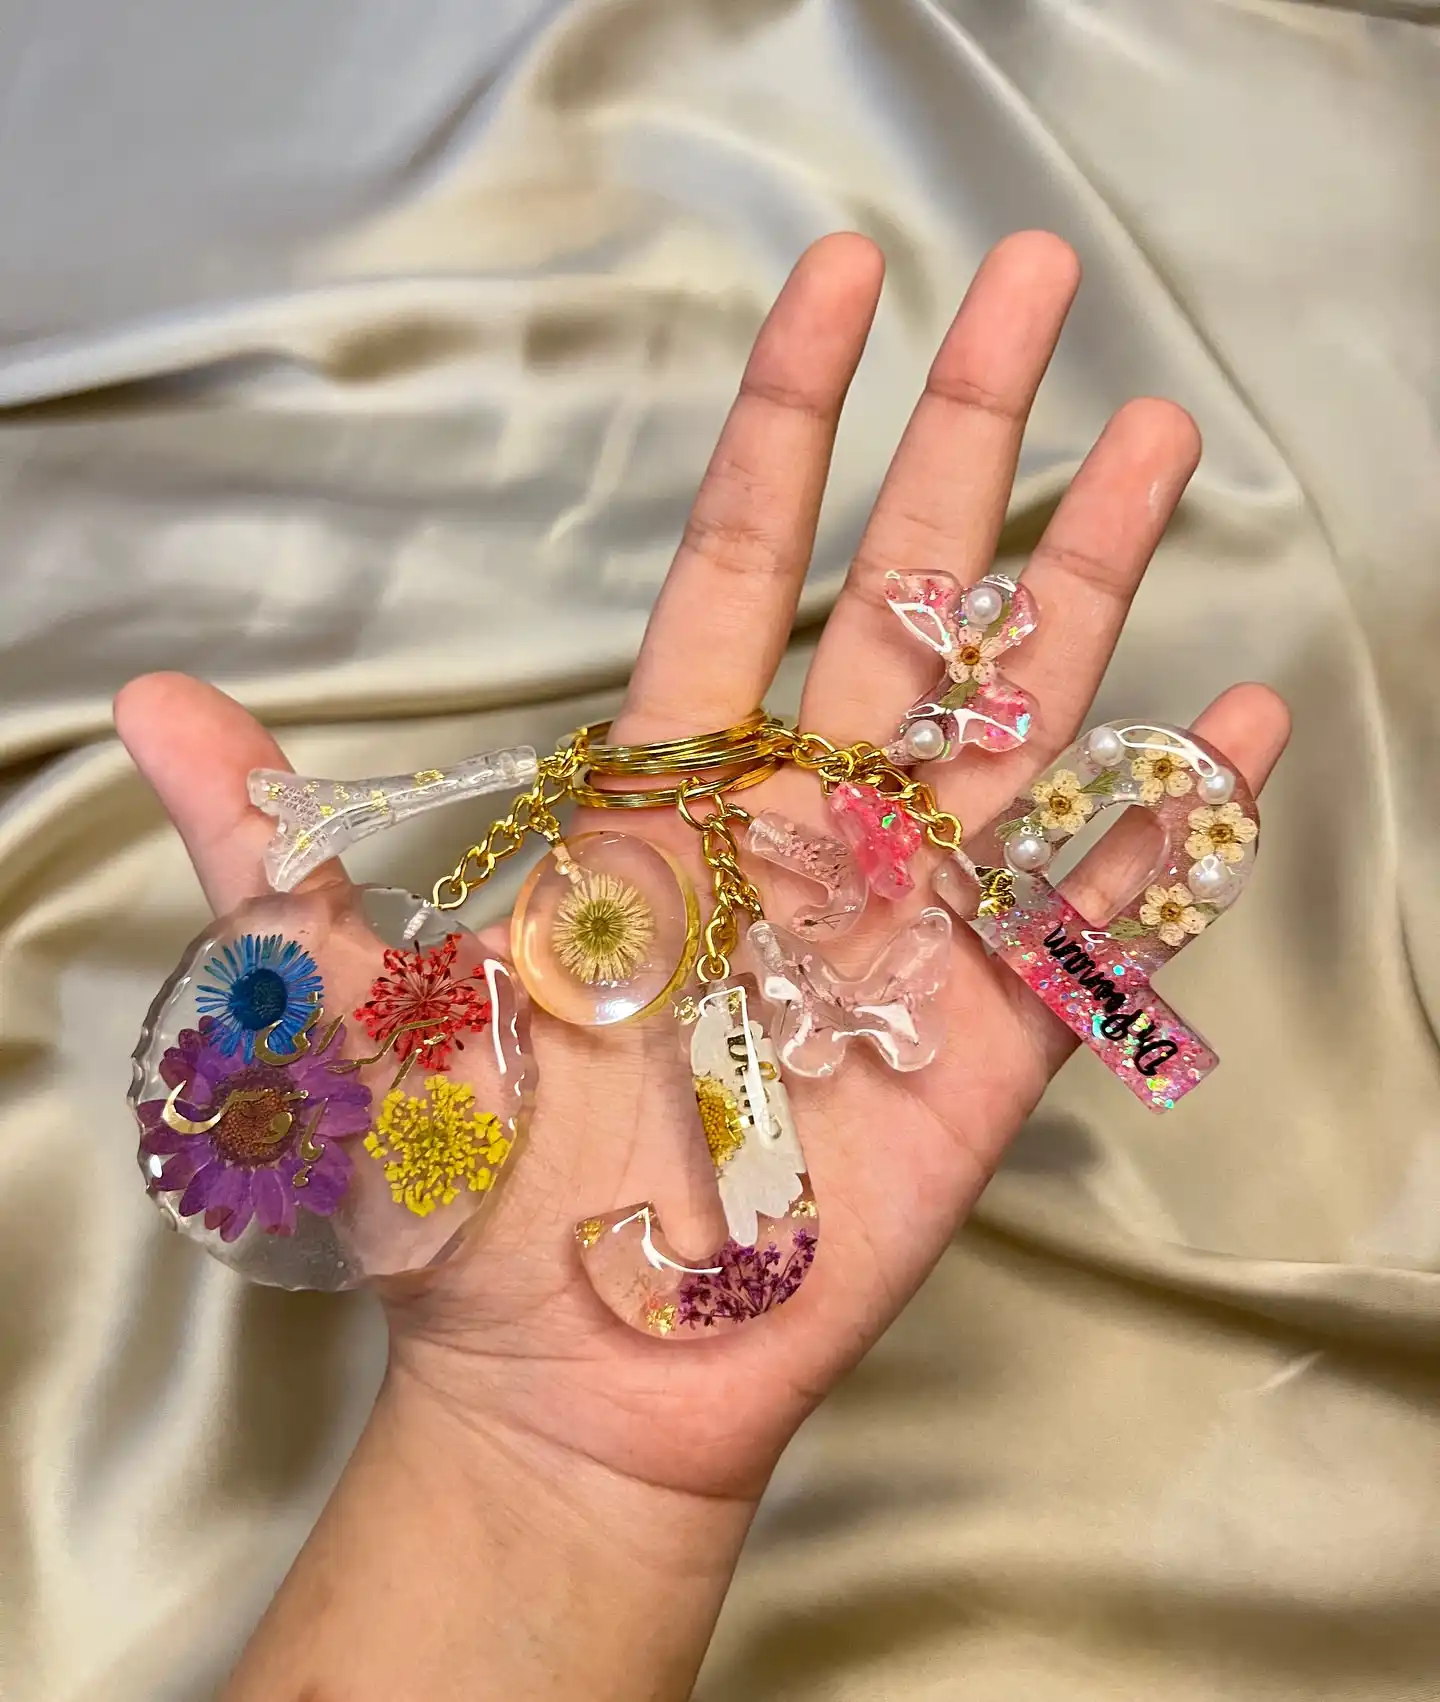
Four different flower colors share one clear scalloped disc here: deep blue, purple, red, and yellow blooms all pressed together instead of the single-flower approach from earlier.
The trick to keeping a busy mix like this from looking chaotic is grouping by color in loose clusters rather than scattering every shade evenly across the surface, so your eye still has clear zones to land on.
The same hand also shows off a handful of smaller companion pieces worth trying once you’ve got the disc down: a letter charm with a single dried bloom pressed inside, a tiny clear heel charm, and a butterfly charm dotted with a pearl and a pressed flower.
None of them need a full mold to shine, they’re just quick, low-pressure ways to use up leftover resin.
13. Round Floral Pendant Paired with a Custom Name Letter
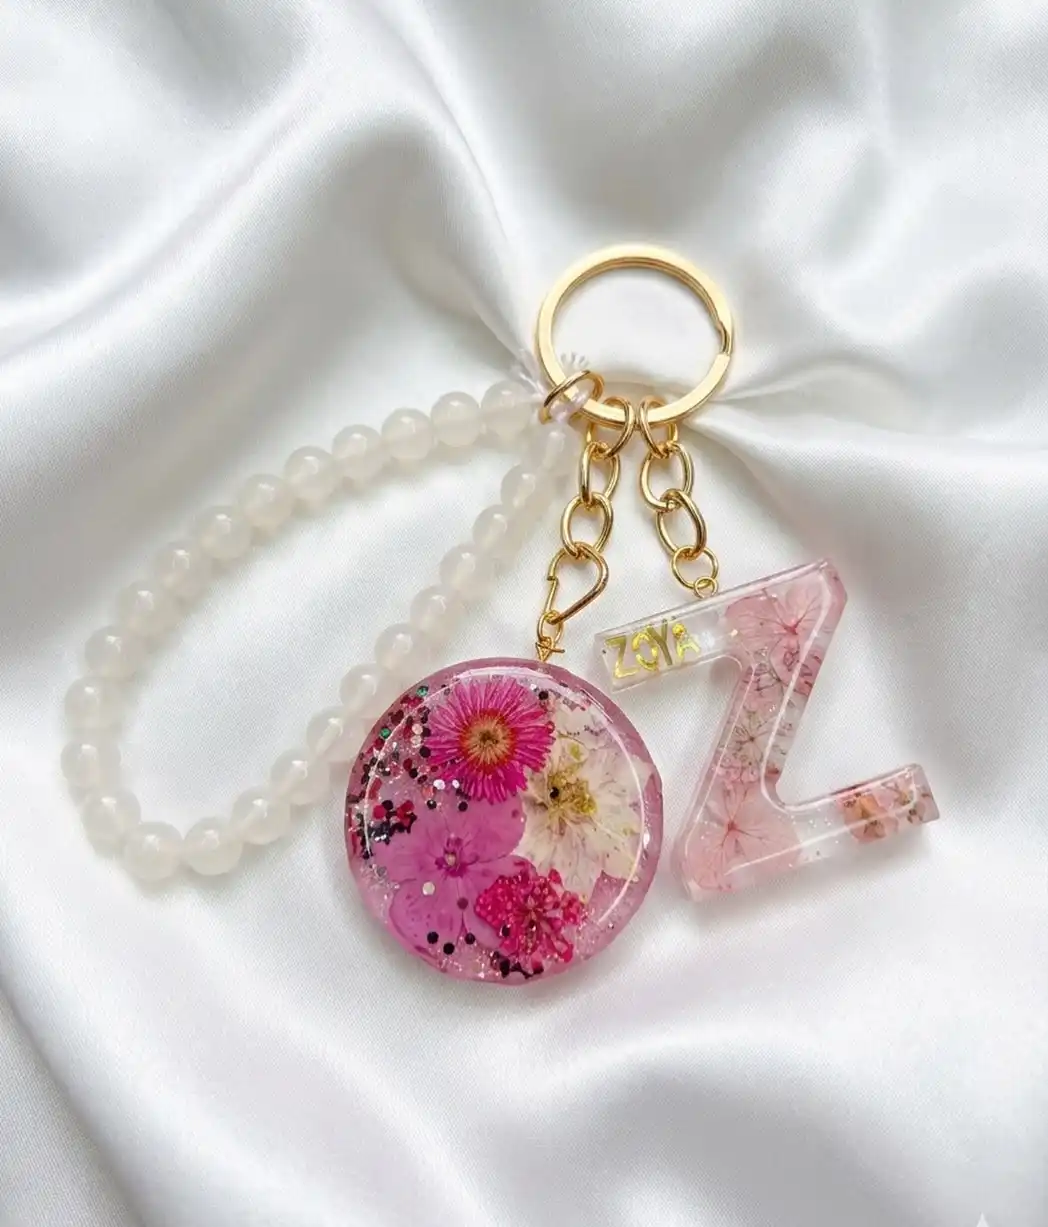
Pink and white pressed flowers fill a round resin pendant here, dusted with fine glitter and a few tiny black flecks that read almost like confetti caught mid-pour.
Right beside it hangs a separate pink letter Z, personalized with a tiny gold foil name tucked into the top corner, so the piece works as both an initial charm and a name tag in one.
A strand of frosted white beads winds around the top of the ring, softening the transition between the gold hardware and the two resin pieces below.
Pairing a solid floral shape with a lettered piece like this is an easy way to make a single order feel more custom without adding a second flower blend.
14. Heart Charm and Engraved Name Bar as a Matching Set
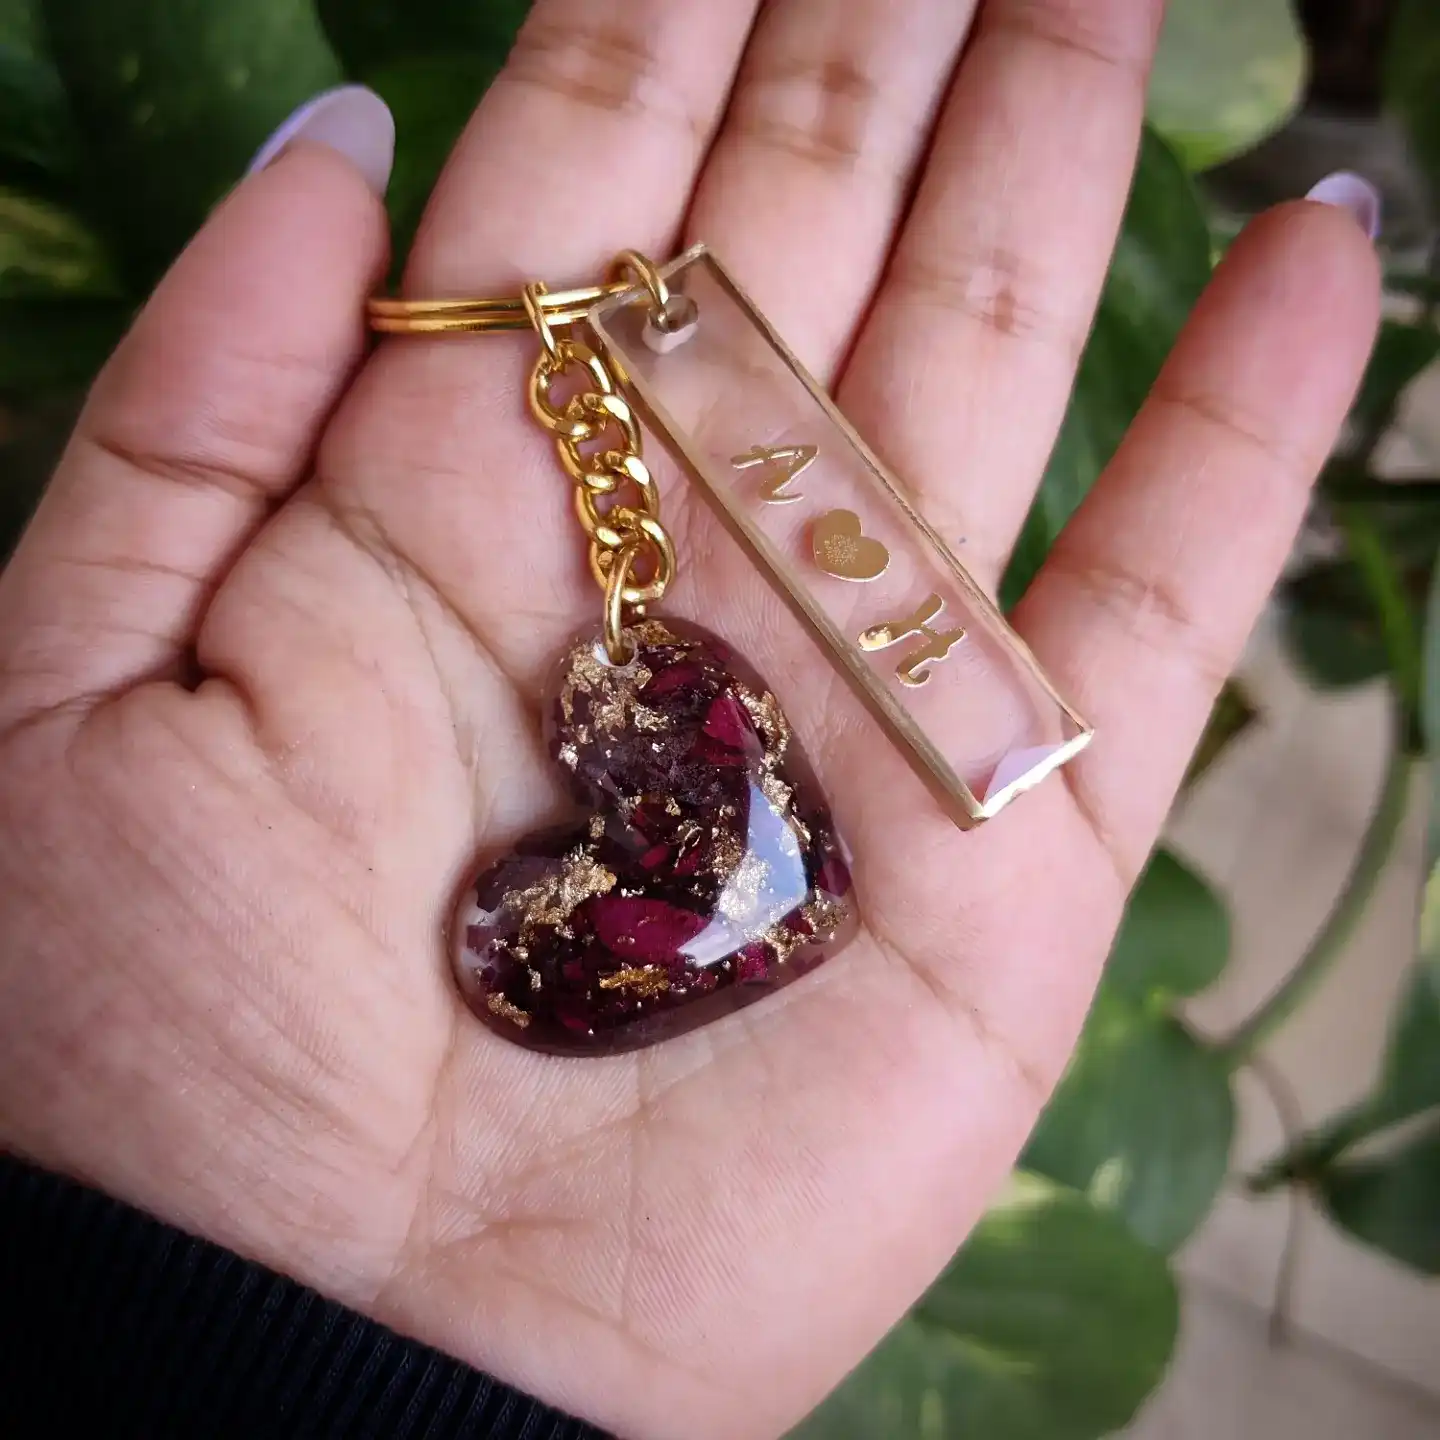
The last idea here goes matte and moody instead of glossy and bright.
A deep burgundy heart is packed with real dried rose petals and loose gold flakes, creating a rich, almost wine-colored marble effect with no clear space left showing.
Next to it hangs a slim rectangular bar, poured in a lightly frosted clear resin and engraved with two gold initials joined by a small heart, like a couple’s tag or a friendship keychain.
Pairing a textured charm with a flat engraved bar is a simple way to close out a set.
The heart carries the color and texture, the bar carries the personalization, and together they read as a matched pair rather than two random pieces thrown on one ring.
One textured charm plus one flat engraved piece always reads as a matched set.
Conclusion
Fourteen ideas down, and hopefully at least two or three jumped out as your next project.
The beauty of resin keychains is that even the more advanced looks here, the dense floral hearts, the layered pearls, the engraved matched sets, started as someone’s first messy pour.
Don’t feel like you need to nail gold leaf placement or perfect color swirls on attempt one. Grab a single mold, pick one flower or one simple color combo, and just begin.
You’ll figure out your own favorite style faster by finishing a few plain ones than by waiting for the perfect setup.
Save this for the next time you need a gift idea or a slow weekend project.