18 Wax Seal Stamp Ideas for Beginners

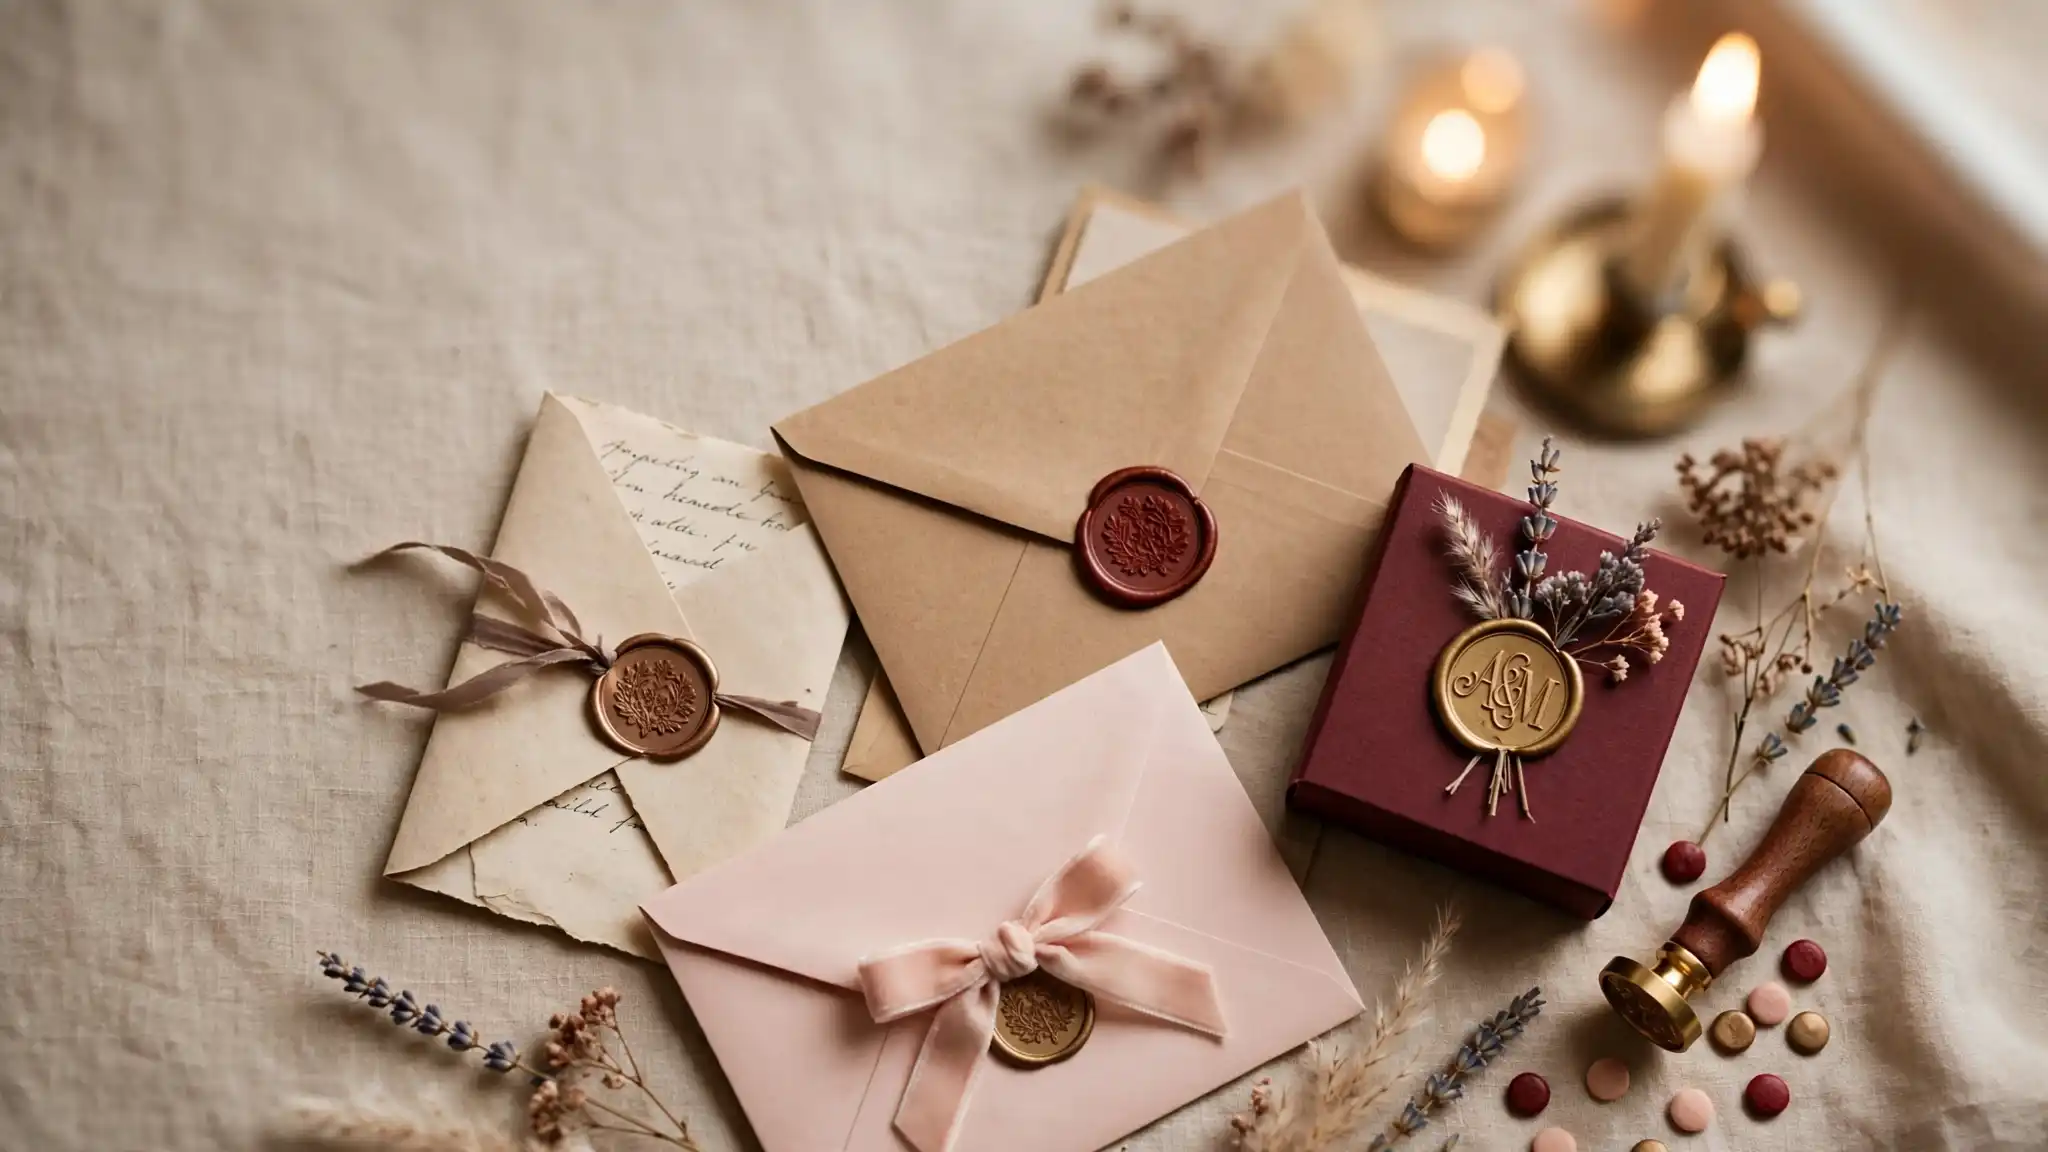
There is a moment right after you press a wax seal for the first time where you either love it or swear off wax forever, and it usually comes down to one small choice you did not know you were making.
Color, paper texture, stamp detail, they all change the outcome more than people expect going in.
This roundup pulls together eighteen real examples, from a plain red seal on kraft paper all the way to hand-painted gold detailing and full illustrated portrait stamps.
Some ideas need nothing more than a candle and a stick of wax. Others lean into batch stamping, custom logos, or mixed materials like twine and ribbon.
A few break the rules on purpose, oval shapes instead of round, black wax instead of red, one seal doing double duty as decoration and closure at once.
Whether you are sealing your first envelope or planning a full wedding suite, these wax seal stamp ideas cover enough ground that something here will match your paper, your palette, and your patience level.
18 Wax Seal Stamp Ideas for Beginners
1. The Classic Red Seal on Kraft Paper
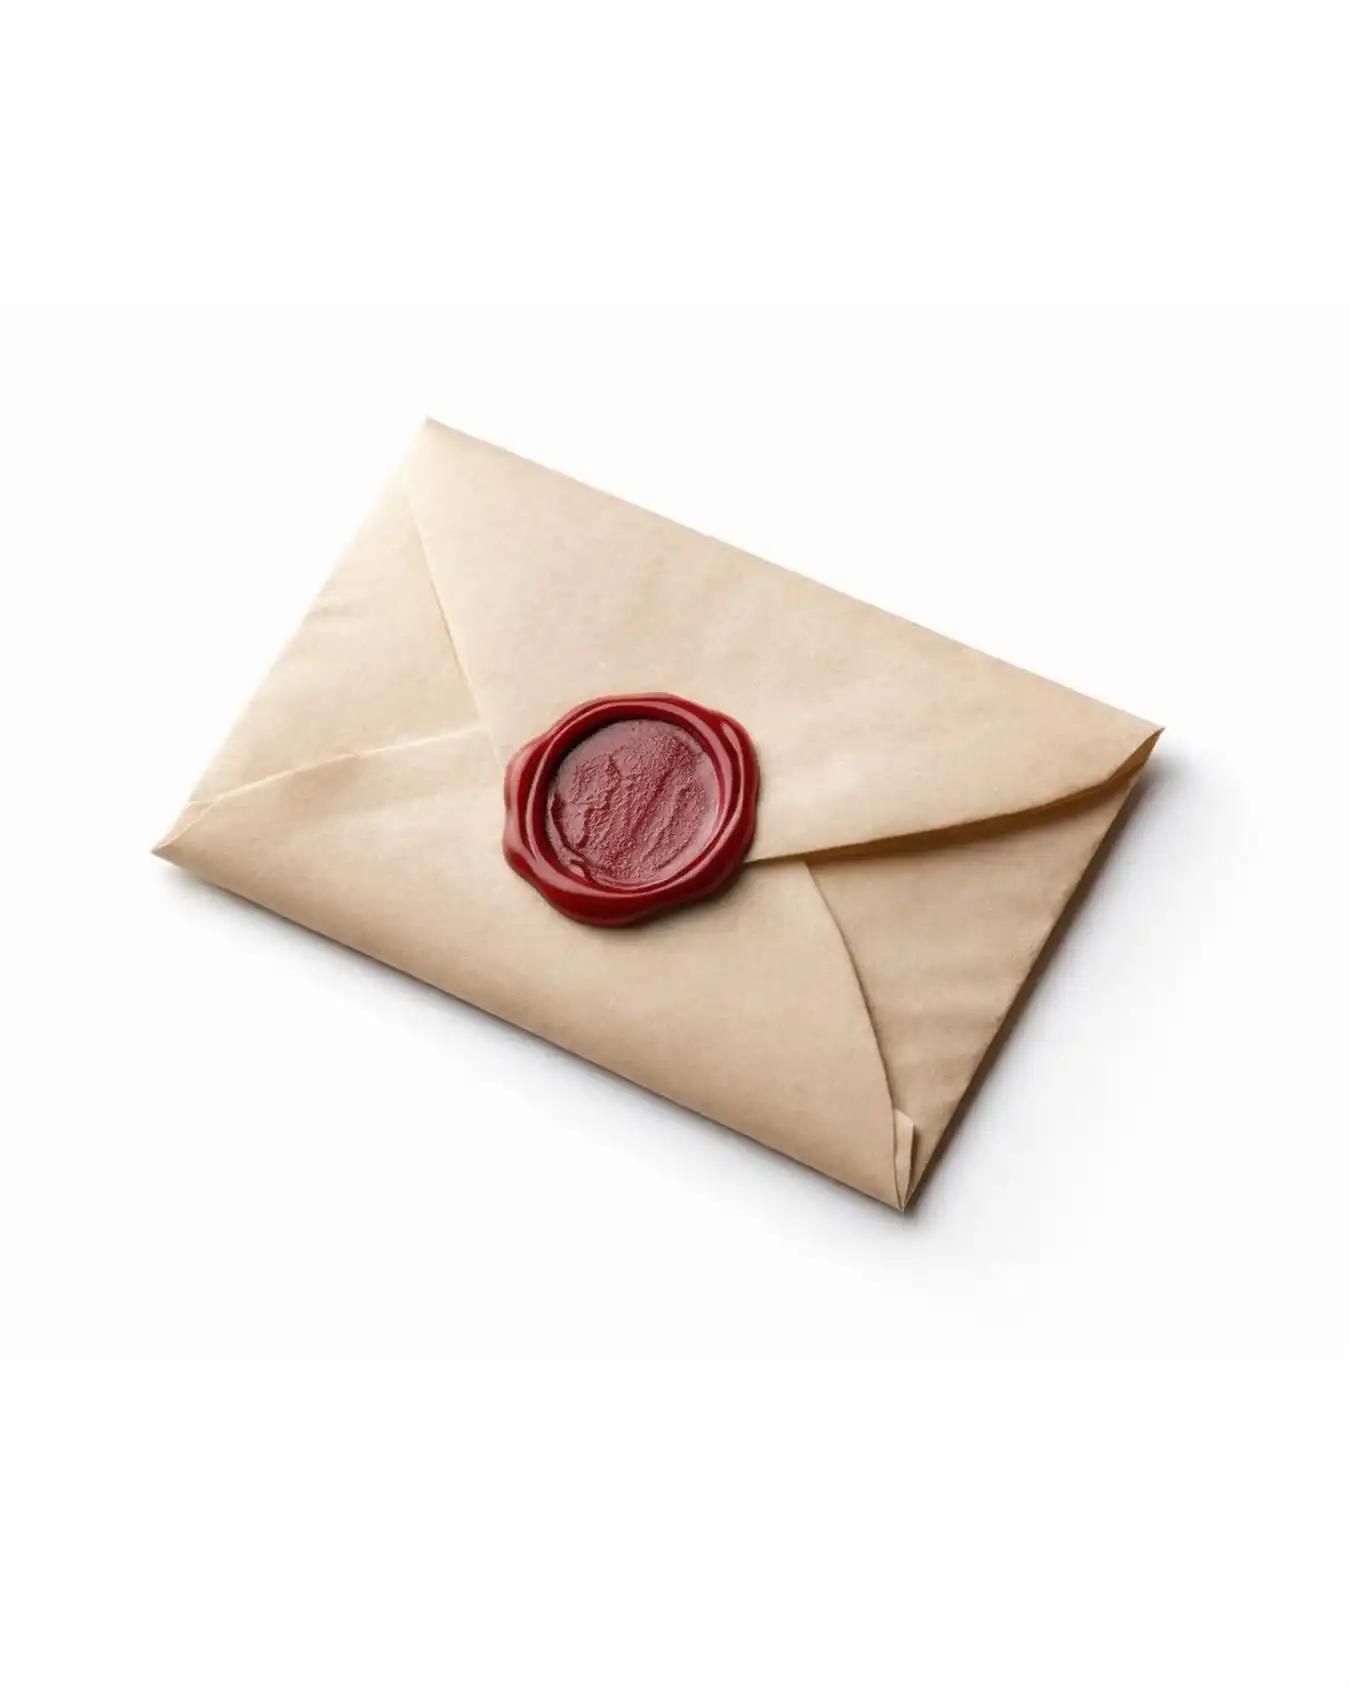
This is the pairing that made wax seals popular again, and it works because it does not try hard.
The kraft envelope stays plain and a little rough around the edges, so a deep red seal in the center reads bold instead of busy. It is the safest first project because the contrast does most of the work for you.
What makes this combination beginner friendly:
- One wax color, so there is no matching to think about
- A single centered seal, easy to place with a steady hand
- Kraft paper hides small wax drips better than white paper does
- Works for invitations, thank you notes, or everyday mail
2. Metallic Wax on Jewel-Tone Envelopes
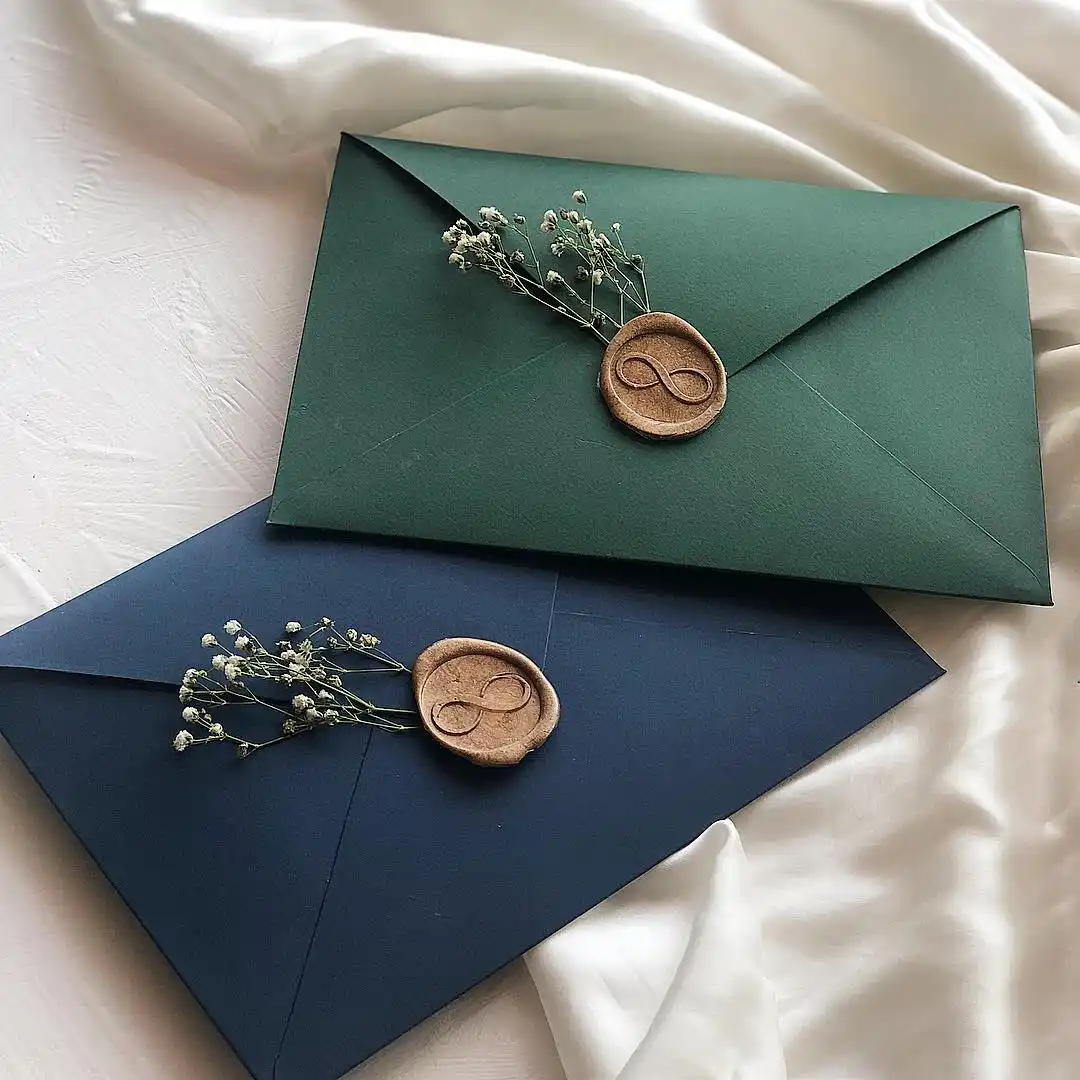
Gold and bronze wax turns a simple seal into something that looks hand finished, especially against colors this rich.
Both envelopes here use the same trick: a deep, saturated color as the base, then a warm metallic wax on top so the seal catches light instead of blending into the paper.
A few dried baby’s breath stems tucked under the wax add texture without any extra cost.
- Emerald green: pairs best with antique gold or bronze wax
- Navy: pairs well with warm gold, cooler silver, or copper
- Either color reads formal enough for weddings, but casual enough for a birthday card
The stem placement matters more than people expect. Tuck it under the seal before the wax fully sets, angled slightly off center so it looks found rather than arranged.
3. Pre-Made Seals on Printed Menu Cards
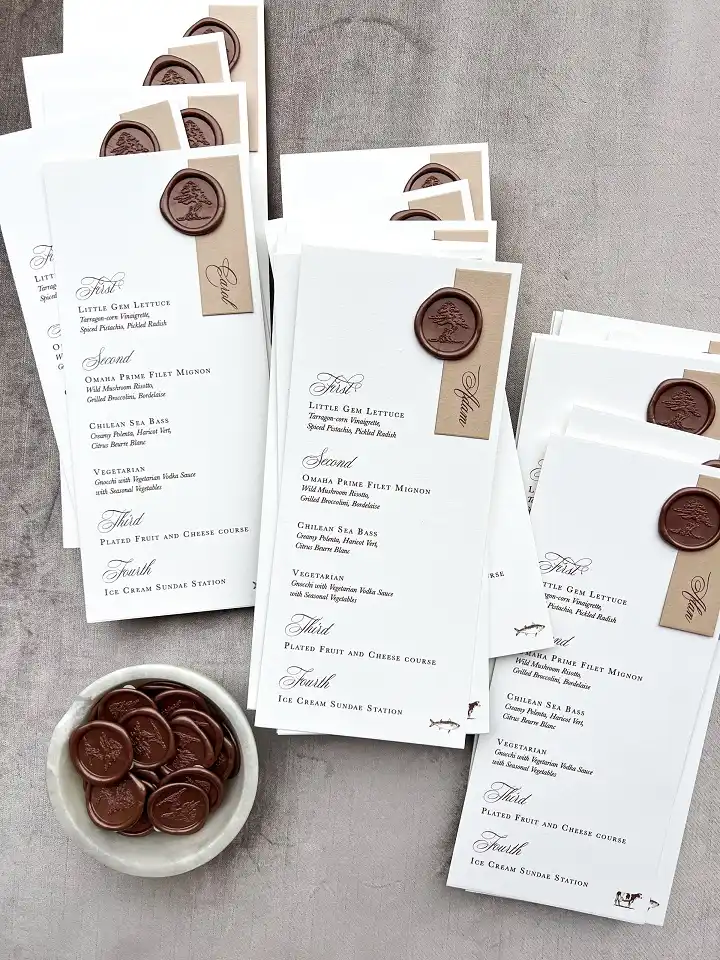
This tray of finished dinner menus shows a shortcut that saves real time if you have a stack of anything to seal at once.
Instead of melting wax fresh on each card, these were stamped ahead of time onto small wax discs, then set loose in a bowl.
When it is time to assemble, each seal gets a dab of glue or a touch of heat and presses onto the card in seconds.
The chocolate brown wax picks up the tree stamp cleanly, and it sits on a tan paper tab so the seal has a clear, consistent spot to land on every single card.
Batch-make your seals a day ahead on parchment paper, then peel and glue them on when you are ready to assemble. It turns a slow, one-at-a-time task into an afternoon of quick stamping.
4. Gold Wax Monogram on Wedding Favor Boxes
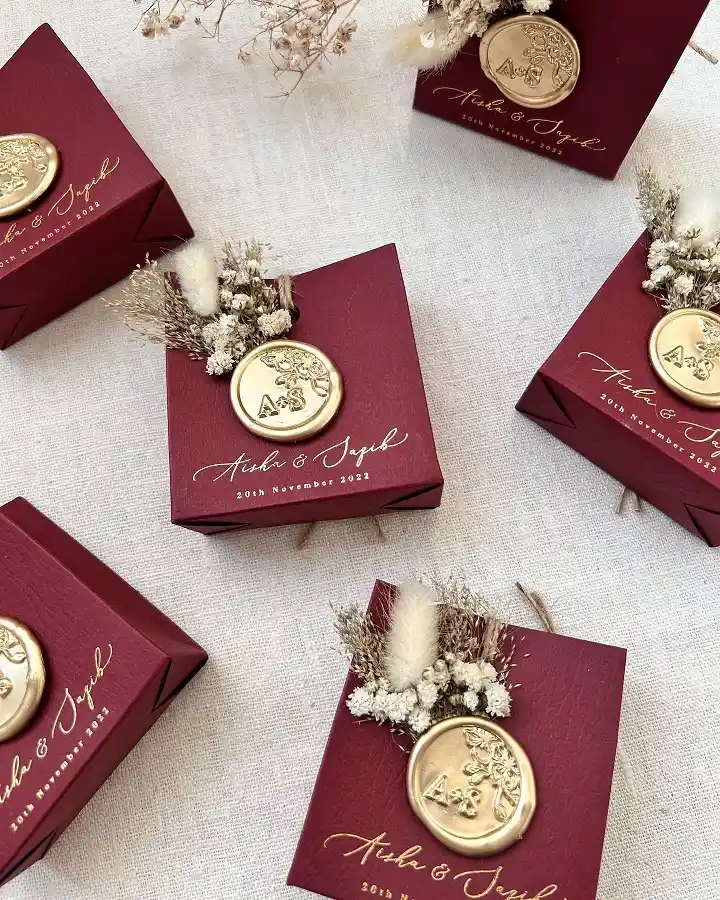
Here the seal is not on paper at all. It sits on a small burgundy favor box, next to gold foil script and a tuft of dried florals.
What makes this one worth trying as a beginner project is the monogram detail.
The wax itself is stamped with a floral wreath around two joined initials, so the couple’s names appear twice in two different textures on the same box, once in shiny gold foil and once in raised gold wax.
That repetition is what makes the packaging feel intentional instead of like an afterthought sticker.
| Element | Role |
|---|---|
| Burgundy box | Deep base color, holds gold well |
| Gold foil script | Names and date, flat and shiny |
| Gold wax seal | Monogram, raised and textured |
| Dried floral sprig | Softens the formal gold and burgundy |
5. Furoshiki-Wrapped Favors With a Botanical Wax Seal
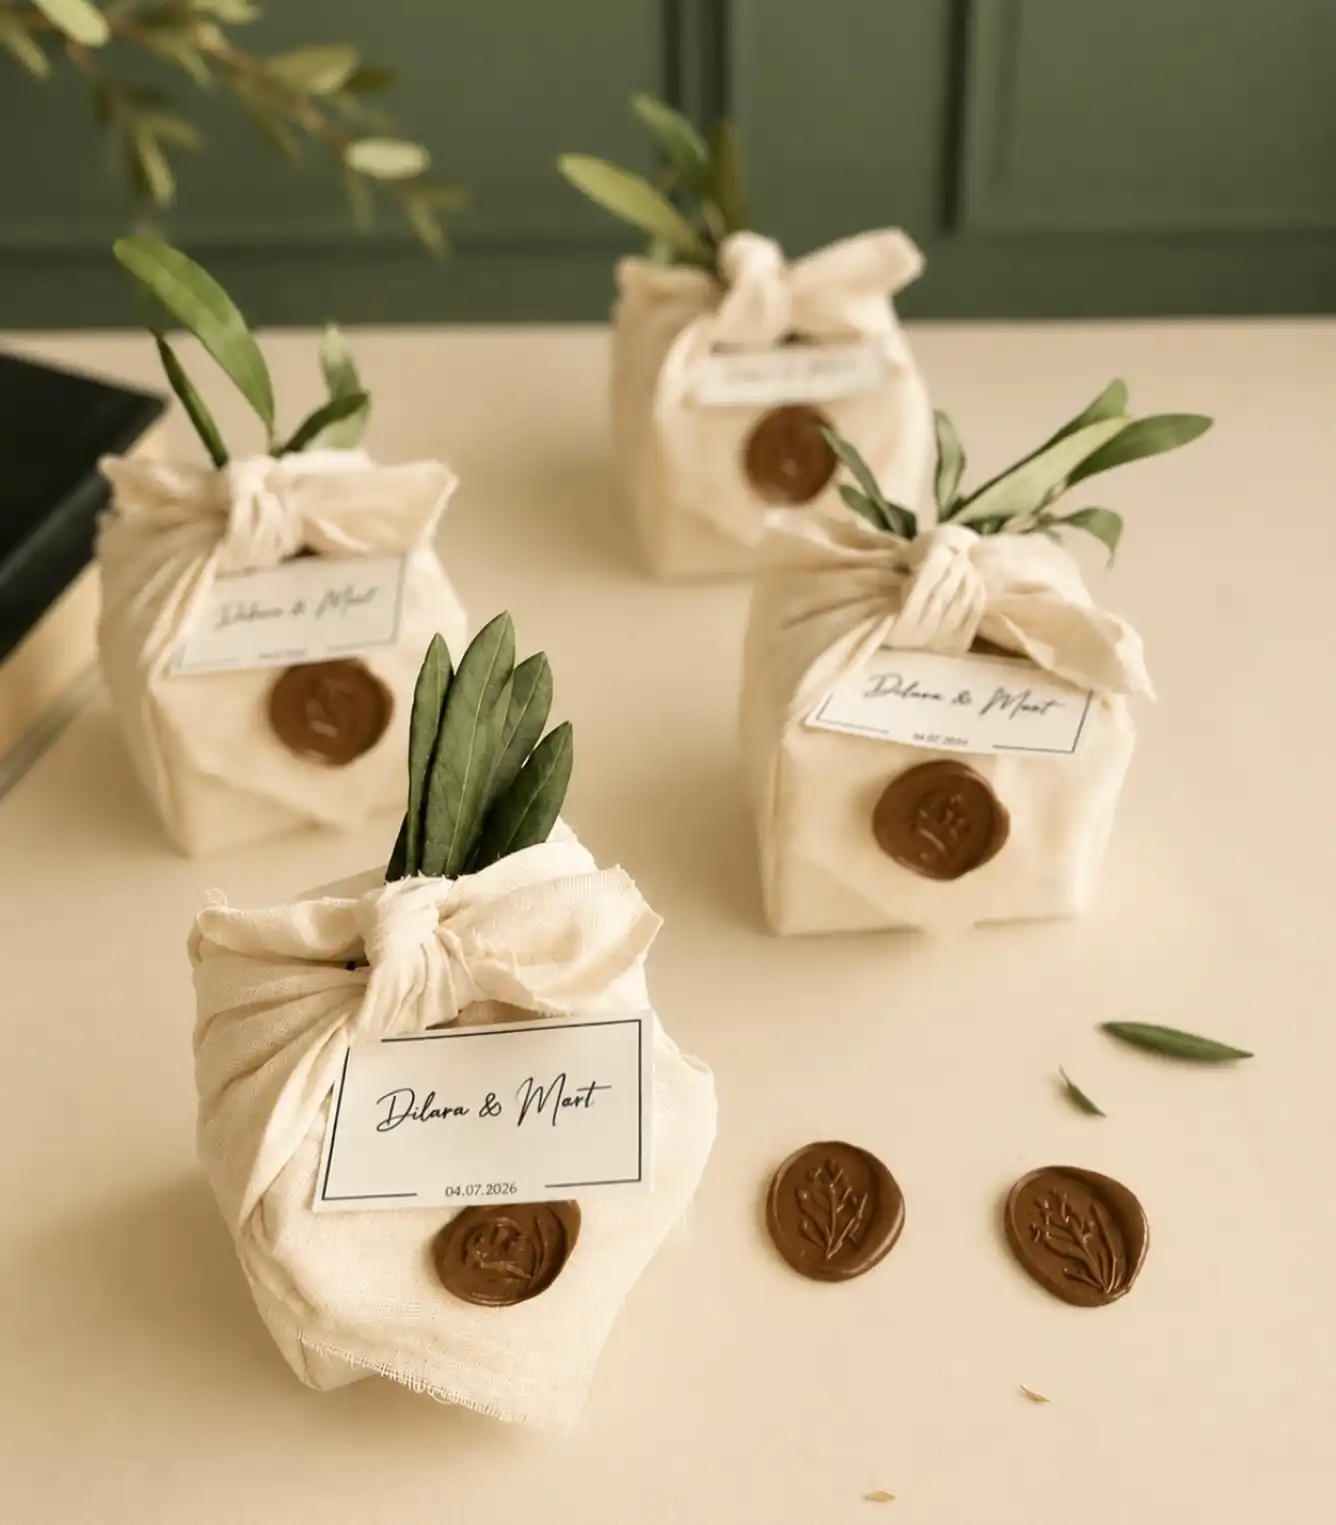
These little bundles skip paper packaging altogether. Each one is wrapped in a natural cotton cloth, tied off with a simple knot, and finished with a small olive branch stem tucked into the fabric.
The wax seal here is the quiet detail that pulls it together. It sits low on the front of the bundle, stamped with a botanical leaf design in the same warm brown as the loose seals scattered on the table.
Nothing about it competes with the printed name card. It just anchors the fold of fabric so the whole bundle looks finished rather than tied shut.
Choose a wax stamp with fine, thin lines so it prints clearly on curved fabric.
Press gently and hold a few extra seconds since cloth cools the wax faster than paper.
Thick, heavy stamps that blur on an uneven surface.
Wrapping so tightly the wax has nowhere flat to sit.
6. Fern Stamp Wax in a Blush Terracotta Shade
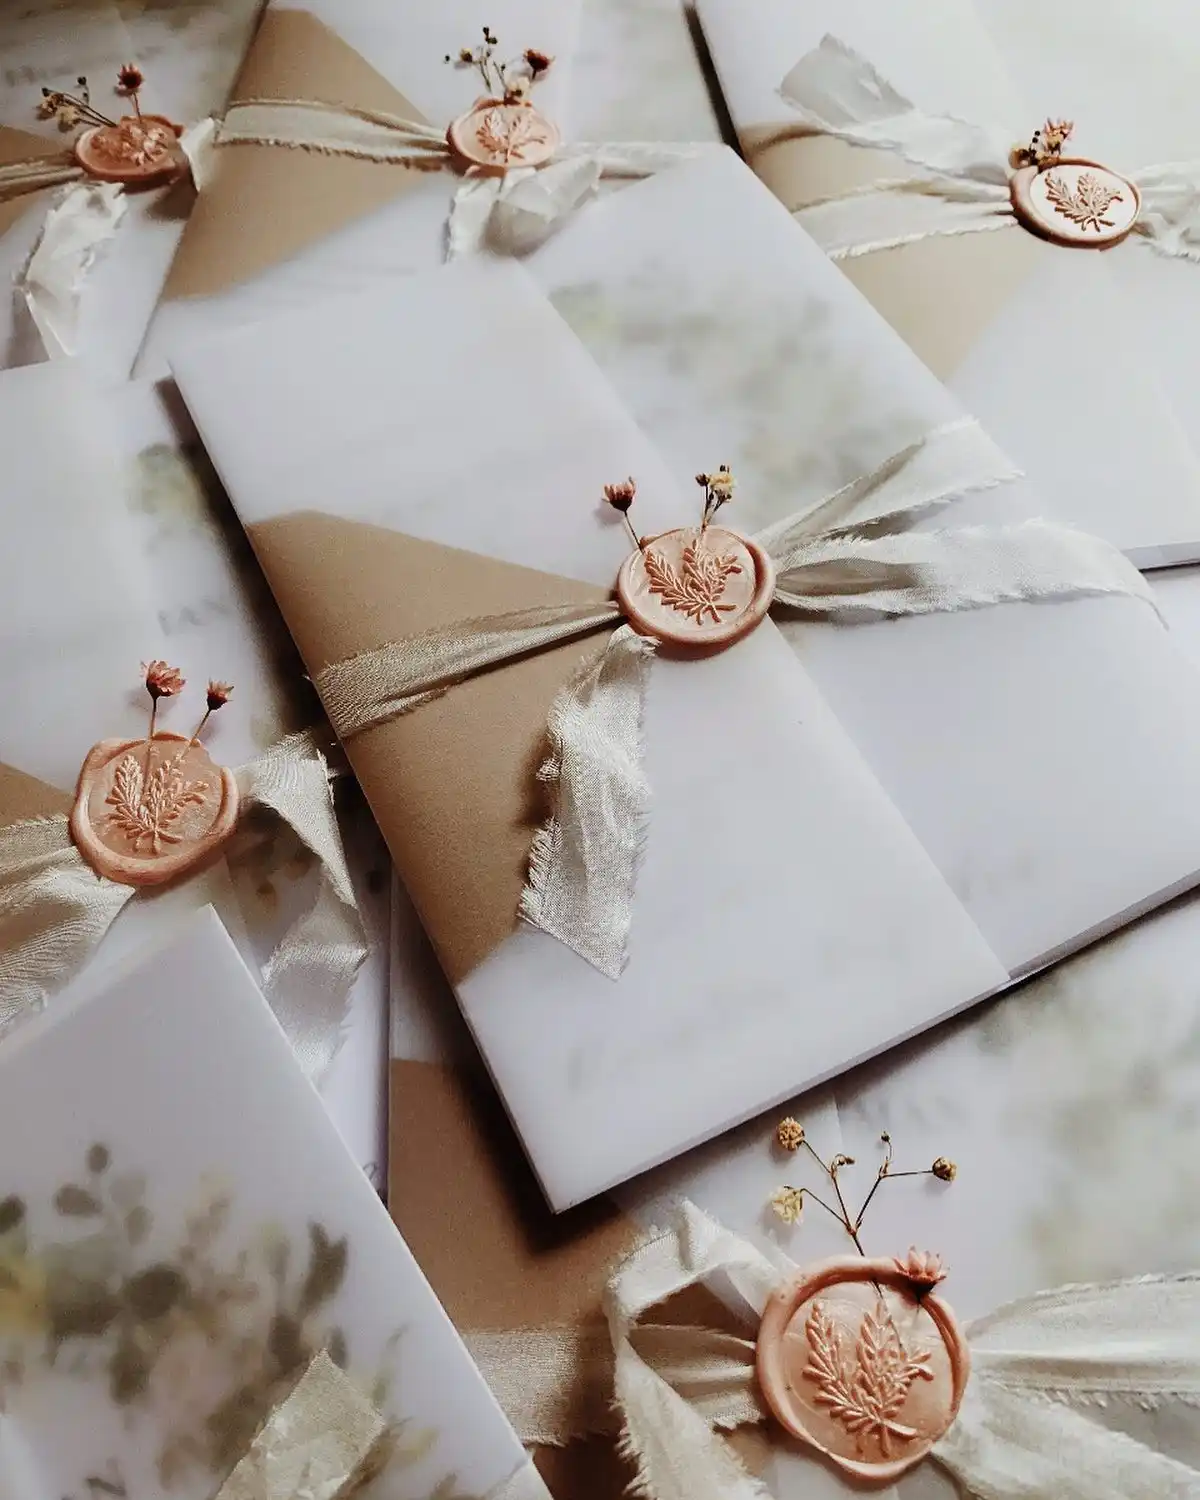
Six invitations, all styled the same way, which makes this one worth studying as a repeatable system rather than a one off idea.
Frayed silk ribbon crosses each envelope on the diagonal, over a two tone marbled and kraft paper base.
Subscribe to DIY Craft Bloom
Get updates on the latest posts and more from DIY Craft Bloom straight to your inbox.
The wax lands right where the ribbon crosses, stamped with a fine fern or leaf design in a soft terracotta that leans more blush than orange. A tiny sprig of dried flowers pokes out from under the seal on every single one.
Design Guidelines
- One wax color used across every envelope, no variation.
- One stamp design repeated, so the eye reads it as a set.
- Ribbon frayed by hand rather than cut clean, for texture.
- A stem placed at roughly the same angle each time.
7. Oval Seal With a Silk Tassel
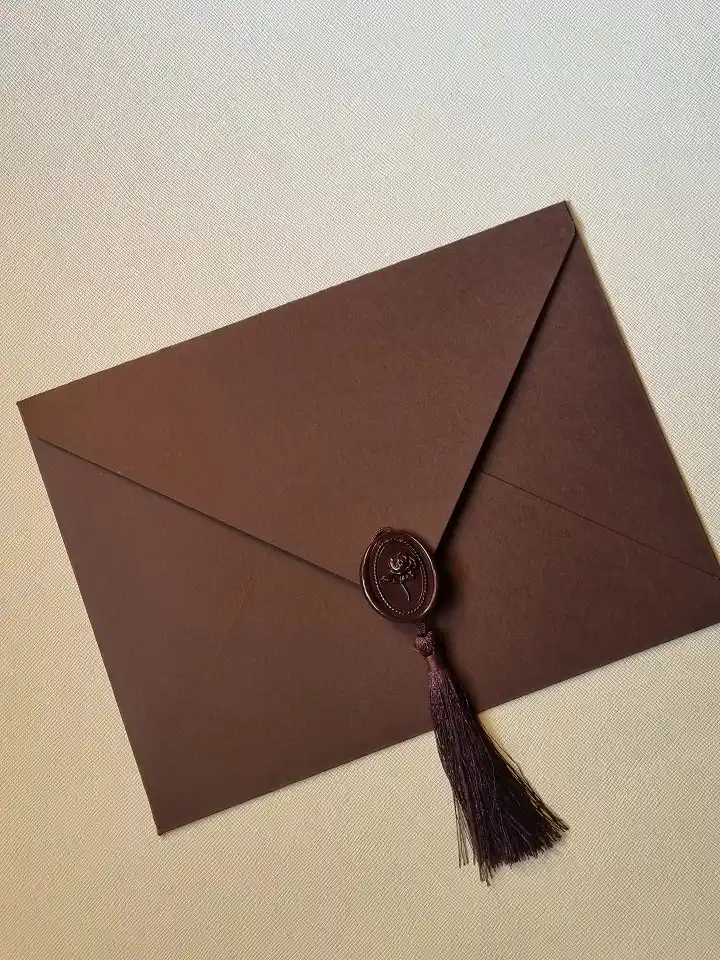
Most seals on this list are round. This one breaks that pattern on purpose, and the shape change alone makes it worth trying once you have the basics down.
The envelope is a single deep brown with no contrast at all, so nothing distracts from the seal itself.
It uses an oval stamp instead of a circle, carved with a small floral figure, and a long silk tassel hangs from the wax like a bookmark ribbon.
Getting the tassel to stay put takes a small trick: the cord gets pressed into the wax while it is still soft, not glued on after.
A tone-on-tone envelope like this only works if the wax finish has some texture to it. Flat, glossy wax on flat, matte paper reads as a sticker rather than a seal.
Same tone paper and wax lets the shape and texture of the seal do all the talking.
8. Black Wax Monogram on Deckle-Edge Details Cards
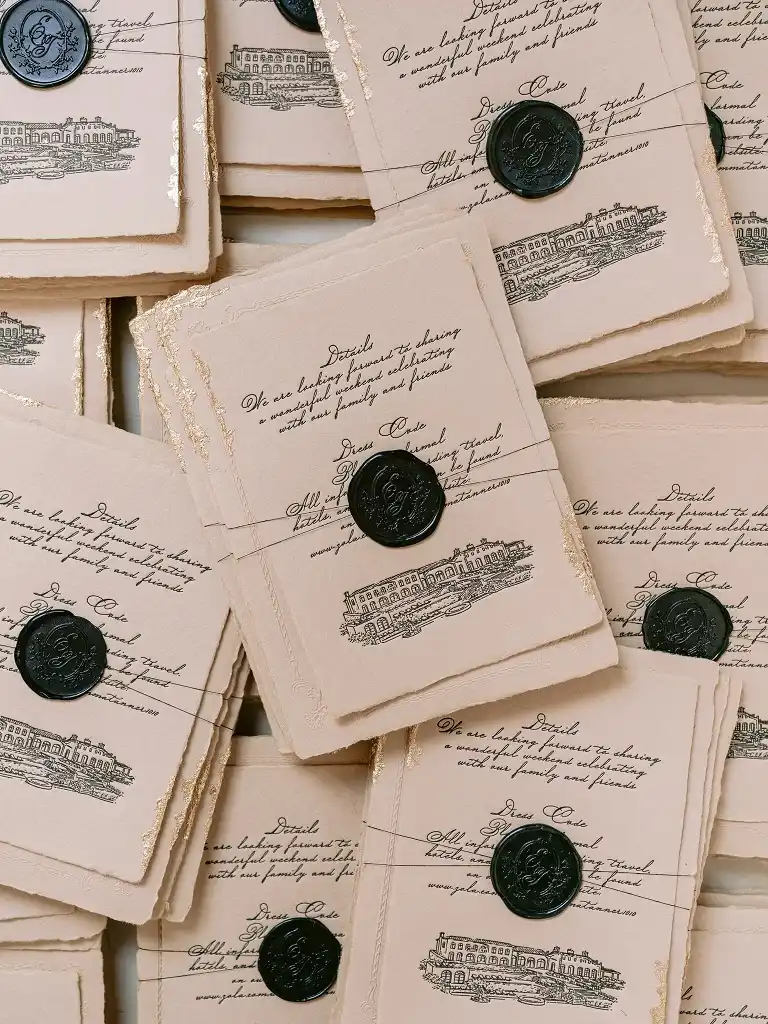
Deckle edges and gold leaf flecks already make a card feel handmade. Black wax on top of that combination is a bold choice, since black reads more modern than the usual red or brown, and it holds its own against the printed venue illustration underneath.
Every card in this stack repeats the same layout: a cursive monogram sealed in black wax sits above hand-lettered event details, and a fine-line illustration of the venue anchors the bottom.
The torn, uneven paper edge and scattered gold flecks keep the whole thing from feeling too severe next to that dark wax.
9. White Pearl Wax vs Copper Wax, Same Monogram
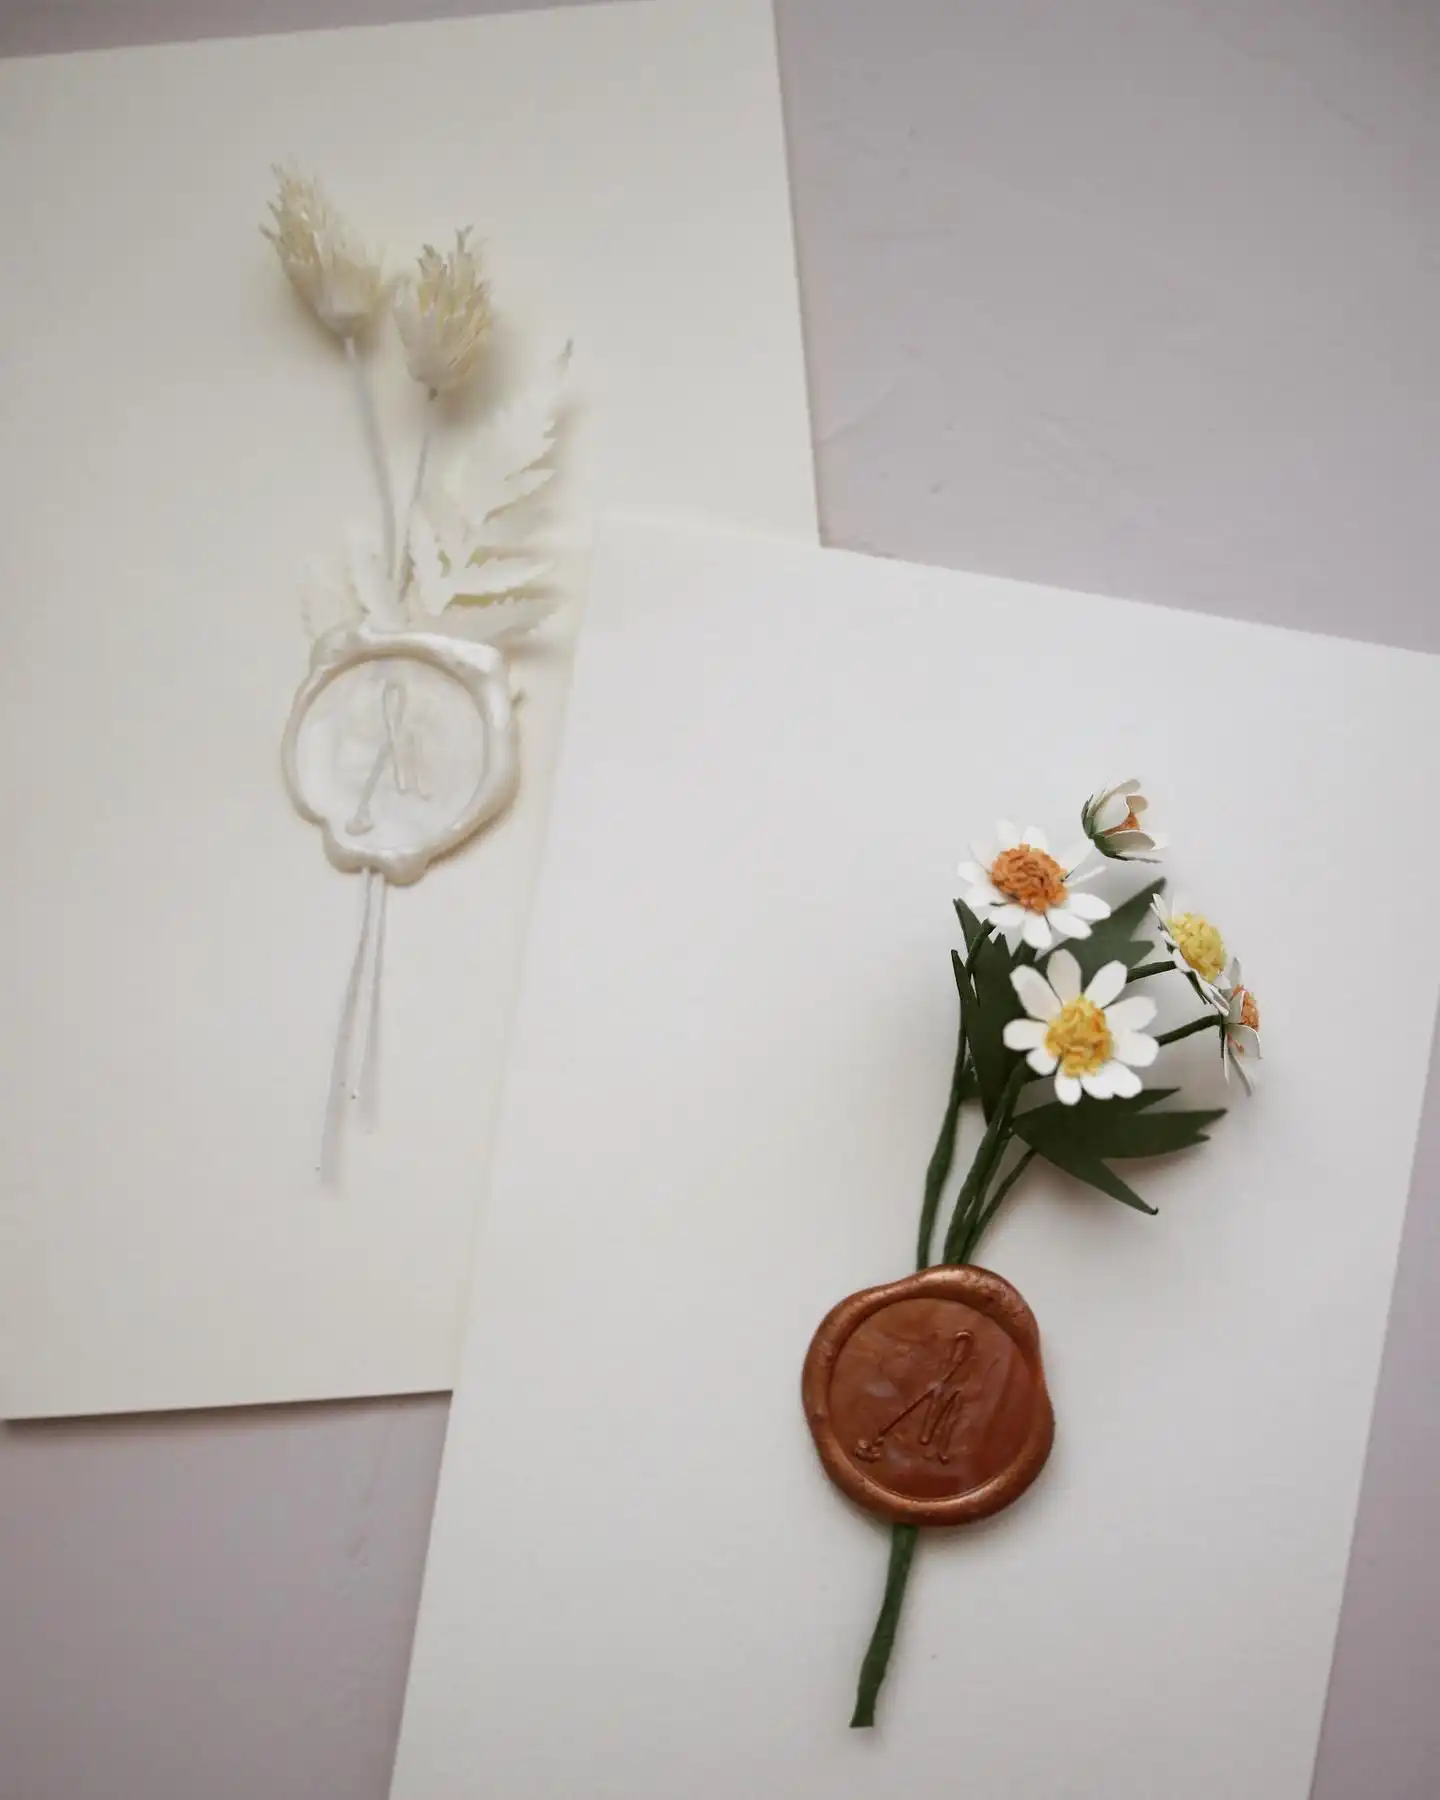
Two versions of the same idea, side by side, make it easy to see how much a wax color changes the mood of a card.
Both cards use the same small monogram stamp and a paper flower stem trailing down from the seal, but nothing else about them feels alike.
The white wax is soft and almost see-through, so it barely reads from a distance and lets pale dried grasses take the attention instead.
The copper wax is opaque and catches light, so the seal itself becomes the focal point next to a handmade paper daisy bouquet.
| White pearl wax | Copper wax |
|---|---|
| Quiet, blends into the paper | Bold, stands out against the paper |
| Suits pale, muted stems | Suits bright, colorful stems |
| Best for subtle, understated cards | Best for cards where the seal is the star |
10. Painted Gold Detail Wax Seal
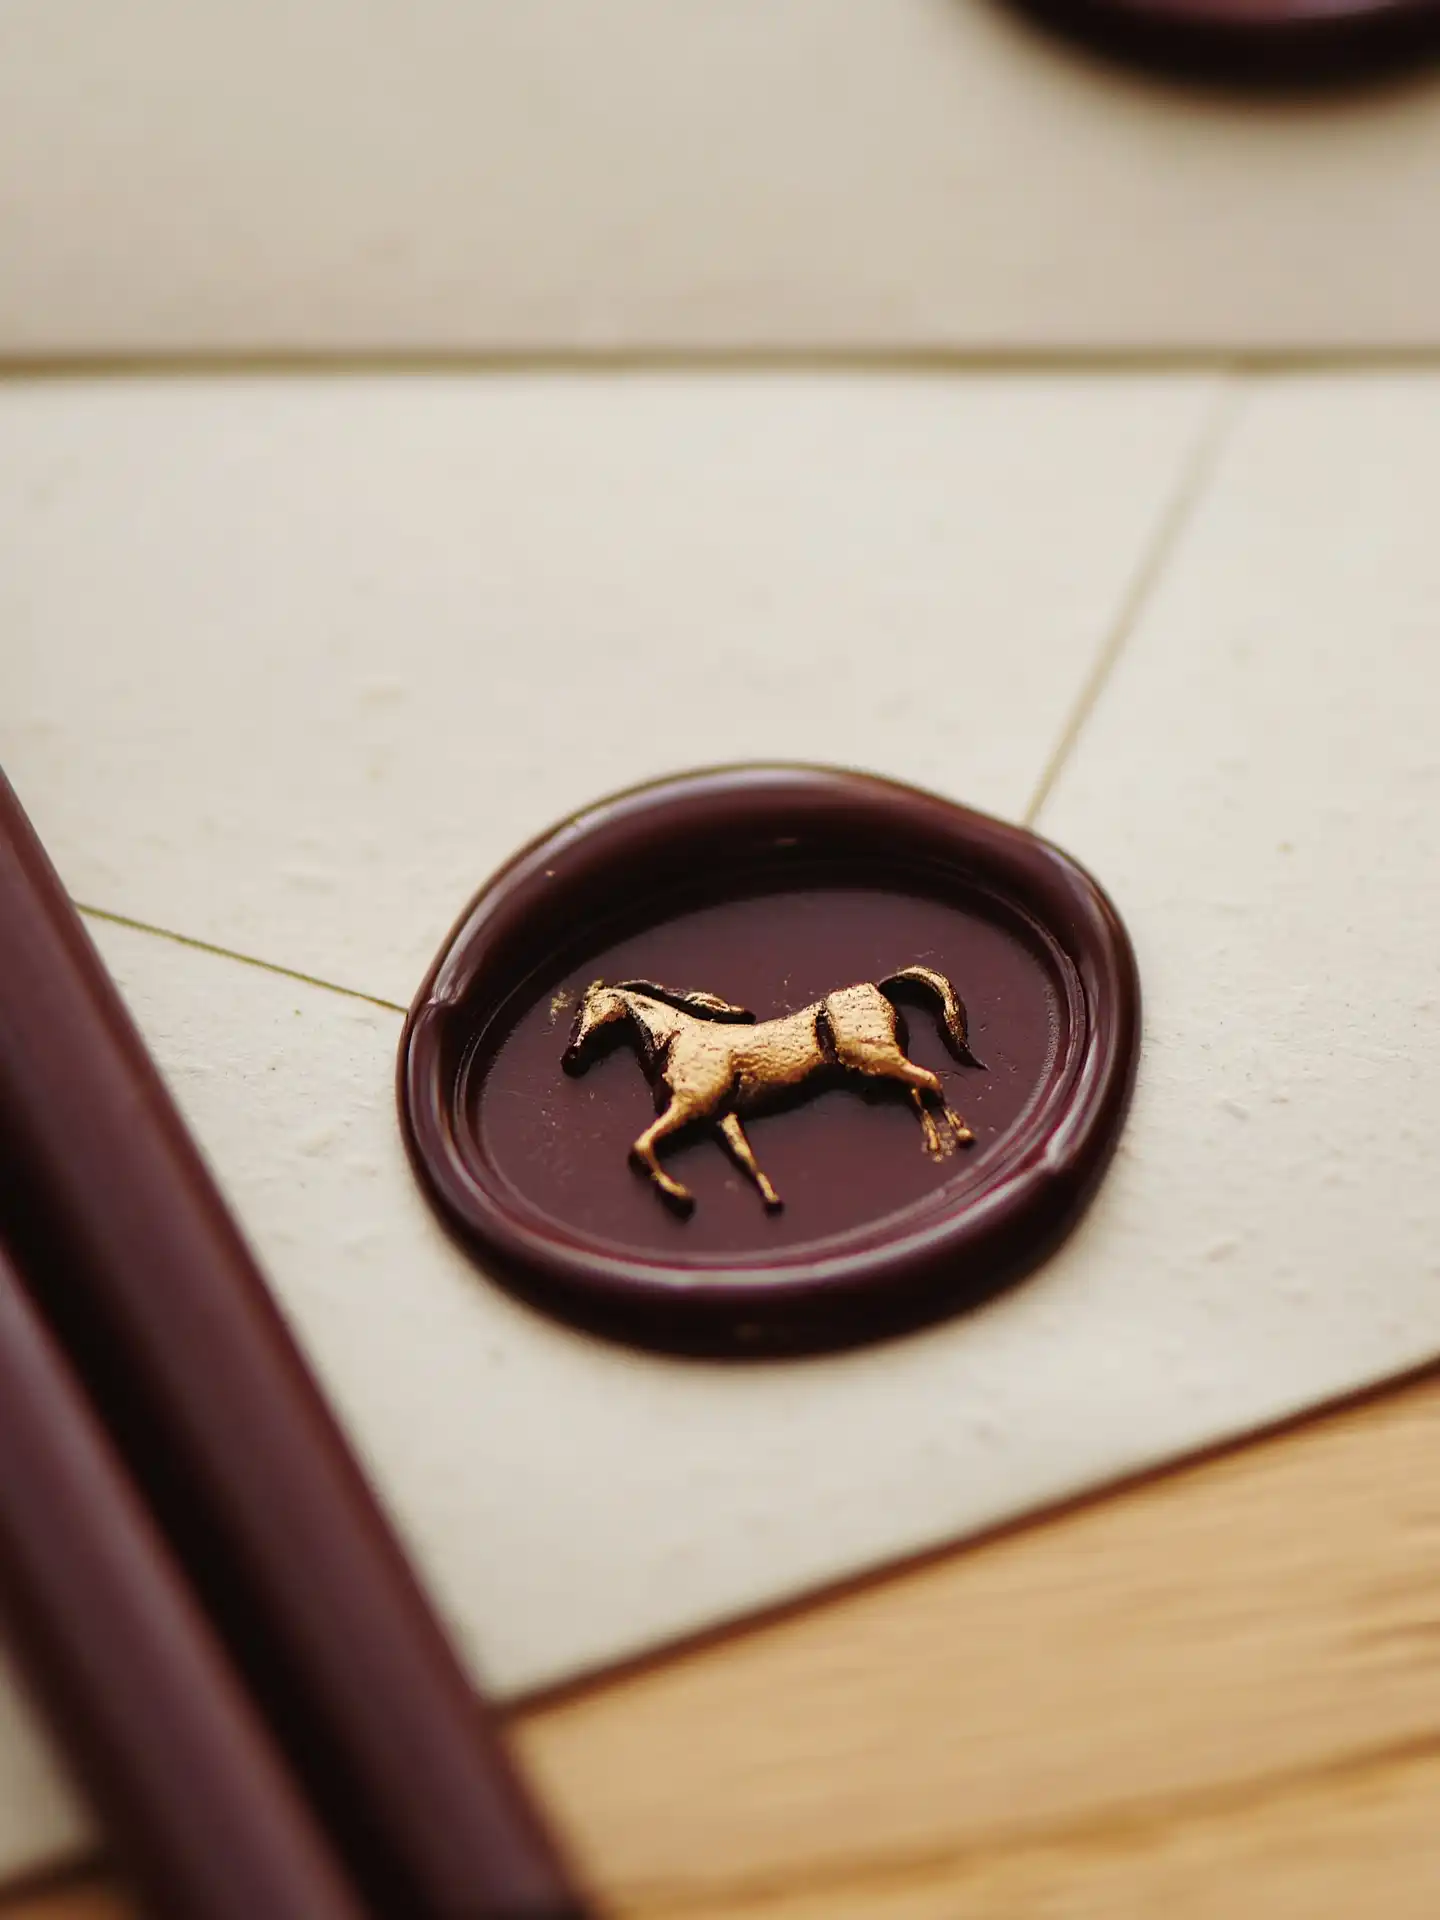
Zoom in close enough and this seal reveals a trick most beginners skip: the horse figure inside is not just embossed, it is hand painted in gold after the wax cooled.
The base wax is a deep plum brown, almost the color of dark chocolate, and the stamp itself carries real detail, right down to the horse’s mane and tail.
A thin gold paint or wax pencil traces just the raised parts, so the color pools into the grooves and leaves the background plum untouched.
It is a slower step than a plain seal, but it turns a simple pressed shape into something that looks metal cast.
- Pick a stamp with a clear, separated raised design so the paint has an easy line to follow
- Let the wax fully cool and harden before painting, or the paint smears
- Use a fine detail brush, not a marker, for any stamp with thin legs or edges
- One light coat looks more refined than a thick, solid fill
11. Cobalt Blue Wax With a Dried Cornflower Bunch
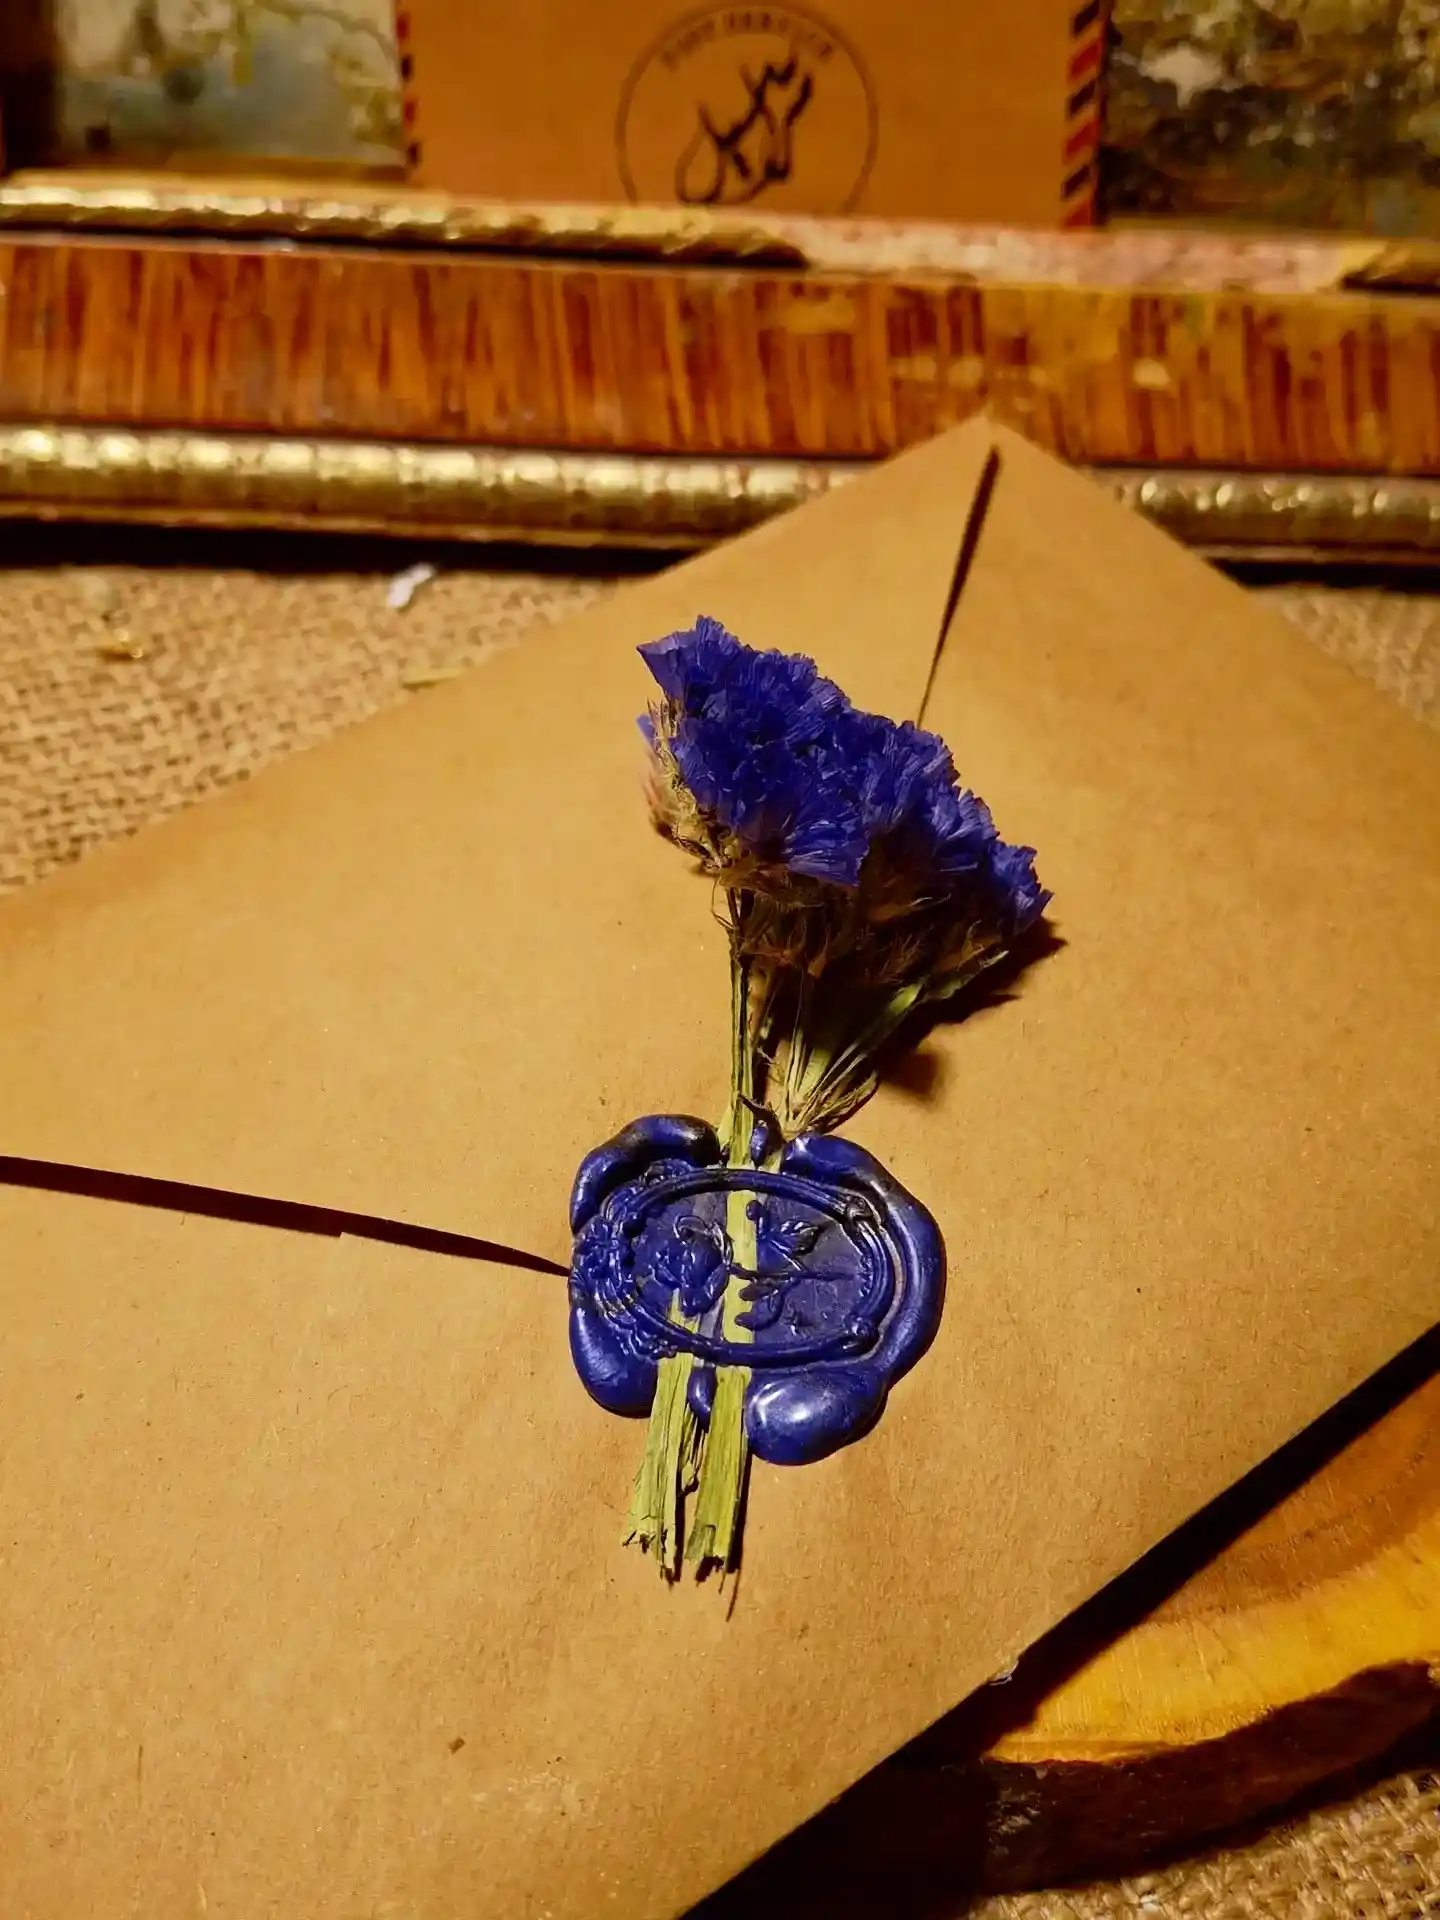
Kraft paper shows up again on this list, but the color choice here is what makes it feel completely different from the first entry.
Cobalt blue wax is a harder color to source than red or gold, so it stands out immediately against plain brown paper.
An oval stamp holds a small floral design, and a full bunch of dried blue statice gets pressed stem-first into the wax while it is still soft, so the stems disappear into the seal instead of just resting on top of it.
Match your stem color to your wax color, not your envelope, since the seal is what the stem actually touches.
12. Tone-on-Tone Ivory Wax With Two-Letter Initials
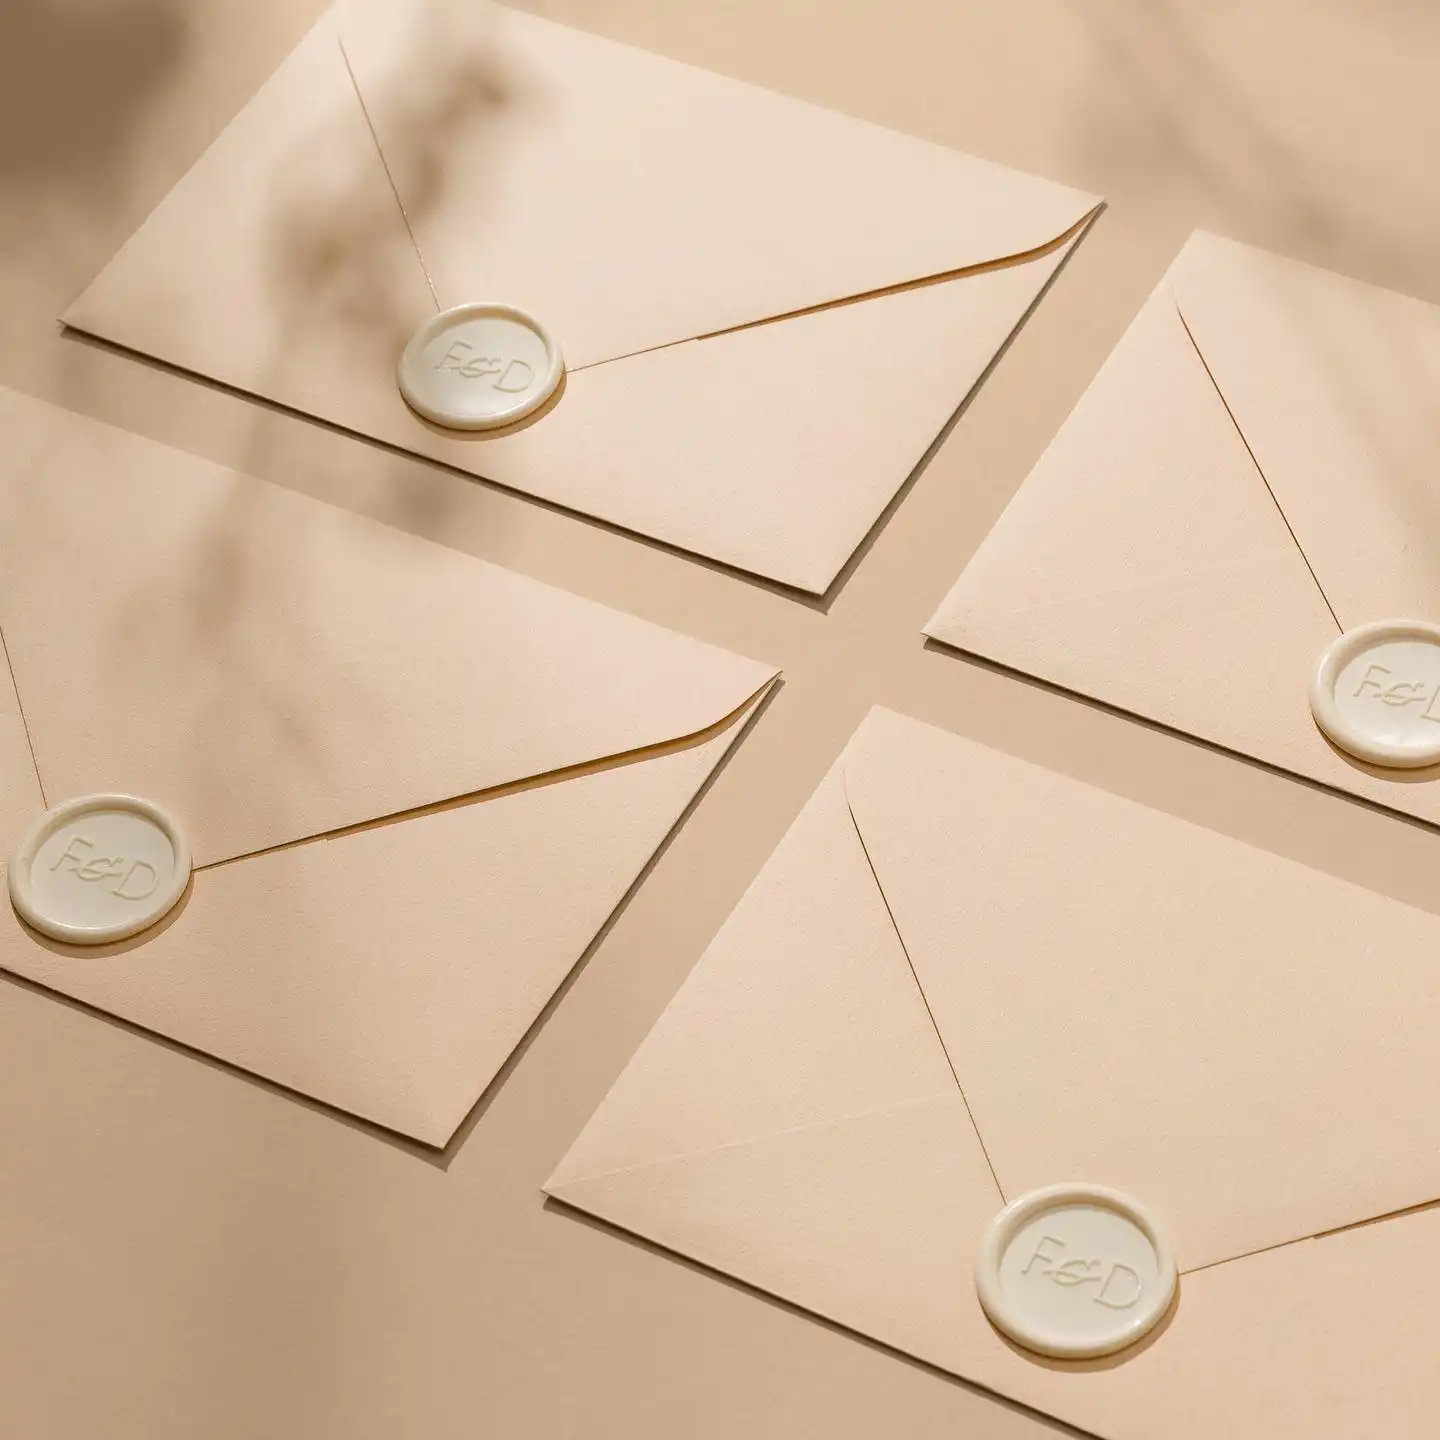
Four envelopes, one blush color, one wax color, and a two-letter monogram repeated exactly the same way each time.
This is about as restrained as a wax seal gets, and it works precisely because nothing fights for attention.
The soft shadows in this photo come from natural light, not from the wax itself, which is a good reminder that a plain seal like this photographs best near a window rather than under a flat overhead light.
Once you get the color match right, this is one of the easiest looks on the list to repeat across a large batch, since there is no pattern or texture to line up, just placement.
Stick with it for the whole set, no mixing shades.
Stay within a few shades so the seal reads as texture, not decoration.
Two initials joined by an ampersand, nothing larger or more ornate.
So the set photographs and stacks evenly.
13. Pearlescent Wax Melts in Playful Shapes
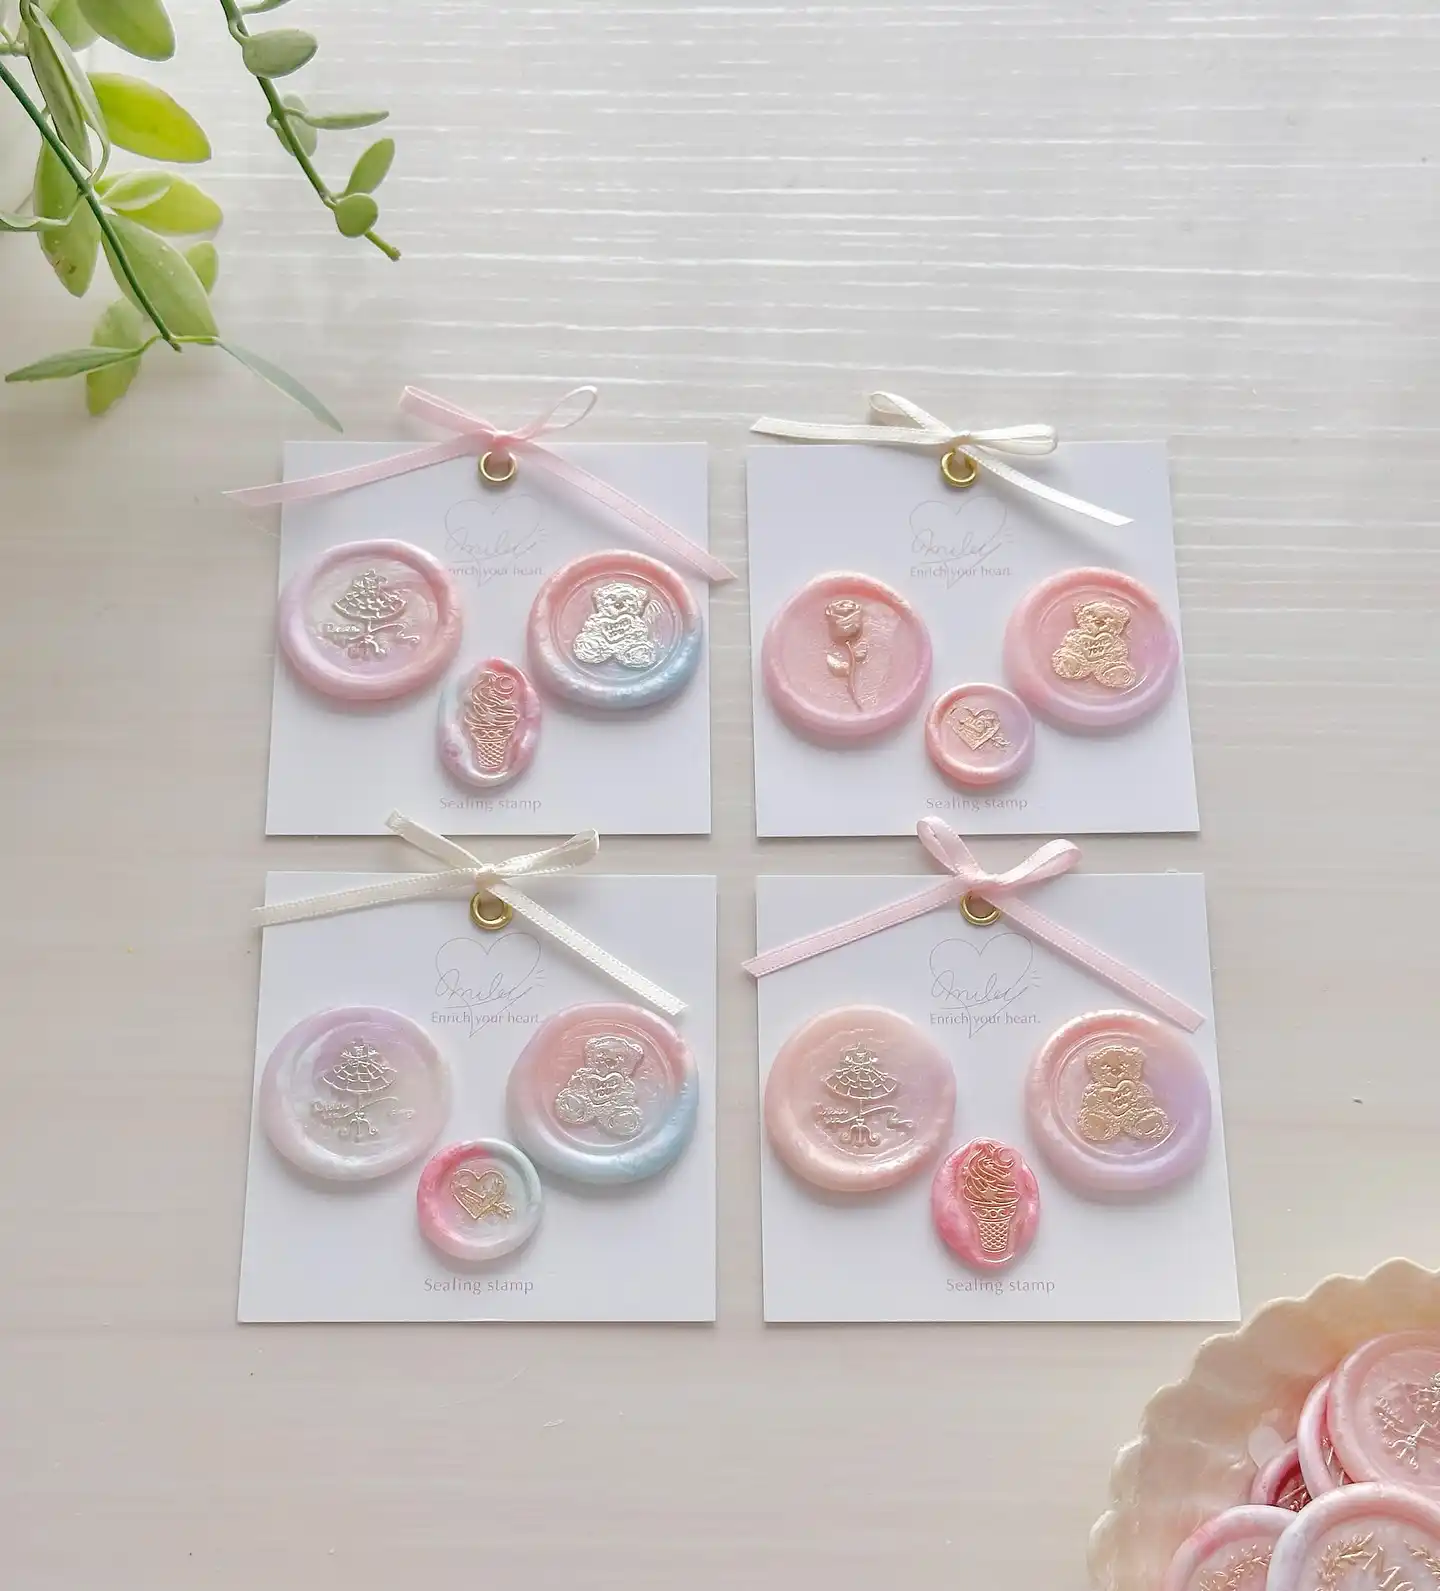
Not every seal has to sit on an envelope. These four cards show wax melts made purely to be pretty, sold on backing cards with tiny bows and no destination at all beyond a jar or a scrapbook.
Subscribe to DIY Craft Bloom
Get updates on the latest posts and more from DIY Craft Bloom straight to your inbox.
Each card sticks to a pastel color story, iridescent pink shifting into lilac or soft blue, and stamps a small set of playful shapes into it: a teddy bear, an ice cream cone, a rose, a tiny heart.
Because the wax itself is tinted pearlescent rather than left plain, the shapes catch light differently depending on the angle, almost like the inside of a shell.
14. Your Actual Starter Kit, Laid Out
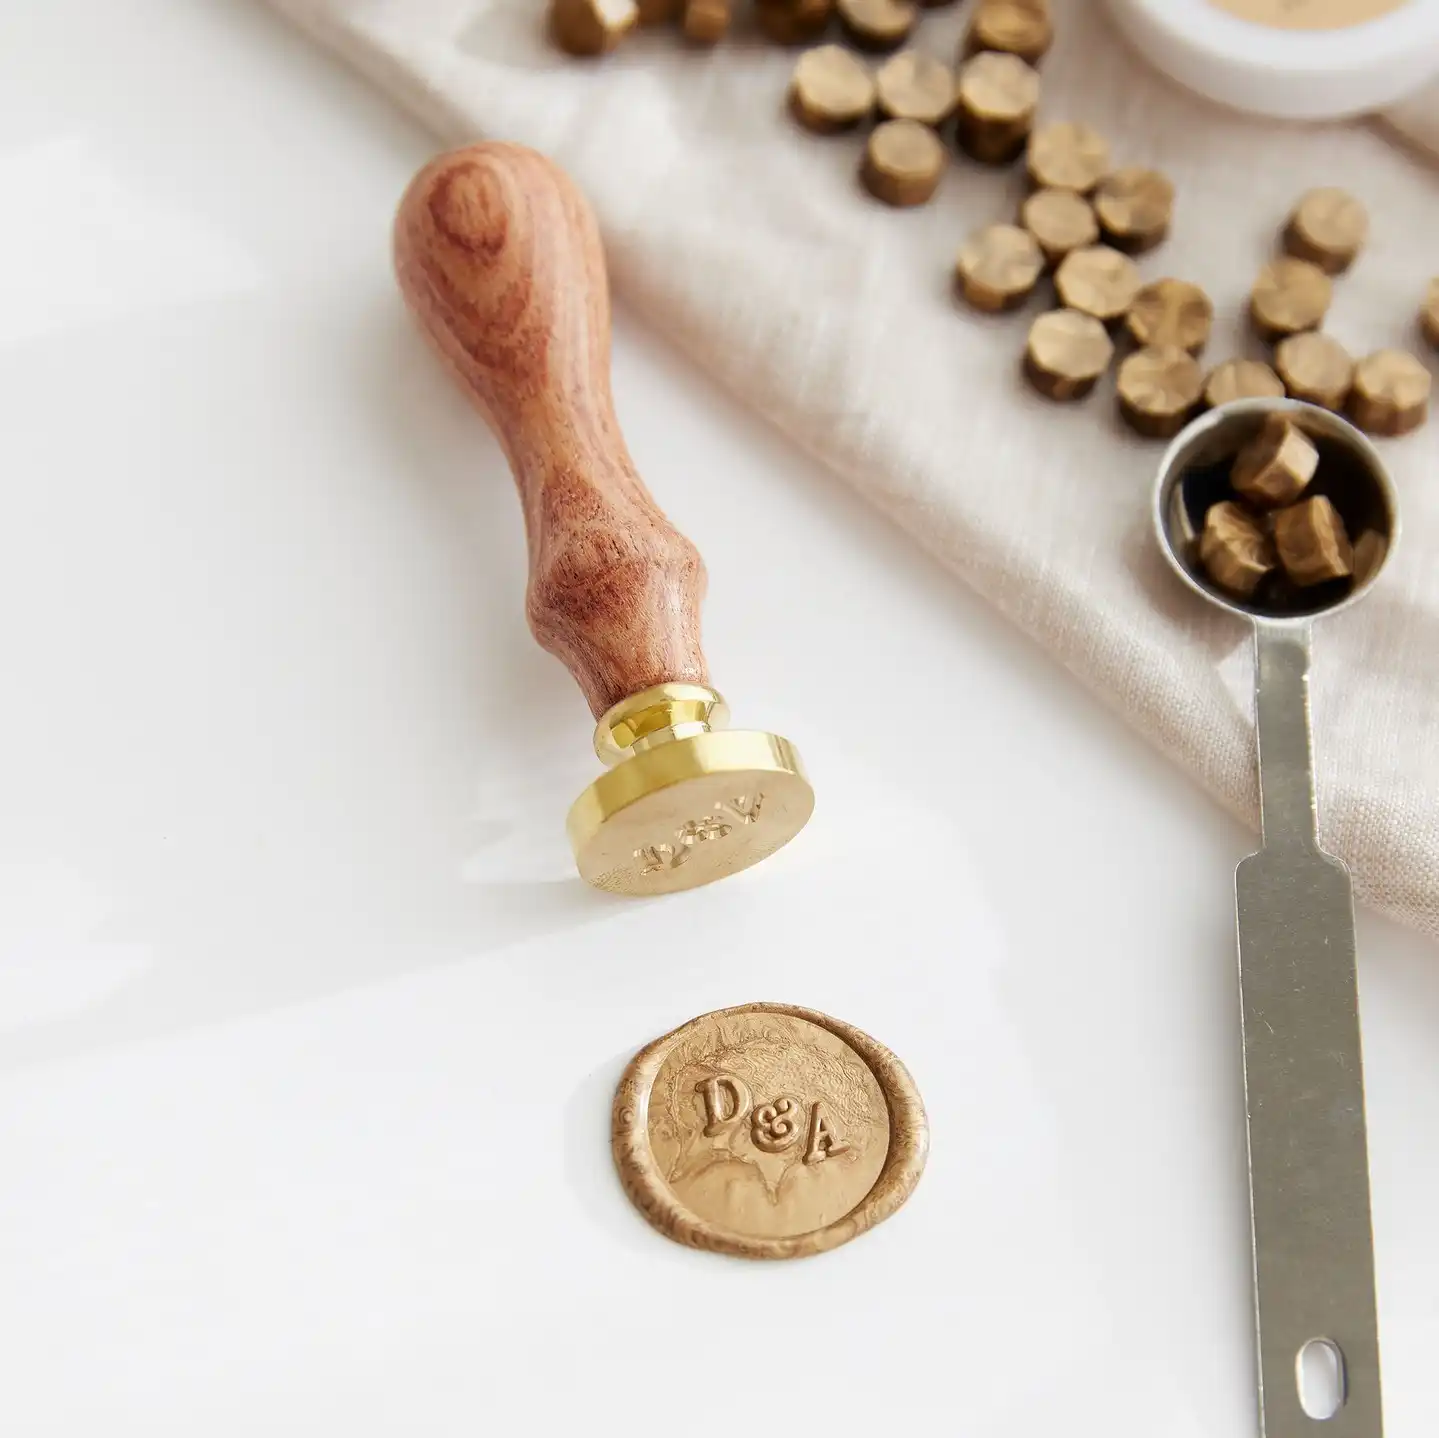
Skip ahead of every finished seal on this list and here is what actually makes one happen: a brass stamp head on a wooden handle, a small metal spoon for melting, and loose wax beads instead of a stick.
Wax beads are the easier starting point for anyone new to this. They melt faster and more evenly over a candle flame than a solid stick does, and the spoon lets you pour a controlled puddle instead of dripping wax freehand, which is where most first attempts go wrong.
The finished gold seal in front shows the payoff: crisp D&A letters with a soft, slightly organic edge around them, the kind you only get from properly melted, properly poured wax.
15. A Novelty Portrait Stamp, Just for Fun
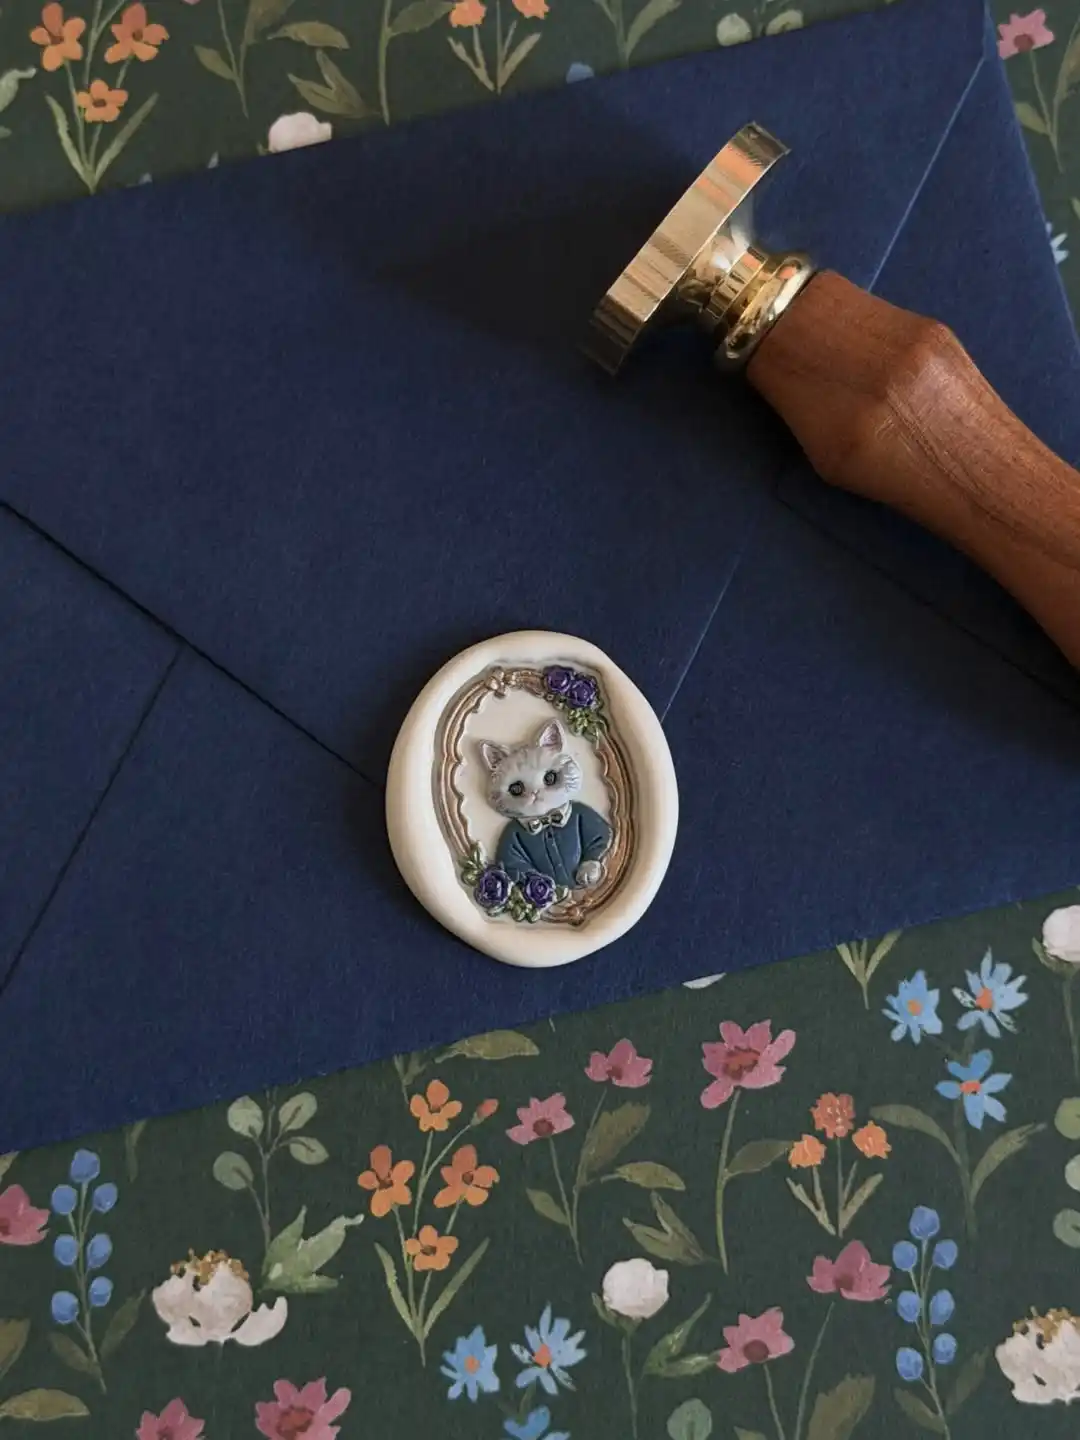
Wax seals do not have to stay traditional. This oval stamp presses a full illustrated portrait, a cat dressed in a little suit inside an ornate frame, and it proves how far novelty stamps have come from plain monograms and simple flowers.
Ivory wax was the right call here, since a design this detailed needs a pale, matte background to actually read.
Dark or metallic wax would swallow the fine linework in the frame and the cat’s face.
The navy envelope underneath and the floral paper beyond give the whole setup a slightly whimsical, storybook feel that matches the seal itself.
16. Gold Foil Wax to Match a Printed Logo
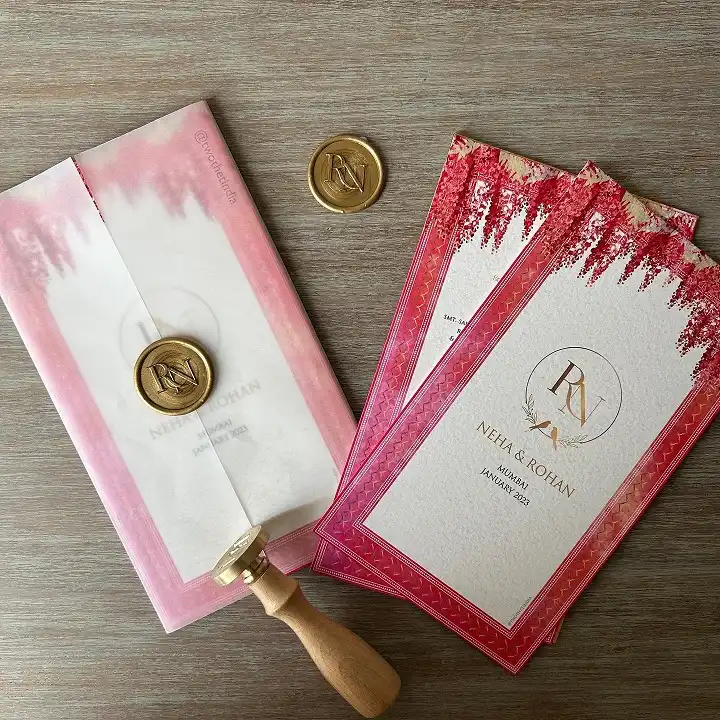
This is the move for anyone getting married and printing their own monogram: take the same logo already on the invitation and turn it into the wax stamp too.
The pink-to-white ombre envelope keeps things soft, but the gold wax seal repeats the exact circular RN logo printed on the card stock inside, initials and all.
That kind of matching only happens when the stamp is custom made from the couple’s actual logo file rather than picked from a catalog of generic designs, which is worth planning for early since custom stamps take longer to arrive than off the shelf ones.
- Order your custom stamp as soon as your invitation logo is finalized, not after
- Test the stamp on scrap paper first, since custom designs often need a firmer press than simple shapes
- Gold wax reads best against pale or white envelopes, the same way it does here
- Do not resize the logo for the stamp without checking fine detail still shows at that scale
- Do not rush the order close to your mailing date, custom engraving takes real lead time
Order your custom stamp as soon as your invitation logo is finalized.
Test the stamp on scrap paper first, since custom designs need a firmer press.
Resizing the logo without checking fine detail still shows at that scale.
Ordering close to your mailing date, custom engraving takes real lead time.
17. Mixed-Media Wrapping With Twine, Tape, and a Wax Seal
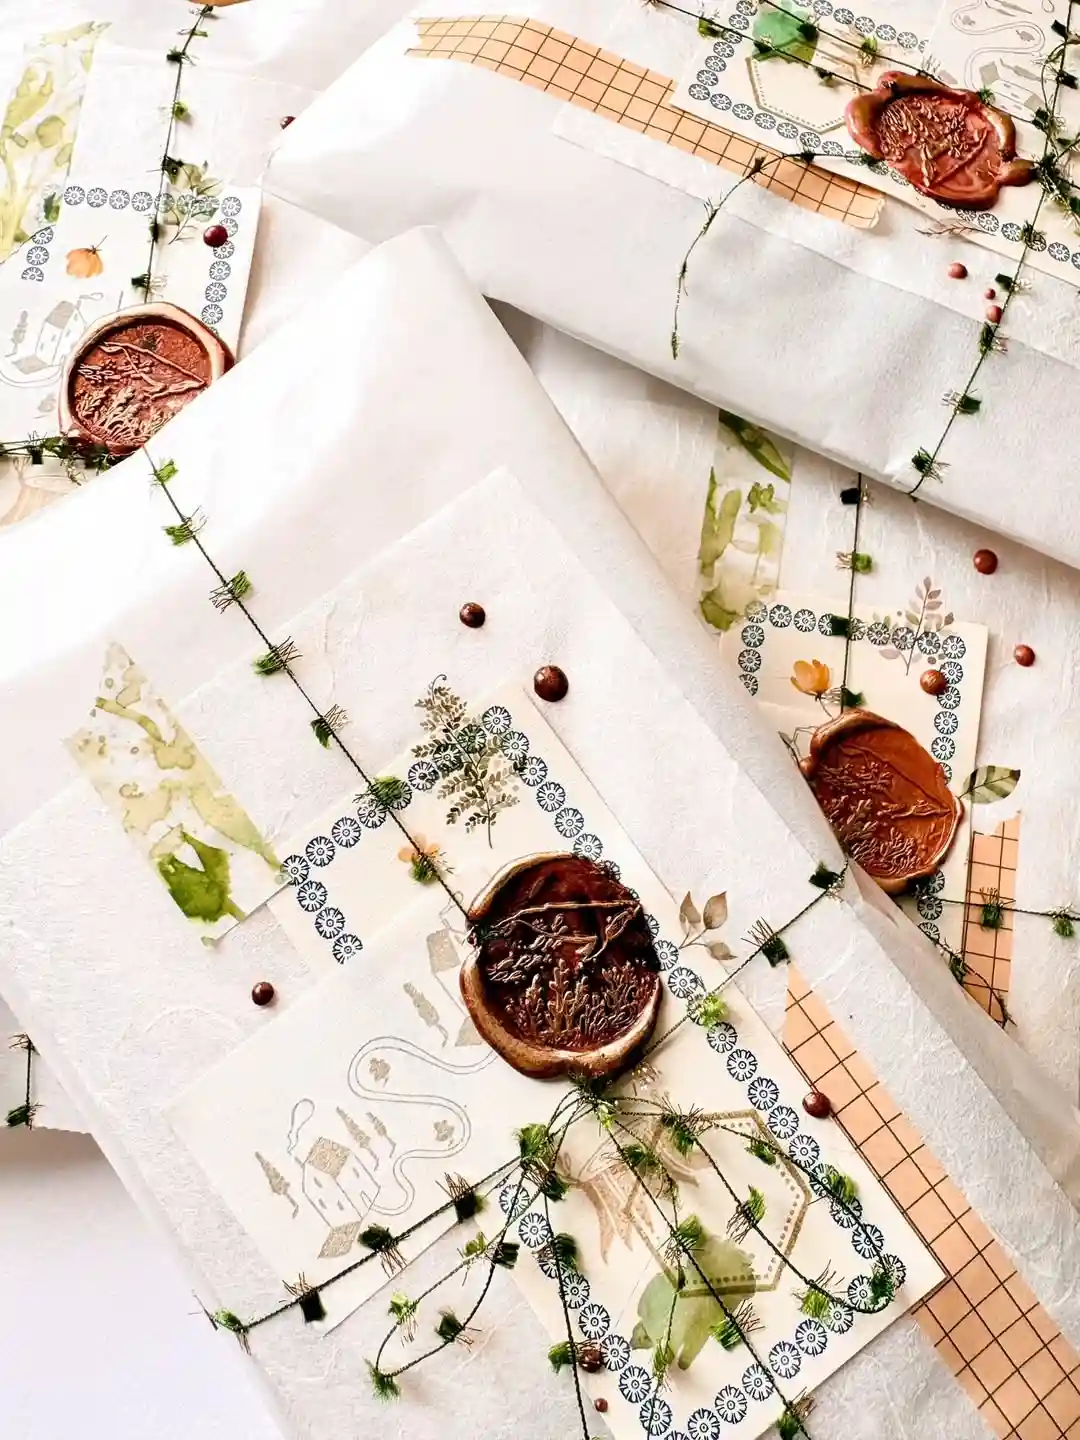
The wax here is only one layer in a much busier package, and that is exactly the point of studying it.
Deckle-edge paper, hand-drawn botanical stickers, patterned washi tape, and a trail of embroidery-style twine dotted with tiny wooden beads all sit under and around the seal.
A rust brown wax stamped with delicate ferns and grasses becomes the visual anchor that pulls the whole collage together, sitting right at the spot where the twine crosses.
Rough, deckle-edge paper gives the wax something to grip and sink into.
Wrapping twine across the package first gives the seal a natural spot to land.
Pouring the wax over the crossed twine locks the whole wrap in place, no extra glue needed.
18. Velvet Ribbon Bows With a Bronze Wax Monogram
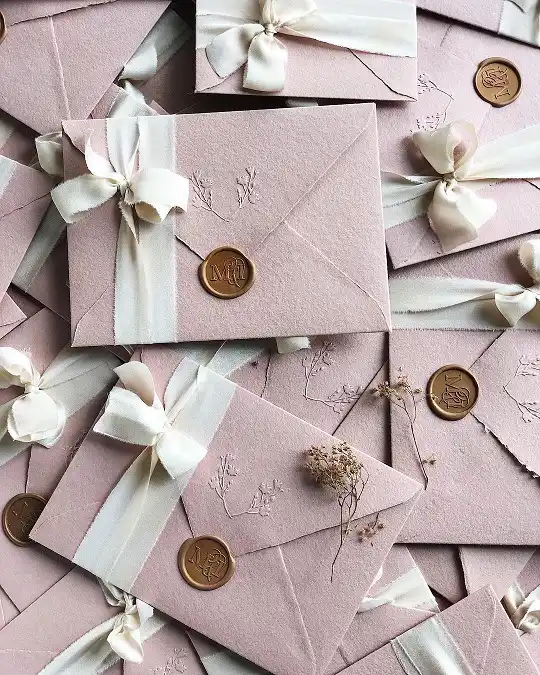
A whole tabletop of these envelopes shows the same formula repeated with just enough variation to keep it interesting.
Dusty pink paper, a thin embossed floral branch pressed blind into the corner, a velvet ribbon tied in a loose bow, and a small bronze wax seal with a two-letter monogram.
What keeps this batch from looking mass produced is the embossing underneath the ribbon.
It is nearly invisible until the light catches it, a quiet detail most people would miss on a single envelope but that adds up across a full stack.
The wax itself stays small and understated on purpose, sitting just below the bow rather than competing with it for attention.
A small seal paired with a bigger bow lets the ribbon lead and the wax quietly finish the look.
Conclusion
Eighteen very different directions, and still only a handful of tools between all of them.
That is the real appeal of wax sealing: once you have wax, a stamp, and a little heat, everything else on this list is just a variation you get to choose.
Start with one pairing that felt doable, kraft paper and red wax is still the easiest place to begin, and build confidence before moving toward metallics, custom logos, or hand-painted detail. The rest will come with practice.
Save this for the next time you want fresh wax seal stamp ideas.