15 Easy Craft Ideas for Teens That Are Actually Cool (Not Cringe)

Most craft lists aimed at teens are full of projects that belong in a second grade classroom. Paper plate animals. Popsicle stick picture frames. Nothing anyone over twelve would keep, let alone put on a shelf.
This list is different. These are easy craft ideas for teens that are actually cool, which means every project here makes something you would use, wear, gift, or hang on your wall. No fake enthusiasm required.
The range is wide on purpose. Some take half an hour and cost almost nothing, like a duct tape cuff or a notebook cover built from stickers you already own.
Others are weekend projects worth the time, like an embroidered denim jacket or a floating shelf cut from an old skateboard deck. A few solve small annoying problems, like earbuds that always come out of your bag in a knot.
Nothing here needs fancy tools or a craft room. Most of it works at a kitchen table with scissors, glue, and whatever is in the drawer.
1. Punch Needle Hoop Art With a Bold Background
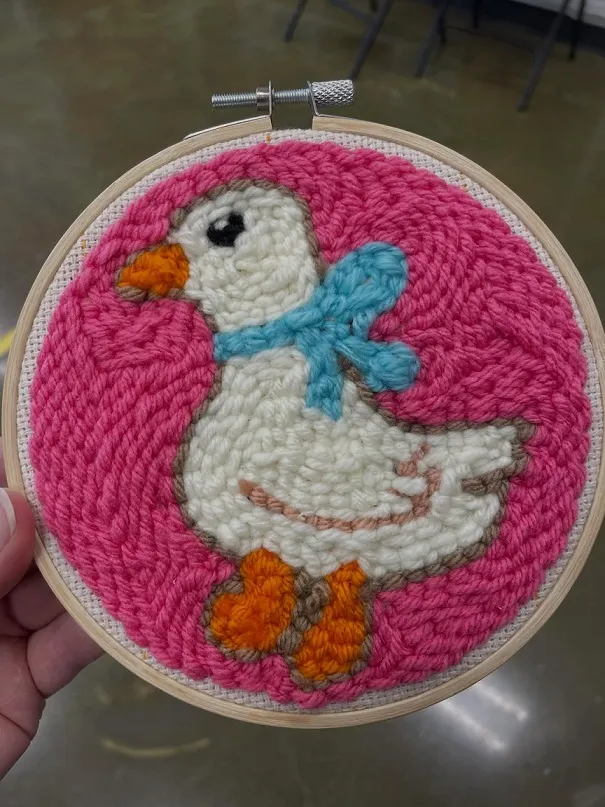
Punch needle looks a lot harder than it is. The tool does the work, and you fill in shapes like coloring with yarn.
What makes this one land:
- The hot pink background takes up more space than the duck, so the whole hoop reads as color first
- The cream body is outlined in a soft tan, which keeps it from blending into the pink
- Orange beak and feet plus a blue bow give three small accents instead of a busy rainbow
- Rows follow the shape of the duck, not straight lines, so the loops look intentional
Pick a simple silhouette for your first one. A duck, a mushroom, a cherry, a cloud. Anything with a clear outline and no tiny details.
Draw it on the fabric with a marker before you punch, then fill the shape first and the background last. Finish the whole hoop right up to the wooden edge.
A background left half empty is the thing that makes punch needle look unfinished.
2. Patch Pouches Everyone Can Personalize
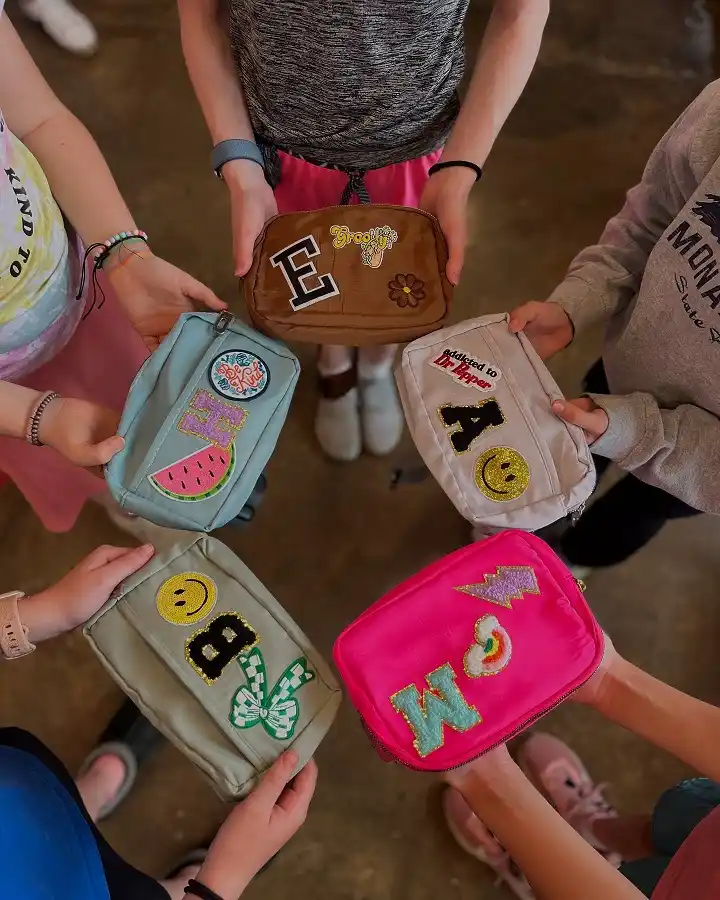
Five plain nylon pouches, five completely different results. That is the whole appeal of this one, and it makes a great group craft when nobody wants to make the same thing.
Each pouch here starts as a solid color, then gets an initial patch plus one or two small patches with personality. A watermelon slice. A checkered bow. A smiley face. A tiny rainbow.
The initial is always the biggest piece, so your eye lands there first and the small patches fill in around it.
Chenille letter patches usually come with iron on backing, but a lot of them hold better with a few hand stitches around the edge. Nylon can be picky about heat, so test a corner first or check the tag.
Lay everything out before anything sticks down. Once a patch is on, it leaves a mark.
3. Pressed Flower Bookmarks You Can Actually Use
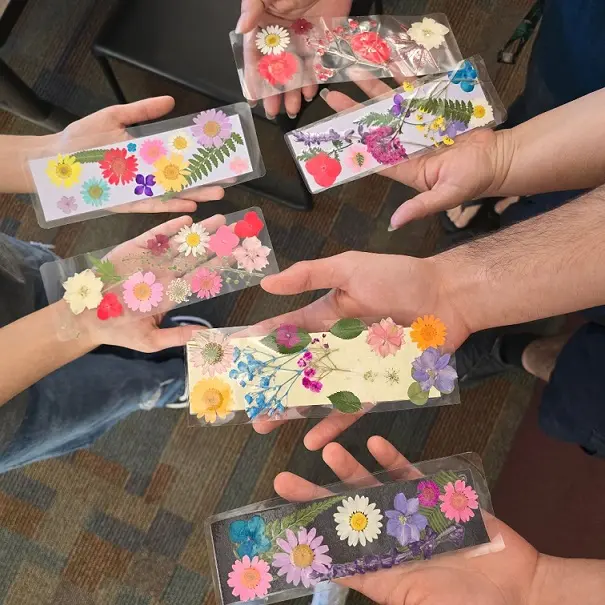
Six people made these and no two look alike, even though the flowers came from the same pile. Some are packed edge to edge with color, others leave clear space around a few blooms and a fern frond.
The clear versions are the ones that catch light. Skipping a paper backing means the sealed sleeve shows whatever page you set it against, so the flowers look like they are floating. Add a cream or pale yellow backing instead and the colors read softer and warmer.
Flat flowers work best. Daisies, cosmos, small ferns, anything with thin petals. Roses and anything thick will bump up under the seal and let air in.
Layer them between parchment inside a heavy book. Give it a week, two if the petals are thick.
Roughly two inches by seven. Clear film for a floating look, cardstock for a softer one.
Set the biggest bloom off center and build around it. Look at it once more before sealing.
Press out from the middle so no air pockets get trapped, then trim a small border all the way around.
4. Disco Ball Canvases in Whatever Colors You Want
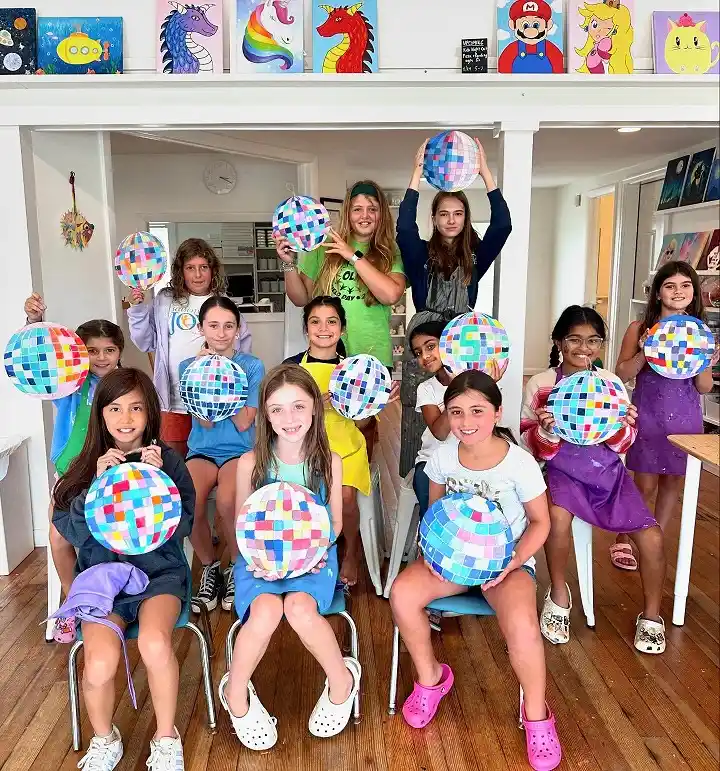
A whole room of these and every single one is different, which tells you how forgiving the project is. Round canvas, painted grid, done.
Look closely and the squares are not neat. They lean, they vary in size, some sit half painted. That is what sells the mirrored effect, because a perfect grid would just look like graph paper.
Most of them stick to one color family. Blues and purples on one, pinks and corals on another, a few going full rainbow. Pick a lane before you start and the finished ball holds together instead of turning muddy.
Squares near the edges are drawn narrower than the ones in the middle. That small trick is what makes a flat circle look round.
Unpainted lines between the tiles read as light bouncing off glass. Filling every millimeter kills the effect.
Subscribe to DIY Craft Bloom
Get updates on the latest posts and more from DIY Craft Bloom straight to your inbox.
Light and dark tiles scattered at random, not grouped. Random beats neat here every time.
5. Customized Tote Bag With Fabric Paint and Stencils
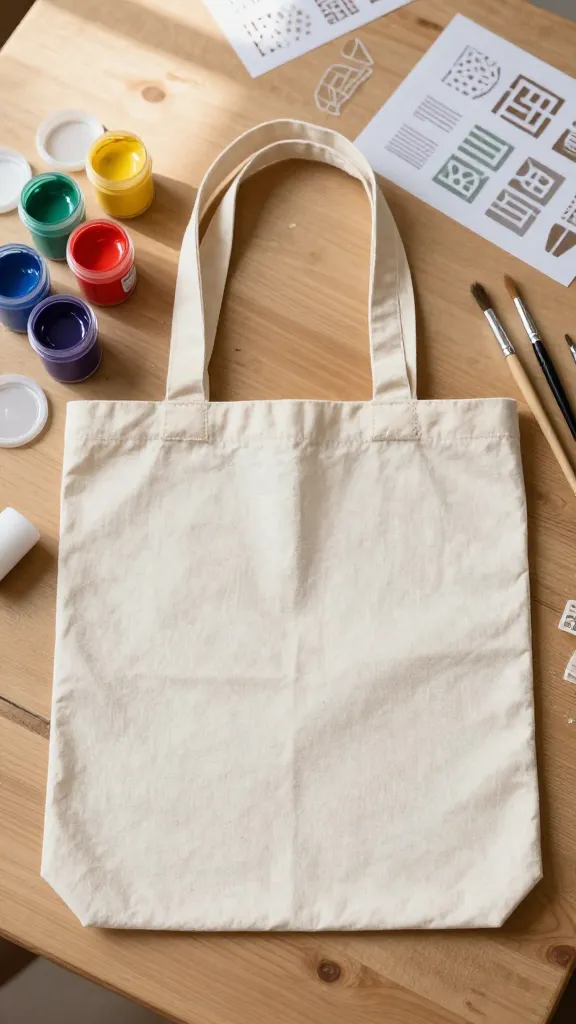
Plain canvas totes become personal statement pieces with fabric paint and creativity. Use stencils for clean lettering, freehand paint designs, or even stamp patterns with cut potatoes or foam shapes.
Add song lyrics, inside jokes, your favorite quotes, or abstract art.
Design Ideas
- Minimalist line art drawings
- Retro rainbow stripes
- Constellation patterns
- Your Spotify code for a favorite song
You’ll actually want to carry this to school instead of hiding it in your locker.
6. Initial Canvases With a Pearl Outline
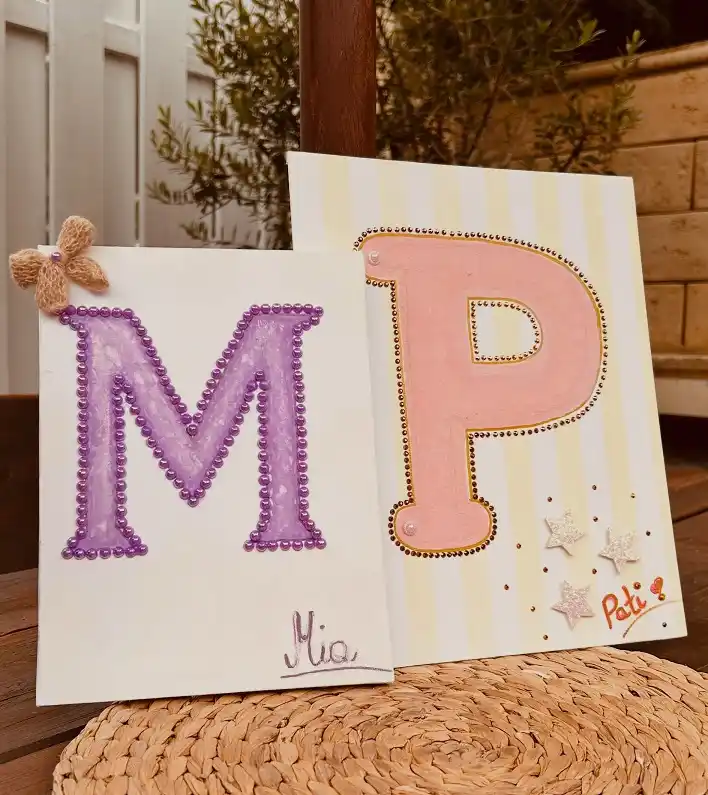
Two canvases side by side make the variations obvious. The M sits on plain white and gets a purple wash inside the letter, outlined in solid purple pearls with one burlap butterfly in the corner.
The P sits on soft yellow stripes, filled in pale pink, and outlined twice, once in gold paint and once in dark beads, with glitter stars scattered below.
Same idea, two moods. The white one is quiet. The striped one is busier and reads younger.
Either way the beads do the heavy lifting. A painted letter on its own looks like homework. Outline it and it looks like a shop bought sign.
7. Personalized Phone Case With Pressed Flowers and Mod Podge
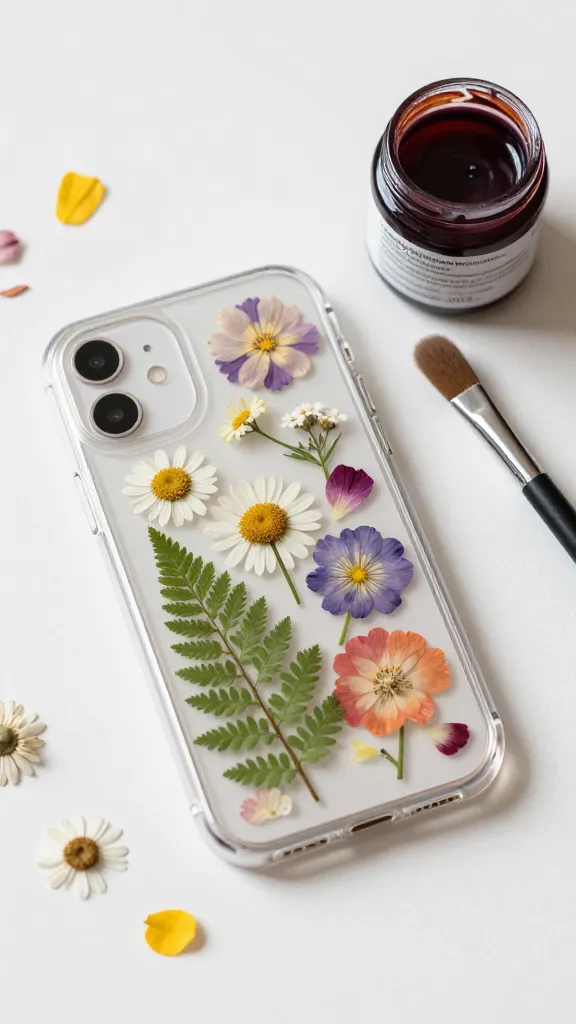
Create a one-of-a-kind phone case by arranging pressed flowers on a clear case and sealing them with layers of Mod Podge.
You can create patterns, spell out initials, or go for a scattered garden look. Each layer of Mod Podge adds durability and a professional finish.
This is seriously one of the easiest ways to make your phone look unique without spending thirty dollars on a designer case. Change it up seasonally or make matching ones with your bestie.
8. Layered Paper Birthday Cards With Sticker Letters
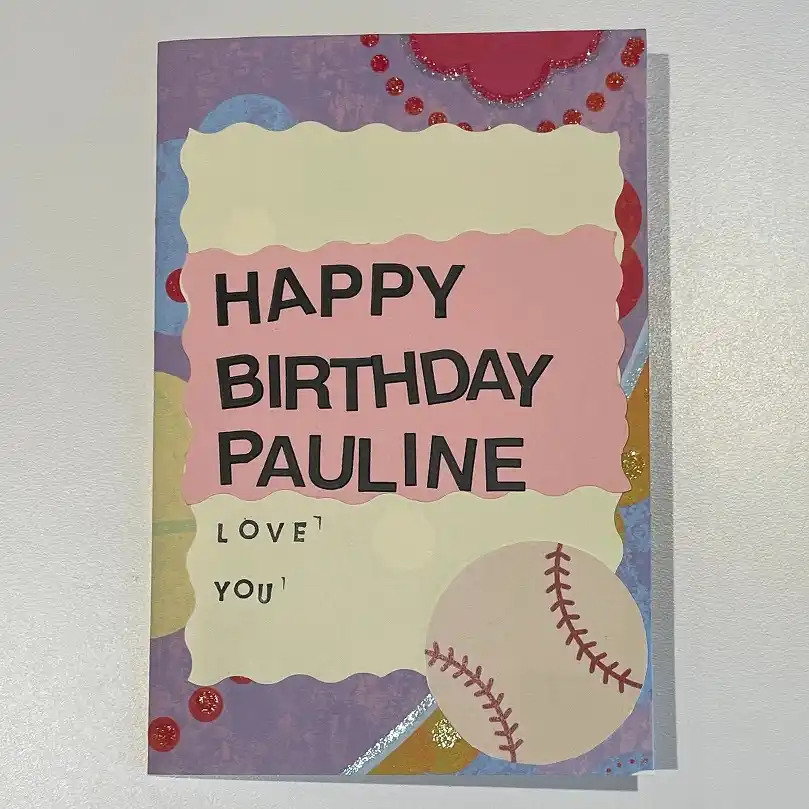
Store bought cards cost money and say nothing. This one is built from three cut paper layers and a handful of sticker letters, and it still manages to feel personal because of the baseball in the corner.
That baseball is the smartest part. It ties the card to whoever is getting it. Swap it for a guitar, a cat, a soccer ball, a coffee cup, whatever the person is known for.
The layers go patterned background, then wavy cream panel, then a pink block behind the name. Each one sits slightly smaller than the last, so you get a frame effect without drawing a single border. Scissors with a wavy edge do that shape in one pass.
Glitter shows up in three small places, not everywhere.
Pencil a light guideline before laying down sticker letters, then erase it after.
Add one object that points to the person getting the card.
Glitter across the whole front. Three small hits read better than full coverage.
Cutting all your layers the same size, which flattens the whole card.
9. Sticker Collage Notebook Covers
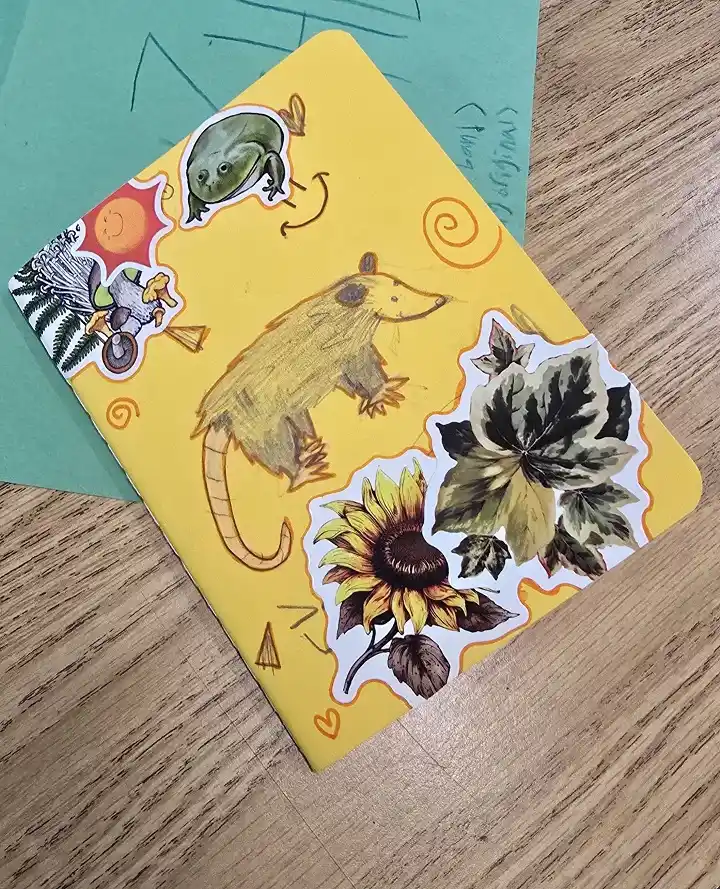
A plain yellow notebook, some cut out stickers, and one drawing in colored pencil. Half an hour, tops.
The opossum in the middle is hand drawn straight onto the cover, and it is not a perfect drawing. It does not need to be.
The stickers around it, a frog, a sunflower, a variegated leaf, a tiny mushroom scene, all sit on the same nature theme, so the page hangs together.
Small orange doodles fill the leftover space. Spirals, arrows, a heart, a couple of triangles. They cost nothing and stop the cover from looking half done.
Nature is just one direction. Music, food, cats, video games, anything works as long as you commit to one theme and stick to two or three doodle shapes.
Subscribe to DIY Craft Bloom
Get updates on the latest posts and more from DIY Craft Bloom straight to your inbox.
Place your biggest sticker slightly off center first, then work outward. Starting in the exact middle boxes you in and everything after it ends up crowded in the corners.
10. Polaroid String Lights Display
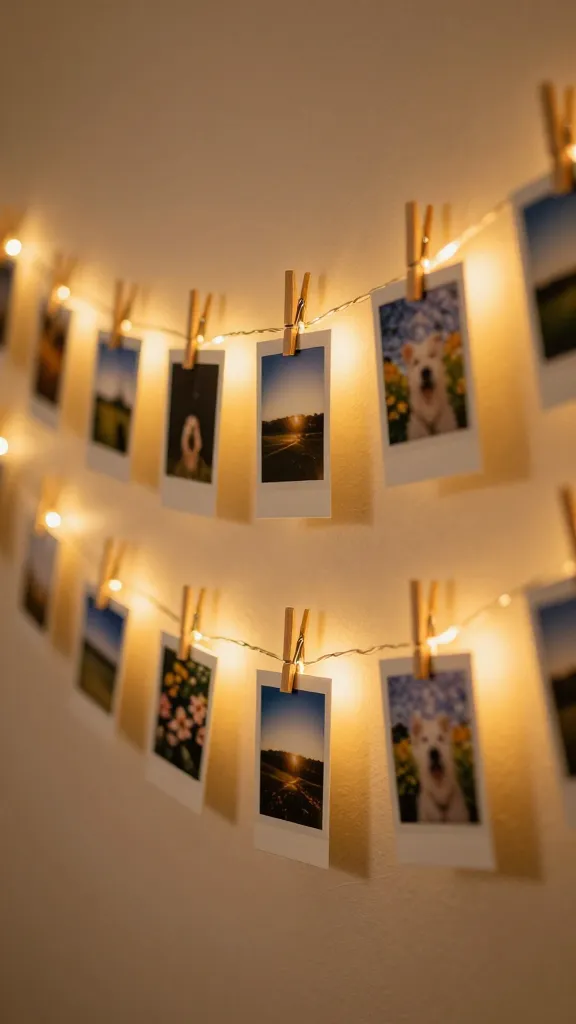
Print your favorite photos in Polaroid style, clip them to string lights with mini clothespins, and hang them across your room. The lights illuminate the photos from behind, creating a warm, nostalgic glow that’s perfect for setting the mood.
This doubles as both lighting and a photo display, making it the ultimate multitasking decor. Switch out photos whenever you want to update the vibe, and you’ve got rotating artwork that’s totally personal to you.
11. Duct Tape Cuffs Built From Scraps
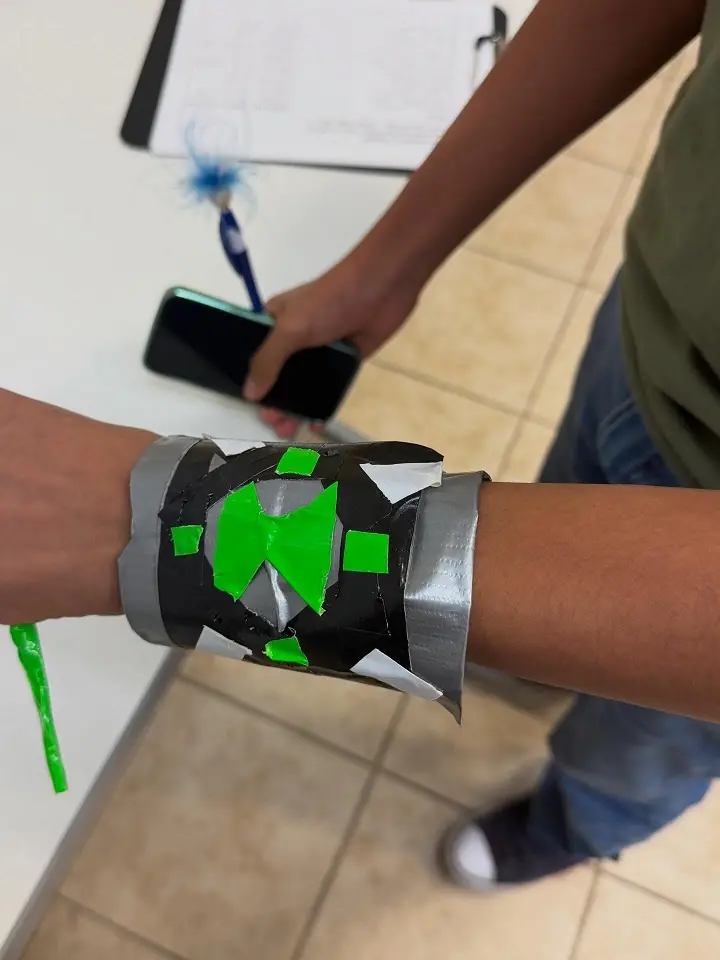
Somebody made this at a table with three rolls of tape and no pattern, and it still looks better than most store bought cuffs.
Silver forms the base band and wraps the wrist. A black panel covers the middle. Then bright green and white pieces get torn, not cut, into rough shapes and layered on top.
Torn edges are the whole point here. They give the cuff that broken glass look that clean scissor lines cannot fake.
Build the base as a double sided strip first, sticky sides pressed together, so nothing grabs your arm hair.
Measure around your wrist and add about an inch for overlap. A small square of hook and loop tape at the ends turns it into something you can actually take off.
12. Felt Animal Earbud Holders
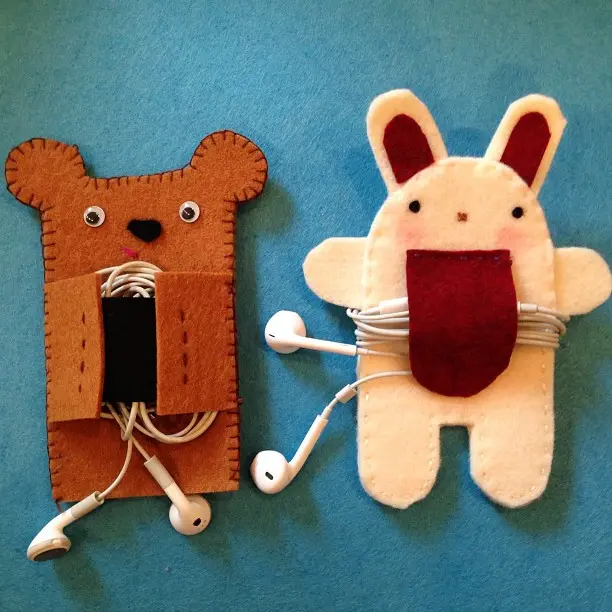
Two versions of the same problem solver: a felt pocket that keeps earbuds from turning into a knot at the bottom of a bag.
The brown bear is a flat rectangle with two ears sewn on and a pocket band across the front. Simpler shape, faster to cut, and the cord wraps around the whole body.
The cream bunny has arms, legs, and long ears, with a deep red pocket down the front and cord wrapped around its middle.
Both use blanket stitch around every edge in contrasting thread, which is what turns two flat pieces of felt into something that looks finished. Felt does not fray, so there is no hemming and no sewing machine needed.
Cut your pocket a little shorter than the body. A pocket that reaches the bottom has nowhere for the cord to sit.
| Simple rectangle | Full character shape |
|---|---|
| Two straight cuts plus ears | Curved outline with arms and legs |
| Good first sewing project | Needs steadier stitching around curves |
| Cord wraps the whole body | Cord wraps the waist between the arms |
13. Embroidered Denim Jacket With Floral Designs
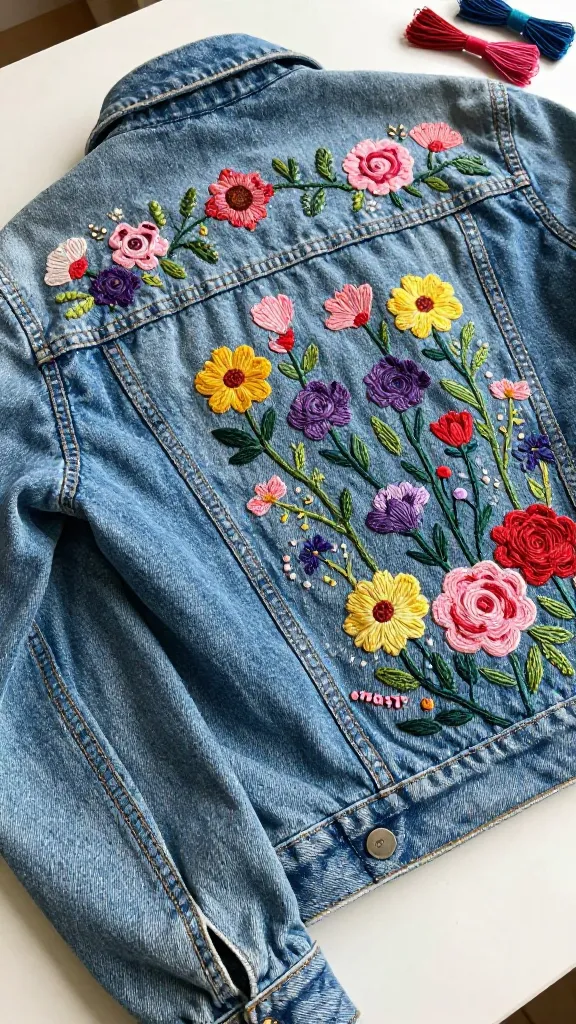
Take a plain thrift store jean jacket and transform it into a wearable masterpiece with embroidery thread. Stitch flowers across the back, add vines down the sleeves, or create patches with inspirational words.
You don’t need to be an embroidery expert—simple stitches like backstitch and satin stitch are all you need.
Getting Started
- Sketch your design with chalk or washable marker first
- Use an embroidery hoop on one layer at a time
- Secure thread ends inside the jacket lining
- Mix thread colors for a more dimensional look
This is the kind of jacket that becomes your signature piece. Trust me, people will ask where you got it.
14. Upcycled Skateboard Deck Shelf
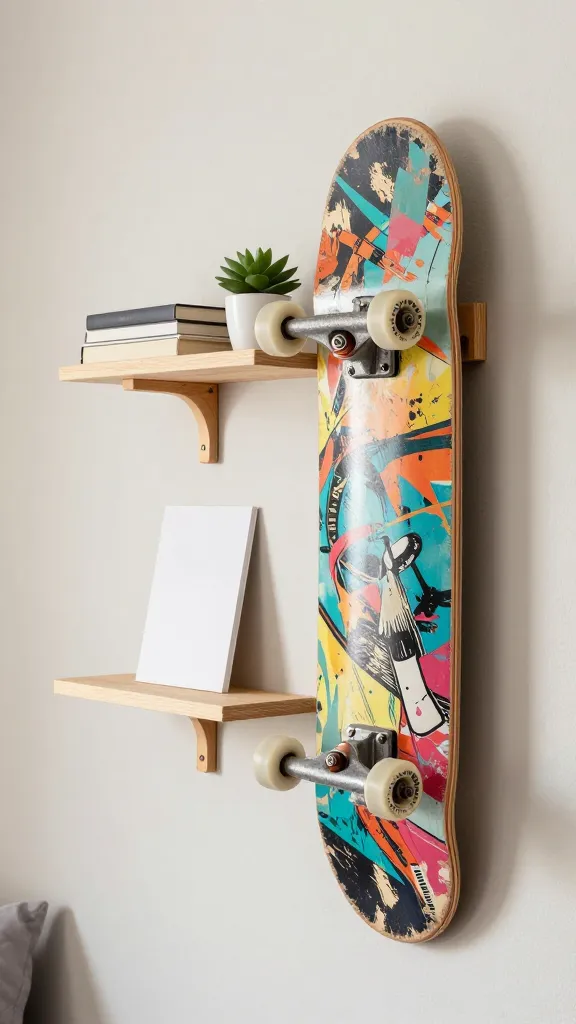
Got an old broken skateboard? Cut it into sections and mount them on brackets to create the coolest floating shelves.
The curved ends make perfect small shelves for plants, books, or displaying your stuff. Keep the original graphics or sand and repaint for a custom look.
This project screams personality and gives off major skater-chic vibes even if you’ve never set foot on a board. FYI, you can also find cheap decks at thrift stores if you don’t have one lying around.
15. Tie-Dye Tapestry Using Ice Dyeing Technique
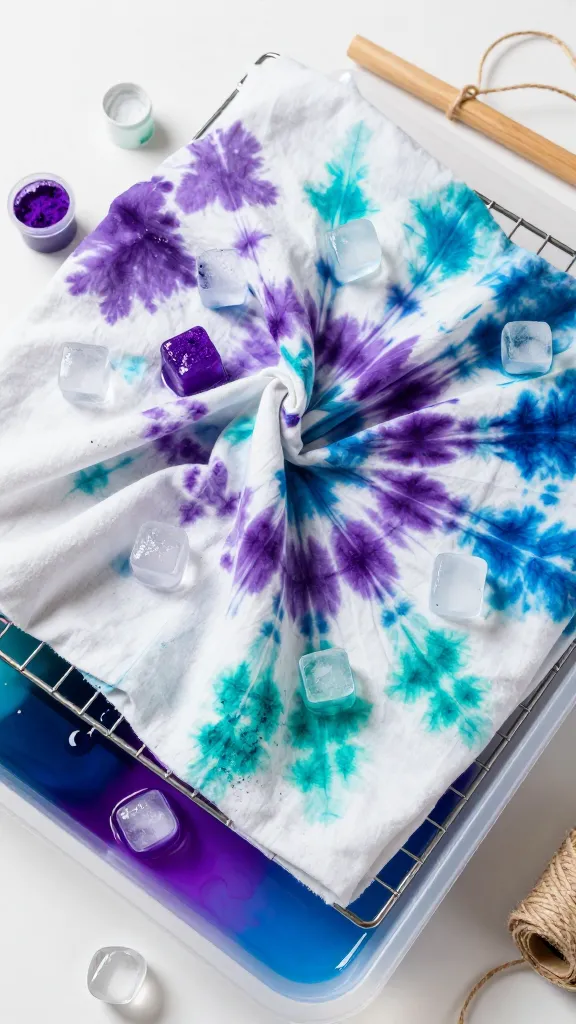
Regular tie-dye is cool, but ice dyeing takes it to another level. Place ice cubes on scrunched white fabric, sprinkle tie-dye powder over the ice, and let it melt naturally.
The result? Watercolor-like patterns with unexpected color blends that look way more sophisticated than traditional tie-dye.
Pro Tips
- Use a large piece of cotton fabric for wall hanging size
- Experiment with color placement—they’ll blend as ice melts
- Let it sit for 12-24 hours for vibrant results
- Add a dowel rod and string for easy hanging
Your walls will thank you for this bohemian upgrade.