19 DIY Mug Painting Ideas You Can Copy This Weekend

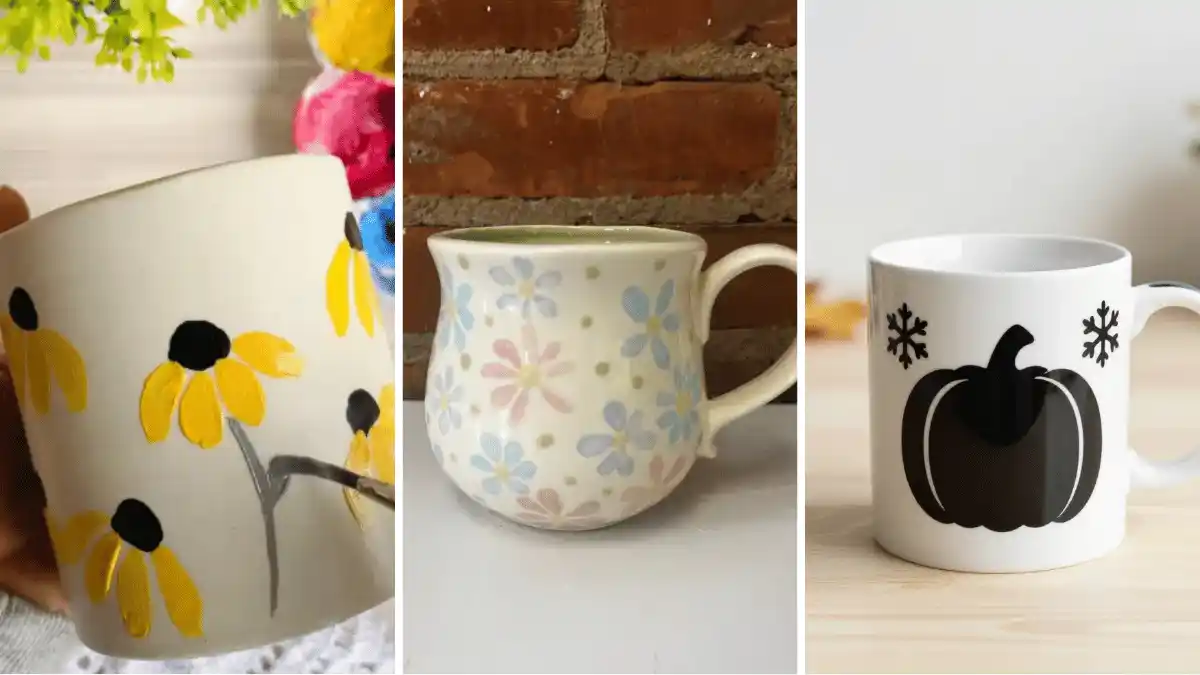
Most mugs in the cupboard look like they came off the same store shelf, because they did. Painting your own fixes that, but a blank white mug can freeze you before the first brush stroke.
What design should go on it, which paint holds up, and will it survive the sink? Those three questions stall a lot of good projects.
Below are 19 DIY mug painting ideas, each with simple steps and honest notes on what lasts. Some need only a paint pen and a quiet evening, like tiny blue daisies or white dots on a black mug.
Others ask a bit more of you, with gold triangle bands, a raised 3D sunflower, or a moon that glows after dark. Pink gingham, a sweet gray cat, and a black pumpkin silhouette show up too, so you’ll find ideas for gifts, holidays, and your own morning coffee.
Beginners get an easier route wherever a design looks tricky. Care tips cover baking, gentle hand washing, and keeping paint away from the rim. Grab a plain mug and start with whichever one makes you smile first.
1. Pink Tulip Garden on a Green Base
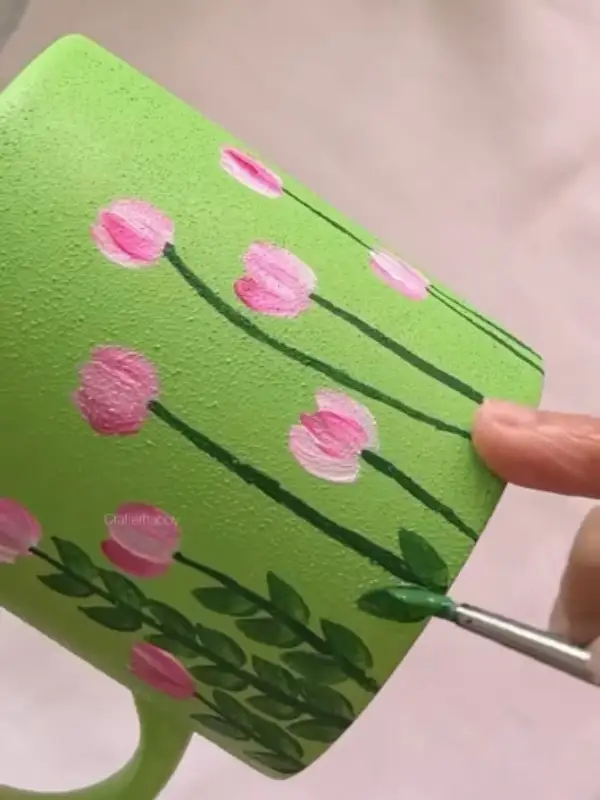
- Base: a full coat of bright grass green
- Main piece: rows of small pink tulip heads
- Color: long, thin stems in dark green
- Finishing touch: tiny leaves along the lower stems
Tulips are easier than they look. Each flower is a few short dabs of deep pink with a lighter pink laid on top. Tall stems do most of the work, since they fill the mug fast and give it a garden feel.
Beginner version: Paint every stem first with a thin liner brush, then drop a tulip at the top of each one. Staggered heights look natural, so skip the ruler. The green base has a soft bumpy texture, and that texture hides small brush marks.
2. Half Pink Dip With Scattered Hearts
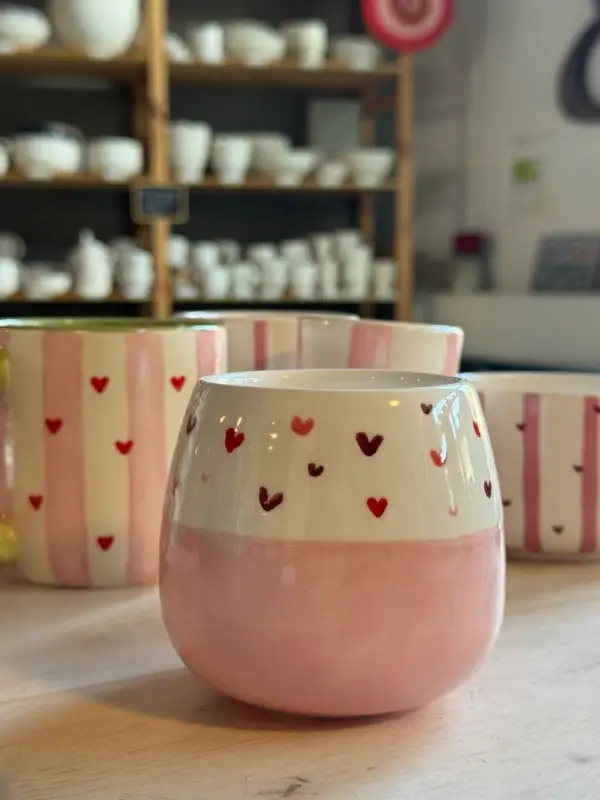
Split the cup in two and give each half one job. The bottom is solid soft pink. Up top, the cream space holds tiny hearts in red, deep berry, and coral pink.
Mixed heart shades make this design work. They keep a simple pattern from looking flat, and they hide any heart that came out lopsided. Paint a few hearts in each color, then fill the gaps.
Behind the cup, shelves of blank white pottery suggest a paint your own pottery studio, where the glaze gets fired for you.
At home, a plain white mug and porcelain paint pens you bake in the oven get you close. Keep the hearts below the rim so your lips never touch the paint.
3. Soft Pink Gingham With Tiny Red Hearts
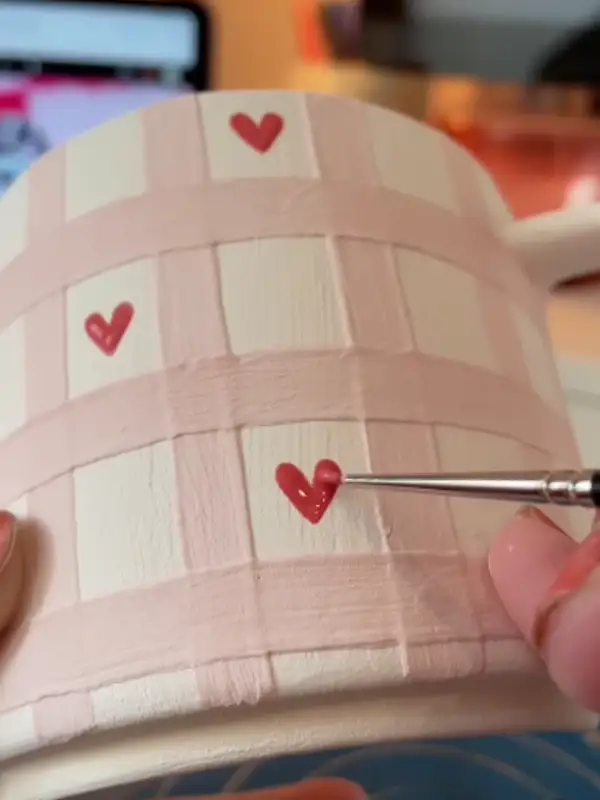
Gingham sounds tricky, but among mug painting ideas it is one of the simplest. It is only two sets of stripes. Wide pink bands wrap around the mug first, then thinner lines run up and down, and the crossings look a shade darker, like real fabric.
Why it works:
- Light pink forgives wobbly lines far more than a dark color would.
- Red hearts land in only a few squares, so the design stays airy.
- Visible brush strokes give it a handmade, woven look.
Spacing note: Sketch faint pencil guides before any paint goes on. On bare bisque like this, pencil burns away in the kiln. Glossy store mugs hold thin strips of tape better, so use tape for straight bands there.
4. Tiny Blue Daisies for Your Morning Coffee
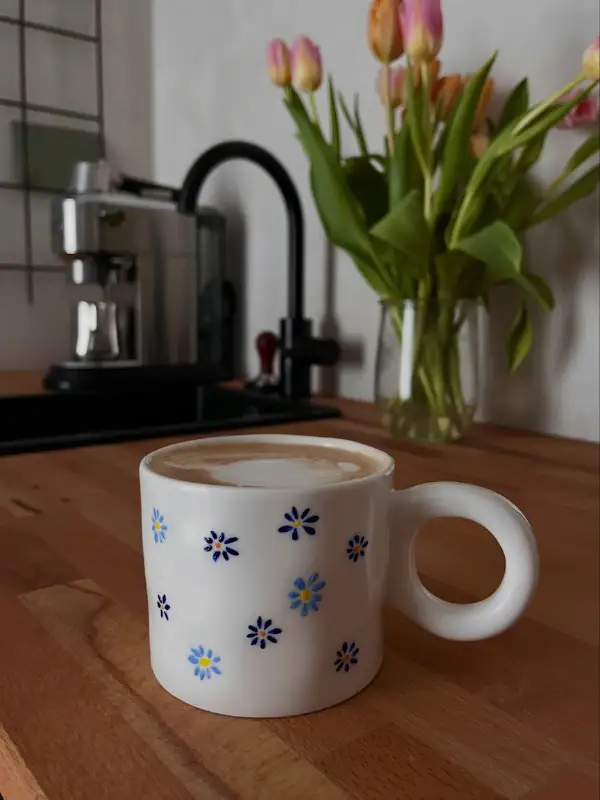
Best for: beginners who want a small pattern they can finish in one sitting.
Little flowers dot this white mug, with plenty of blank room between them. Some daisies are light blue and others are deep navy, each with a yellow dot in the middle. Tiny flowers mean a shaky hand barely shows.
Each petal is just a short dash. Start with the yellow dot, then pull six to eight small strokes out from it. Scatter the flowers at odd angles so the pattern feels loose and friendly.
One small change: Pick a mug with a fun handle, like the round loop shape here. A plain pattern on an unusual handle looks like something from a boutique shop.
5. Candy Stripes With Hearts Inside and Out
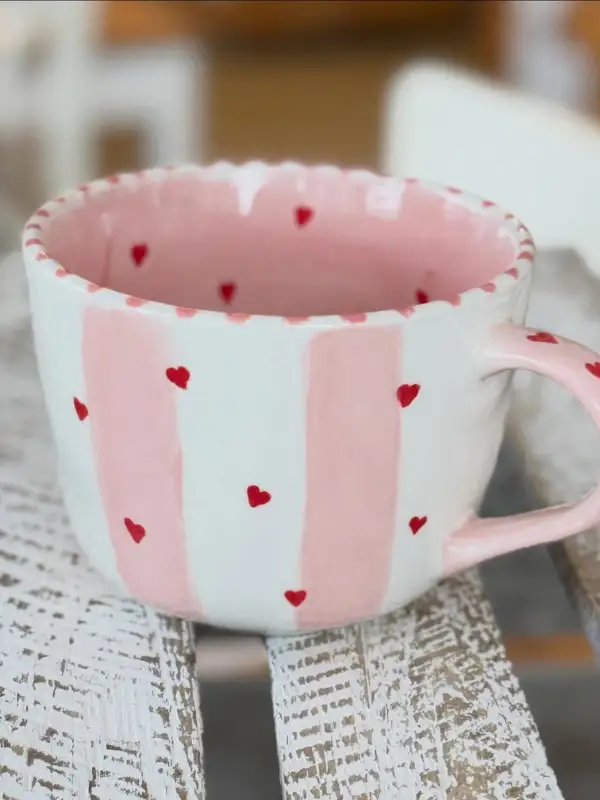
The build: wide pink stripes, tiny red hearts, a dotted pink rim, and a pink handle.
Look inside this mug and the fun keeps going. The interior is washed in pink with red hearts dropped in, so every sip shows a surprise.
Stripes on the outside are brushy and slightly uneven, which makes the mug feel hand painted rather than printed.
Paint the stripes first with a flat brush, one pass each. Once they dry, dot hearts with a small round brush across both the pink and white areas. Finish with little pink dashes all around the rim.
Skip this: Painting the inside or the rim with craft acrylic or bake on pens. Those areas touch food and lips, so save that part for a pottery studio where a food safe glaze gets fired on.
6. Drooping Black Eyed Susans on Speckled Clay
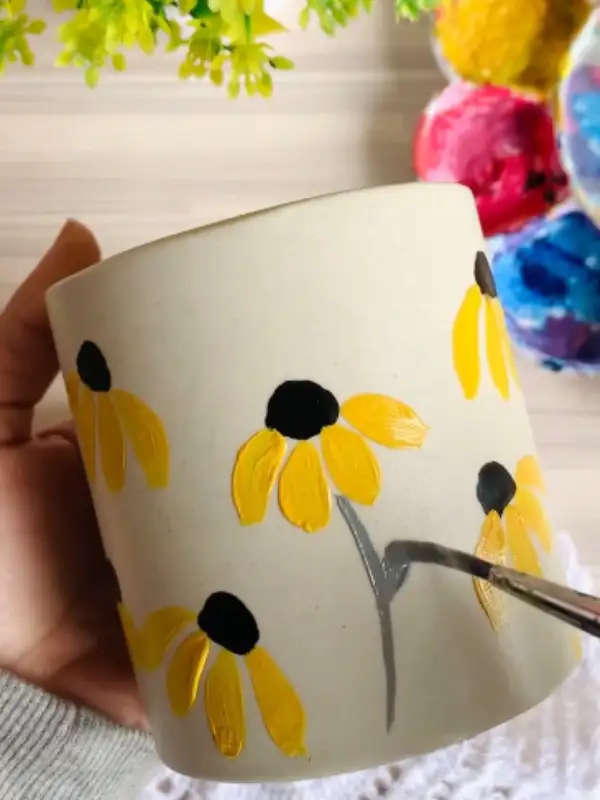
Bold yellow petals and black centers pop against this oatmeal speckled cup. Among quick DIY mug painting ideas, this one takes very few strokes.
Each flower is four or five fat petals hanging from a round black dot, with thin gray stems added last. No handle shows in this shot, so a tumbler or handleless cup works just as well.
Paint note: Load the brush well, press it down, then lift. That single press makes a full petal with no outlining needed.
Subscribe to DIY Craft Bloom
Get updates on the latest posts and more from DIY Craft Bloom straight to your inbox.
Placement note: Tilt some flowers left and others right. Uneven heads read like a real field instead of wallpaper.
Care tip: Hand wash painted cups gently, even after baking or curing. Scrubbing pads wear bright paint down faster than you think.
7. Wavy Color Blocks in Sky Blue, Cream, and Rose
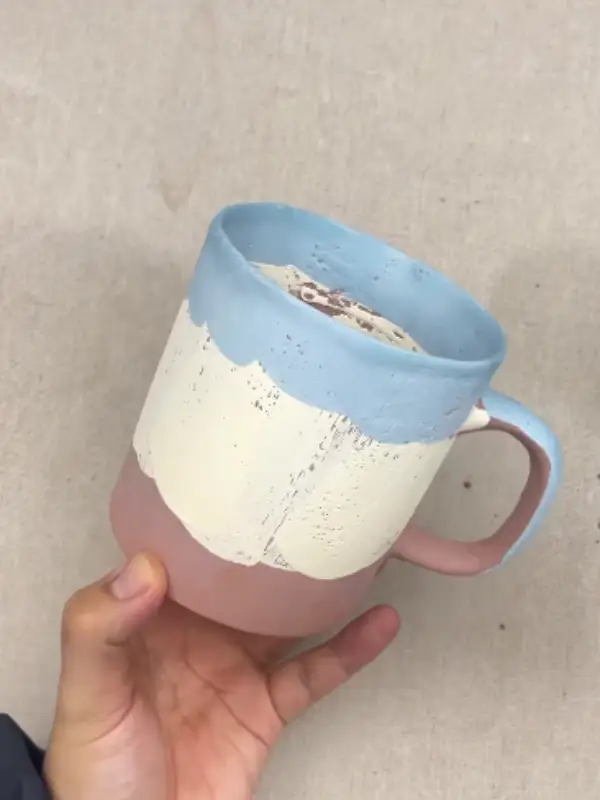
- Bottom: dusty rose on the lower third
- Middle: a wide cream band with a wavy lower edge
- Top: sky blue across the rim, dipping into soft scallops
- Handle: blue at the top, rose near the base
No stencils here, just loose wavy lines painted by hand. The first coats look streaky and speckled, which is normal on raw bisque before more layers and the glaze firing. Build each color in two or three thin coats, and let each coat dry to the touch.
Make it easier: Paint the lightest color first and the darkest last. Cream goes on before rose, and blue comes at the end, so any wobbly edge gets covered by the deeper shade.
8. Raised 3D Sunflower Mug
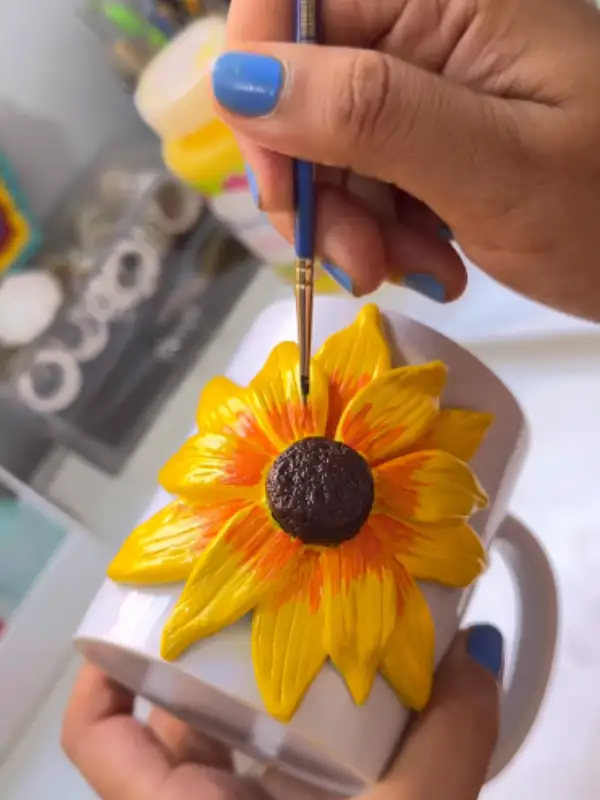
Petals that stand off the surface make this mug feel like a gift shop find. The sunflower looks shaped from craft clay, pressed onto a plain white mug, then painted. Poke the center with a toothpick before the clay dries to get that bumpy, seedy texture.
Why it works:
- One big flower fills the side, so no pattern planning is needed.
- Warm orange streaks near the middle make flat yellow look alive.
- A rough brown center contrasts with the smooth, glossy petals.
Heads up: Raised clay turns this into a display mug or pen holder more than a daily dishwasher mug. Seal the flower well and wash by hand if you do drink from it.
9. Pastel Daisies and Sage Green Dots
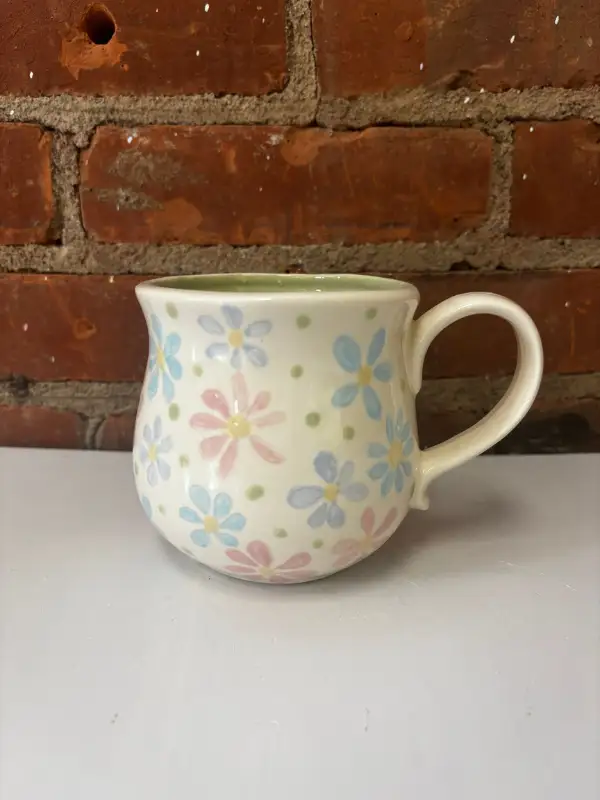
Simple version: pastel daisies in three colors, sage dots in the gaps, and a sage green inside.
Soft blue, lavender, and pink flowers cover this creamy, belly shaped mug. Small green dots fill the empty spaces and tie the outside to the sage interior. Some daisies run past the bottom edge, so the pattern looks like it keeps going.
Painting it takes three steps. Dab a yellow dot for each center, pull petals out in your pastel colors, then add the green dots last. For a painted mug that feels springy but not loud, a pastel palette like this is hard to beat.
Color note: Pastels look pale and chalky before firing or baking. Give the petals two coats so they come out this clear instead of washed out.
10. Minimalist Monochrome Dots
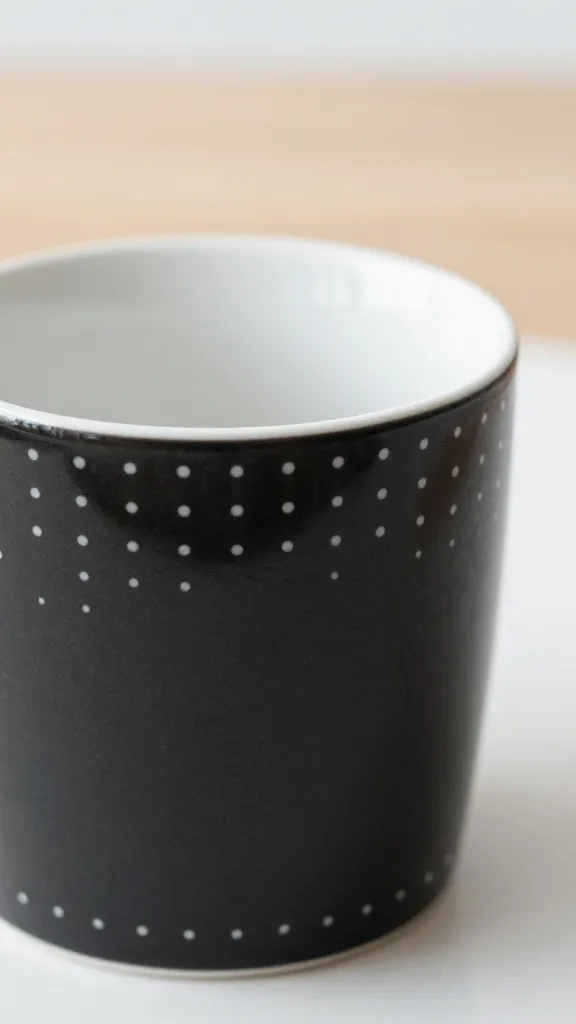
Black glossy mugs need very little paint to look sharp. On this one, rows of tiny white dots curve across the top in soft arcs, and a single dotted line circles the base. A white rim and white inside keep the whole cup crisp.
Getting those shrinking dots is easier than it looks. Dip a dotting tool or the end of a brush handle into white porcelain paint once, then press several dots in a row. Each press leaves less paint behind, so the dots get smaller on their own.
Chalk shows up well on a dark surface, so sketch your arcs lightly first. Mistakes wipe off with a damp cotton swab before the paint sets. Among DIY mug painting ideas, this one wins over people who never want flowers or pastels on their cup.
11. Emoji Expressions Mugs

Best for: a quick gift for a friend, coworker, or kid who could use a daily grin.
One huge face fills the front of this white mug, and nothing else competes with it. Squinting eyes, a wide white grin, and an orange tongue make it read as pure joy from across the kitchen. Glossy white space around the face keeps the look clean.
Start by tracing a round jar lid in pencil. Fill the circle with two coats of yellow, and blend a little orange around the edge while the yellow is still wet. Dark brown arcs form the closed eyes, and a brown mouth with a white band for teeth finishes the smile.
Try instead: The smooth shading on this mug looks printed, which is hard to copy by hand. Flat yellow with a thin black outline gives you the same cheerful face with far less blending.
12. Botanical Sketch Mugs
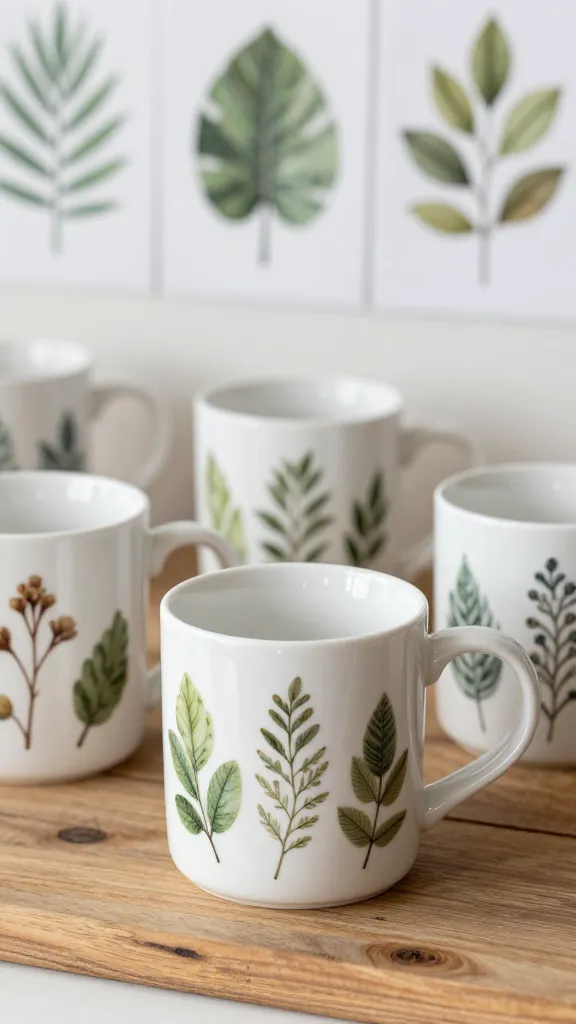
Three plant sprigs stand in a neat row across the front of this white mug. There’s a broad leaf stem, a feathery fern, and a branch of pointed olive leaves. Every shade stays in the sage and olive family, so the design feels calm.
Look at the other mugs behind it. Each one mixes different plants, including a trailing branch and a rust brown seed stem, yet the set still matches. Painting a group of mugs this way makes a thoughtful housewarming gift.
Brush note: A small round brush handles all of it. Draw a thin stem first, then press and lift for each leaf, working from the top down.
The detail to steal: Keep two greens on your palette and let each leaf pick up more of one than the other. That light and dark shift looks like watercolor without any blending.
Budget swap: Pick a leaf from your yard or a houseplant and trace its outline lightly in pencil. Real leaves give you true shapes for free.
13. Glam Geometric Metallics
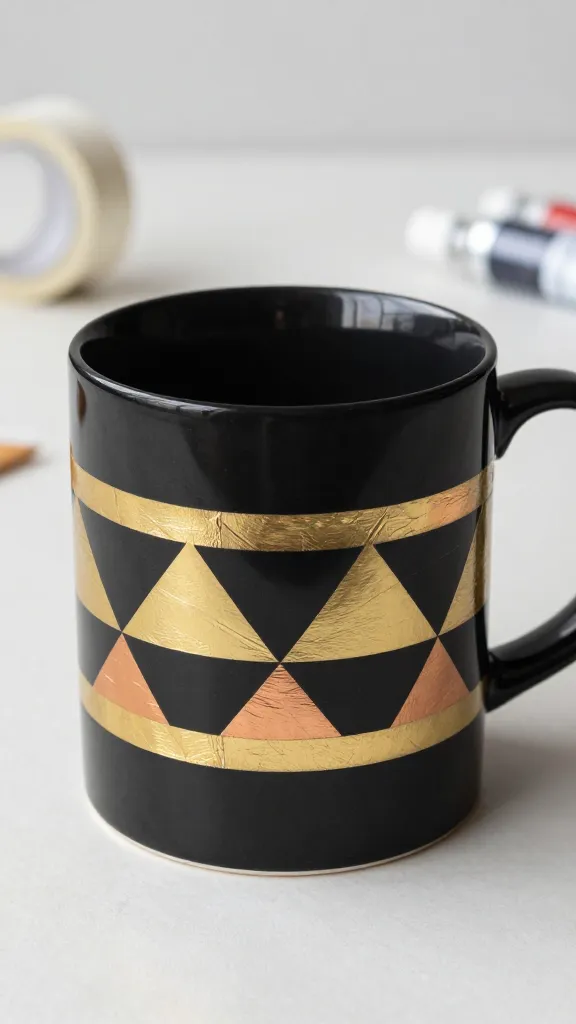
- Bands: two gold stripes wrapped around the middle
- Top row: gold triangles pointing up between black ones
- Bottom row: copper triangles filling the lower gaps
- Mug: glossy black inside and out, rim left bare
Metallic shapes on black look rich, and the whole pattern stays inside one wide band. A roll of tape sits behind this mug, which is how edges this clean happen.
Tape the two stripes first, then mask off each black triangle before any gold or copper goes on. For readers who find florals too sweet, this mug painting idea brings sharp, bold style.
Finish note: The gold here has a crinkled texture, like metal leaf pressed onto the surface, and leaf scuffs easily. Metallic porcelain paint pens hold up better on a mug you drink from every day. Hand washing keeps the shine longer.
Subscribe to DIY Craft Bloom
Get updates on the latest posts and more from DIY Craft Bloom straight to your inbox.
14. Ocean Ombre Waves
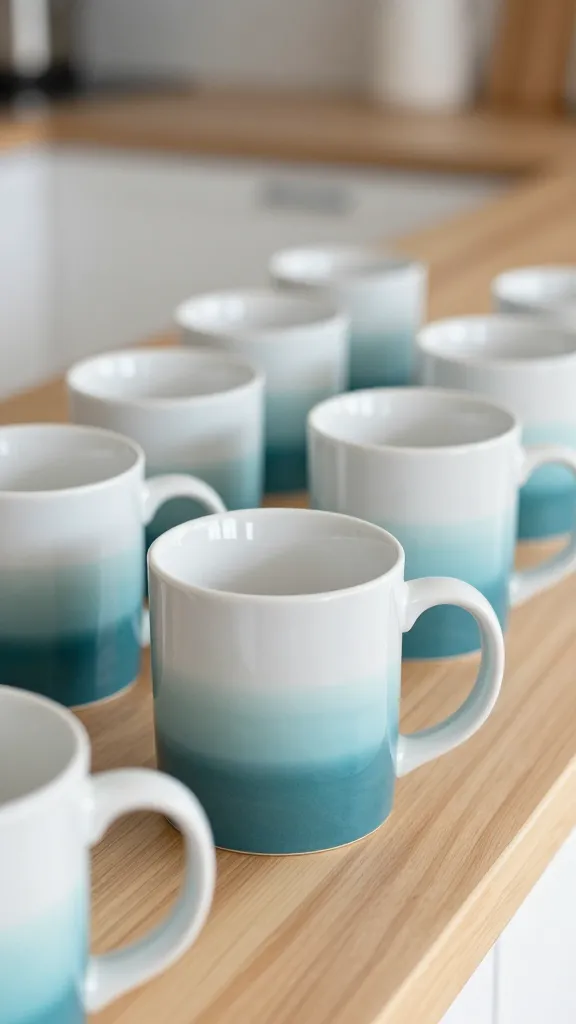
Deep teal pools at the base of each mug, then melts up into pale aqua and finally plain white. Several of them sit on this counter, all fading at about the same height. That shared line makes a set look planned, even when each mug came out a little different.
Why it feels modern:
- Just one color family shows, so nothing looks busy.
- Soft blending hides brush marks, since there are no hard edges to keep neat.
- Bright white rims and handles give the eye a clean place to rest.
Sponge note: A makeup sponge does the blending for you. Mix three shades by adding white to your teal, then dab the darkest along the bottom. Work each lighter shade upward while the last one is still damp, and stop well below the rim. Mark the stopping height with a small pencil dot on every mug first, so the whole set lines up.
15. Handwritten Quote Mug in Bold Black Letters

Lettering recipe: a black paint pen, four short lines of text, and a few tiny accent dashes.
Casual handwriting fills the front of this white mug. Letters are round and chunky, a bit uneven, and the lines drift slightly left and right. Small tick marks near the first and last lines add little sparks of energy around the words.
Pick a short phrase of four to eight words, like an inside joke or a morning motto. Write it on paper first at mug size, then copy it lightly in pencil.
Go over each letter slowly with a black porcelain paint pen, and add the accent dashes last. Among painted mug ideas, a quote makes the most personal gift, because nobody else owns those words.
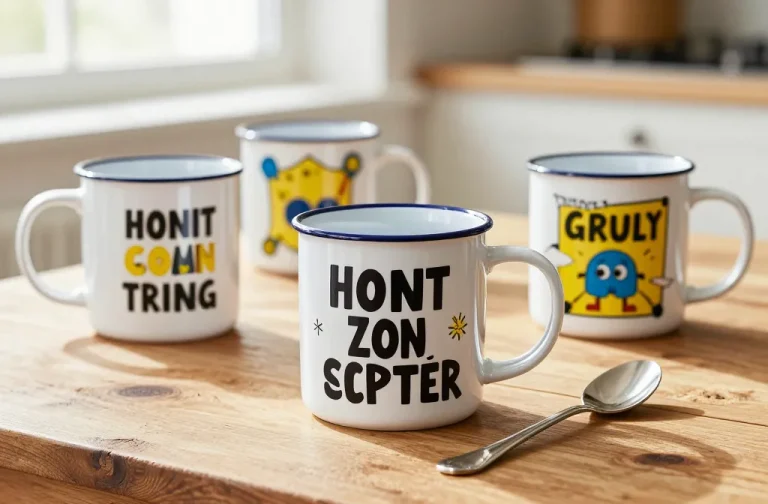
Proofread tip: Look closely at this mug, and you’ll see the words don’t spell a real phrase. Check every letter against your paper draft before baking, since a typo becomes permanent.
16. Black Pumpkin Silhouette With Snowflakes

Autumn and winter share this mug in a simple way. A solid black pumpkin sits in the center, with two thin white curves left open to show its ridges.
Two small black snowflakes float near the top corners, so one cup covers the whole cozy season.
Silhouettes suit beginners because there’s no shading at all. Cut a pumpkin shape from printer paper, trace around it lightly in pencil, and leave two narrow curved gaps inside for the ridges.
For the snowflakes, draw a small plus sign, cross it with an X, and tick a tiny V onto each end.
Crisp edges make this design look store bought. Outline everything with a fine black porcelain paint pen, then fill the pumpkin with a brush in two coats.
Falling leaves can replace the snowflakes on a mug that stays strictly fall. Follow the bake time on your paint label, and it’s ready for the first chilly morning.
17. Whimsical Animal Faces

Gray fur, peach ears, and a tiny brown smile turn this cream mug into a friendly cat. The chin and lower cheeks stay unpainted, so the white mug itself becomes the muzzle.
Round brown eyes with a small white shine dot make kids and cat lovers reach for it first.
Shape note: Draw a wide oval, add two triangle ears, then scoop a soft curve across the lower face. Only the area above that curve gets gray paint.
Shading tip: Notice how the gray looks darker between the ears and lighter near the cheeks. Dab a second thin coat on the forehead only, and that soft patchy fur shows up with no blending.
Pet swap: Match a real cat at home by switching the gray for orange, black, or tabby stripes. Add the white eye dots last so they sit on top, and this becomes one of the sweetest DIY mug painting ideas to give a pet owner.
18. Glowing Moon and Stars for Night Cocoa
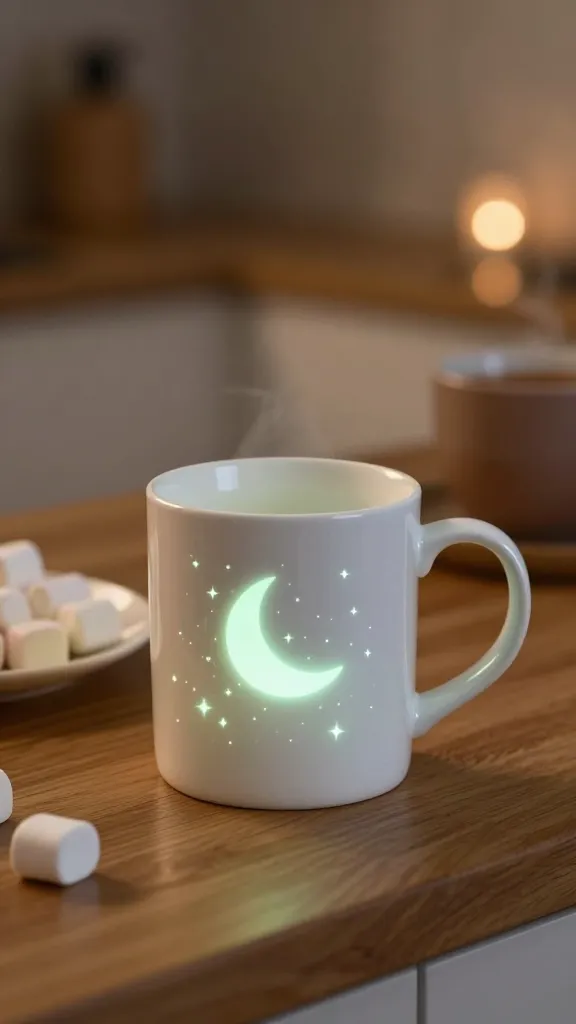
Best for: night owls and kids who love a warm cup of cocoa before bed.
A pale green crescent moon glows on the side of this white mug, with tiny stars scattered around it. Some stars are four point sparkles, and the rest are simple dots. Marshmallows and a wisp of steam set the scene for a slow evening.
Glow in the dark craft paint gets you close to this look. Draw one circle in pencil, then a second circle shifted to the side, and paint only the sliver outside the second one. Sparkles start as a small plus sign with a tiny x through the middle. Dots come from the tip of a toothpick.
Upgrade note: Glow paint looks faint in daylight, so paint the moon in pale green porcelain paint first, then add glow coats on top. Real glow is softer than this photo shows. Keep the design on the outside below the rim, since most glow paints aren’t made for food contact. Leave the mug under a lamp before dark so it charges up.
19. Textured Terracotta Tones
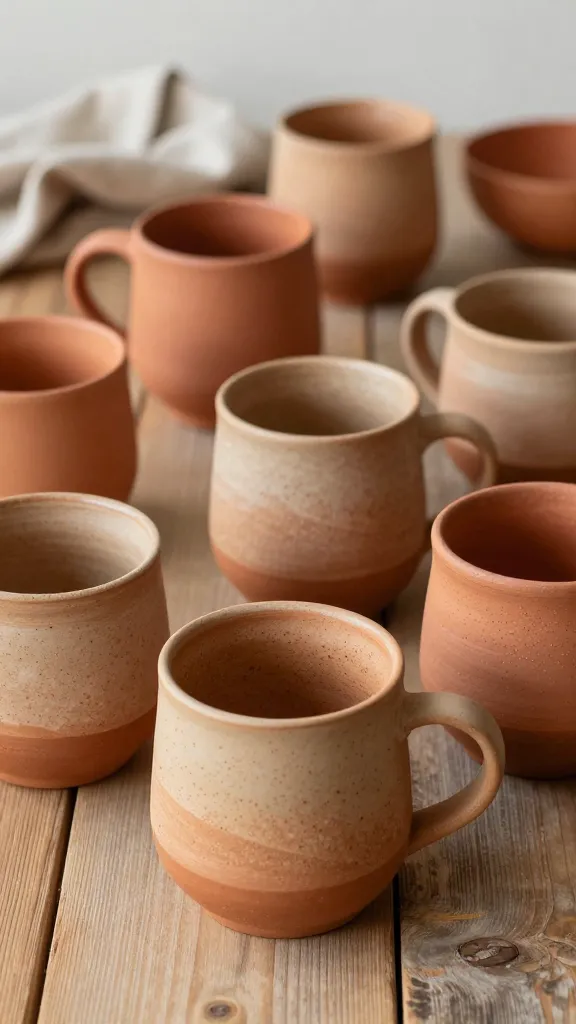
- Upper half: warm sandy beige with fine brown speckles
- Lower half: rich terracotta orange
- Middle: a soft, uneven line where the two colors meet
- Finish: matte like bare clay, with no shine at all
Rustic mugs like these rely on color, not pattern. Warm clay shades look calm on an open shelf. A mix of solid orange cups and two tone ones still reads as a matching set. Paint the terracotta base first. Once it dries, pull the sand color down in loose strokes so the meeting line stays wavy instead of ruler straight.
Speckle trick: Dip an old toothbrush in thinned brown paint and run your thumb across the bristles. Tiny flecks land on the beige and copy that stoneware look. Test on paper first, because a loaded brush throws big blobs.