16 Fall Mug Painting Ideas You Can Actually Pull Off at Home

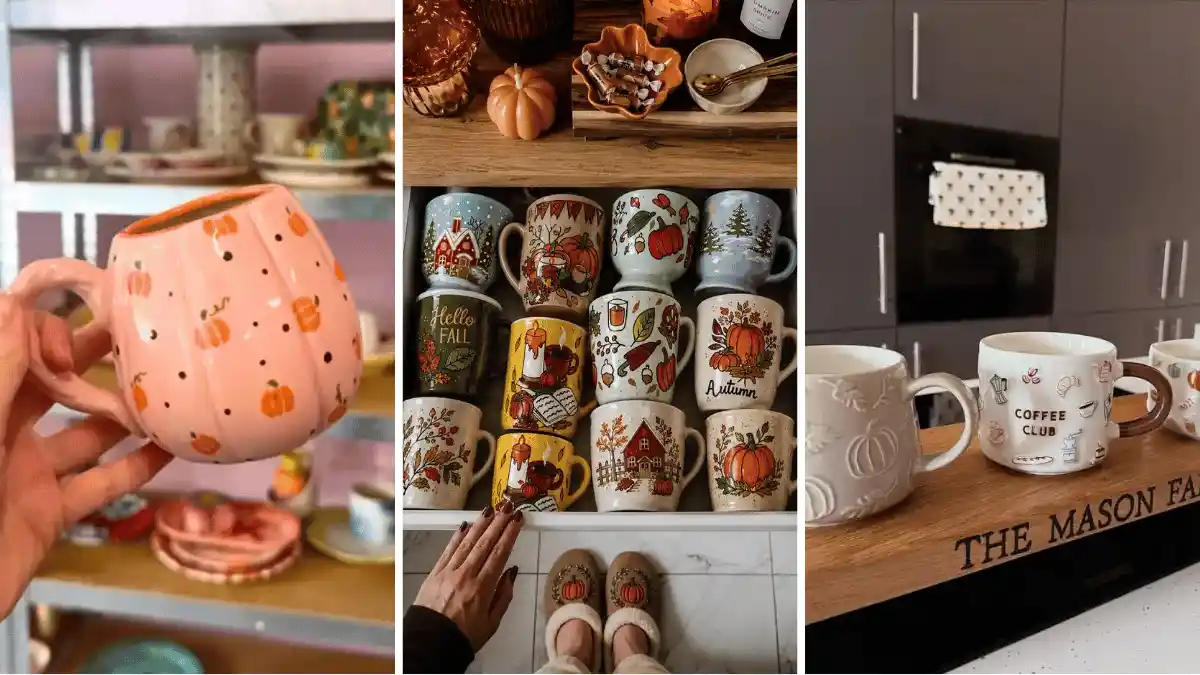
Store bought fall mugs start to blur together after a while. Same orange pumpkin, same curly “Autumn,” same shelf at every shop.
What most of us really want is a mug that feels like ours, the one we grab first on a chilly morning while the coffee brews.
Painting it yourself is easier than it sounds. Nearly every design below breaks down into simple shapes, like orange ovals for pumpkins, dots for stars, and little V marks that turn a plain mug into a knit sweater.
Some ideas come from real potters and painters, including a carved harvest band, an oak branch with shiny gold acorns, and signs from favorite fall rewatches.
Others are quick home projects, such as a harvest moon night sky, golden wheat stalks, and a s’mores stack you can finish in an afternoon.
Each of these fall mug painting ideas comes with a beginner route, the colors to grab, and tips for paint that survives the sink.
Keep a plain mug and a pencil nearby as you scroll. Chances are one of these will be steaming on your table by Saturday.
1. Tiny Pumpkins on a Blush Pink Pumpkin Mug
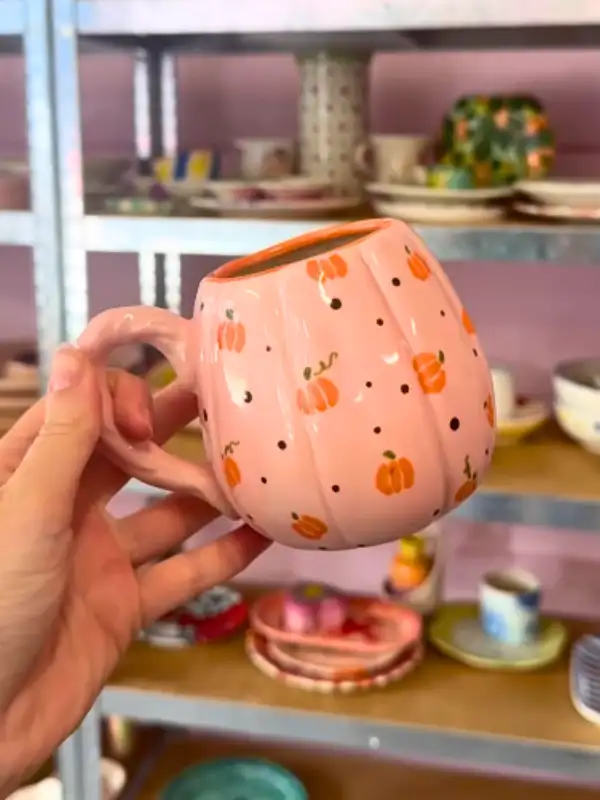
- Background: soft blush pink over the whole ribbed mug
- Main motif: small orange pumpkins scattered at loose angles
- Accent: dark brown dots and curly green vines in the gaps
- Finishing touch: a thin orange line around the rim
Pink and orange sound like an odd fall pair. On this pumpkin shaped mug, they come across sweet and cozy, not loud.
Each little pumpkin is just two or three orange ovals, a short stem, and one curl. Scatter them at slight tilts, then dot the gaps using the back of a brush.
Supply note:
The shelves of plates and mugs behind it hint at a paint your own pottery studio. That route is the easy win for beginners.
You paint an unglazed piece with underglaze, and the studio glazes and fires it, so the finish is usually food safe. Ask if they carry a pumpkin shaped blank.
2. Caramel Drip Rim With Scattered Pumpkins and Leaves
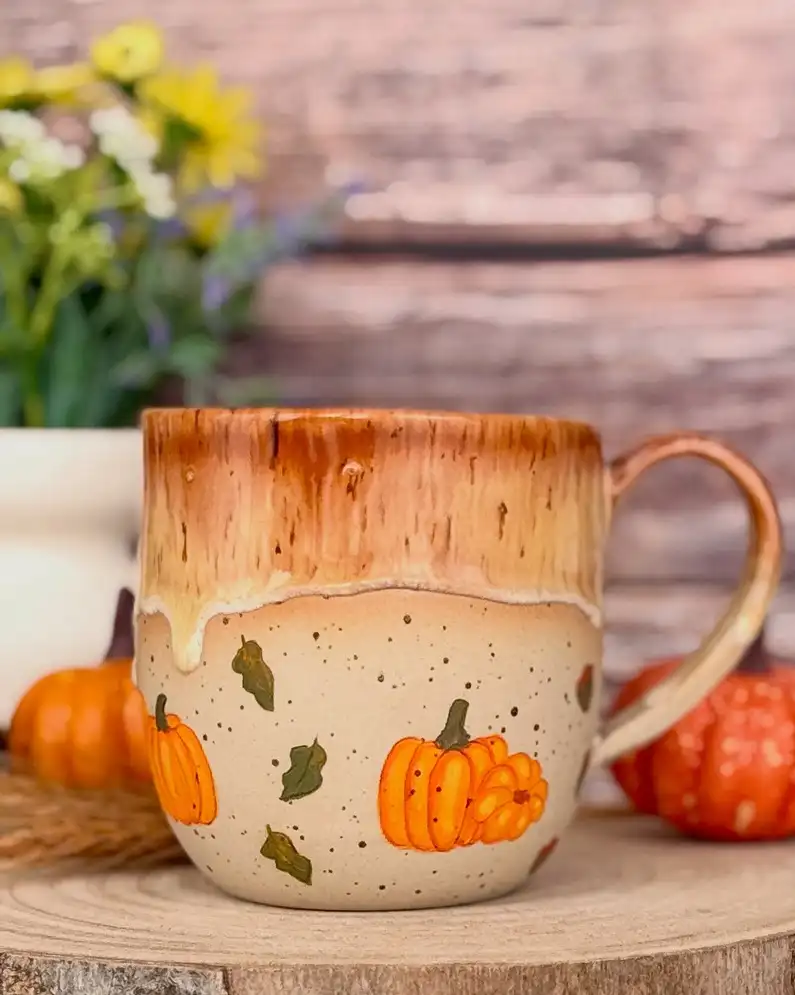
Caramel on top, speckled cream below. That split makes this mug look like a pumpkin spice latte you can hold.
The painting itself stays small, just a few orange pumpkins and olive leaves spread over the lower half.
Bare space matters here. Crowd the pumpkins and the speckles get lost, and those speckles are half the charm.
Three pumpkins in different sizes plus six or seven single leaves is plenty, which makes this one of the easiest fall mug painting ideas for a first try.
Real potters get that drip from glaze in a kiln. For a home version, use a plain speckled mug and paint made for ceramics, then brush a streaky amber band with a few drips running down.
Keep that band about an inch below the rim so your lips never touch paint, and bake it the way your paint label says.
3. Harvest Band of Sunflowers, Daisies, and Pumpkins
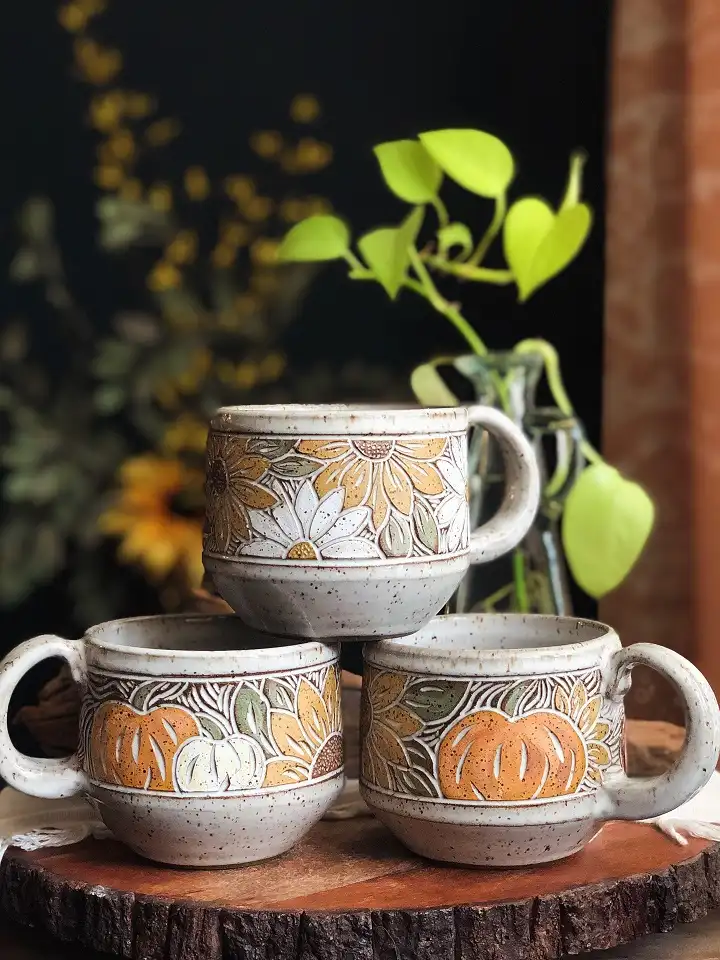
Sunflowers, white daisies, and ribbed pumpkins wrap around the middle of these speckled mugs like a wide ribbon.
Fine brown swirls fill every gap behind them. Each mug gets its own star, with sunflowers leading on the top mug and pumpkins up front on the other two, so the set matches without looking copied.
Why it works:
- Plain speckled space above and below frames the band like a picture.
- Mustard, pumpkin orange, and sage all sit in the same warm family.
- The brown line work ties every flower and pumpkin together.
Make it easier:
Potters get this look through sgraffito, scratching through a dark coat to reveal the clay underneath.
At home, wrap two strips of painter’s tape around the mug to mark the band. Paint the flowers and pumpkins first, then fill the gaps with swirly lines from a fine brown paint pen.
4. Oak Branch Mug With Shiny Gold Acorns
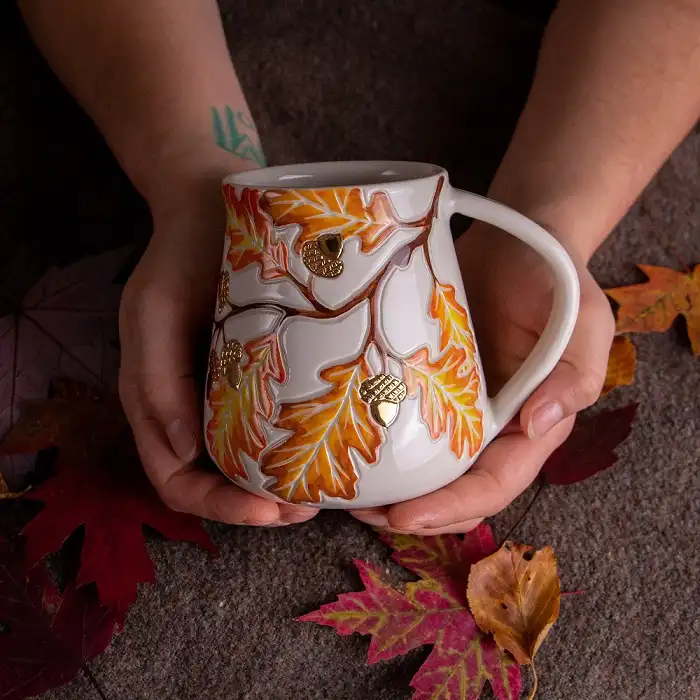
Glossy white gives one bold branch plenty of room to wander. Oak leaves start butter yellow in the middle and deepen to orange at the tips, with gold acorns hanging between them.
On the original, the branch is carved and raised, but the design reads just as well as flat painting.
- Paint note: Blend each leaf while the paint is still wet. Lay yellow down first, then pull orange in from the edges with a damp brush.
- The detail to steal: Metallic acorns. A gold paint pen and a quick crosshatch on each cap look fancy for about two minutes of work.
- Care tip: Gold tends to wear off before other colors do. Hand wash this mug, skip scrubby sponges, and keep it out of the microwave, since metallic finishes and microwaves do not mix.
5. Doodle Mugs Packed With Cozy Fall Things
Best for: painters who love small drawings more than big scenes, and anyone building a matching mug set.
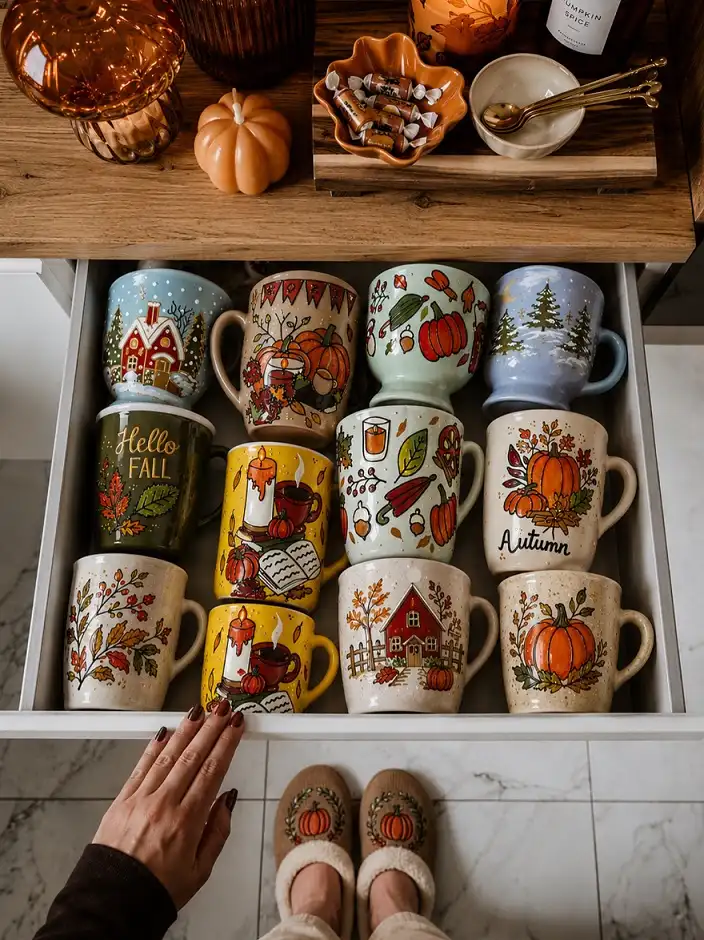
Look closely at this drawer and a pattern shows up. Most mugs reuse the same handful of cozy icons, like a lit candle, a steaming cup, an open book, pumpkins, acorns, and a little red house.
Mix and match them, and every mug feels new while the set still belongs together.
Subscribe to DIY Craft Bloom
Get updates on the latest posts and more from DIY Craft Bloom straight to your inbox.
Background color does a lot of work too. Mustard, sage, and dark olive make orange pumpkins pop, while speckled cream keeps things calm.
Hand lettered words like “Autumn” or “Hello Fall” finish these painted fall mugs, and script forgives a shaky hand because wobbles look planned.
Budget swap: Skip the giant paint set. Five pen colors cover almost every icon here: orange, mustard, sage, brown, and deep red.
6. Raised Pumpkin Texture in Soft Cream
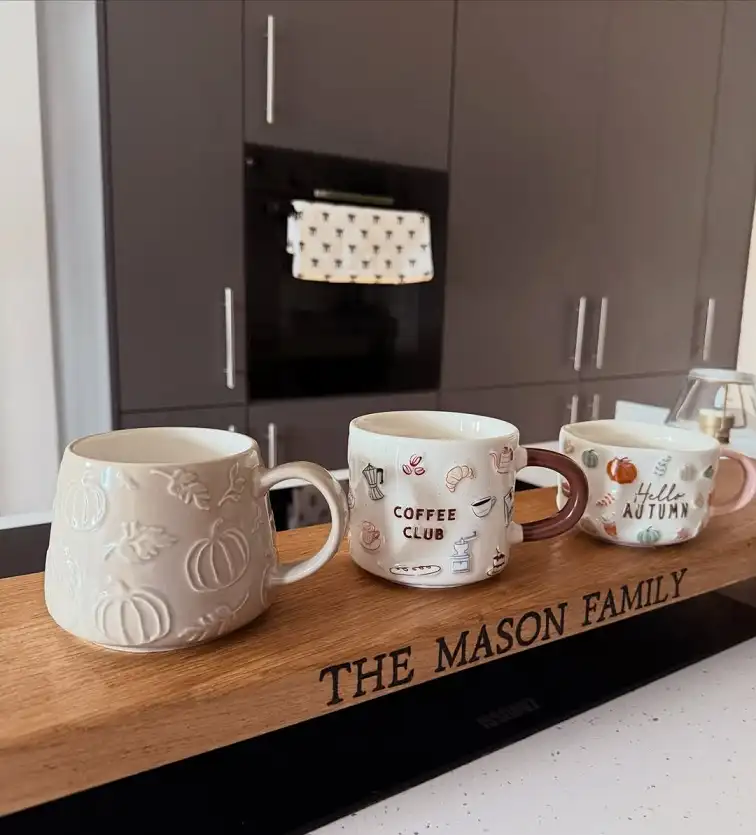
The build: a cream mug, raised pumpkins and leaves in that same cream, and one painted handle.
Not every fall mug needs orange. On the cream mug at the left, the pumpkins and leaves match the body, so the design shows only through texture and shadow.
It feels calm and grown up, a good fit for a modern gray kitchen like this one.
Dimensional outliner made for glass and ceramics gets you close at home. Trace pumpkin ribs and leaf veins in cream or white, and let each layer dry fully before adding more.
Next door, the other mugs show a finishing trick, a handle painted brown or blush pink for one quiet hit of color.
Texture note: Only the raised lines catch light, so keep them thick and simple. Chunky pumpkin ribs read better than tiny detail.
7. Comfort Rewatch Mugs With Painted Shop Signs
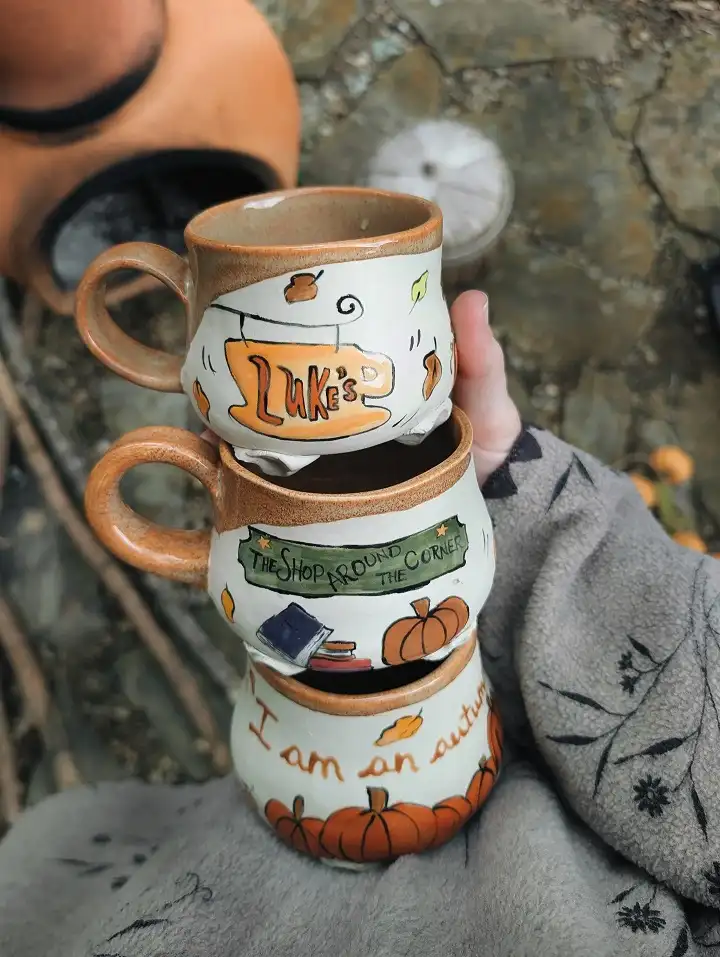
- Base: white body framed by warm brown at the top and handle
- Sign: a simple coffee cup or banner shape holding the name
- Lettering: one place name or short line from the story
- Filler: pumpkins, falling leaves, and one tiny prop like books
These three nod to cozy fall rewatches, with Luke’s diner from Gilmore Girls and the bookshop from You’ve Got Mail.
The bottom mug starts a hand lettered autumn phrase that curls out of frame. Pick whatever you rewatch every October, and your autumn mug painting turns into a one of a kind fan mug.
Placement note:
Center the sign opposite the handle before painting anything else.
Sketch words lightly in pencil, then wipe stray lines away with a damp cotton swab once the paint dries. Pumpkins and leaves go in last, tucked into the empty corners
8. Rustic Pumpkin Patch on a Rolling Hill
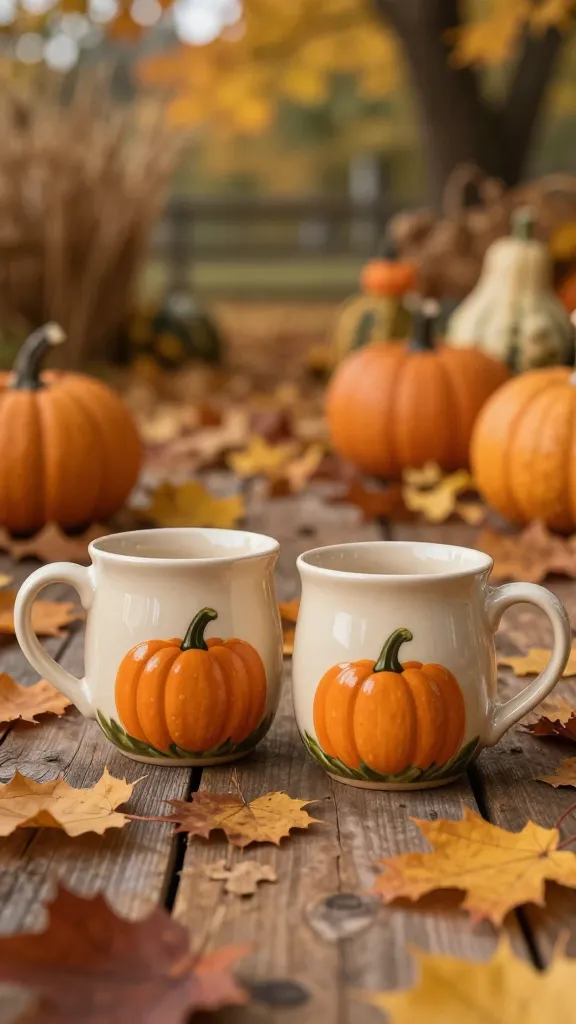
Rolling hills make the easiest backdrop for a pumpkin patch.
Sketch one gentle curve around the lower half of a cream mug, then line up small orange pumpkins along it. Brown stems and a few green curls finish each one.
Stagger the sizes so the row feels natural.
Big pumpkins go in front, and smaller ones sit a little higher on the hill, like they are farther away. Scattered leaves above the patch give the sky something to do.
Regular craft acrylic will peel off in the sink, so reach for paint made for ceramics instead.
Skip clear spray sealers too. Most are not meant for a surface you drink from, and baking the right paint does the job better.
9. Harvest Moon Night Sky Mug
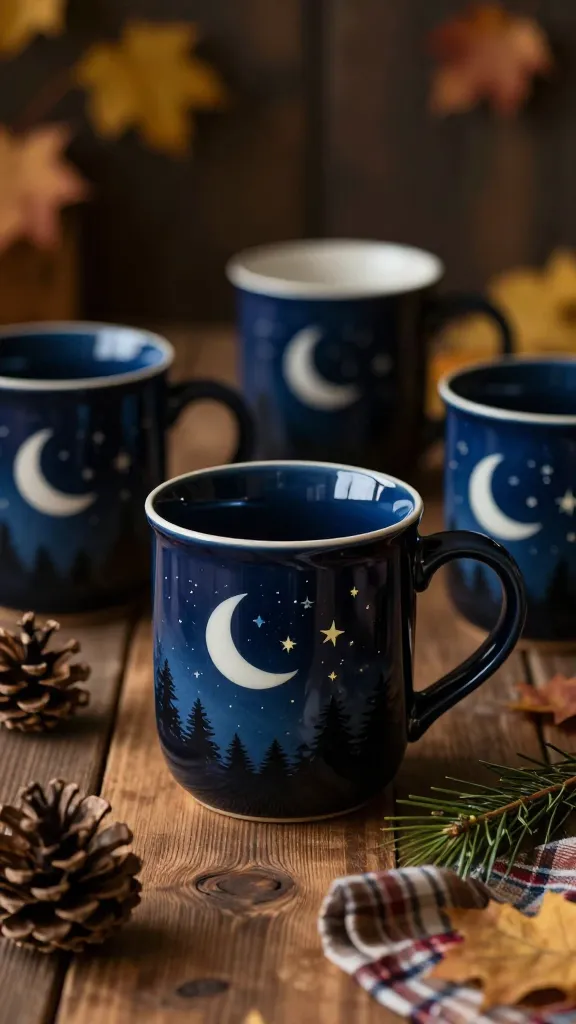
Best for: early risers, stargazers, and anyone who wants a moody mug for dark October mornings.
Deep navy makes every star glow. Start with a dark blue mug and sponge a lighter blue glow near the bottom.
Black pine trees along that lighter edge and a pale orange harvest moon make it an autumn night, not a winter one.
Speckled stars take seconds. Dip an old toothbrush in white paint and flick the bristles with your thumb. Larger stars get a dot from a fine brush, with a few in pale yellow for warmth.
Try instead: Stencil the trees. Cut small pine shapes out of sticker paper, press the paper on, and dab black paint into the openings.
10. Painted Cinnamon Stick Bundle
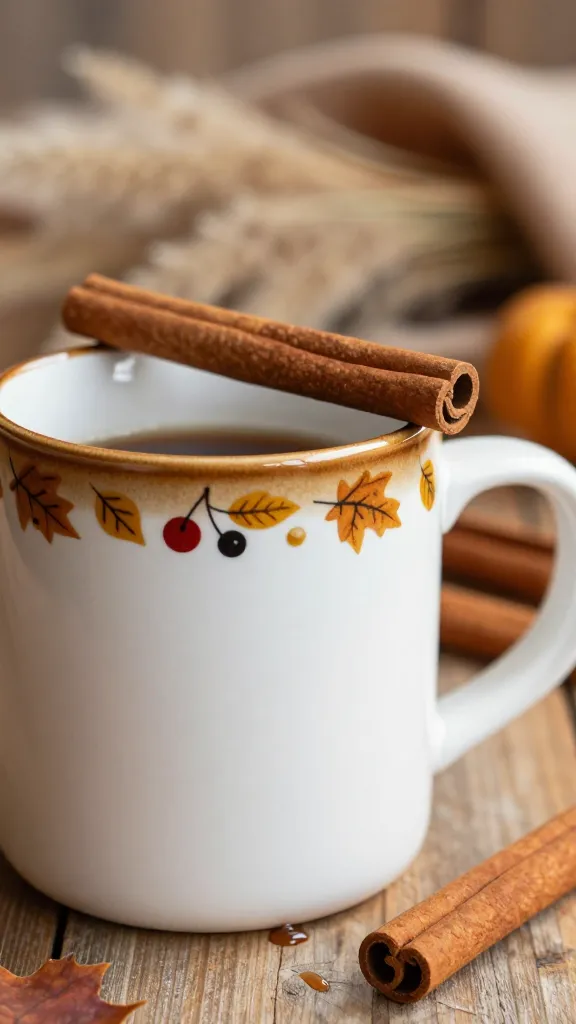
Simple version: a white mug, three painted cinnamon sticks tied with a red bow, and a few tiny berries around the base.
Real cinnamon glued to a mug sounds cute, but it falls apart in hot water, and glue near your coffee is no fun.
Painting the sticks gives you the same spiced look with none of the mess. Each stick is just a brown rectangle with a darker curl at the top.
Layer two browns for depth. Start with warm tan, then add thin reddish brown stripes along each stick so it looks rolled.
Subscribe to DIY Craft Bloom
Get updates on the latest posts and more from DIY Craft Bloom straight to your inbox.
Gift idea: Tie one real cinnamon stick to the handle with twine before you hand it over. It smells lovely in the box and comes off before the first wash.
11. Golden Wheat Stalks on Cream
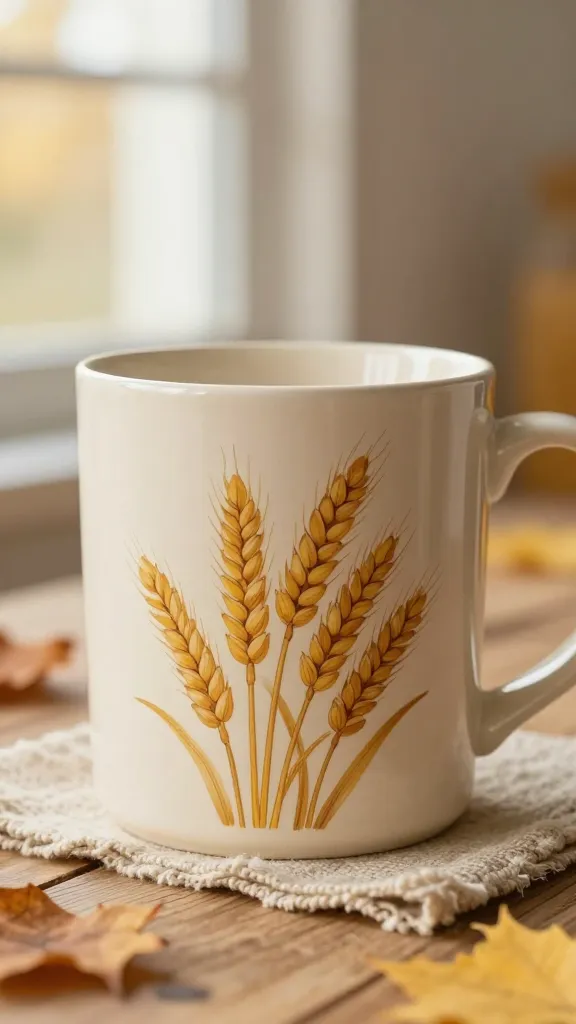
Wheat is fall without a single pumpkin, which makes it a nice break from the other fall mug painting ideas here.
A loose bundle of golden stalks rises from the bottom third of a cream mug, leaning like it caught a breeze. Each seed head is a short chain of tiny ovals in ochre and pale gold.
Why it feels cozy:
- Gold and taupe on cream stay soft and warm.
- Tall, thin lines leave lots of open space.
- It suits almost any kitchen, not just a farmhouse one.
Spacing note: Three to five stalks is enough. Paint them in a fan, close together at the bottom and spreading apart near the top.
12. Chunky Knit Sweater Mug
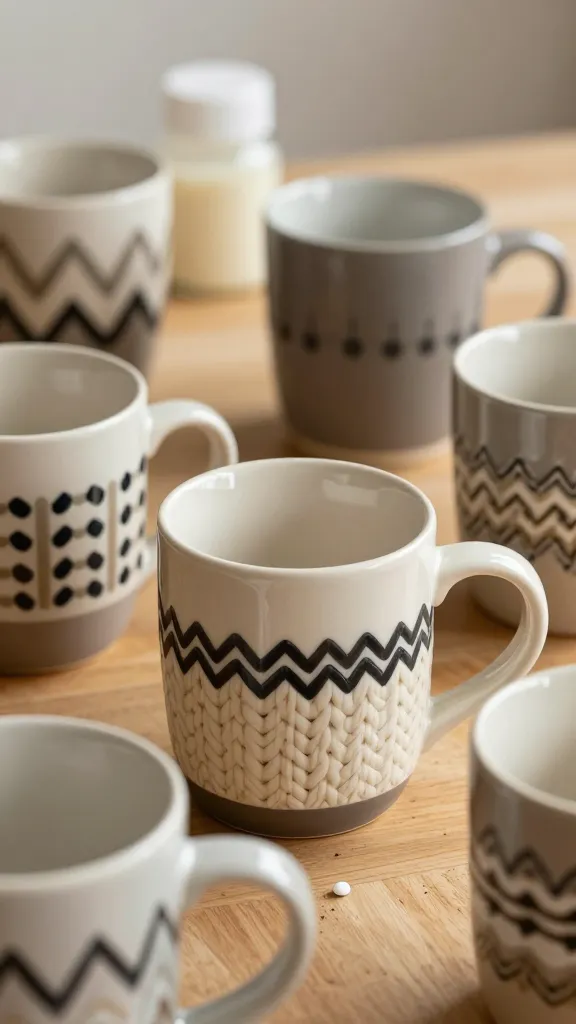
Knit stitches are just little V shapes stacked in columns. That one trick sells the whole sweater look. Cream Vs on a taupe or soft gray mug give your coffee its own chunky pullover.
Color note: Charcoal with cream and sage with caramel both work. Pick colors with strong contrast so the stitches stay readable.
Beginner version: Stick thin strips of tape down the mug as column guides. Filling one column at a time keeps every V lined up.
Hem note: Paint a band of short vertical lines around the base. It looks like the ribbed hem on a real sweater.
13. Soft Watercolor Leaves Drifting Down
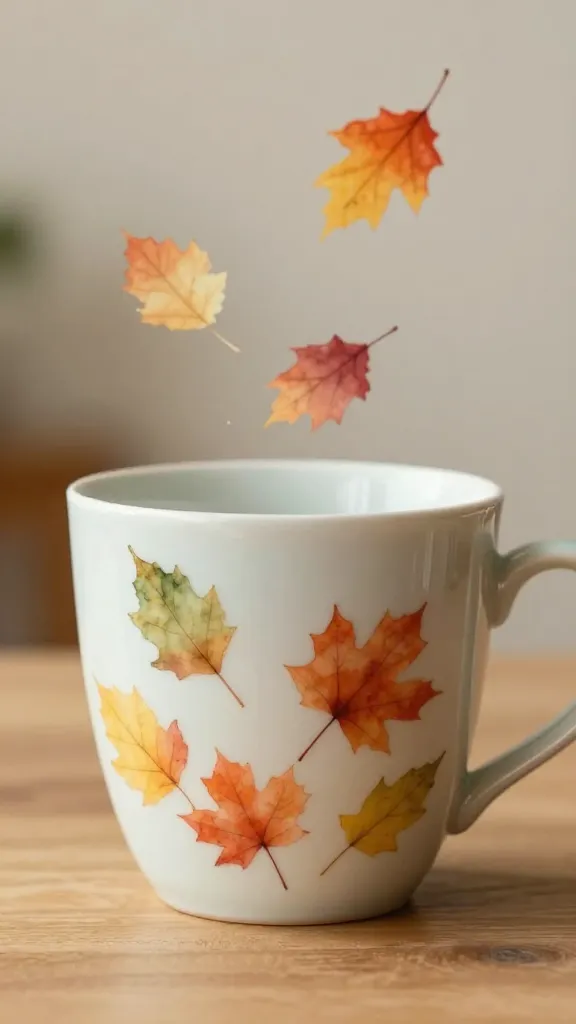
Loose, see through leaves in rust, orange, gold, and olive drift down the mug like they just let go of a branch.
Edges stay soft and blurry. Some leaves overlap, and the spots where they cross turn a deeper shade.
Real watercolor paint washes right off a glazed mug. Thin your ceramic paint with the medium or thinner made by the same brand, and test the mix on a plate first.
Work one leaf at a time while it is wet. Drop a second color into the tip and let it bleed on its own.
Tiny veins in a fine brown line, added once everything dries, keep the leaves from looking like blobs.
14. Halloween Silhouettes Against a Sunset Sky
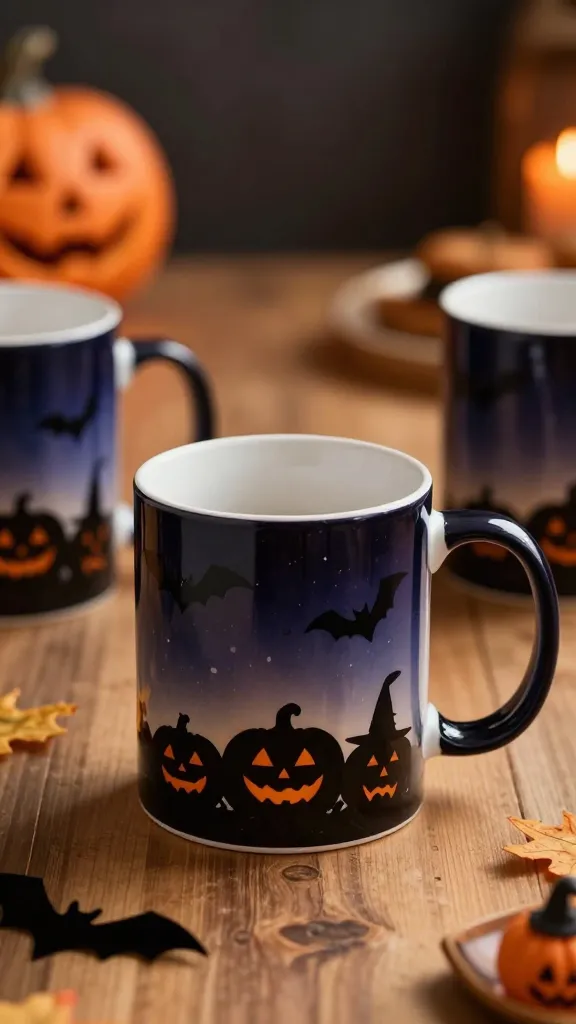
Layout: a black and orange sunset sky, black shapes along the bottom, and a thin crescent moon.
Spooky can still be sweet. Bats, a cat, grinning pumpkins, and a witch hat lined up along the bottom edge feel playful, not scary.
Sponge black on the top half and warm orange on the lower half, then blend where they meet.
Silhouettes might be the most beginner friendly of all these autumn mug designs. No shading, no highlights, just solid black.
Keep every shape bold and chunky so it reads from across the table.
Skip this: Tiny details inside the shapes. A bat with painted eyes and toes gets muddy fast.
15. Short Fall Quote in Clean Lettering
Paint it for: journal lovers, teachers, and anyone who likes a little message with their latte.
Words carry this whole mug, so keep them short. Three to six words fit neatly on one side, like “Hello pumpkin” or “Slow fall mornings.”
Warm brown lettering on a cream mug looks soft, and a tiny leaf on each end frames the line.
Neat lettering is easier to copy than to freehand. Print your phrase in a font you love, sized to fit the mug.
Rub pencil over the back of the paper, tape it in place, and trace the letters to leave a faint guide.
One small change: Curve the words into a gentle smile instead of a straight line. A curve looks hand drawn in a good way and hides uneven spacing.
16. S’mores Stack Mug

S’mores stack up nicely on a mug. Tan graham cracker sits at the bottom, rich chocolate brown fills the middle, and fluffy white marshmallow tops it off with a few soft drips.
Together the bands cover the lower two thirds and leave the top bare for sipping.
Why it looks sweet:
- Three flat bands are easy for any beginner.
- Warm tan, chocolate, and white look toasty together.
- Little crumb dots on the graham band add texture.
Finish note: Let each band dry before starting the next. Wet chocolate bleeds into marshmallow and turns it muddy gray fast.