20 Simple Craft Ideas For Kids Using Stuff You Already Have

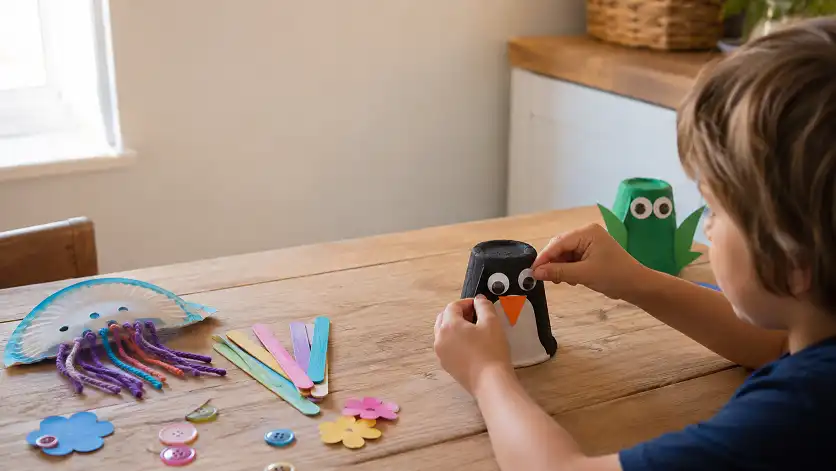
Most kids do not need a craft kit. They need a paper cup, a pair of scissors, and twenty minutes before dinner.
That is the whole idea behind this list. Every project here starts with something you already have, an empty egg carton, a cardboard tube, a paper plate, a handful of craft sticks, or a few smooth rocks from the yard.
Nothing needs a special trip to the store, and nothing takes a full afternoon unless your child wants it to.
These simple craft ideas for kids also cover a real range of ages and moods. Some are quick paper builds a four year old can finish alone.
Others, like salt dough handprints or paper mâché bowls, are slower projects worth doing together on a rainy Saturday. A few end up as keepsakes. A few end up in the recycling bin by Friday, and that is fine too.
Start anywhere on the list. Pick the one that matches what is already sitting in your craft drawer, and let your child take it from there.
1. Folded Half Circle Flowers On A Drawn Stem
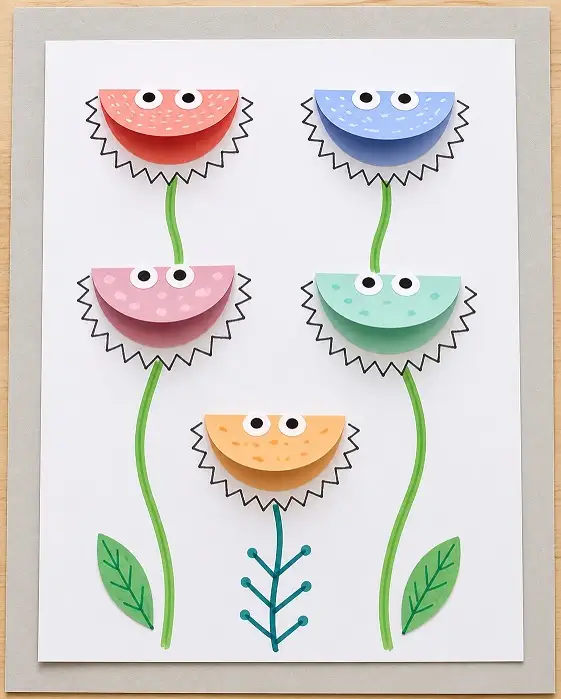
Five paper circles, folded once each, become five flower heads with room underneath for a face. The fold is what gives them the little shelf shape instead of a flat sticker look.
Everything around the paper is drawn straight onto the page. Zigzag petals in black marker, green stems that bend slightly, two leaves cut from lighter green paper. The mix of drawn lines and glued paper is why this one photographs well.
Speckles, spots and tiny dashes on each flower head keep the five from looking identical. Kids can pick their own pattern for each one, which is usually the part they spend the longest on.
Cut five paper circles and fold each one just above the middle, so the front flap sits a little short.
Place a circle on the page, trace loosely around the bottom half with a black marker, then keep the pen moving in a sharp zigzag.
Put glue on the back flap so the front stays loose and lifts off the paper.
Stick two eyes under each fold, draw green stems down to the bottom edge, and give every flower a different pattern.
2. Egg Carton Penguin With Wobbly Eyes
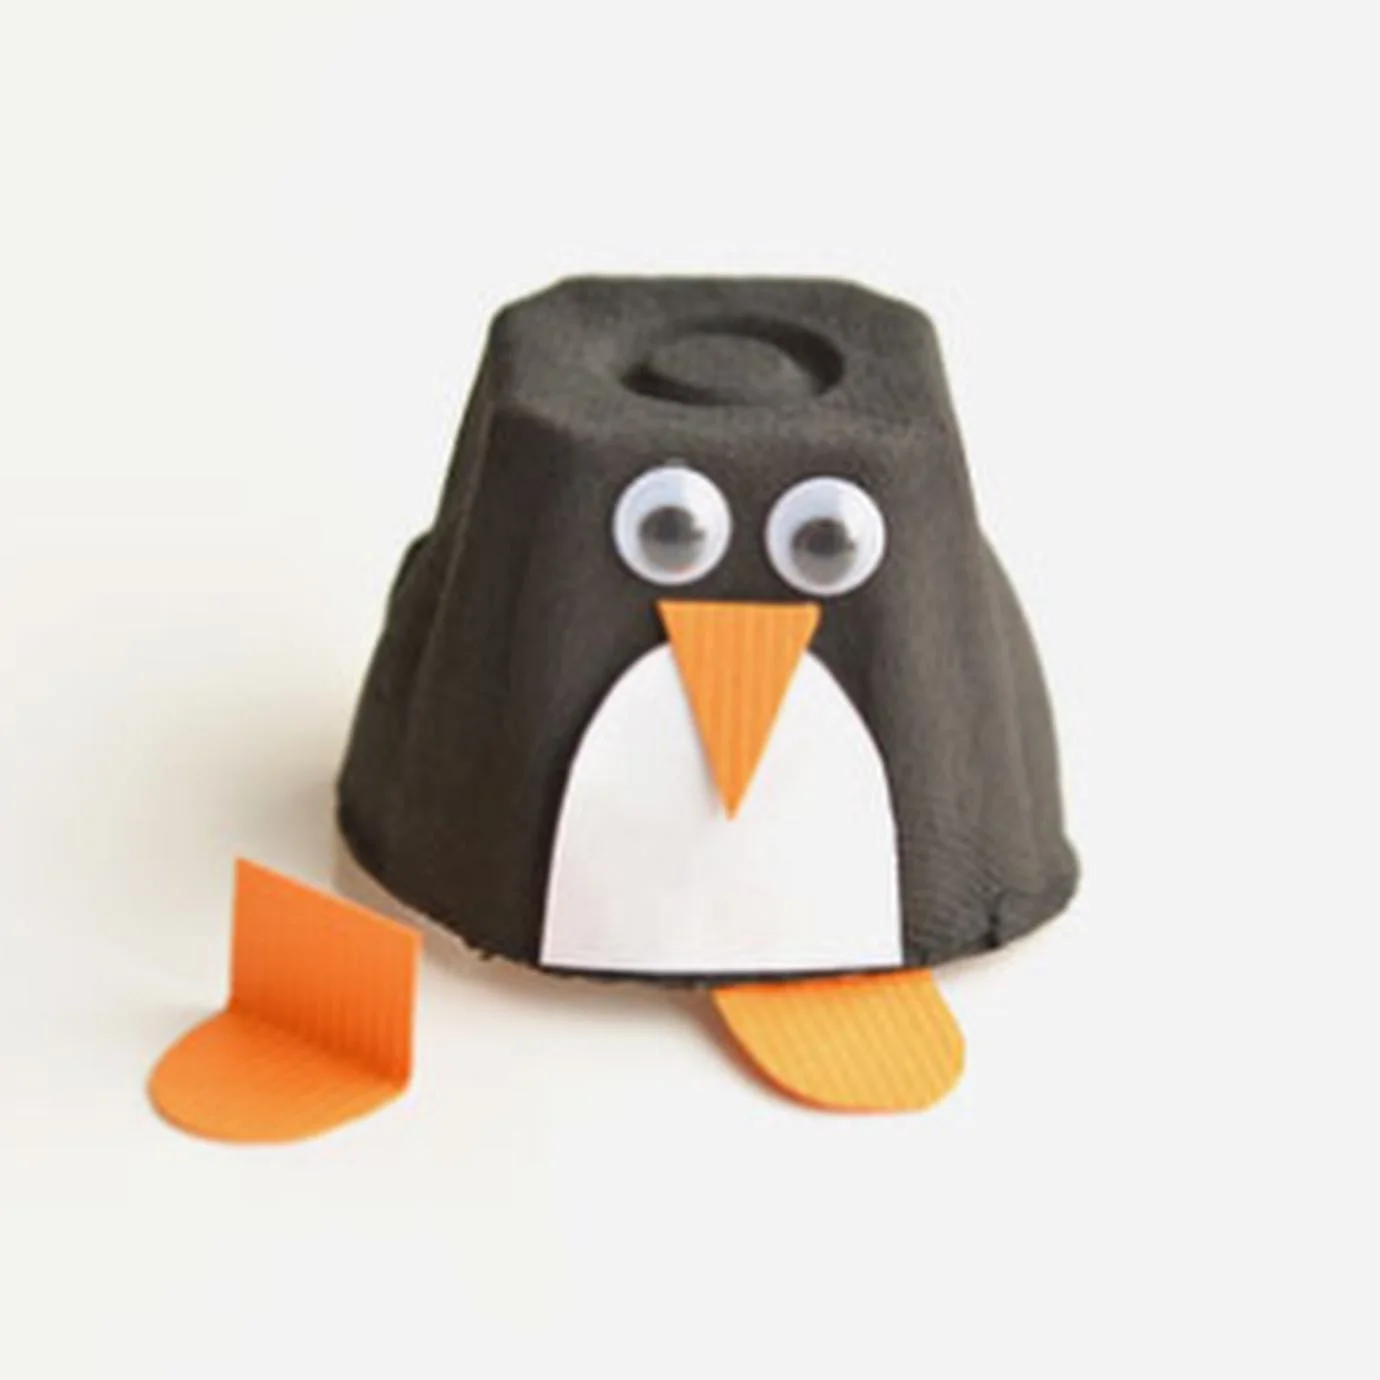
An empty egg carton cup, flipped over and painted dark grey, already has the right penguin shape before a child touches it. The bumpy texture reads like feathers once the paint dries, so nobody has to draw a single detail.
What makes this one work for small hands is the shape breakdown. A white rounded belly, a skinny orange triangle for the beak, and two orange ovals for feet. That is it. Three cuts, four glue spots.
The feet are the smart part. Each one is folded at the back so it stands up on its own and props the penguin forward, which is the difference between a craft that sits flat and one that stands on a shelf.
Cut the beak a little longer than feels right. It looks better once it overlaps the white belly.
3. Cardboard Tube Halloween Characters
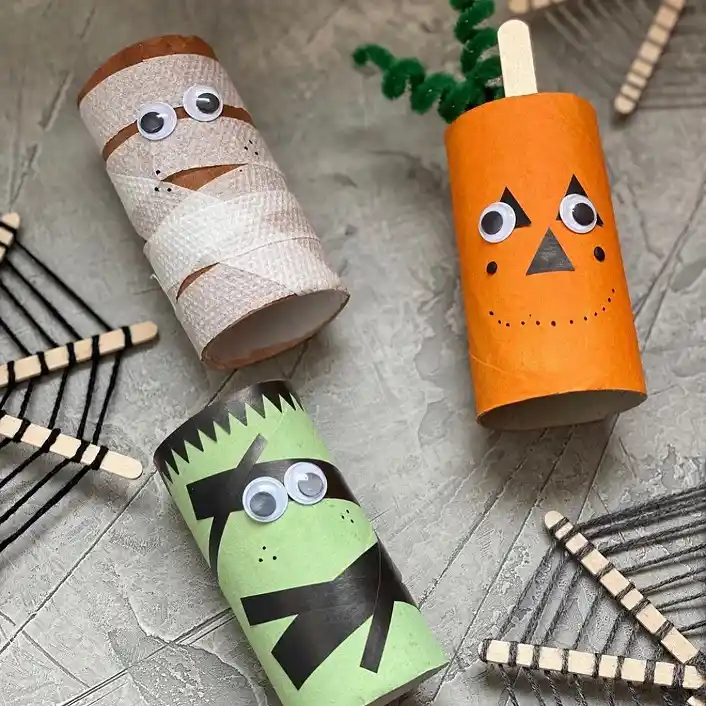
Cardboard tubes pile up fast in most houses, and three of them here turn into a mummy, a jack o lantern and a green monster. Same base, three completely different results, which is exactly what you want when several kids are crafting at once.
The mummy skips paint entirely. Strips of white tissue or paper towel wrap around at slightly wrong angles, and the messier the wrap, the better it looks. Googly eyes go on last, peeking through a gap.
The pumpkin is orange paper with black paper shapes for eyes and nose, plus a dotted smile drawn in marker. A short craft stick pushed into the top makes the stem, with a twisted green pipe cleaner curling off it.
Spiderwebs made from craft sticks and black yarn fill the background. Worth making a few if you want the table to look finished.
4. Four Ways To Build With Painted Craft Sticks
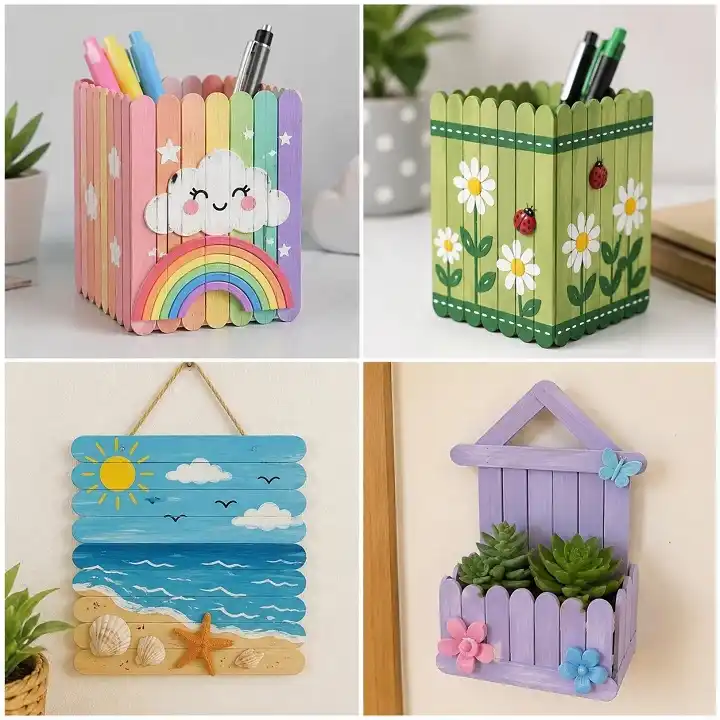
Craft sticks stop feeling like a school supply once they are painted first and glued second. All four projects here use the same sticks and land in totally different places.
Two are containers. One is a rainbow pen pot with a smiling cloud glued on the front, the other a green fence style pot with painted daisies and small ladybug buttons. Both are just four flat panels of sticks glued edge to edge, then joined into a box.
Two are wall pieces. A beach scene painted straight across a row of sticks, with real shells and a starfish glued to the sand section, and a small hanging planter with a triangle roof holding two little succulents.
Paint before assembly every time. Trying to paint a finished box means brush marks in every gap.
Each stick painted a different shade, then the rainbow and cloud glued on top as separate cut shapes.
One green base coat, white dotted lines along the top and bottom, and simple five petal flowers painted across.
Sky, sea and sand painted in three bands across the sticks, with real shells glued to the bottom row and twine for hanging.
A shallow box with an open front, one purple coat, and a triangle roof that gives it the little house shape.
5. Upside Down Paper Cup Animals
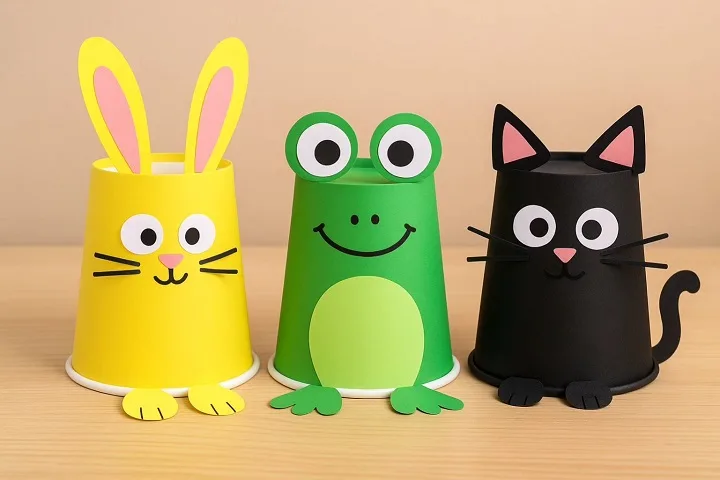
Turn a paper cup over and you have a body, a head and a face area all in one piece. A yellow bunny, a green frog and a black cat here prove how far one shape stretches.
What works here is that every animal is built from the same four part kit. Eyes, a nose or mouth, something on top, and feet at the bottom. Only the shapes change.
The frog gets its personality from eyes glued on top of the rim instead of the front, so they poke up over the edge. The cat gets a curled tail glued to the side, which breaks up the plain black shape.
The bunny keeps its ears tucked inside the open cup so they stand straight without extra support.
Thin strips of black paper make better whiskers than drawn ones. They catch the light.
Use cups that are already colored so nobody waits for paint to dry.
Subscribe to DIY Craft Bloom
Get updates on the latest posts and more from DIY Craft Bloom straight to your inbox.
Glue the ears and eyes to the inside rim so they stand up on their own.
Cut feet as one connected piece and slide it under the cup edge.
Skip tiny cut pieces for young kids, since small shapes take longer than the whole rest of the craft.
Skip liquid glue on the smooth cup surface, it slides before it grabs.
Skip drawn on faces if you want the crisp look in the photo.
6. Paper Cup Flower Pot That Never Wilts
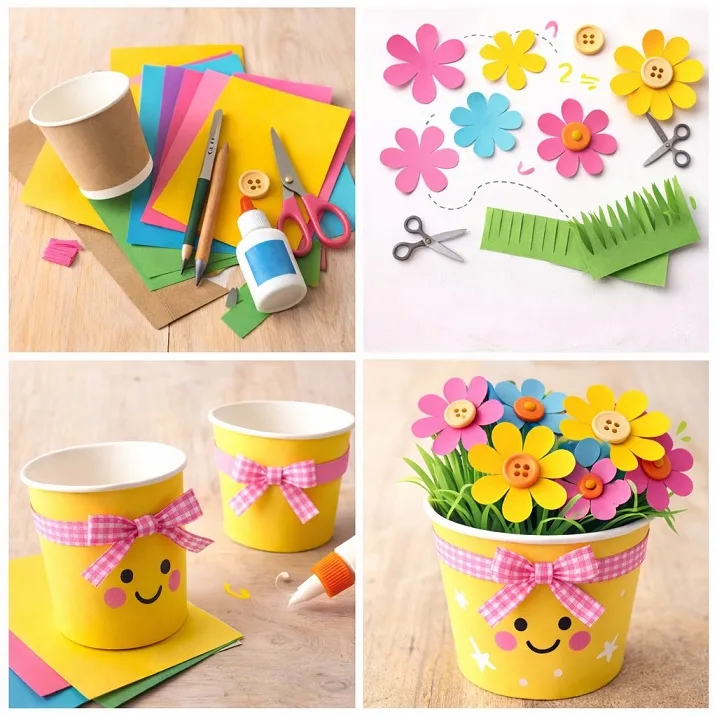
Here the whole build is laid out across four photos, which makes it a good one to hand to a kid who likes knowing the plan before starting.
It begins with a plain paper cup, colored paper, scissors, glue, a pencil and a few buttons. The flowers come next, cut as simple six petal shapes in pink, yellow and blue, with a button glued in the center of each one.
A strip of green paper snipped along one edge becomes the grass that fills the bottom of the cup.
The cup itself gets a coat of yellow paper, a small smiling face, pink cheeks, and a checked ribbon tied in a bow around the middle.
Fringe the green strip only halfway down. The uncut part is what keeps it standing up inside the cup.
7. Paper Plate Jellyfish Hanging In The Window
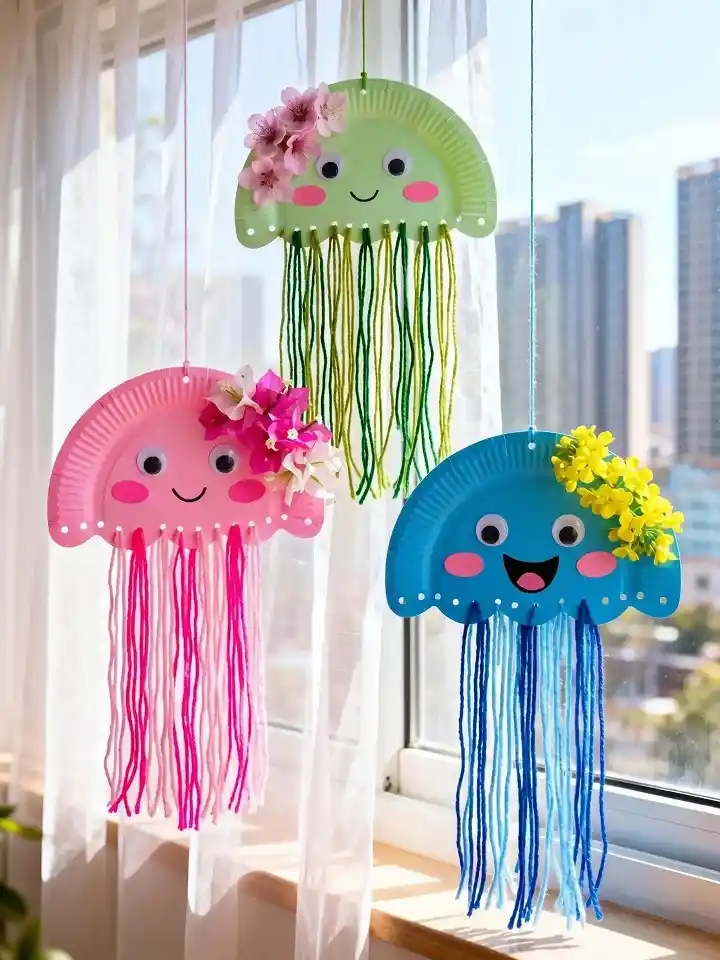
Sunlight does half the work on this one. Three painted paper plates, cut in half and hung in front of a window, with yarn tentacles that move whenever someone walks past.
Each half plate is painted a single flat color, pink, green or blue. Small holes get punched along the curved cut edge, then yarn is threaded through and knotted, with the ends left long and uneven so they hang like real tentacles.
The faces are simple. Two googly eyes, a marker smile, and two oval cheeks in a lighter shade. One of the three has an open mouth instead of a smile, which is a small change that makes the group feel like characters rather than copies.
Fresh or fake flowers tucked along the top edge give each jellyfish a different look while keeping the set matched.
8. Paper Plate Animals
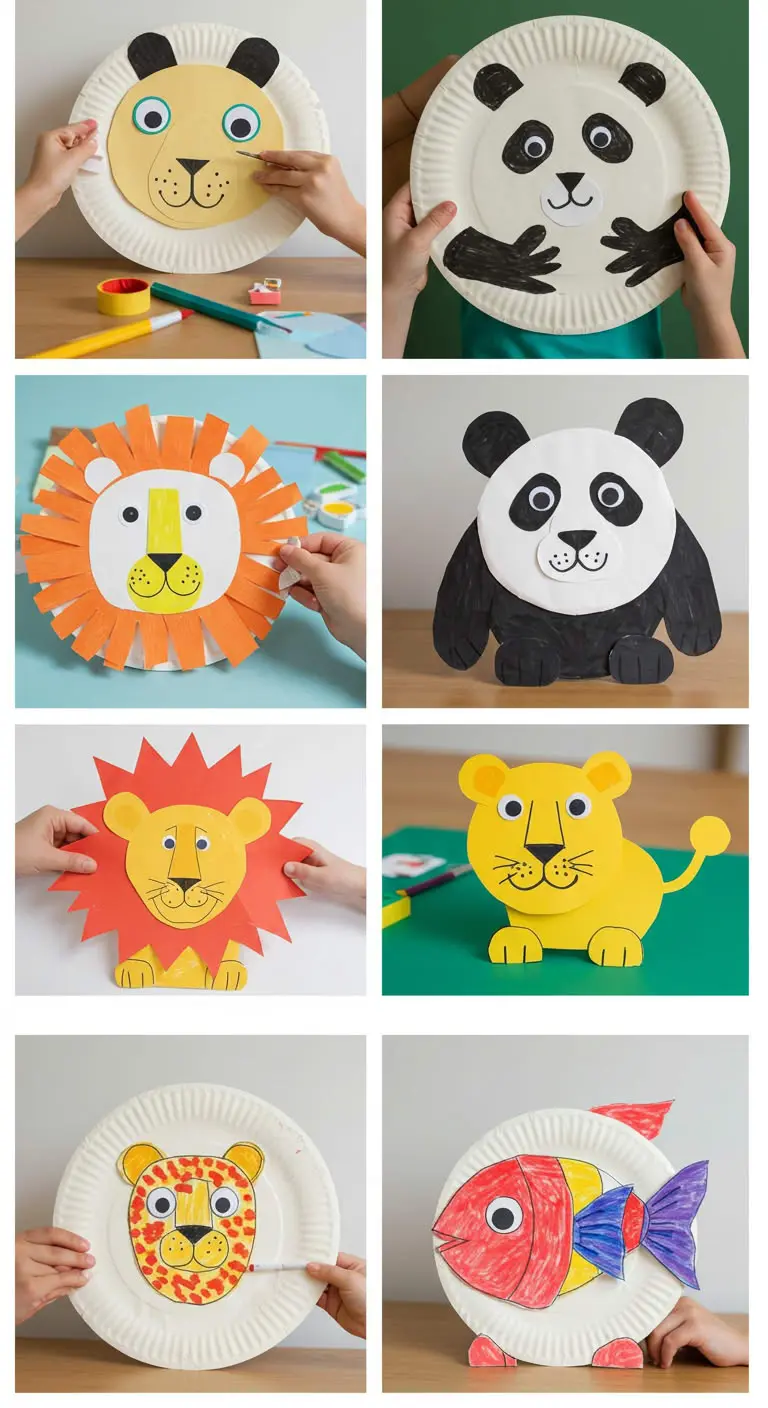
What You Might Need: Paper plates, markers, construction paper, glue, scissors.
This classic craft is always a hit with young kids! Take a paper plate, and turn it into a fun animal face. You can create a lion, cat, dog, or any other animal your child loves.
Cut out ears, noses, and other details from construction paper, and let the kids go wild with their creativity by drawing on the plate for extra features. For more fun projects, check out Creative Craft Ideas For Kids.
Instruction:
- Start by painting or coloring the paper plate to create the base for the animal’s face.
- Cut out shapes for the ears, eyes, and nose from construction paper.
- Glue them to the plate.
- Add finishing touches with markers or crayons to bring the animal to life.
Picture This:
A group of kids sitting around the table, their faces glowing with pride as they hold up their paper plate lion creations. Bright colors surround them, and the room is filled with laughter and imagination!
9. Popsicle Stick Picture Frames
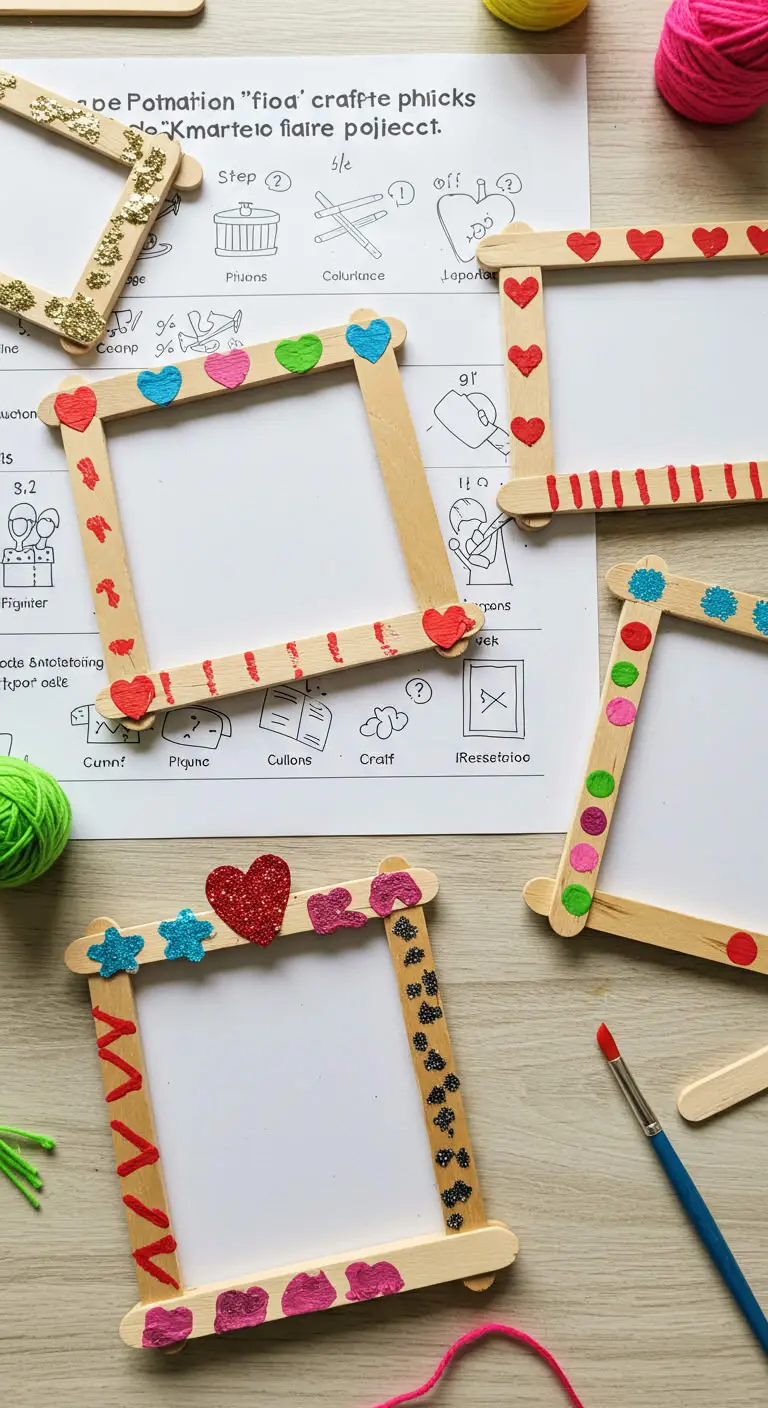
What You Might Need: Popsicle sticks, glue, paint, embellishments like buttons or glitter.
This project is simple but allows kids to create something personal. They can design their own picture frame and decorate it however they like.
Once they’re done, they can add a special photo, making it a great keepsake. If you’re looking for more ideas, check out Easy Craft Ideas For Kids.
Instruction:
- Glue four popsicle sticks together to form a rectangle shape.
- Once the frame is dry, paint it in fun colors.
- Add embellishments like buttons, beads, or glitter.
- Insert a photo or a fun picture they’ve drawn and display it proudly!
Picture This:
A child’s bright smile lights up as they hold up their homemade popsicle stick frame, showing off a photo of their favorite pet or a family moment.
10. Salt Dough Handprints
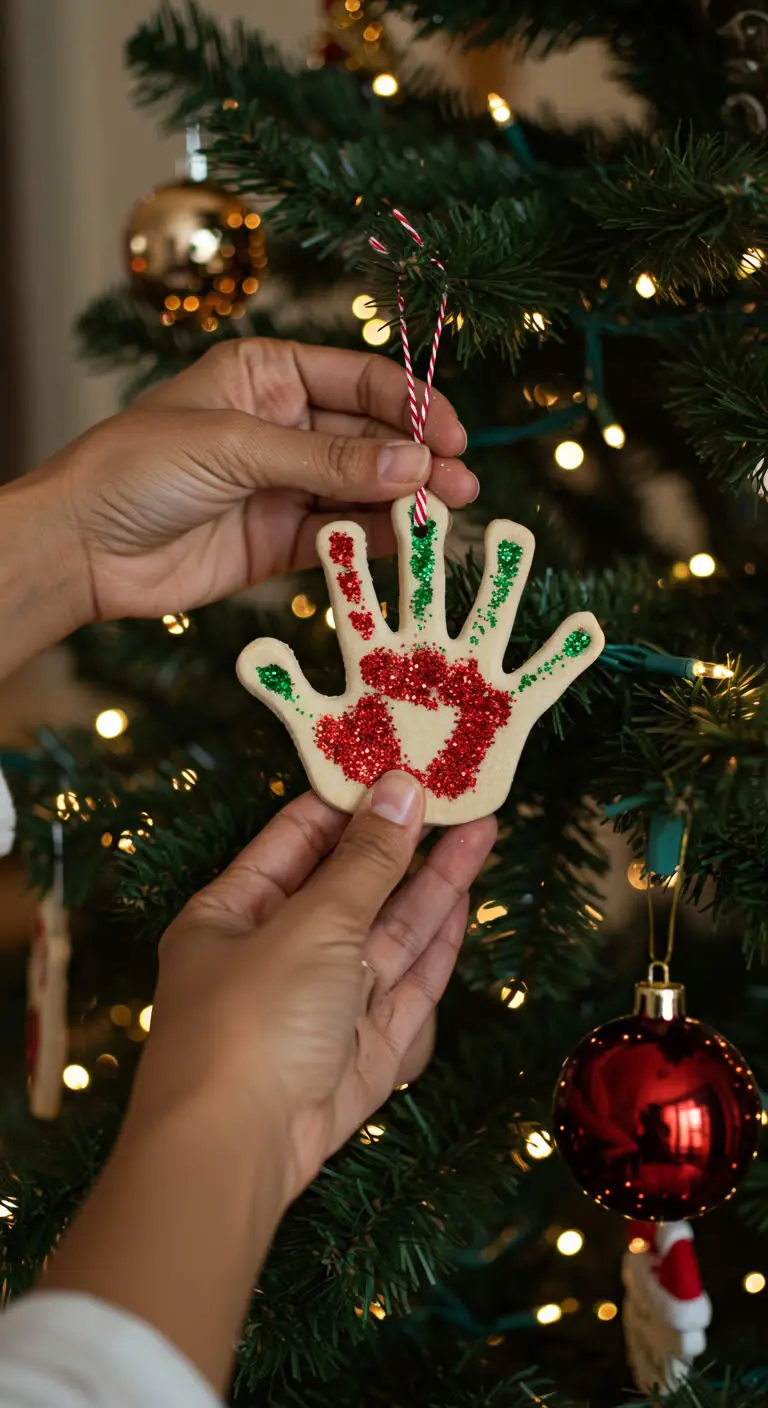
What You Might Need: Salt dough (flour, salt, water), rolling pin, baking sheet, markers or paint for decorating.
This craft is a sentimental favorite that also makes for an amazing keepsake. Kids can press their handprints into the salt dough to create a lasting memory. For more memorable keepsakes, explore DIY Craft Ideas For Kids.
Instruction:
- Mix the salt dough and roll it out on a flat surface.
- Press your child’s hand into the dough to make an impression.
- Use a straw to make a hole for hanging, then bake the dough as per instructions.
- Once cooled, paint the handprint and add the year or any other personal touches.
Picture This:
A proud parent hangs the salt dough handprint ornament on the Christmas tree, remembering how small their child’s hands once were.
11. Toilet Paper Roll Binoculars
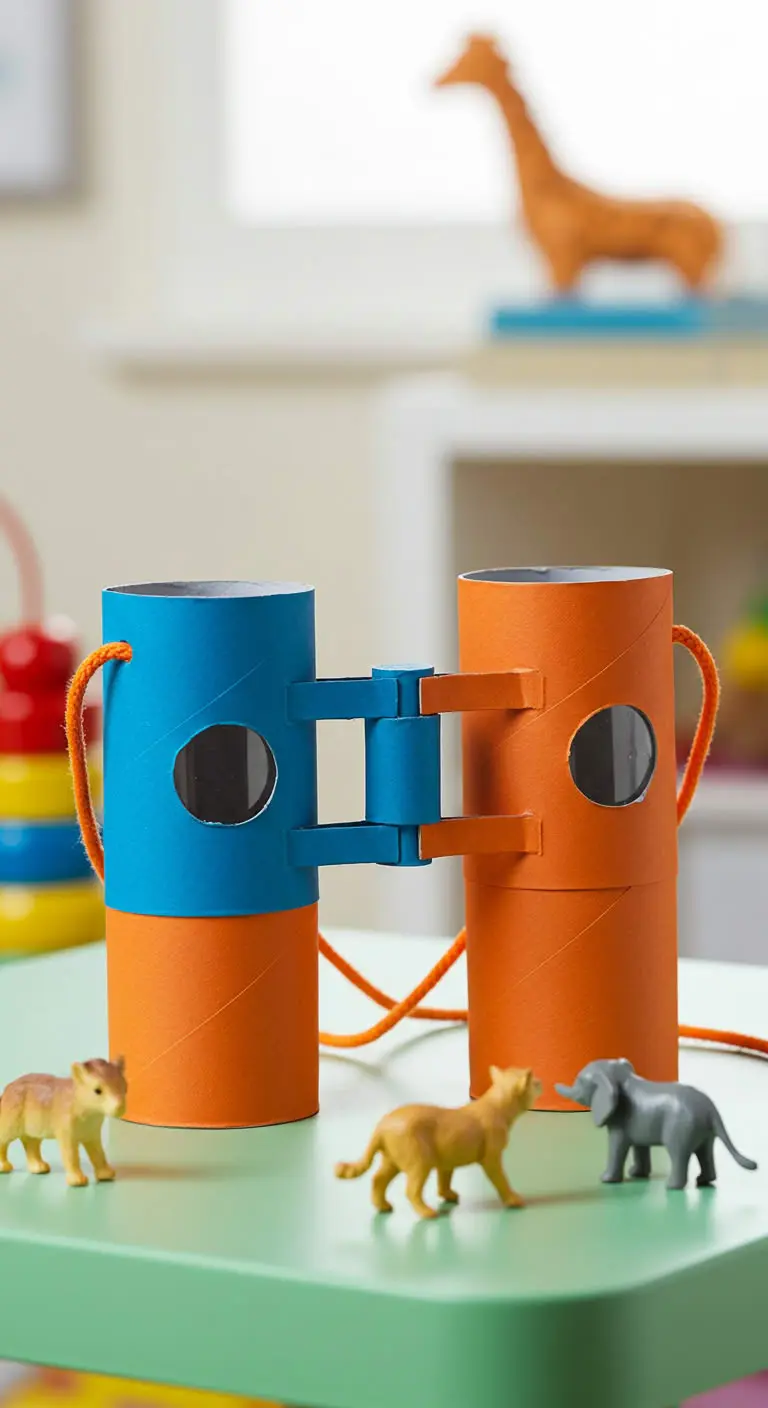
What You Might Need: Two toilet paper rolls, string, markers, tape, glue.
Create a fun pair of binoculars using just a couple of toilet paper rolls. It’s an easy craft that can be used for imaginative play outdoors! You can also check out Craft Ideas For School for more classroom-friendly projects.
Instruction:
- Tape or glue two toilet paper rolls together side by side.
- Decorate them with markers or stickers.
- Add a string to each side to make them wearable.
- Let your child take them outside and start a pretend adventure.
Picture This:
A child wearing the toilet paper roll binoculars around their neck, running through the yard with excitement as they look for hidden treasures in the trees.
12. Painted Rock Animals
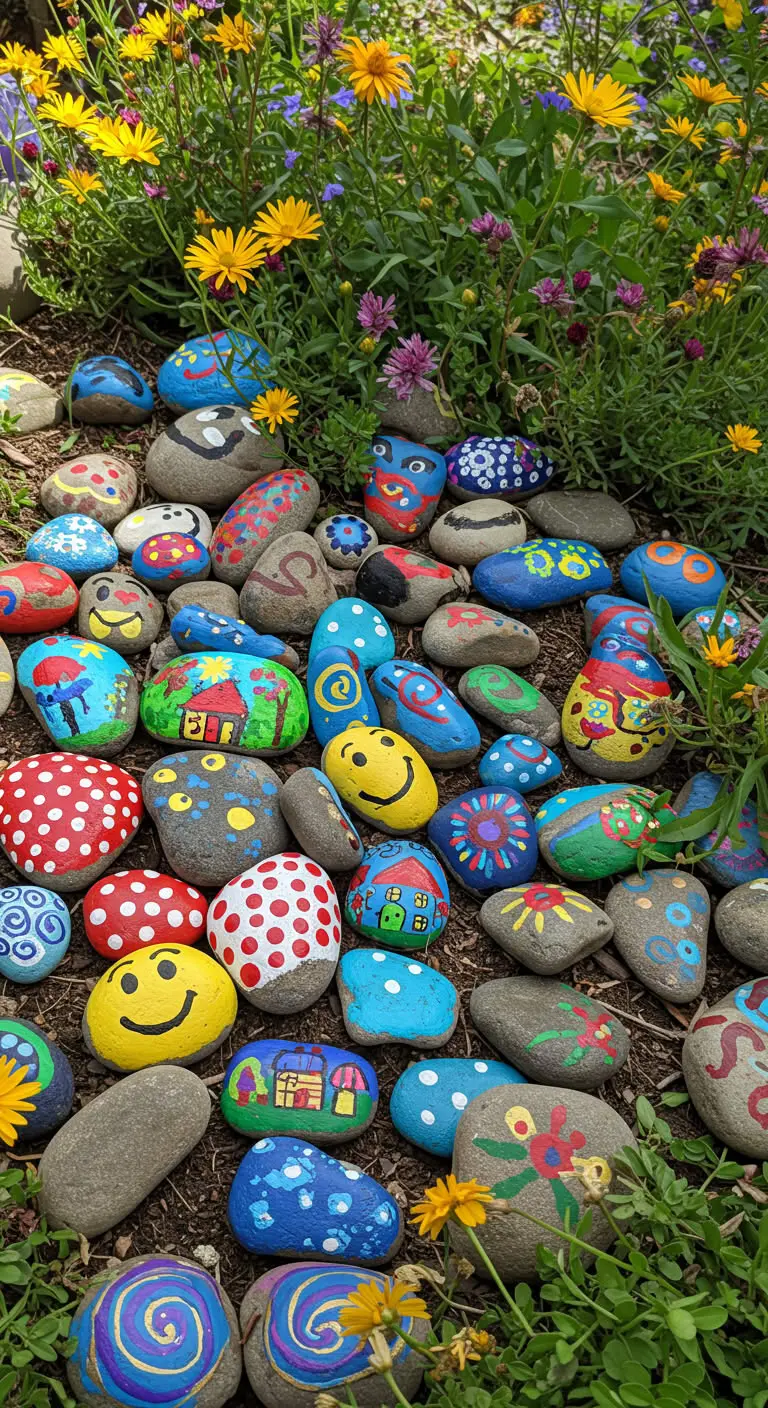
What You Might Need: Smooth rocks, paint, brushes, sealant.
Find some smooth rocks and turn them into adorable animal figures. You can paint them as ladybugs, turtles, or even owls! If your child loves animals, you might also want to check out Craft Ideas For Kids Of All Ages.
Instruction:
Subscribe to DIY Craft Bloom
Get updates on the latest posts and more from DIY Craft Bloom straight to your inbox.
- Paint a rock in the shape of your favorite animal.
- Use different colors for details like eyes, legs, and spots.
- Once the paint is dry, apply a sealant to make the paint last longer.
- Display your new animal friend in the garden or as a decoration!
Picture This:
A collection of beautifully painted rocks scattered across a garden bed, adding a whimsical touch to the outdoor space.
13. Nature Collage
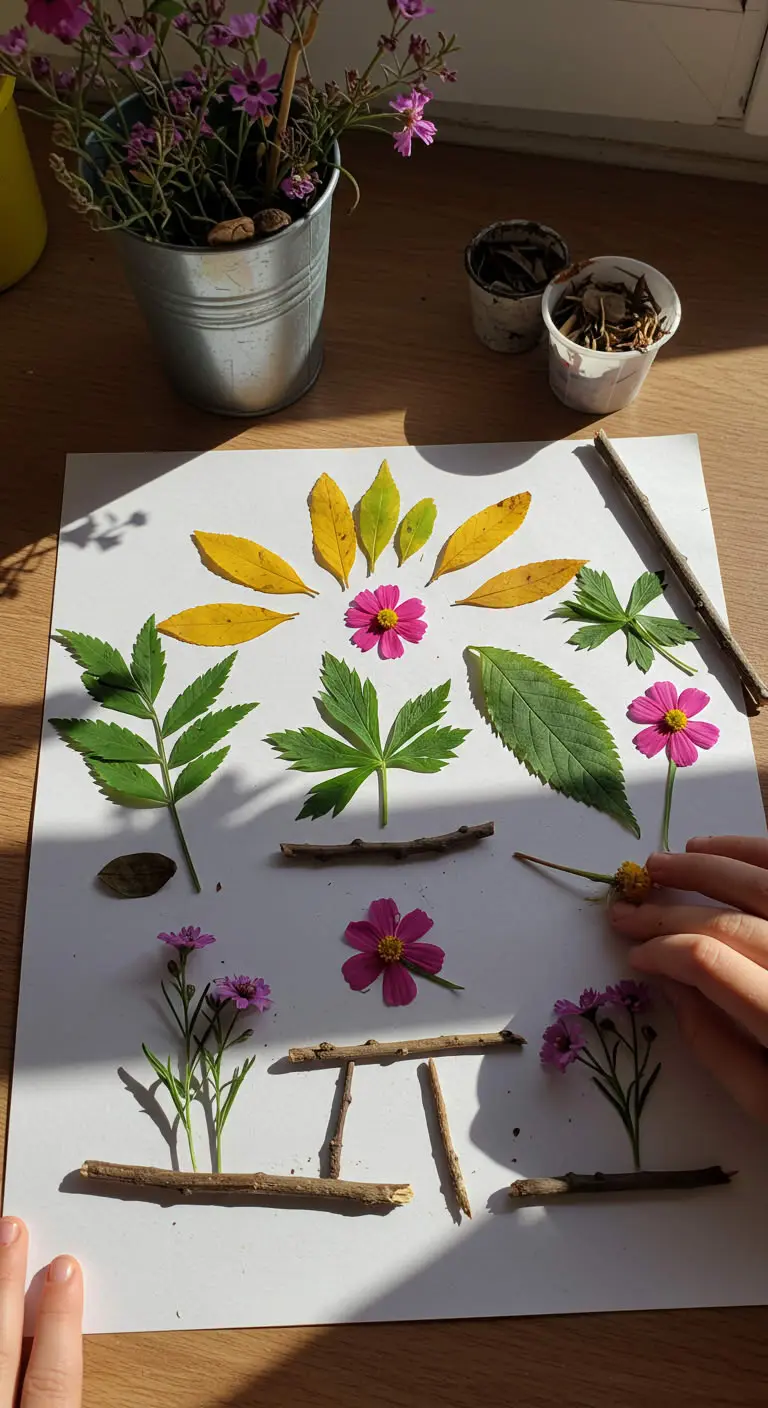
What You Might Need: Leaves, flowers, twigs, glue, paper.
Bring the outdoors inside! Head to the yard and collect leaves, flowers, and twigs. Then, use these to create a beautiful nature collage. For more nature-inspired crafts, try Simple Craft Ideas.
Instruction:
- Gather natural materials like leaves, flowers, and twigs.
- Arrange them on a piece of paper in a creative pattern.
- Glue everything down.
- Display the finished collage on the wall or turn it into a card for a loved one.
Picture This:
Children sitting on a picnic blanket, their nature collages coming to life with every petal and leaf they place down.
14. Paper Bag Puppets
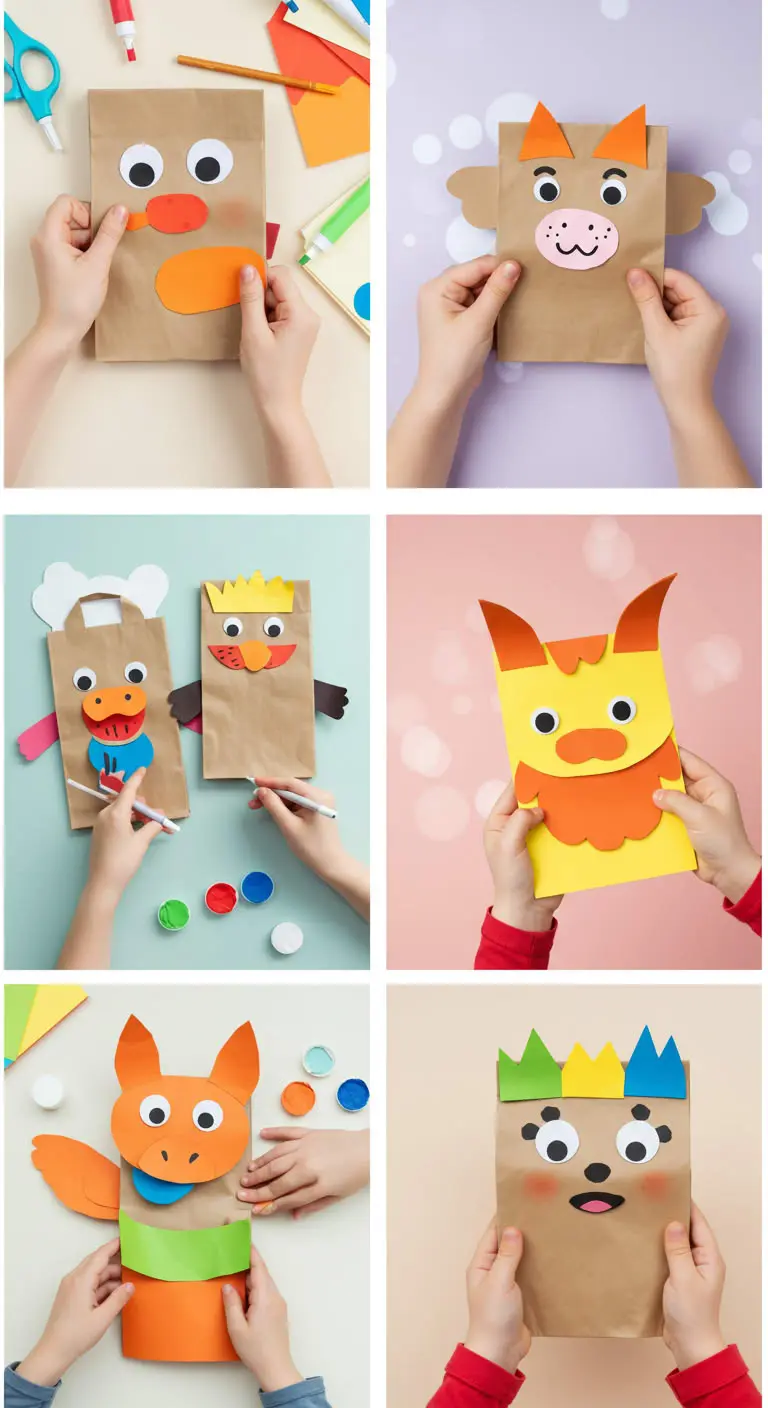
What You Might Need: Paper bags, markers, yarn, buttons, glue.
Make adorable puppets out of paper bags! These are perfect for encouraging creativity and pretend play. For more puppet ideas, explore Craft Ideas For Teens DIY.
Instruction:
- Start with a paper bag as the base of the puppet.
- Draw a face with markers or glue on buttons for eyes.
- Add yarn for hair and any other features you like.
- Use your new puppet for a fun show!
Picture This:
A group of kids performing a puppet show for their family, laughing and acting out silly stories.
15. DIY Bird Feeder
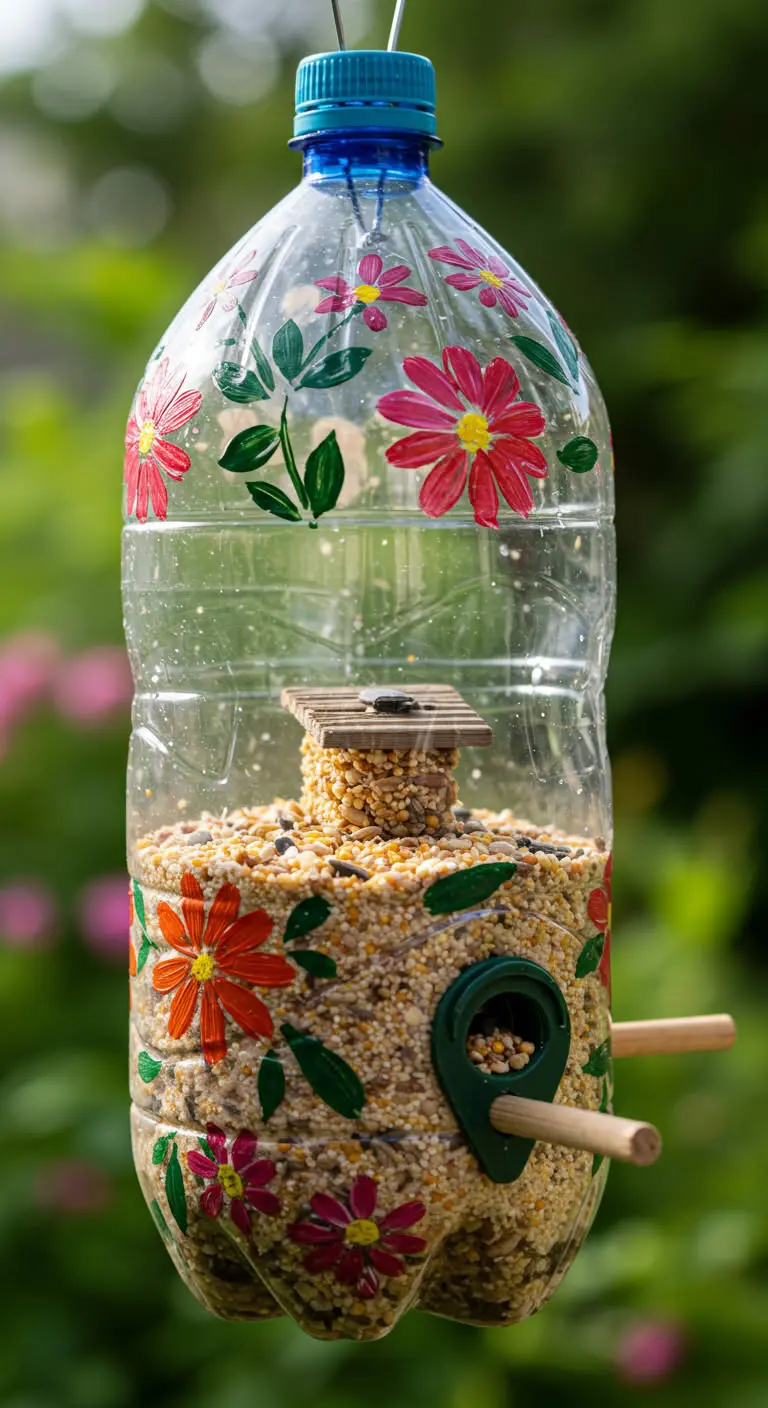
What You Might Need: Toilet paper roll, peanut butter, birdseed, string.
Encourage kids to help the birds by making a simple bird feeder. This eco-friendly craft is a great way to teach kids about nature and responsibility. Check out more nature crafts in Craft Ideas For Kids Easy.
Instruction:
- Spread peanut butter on a toilet paper roll.
- Roll it in birdseed until it’s covered.
- Tie a string around the roll and hang it on a tree branch.
- Watch the birds come and feast!
Picture This:
Children peeking out the window, their faces lighting up as a colorful bird swoops down to enjoy the bird feeder they just made.
16. Button Flowers
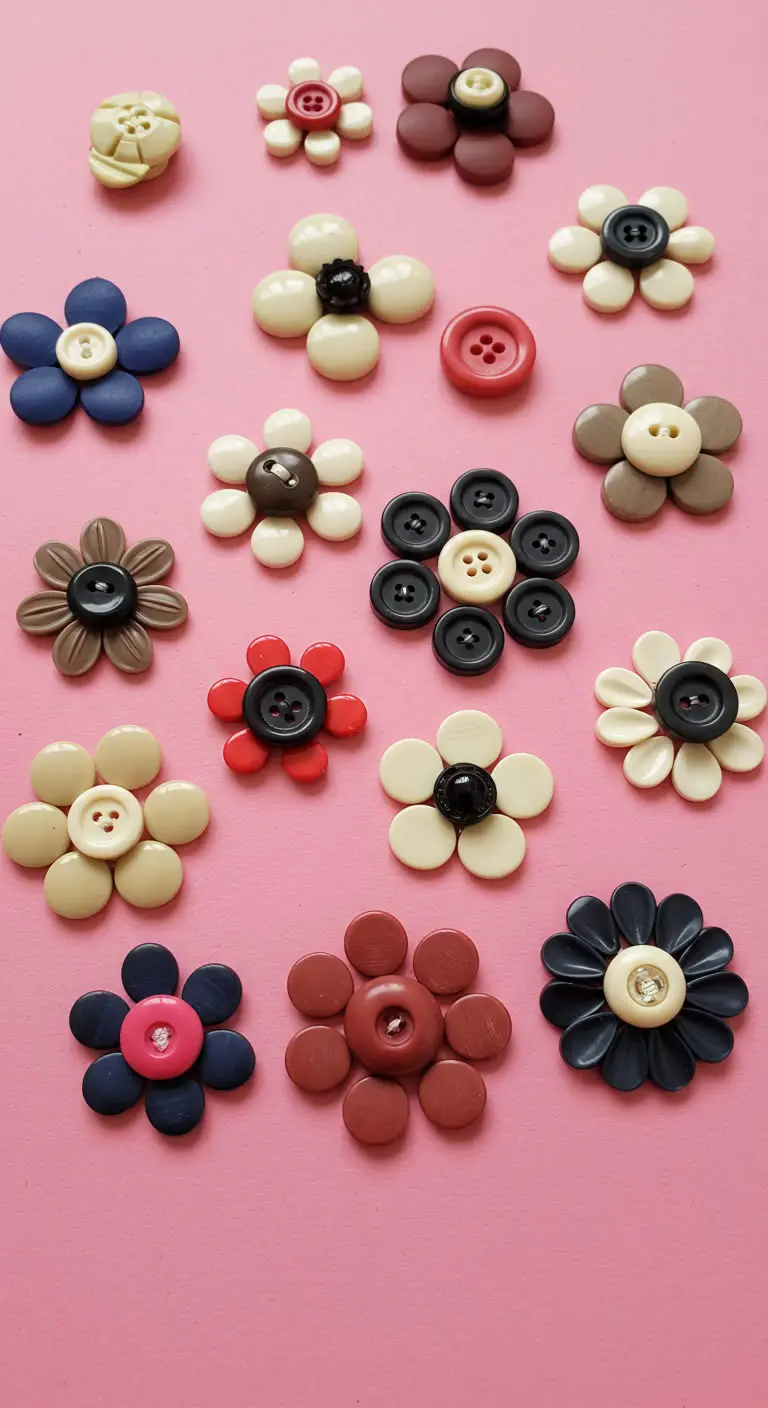
What You Might Need: Buttons, glue, construction paper, markers.
This simple craft project brings a splash of color to any room and allows your child to get creative with button shapes and colors. It’s a great way to explore different textures and color combinations. You can check out more creative ideas in Craft Ideas For Kids Creative.
Instruction:
- Start by gluing buttons onto a piece of construction paper to create the flowers.
- Use markers to draw stems, leaves, and any extra details.
- Add as many flowers as your child wants and let the masterpiece dry!
Picture This:
A bright, colorful field of button flowers, with every bloom different, popping against the simple backdrop of construction paper.
17. Paper Mâché Bowls
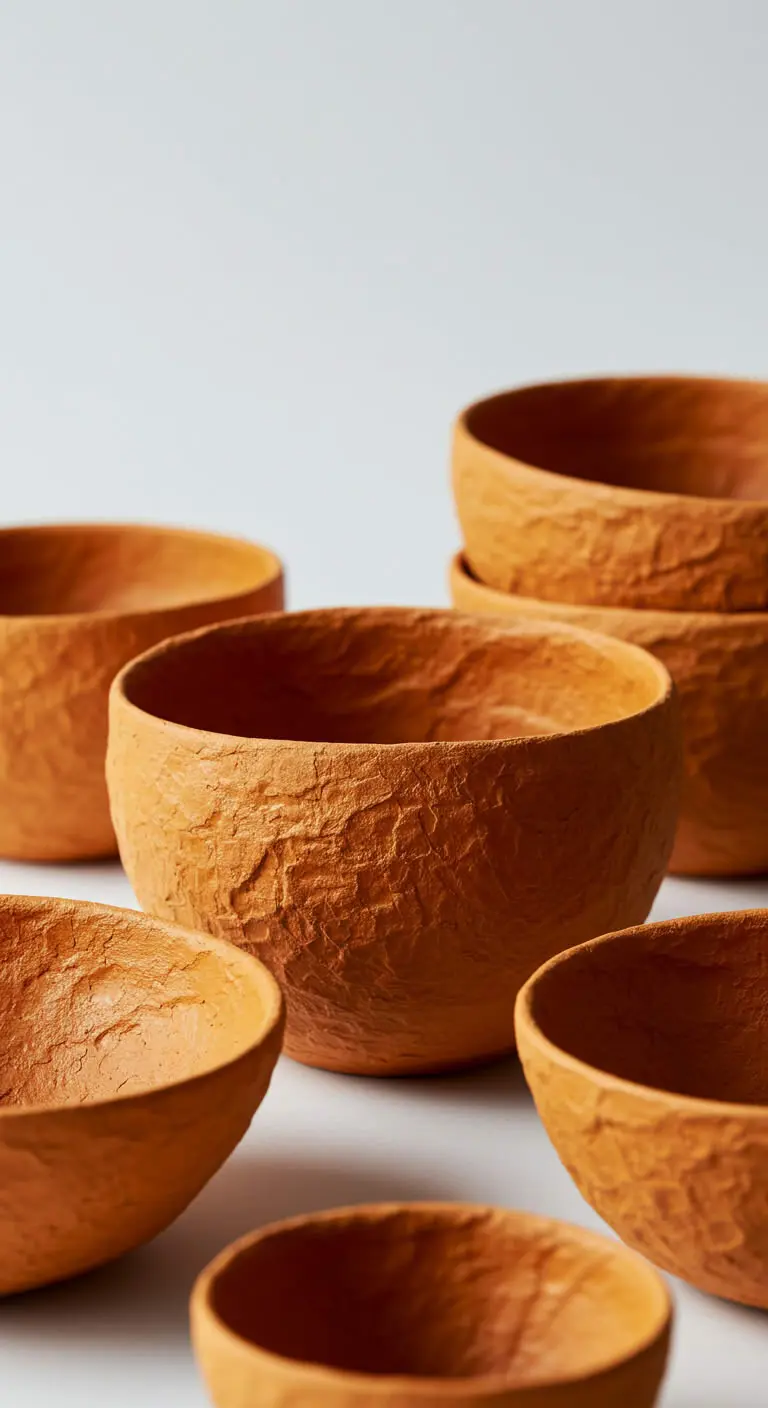
What You Might Need: Newspaper, flour, water, a bowl, paint.
Paper mâché is a classic crafting technique that’s fun for kids and allows them to make something both functional and decorative.
You can make a bowl for storing little treasures, like coins or beads. If you’re interested in more crafty storage ideas, try exploring Craft Ideas For Teens Room Decor.
Instruction:
- Mix flour and water to create a paste.
- Tear the newspaper into strips and dip them into the paste.
- Place the strips over a bowl to form the shape of your paper mâché bowl.
- Once dry, remove the bowl from the mold and paint it.
Picture This:
A child proudly holding a painted paper mâché bowl, filled with shiny marbles or little keepsakes, reflecting their hard work and creativity.
18. Cupcake Liner Flowers
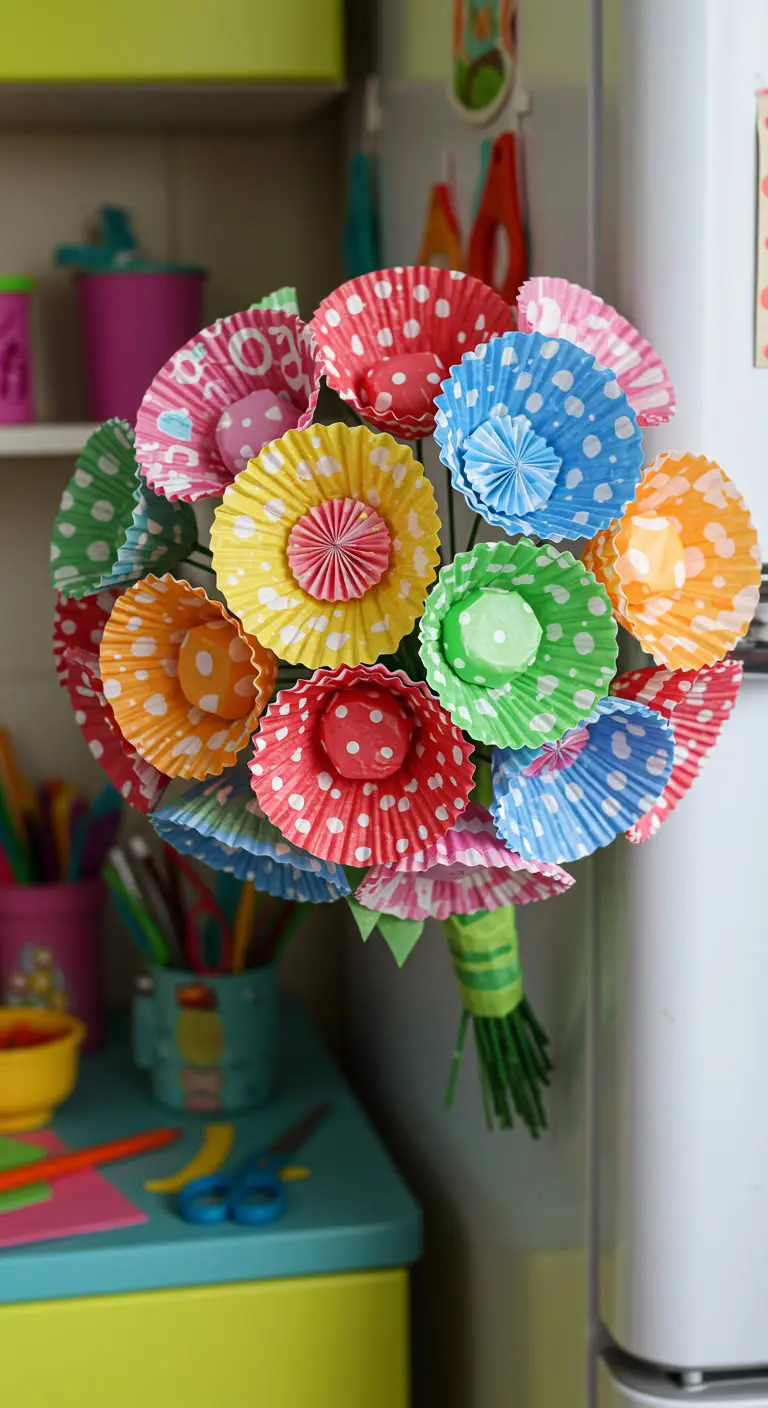
What You Might Need: Cupcake liners, glue, markers, scissors.
These adorable flowers are so easy to make with simple cupcake liners. Kids can personalize them by coloring the liners and adding creative elements. Check out Craft Ideas For School for other school-related crafts.
Instruction:
- Flatten a cupcake liner and color it with markers.
- Fold it into a flower shape.
- Glue it onto a piece of paper and draw a stem beneath it.
- Make several flowers to create a whole bouquet!
Picture This:
A bright, cheerful bouquet of cupcake liner flowers, with vibrant colors and patterns, resting on a desk or hanging proudly on the fridge.
19. Origami Animals
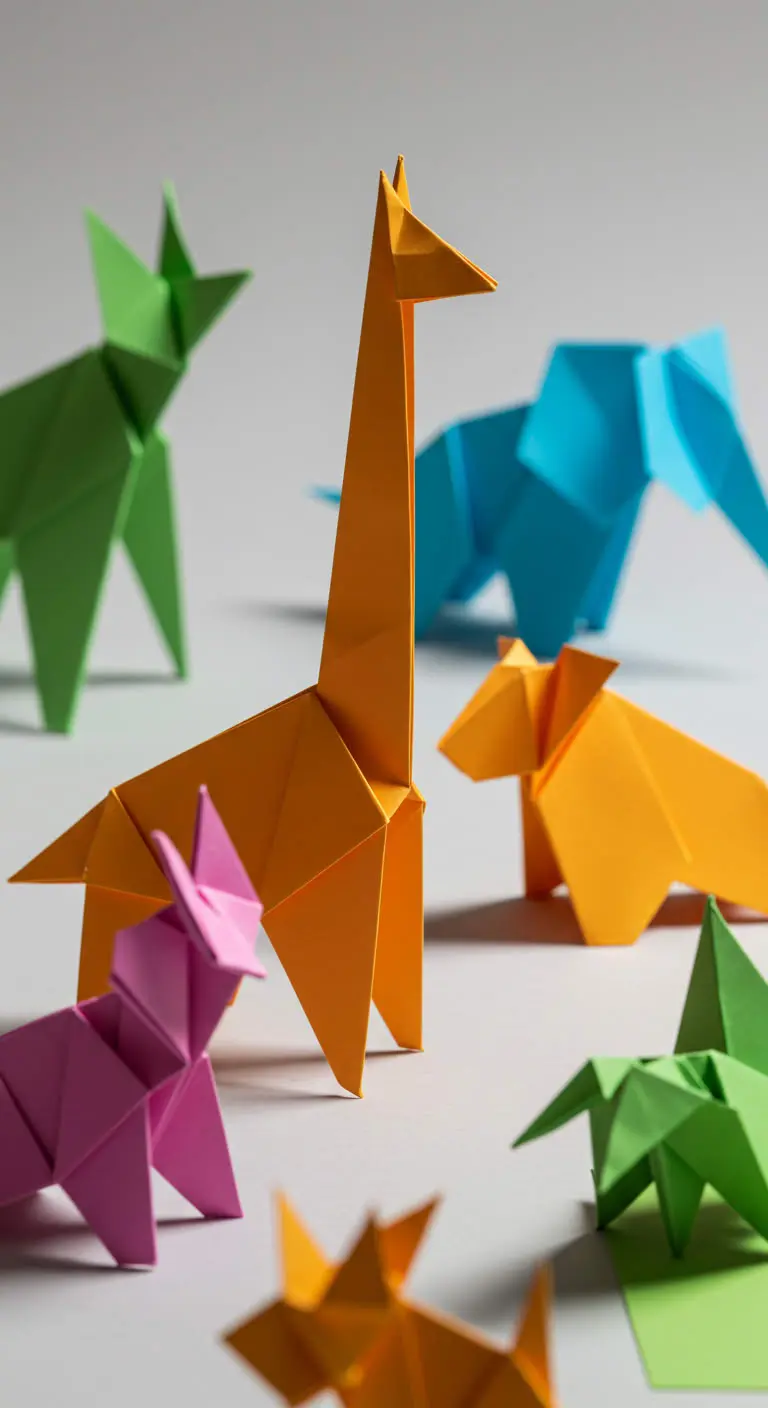
What You Might Need: Square pieces of paper, markers, instructions for folding.
Origami is an ancient art that’s not only fun but also helps improve children’s concentration and patience.
By folding paper into animals like frogs, birds, or fish, kids can learn basic origami techniques and feel accomplished with each completed creation. You might also enjoy other folding crafts in Craft Ideas For Kids Of All Ages.
Instruction:
- Start with a square piece of paper.
- Follow simple folding instructions to create animals like a frog or a crane.
- Use markers to add facial features or decorations.
- Play with the animals after they’re made!
Picture This:
A child’s hands carefully folding a square of paper, transforming it into an origami frog that hops with a little help from their imagination.
20. Tissue Paper Suncatchers
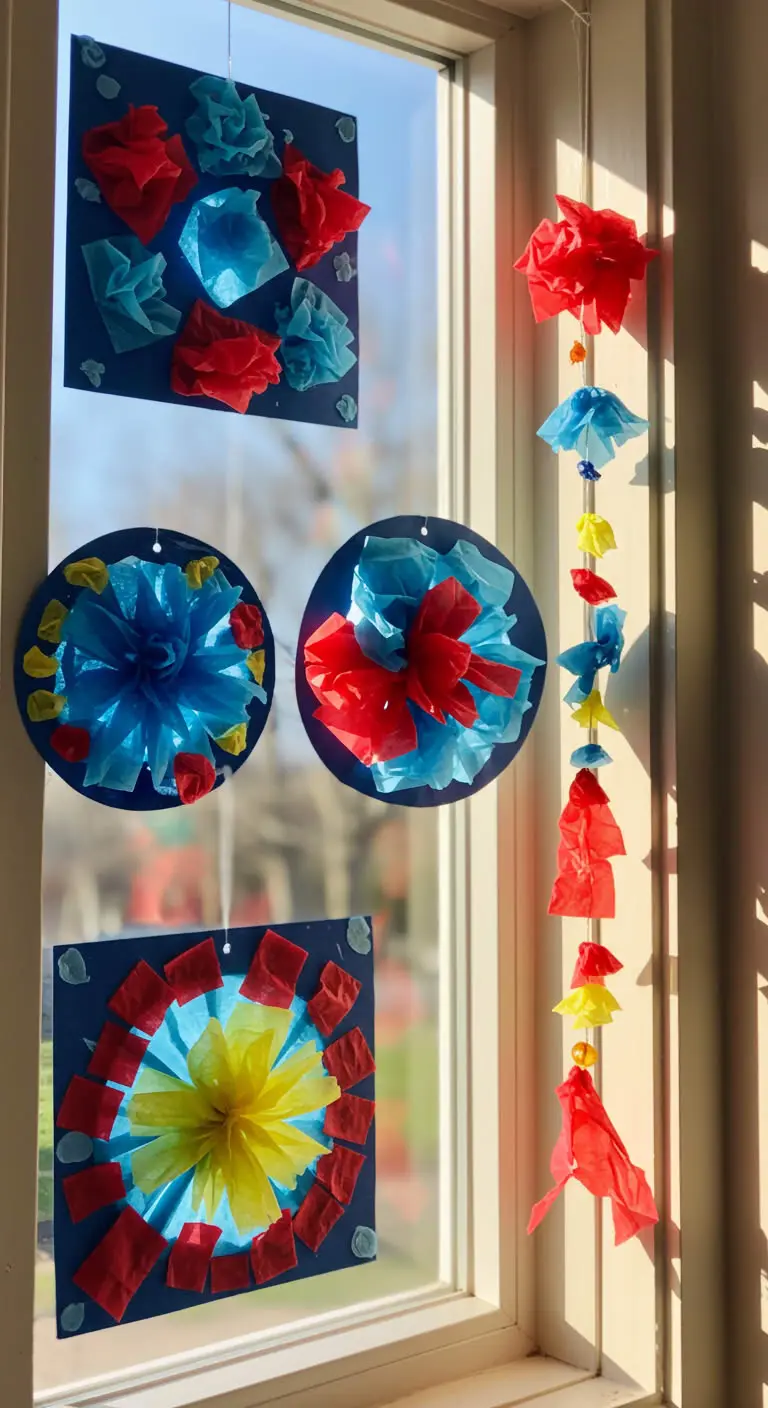
What You Might Need: Tissue paper, clear contact paper, scissors, markers.
Brighten up any window with these colorful tissue paper suncatchers! This easy craft uses materials you likely already have around the house and results in beautiful window decorations that shimmer in the sunlight. For more window decor ideas, check out Craft Ideas For Teens At Home.
Instruction:
- Cut the tissue paper into small pieces.
- Stick the pieces to clear contact paper in a fun design.
- Once it’s covered, place a second sheet of contact paper over the top.
- Cut out the suncatcher shape and hang it in a window.
Picture This:
A window filled with colorful tissue paper suncatchers that sparkle in the sunlight, casting vibrant hues across the room.