17 Cool Craft Ideas for Teen Boys Summer Camp They’ll Take Home and Keep

Hand a teen boy a bag of pom poms and googly eyes and watch him find somewhere else to be. That is the real problem with most camp craft lists. They were written for eight year olds and then handed to fourteen year olds, and everyone in the room knows it.
The cool craft ideas for teen boys summer camp collected here go the other direction.
Some are quiet and skill based, like painting a small landscape on a leaf you picked up on the trail or weaving a paracord bracelet tight enough to look like gear. Some involve tools and a little supervision, like burning trail signs into cedar boards or casting a concrete fire bowl.
A few are just good builds, the kind where the challenge is getting five pinecone figures to balance on one branch without tipping.
They also make things worth keeping. A wallet he actually carries. A speaker that runs without batteries.
A sign that stays nailed to a post long after the bus pulls out. Here are seventeen to work through this summer.
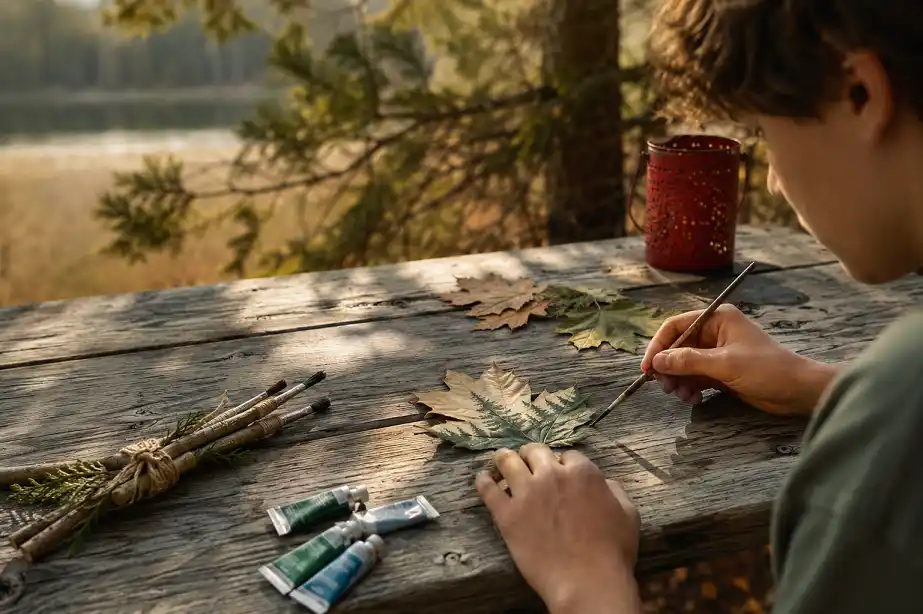
1. Paint a Tiny Landscape on a Real Leaf
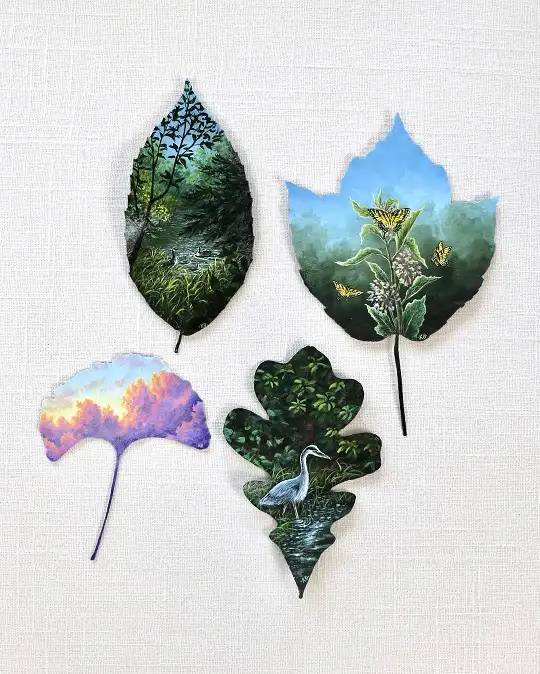
Four leaves, four completely different scenes: a creek with ducks, butterflies over a flowering stem, sunset clouds across a ginkgo, and a heron standing in shallow water on an oak leaf.
What makes these work is that each shape got matched to a scene. The narrow pointed leaf became a tall forest. The wide fan became a sky.
Best part for camp: the supply list is a pack of acrylics and whatever fell off a tree that morning.
- Press leaves flat in a heavy book for a day or two first
- Brush on a thin coat of matte medium so paint sits on top instead of soaking in
- Block in the sky and background first, add small details last
- Sign it small in the corner, like the artist did here
2. Build a Painted Camp Bowling Set for the Cabin
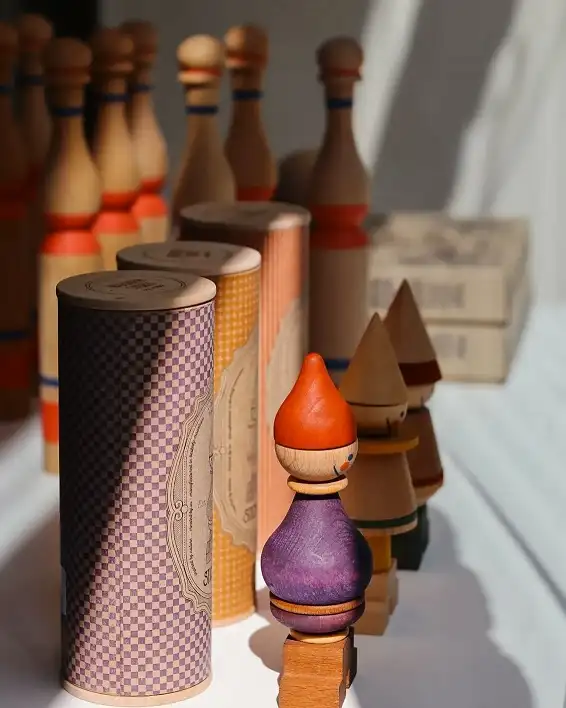
Those pins look lathe turned, which most camps do not have. The idea still transfers, because the thing that makes them look good is the paint, not the shape: plain wood with two or three clean color bands wrapped around it, always in the same spot on every pin.
Cut ten thick branch sections to the same height instead, and you get a set that lives on the cabin porch all summer.
Same height matters more than same width. Sand the top and bottom flat so they stand on their own.
Masking tape gives the crisp edge that makes a homemade set look bought. Two colors only, repeated on every pin.
Write a point value under each pin. Now knocking one down is a score, not just a noise.
3. Map Your Dream Adventure Spot in Ink and Watercolor
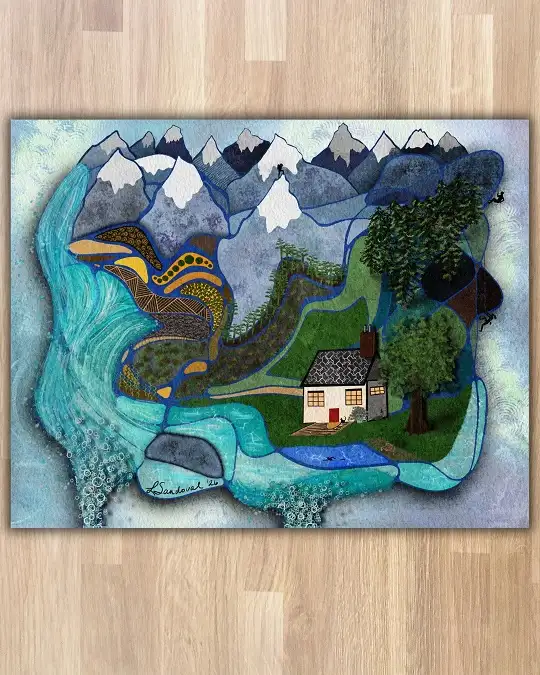
A snowy mountain range, a waterfall pouring off the left edge, a cabin with a red door, and tiny black climbers hanging off the rocks.
Every zone in the painting is outlined in blue ink and filled with its own pattern, which is what keeps a busy scene readable.
For a teen who says he cannot draw, this is the one to hand him. The whole picture is built from shapes, not from drawing skill.
One blue pen traces around each zone, so the water, grass and rock never blur together.
Dots, stripes and scallops fill the gold section. Much easier than painting real texture, and it looks better.
Three tiny climbers set the scale and make the mountains feel huge. They take ten seconds each.
4. Punched Tin Can Lanterns for the Fire Pit
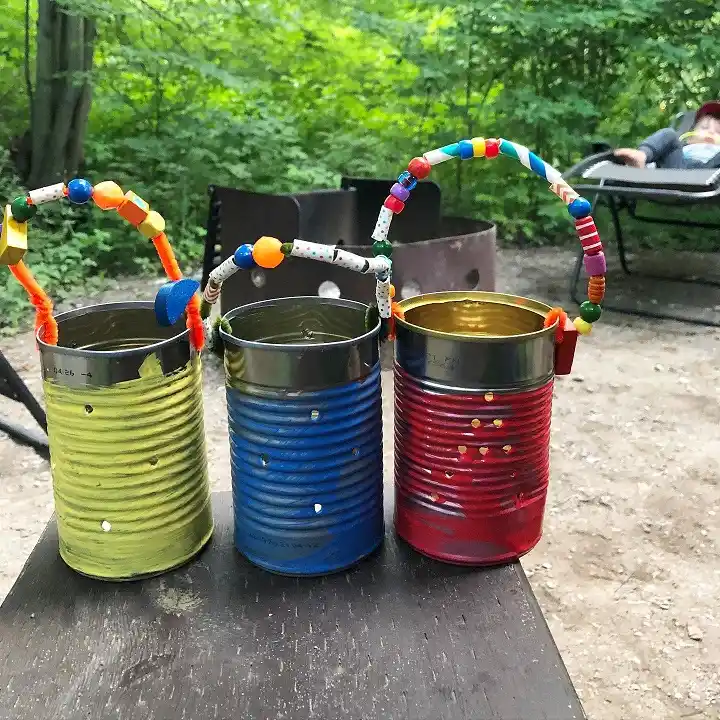
Three cans, three flat colors, and a scatter of nail holes that turn into light once the sun drops. The handles are pipe cleaners strung with wooden beads and rolled paper straws, which is the detail that keeps them from looking like a preschool project.
Fill each can with water and freeze it solid before punching. The ice stops the metal from denting, and the holes come out clean.
Sand the cut rim or fold masking tape over it before anyone carries one around a dark campsite.
Skip the tea light and drop in a battery votive if your camp has a no open flame rule.
5. Wood Burned Trail and Cabin Signs
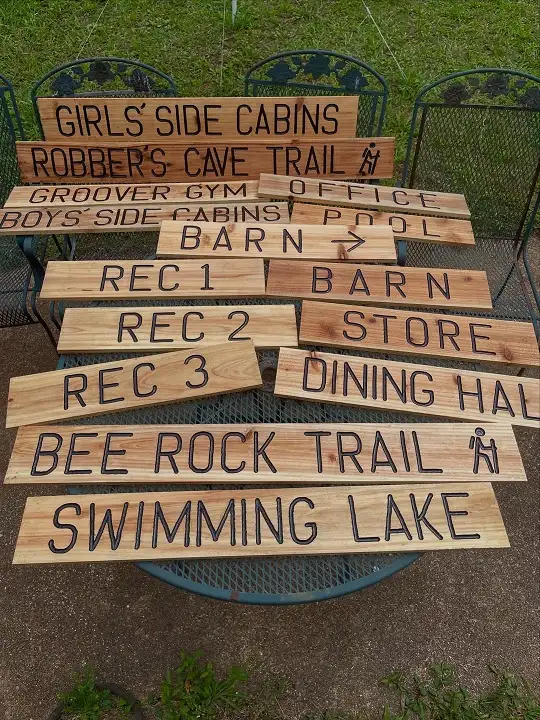
A whole table stacked with cedar boards: Swimming Lake, Bee Rock Trail, Rec 1, Rec 2, Rec 3, Dining Hall. The lettering is thick and slightly uneven, all capitals, with a little hiker icon burned beside the trail names.
This is the project older campers take seriously, because the sign stays on the property after they leave.
Pencil the letters first, burn slowly along the lines, then go back and widen each stroke. Rushing is what makes wood burning look scratchy.
Real signs need real supervision. One burner per pair, wood clamped down, and a cooling stand within reach.
| Wood burner | Paint marker |
|---|---|
| Lasts outdoors for years | Fades after a season in sun |
| Needs an adult at the table | Safe to hand out to a whole cabin |
| Mistakes are permanent | Sand it off and start again |
| About one board per session | Several boards in one session |
6. Design Your Own Camp Patch
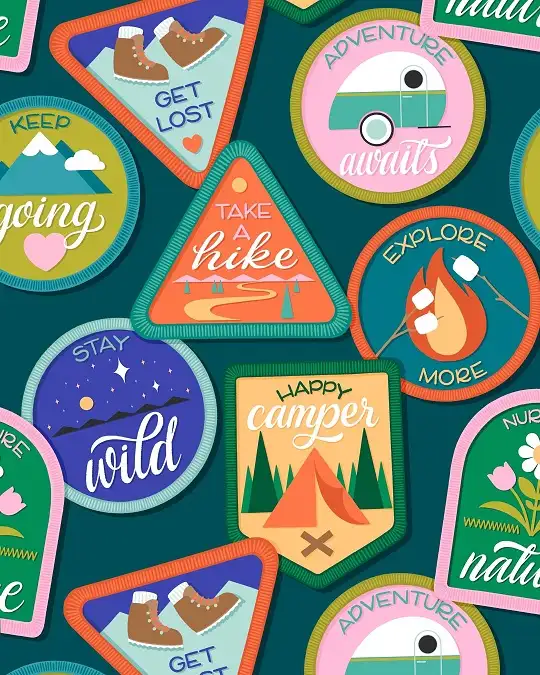
Look at what these badges have in common. Each one is a simple outer shape, a bold zigzag border, one flat illustration, and two or three words. Boots. A campfire with marshmallows. A tent between pine trees. Nothing shaded, nothing complicated.
Subscribe to DIY Craft Bloom
Get updates on the latest posts and more from DIY Craft Bloom straight to your inbox.
Hand out felt circles and triangles, fabric markers, and embroidery floss for the edge stitch. The shape and border do the heavy lifting, so the drawing inside can stay simple.
Give the cabin a theme and let each camper design a patch for one thing they did that week. By Friday you have a wall of them.
7. Paracord Bracelet With a Contrast Center Stripe
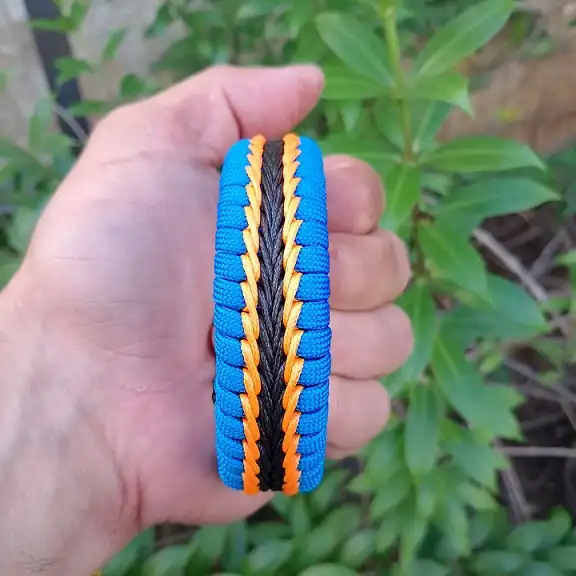
Blue cord makes up the body, a thin dark cord runs straight down the middle, and orange stitching zigzags along both sides of it. Three cords, one tight weave, and it reads like something from a gear shop.
Weave tension is everything here. Loose rows look sloppy and stretch out by week two.
Once a camper gets the pattern, he will make five more. Set out a bin of color combos and let the cabin trade them.
8. Driftwood Leaves Built From Beach Sticks
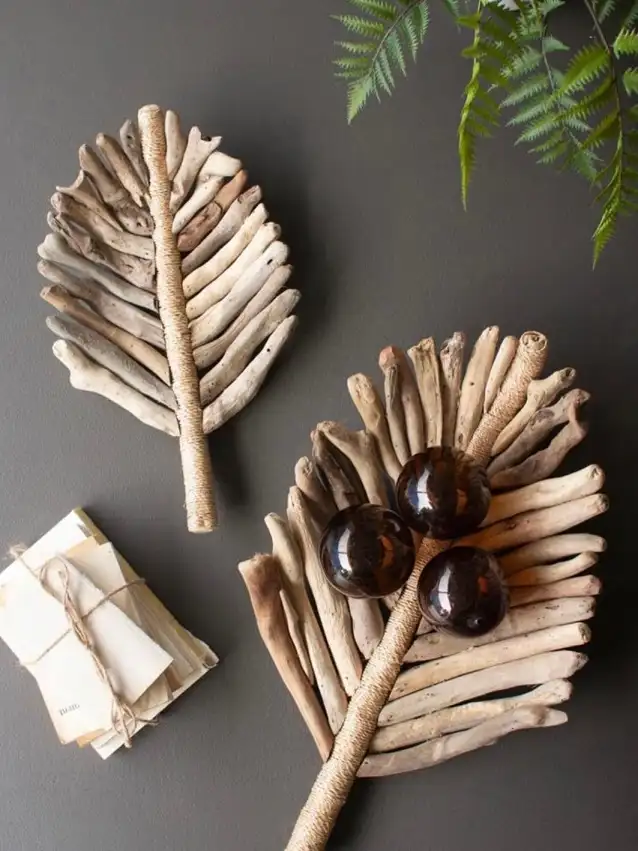
Dozens of small bleached sticks, laid side by side and angled like veins, glued around a long center branch wrapped in twine.
One has three dark glass floats resting in the middle for weight. Against the dark grey wall, all that pale wood really stands out.
Sorting the sticks is the actual work. Longest go in the middle of the leaf, shortest at the tip, and the angle stays the same the whole way down.
Give this one to the camper who likes puzzles more than painting.
Dry fit the whole leaf on the table before you open the glue. Once you like the shape, photograph it with your phone, then glue stick by stick using the photo as a map.
9. Painted Driftwood Wall Hanging on a Curved Branch
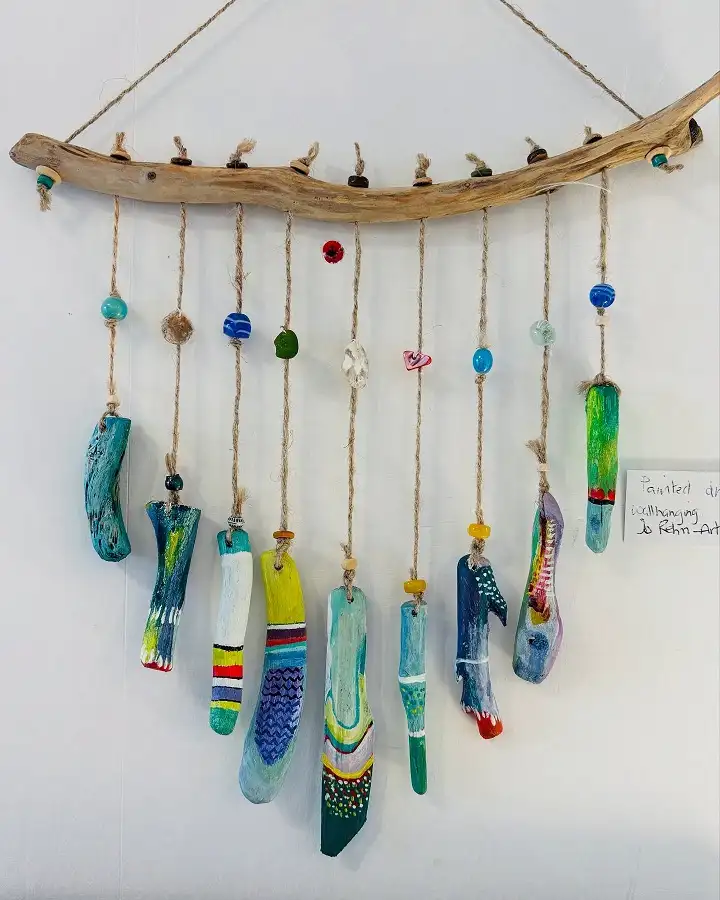
Ten painted driftwood pieces hang from a single curved branch on lengths of twine, each strand broken up with a glass or stone bead.
The paint jobs are all different, teal stripes, dotted rows, one with a bright orange tip, but they hold together because every piece stays in the same blue and green family with small hits of red.
Hang the shortest strands at the ends and the longest in the middle. That curve is what makes it look finished instead of random.
A cabin can build one together, one stick per camper, and leave it hanging above the door.
10. Pinecone Owls Perched on a Forked Branch
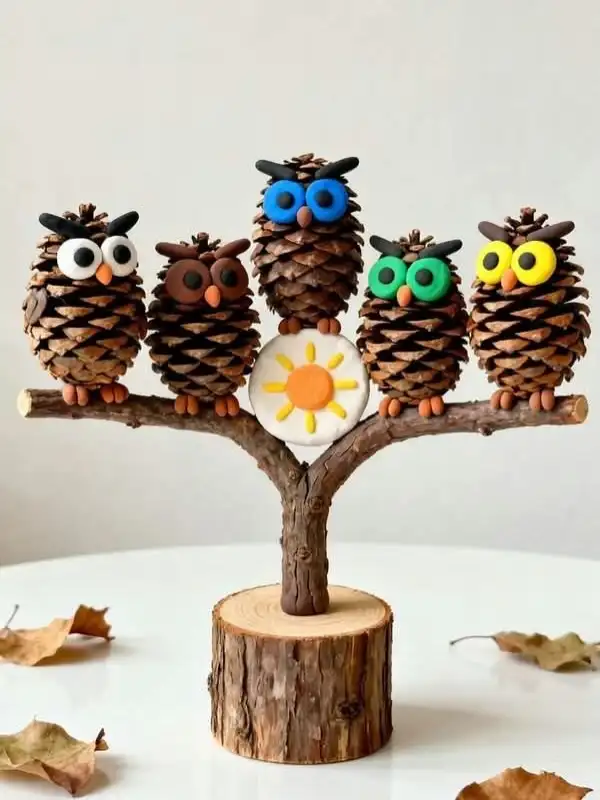
Five pinecones sit along a forked branch, each with clay eyes in a different color, a small orange beak, ear tufts, and little feet gripping the wood. The branch is set into a sawn log round so the whole thing stands on a shelf.
Teen boys usually roll their eyes at owls, so sell them the build instead of the craft. The real project is the stand: drill the log, seat the branch, get five figures balanced and glued so nothing tips.
Drill the log round first and test fit the branch before any clay work starts.
Give each figure its own eye color so nobody argues over which one is his.
Let campers invent their own creature. Hawks, bats and gremlins all use the same build.
Damp pinecones. They close up as they dry and pop the clay off.
Thin ear tufts that snap in a backpack on the ride home.
A skinny branch. It has to hold five figures without bending.
11. Foraged Paintbrushes Made From Sticks and Plants
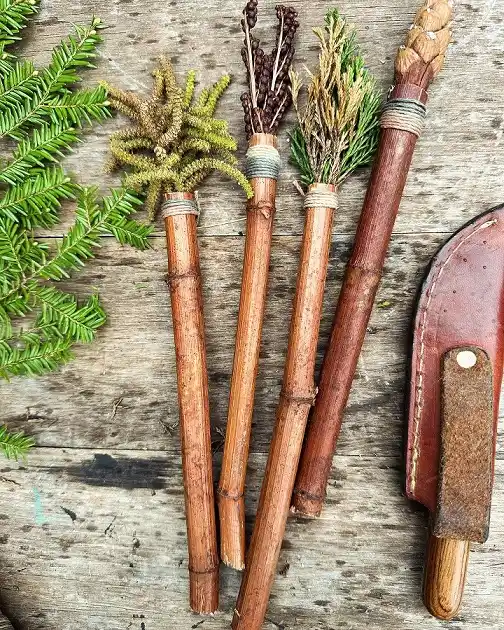
Four cut stems lie on weathered wood, each one bundled at the tip with a different plant: fuzzy green catkins, dried brown seed heads, a sprig of cedar, and one wrapped tight with braided cord.
The bindings are simple wraps of twine and waxed thread, each in a slightly different shade.
Every brush leaves a completely different mark. The cedar one stipples. The catkin one drags. Nobody knows what a brush will do until it hits the paper, and that is the whole point of the session.
Pair this with entry one and the same walk supplies both projects.
When the tool is homemade, nobody expects a perfect painting, so the campers who never touch a brush actually pick one up.
12. Custom Graffiti-Style Skateboard Deck Wall Art
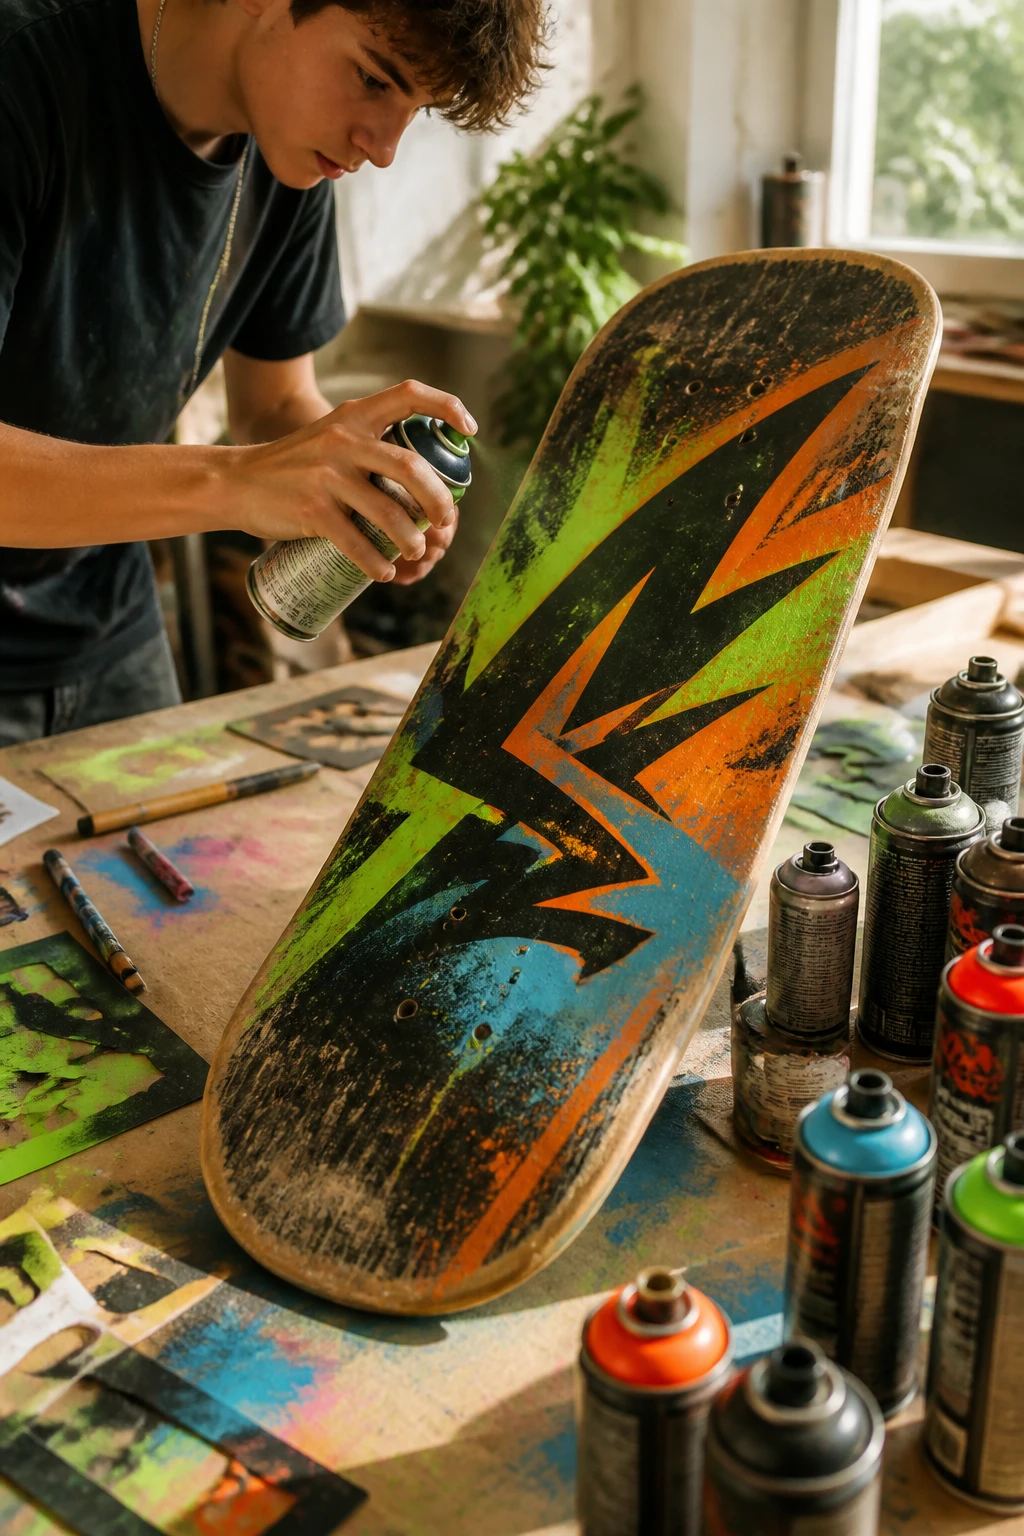
Turn an old skateboard deck into epic wall art that screams personality. Whether it’s covered in bold graffiti lettering, abstract designs, or favorite band logos, this craft transforms a beat-up board into a statement piece that’s perfect for a bedroom or camp cabin.
Subscribe to DIY Craft Bloom
Get updates on the latest posts and more from DIY Craft Bloom straight to your inbox.
The worn edges and scuffed surface actually add to the aesthetic, making it look authentically street-style.
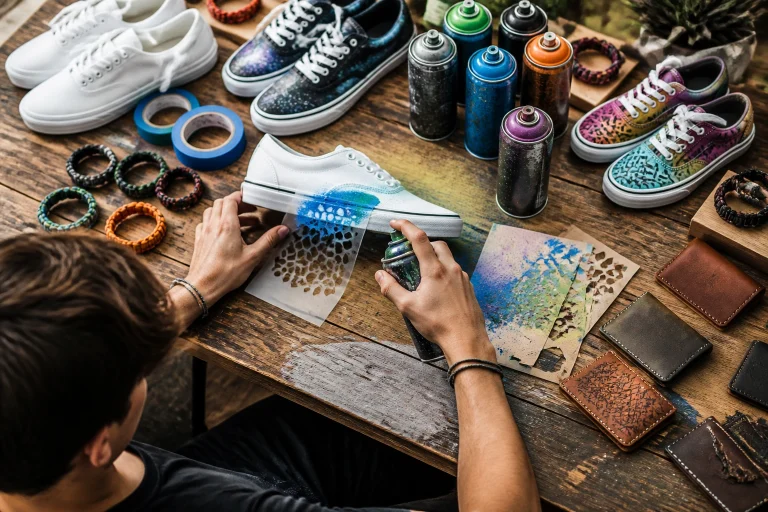
This project lets guys experiment with spray paint, paint markers, and stencils without worrying about perfection.
The beauty is in the raw, edgy vibe—those drips and overlapping colors make it look intentionally urban and artistic.
13. Industrial Pipe Smartphone Speaker Amplifier
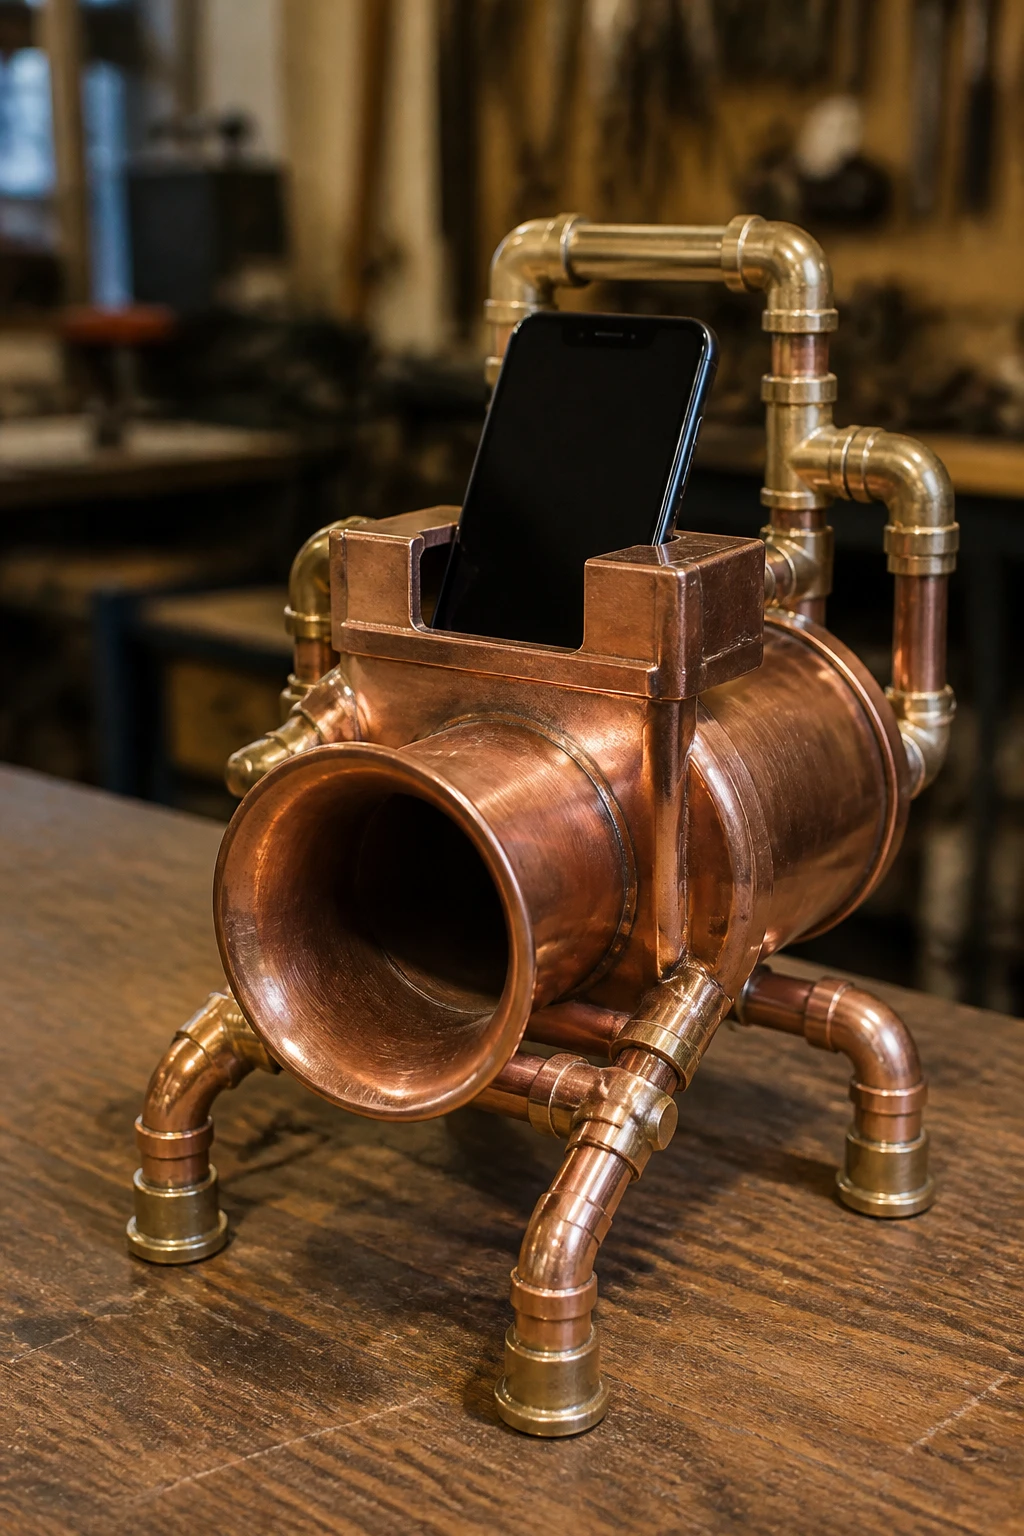
This genius zero-electricity speaker uses physics to amplify sound naturally. Built from copper or PVC pipes, it creates an acoustic chamber that boosts phone audio without batteries or charging.
The industrial look with exposed pipes and fittings makes it look like something from a trendy maker space.
The best part? It actually works impressively well for playing music at camp, and guys can customize the size based on available materials.
It’s functional art that teaches basic sound engineering concepts while looking absolutely sick on a shelf.
14. Custom Leather Stamped Wallets and Keychains
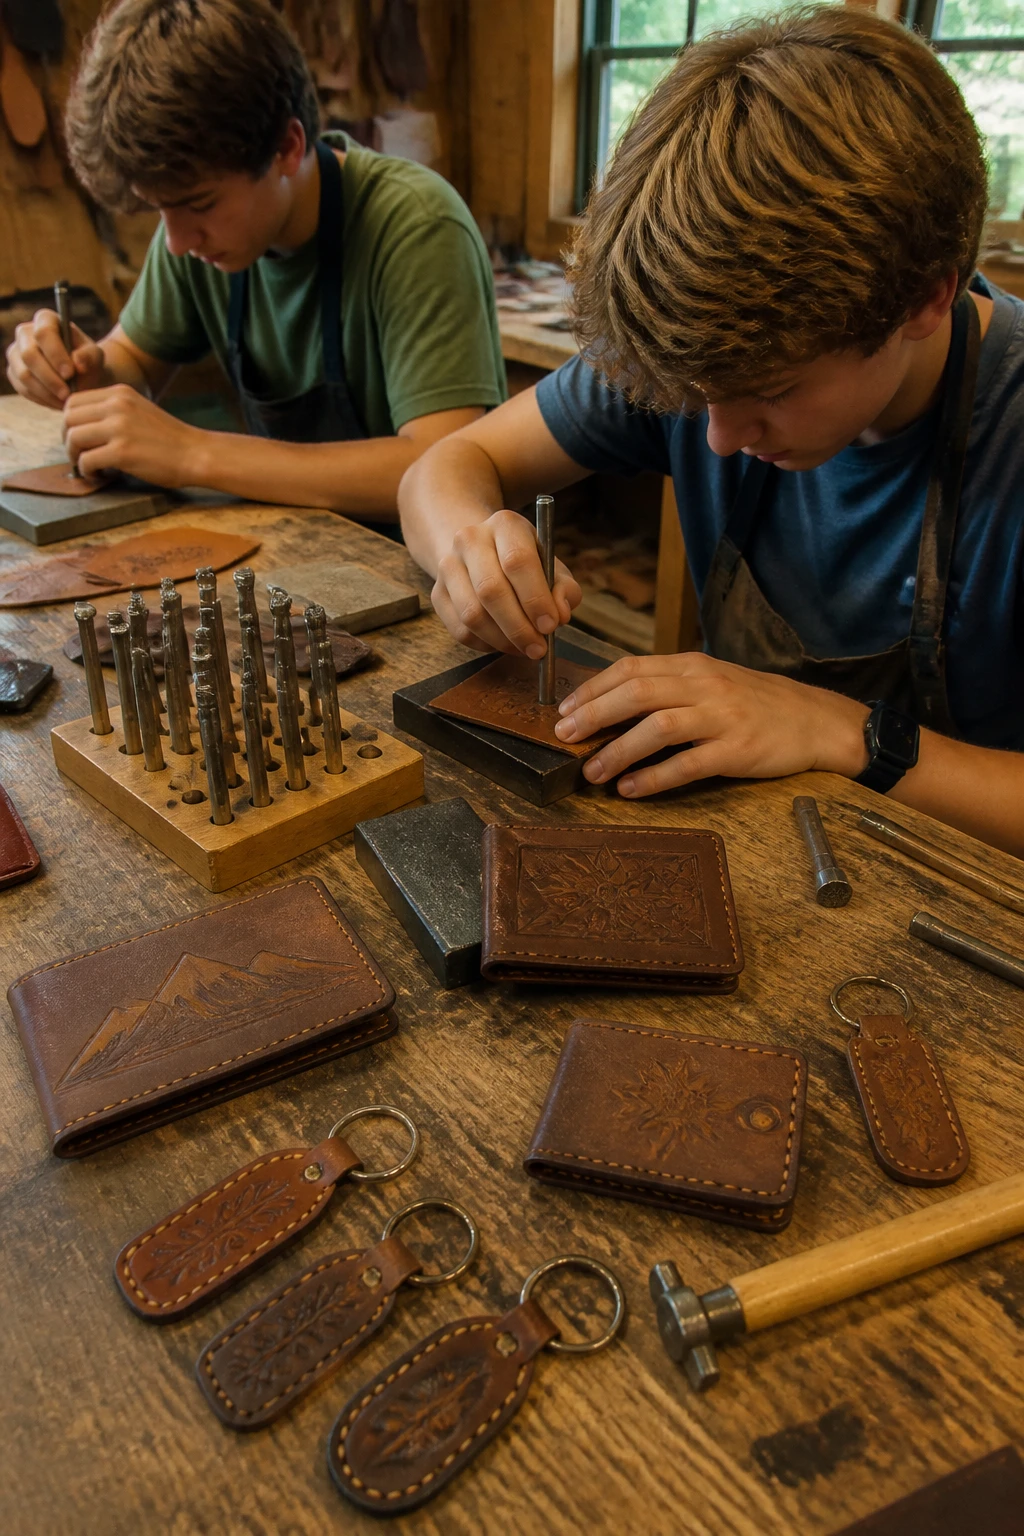
Leather crafting feels legitimately grown-up and produces something guys will actually use every day.
Simple designs like bifold wallets or sturdy keychains can be completed in one camp session, and the leather stamping lets everyone personalize their pieces with initials, designs, or patterns.
The natural variations in leather color and texture mean no two pieces look identical. As the leather ages and develops a patina, it actually gets better looking—which is a refreshing change from stuff that just wears out.
15. Concrete Fire Bowls for Backyard Hangouts
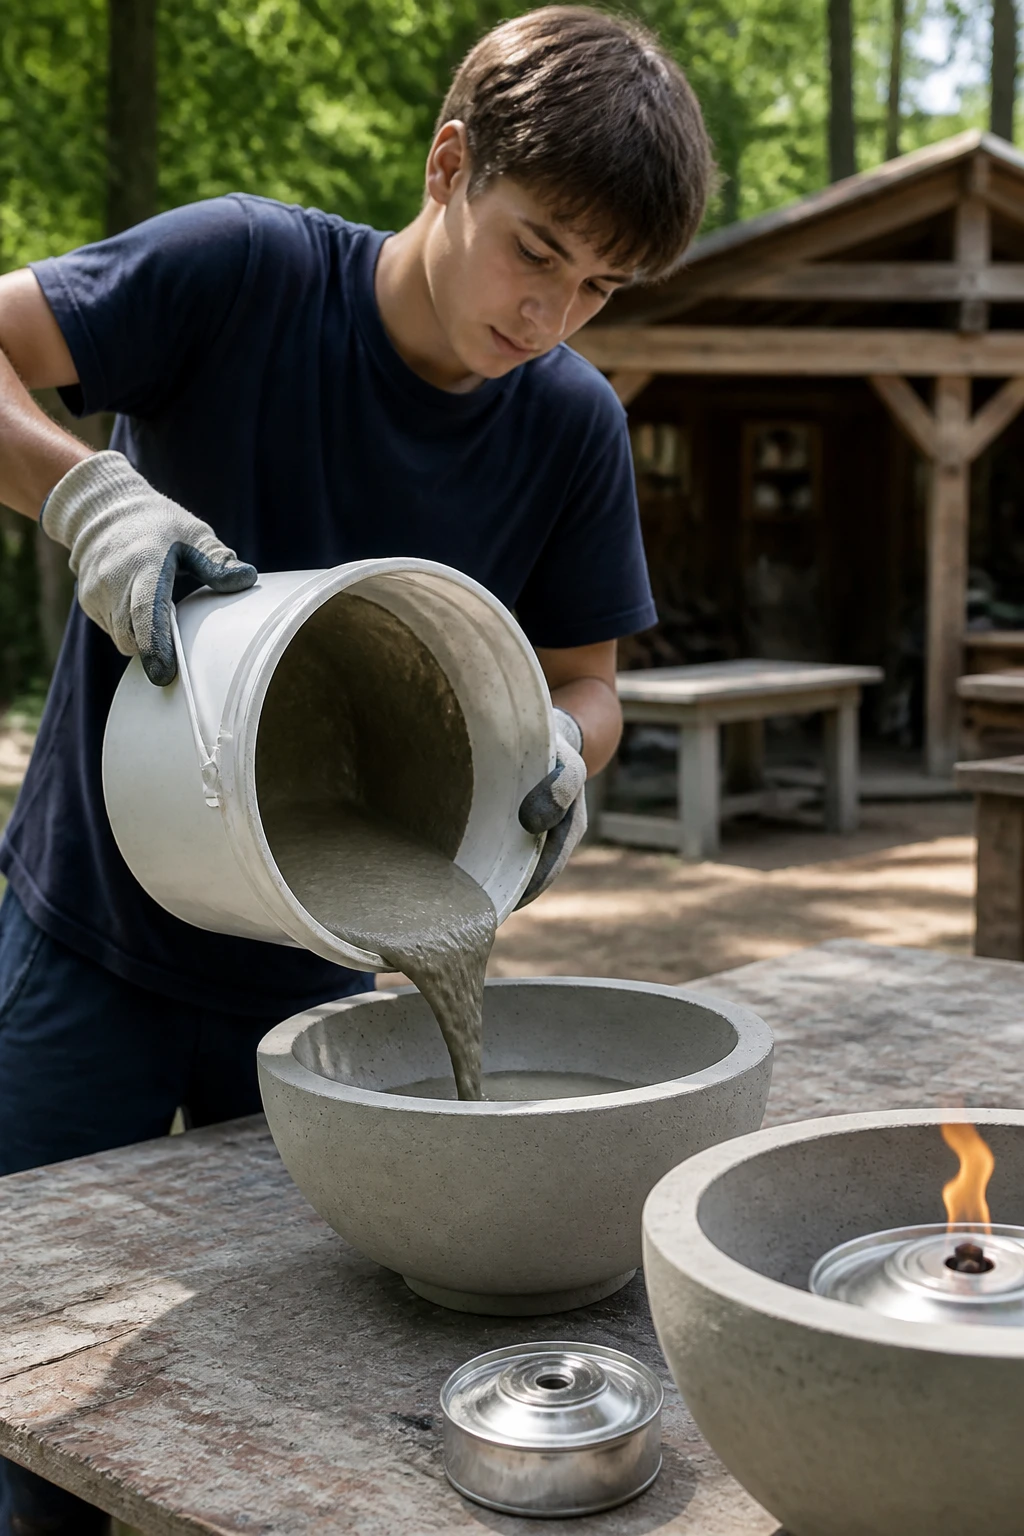
Nothing says summer camp like fire, and these DIY concrete fire bowls let guys create their own mini fire pits for future backyard gatherings.
The industrial concrete aesthetic looks modern and expensive, but the materials are dirt cheap. Fill them with gel fuel canisters or use them as permanent fixtures with proper installation.
The casting process is incredibly satisfying—mixing concrete, pouring into molds, and revealing the finished product feels like legitimate making.
Plus, these bowls weigh enough to feel substantial and permanent, not like some flimsy craft project.
16. Wooden Bottle Opener Boards With Magnetic Cap Catchers
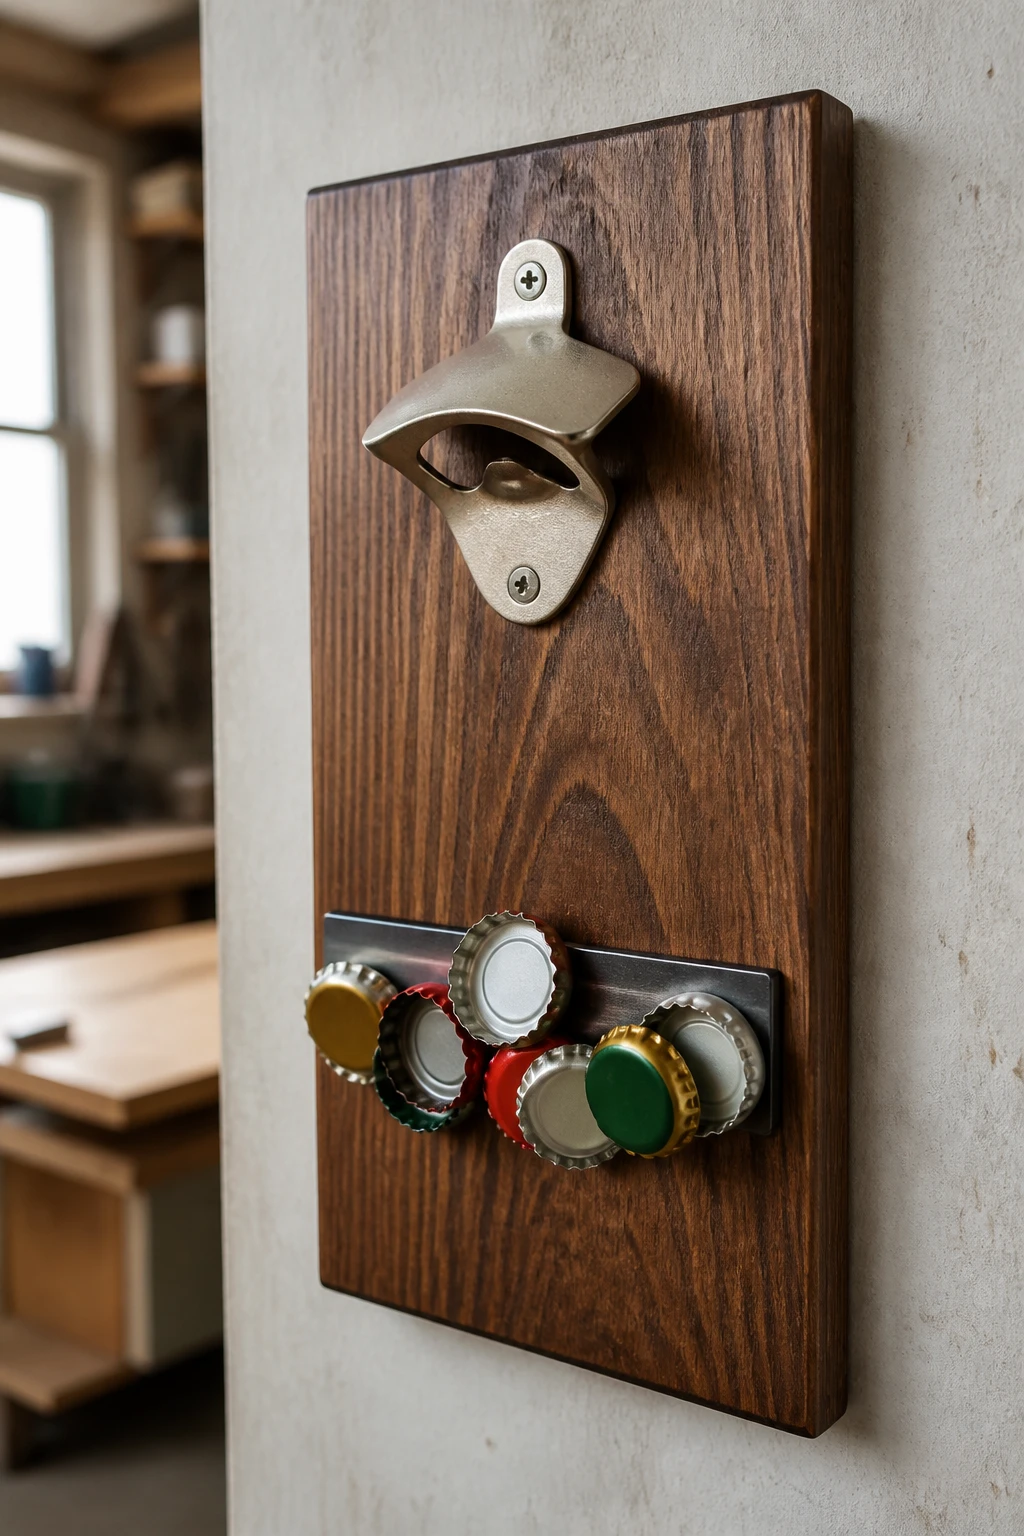
This project combines woodworking, practical functionality, and a bit of mechanical problem-solving.
Mount a bottle opener to a piece of wood, add a magnetic strip or container underneath, and you’ve got a wall-mounted station that opens bottles and catches the caps automatically.
It’s the kind of thing that gets used constantly and makes people say “where’d you get that?”
Guys can personalize the wood with wood burning, staining in different colors, or adding text like “Cold Ones” or their family name.
The magnetic cap catcher is the genius detail that elevates it from simple to seriously clever.
17. LED-Lit Resin River Rock Paperweights
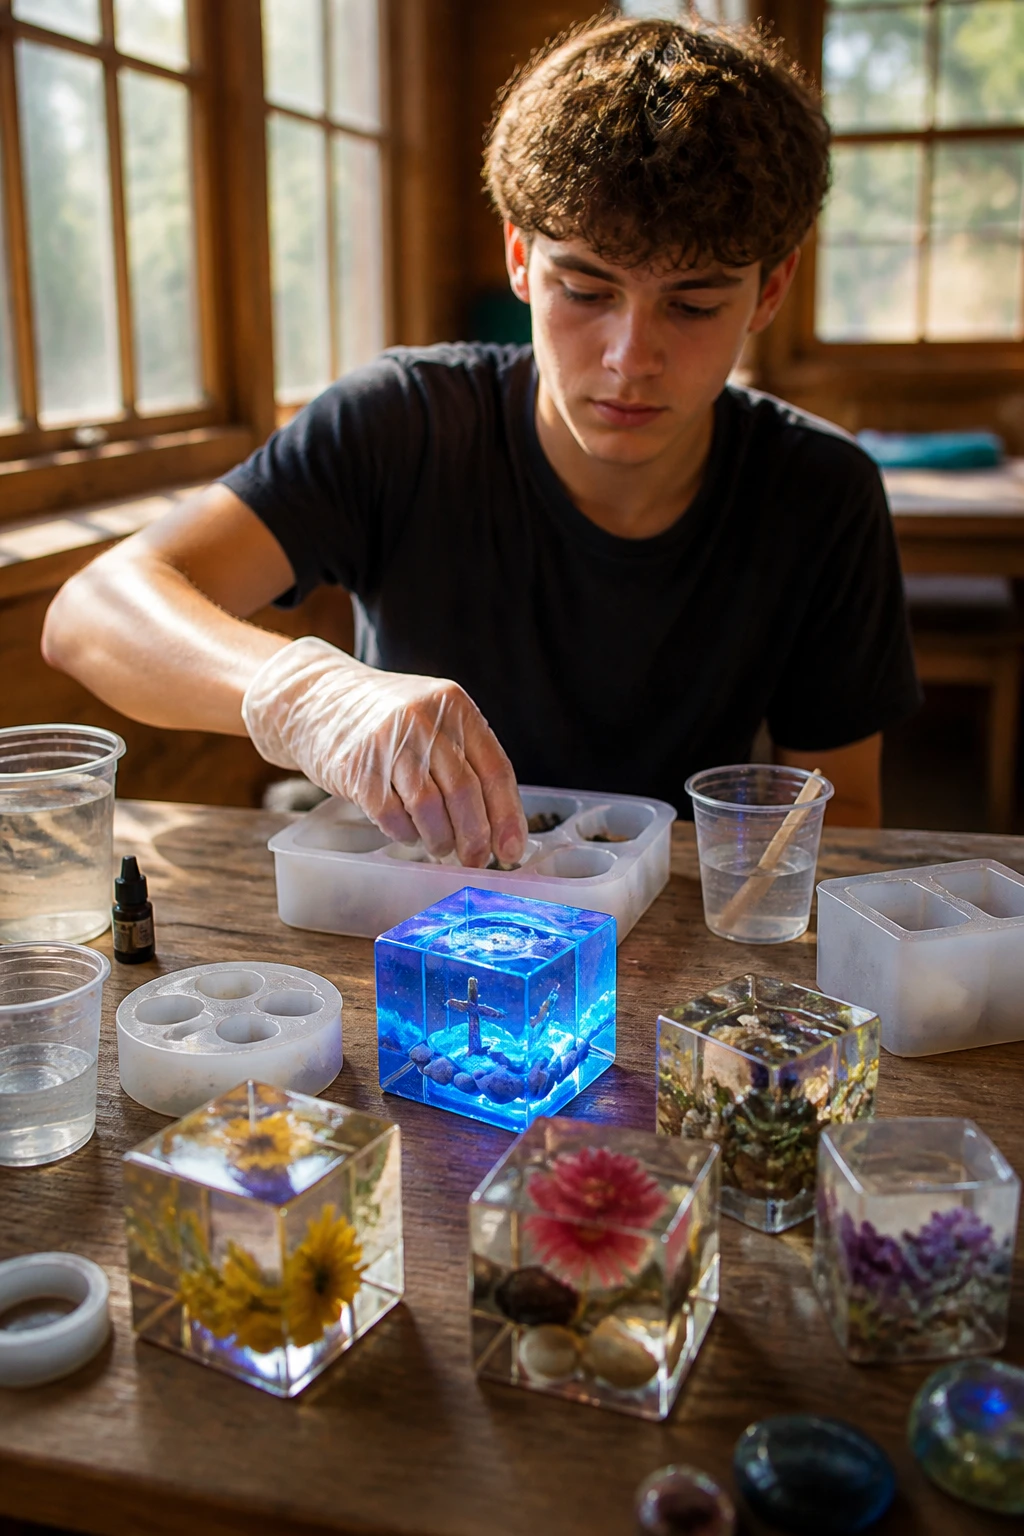
Resin crafts have exploded in popularity, and for good reason—the results look like expensive art gallery pieces. These paperweights suspend small objects, rocks, or even LEDs in crystal-clear resin, creating dimensional pieces that catch light beautifully.
Add a small battery-powered LED, and you’ve got a glowing accent piece that’s equal parts science experiment and art project.
The process teaches patience (resin requires curing time) and creativity in arranging elements within the mold.
Guys love experimenting with different materials embedded in the resin—everything from coins and small figurines to natural elements like stones, shells, or preserved insects.