20 Craft Ideas for School That Teach a Lesson While Kids Create

Somewhere between the spelling test and the final bell, every class needs something to do with its hands. Teachers want that time to count.
Parents want a school project that won’t eat a whole weekend or a whole paycheck. Kids just want to make something they can show off.
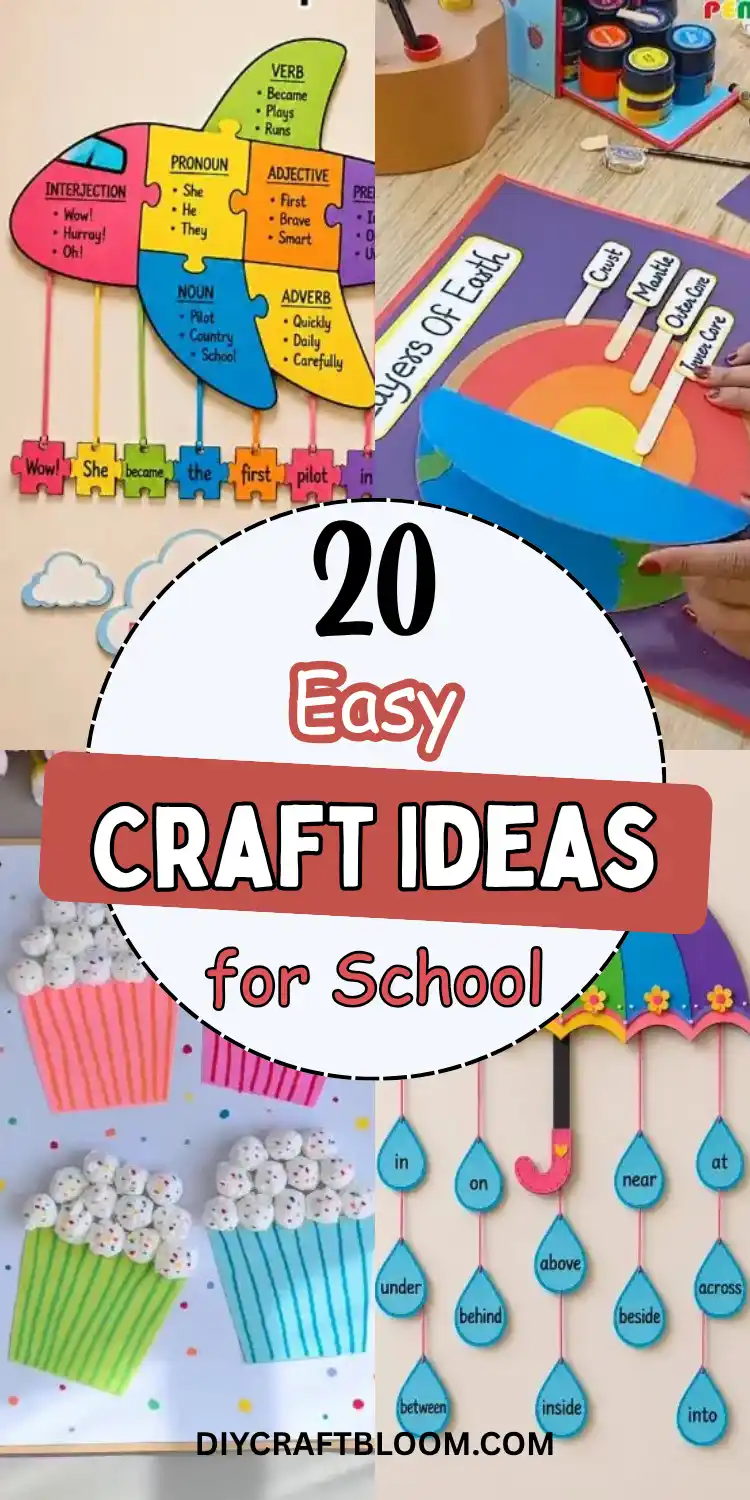
This list of craft ideas for school covers all three. Some projects sneak in a real lesson, like a puzzle airplane built from parts of speech or a lift the flap model of Earth’s layers.
Others are pure fun. Cupcake liner jellyfish sway over the desks, and cone carrots stare back with goofy googly eyes.
Most need only paper, glue, craft sticks, and the odds and ends already sitting in a supply closet. Several work for preschoolers, and a few will keep older kids busy much longer.
Along the way, you’ll find tips for making projects easier, cheaper, or sturdier. That matters once a craft gets stuffed into a backpack for the trip home.
Grab the scissors. Number one starts with nothing more than a couple of paper strips and a pencil.
1. Curled Paper Snails on a Leaf
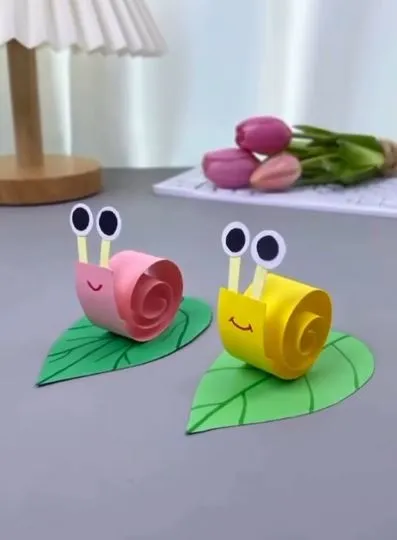
Two strips of paper and a leaf cutout are all these little snails need. Each shell is one long strip rolled into a tight spiral and glued at the outer end so it holds the coil.
A second strip, folded so one end stands up, becomes the head and body, with a tiny smile drawn in marker.
Kids love how fast this one comes together. Rolling the strip around a pencil keeps the spiral round, and sliding the pencil out leaves a neat center.
Paper eyes glued to thin strips stand in for antennae, so there is no need for googly eyes.
Set each snail on a green leaf with vein lines drawn on top.
That small step turns a paper curl into a tiny garden scene for a spring board or a quick Friday craft.
Let the glue dry before anyone picks them up, or the shell will spring open.
2. Folded Rainbow Petal Flowers
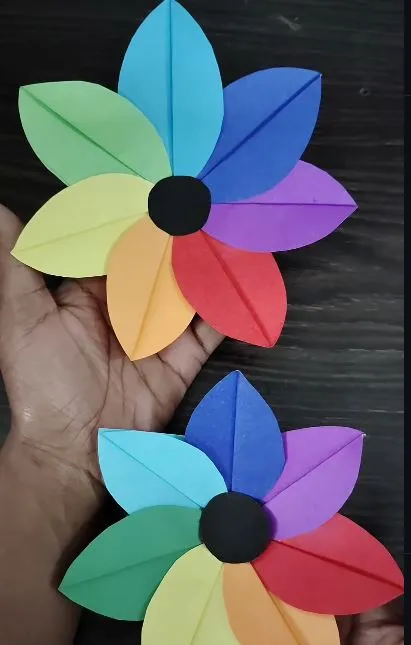
- Petals: leaf shapes cut in every rainbow color
- Fold: a crease down the middle of each petal
- Center: a black paper circle over the petal tips
- Finishing touch: colors set in rainbow order
Students get a color lesson and a scissor workout from one easy school craft. Tracing a single petal template keeps every piece the same size.
Gluing only the inner tip lets the folded sides lift, which gives the flower its crisp 3D shape.
Beginner version: Skip the fold for preschoolers and glue the petals flat. Precut shapes mean little hands only need to arrange and press.
3. 3D Paper Oranges With Leafy Stems
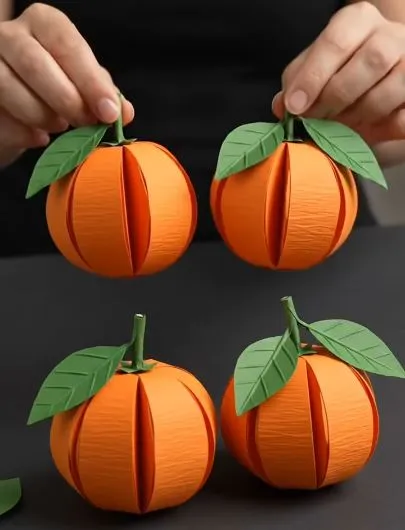
Best for: a healthy food lesson, a harvest table, or a fruit themed class display.
Each orange looks built from several folded paper sections glued side by side until they close into a ball.
Crinkled orange paper gives the peel real texture, and the deep creases between sections look like fruit segments. A green stem and two veined leaves on top finish it off.
Start with identical shapes cut from one template, since uneven pieces make a lumpy fruit.
Fold each one in half, glue that half to the next piece, and keep going around. Older kids, around third grade and up, will handle this best because the last join takes patience.
Budget swap: Plain orange construction paper works fine if textured paper is hard to find. Light wavy marker lines on each section fake the peel texture.
4. Pastel Craft Stick Pencil Holder
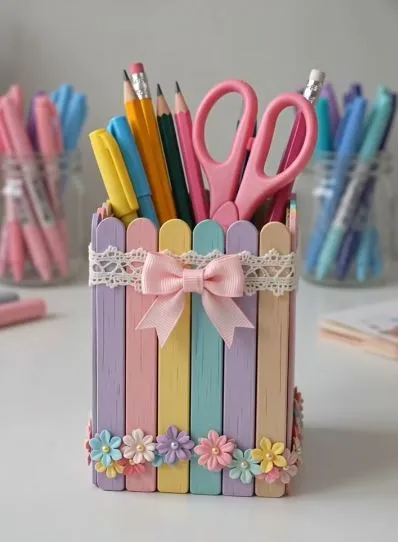
The build: a clean can or cup, pastel craft sticks, white lace, a pink satin bow, and small flower trim.
Pastel sticks in lavender, pink, butter yellow, and mint stand shoulder to shoulder around the holder.
Nothing shows of the base, so a clean tin can or sturdy paper cup works well underneath. Lace across the top and tiny pearl flowers along the bottom cover any messy glue lines.
Paint plain sticks first and let them dry flat, or grab a pack of colored ones. Glue guns grip best on metal, and that part belongs to an adult. Kids can take over the lace, the bow, and the flowers.
Classroom tip: Ask each student to write their name on one stick before it goes on. Every desk gets its own holder for back to school, and nobody argues over whose markers are whose.
5. Cupcake Liner Jellyfish That Float Over the Classroom
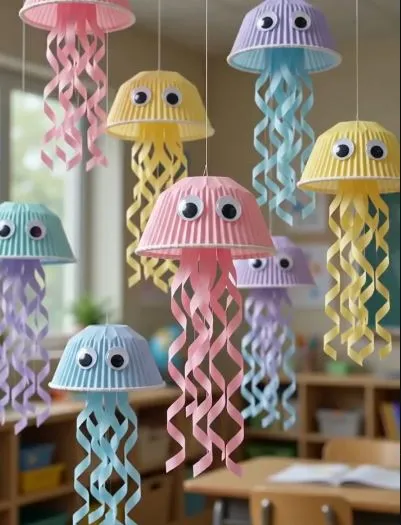
Upside down cupcake liners, or paper cups that look just like them, form the pastel bodies, each with a pair of googly eyes. Curly paper strips hang below as tentacles, matched to the color of each body.
Hang a whole class set from the ceiling at different heights, and an ocean unit becomes a classroom craft kids walk under every day.
Why it works:
Subscribe to DIY Craft Bloom
Get updates on the latest posts and more from DIY Craft Bloom straight to your inbox.
- Curled strips sway when air from a door or fan hits them.
- Liners cost little and come in big multicolor packs.
- Every child makes one, so the display belongs to the whole class.
Curl trick: Wrap each strip around a pencil, hold it for a few seconds, and slide it off. Glue the tentacles inside the rim before adding the eyes, so busy fingers don’t knock them loose.
6. Cotton Ball Popcorn Buckets
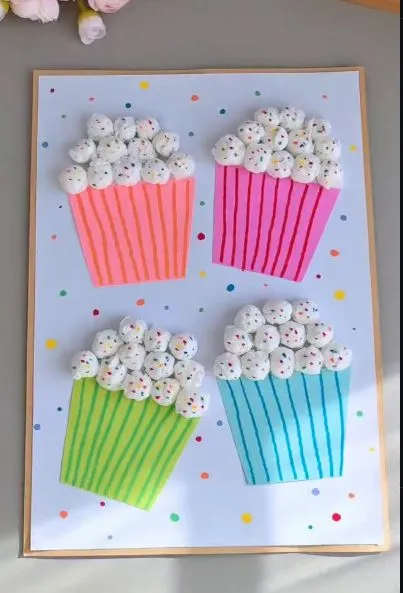
Popcorn made from cotton balls is soft, puffy, and hard for little hands to resist. Four striped paper buckets sit on a dotted white sheet, each piled with white puffs flecked with tiny bits of color like sprinkles.
Kids cut a simple trapezoid for each bucket, draw the stripes in marker, then glue the puffs along the top edge.
Lesson link: Turn it into counting practice. Give each child a number card and have them glue that many puffs on their bucket.
Supply note: Roll each cotton ball lightly between two fingers before gluing. Rounder puffs look more like real kernels.
Skip this: Loose glitter for the sprinkles, since it ends up everywhere. Dots of marker or a few fine sequins stay put and clean up faster.
7. Paper Cone Carrots With Fringe Tops
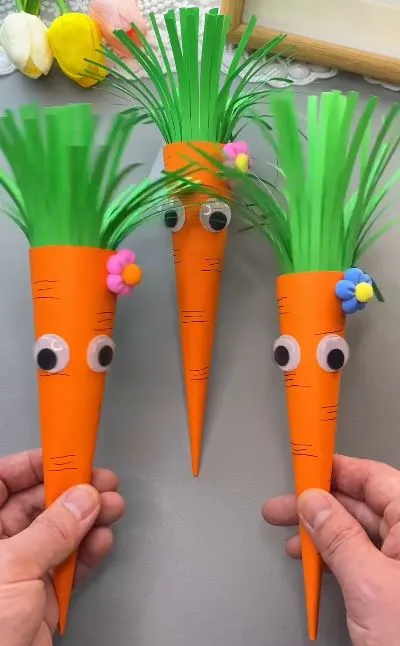
Orange paper cones make surprisingly real carrots, and each one gets a goofy face. Short black marker lines across the body copy the ridges on a real carrot.
Big googly eyes and a tiny pom pom flower on the side are the silly part kids remember most.
For the leafy top, cut a strip of green paper into thin fringe, leaving a solid band along the bottom.
Roll that band up and glue it inside the open end of the cone. More cuts mean a fuller, bushier top.
Spring lessons, a garden unit, or an Easter class party all fit this easy school craft. Fill the cones with small treats before adding the tops, and they double as party favors.
Tape along the seam, since glue alone tends to pop open on a tight cone.
8. Parts of Speech Puzzle Airplane
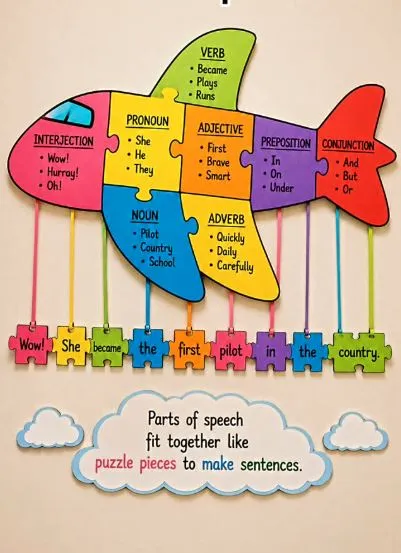
- Body: an airplane cut into eight puzzle pieces
- Labels: one part of speech per piece, three words each
- Sentence strip: ribbons ending in puzzle piece word tiles
- Finishing touch: a paper cloud with the big idea
Hanging tiles spell out a full sentence, “Wow! She became the first pilot in the country.” Students see single words from different groups lock together into real writing.
Swap in new sentence tiles each week, held on with sticky tack, and the chart keeps teaching all term.
Make it easier: Start younger grades with three pieces: noun, verb, and adjective. Add the rest as each one gets taught.
9. Lift the Flap Layers of Earth Model
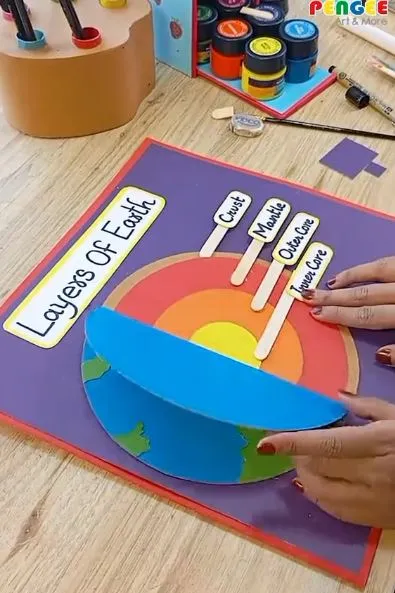
Best for: science fair tables, a geology unit, or a take home project in upper elementary.
Four paper circles, each a little smaller than the last, show the crust, mantle, outer core, and inner core. Tracing a plate and a few bowls gives clean circles without a compass.
A blue Earth flap with green land folds down over the cut side, and lifting it shows the layers inside.
Craft sticks topped with white name tags point to each layer, so the labels stay neat and easy to read.
Glue only one edge of the flap, or tape it like a hinge, so it opens again and again. Few school craft ideas double as a graded science project this well.
Upgrade note: Write one fact about each layer on the back of its craft stick. Students can flip the sticks and read them aloud during a presentation.
10. Rainbow Umbrella Preposition Raindrops
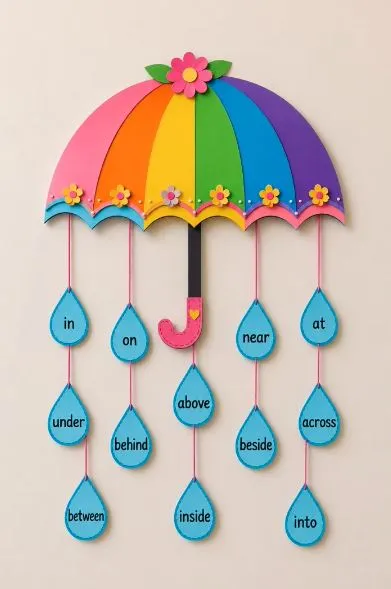
Blue raindrops dangle from a rainbow umbrella, and each drop carries a preposition such as under, beside, or between.
Pink string keeps every drop in its own lane below the scalloped edge. Words that describe where something is feel far less abstract once kids can see them hanging in the air.
Why it works:
- Twelve words fit on one display without crowding.
- Drops on clips can come down so kids can act out each word.
- Bright rainbow panels catch eyes from across the room.
Care tip: Laminate the raindrops before punching the string holes. Rainy season lessons can run for weeks, and paper drops go soft fast when little hands keep grabbing them.
11. Folded Corner Monster Bookmarks
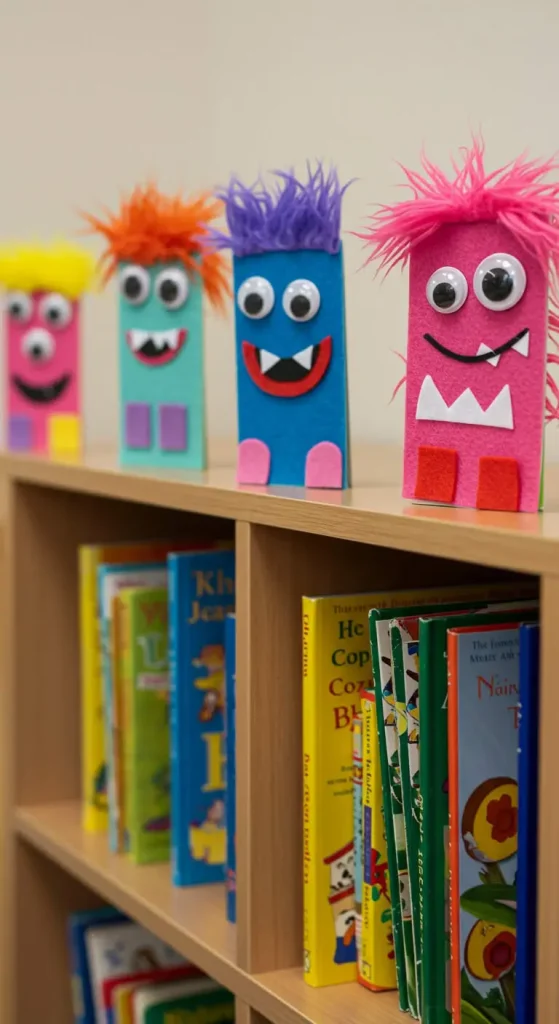
What you need: a paper square, two googly eyes, and a strip of white paper for teeth.
Fold the square into a triangle, then fold the top layer of the peak down to the long edge. Bring both side points up to the top and tuck them behind that flap. The pocket left behind slips over the corner of a page and holds tight.
Eyes sit above the pocket, and a zigzag of teeth lines its edge. On the page, the monster looks like it is chomping the corner.
Teacher tip: Hand these out when a class read aloud begins. Every monster marks the same chapter.
12. Clay Pencil Toppers
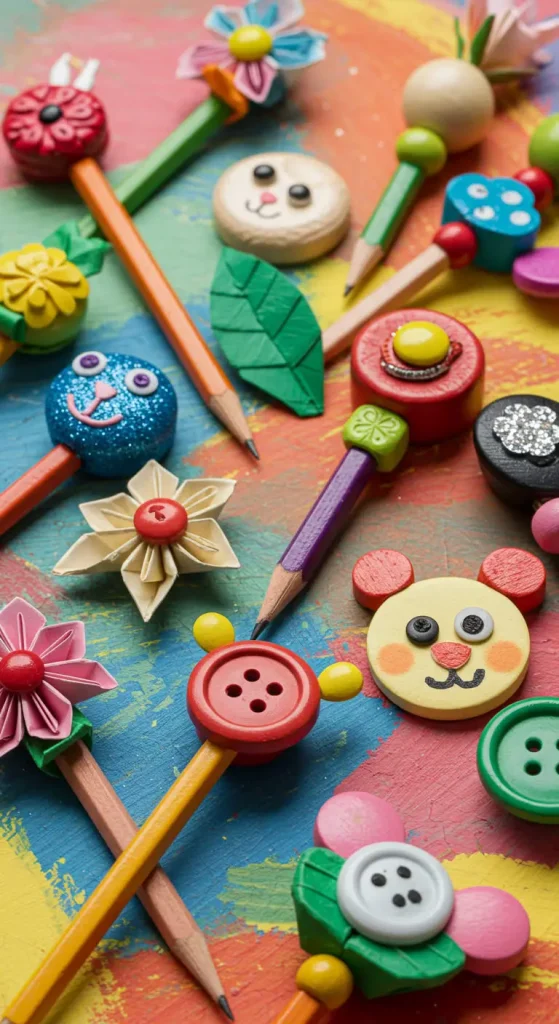
Stars, smiley faces, and tiny animals all work as pencil toppers. Kids shape a small lump of air dry clay, then push the eraser end of a pencil into the bottom.
Wiggle it a little so the hole stays roomy, pull it out, and let the clay harden.
Subscribe to DIY Craft Bloom
Get updates on the latest posts and more from DIY Craft Bloom straight to your inbox.
Size note: Keep each topper smaller than a grape. Heavy ones tip the pencil and tire small hands.
Drying time: Most air dry clay needs a full day or two. Check the package.
Paint note: Add color once it dries, then a thin coat of clear glue to stop chipping.
13. Paper Plate Clocks for Telling Time

- Face: a paper plate painted any color
- Numbers: 1 to 12 written around the rim
- Hands: one short and one long cardstock arrow
- Center: a paper fastener through all three layers
Younger grades get a working clock they can turn with their own fingers. Call out a time, and each child moves the hands to match. The minute hand should be clearly longer so nobody mixes them up.
Spacing note: Write 12, 3, 6, and 9 first. Filling in the rest between them keeps the numbers even.
14. Countdown Paper Chains
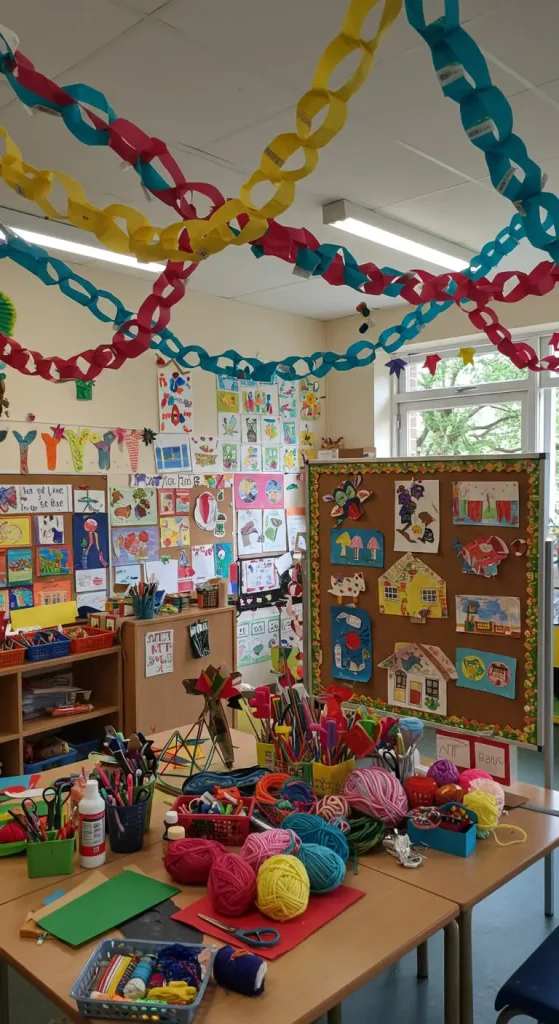
Colored paper strips looped into rings make a classic classroom craft. It still earns its spot because every child can do it, even on the first day.
Give the chain a job, though. Add one link for each day left until a field trip or holiday, then tear one off every morning. Kids watch it shrink and practice counting down.
Staples hold faster than glue when the class is big and time is short. Hang the finished chain across the whiteboard, where everyone can see it.
15. Roll a Story Cubes
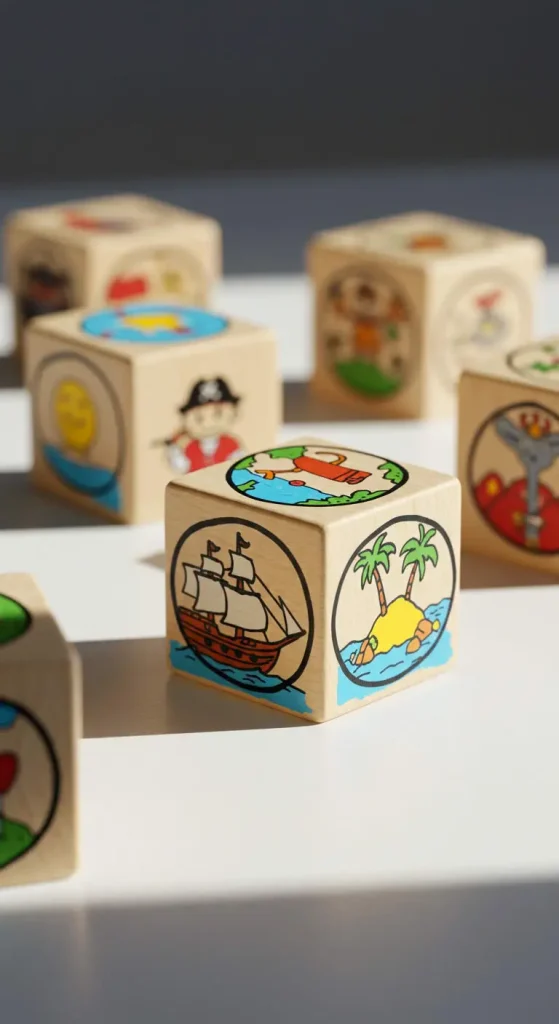
Cubes folded from a cardstock template turn into a writing game. Kids draw a character, an object, or a place on each side. Roll two or three, and whatever lands on top becomes the start of a story.
Why kids ask for it again:
- Every roll gives a new and often silly prompt.
- Shy writers get a starting point instead of a blank page.
- Small groups can play while the teacher works with others.
Grade tip: Younger students can draw pictures only. Older ones can add one word under each drawing.
16. Melted Crayon Shapes From Broken Bits
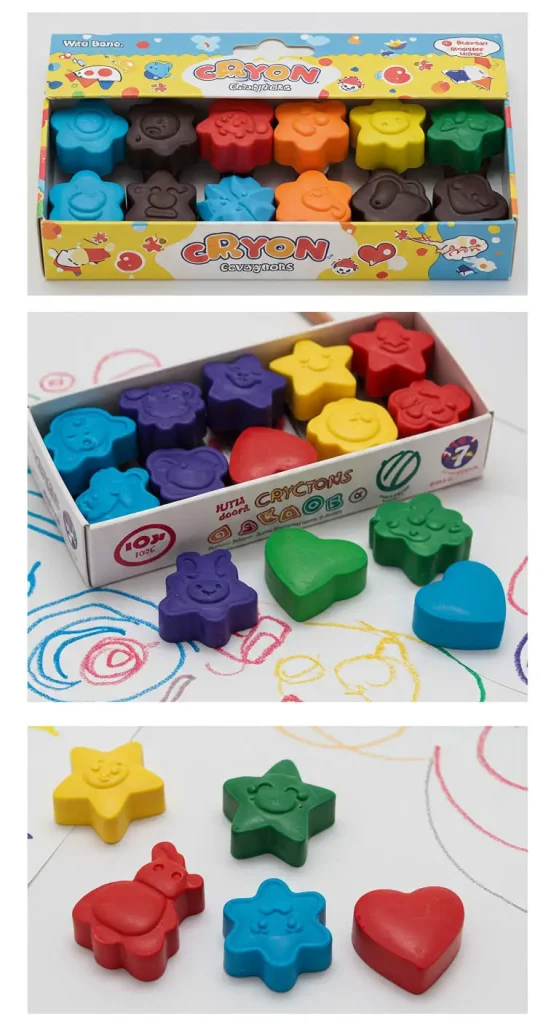
Broken crayons pile up fast in any classroom bin. Peel off the paper, snap the pieces small, and drop them into silicone molds shaped like stars or hearts.
An adult bakes them in a low oven, around 230°F, for roughly 10 to 15 minutes until the wax melts.
Adult step: The oven and the hot molds stay with a grown up. Kids handle the peeling and sorting.
Color note: Two or three shades per mold make swirled crayons. Too many turn the wax a muddy brown.
Cool time: Leave the molds on the counter until the wax is fully hard before popping the shapes out.
17. Craft Stick Mini Whiteboards
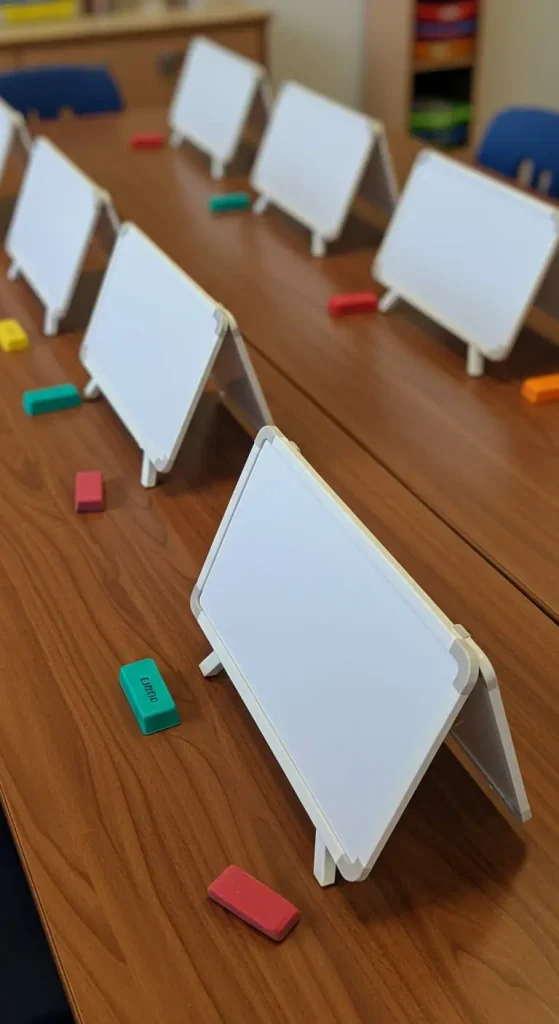
Simple version: a square frame of craft sticks, a sheet of laminated paper, and a dry erase marker.
Glue four sticks into a square, and add a second layer if the frame feels flimsy. Tape the laminated sheet to the back so it shows through the middle.
Each student now has a small board for spelling words, math facts, or quick answers held up during a lesson.
White paper looks cleanest, but lined or graph paper under the lamination helps with handwriting and number work.
Eraser idea: An old sock or a scrap of felt wipes marker off. Store one with each board so nothing goes missing.
18. Salt Dough Alphabet Letters
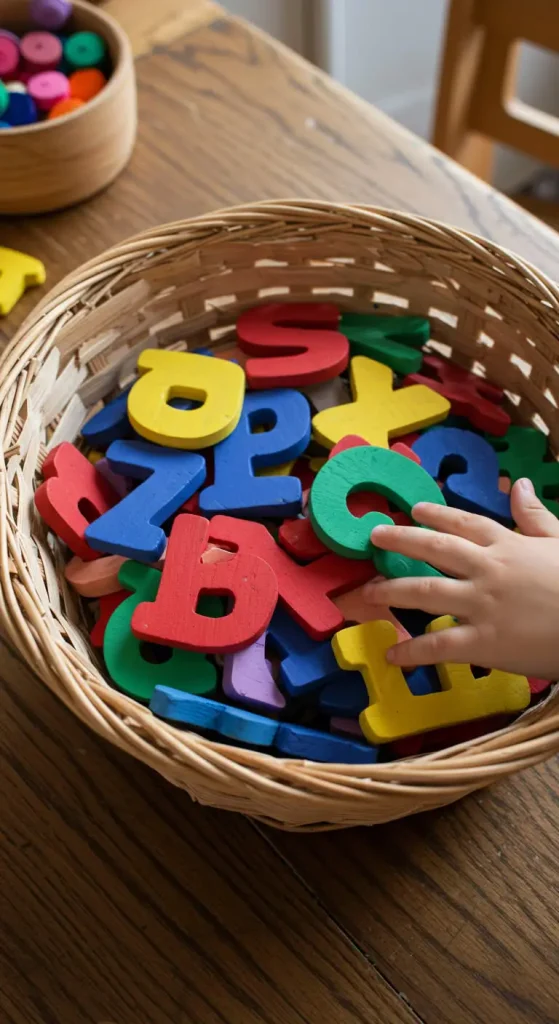
Good for: preschool and kindergarten letter practice.
Mix 1 cup of flour, ½ cup of salt, and ½ cup of water into a soft dough. Kids roll snakes and bend them into letters, or press out shapes with letter cookie cutters.
Bake the letters low and slow, around 250°F for two to three hours, until hard.
Thicker letters need longer. Once they cool, paint each one so little hands can trace, sort, and spell with them.
Thrift swap: No cutters? A plastic knife or a straw shapes the edges just fine.
19. Tissue Paper Stained Glass Windows
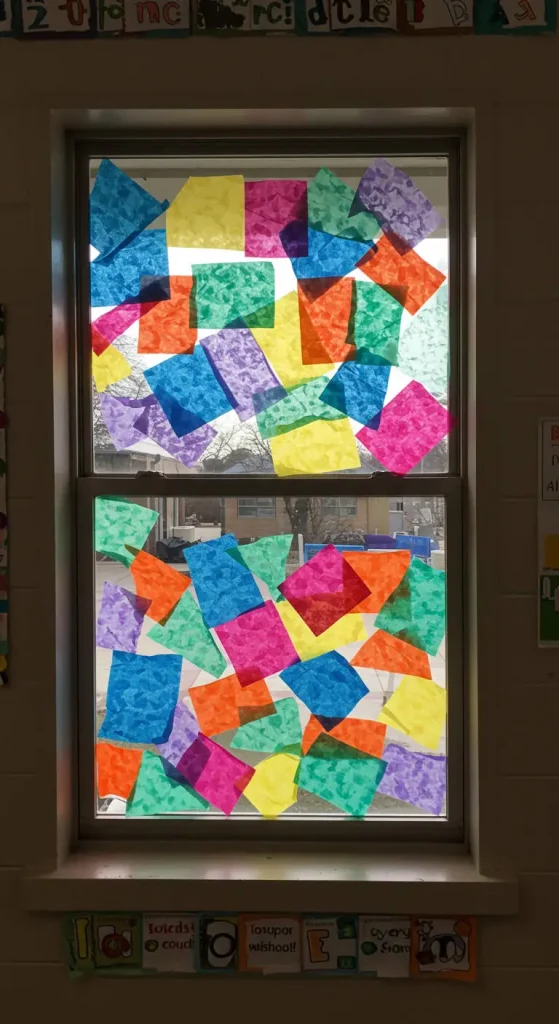
Sunlight does most of the work on this one. Kids cut a frame from black paper, then fill the open middle with small squares of colored tissue paper.
Clear contact paper makes it far easier than glue. Stick the frame to the sticky side, press the tissue down, and seal it with a second sheet.
Overlapping two colors creates a third, which sneaks in a quick color mixing lesson.
Tape each finished piece to a classroom window. On a bright morning, the whole wall glows.
20. Recycled Bottle Desk Caddies
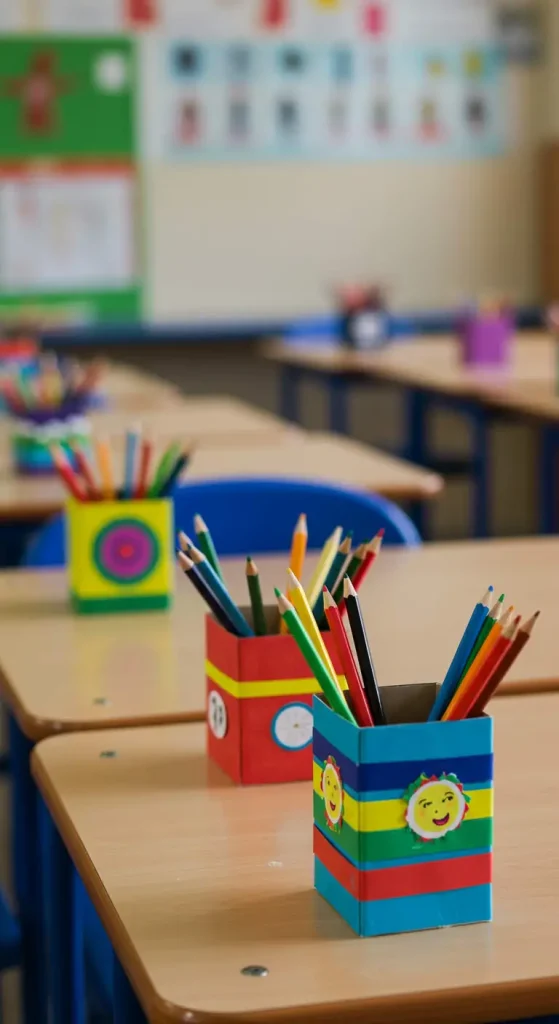
- Base: the bottom half of a clean plastic bottle
- Edge: cut smooth, then covered with colored tape
- Decoration: paint pens, stickers, or paper shapes
- Finishing touch: a name label on the front
Empty bottles from lunch boxes become desk caddies, which makes this a natural Earth Day project.
Cutting the plastic belongs to an adult, since the edge can be sharp. Kids take over once the tape is on.
One small change: Glue three bottle bottoms side by side. Pencils, markers, and scissors each get their own slot.