Craft Ideas for Adults: 22 Creative DIY Projects to Try This Weekend

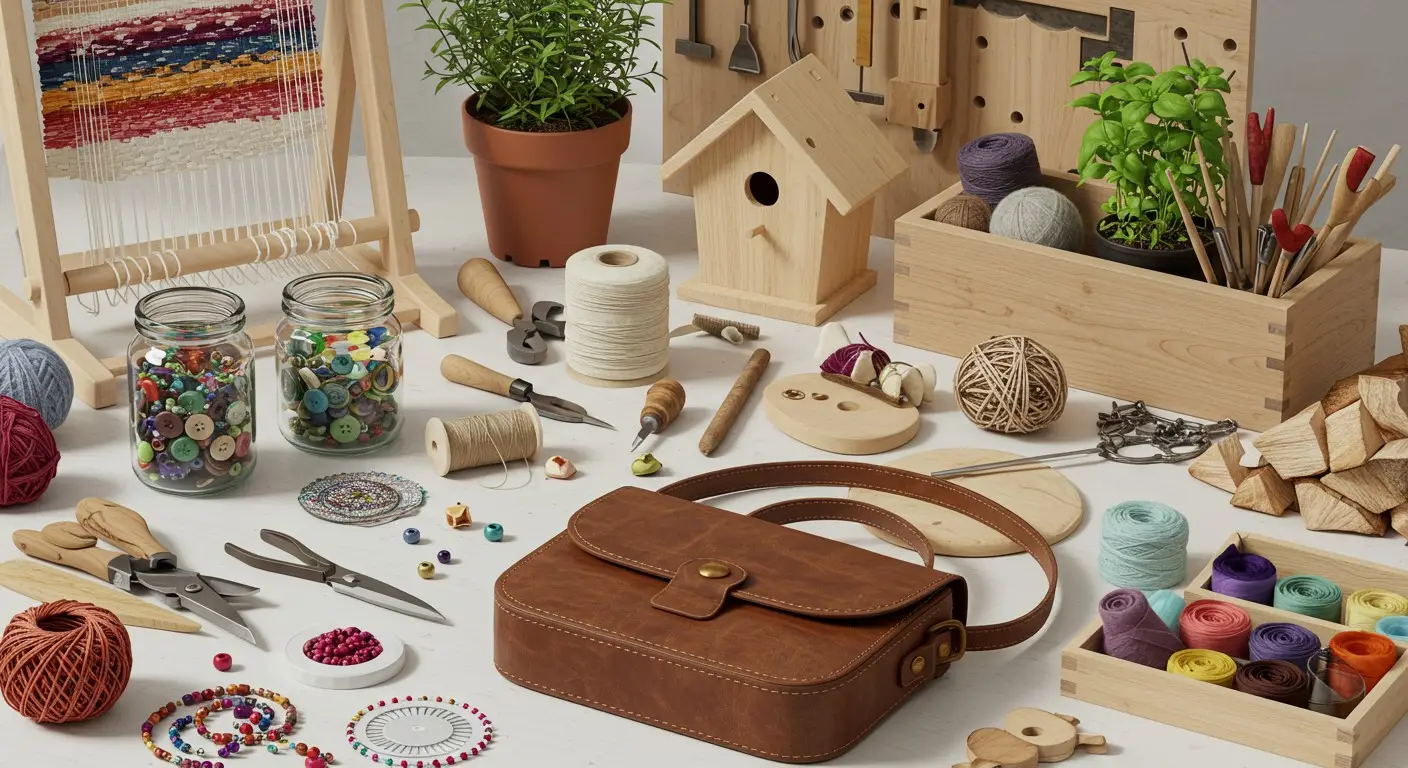
Most craft lists are written for kids, or for people with a full studio and a free week. This one is not.
Every project below came from a real photo, and most of them use things already sitting in your kitchen, your recycling bin, or the back of a drawer.
There is a reason adults keep coming back to making things. It gives your hands something to do that has an actual finish line.
You start on a Saturday morning, and by Sunday evening there is a lamp that glows warmer, a fence with color on it again, or a small dish by the sink that finally keeps your rings out of the drain.
These craft ideas for adults run from quiet indoor projects to bigger outdoor builds. Some take one evening and a glue brush. Others, like the mosaic stump seats, will eat a full Saturday and be worth it.
A few fix problems you have probably stopped noticing, like the blank corner or the patio that goes dark at eight.
1. Decoupage Shell Dishes That Catch Your Rings
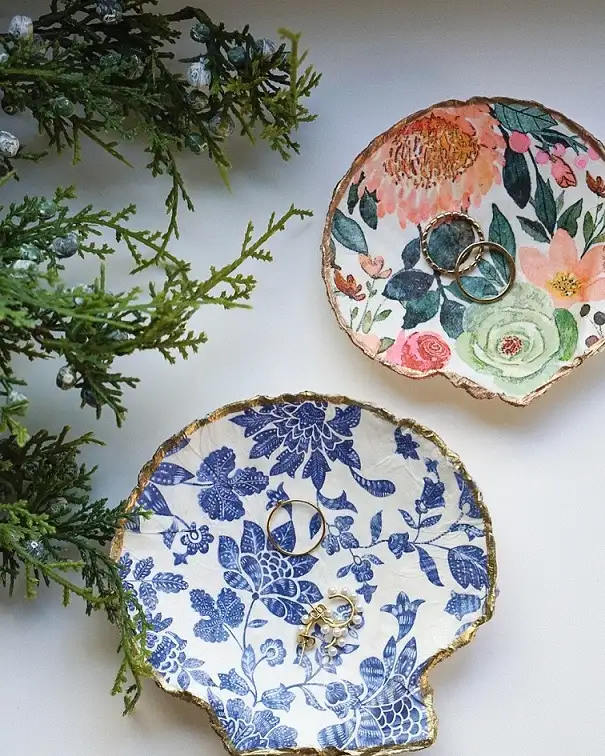
Rings and small earrings end up on the edge of the sink, and eventually one goes down the drain.
These two scallop shells fix that in about an hour. One carries a soft watercolor flower pattern in coral and green, the other a blue and white print that looks like old china.
Both have gold painted along the rough edge, which is the detail that lifts them from craft project to something that belongs on a dresser.
The pattern comes from paper napkins. Separate the layers so you are working with the thin printed sheet only, then smooth it over the shell in sections.
Brush a coat of white paint into the shell so the printed pattern reads clearly instead of sinking into the shell color.
Torn napkin edges blend into each other. Cut edges leave a visible line every time.
Push the glue outward with a soft brush so wrinkles have somewhere to go.
A dry brush of gold along the ridge hides every rough spot where the paper stopped.
2. Pressed Flower Candle Jars for a Slow, Quiet Evening
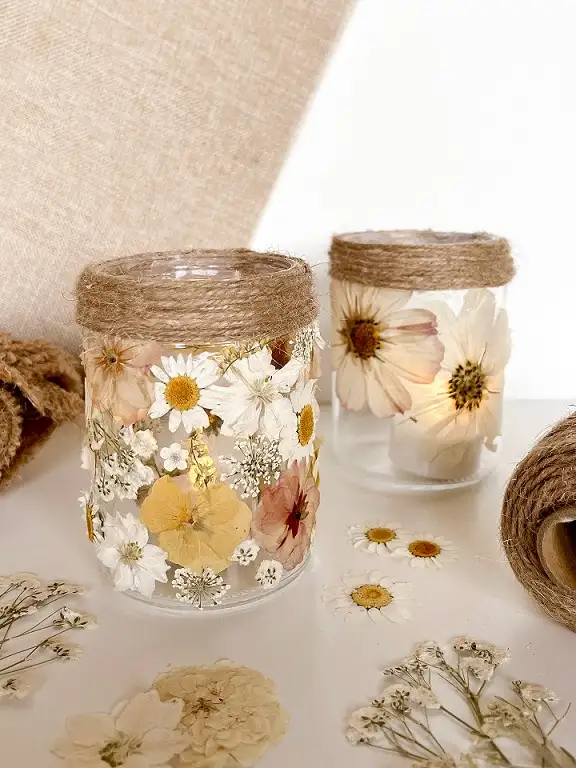
Some evenings you want something to do with your hands that does not need a plan.
Pressed flowers on glass is that project. Two jars sit here covered in dried daisies, cosmos, and small white filler blooms, with a thick collar of jute wrapped around each rim.
The flowers keep their soft cream and blush tones, and when a candle sits inside, the petals show as shadows through the glass.
The smaller jar uses only three or four large blooms. The taller one is packed edge to edge. Both look good, which tells you the density is a choice, not a rule.
Use a flameless candle if the petals sit high on the jar.
3. Turn Woven Placemats Into Large Scale Wall Art
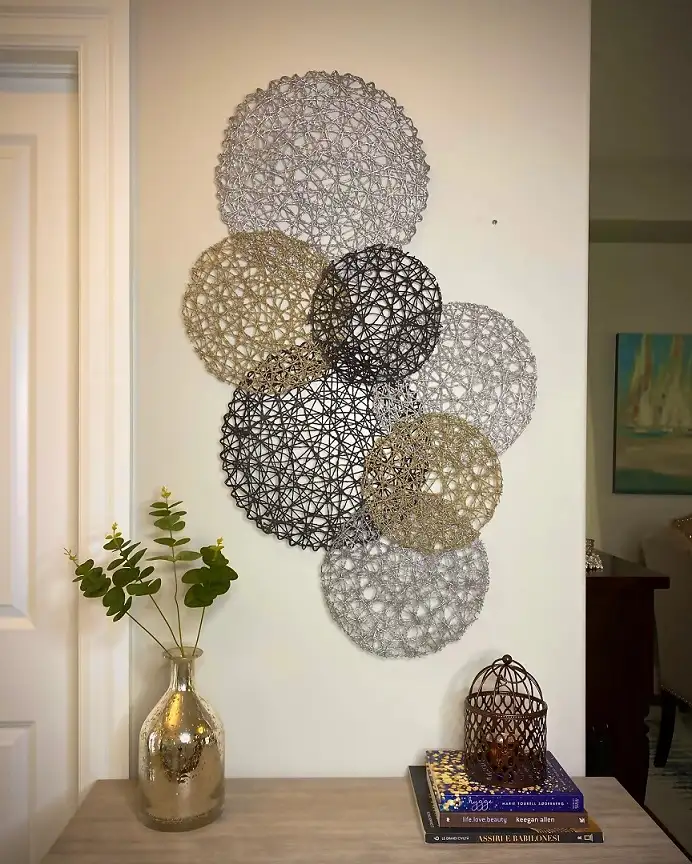
Big wall art is expensive, and most of us have a wall too large for anything we own.
Here, seven round metallic placemats in silver, gold, and dark bronze overlap into one sculptural cluster.
From across the room it reads as a single expensive piece. Up close you can see it is just open weave discs layered at different depths.
What makes it work is the overlap. The circles sit on top of each other instead of lining up politely, so the group gets a sense of movement.
Two sizes and three metal tones are enough. Any more and it turns busy.
Hang the biggest disc first at eye level, then tuck the others under and around it, letting each one cover about a third of its neighbor.
Lay the whole arrangement on the floor first and photograph it from above. Fixing the layout on your phone is a lot easier than fixing it with nail holes.
4. Cut Paper Sleeves That Warm Up Cold Lamp Light
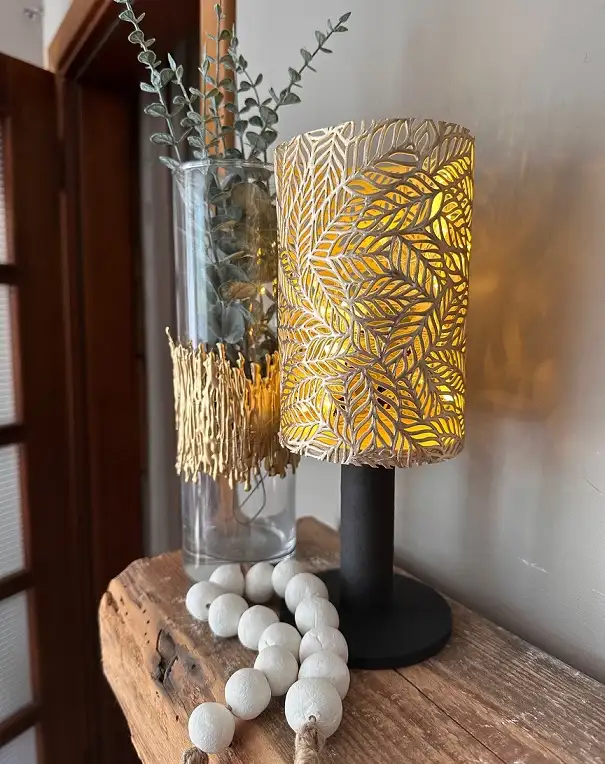
Bare bulbs and plain glass vases throw a hard white light that makes a room feel unfinished.
The lamp in this photo wears a cream paper sleeve cut into an overlapping leaf pattern.
Light pushes through the gaps and turns gold, and the leaf shapes throw a soft pattern onto the wall behind it.
The vase beside it uses the same idea in a simpler form, with a short fringed paper collar catching the glow from the lights inside.
Two different problems, one technique. The table below shows which version to make first.
| Cut leaf sleeve | Fringed collar |
|---|---|
| Takes patience and a fresh blade | Scissors and twenty minutes |
| Casts a pattern on the wall | Softens the glow at the base only |
| Best on a lamp you look at | Best on a vase you walk past |
5. A Stained Glass Wreath That Uses Up Your Scrap Pile
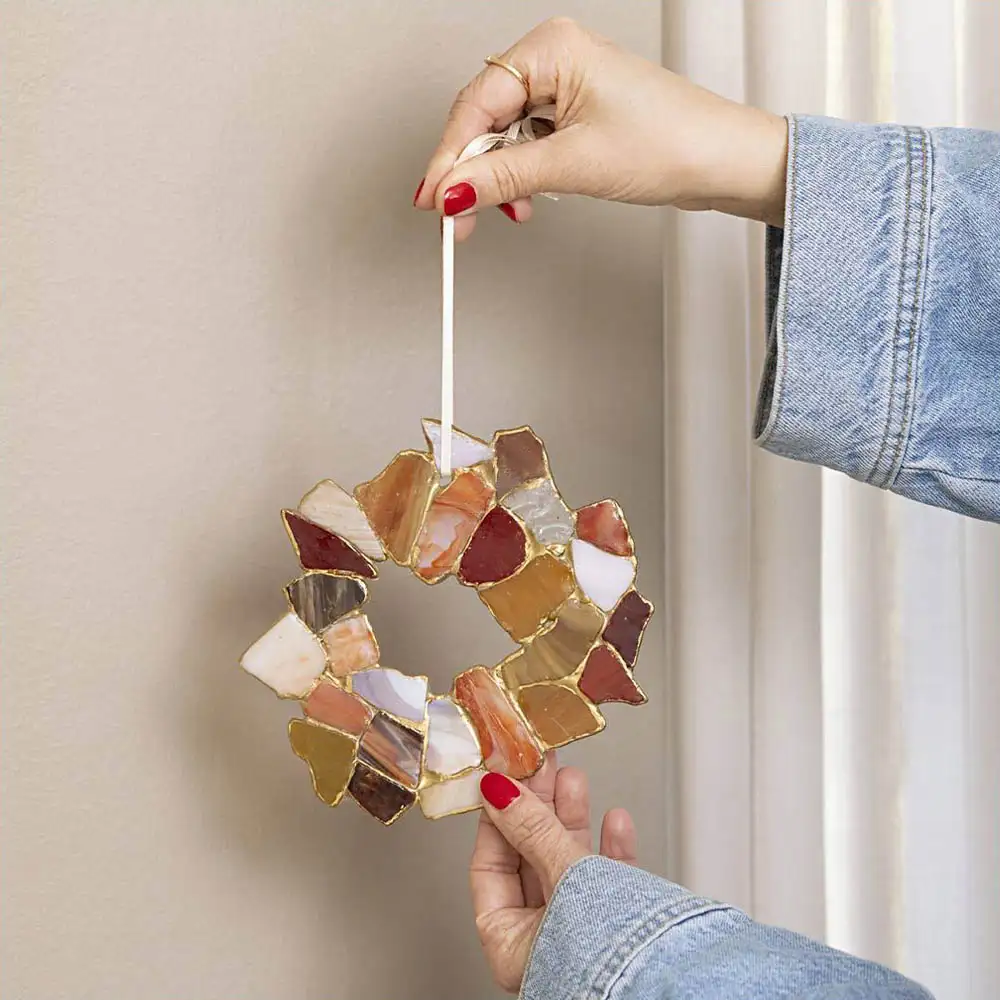
Every glass crafter has a box of offcuts too small to use and too pretty to throw away.
This small wreath is made entirely from those pieces. Amber, rust, cream, and deep red fragments are set in a ring, each one wrapped in gold foil tape so the edges catch the light.
The shapes are irregular on purpose. No two pieces match, and the gold outline is what pulls the whole ring together.
It hangs from a plain ribbon, small enough to sit on a cupboard door or a window frame rather than the front door.
Subscribe to DIY Craft Bloom
Get updates on the latest posts and more from DIY Craft Bloom straight to your inbox.
One honest warning. Cut glass edges are sharp until they are foiled, so wear gloves while you sort.
6. Build a Handmade Gallery Wall That Fills an Empty Corner
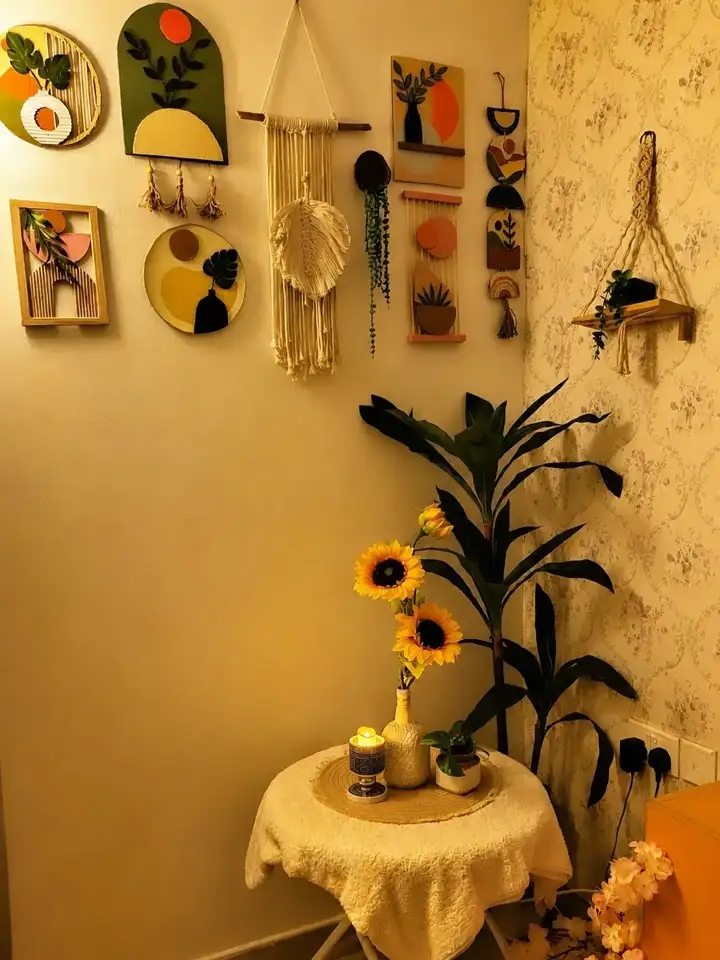
Blank corners are the hardest part of a room to fix, because one big piece of art usually costs more than the whole corner is worth.
This wall solves it with small handmade pieces instead.
Painted wood arches, a yarn weaving in a wood frame, a round woven disc, and a macrame hanging all sit together in a warm mustard and olive family.
Nothing matches exactly, but the repeated colors hold it together.
The trick worth stealing is the mix of shapes. Circles, arches, and one long vertical hanging keep your eye moving instead of settling into a boring grid.
Start with your largest piece slightly off center, then build outward with the smaller ones.
Rounds, arches, and one tall hanging keep the group from looking like a photo grid.
Mustard shows up in almost every piece, which is what makes mismatched crafts read as a set.
The small table with flowers and a candle anchors the wall so the art does not float.
7. Glowing Star Jars for a Wall With No Outlet Nearby
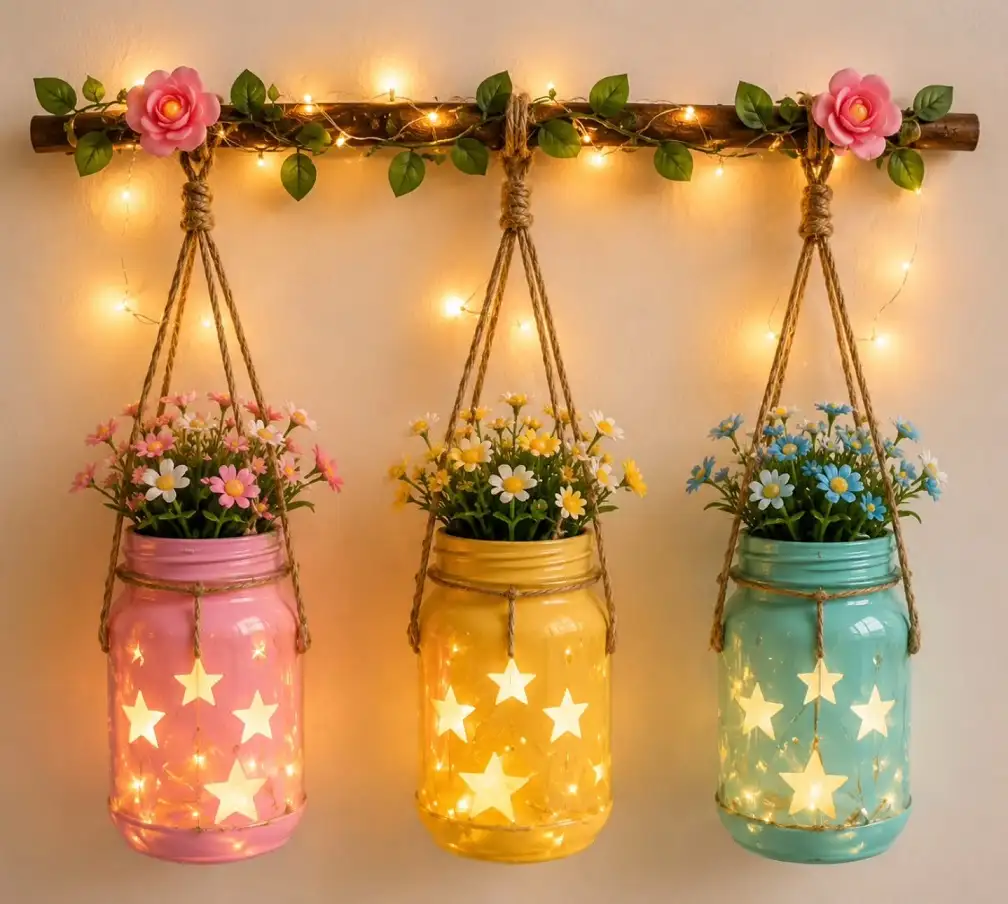
Some walls have no lamp and no plug, so they stay dim all evening.
Battery fairy lights inside painted jars fix that without an electrician. Three jars here are washed in pink, yellow, and soft teal, with star shapes left clear so the light punches through.
Twine slings hold them from a branch wrapped in leaves and more lights, and each jar holds a little bunch of flowers at the top.
The star effect comes from masking. Stick star shapes on the glass, paint over everything, then peel the shapes off once it dries. The paint stays, the stars stay clear.
Keep the flowers dry and artificial if the lights sit close to them.
8. DIY Embroidery Hoop Art
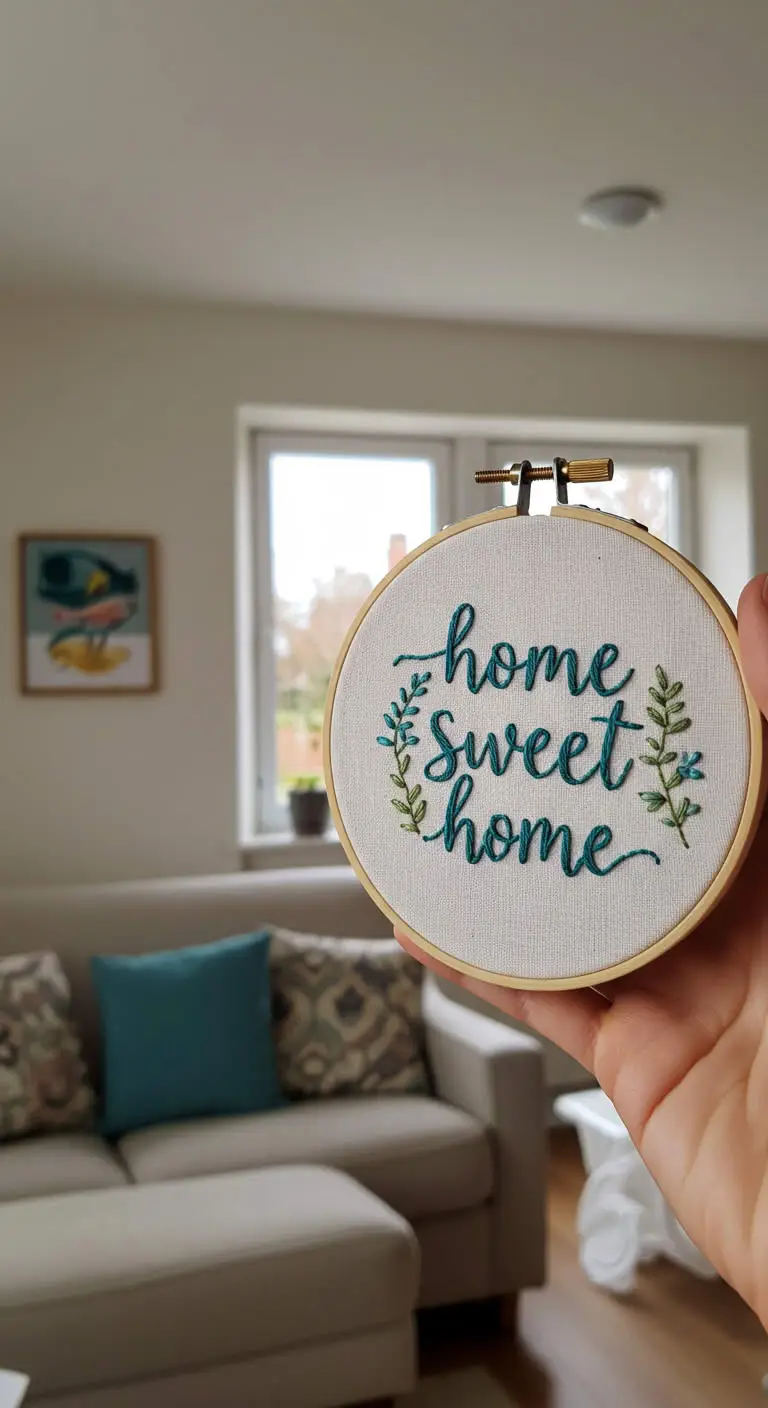
Embroidery hoop art adds a handmade charm to walls or shelves.
How to Make It:
- Stretch fabric into an embroidery hoop.
- Stitch a simple floral or quote design.
- Trim the excess fabric and display.
Picture This: A delicate embroidery hoop featuring the words “Home Sweet Home,” hanging on a cozy living room wall.
9. A Craft Stick Ladder That Gives Plants a Home Off the Floor

Small apartments run out of surfaces long before they run out of plants.
This hanging piece moves three of them onto the wall. The frame is craft sticks stained dark brown and laid in an offset ladder pattern, with a rope loop at the top.
Three round holders made from thin bamboo slats sit at staggered heights, each wrapped with jute at the top and bottom and marked with a small felt flower.
The staggered spacing is the part to copy. Even spacing would look like a shelf. Offsetting them lets each plant have its own pocket of air.
Keep the pots light. Craft sticks and glue hold small artificial greenery well, but not wet soil.
10. Pastel Stick Panels That Fill a Narrow Wall Strip
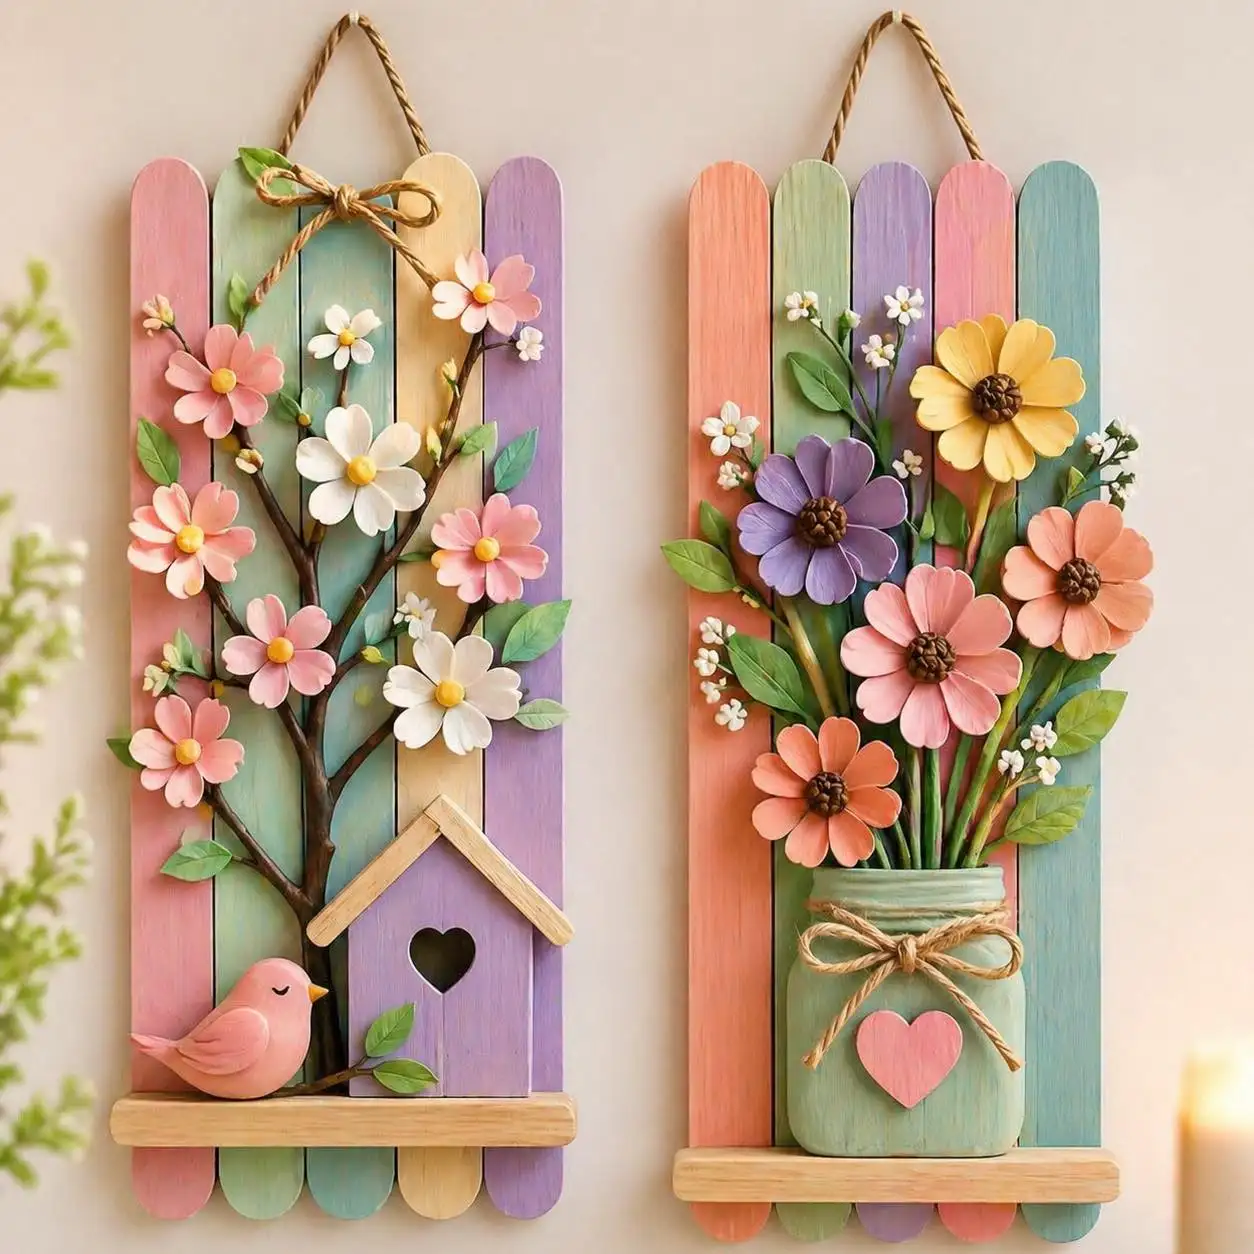
Narrow strips of wall beside a door or between two windows are awkward. Standard frames are too wide and shelves stick out too far.
Two tall panels solve it here. Each one is a row of craft sticks painted in soft pink, mint, peach, lavender, and blue, with a small ledge across the bottom.
One panel carries a branch with clay style blossoms, a heart cut birdhouse, and a pink bird. The other holds a jar of raised flowers tied with rope.
They hang from twisted rope loops, which keeps the hardware simple. Made as a pair, they hold the wall better than either would alone.
11. Painted Spoon Wind Chimes for Odd Cutlery You Never Use
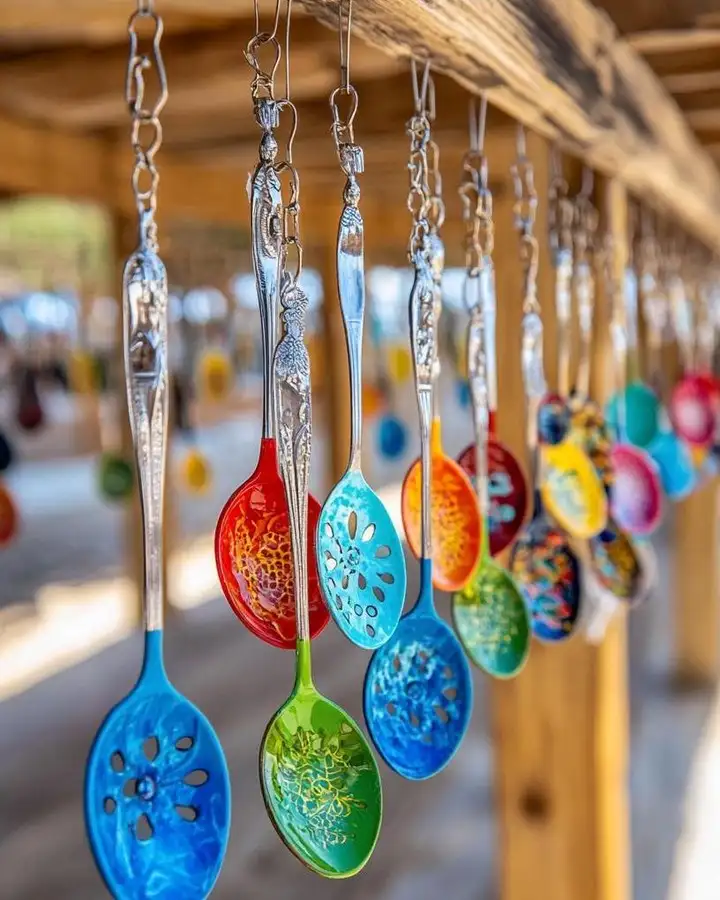
Mismatched spoons at the back of a drawer have no purpose and no resale value, but the handles are often beautifully patterned.
Turning them into a chime keeps that detail visible. Every bowl in this row is painted in a different translucent color, blue, red, green, turquoise, and orange, with swirls and fine line patterns showing through.
The handles are left bare so the pressed metal design catches the sun.
Small jump rings and lengths of chain join them to a wood beam, hung at different lengths so they knock against each other in the wind.
Paint the part that catches light. Leave the part that already has detail alone.
12. DIY Hand-Painted Plant Pots
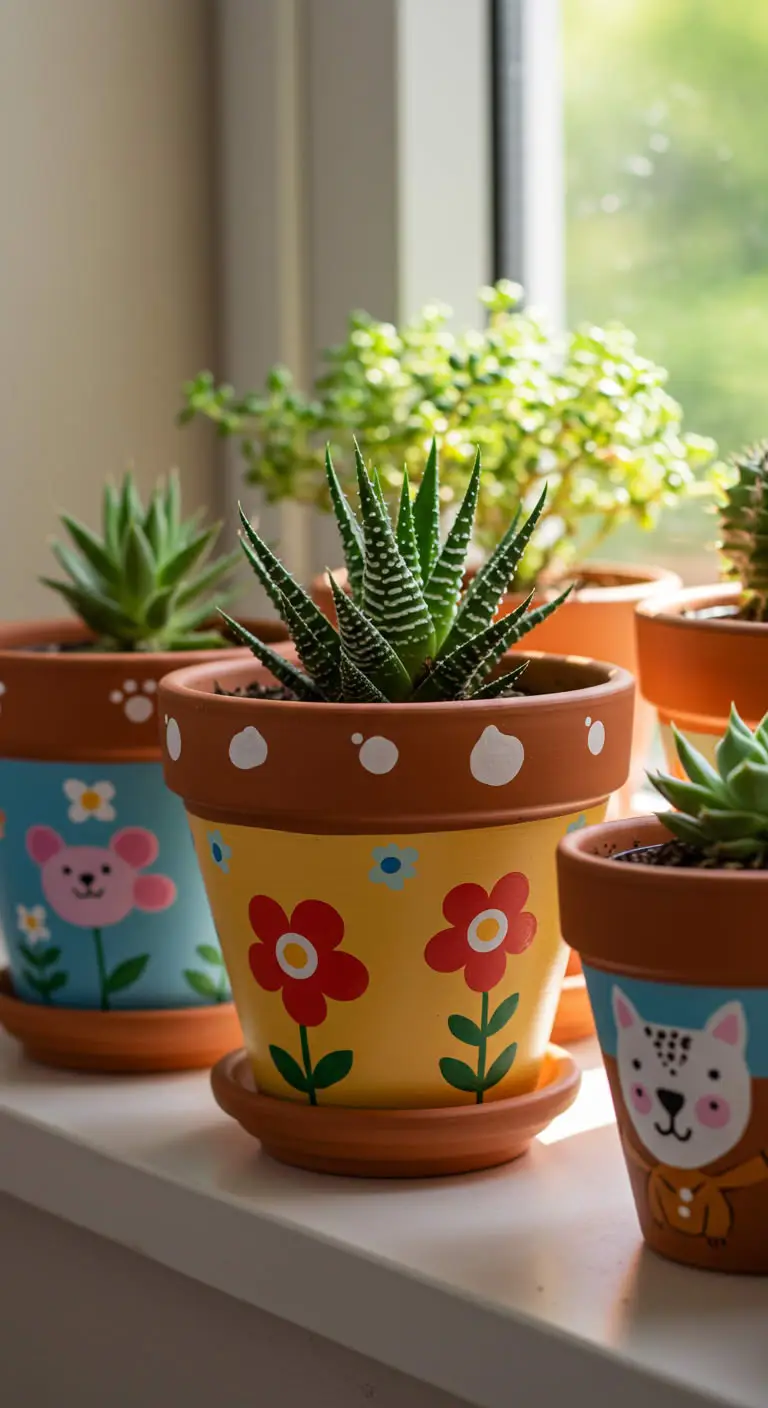
Custom plant pots add personality to any indoor space.
- Choose a plain ceramic or clay pot.
- Use acrylic paint to create abstract, geometric, or floral designs.
- Let dry and seal with Mod Podge.
Picture This: A collection of hand-painted plant pots with cute patterns, giving life to a windowsill filled with greenery.
13. Reclaimed Wood Lanterns for a Patio That Goes Dark at Eight
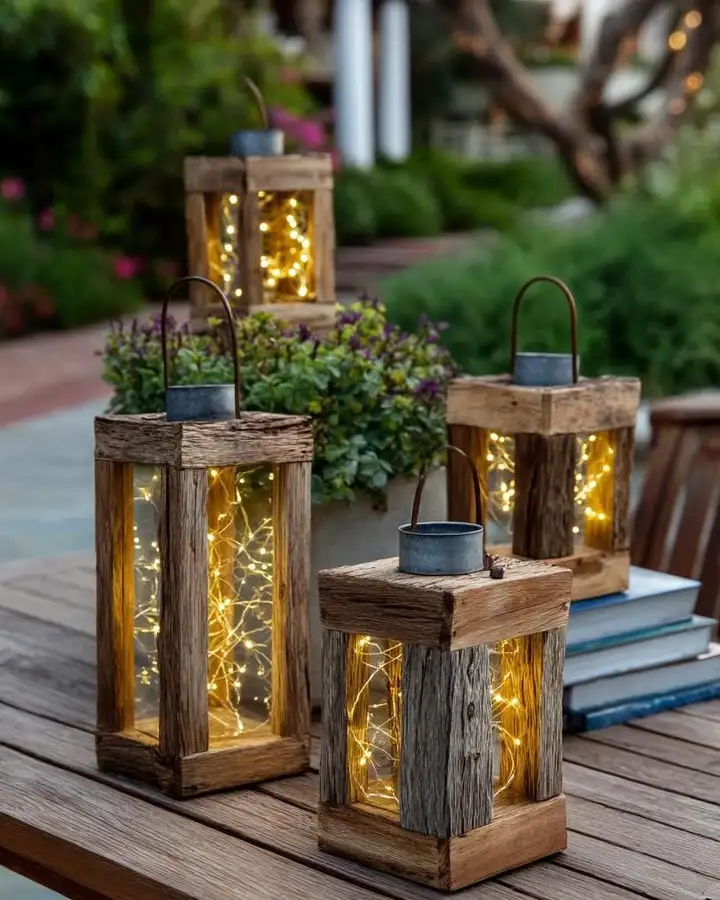
Outdoor lighting usually means running cords across a deck or paying for solar stakes that fade by midnight.
Subscribe to DIY Craft Bloom
Get updates on the latest posts and more from DIY Craft Bloom straight to your inbox.
These four lanterns skip all of it. Each frame is built from weathered wood with open sides, topped with a small metal handle, and filled with a nest of warm fairy lights on a battery pack.
Different heights, same build, so they group together on a table without looking repetitive.
The grey wood is doing real work here. New lumber would look like a school project.
Old fence boards or pallet wood already carry the grain and color that make these read as something bought.
14. DIY Handmade Bookmarks
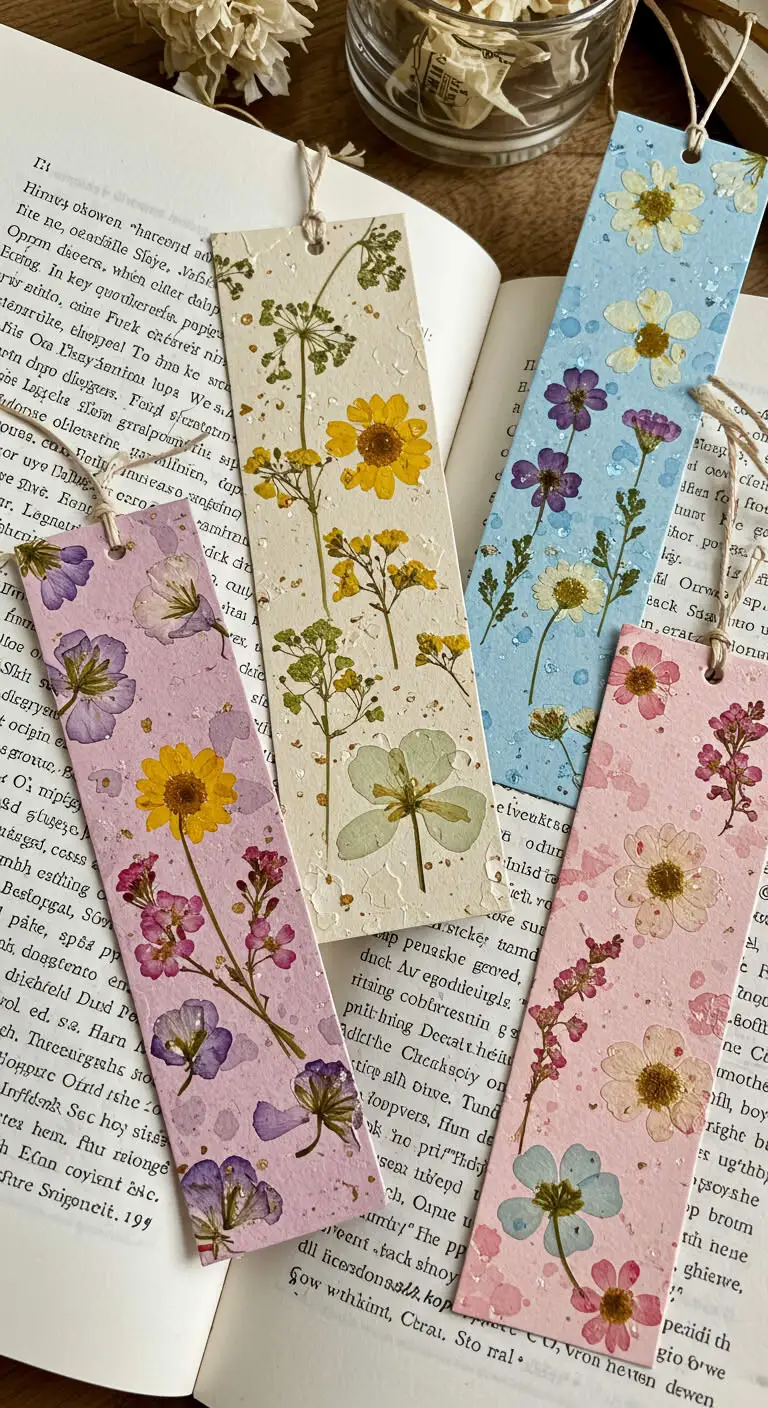
Handmade bookmarks make reading even more enjoyable.
- Cut thick paper or clay into bookmark shapes.
- Decorate with paint, stickers, or pressed flowers.
- Punch a hole at the top and add a ribbon.
Picture This: A set of aesthetic bookmarks with delicate floral designs, peeking out from favorite books.
15. Painted Disc Suncatchers Along a Bare Porch Wall
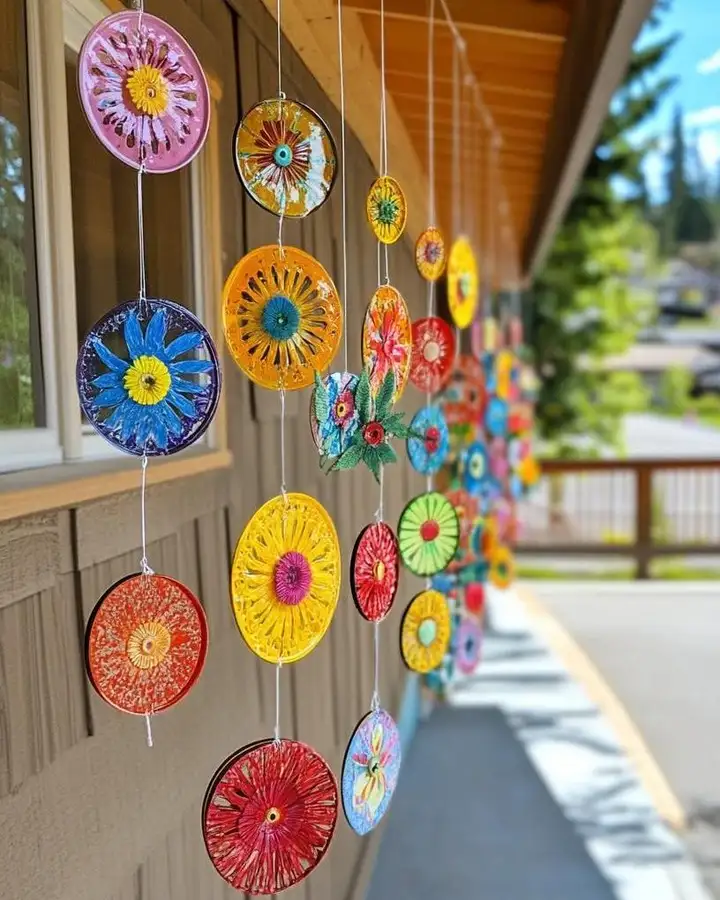
Long exterior walls tend to stay empty because outdoor art fades, warps, or blows away.
This string of painted plastic discs handles all three. Each round piece is painted with a bold flower in pink, yellow, orange, blue, and green, with a spoked pattern that lets sunlight pass through.
They hang on clear line in vertical rows, spaced out so the wall shows between them.
The rows are what make it. One disc is a craft. Twenty running the length of a porch turns into a real installation.
Old plastic lids, deli tubs, and scratched picnic plates all work as the base.
16. DIY Pressed Flower Candles
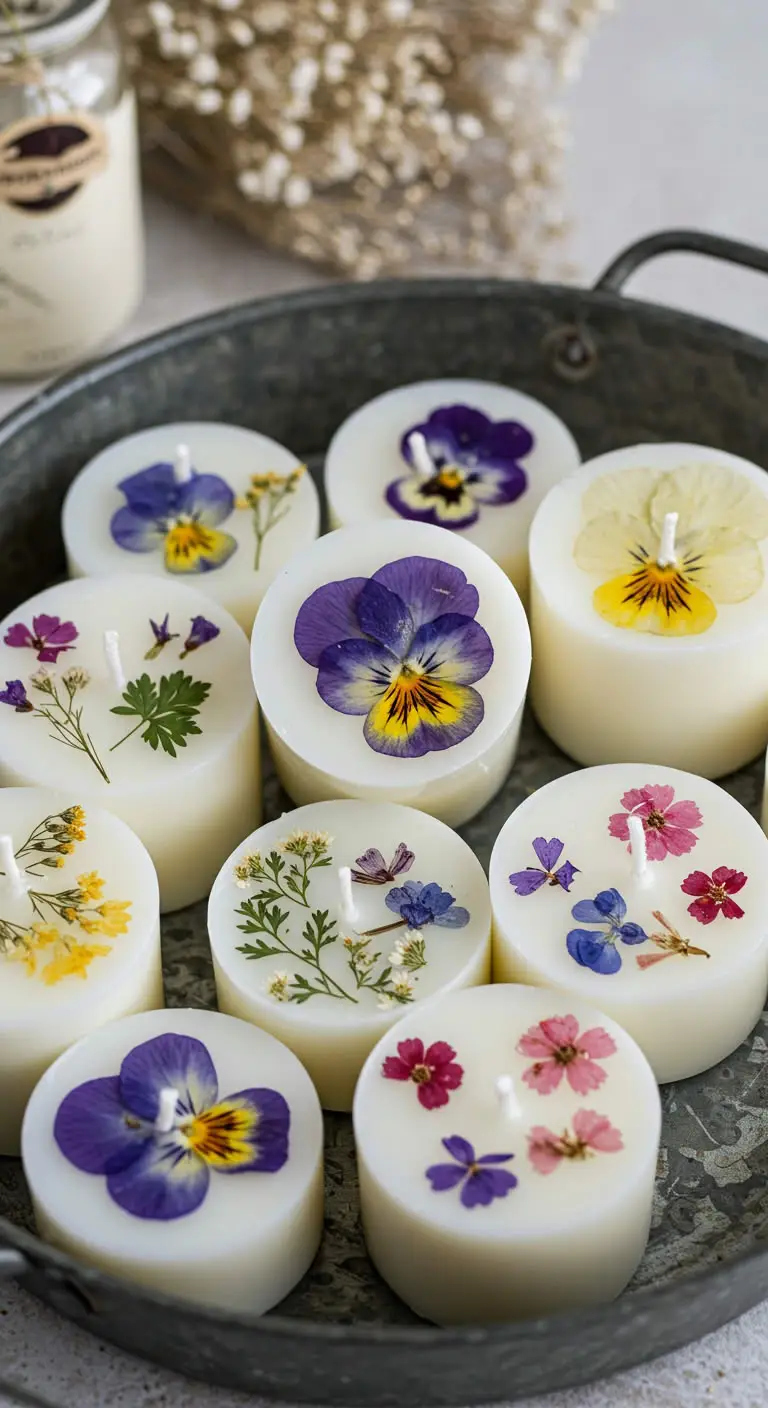
Pressed flowers turn plain candles into beautiful, nature-inspired decor pieces.
- Press fresh flowers between heavy books for a few days.
- Apply Mod Podge to a candle and gently press the flowers onto it.
- Let it dry completely before displaying.
Picture This: A collection of white candles with delicately pressed wildflowers, adding a soft and romantic touch to a cozy space.
17. Colored Glass Jar Lanterns Strung on Beaded Chains
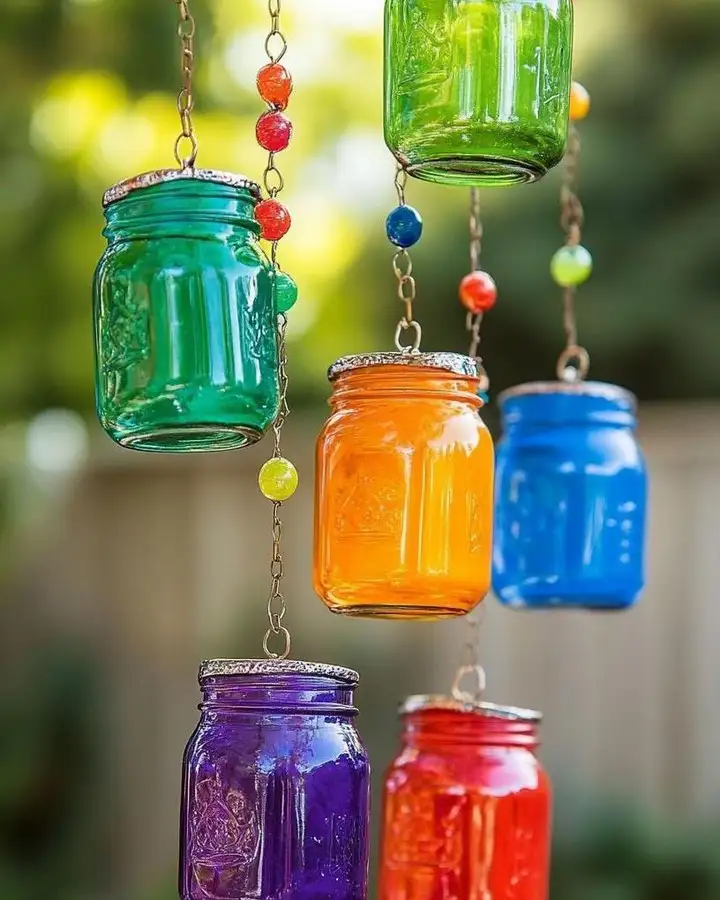
Garden corners often need color in the daytime and light at night, and most solutions only do one.
Six jars here handle both. Green, orange, blue, purple, and red glass hang at different heights from thin chains, with round glass beads threaded between the links in matching colors.
In daylight the color is the point. After dark, a tea light in each one turns the whole cluster into soft lanterns.
The beads on the chain are a small detail that pays off.
They break up the plain metal and echo the jar colors, so the hanging line becomes part of the piece rather than just the way it stays up.
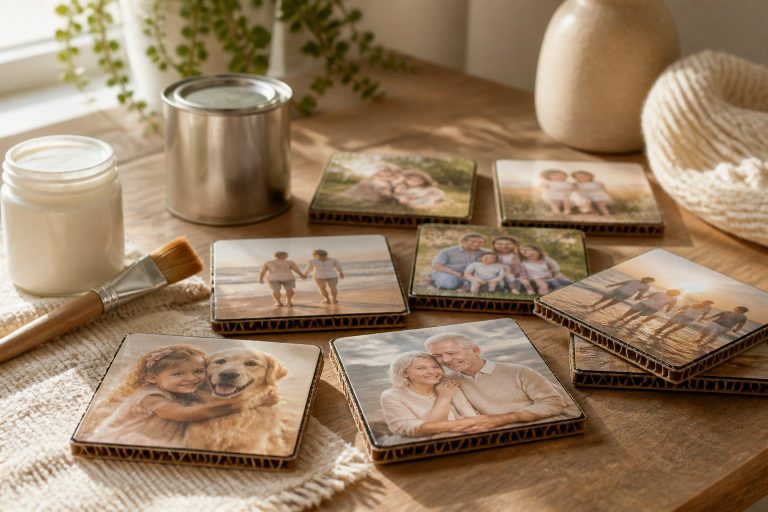
18. DIY Resin Coasters
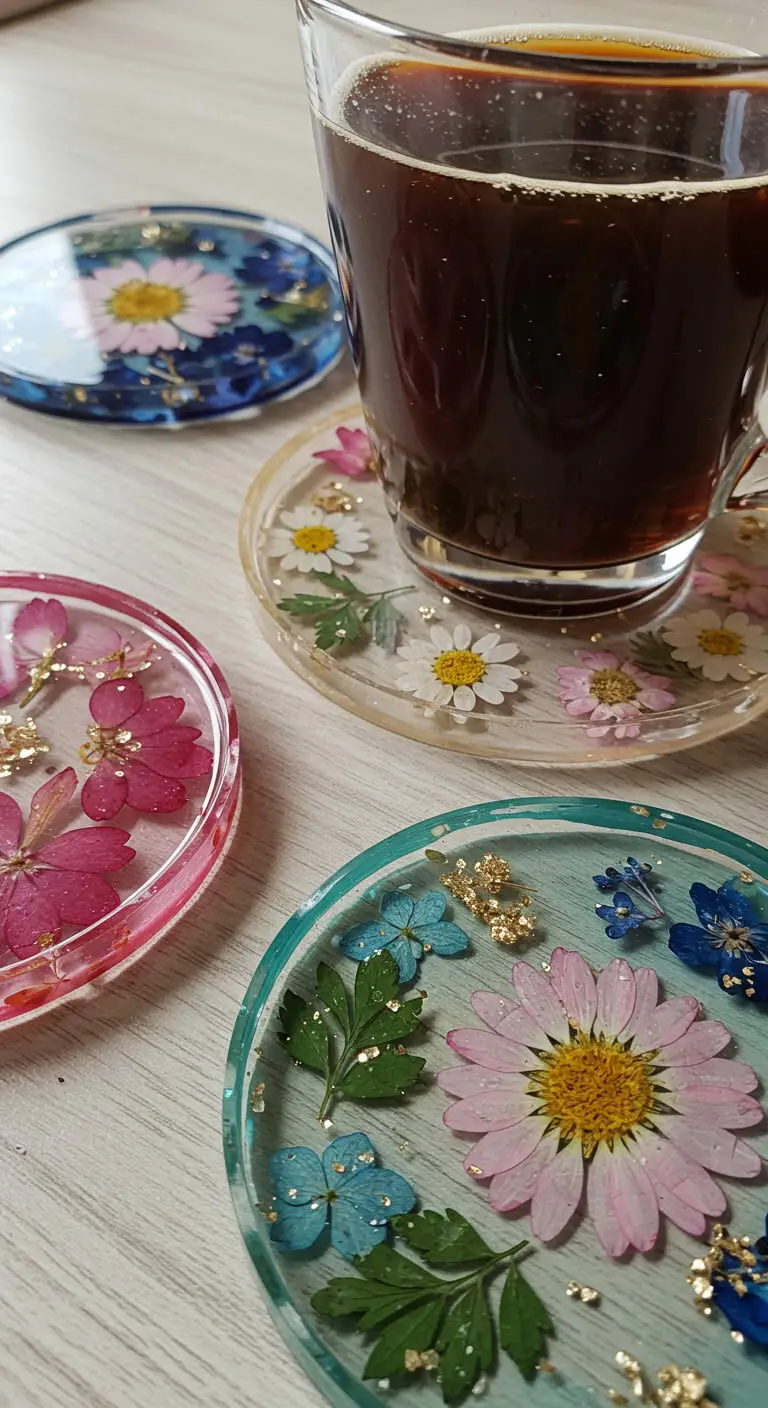
Resin coasters are an elegant and functional way to decorate your coffee table.
- Mix resin according to package instructions.
- Pour into silicone molds and add dried flowers, gold flakes, or colored pigment.
- Let it cure for 24 hours, then remove from the mold.
Picture This: A set of handmade resin coasters with embedded flowers, making every coffee break feel extra special.
19. Mosaic Topped Stumps That Turn Cut Logs Into Garden Seats
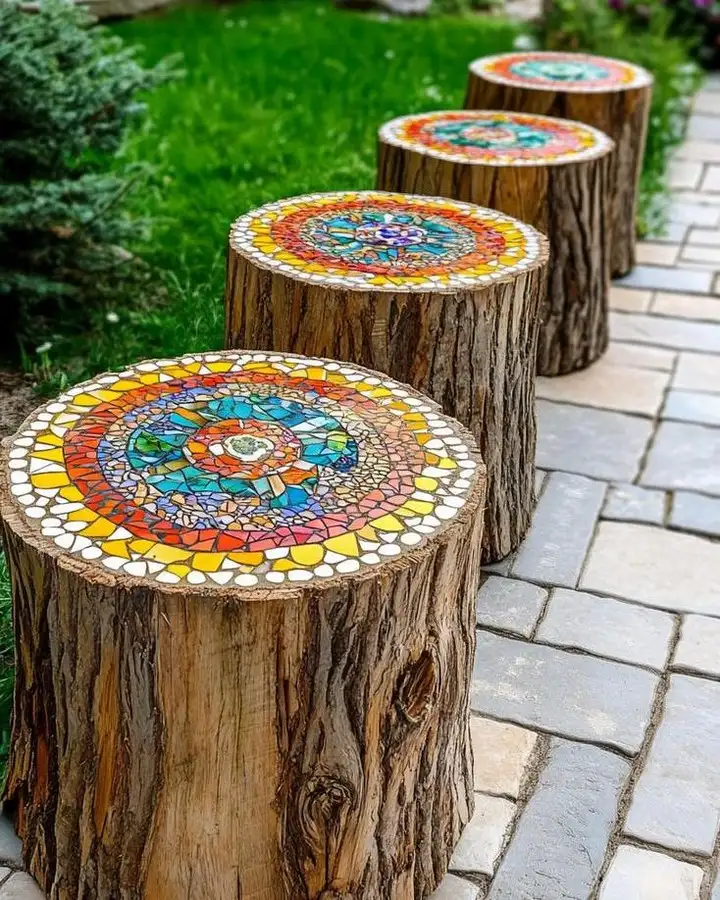
A felled tree leaves you with heavy stumps nobody wants to move.
Four of them line a path in this photo, each cut flat and topped with a tile mosaic in a circular mandala.
Yellow, orange, turquoise, and white pieces radiate out from a center medallion, and the rough bark is left untouched around the sides. That contrast between raw bark and neat tile is the whole design.
They work as low stools, plant stands, or path markers, and they stay outside all year without needing to be brought in.
Let the stump dry out fully before you tile, so it stops shrinking first.
Work outward from a center piece so the pattern stays even.
Do not tile the bark sides. The rough edge is what makes the top stand out.
Do not use indoor grout, since rain and frost will lift it within a season.
20. DIY Fabric Wall Hanging
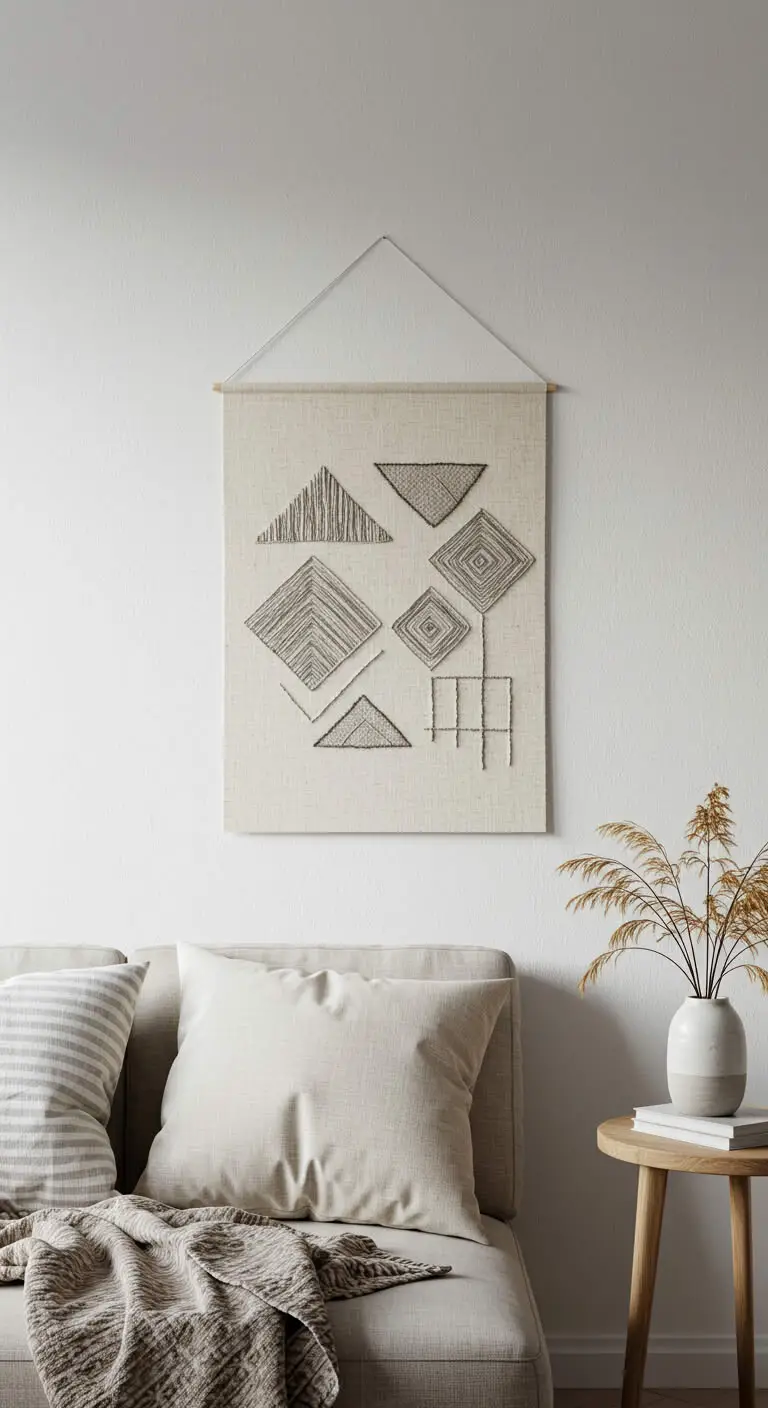
A simple fabric wall hanging adds a boho touch to any space.
- Cut a piece of canvas or linen into a rectangle.
- Use fabric paint or embroidery to create a pattern.
- Attach the fabric to a wooden dowel with twine.
- Hang it on the wall for a cozy aesthetic.
Picture This: A neutral-toned fabric wall hanging with geometric embroidery patterns, adding warmth to a minimalist living room.
21. Bottle Cap Flowers: Craft Ideas for Adults With a Full Recycling Bin
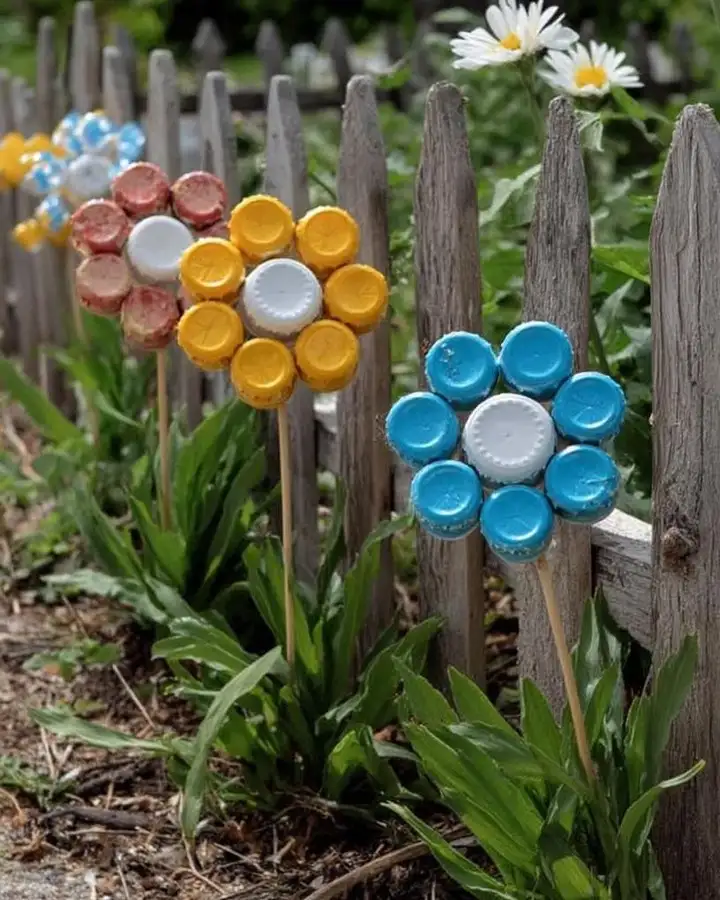
Bare soil along a fence looks patchy for most of the year, and real flowers take a season to fill in.
Metal bottle caps fix the gap now. Each bloom here is six caps in one color set around a single white cap, glued flat and mounted on a wooden dowel.
Yellow, sky blue, and faded red versions repeat down the fence line, sitting just above the leaves so they read against the weathered grey pickets.
Save caps for a few weeks, sort them by color, and you can make a dozen in an afternoon. The paint on caps softens outdoors over time, which honestly suits them.
Repeat one simple shape enough times and it stops looking like scrap and starts looking like a plan.
22. DIY Decorative Glass Jars
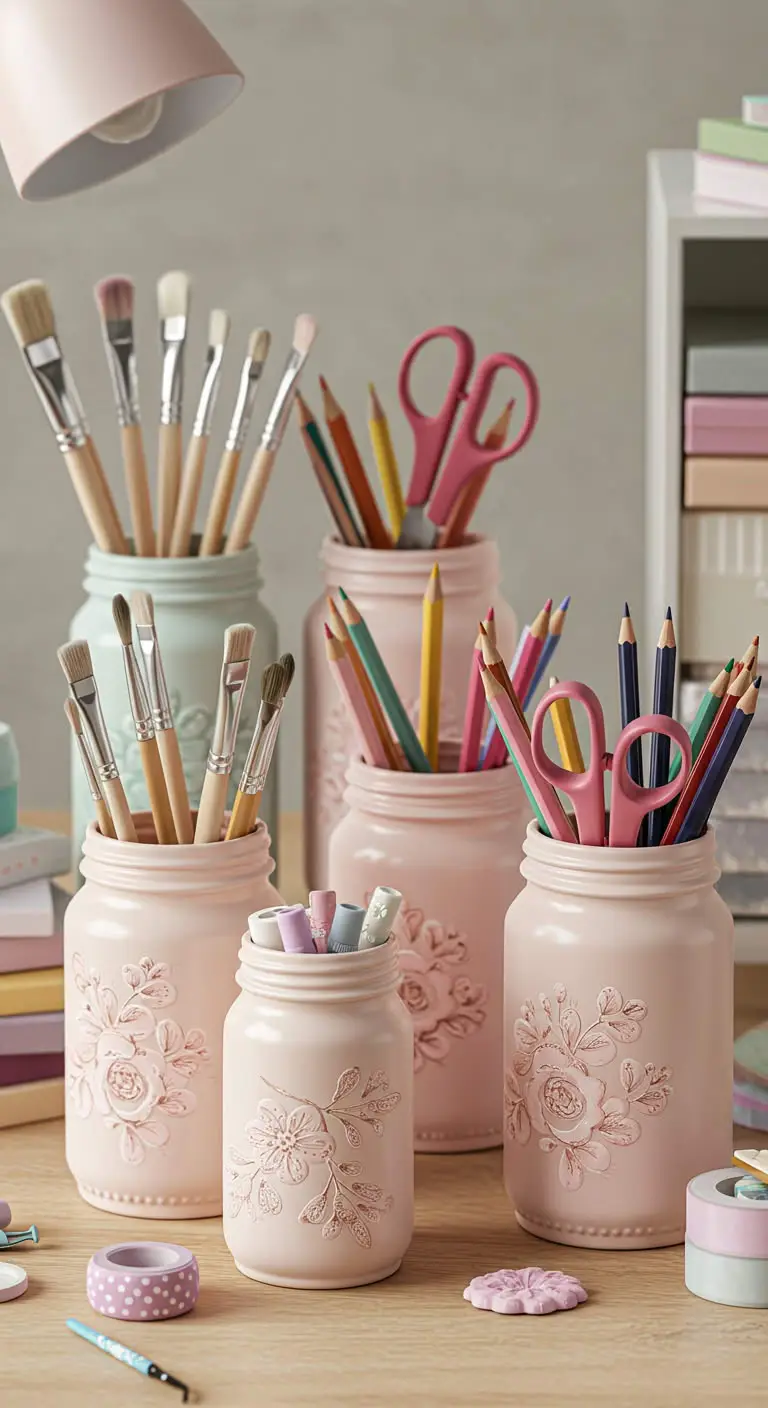
Upcycled glass jars can be turned into stylish storage containers.
- Clean and remove labels from glass jars.
- Paint or add decorative paper to the outside.
- Use as storage for craft supplies, bathroom essentials, or dried herbs.
Picture This: A set of pastel-painted glass jars holding paintbrushes and crafting tools on a desk.