19 Outdoor Nature Crafts for Kids Using Leaves, Sticks, and Stones


Hand a kid a stick and something happens. It turns into a sword, a wand, a fishing rod, or a bridge for an ant. That spark is where every good craft begins.
Nature already did half the work. Leaves arrive in a dozen colors, stones come smooth and ready to paint, and twigs snap to any length you need. Your job is to supply glue, paper, and a little time.
Below are 19 outdoor nature crafts for kids that turn backyard finds into bugs, wreaths, fairy homes, and gallery worthy art. Most need under an hour. Many use nothing more than glue and paper you already own.
How to Gather and Prep Your Nature Supplies
Good crafts start with good finds. A short collecting walk becomes its own activity, and a little prep keeps leaves from curling and glue from failing. Run through these before you sit down to build.
- Pick from the ground: Fallen leaves, loose twigs, and stray stones protect living plants.
- Press leaves first: Lay them inside a heavy book for two or three days so they stay flat.
- Dry everything out: Damp sticks and wet stones won’t hold glue, so let finds sit indoors overnight.
- Match glue to weight: White glue suits leaves, while stones need tacky glue or an adult with a glue gun.
- Check for hazards: Skip berries, mushrooms, and sharp bits, and wash hands after every trip.
1. Beaded Twig Sculptures in Clay Bases
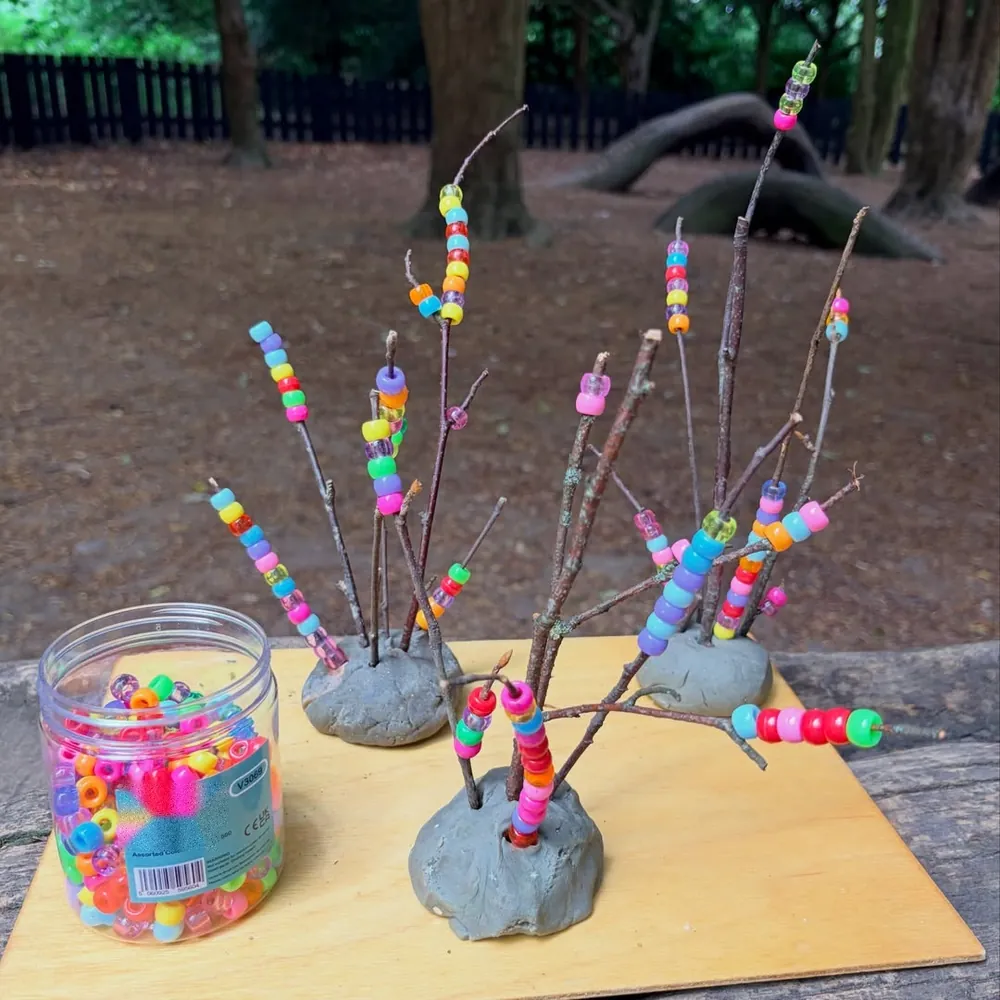
Bright pony beads turn plain twigs into tiny rainbow trees. In this photo, kids pushed thin branching sticks into lumps of grey clay, then threaded beads in pink, yellow, blue, green, and red onto every tip. A wooden board keeps the three sculptures steady on an outdoor log table.
Forked twigs work better than straight ones. Each branch becomes its own bead pole, so one stick gives a child five or six places to build. Thin ends also slide through pony bead holes without any trimming.
Air dry clay sets the base hard within a day or two. Playdough works for a quick version, though it stays soft. Keep the jar of beads for children over three, since loose beads are a choking risk for toddlers.
2. Wildflower Crescent Wreath
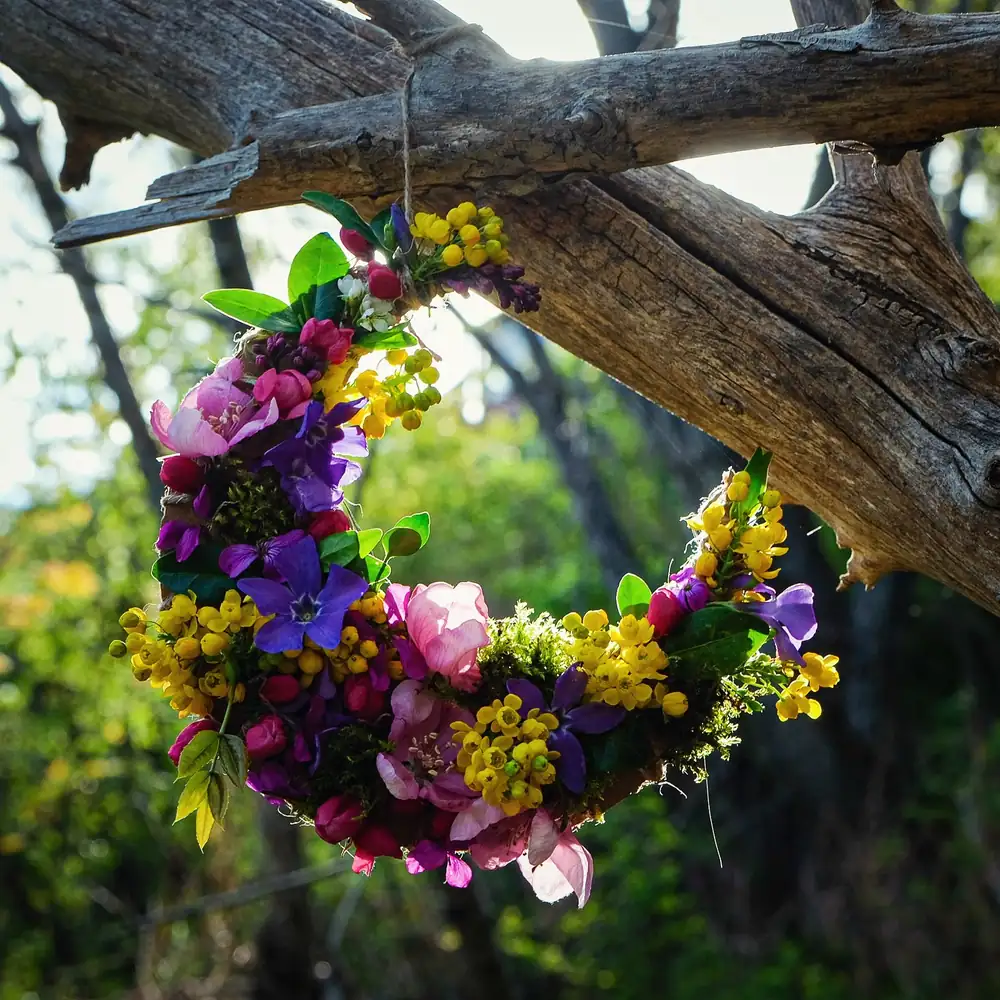
Soft pink petals, deep purple blooms, and clusters of tiny yellow flowers cover this crescent wreath. Moss and green leaves fill every gap between colors. A single loop of twine ties it to a weathered branch, letting the piece sway in the sunlight. The frame hides under the flowers, so a bent willow stick or small grapevine ring can do the same job.
Why it works:
- Tucking short stems trains small fingers to grip and push with control.
- Mixing three or four flower colors teaches kids simple color balance.
- Hanging it outdoors lets children watch petals change over a few days.
Care tip: Mist the flowers with water each morning to keep them fresh longer, then compost the wreath when it fades.
3. Coat Hanger Balance Scale

Best for: Preschoolers learning heavy, light, more, and less.
A wooden coat hanger hooks onto a post, with twine holding a clear plastic tub at each end. Below sits a wicker basket filled with pinecones, bark pieces, and smooth grey and tan stones. Kids drop finds into each tub and watch which side dips.
Simple science like this sits right beside outdoor nature crafts for kids, because children help build the tool and then play with it. Ask guessing questions first. How many pinecones equal one big stone? Let them test, count, and test again.
Make it easier: Knot the twine tightly at each end of the hanger so the tubs can’t slide toward the middle. Any sturdy branch or fence rail can stand in for the post.
4. Leaf Roof Cottage Nature Collage
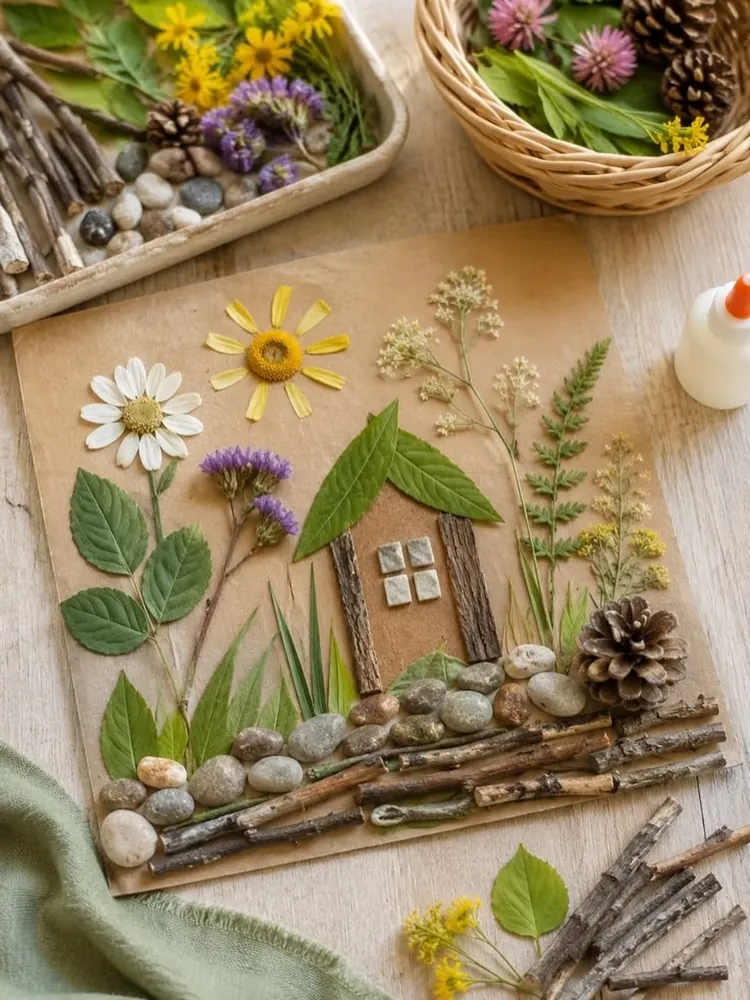
Copy this:
- Base: A square of brown kraft paper or thin cardboard
- House: Bark strips for walls and two big green leaves for the roof
- Ground: Rounded pebbles and short twigs laid in rows
- Finishing touch: A white daisy, yellow petal flower, purple thistle, and a pinecone
Four tiny stone squares make the cottage window, which kids love to spot. Everything sits flat on the paper with white glue, while the pinecone needs a thicker dab. Nearby, a tray of sticks and pebbles and a basket of clover blooms keep supplies within reach. Sorting finds into containers before gluing saves a lot of mess.
Age note: Children five and up can plan the scene alone, while younger kids do well with the roof and path already drawn in pencil.
5. Twig Bicycle Picture

Craft formula: Two bent twig circles + straight twigs for the frame + a few leaves for cargo = a bike you can hang on the wall.
Thin, bendy twigs form both wheels, with tiny stick spokes glued inside each ring. Straighter pieces make the frame, seat post, and handlebars. A thicker branch runs underneath as the ground, and leaves rest on the back like a load of cargo.
Older kids will enjoy this one most because it rewards patience. Stick art for kids usually stays loose and wild, yet this version teaches them to measure, snip, and fit pieces like a puzzle. Lay every twig out dry before any glue comes near the card.
Wheel tip: Soak willow or other green twigs in warm water for an hour, then bend them around a jar lid and tie with thread until dry.
6. Leaf and Twig Bugs on Name Tags
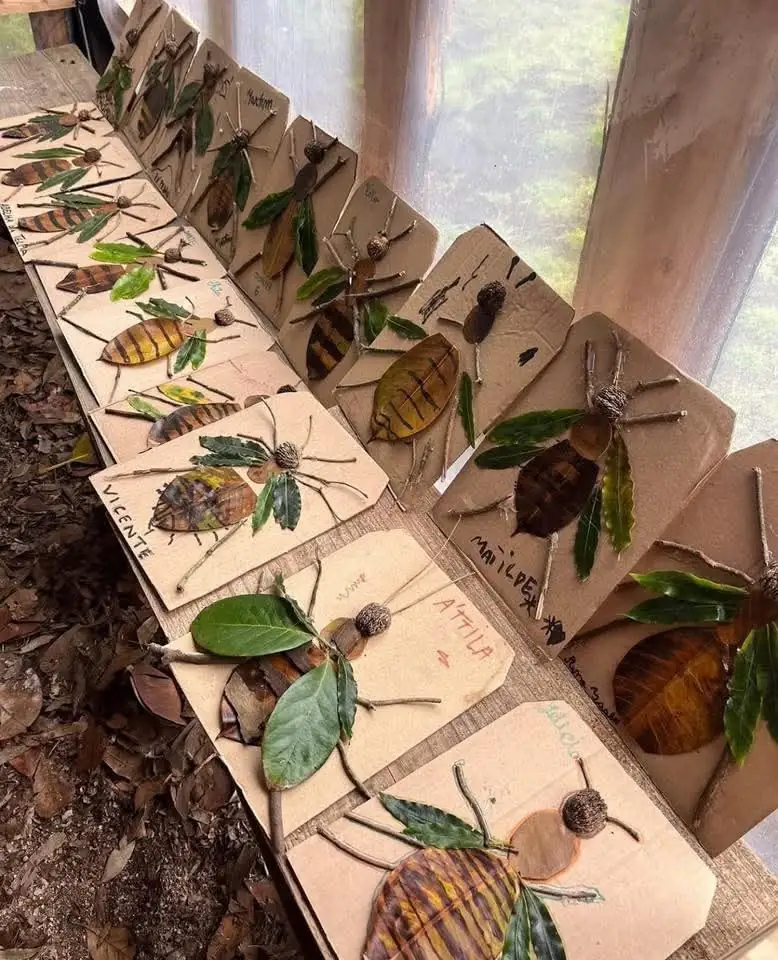
Rows of cardboard tags line a bench, each one holding a bug built from nature. Striped brown leaves make the bodies, green leaves become wings, and thin twigs stick out as legs and antennae. Round acorn caps or seed pods form the heads. Every child wrote a name on their own tag, which turns a simple craft into a class display.
Learning link: Count the legs together. Real insects have six, so kids can check their bug against a picture before gluing.
Subscribe to DIY Craft Bloom
Get updates on the latest posts and more from DIY Craft Bloom straight to your inbox.
Texture note: Dry, crinkly leaves with dark veins look most like beetle shells, so collect a mix of crisp and fresh ones.
Group tip: Set a shared basket of twigs and caps in the middle of the table so a whole class can work at once.
7. Maple Seed Dragonflies
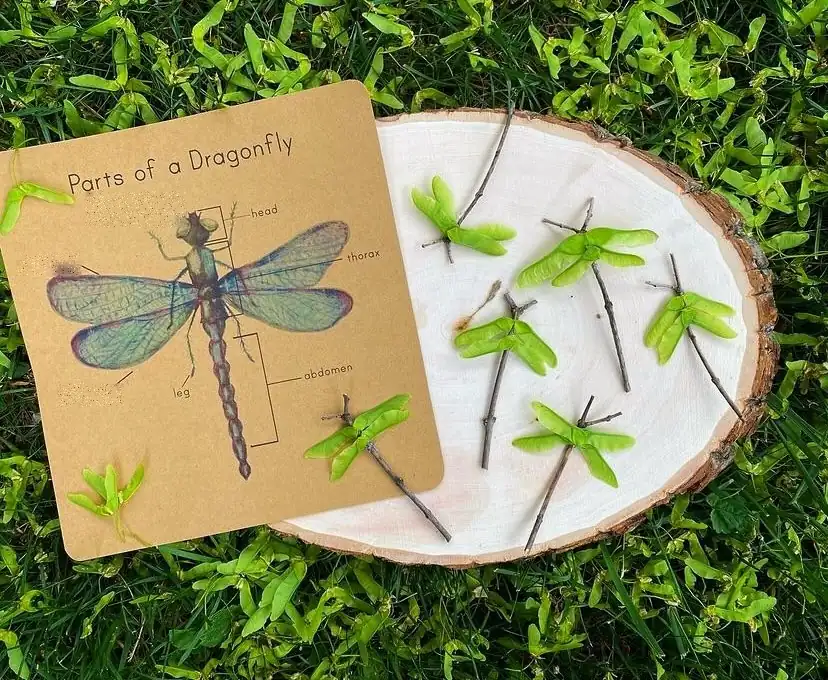
Green maple seeds have wings built in, so they make the easiest dragonflies around. Here, pairs of seeds rest on short twigs laid across a pale wood slice in the grass. Each twig becomes the long body, and the seeds spread out as two sets of wings.
A printed Parts of a Dragonfly card sits beside the slice. It labels the head, thorax, abdomen, and legs, which gives kids something real to compare. Ask them to point out where their twig body matches the picture.
Late spring through summer brings the most green seeds to the ground. Brown, dried ones work in autumn too, though they crack more easily. No glue is needed for a quick nature table display, so little ones can rebuild the bugs again and again.
8. Stick Campfire with Paper Flames
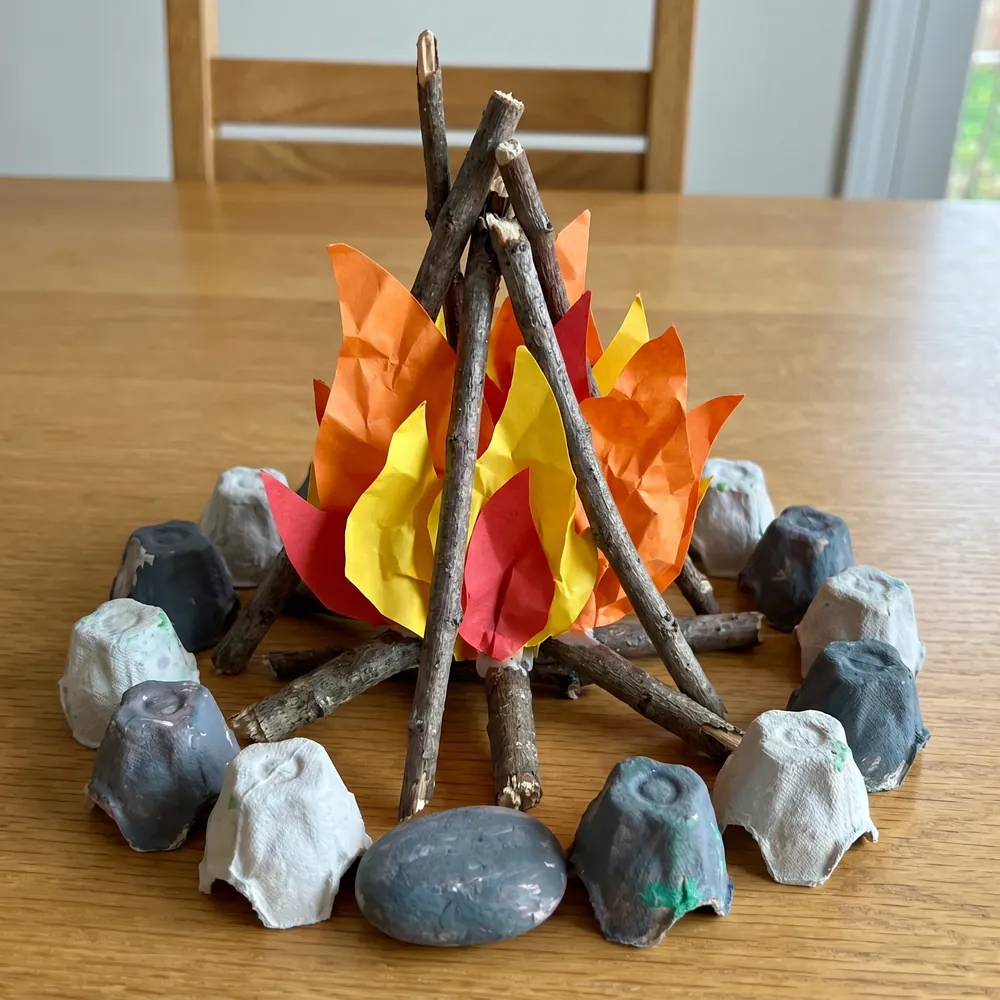
Sturdy sticks lean together in a teepee over layers of crinkled red, orange, and yellow paper flames. More sticks lie flat at the base like real logs. Around the fire, painted egg carton cups in grey and white stand in for a stone ring, with one real smooth stone mixed in. This is one of those nature crafts for children that works on a rainy day, since the sticks come inside with you.
Safety note: A paper fire is a great way to teach real campfire rules, like staying one big step back from the flames.
Budget swap: Gather real stones for the ring instead of egg cartons if your yard has plenty.
Play idea: Add toy figures, a blanket, and marshmallows on twig skewers for pretend camping.
9. Pebble Bugs on a Drawn Play Mat

Smooth pebbles become a whole garden of critters on this big sheet of paper. Some stay plain grey, while others are painted, like a red ladybug with black spots and a bee in yellow and black stripes. Marker lines add legs, wings, antennae, and dotted flight paths around each stone. A snail of three stacked stones, a long caterpillar, a spider, and a white mouse fill the rest.
Why kids love it:
- Stones can be moved and swapped, so the picture changes every play session.
- Drawing around a rock helps children see shapes in everyday objects.
- Rock crafts for kids like this need no glue at all.
Try instead: Laminate the drawn sheet or use a dry erase board so the mat lasts all summer.
10. Leaf Caterpillar Story Craft

What you need:
- Base: Brown kraft paper cut into small rectangles
- Body: Five or six green leaves glued in a wavy line
- Head: A red paper circle with yellow and green eyes
- Finishing touch: Two small purple paper antennae on top
Four finished caterpillars dry on a wooden bench next to a well known picture book about a hungry caterpillar. Reading the story first gives kids a reason to go hunting for leaves. Fresh, flat leaves like these stick best with plenty of white glue, and they keep their green color for a few days.
Make it last: Press the leaves overnight before gluing so they don’t curl as they dry. Colors will fade to tan within a week, which is a fun change to point out.
11. Clay and Stick Minibeasts

Great for: Forest school groups and playdates with four or more kids.
Small hands gather around a black tuff tray covered in cardboard squares. Each child has a lump of grey clay studded with twigs, which turn into legs, spikes, and antennae. One looks like a hedgehog with sticks poking out on every side.
A basket in the center holds big green leaves, pinecones, a deck of minibeast cards, and wooden slices that spell BUGS. Kids flip a card, pick a bug, and try to sculpt it. Leaves tucked beside each model become food or shelter for the creature.
Seasonal swap: Autumn brings conkers, acorns, and seed pods, which press into clay as eyes and shells. These outdoor crafts for kids change with every season you try them.
12. Evergreen Cardboard Ring Wreath

Wreath formula: Cardboard ring + evergreen sprigs + red berries = a fresh winter wreath for the front door.
Needle covered evergreen sprigs lie flat around a brown cardboard ring. Thin tan strips hold each branch in place, and small red berries sit tucked between the greens. In the photo, a child’s hands press one last sprig under a strip near the bottom.
Cut the ring from a cereal box or shipping carton, then wrap it loosely with string before adding greens. Kids slide each stem under the string, which means no glue and no hot tools. Trim any sprig that sticks out too far to keep the circle neat.
What to avoid: Bright red berries may tempt little ones, so use them only with kids old enough to know they aren’t for eating.
Subscribe to DIY Craft Bloom
Get updates on the latest posts and more from DIY Craft Bloom straight to your inbox.
13. Acorn Cap Dewdrop Pendants

Little acorn caps sit on top of clear glass drops, so each one looks like a dewdrop wearing a hat. Bright green and blue yarn loops through the top of every cap. Held up against a woodland path, the three pendants catch the light like tiny raindrops.
Flat backed glass gems or clear marbles fit snugly inside most oak caps. An adult should handle the glue gun here, since the caps are small and the glue gets hot. Kids can choose yarn colors and tie the loops themselves.
Drill a tiny hole through the cap first, or glue the yarn knot inside before the gem goes in. Hang finished pendants from a window latch or a branch to make a simple sun catcher. Keep them away from toddlers, because glass gems can be swallowed.
14. Nature Color Hunt Board
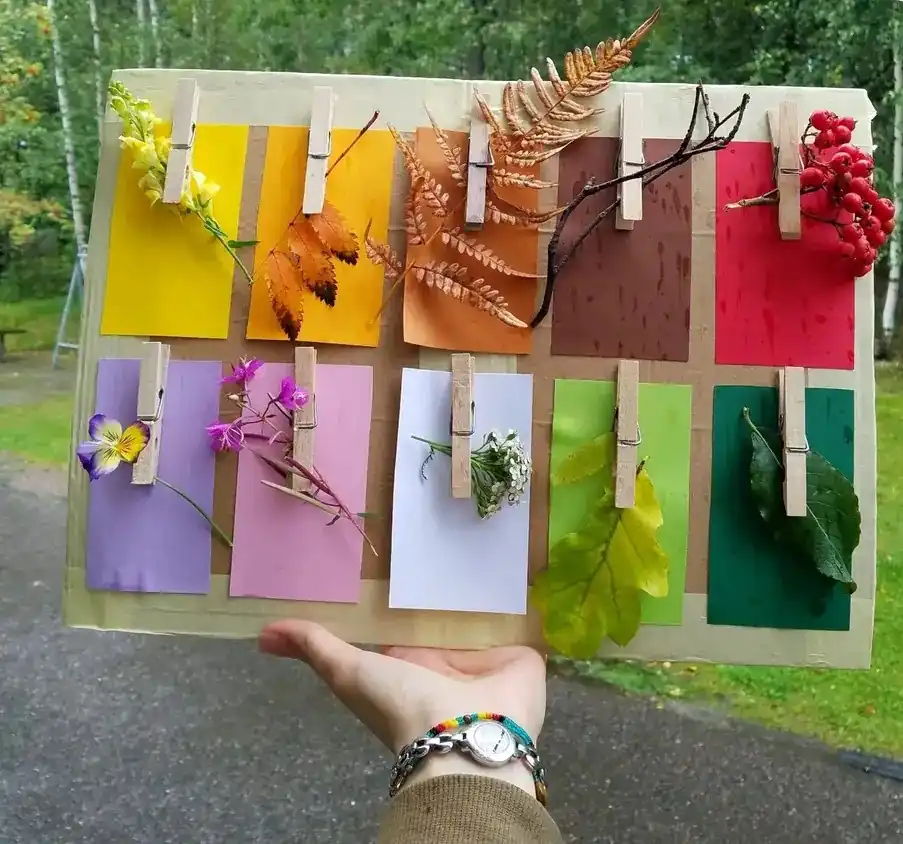
Ten paper swatches in yellow, orange, rust, brown, red, purple, pink, white, light green, and dark green cover this cardboard panel. Above each one, a wooden clothespin holds a find that matches it. Yellow blooms, a rusty fern frond, a cluster of red berries, a purple pansy, and a white yarrow head all made the cut. Few nature crafts for kids double as a scavenger hunt this well.
Color note: Include tricky shades like brown and white, since kids have to look closer to find them.
Toddler version: Use just four bold colors and big swatches so younger kids can match without frustration.
Weather note: Clip finds on during the walk, not after, because petals wilt fast on warm days.
15. Autumn Leaf Hair Portraits

Gather these:
- Paper: White card stock for each portrait
- Face: A crayon drawn head with simple eyes, freckles, and a smile
- Hair: Dried autumn leaves in red, orange, yellow, and brown
- Extra touch: Rolled leaf roses for curly hair
Five silly faces fill this table, and each one has a different hairstyle. Spiky maple leaves stand straight up on one kid, long narrow leaves fan out on another, and tightly rolled leaves turn a third into a head of curls. A wink, a stuck out tongue, and a surprised mouth give every portrait its own personality.
The detail to steal: Glue the leaves stem side down along the top of the head so the hair seems to grow upward. Kids can draw themselves or a family member for a fall keepsake.
16. Bark and Stick Fairy House
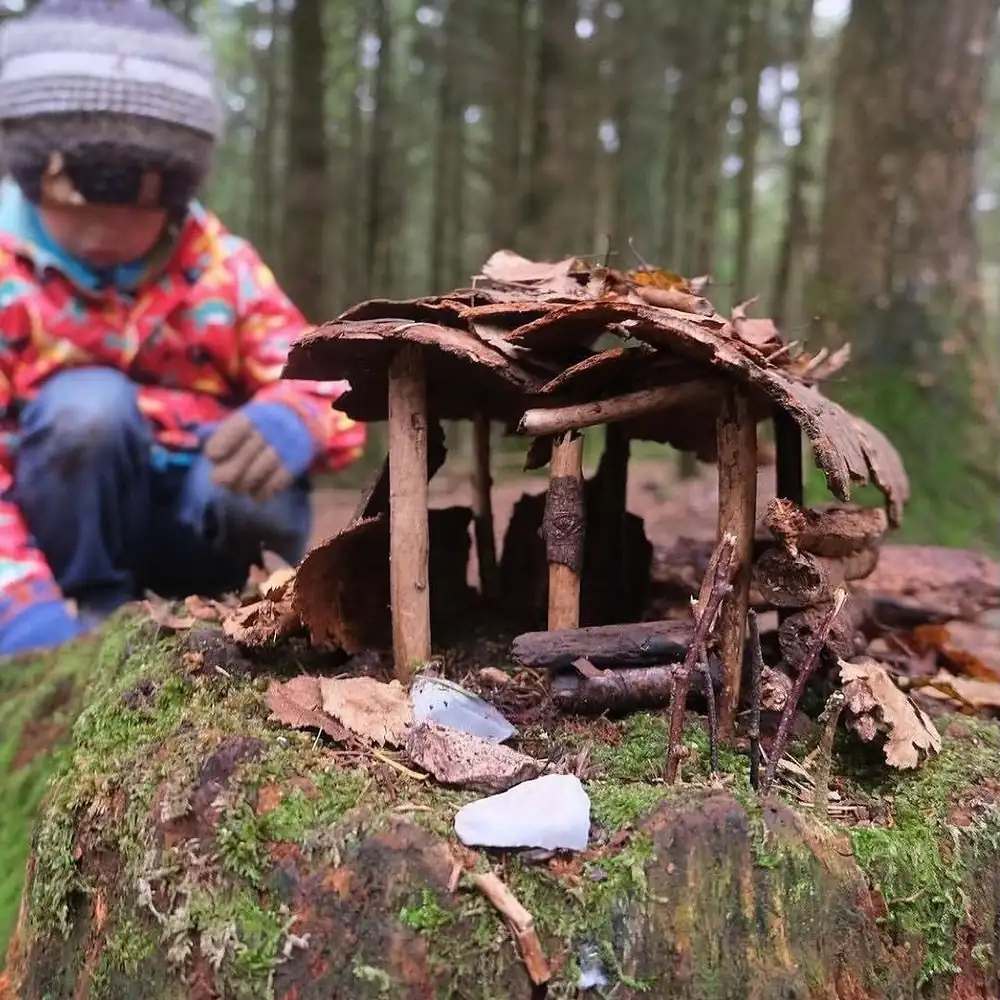
Deep in the woods, a child crouches beside a mossy stump to build a tiny home. Upright sticks hold up a roof of curved bark pieces and dry leaves. A short twig fence leans on one side, and pale flat stones rest near the doorway.
Why it works:
- Building on a stump gives a flat, natural base that already looks magical.
- Bark bends into roof shapes without any cutting or glue.
- Open ended play keeps kids busy far longer than a set craft.
Leave no trace: Use only fallen bark and loose sticks, and leave the house standing for woodland visitors to discover. Kids love coming back next week to see if anything moved in.
17. Pressed Leaf Forest Collage

Scene formula: Leaf treetops + twig and bark trunks + moss, pinecones, and pebbles at the base = a full forest on paper.
Every tree here uses a different natural find. Golden leaves line one branch, a big red maple leaf crowns a real birch bark trunk, and two tall evergreens are built from flat green sprigs. A brown deer cutout stands in the middle on a pebble path.
Pressed leaf art for kids works best when finds dry flat for a few days first. Moss, lichen, a pinecone, and an acorn fill the bottom edge, which gives the scene depth. Start with the trunks, add the tops, and finish with the ground layer last.
Display idea: Frame it in a deep shadow box so the pinecones and moss don’t get crushed behind glass.
18. Autumn Leaf Village in the Rain

Good for: Kids aged seven and up who enjoy painting as much as collecting.
Tall autumn leaves in gold, red, olive, and orange stand like trees on both sides of a winding path. Small painted houses with brown roofs peek out between them. Two grey clouds hang above, with painted raindrops falling toward the village.
The path is the clever part. Its edges are lined with crumbs of crushed dry leaf, and dark stepping stones lead the eye up to the main house. Kids can paint the houses on paper first, cut them out, and tuck them between leaves so they look nestled in.
Simpler version: Skip the painting and use small cardboard squares with drawn windows for the houses. Younger children still get the full leaf tree effect with half the work.
19. Forked Stick Nature Weaving
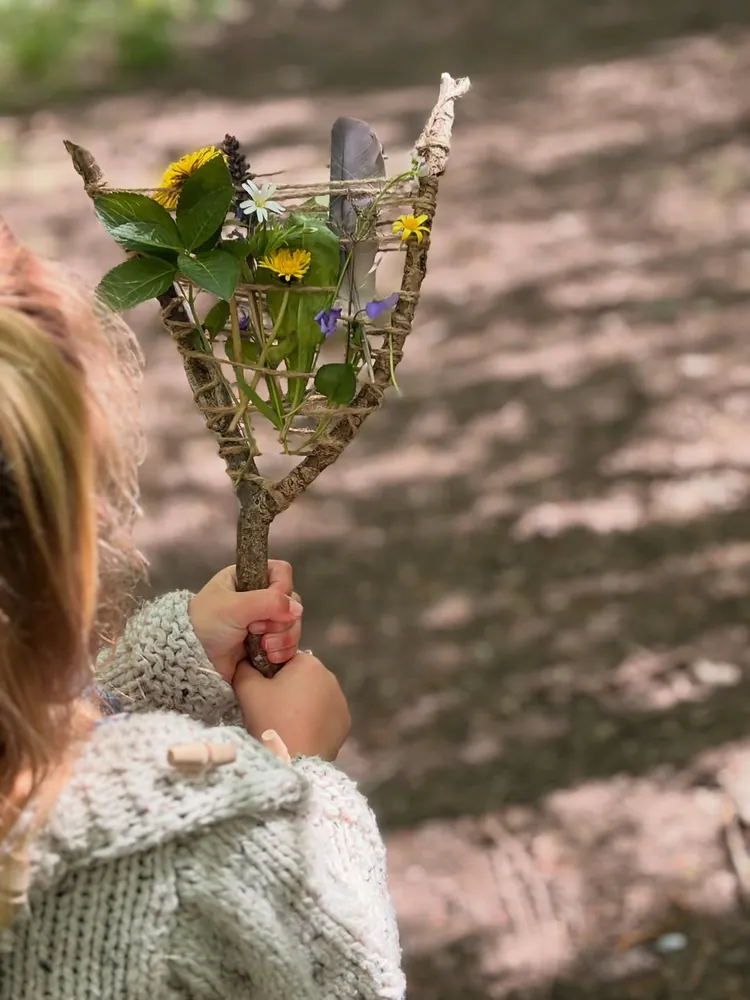
Tiny fingers wrap around a Y shaped stick wound back and forth with twine. Tucked into the strings are dandelions, a white daisy, purple violets, green leaves, a dark seed head, and one grey feather. The stick works like a tiny loom that kids fill as they walk.
Start by finding a fork with two arms about the same length. Tie twine to one arm, then zigzag it across to the other, wrapping each side once before crossing back. Leave about a finger’s width between rows so stems slide in easily.
Among all the outdoor nature crafts for kids here, this one makes the sweetest ending to a walk. Fresh flowers wilt within a day, yet the twine frame lasts for many weaves. Pull out the old blooms and the stick is ready for tomorrow’s walk.