Handmade Birthday Cards Using Scrapbook Paper – 15 Easy DIY Ideas

Birthday cards may seem like a small detail, but they often become one of the most memorable parts of a gift. There’s just something special about receiving a card that was made by hand instead of picked off a store shelf.

That’s probably why scrapbook paper crafts have become so popular lately. They’re affordable, creative, and incredibly easy to personalize.
Plus, scrapbook paper comes in endless colors and patterns, making it perfect for creating cards that feel fun, cheerful, and unique.
Another reason people love handmade cards is how beginner-friendly they are. You don’t need expensive tools or artistic talent to create something beautiful.
Even simple cut-and-paste designs can look surprisingly stylish with the right paper combinations.
Whether you prefer floral designs, cute layered details, or clean minimalist layouts, there are endless ways to get creative with scrapbook paper.
To inspire your next craft session, we’ve rounded up 15 handmade birthday cards using scrapbook paper that are quick, cute, and easy enough for anyone to try.
1. Layered Confetti Pop Card

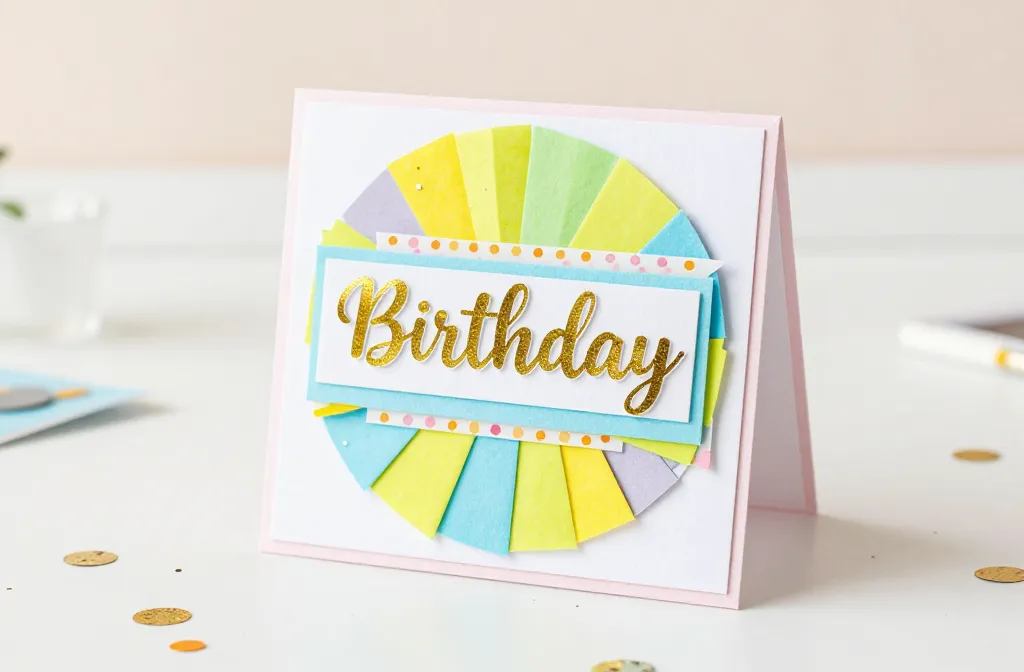
Picture this: a card that feels like a party when you open it. A burst of layered paper confetti, a shiny title, and a playful pop of color. It’s modern, festive, and surprisingly easy.
Materials Needed
- Cardstock base (white or pale pastel)
- Assorted scrapbook paper scraps
- Sequins or tiny confetti pieces
- Double-sided tape or glue dots
- Transparent acetate (optional for shaker feel)
How to Make It
- Cut mini squares or circles from scraps in a bright color palette.
- Layer them in a fan or scattered layout on the front panel, adhering with foam dots for dimension.
- If you’re feeling extra festive, add a few sequins with a dab of glue and place a clear acetate layer to mimic a mini shaker card.
Pro Tips
- Use a bold greeting die-cut in shiny foil for a celebratory vibe.
- Let a few pieces peek from the edges for depth.
Who’ll love it: Party planners, journal-keepers, and anyone who adores a little sparkle. This card says “you’re amazing” with a wink.
2. Watercolor Wash Birthday Card With Scrap Paper Ink

Think watercolor vibes with scrapbook textures peeking through. A soft, artsy card that feels handmade and heartfelt.
Materials Needed
- Watercolor paper or heavyweight card stock
- Assorted scrapbook papers with subtle patterns
- Watercolor paints or ink pads
- White gel pen for doodle accents
How to Make It
- Create a light watercolor wash on the card base in a gentle hue (peach, lavender, or mint work beautifully).
- Cut a rectangle or circle from scrapbook paper and adhere as a focal element. Layer with a smaller piece for contrast.
- Add a hand-drawn border and a simple “Happy Birthday” greeting in white gel pen or foil.
Pro Tips
- Keep colors soft to maintain that dreamy watercolor feel.
- Experiment with metallic ink pens for a subtle shimmer.
Who’ll love it: Aesthetic lovers, minimalist design fans, and anyone who enjoys a gentle, artsy card.
3. Geometric Origami Flower Card

Bold geometry meets a delicate flower crafted from paper. This card feels couture but is delightfully doable for beginners.
Materials Needed
- Cardstock card base
- Two or three contrasting scrapbook papers
- Double-sided tape
- Scissors or craft knife
How to Make It
- Cut small squares from each paper and fold them into simple origami shapes (mountain and valley folds work well).
- Arrange into a flower cluster on the front and secure with tape, layering for depth.
- Add a slim greeting banner beneath the flower cluster.
Pro Tips
- Choose papers with slightly different textures for a richer look.
- Experiment with a metallic center for a chic focal point.
Who’ll love it: Fans of mid-century modern vibes and anyone who adores a structured, graphic aesthetic.
4. Puffy-Stamped Card With Scrap Paper Clouds

Soft, tactile, and irresistibly huggable—this card uses puffy felt or foam stamps layered onto cloud shapes cut from scrap paper.
Materials Needed
- Card base
- Scrapbook papers in sky hues
- Puffy stamps or foam stamp set
- White acrylic paint or pigment ink
How to Make It
- Cut cloud shapes from light paper scraps and stamp happy birthday across them with white ink.
- Mount clouds onto the card with foam adhesive for dimension.
- Scatter tiny stars or hearts for a cute finishing touch.
Pro Tips
- Mix matte and slightly glossy papers for a playful texture contrast.
- Keep the greeting tucked beneath a cloud for a peekaboo effect.
Who’ll love it: Card receivers who adore soft, cuddly designs and whimsical scenes.
5. Monochrome Chic Card With Textured Stripes
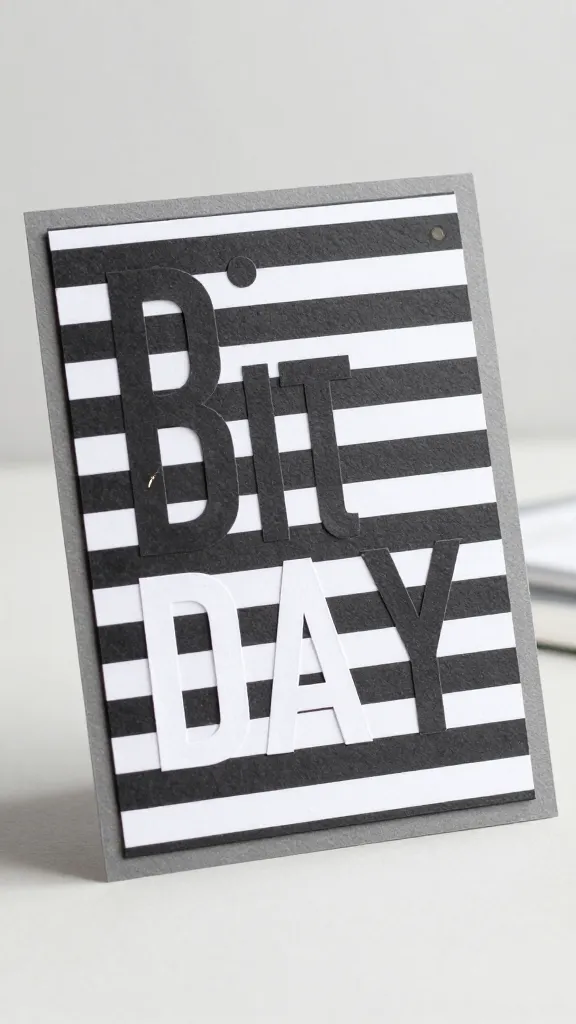
Elegance starts with a single hue and varied textures. This monochrome card uses striped scrapbook paper and bold typography for modern chic.
Materials Needed
Subscribe to DIY Craft Bloom
Get updates on the latest posts and more from DIY Craft Bloom straight to your inbox.
- Black, white, or gray scrapbook papers
- Cardstock base
- White embossed sentiment or black die-cut letters
How to Make It
- Cut a large stripe panel from textured scrapbook paper and mount on the card base.
- Place a bold sentiment on top—embossed or die-cut letters create instant impact.
- Add a tiny metallic accent (line of foil or a dot) to finish.
Pro Tips
- Line up the stripes at a slightly off-center angle for a dynamic look.
- Use a coordinating envelope seal to pull the whole set together.
Who’ll love it: Minimalists, modern home decor fans, and anyone who loves a timeless palette.
6. Floral Burst Card With Paper Petals

Turn a few favorite scrap papers into a bouquet of petals—this card blooms with color and charm.
Materials Needed
- Card base
- Bright floral-patterned scrapbook papers
- Scissors or paper punch
- Glue dots
How to Make It
- Cut petal shapes from several papers and curl edges with a pencil tip for dimension.
- Arrange into a blooming flower cluster at the corner of the card and secure with glue dots.
- Add a small center dot in a contrasting color.
Pro Tips
- Layer petals in a staggered fan for a fuller look.
- Combine warm and cool tones to keep the bouquet lively.
Who’ll love it: Garden lovers, bright-spring enthusiasts, and anyone who wants a card that feels like a bouquet in a box.
7. Scrap Paper Silhouette Scene Card

Create a tiny, dramatic scene using silhouettes cut from dark scrap paper against a sunset-hued background. It’s storytelling on a card.
Materials Needed
- Card base
- Sunset gradient scrap papers (yellows, oranges, pinks, purples)
- Black construction paper or scrapbook paper for silhouettes
- Glue or double-sided tape
How to Make It
- Build a gradient sky as the backdrop by layering strips of the sunset papers.
- Cut a simple silhouette (tree, balloons, or a cat) from black paper and attach toward the bottom of the scene.
- Optionally add a tiny moon or stars for extra drama.
Pro Tips
- Use a soft pencil line to guide your silhouette placement.
- Keep the silhouette large enough to read against the sky.
Who’ll love it: Film lovers, dreamers, and anyone who enjoys a moody, storytelling vibe.
8. Pocket Card With Hidden Birthday Message
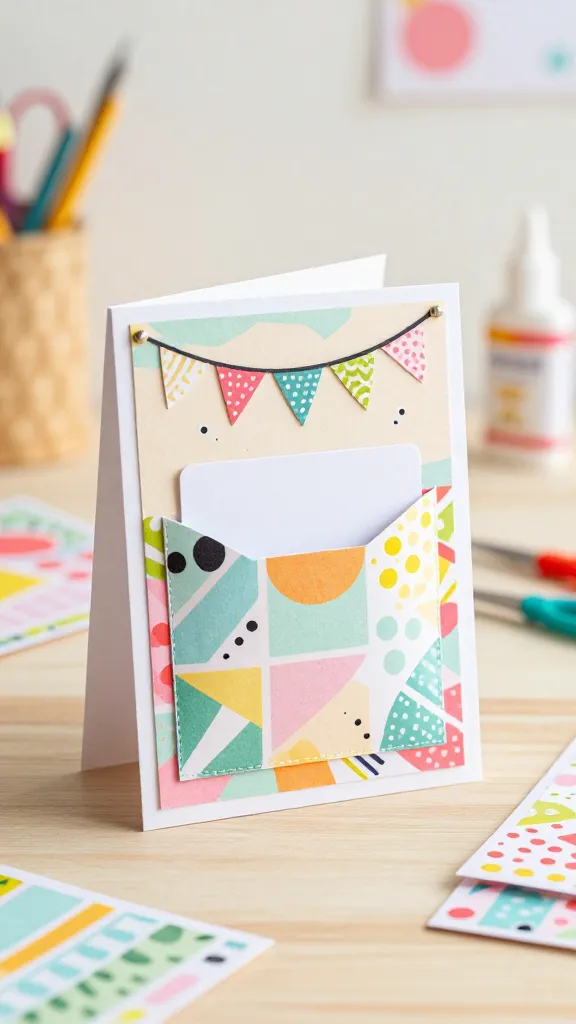
Surprise and delight with a tiny pocket that hides a birthday note. It’s playful, tactile, and a tad interactive.
Materials Needed
- Card base
- Patterned scrapbook papers
- Pre-folded pocket template or hand-cut pocket
- Small tag or mini card for the message
How to Make It
- Glue two sides of a rectangle of pattern paper to create a pocket on the front.
- Slip a mini message tag inside and decorate the front with a small pennant or sticker.
- Optionally add a string pull for a playful reveal.
Pro Tips
- Choose a bold pocket color to contrast with the card base.
- Write a heartfelt note on the tag for a personal touch.
Who’ll love it: People who adore interactive design and heartfelt surprises.
9. Chalkboard-Style Greeting Card With Scrap Paper Frame

Bold, graphic, and a touch retro—this card uses a chalkboard motif framed by scrap paper to mimic a real chalkboard look.
Materials Needed
- Black or dark gray card base or paper
- White gel pen or white embossing powder
- Bright scrapbook paper for frame accents
How to Make It
- Cut a rectangle or oval from a bright paper to act as a frame and mount on the black card base.
- Use a white gel pen to draw a hand-lettered “Happy Birthday” and small doodles like hearts or stars.
- Add a few white highlights to resemble chalk dust edging.
Pro Tips
- Embellish with a tiny ribbon for a tactile finish.
- Keep the design intentionally imperfect to mimic real chalkboard charm.
Who’ll love it: Chalkboard fans, teachers, and anyone who appreciates a retro vibe with modern craft charm.
10. Map-Inspired Card With Vintage Papers
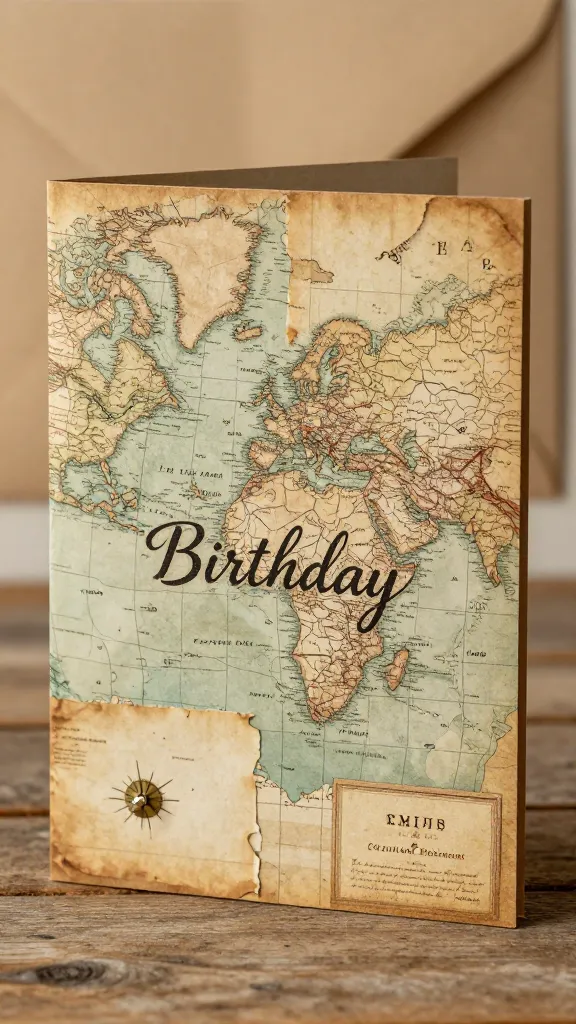
For the traveler at heart, scrap map papers layered into a vintage card feels nostalgic and stylish.
Materials Needed
- Card base
- Scrapbook papers or cuttings from old maps
- Small metal or foil embellishment (optional)
How to Make It
- Build a layered panel using map papers in varying sizes.
- Top with a small sentiment sticker or die-cut banner.
- Finish with a vintage-style edge by gently sanding the edges.
Pro Tips
- Use a distressed ink pad to age the edges a touch more.
- Pair with a kraft envelope for a curated travel feel.
Who’ll love it: Avid explorers, history buffs, and anyone who loves a story behind the card.
11. Bright Border Burst Card

Subscribe to DIY Craft Bloom
Get updates on the latest posts and more from DIY Craft Bloom straight to your inbox.
Think fan of color along the border with a crisp central message. This card is all about that high-energy, framed feel.
Materials Needed
- Card base in a light color
- Multiple scraps in bold hues
- Adhesive foam or double-sided tape
- Coordinating sentiment sticker or foil
How to Make It
- Cut slim, long strips from scraps and arrange them along the card edges to form a bright frame.
- Place a bold sentiment in the center with foam backing for depth.
- Add a tiny embellishment as a focal point at the bottom corner.
Pro Tips
- Vary the strip widths for a lively, painterly frame.
- Keep the center clean to let the message shine.
Who’ll love it: The color-obsessed, party planners, and anyone who enjoys a bold, graphic statement.
12. Ribbon-Told Tale Card With Scrap Paper Banners
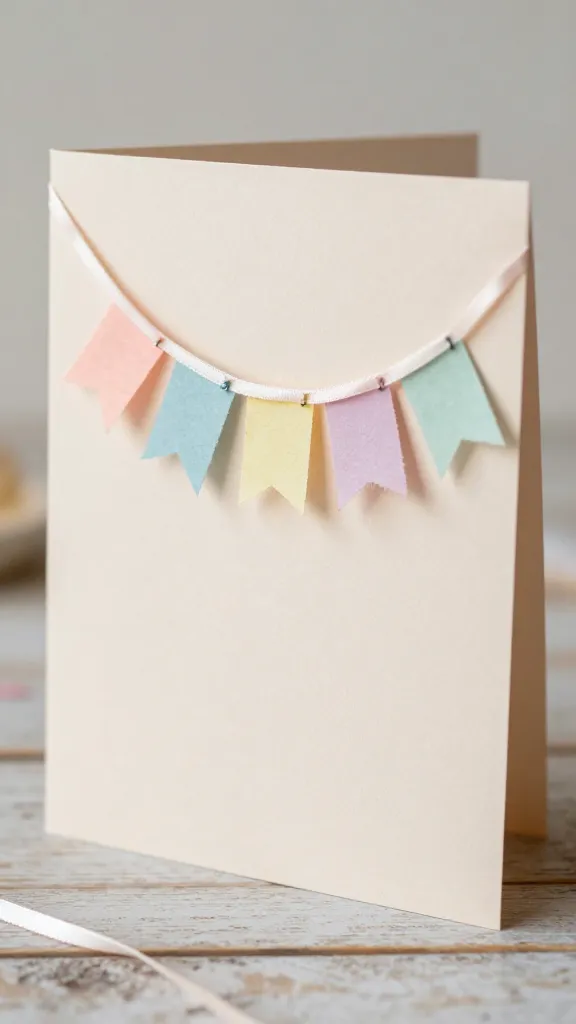
A playful story unfolds with mini banners cut from scraps and threaded with a delicate ribbon. It’s whimsical and textural.
Materials Needed
- Card base
- Assorted scrap papers for banners
- Ribbon or twine
- Adhesive and mini staples (optional)
How to Make It
- Cut small banners and string them along a length of ribbon glued to the card front.
- Stack a tiny sentiment at the end of the banner line or in the center of the card.
- Secure with staples or a dab of glue to keep everything tidy.
Pro Tips
- Use contrasting ribbon for a pop, or monochrome for elegance.
- Let the banners sway slightly for a playful touch in photos.
Who’ll love it: Crafty friends who love texture, movement, and a bit of whimsy.
13. Photo-Cilled Scrap Card With Personal Snapshot

Turn a precious moment into a card by pairing a small photo with decorative scrap paper layers. Personal and priceless.
Materials Needed
- Card base
- Small photo (4×4 cm or similar)
- Scrapbook papers to create a frame around the photo
- Adhesive and small embellishments
How to Make It
- Mount the photo in a decorative frame cut from patterned paper.
- Layer additional scraps behind the frame for a collage effect.
- Finish with a handwritten message or a tiny sticker sentiment.
Pro Tips
- Print photos with a subtle matte finish to avoid glare.
- Choose papers that complement the tones in the photo for cohesion.
Who’ll love it: Grandparents, best friends, and anyone who cherishes a personal touch.
14. Glitter-Garnished Birthday Card With Scrap Chamfered Edges

Glimmer meets geometry. A touch of glitter along paper chamfers brings a festive, luxe feel without going overboard.
Materials Needed
- Card base
- Scrapbook papers in complementary colors
- Fine glitter or glitter tape
- Matte sealant spray (optional)
How to Make It
- Cut chamfered edges or a stepped border from contrasting papers.
- Apply glitter selectively along the edges or a slim border band.
- Seal with a light spray if you’re using loose glitter to reduce shedding.
Pro Tips
- Use color-matched glitter for a polished look rather than neon hues.
- Pair with a simple, bold sentiment to balance the sparkle.
Who’ll love it: Glitter lovers, party-goers, and anyone who wants a hint of glam.
15. Mandala-Inspired Circular Burst Card

Symmetry, color, and a little zen—this circular mandala burst is a meditative cut-and-paste project that pays off in major style.
Materials Needed
- Card base
- Assorted circular cuts from patterned papers
- Glue or glue sticks
- Fine-tip black pen for detailing
How to Make It
- Arrange small circles to form a mandala on the front of the card, layering as you go.
- Trace a few decorative lines with a black pen to enhance the pattern.
- Center a simple sentiment inside or on the outer ring.
Pro Tips
- Keep the palette cohesive to maintain harmony in the design.
- Give the center a pop of metallic color for a focal anchor.
Who’ll love it: Lovers of symmetry, mindfulness-inspiring designs, and those who enjoy a precise, pretty look.
Conclusion
These 15 handmade birthday cards using scrapbook paper prove that you don’t need fancy supplies to create something magical.
Each idea is distinct, easy to adapt, and ready to pin, gift, or keep for yourself as a source of crafty joy.
Pick one (or all) and start crafting—your future self will thank you for the creative stress relief and the smiles you’ll inspire.
Want more ideas? Mix and match textures, colors, and themes to build a handmade card library you’ll reach for again and again.
Happy creating, friend—trust me, your smart scraps are begging to become art.