16 DIY Stationery Ideas to Make at Home

Store-bought stationery all starts to look the same after a while, same finishes, same fonts, same predictable colors.
The best stationery pieces are the ones that carry a little bit of your own hand in them, a rough torn edge, a stamped pattern, a color you mixed yourself.
This roundup pulls together diy stationery ideas that range from five minute fixes, like wrapping raffia around a paperclip, to weekend projects like building a cardboard castle organizer or stitching a leather clipboard sleeve.
What ties all sixteen ideas together is texture. Handmade paper with visible flecks, watercolor that’s allowed to bloom instead of staying inside the lines, clay pressed with your thumb instead of poured into a mold, these are the details that make a piece look made, not printed.
Some ideas lean decorative, personalized notebooks, collaged journal covers, envelope liners. Others are purely functional, a pencil organizer built from recycled tubes, a ring-bound pouch for sticker sheets.
A few sit in between, dressing up something you’d normally overlook, like a plain paperclip or a pen rest.
16 DIY Stationery Ideas to Make at Home
1. Mini Patterned-Paper Notebooks
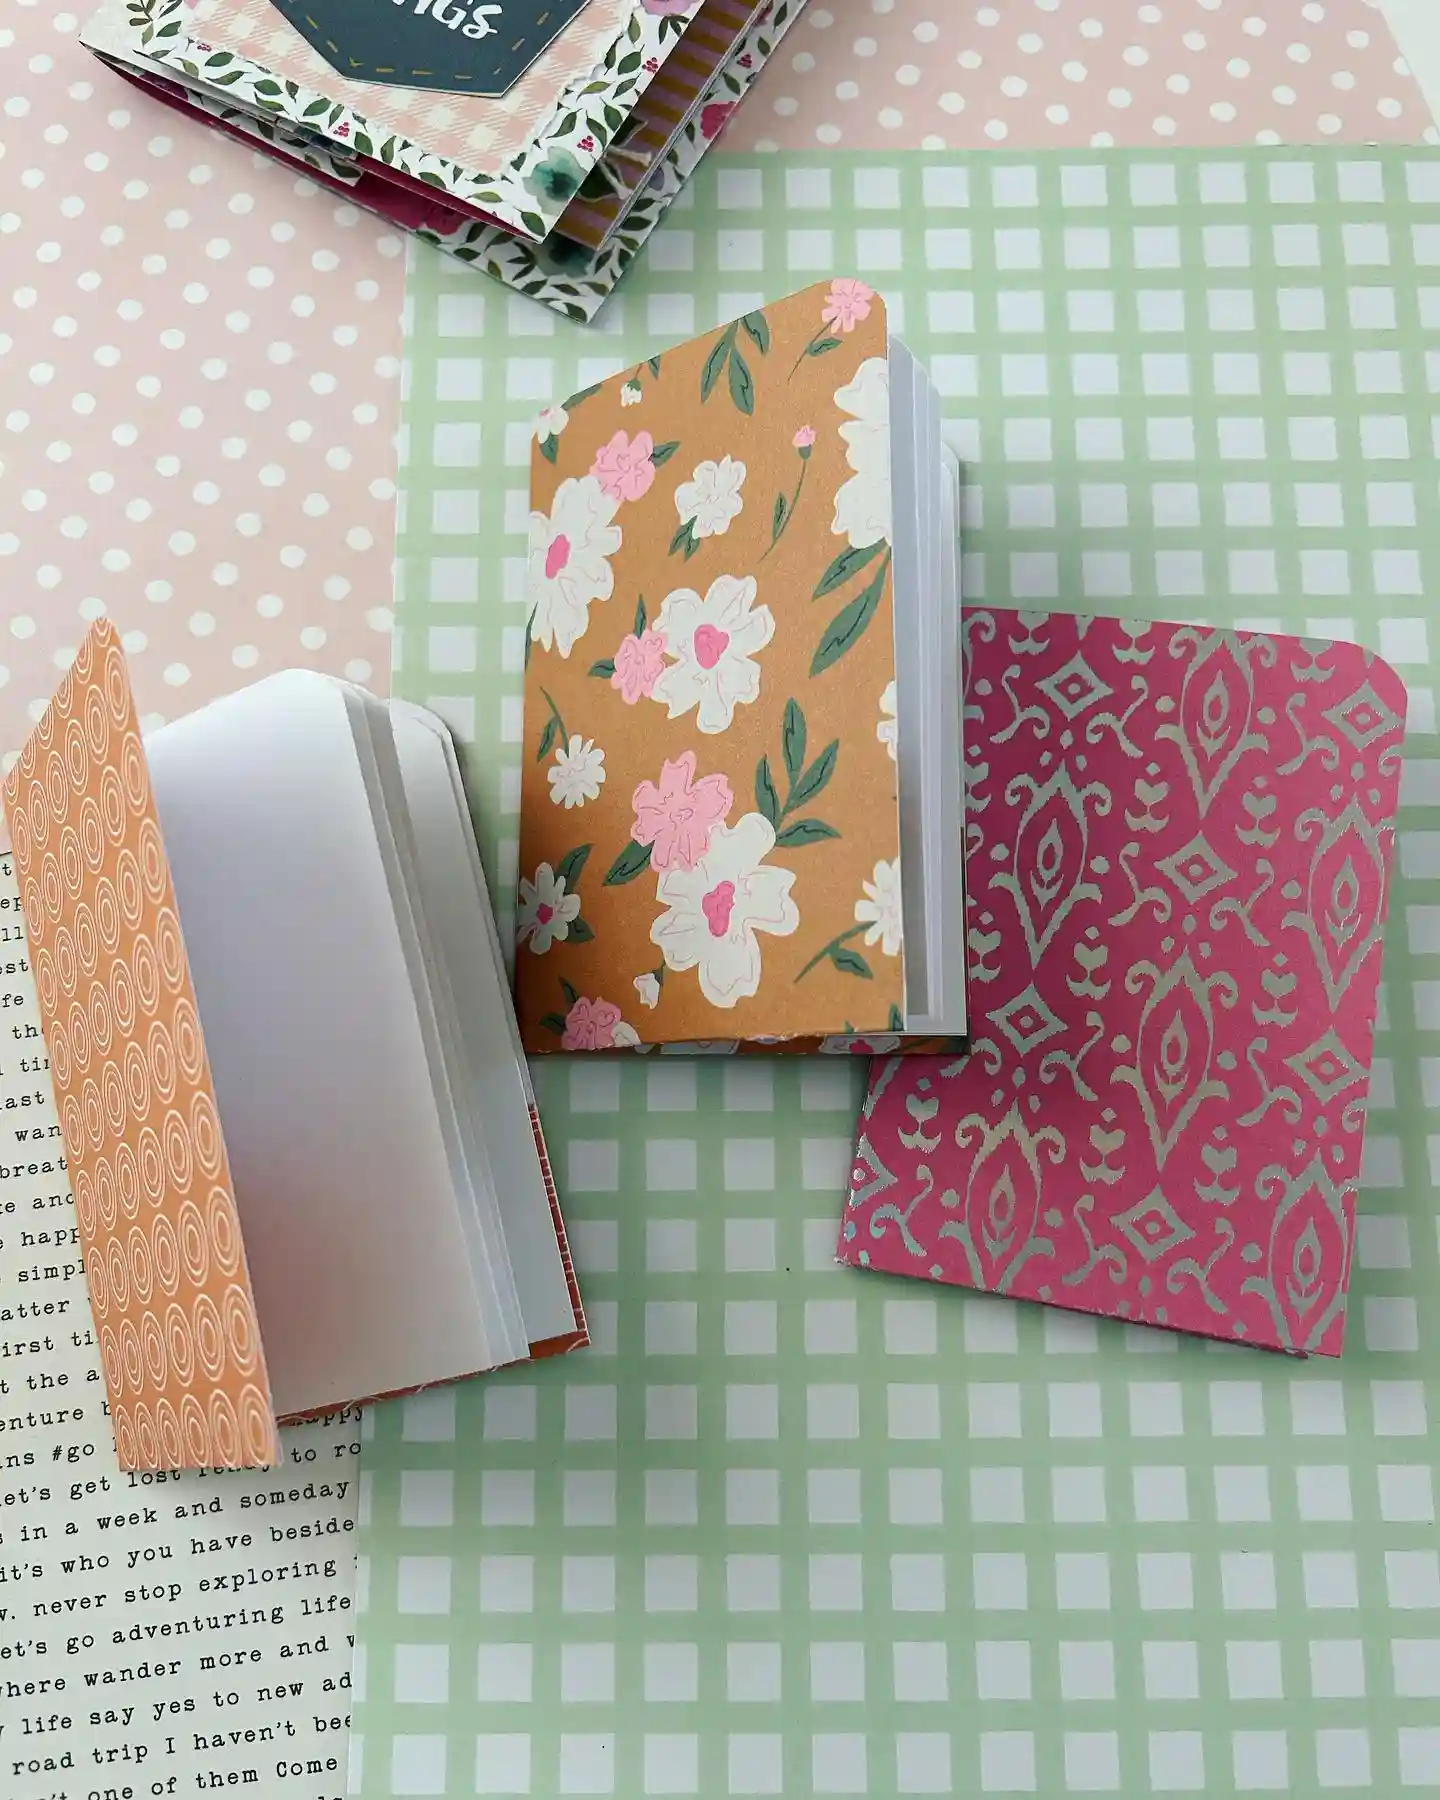
Scrapbook paper turns into a stack of pocket notebooks here, and the trick is all in the paper choice.
Each cover uses a different print, a soft floral, a pink damask, a small circle pattern, so the whole set looks curated instead of matchy.
A few things worth noting from the photo:
- The covers are cut slightly larger than the inside pages, so there’s a clean border all the way around
- Corners are rounded on some covers, which softens the whole look and keeps edges from bending
- The inside pages appear to be plain white cardstock, folded and nested inside the cover
- A basic pamphlet stitch or a few staples along the spine holds everything together
2. Embroidered French Knot Bookmarks
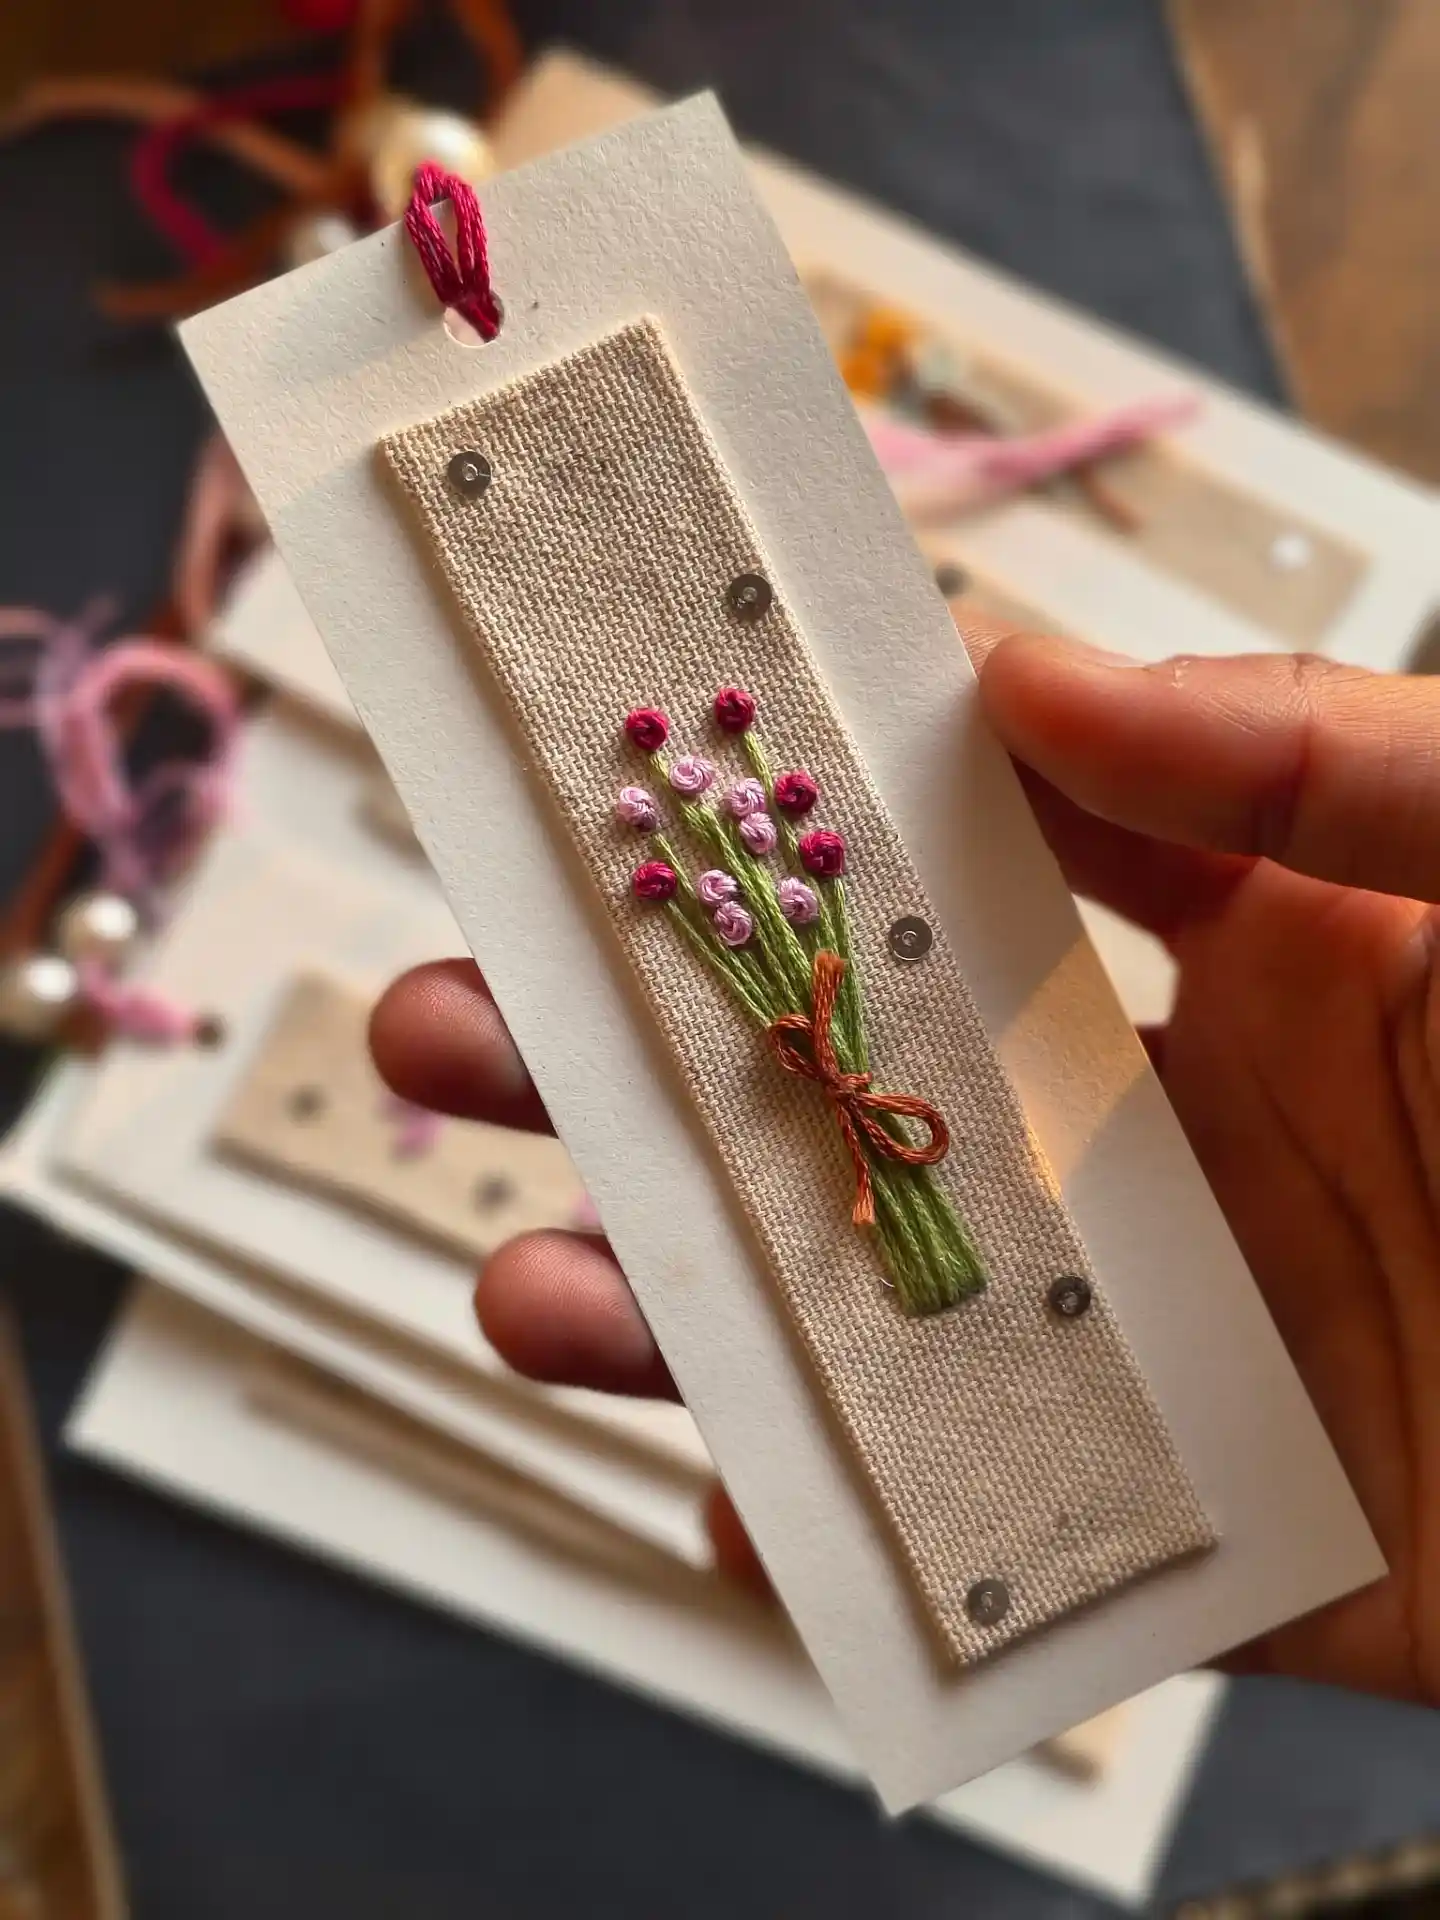
Cross-stitch fabric glued to a cardstock base gives this bookmark its texture, and the little bouquet is made almost entirely from French knots.
It’s a slower project than most on this list, but nothing here requires fancy stitches.
A punched hole and a loop of embroidery floss finish it off at the top, and a few loose sequins scattered across the fabric catch the light without competing with the stitching.
To get this look:
- Cut and mount a rectangle of Aida or cross-stitch fabric onto a slightly larger cardstock backing
- Stitch the stems in a simple backstitch using green floss
- Add the blooms with French knots in two or three shades of pink
- Tie a tiny bow at the base with a contrasting floss color
- Punch a hole at the top and thread a loop for hanging
Glue a rectangle of Aida cloth onto a slightly larger cardstock backing.
Use a simple backstitch in green floss to sketch the bouquet shape.
Add French knots in two or three pink shades, then tie a small bow at the base.
3. Die-Cut Paper Flower Greeting Cards
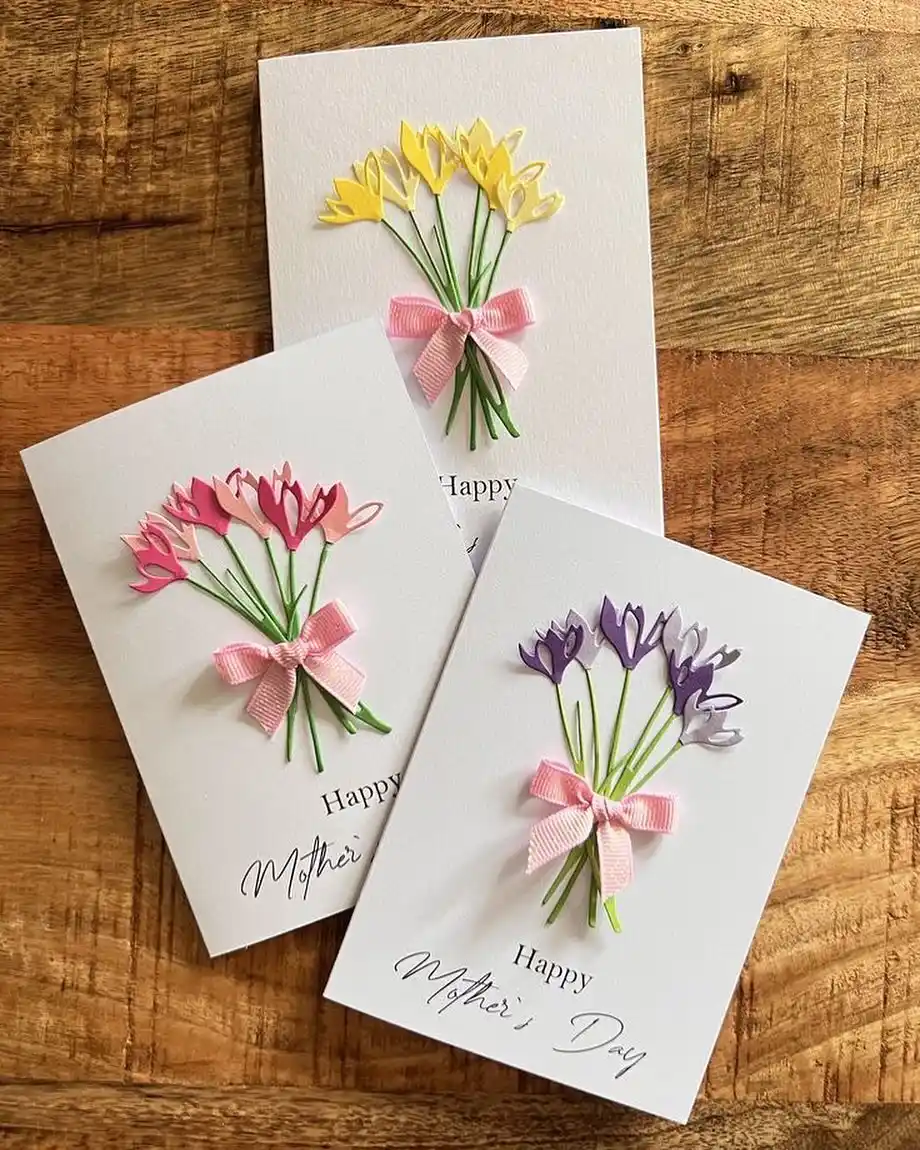
Three color palettes, one simple technique. Each card uses the same paper flower die-cut, tulip-shaped petals in layered cardstock, wired into a tiny bouquet with a ribbon bow.
Swapping the paper color from soft pink to sunny yellow to deep purple is what makes the set feel handmade rather than mass-produced, and it means one die-cut shape can carry an entire line of cards.
What makes it work:
- Stems are thin floral wire wrapped in green paper tape, bent slightly for a natural curve
- Each bouquet is glued flat to the card front so it lies smooth for mailing
- A small grosgrain ribbon bow ties the stems together and hides the glue point
- Printed or hand-lettered script underneath keeps the focus on the flowers
4. Beaded Flower Charm Pens
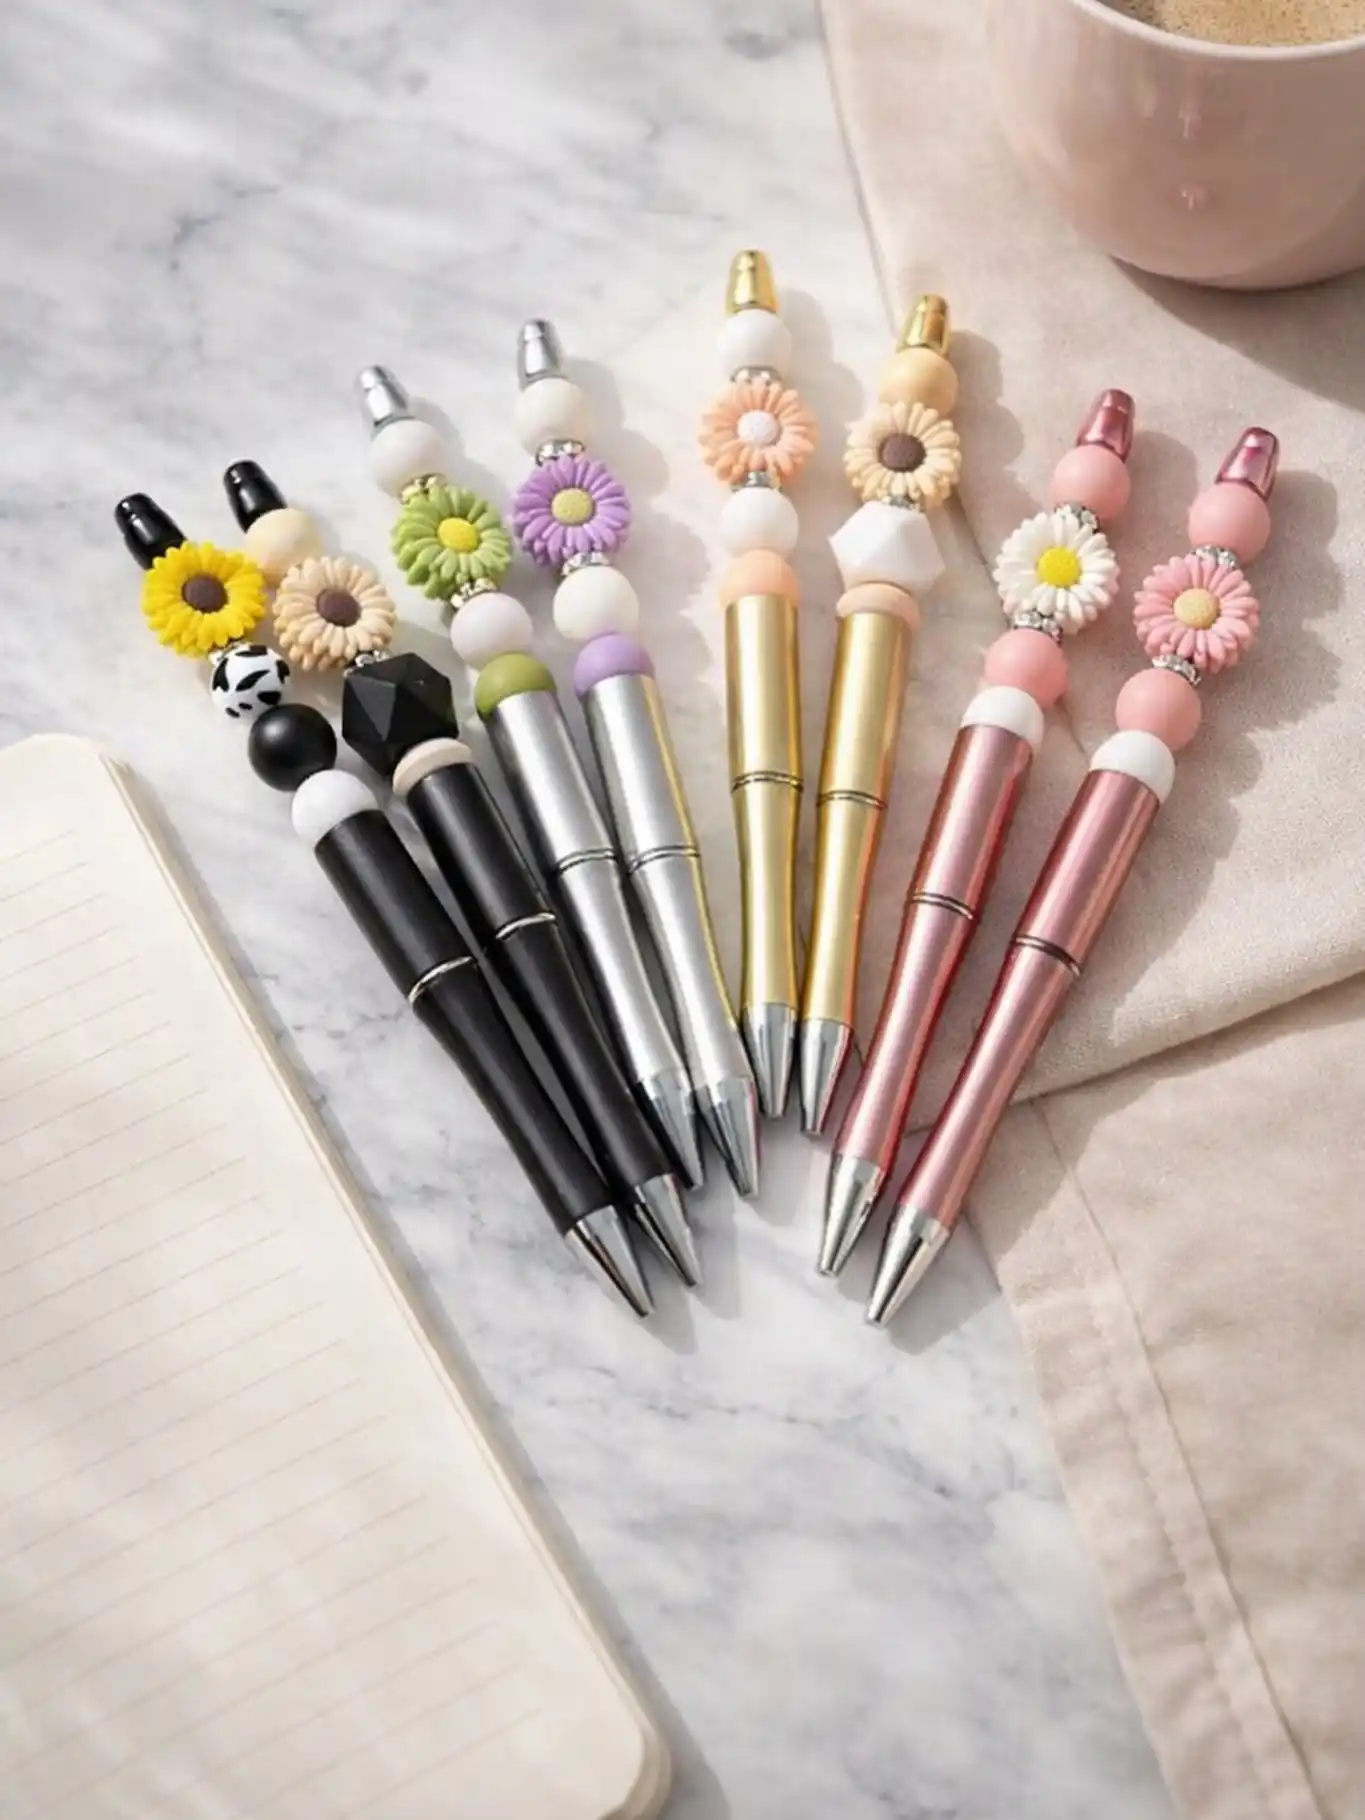
Six colorways, one repeatable formula: a metallic ballpoint pen shaft threaded with silicone beads and a single clay flower charm near the top.
Daisies and sunflowers do the heavy lifting here, and the pen barrel color, gold, silver, black, rose, pulls the whole look together so nothing feels random even with six different pens side by side.
Getting the proportions right matters more than the flower choice. Two or three beads below the charm, one or two above, and a cap bead that matches the barrel finish keeps each pen looking finished instead of overloaded.
5. Holographic Name Notebooks With Iridescent Vinyl Lettering
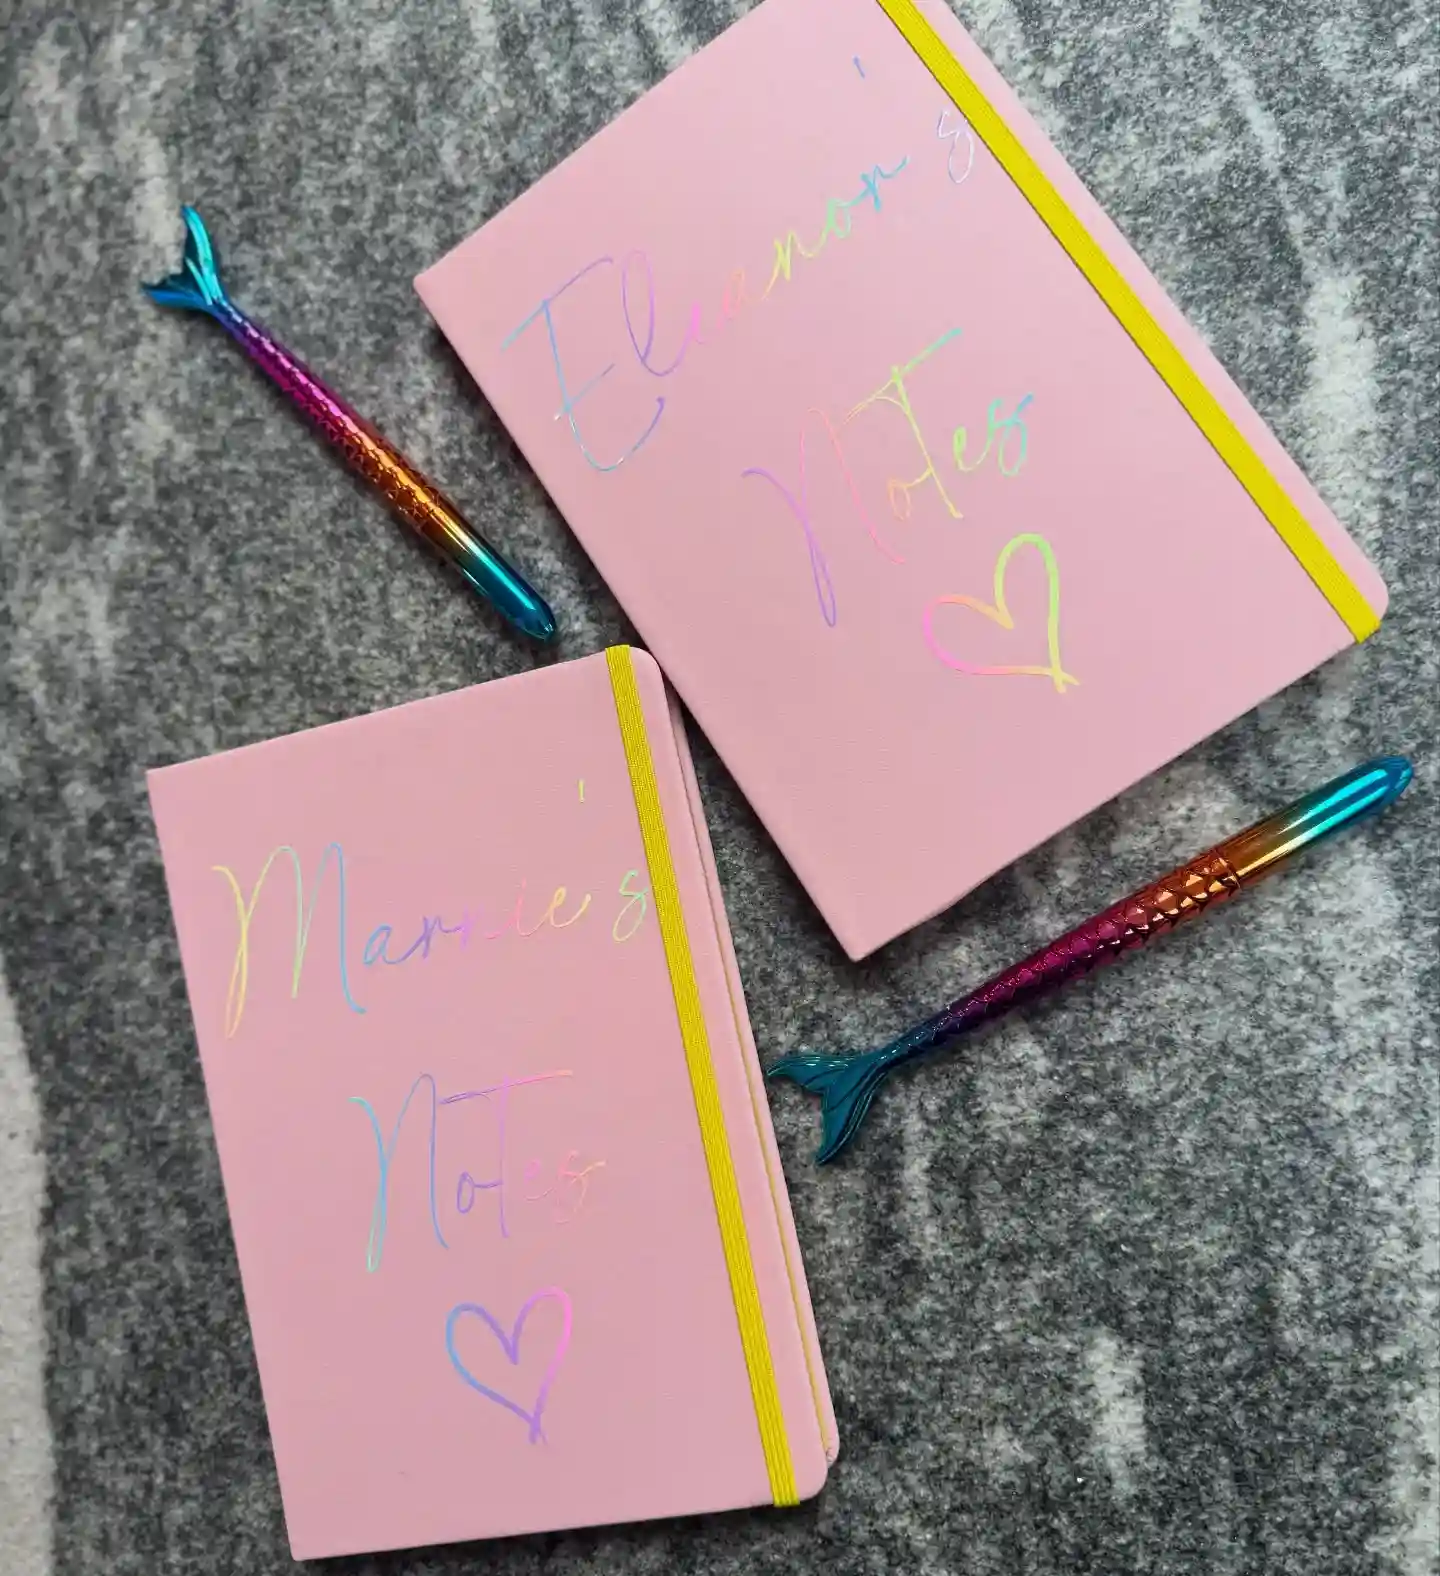
Two blush pink notebooks sit side by side, each one labeled with a name in rainbow holographic script and a small heart tucked underneath.
The lettering catches light in blue, pink, and green depending on the angle, which is what makes this idea feel more special than a plain personalized notebook.
A bright yellow elastic band closure and matching mermaid tail pens finish the set, so the whole thing reads as a coordinated little gift rather than a random notebook.
The trick is in the letter application, not the notebook itself. Here’s how to get the look:
Subscribe to DIY Craft Bloom
Get updates on the latest posts and more from DIY Craft Bloom straight to your inbox.
- Start with a plain notebook in a soft solid color so the lettering has room to stand out
- Use holographic adhesive vinyl letters, or an iridescent gel paint pen if you prefer freehand
- Write the name in a loose cursive, angled slightly upward across the cover
- Add one small heart or symbol underneath to anchor the design
6. Color-Coded Pastel Desk Kit With Matching Everything
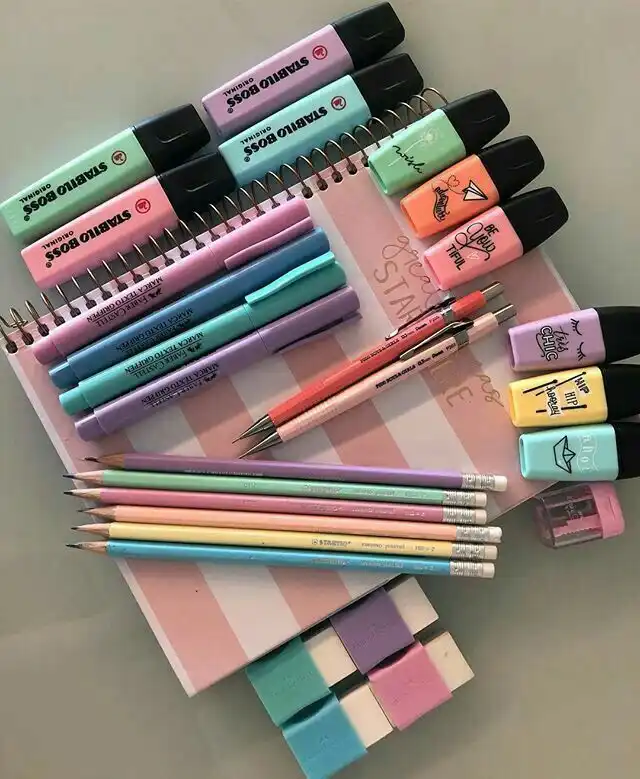
This one is less about making a single item and more about building a whole system.
Highlighters, fine liners, colored pencils, mechanical pencils, and even the erasers all sit in the same soft pastel palette of mint, lilac, blush, and butter yellow.
Nothing in the pile clashes because every tool was chosen to match, down to the little stamped labels on the eraser caps and the striped pink notebook underneath everything.
What makes this work is the restraint, not the amount of stuff:
- Pick three or four pastel shades and stick to them across every tool
- Group by type, pens together, pencils together, erasers together, so the kit photographs and functions like a set
- Use a patterned or striped notebook as the neutral base everything else sits on
- Add one small pencil sharpener in a matching tone to finish the set
7. Torn Kraft Paper Diary Cover With Pressed Botanicals
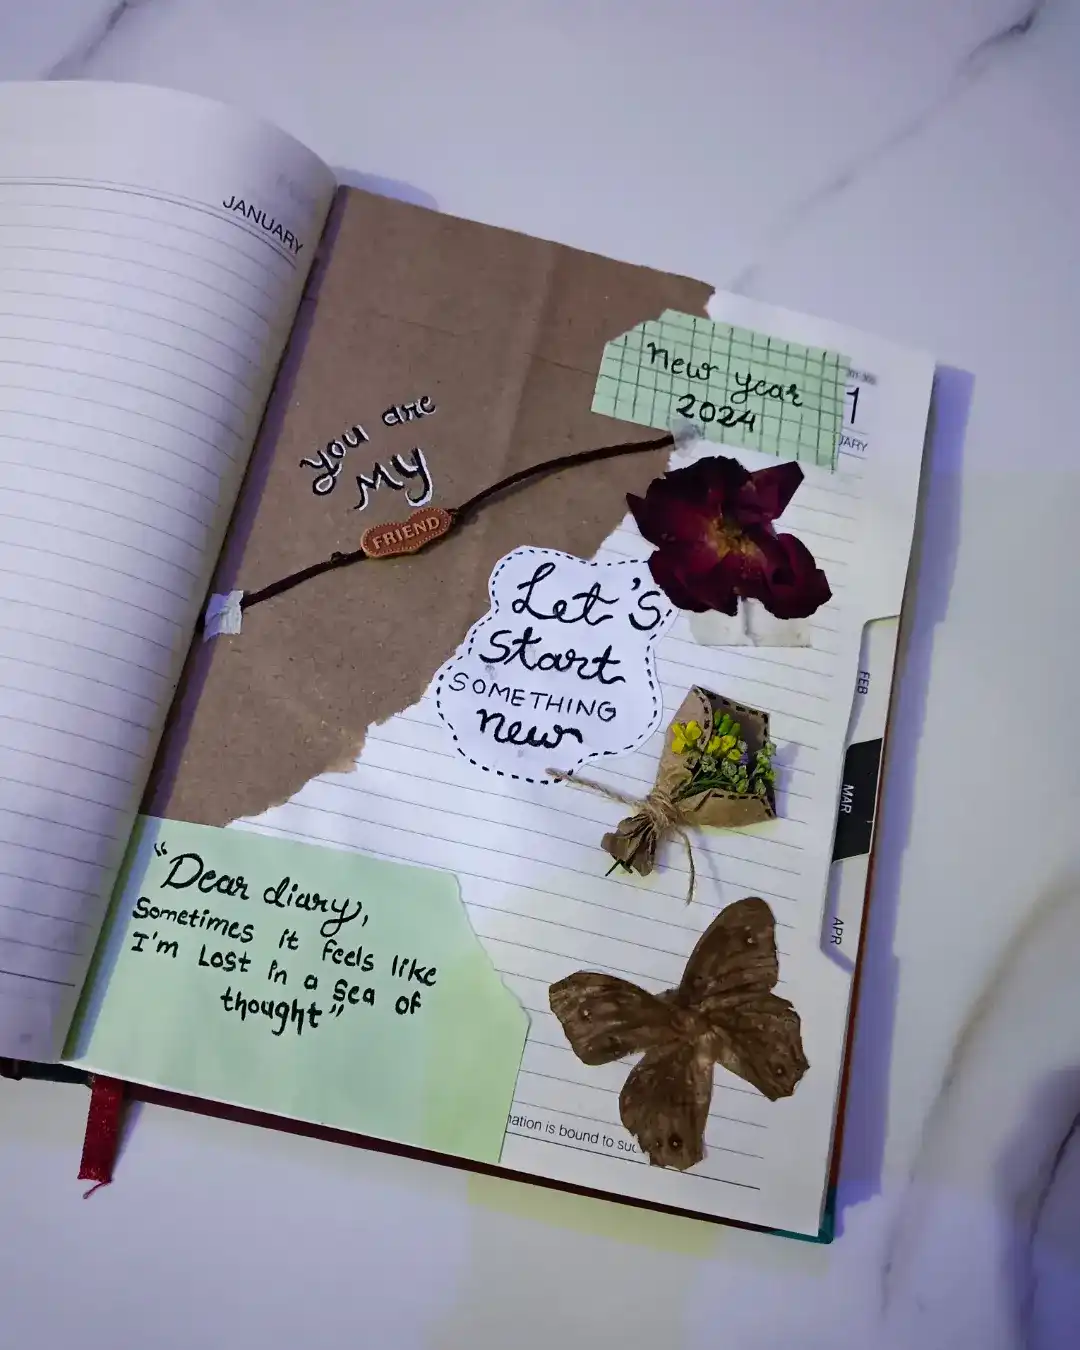
A journal cover built entirely from paper scraps and things pressed flat, torn kraft paper layered over the page, a cut out speech bubble with hand lettering, a small grid sticky note, and two pressed botanicals, a dark red flower and a dried leaf shaped like a moth, glued straight onto the paper.
A tiny twine wrapped bundle of dried flowers sits below like a little parcel. Nothing here is printed, every texture is real paper or a real dried piece, which is what gives the page its handmade feel.
To recreate this at home:
- Tear, don’t cut, a piece of kraft paper or a brown paper bag for the base layer, torn edges look intentional here
- Press flowers or leaves flat between book pages for a week before using them
- Cut a rough speech bubble shape from plain paper and hand letter a short phrase inside it
- Glue the pressed botanicals last, on top of everything else, using a thin layer of craft glue so petals don’t lift
8. Ring-Bound Sticker Pouch With Charm Details
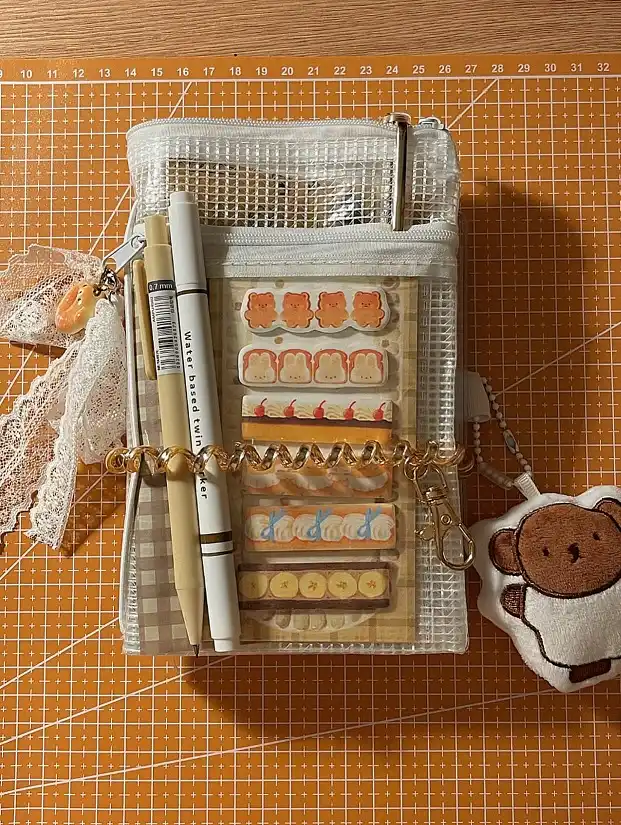
Clear mesh zip pouches get closed with plastic O-rings instead of just zipping shut, which turns a plain pouch into something you can flip through like a mini binder.
Rows of food-themed sticker sheets sit stacked inside, held in place by the ring binding itself, while a water-based twin marker and fine liner tuck into the top pocket.
Lace trim and a small plush bear charm clipped to the zipper pull turn a purely functional pouch into something that still feels personal.
The ring binding is the whole trick here. Once you punch holes along one edge of a clear pouch and thread it onto O-rings, you can add or remove sticker sheets whenever you want instead of digging through a flat pile.
Use a hole punch made for plastic or vinyl, a paper punch can crack a clear mesh pouch instead of cutting through it cleanly.
9. Vintage Collage Journal Cover With Pearl Trim and Lace
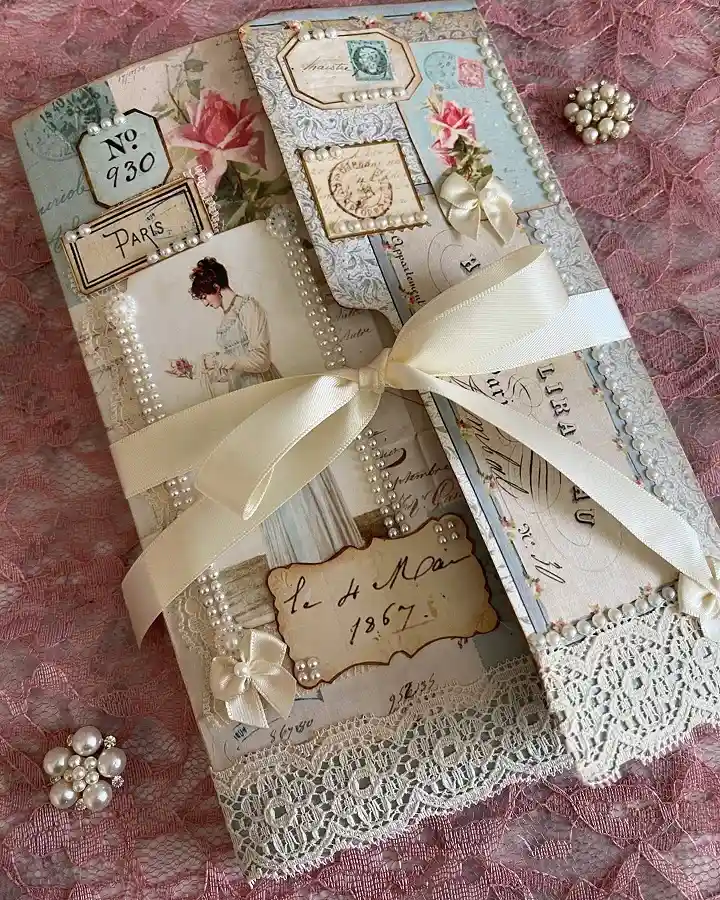
A plain journal disappears completely under a full collage of vintage-style paper, faded postage stamps, an old Paris label, a rose illustration, and a Victorian portrait cutout, all layered edge to edge across the cover.
Strands of pearl beading trace the borders of each collaged section, ivory ribbon wraps around the whole book in a loose bow, and a strip of cream lace lines the bottom edge.
Two small pearl brooches sit off to the side as styling props rather than part of the book itself.
Getting this look is really a layering exercise:
- Print or collect vintage-style ephemera, postage stamp images, old script paper, faded floral prints, and cut them into rectangles that fit your cover
- Glue the paper pieces edge to edge like a patchwork before adding any embellishment
- Hot glue strands of fake pearl trim along the seams between paper sections to hide the raw edges
- Finish with a scrap of lace along the bottom and a wide ribbon tied around the spine
A plain notebook with a blank solid cover.
A patchworked, pearl trimmed cover that looks pulled from an antique shop.
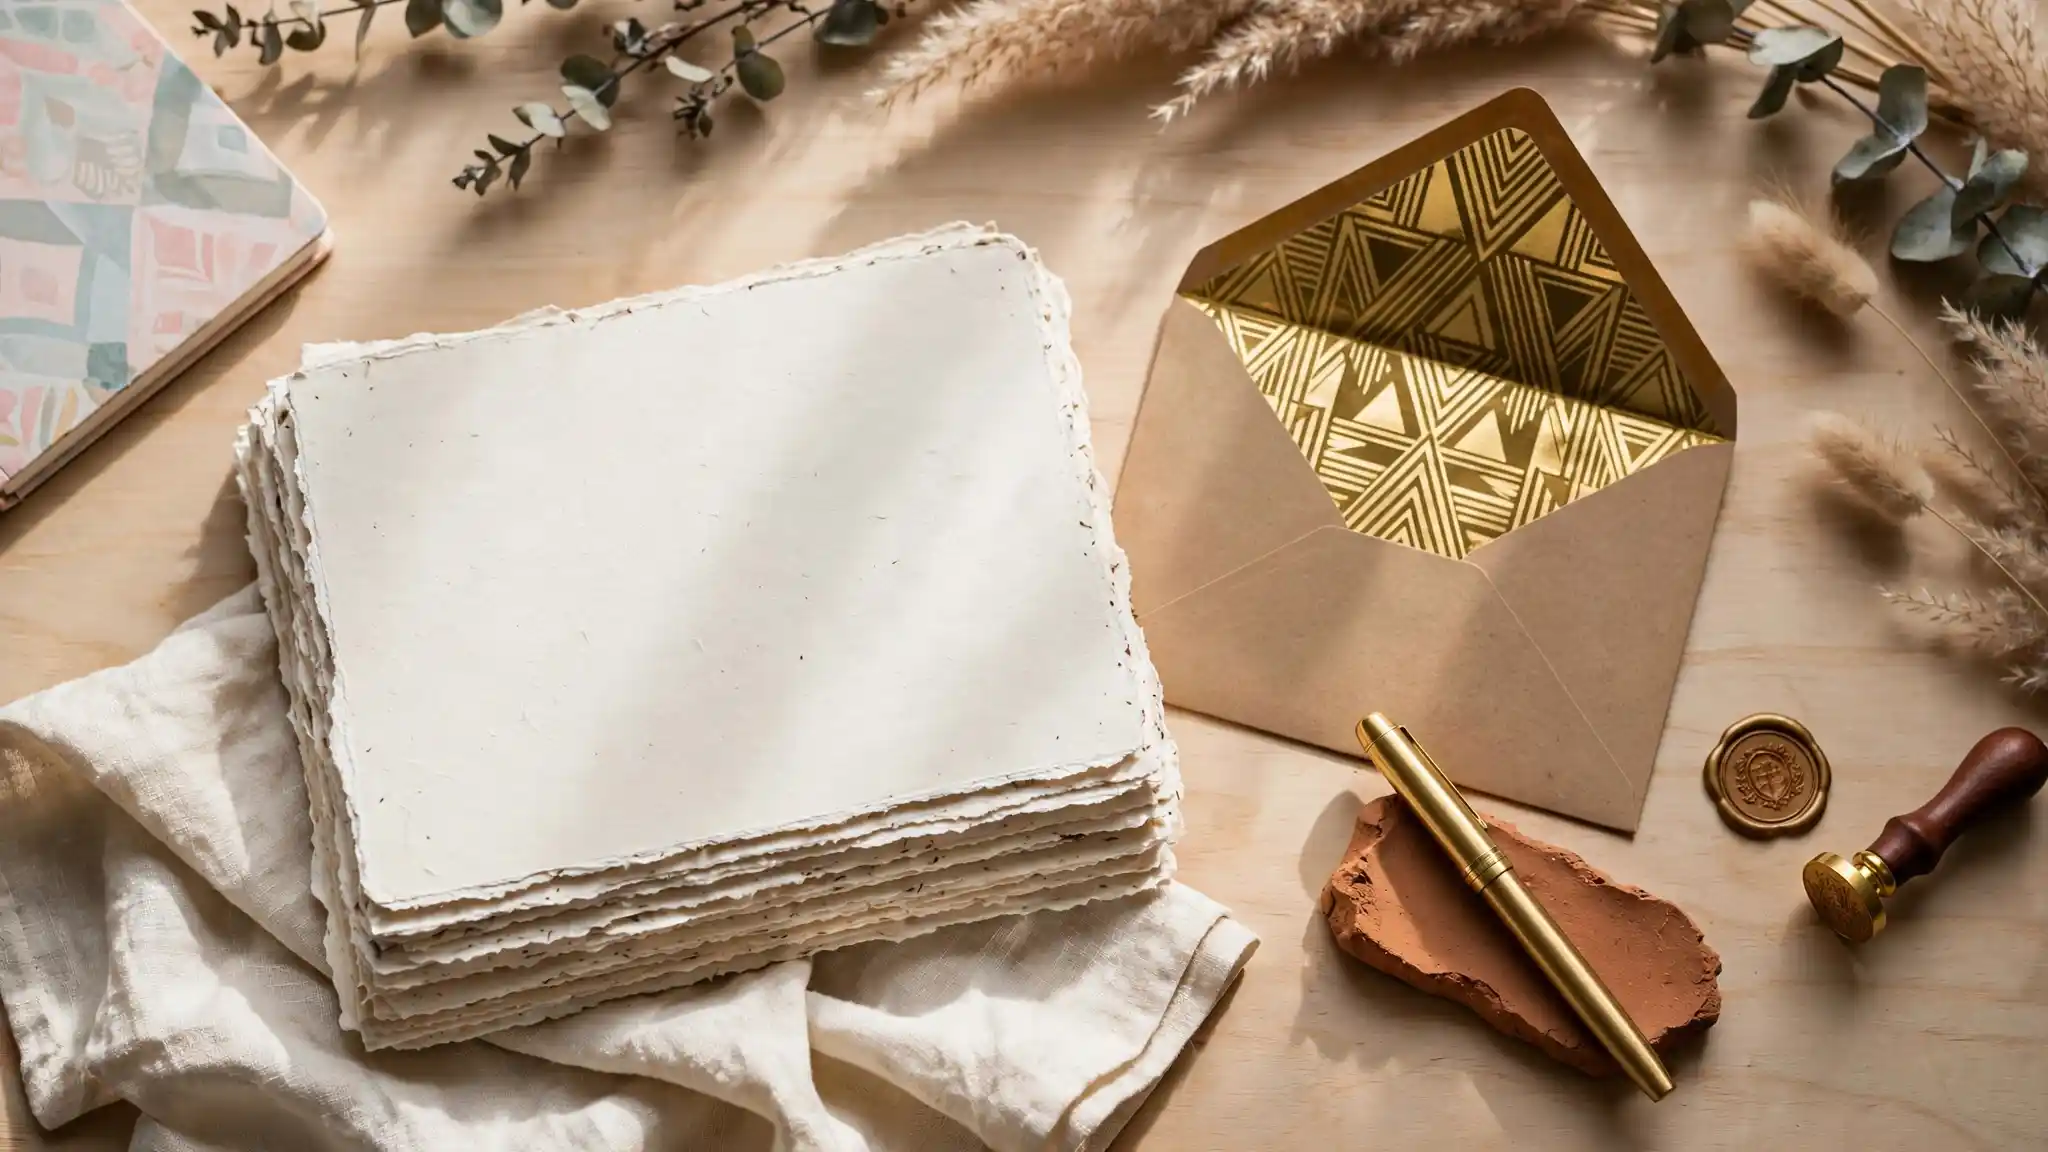
10. Handmade Deckle-Edge Paper With Stamped Mudcloth Border
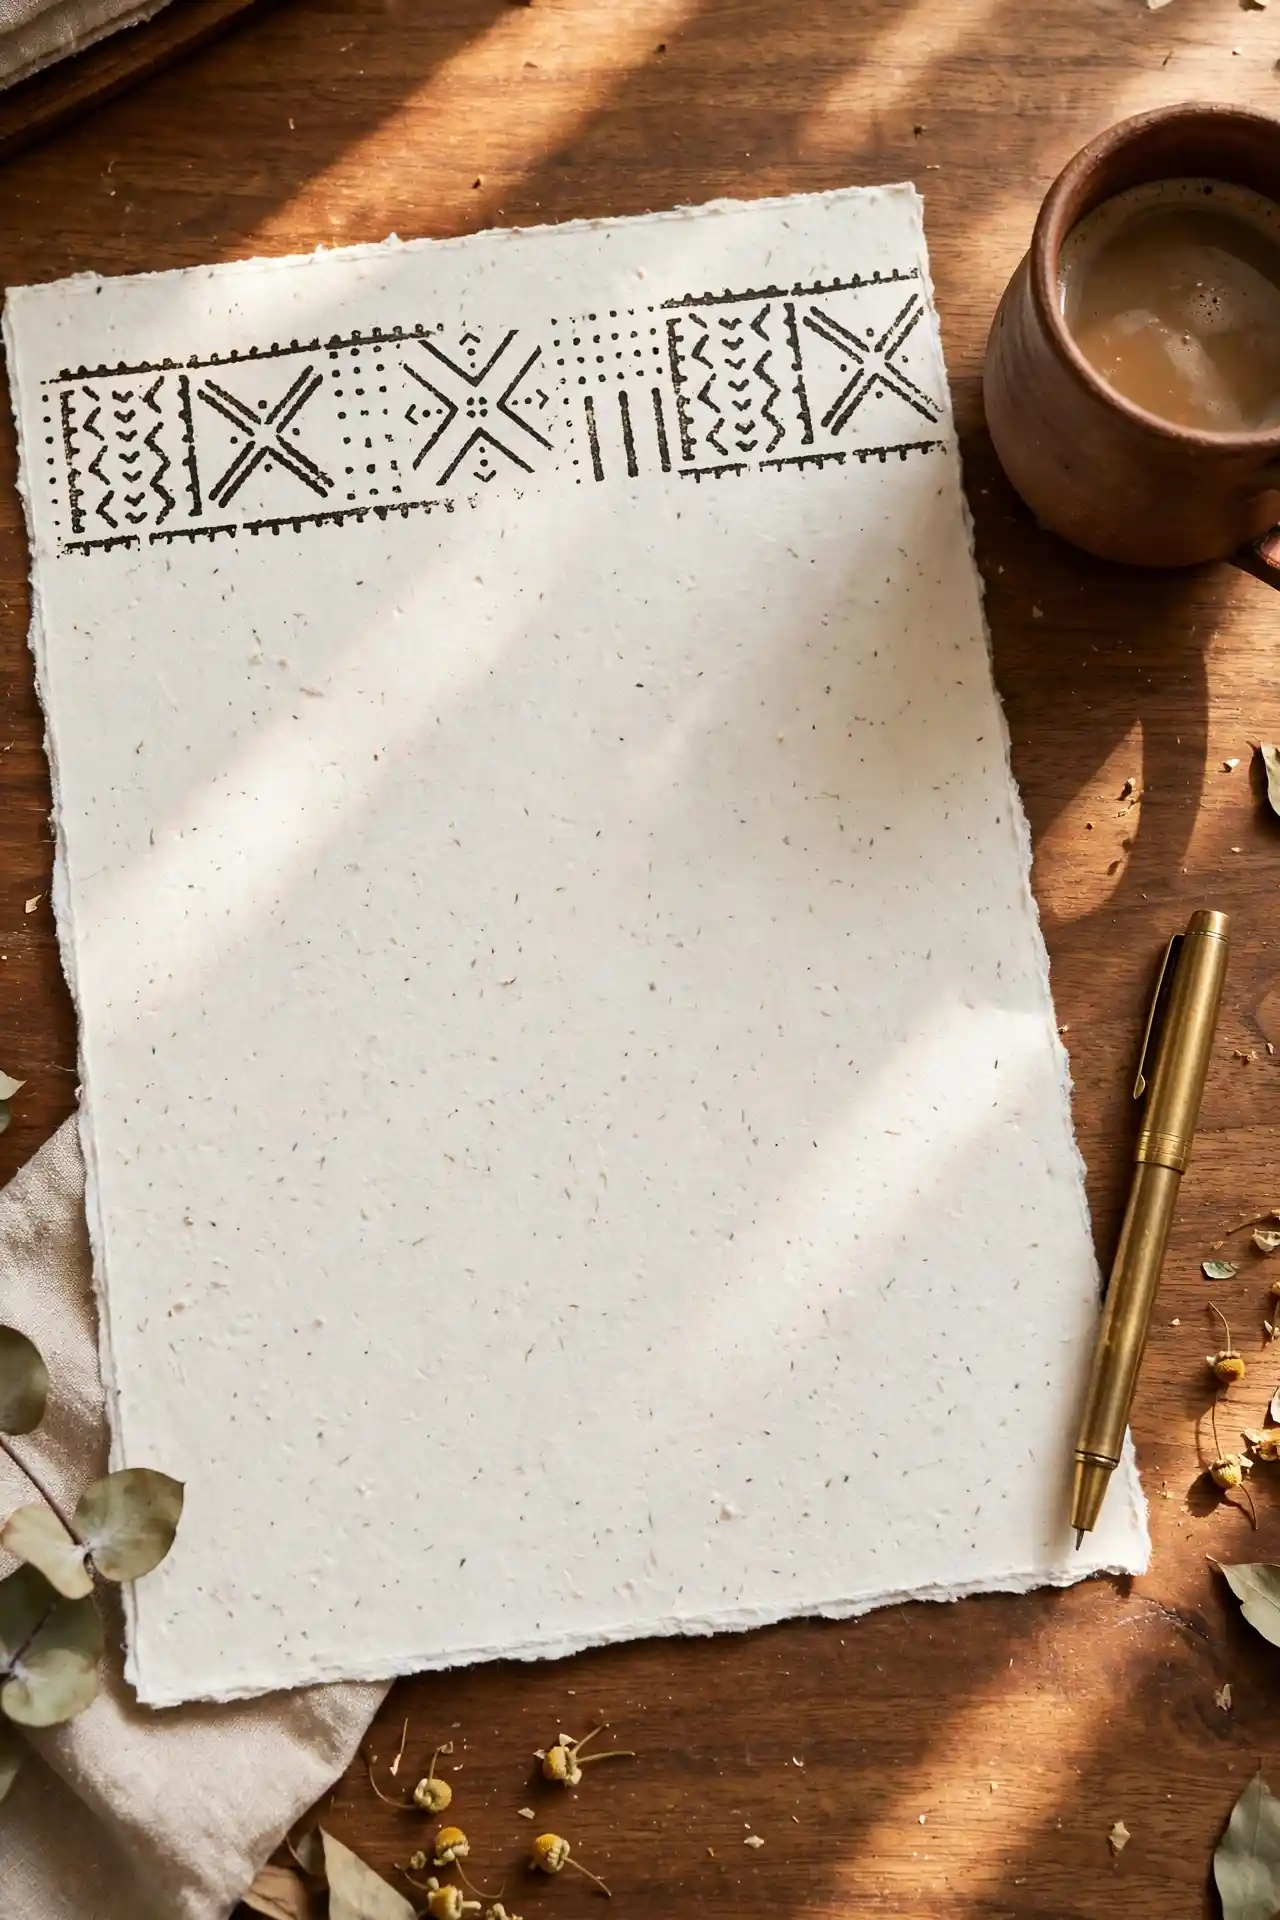
A sheet of rough handmade paper, flecked with visible plant fiber and torn to a deliberately uneven deckle edge, gets a single geometric border stamped across the top in a tribal-inspired pattern of X shapes, dashes, and dots.
There is no other decoration anywhere on the page, the texture of the paper itself and that one stamped band do all the work.
It sits ready for a letter, styled simply with a brass pen and a cup of coffee nearby.
Two things make this one work so well. First, the paper texture is real, not printed, so light catches the flecks and rough edges differently than smooth cardstock ever will.
Second, restraint, one stamped border and nothing else keeps a busy handmade pattern from turning into clutter.
Real paper texture plus one restrained stamped border beats any printed pattern for a handmade feel.
11. Raffia-Wrapped Oversized Paperclip for a Handmade Paper Stack
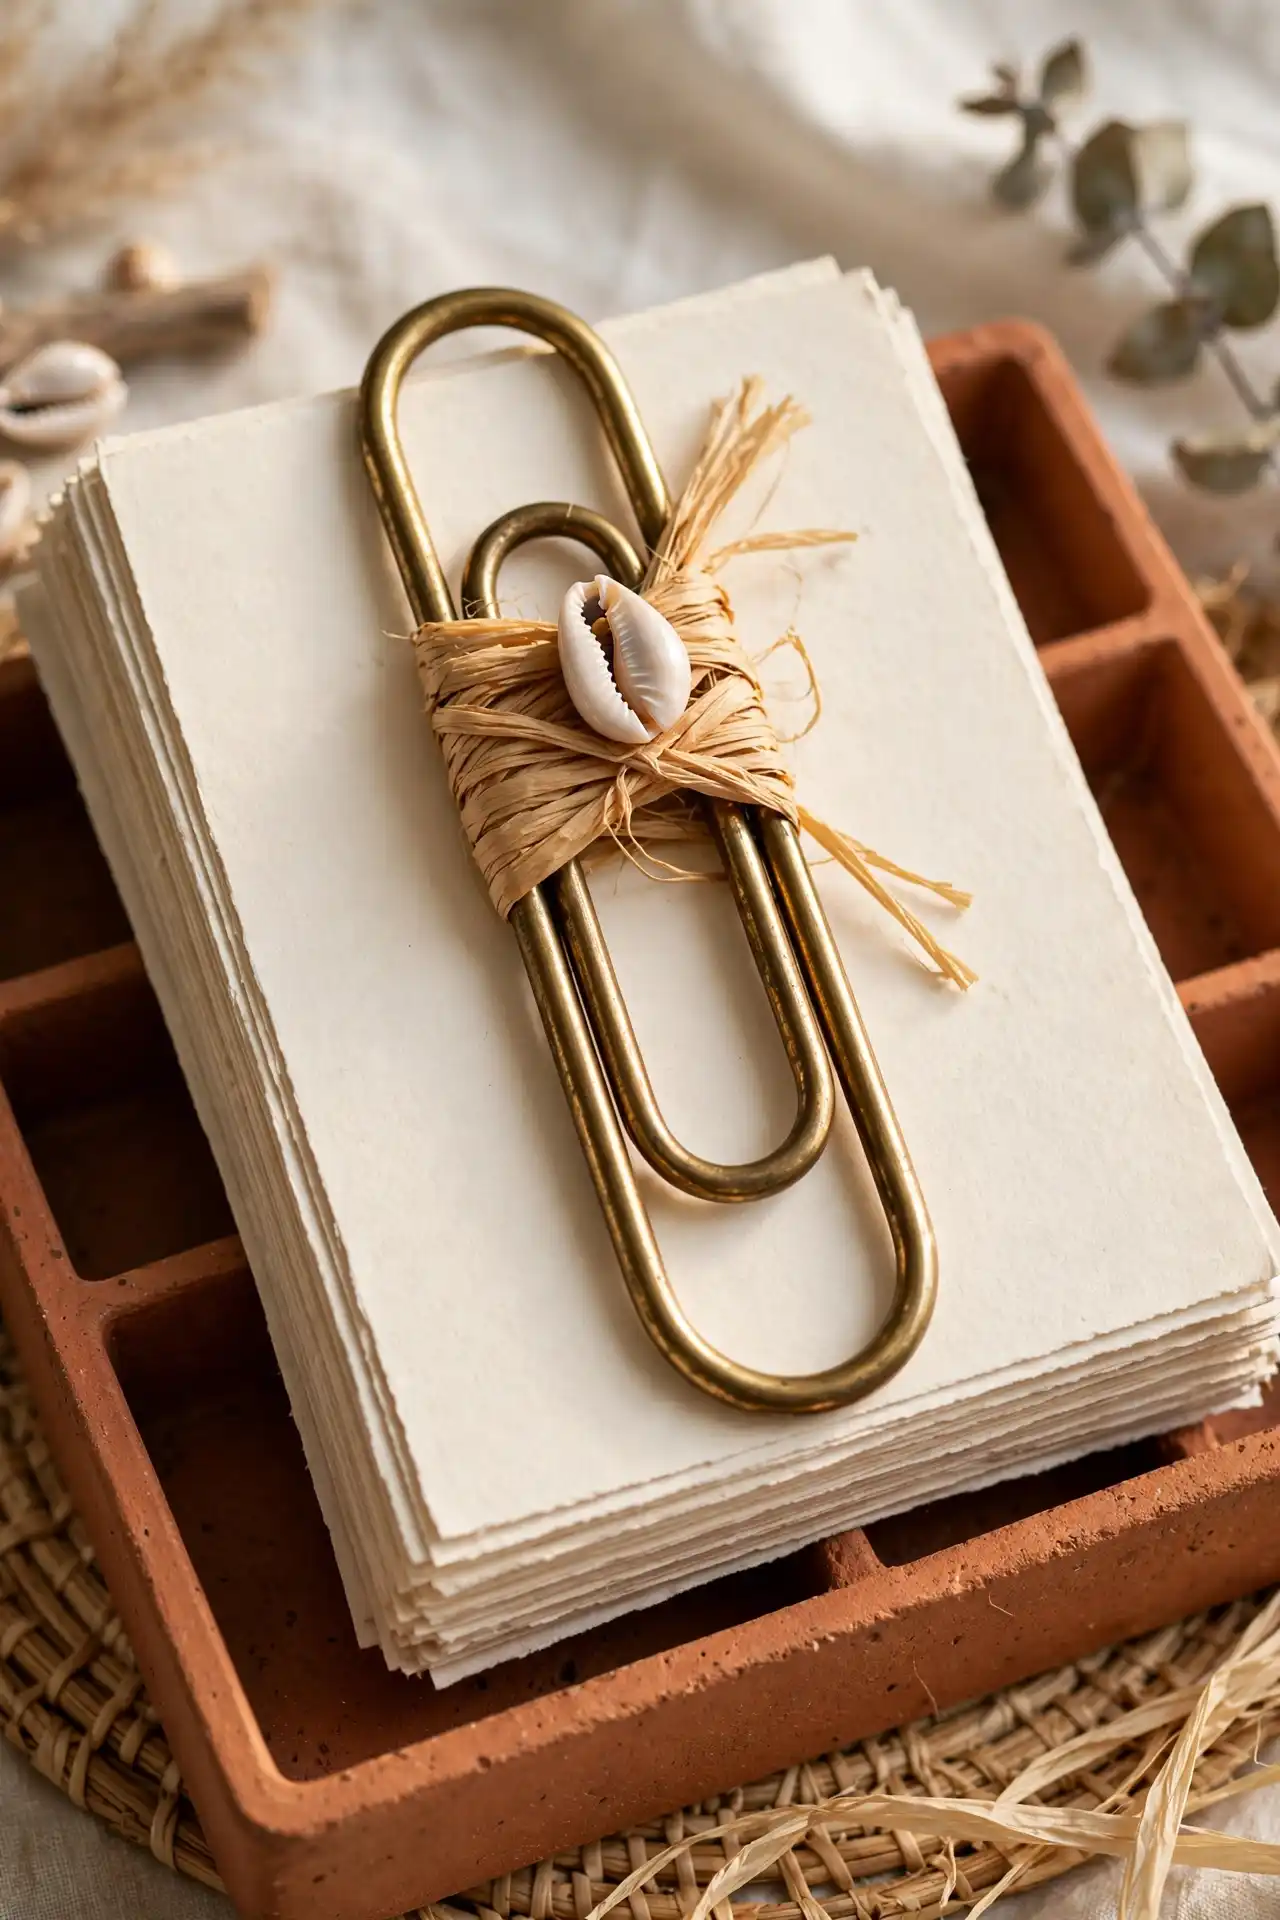
A single jumbo brass paperclip becomes a small styling moment once natural raffia gets wound around its curve and knotted, with a tiny cowrie shell tucked into the wrap.
It sits clipped over a stack of deckle-edge handmade paper inside a terracotta tray, so the whole corner of the desk reads coastal and earthy without a single printed pattern in sight.
Subscribe to DIY Craft Bloom
Get updates on the latest posts and more from DIY Craft Bloom straight to your inbox.
This is one of those ideas that costs almost nothing and takes minutes to put together.
12. Watercolor-Edged Notecards With a Rust and Amber Wash
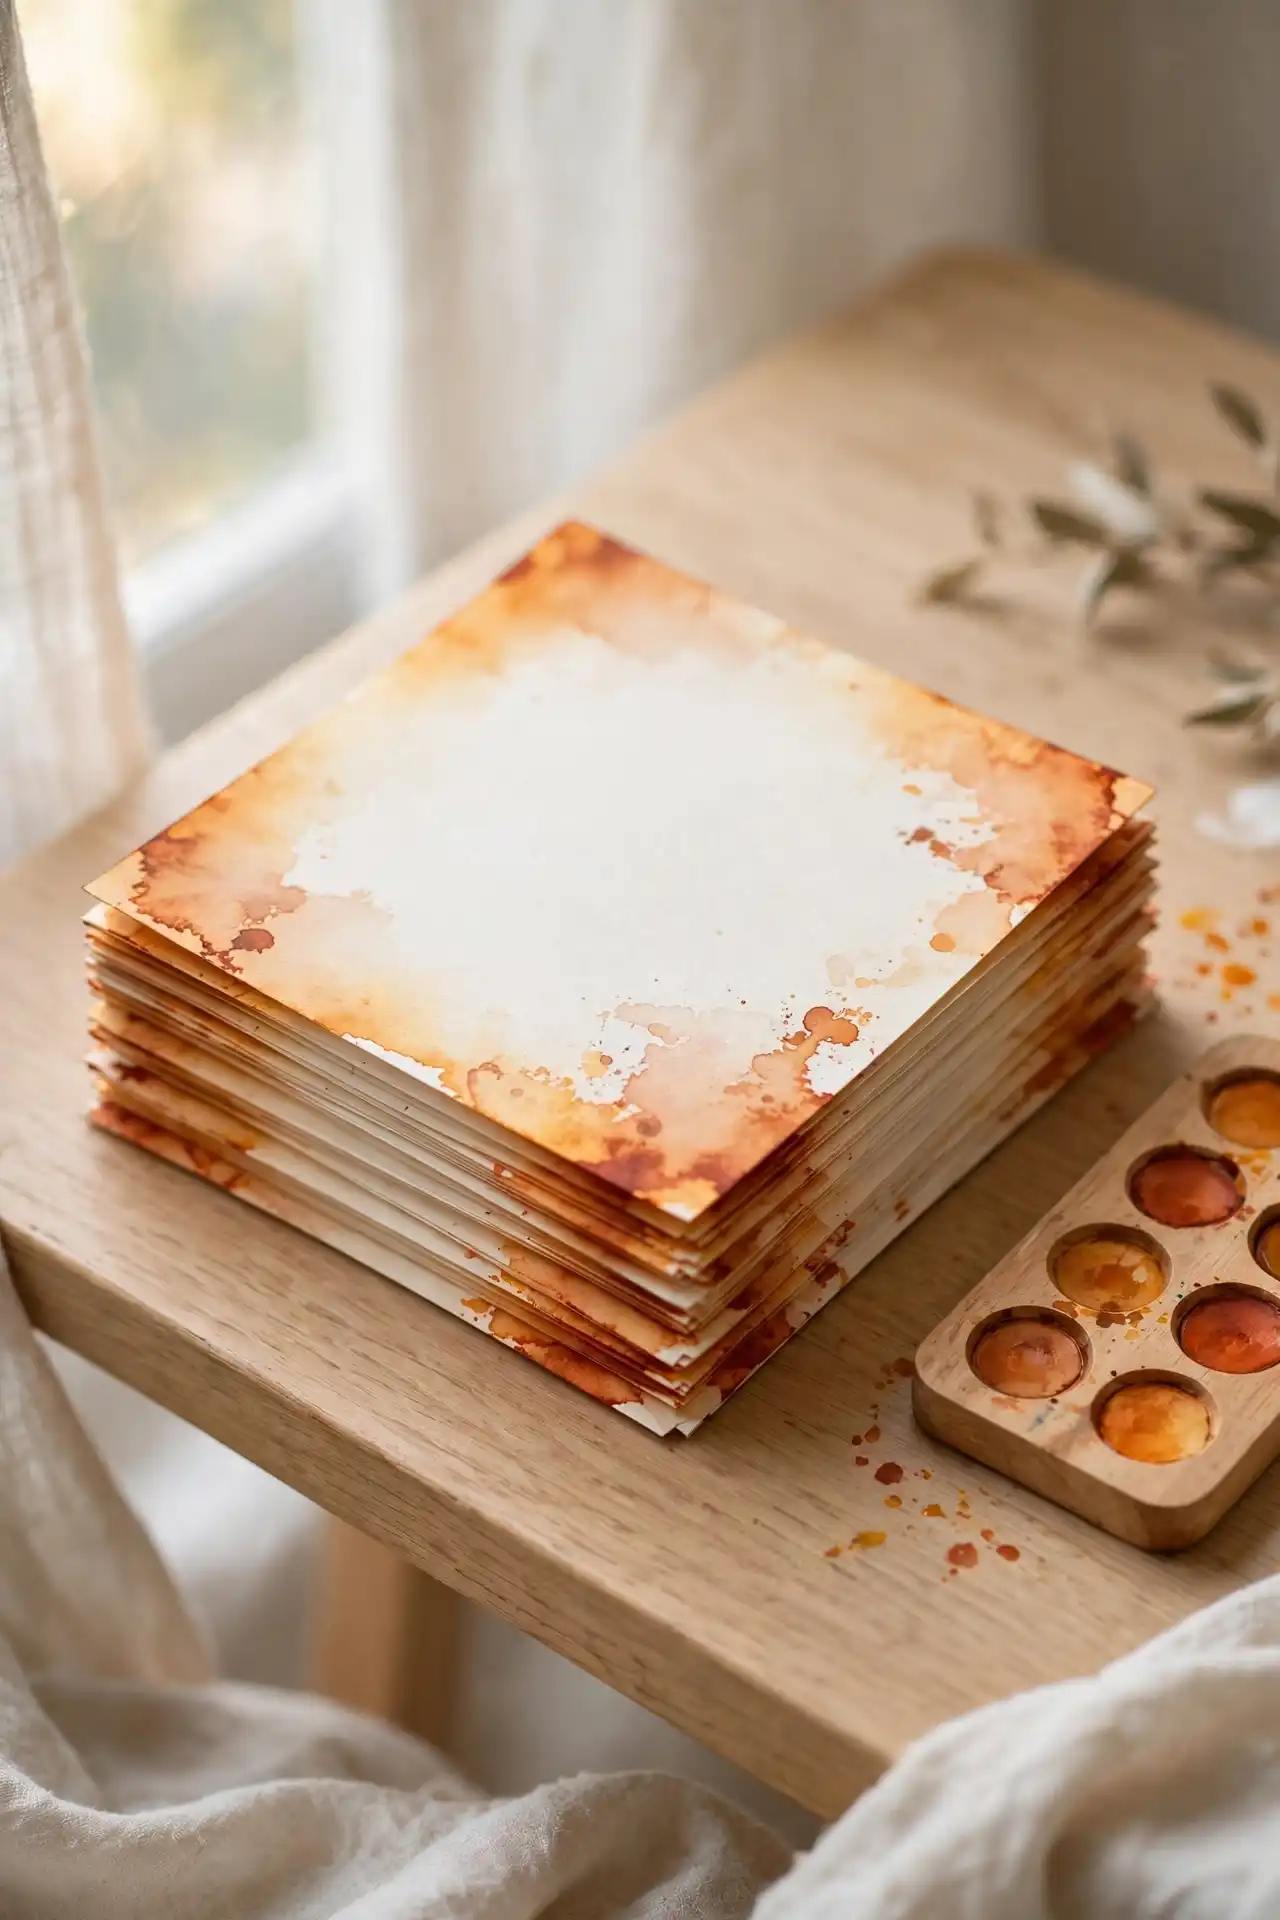
A stack of square notecards gets its border painted in loose watercolor rather than stamped or printed, warm rust, amber, and burnt orange bleed inward from all four edges and pool unevenly, leaving a clean white center untouched for writing.
A small wooden paint palette with several mixed earth tones sits beside the stack, still splattered from use.
Unlike a hard printed border, every card in this stack looks slightly different because the color was allowed to bloom on its own.
The technique is simpler than the result suggests:
- Wet the border of each card with a damp brush before adding any pigment, this is what makes the color bleed and bloom instead of sitting in a hard line
- Load a second brush with two or three warm watercolor tones and touch it to the wet edges only
- Let gravity and the water do the blending, resist brushing it around too much
- Leave the center completely dry and untouched so there is still room to write
13. Cardboard Tube Castle Pencil Organizer
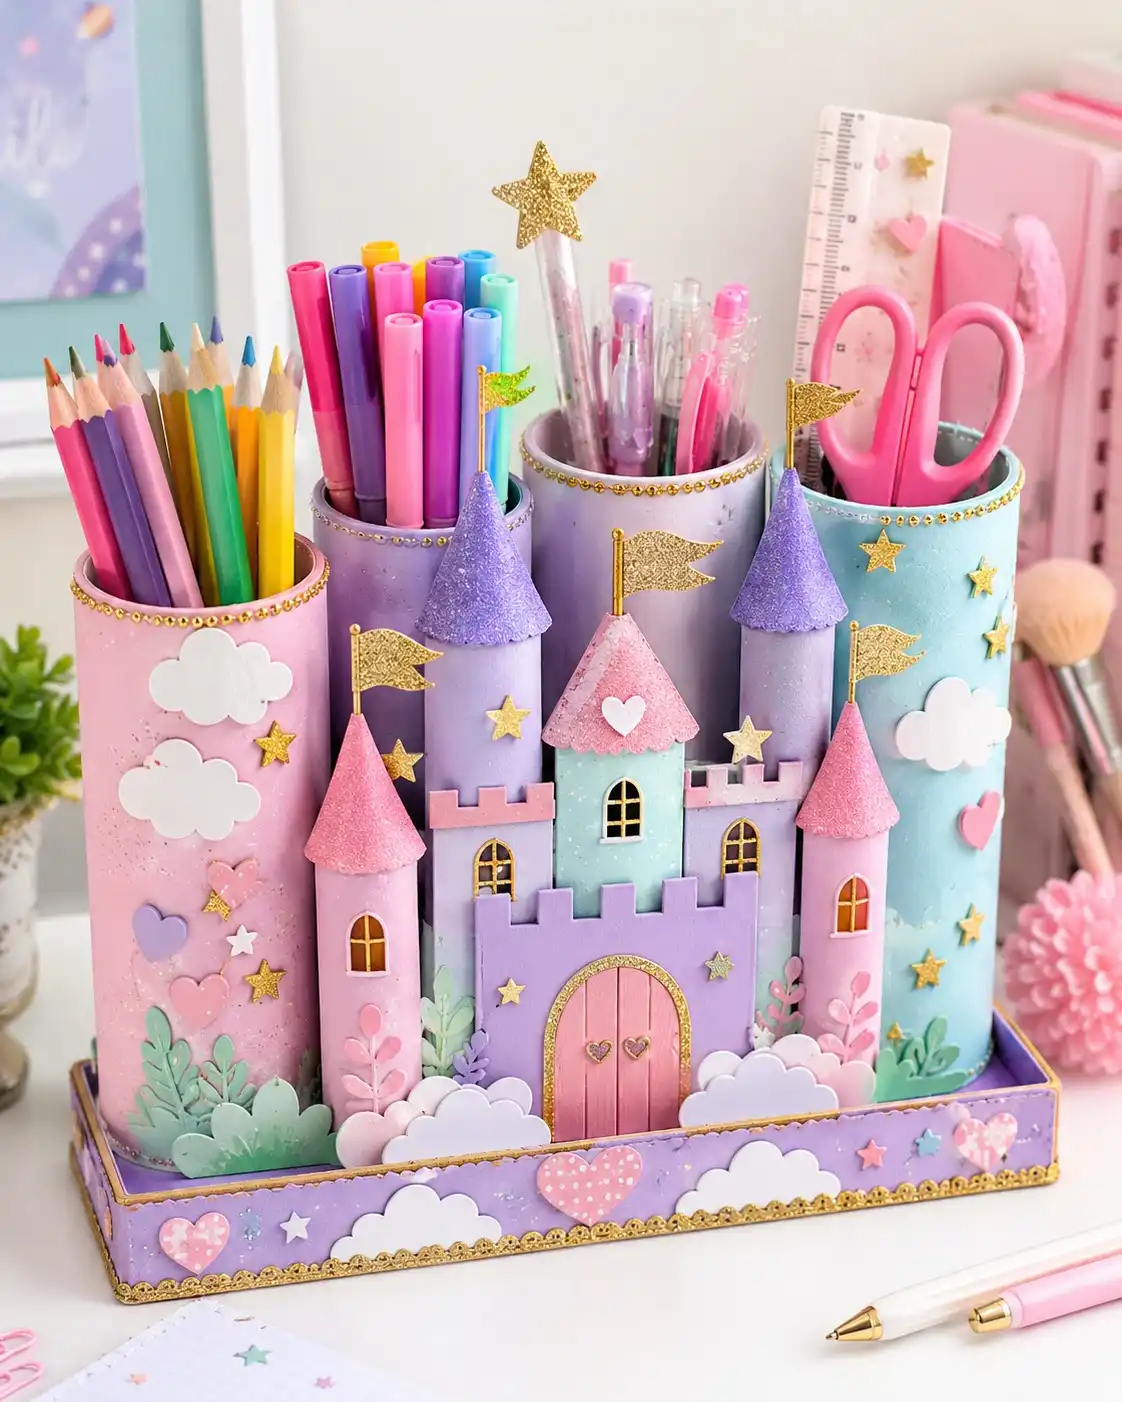
Ordinary cardboard tubes get transformed into a fairy tale castle, each tube painted a different pastel and topped with a glitter cone roof, gold foil flag, and tiny star sticker.
The tubes stand at different heights inside a shared painted tray, so pencils, markers, gel pens, and scissors each get their own turret instead of one crowded cup.
Small foam clouds, hearts, and a scalloped gold trim along the tray base pull the whole scene together into one cohesive castle rather than a row of decorated tubes.
Building your own version is mostly about layering small details on a simple base:
- Save four or five cardboard tubes in different heights, toilet paper and paper towel rolls both work
- Paint each tube a solid pastel and let it dry completely before adding any details
- Cut small cone shapes from cardstock, roll them into roof shapes, and glue a paper flag to the top of each
- Glue the finished tubes upright inside a shallow box or tray, then fill any gaps with foam stickers, clouds, or paper flowers to hide the seams
14. Patterned Envelope Liners in Metallic Gold Foil
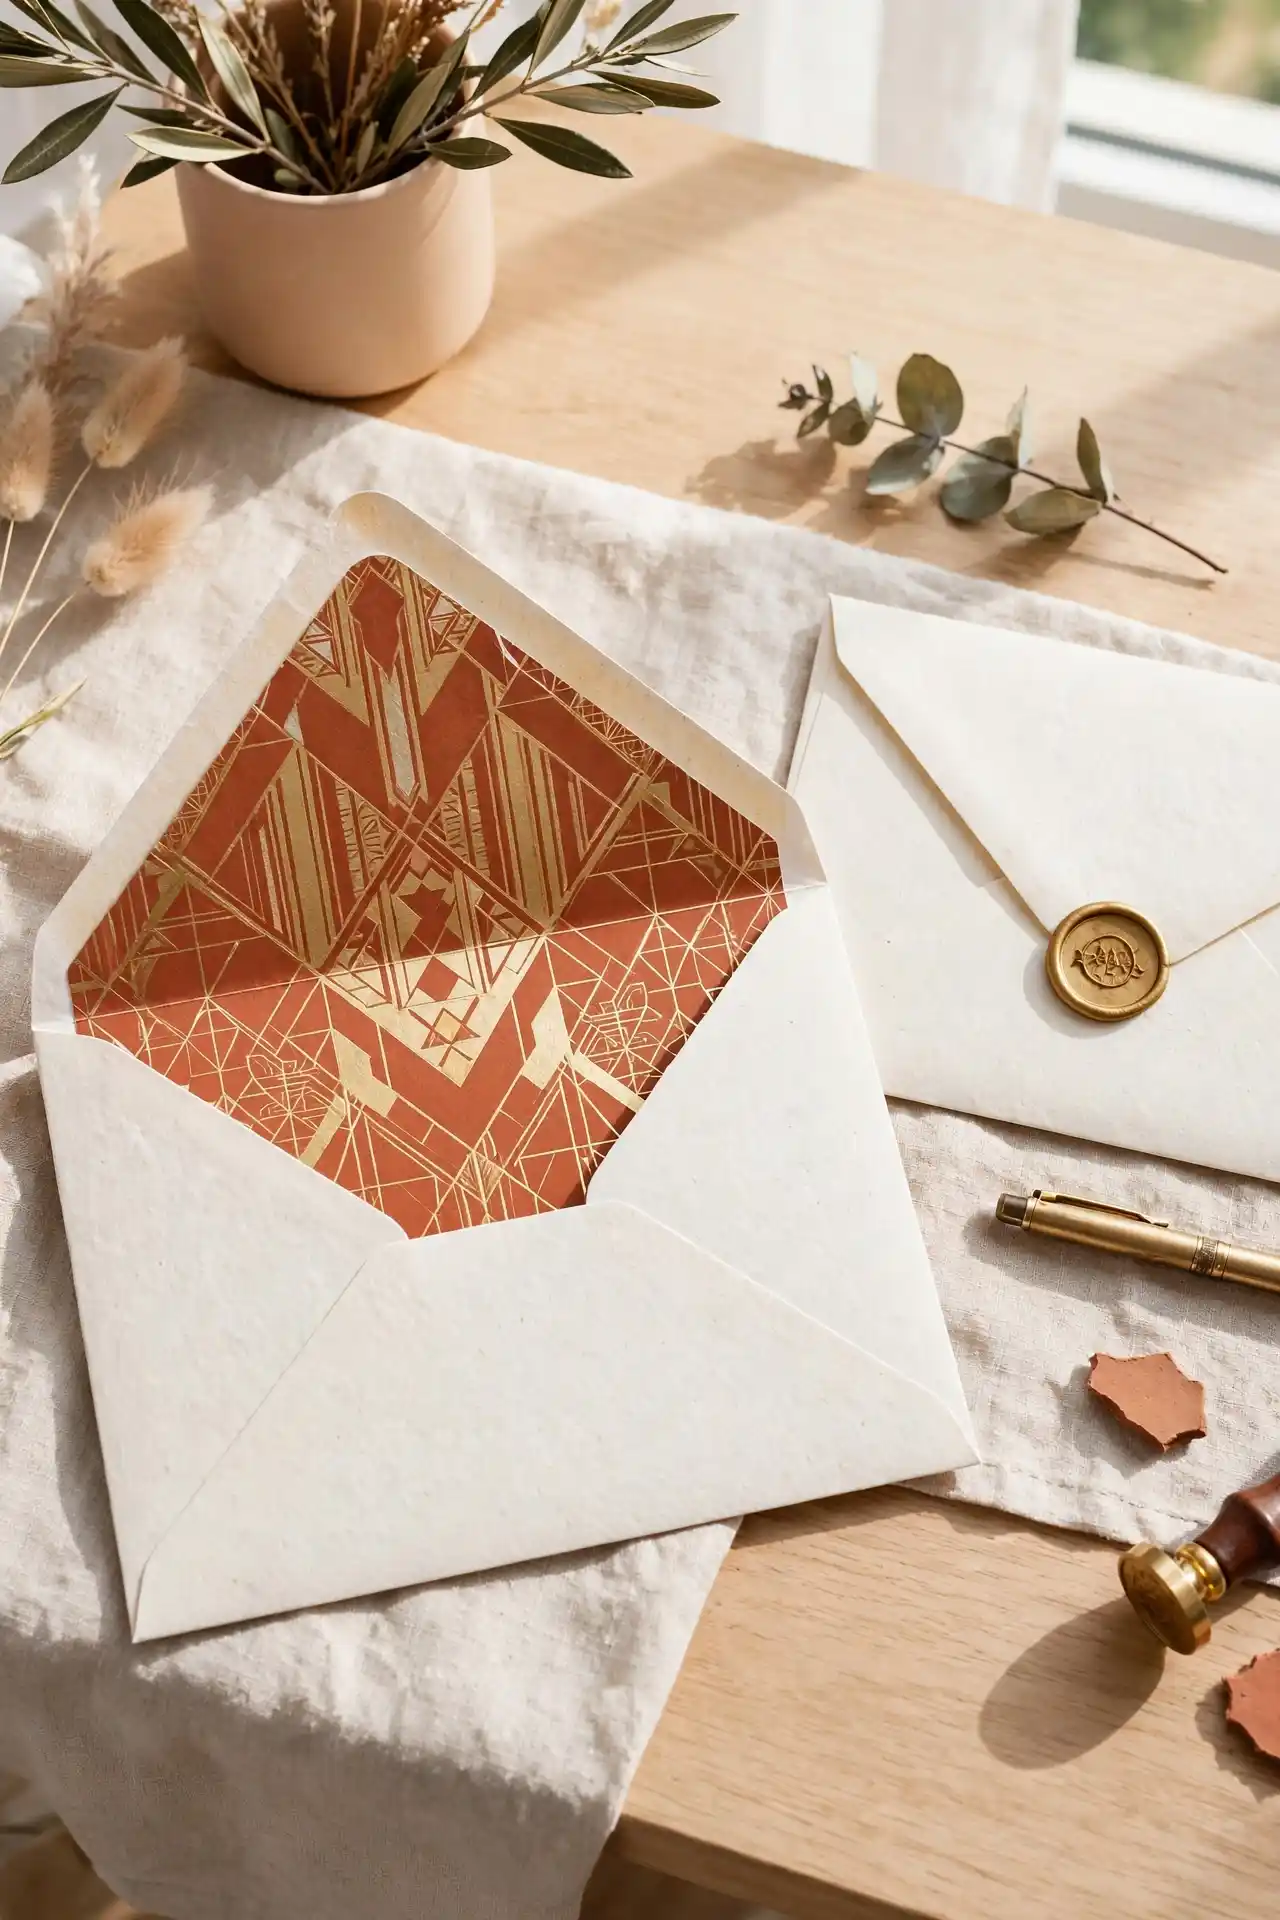
A plain kraft envelope hides a surprise the moment it opens, a bold geometric liner in burnt terracotta and gold foil, cut to fit the envelope’s exact triangular flap.
Next to it sits a second envelope closed with a wax seal instead, showing two very different ways to dress up the same plain paper.
The liner idea works because the outside stays understated, all the personality is tucked inside where it only shows when the envelope is opened.
Trace the envelope flap onto patterned paper and cut it slightly smaller before gluing it inside.
Best for a hidden surprise the recipient only sees once opened.
Melt a wax stick onto the sealed flap and press a stamp into it while it’s still soft.
Best for making the outside feel just as special as the inside.
15. Leather Sleeve Clipboard for a Kraft Memo Stack
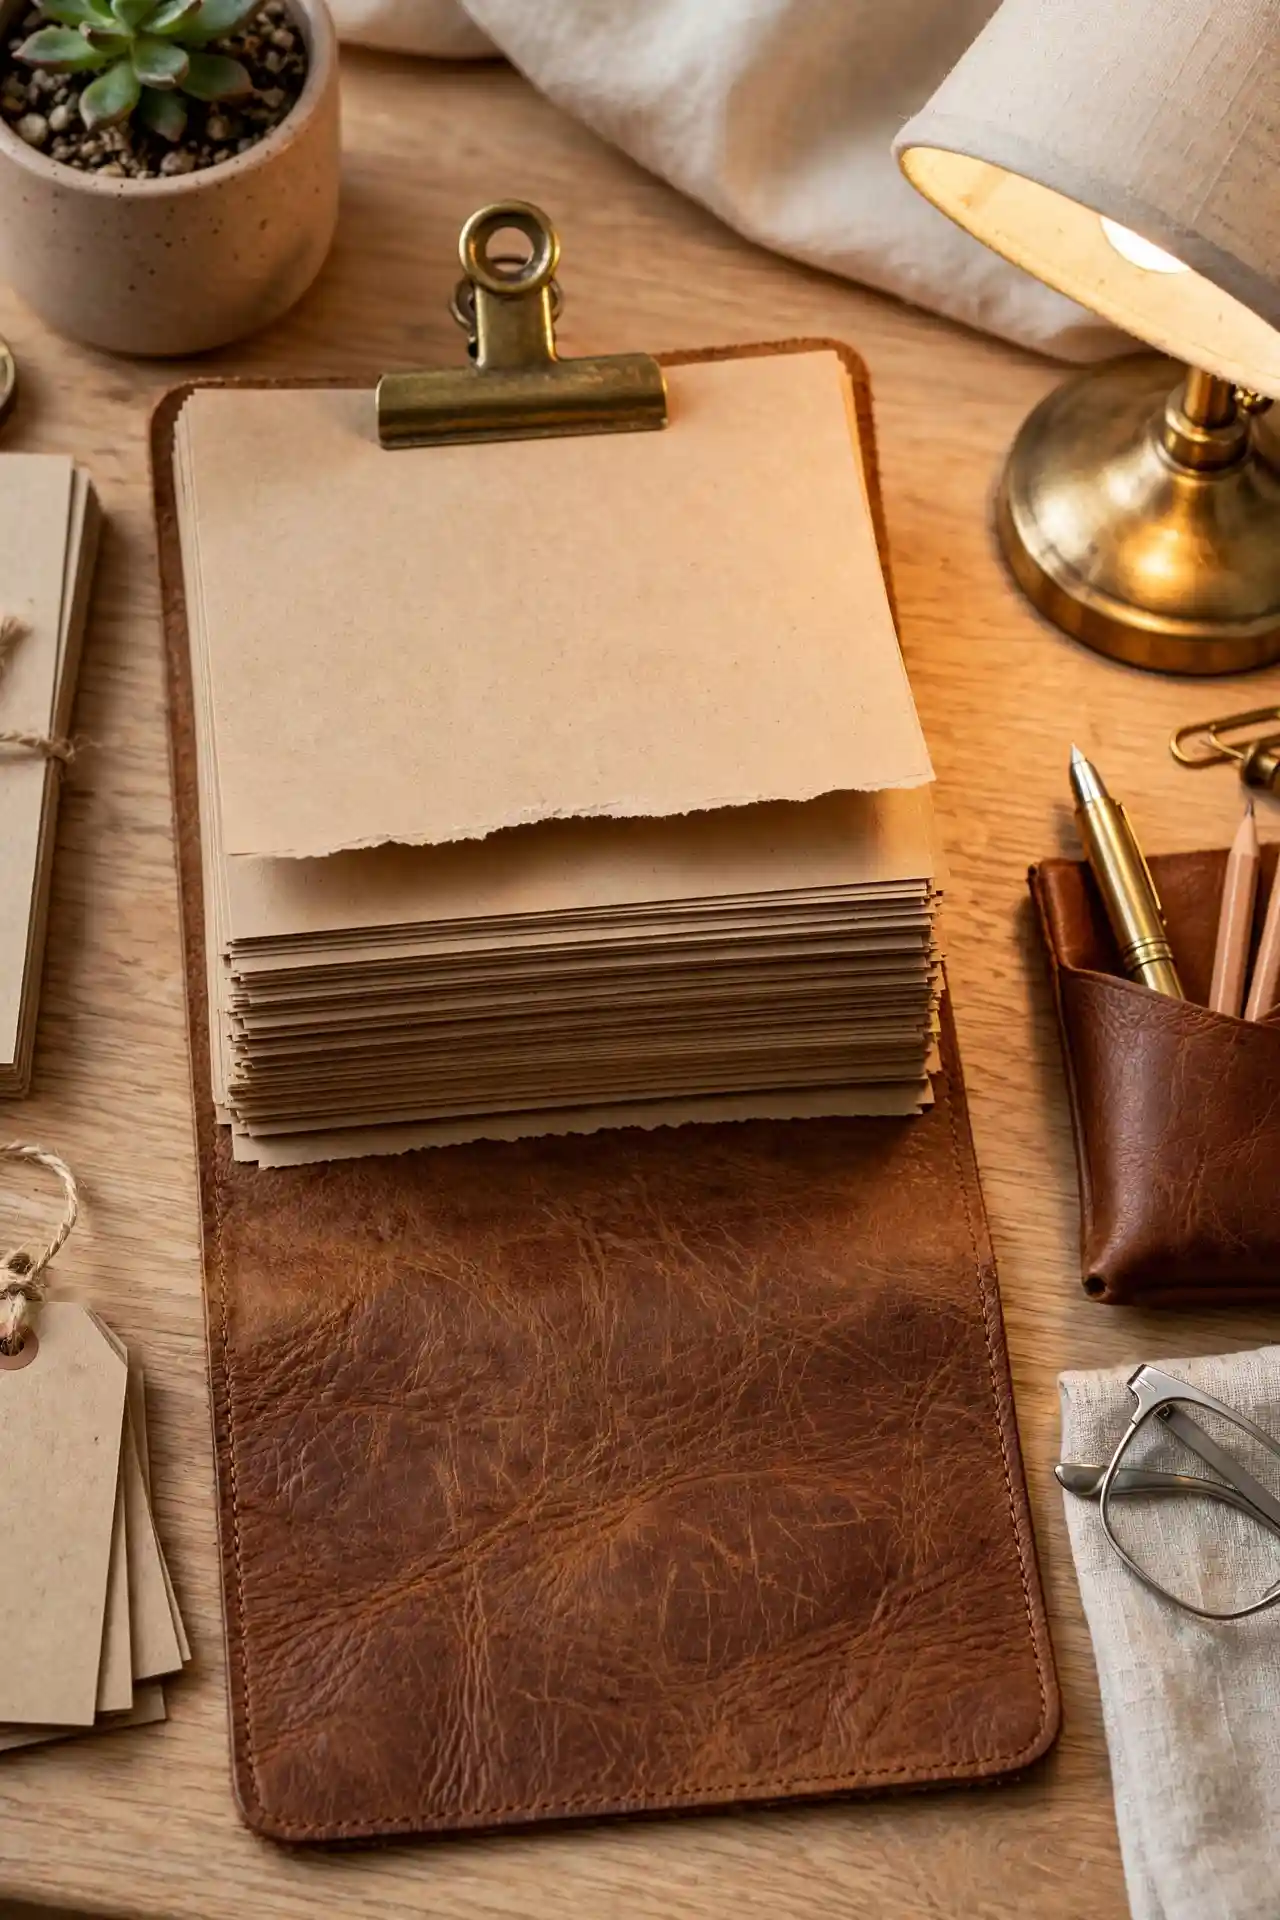
A stitched leather cover folds up around a clipboard, holding a thick stack of torn kraft memo sheets in place under a brass bulldog clip.
The leather is left raw and creased on purpose, so every fold and wrinkle shows, while the paper stack inside stays deckle edged and undyed.
This is really a two part project, the leather sleeve and the paper stack, and either one works on its own if you don’t want to tackle both.
16. Freeform Air-Dry Clay Pen Rest
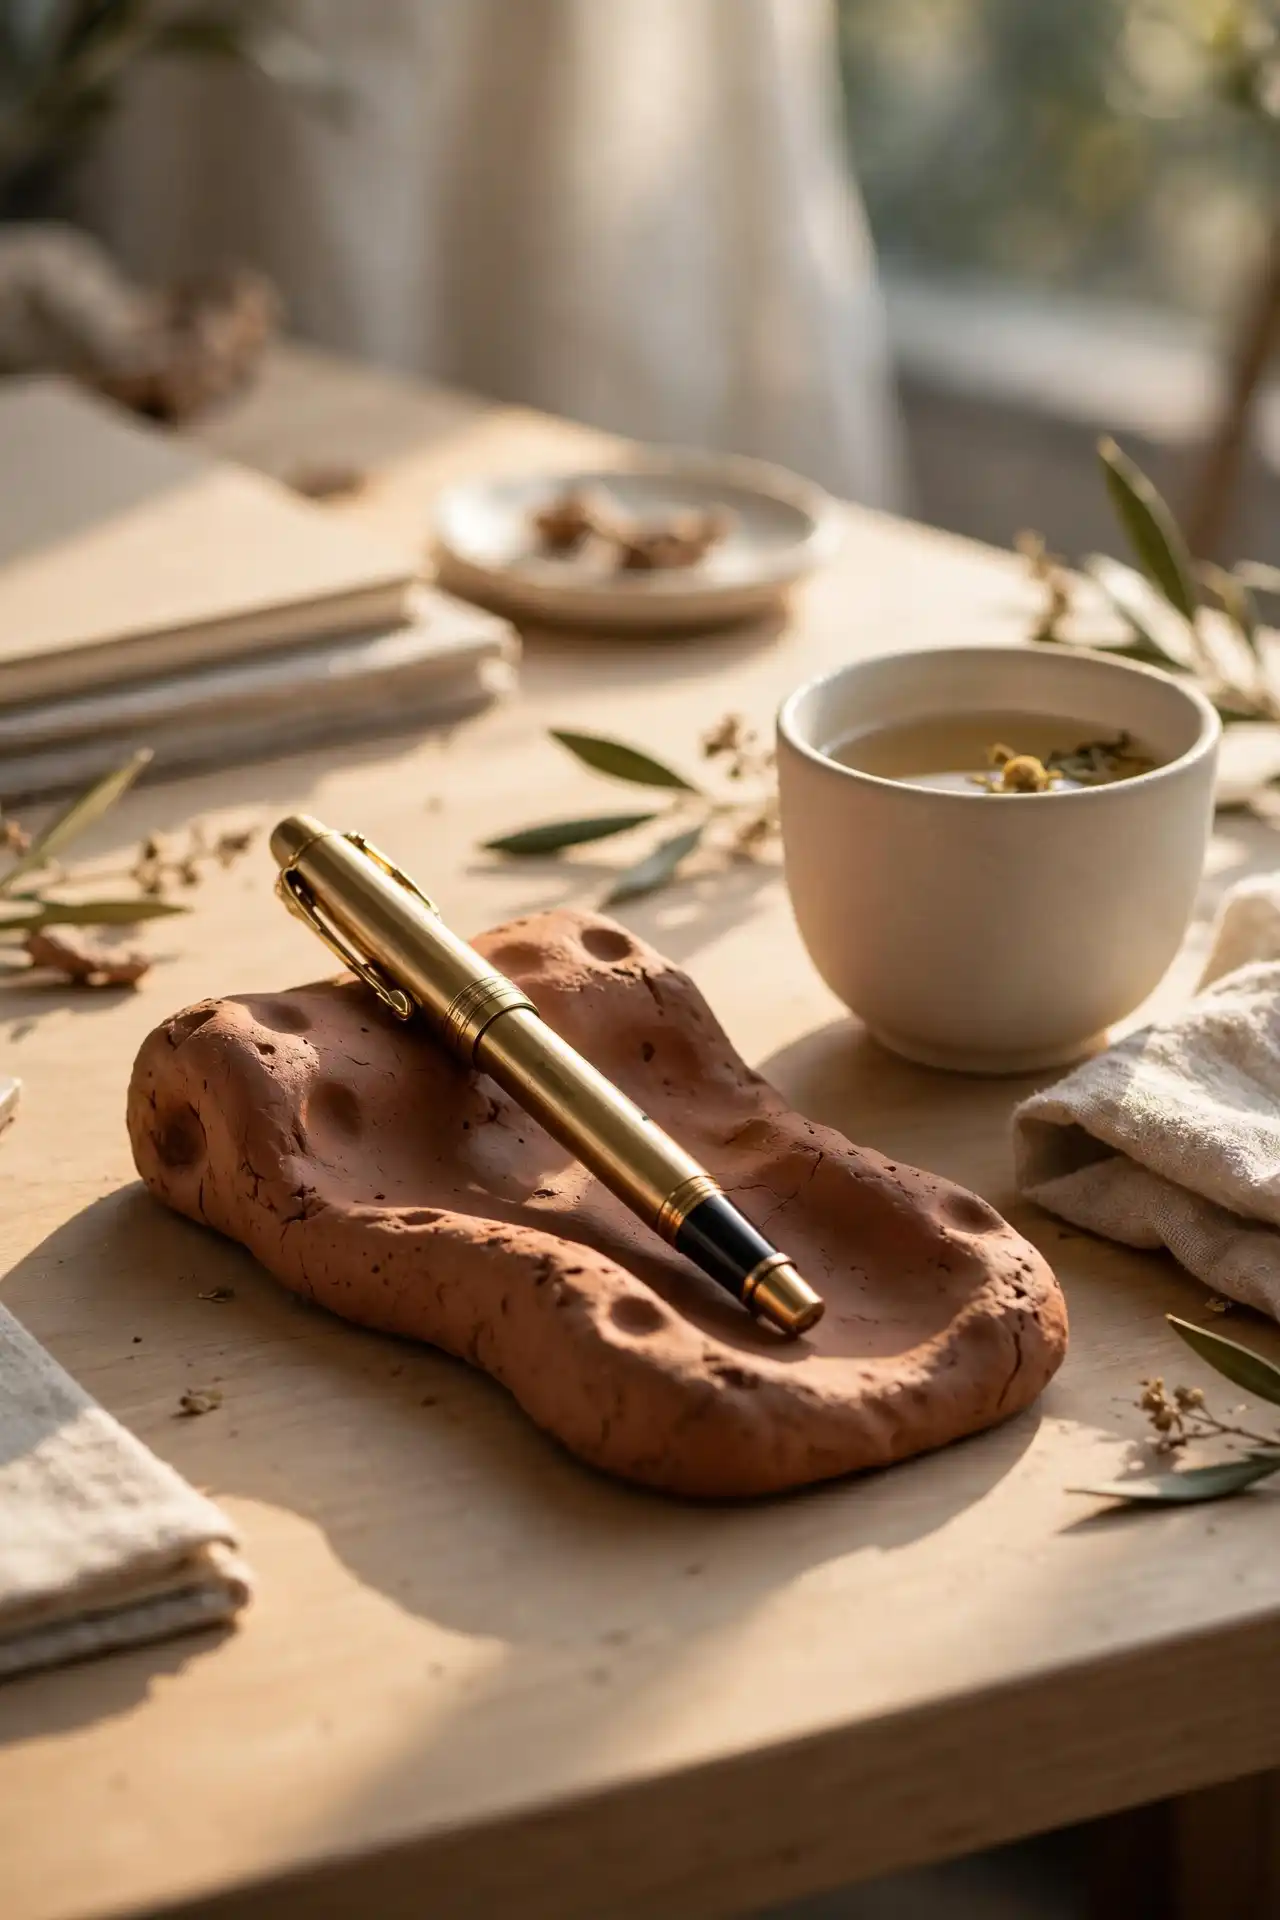
An organic, freeform slab of terracotta clay holds a brass fountain pen at rest, its surface dotted with small irregular thumbprint dents and rough torn edges instead of a clean molded shape.
There’s no symmetry to it at all, and that’s exactly the point, it looks hand pressed rather than poured into a mold, which fits right in on a warm, sunlit desk next to a teacup and folded linen.
This one comes down to working the clay by hand instead of reaching for tools:
- Flatten a ball of air-dry terracotta clay into a rough oval slab about half an inch thick
- Press your thumb into the surface at random spots to leave shallow dents, this catches light and adds texture
- Pinch and tear the edges slightly instead of smoothing them for a rougher, more natural border
- Let it air dry fully for 24 to 48 hours before resting a pen on it
Skip a sealant step and the clay stays porous, which can leave dust or marks on light colored desks over time.
conclusion
Every idea on this list started with basic supplies and a little patience, no fancy tools required.
The small handmade touches, a rough torn edge, a color left to bloom, a shape pressed by hand, are what a store bought version can never quite copy.
Start with whichever one fits your afternoon best, there’s no need to work through the list in order.
Save this for the next time you want a fresh stationery project to try, or come back to it whenever your desk needs a refresh.