14 Waste Material Craft Ideas for School Projects

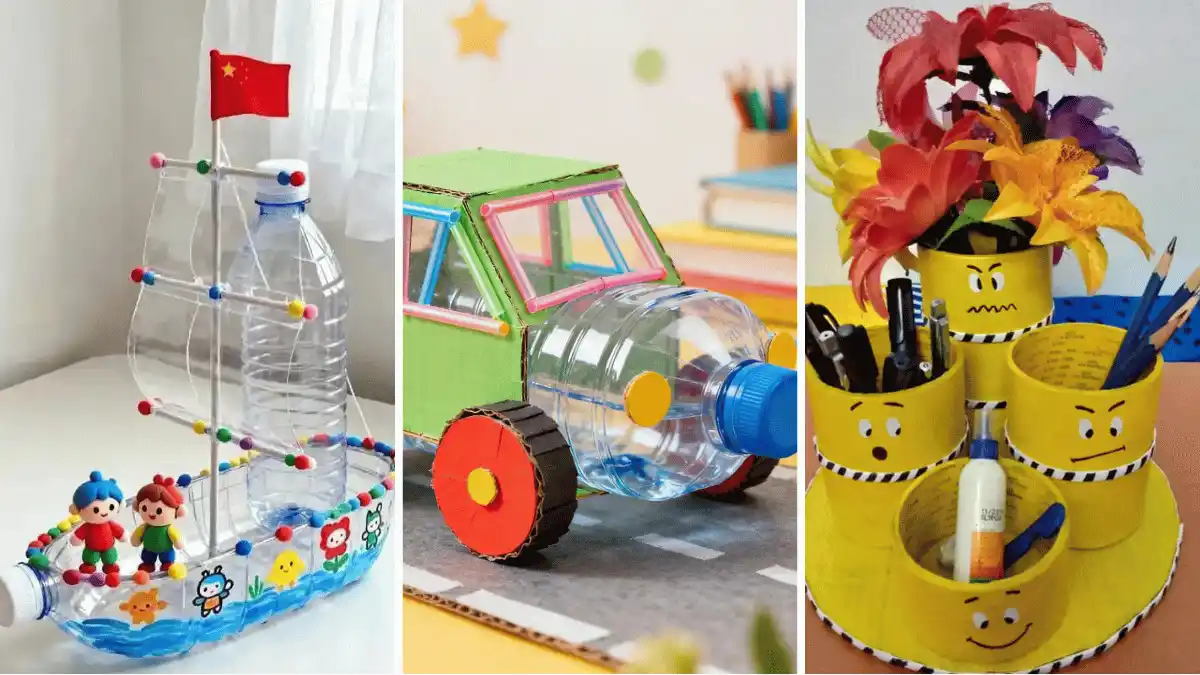
Running out of fresh waste material craft for school ideas is a real problem once you have made the tenth pipe cleaner spider or paper plate animal.
The good news is that a bottle, a cereal box, or a handful of bottle caps can turn into something a lot more interesting than the usual recycling bin standby, and none of it needs supplies beyond what most homes and classrooms already have sitting around.
This roundup pulls together fourteen builds that lean on different materials and different skill levels, from a five minute pencil cup to a full weekend diorama house, so there is something here whether you have twenty minutes before class or a whole Saturday to fill.
Bottles get sliced into boats and shaped into sharks, cans turn into a desk full of characters, and cardboard folds into a giraffe that actually stands on its own.
14 Waste Material Craft Ideas for School Projects
1. Turn Empty Water Bottles Into a Whole Painted Castle
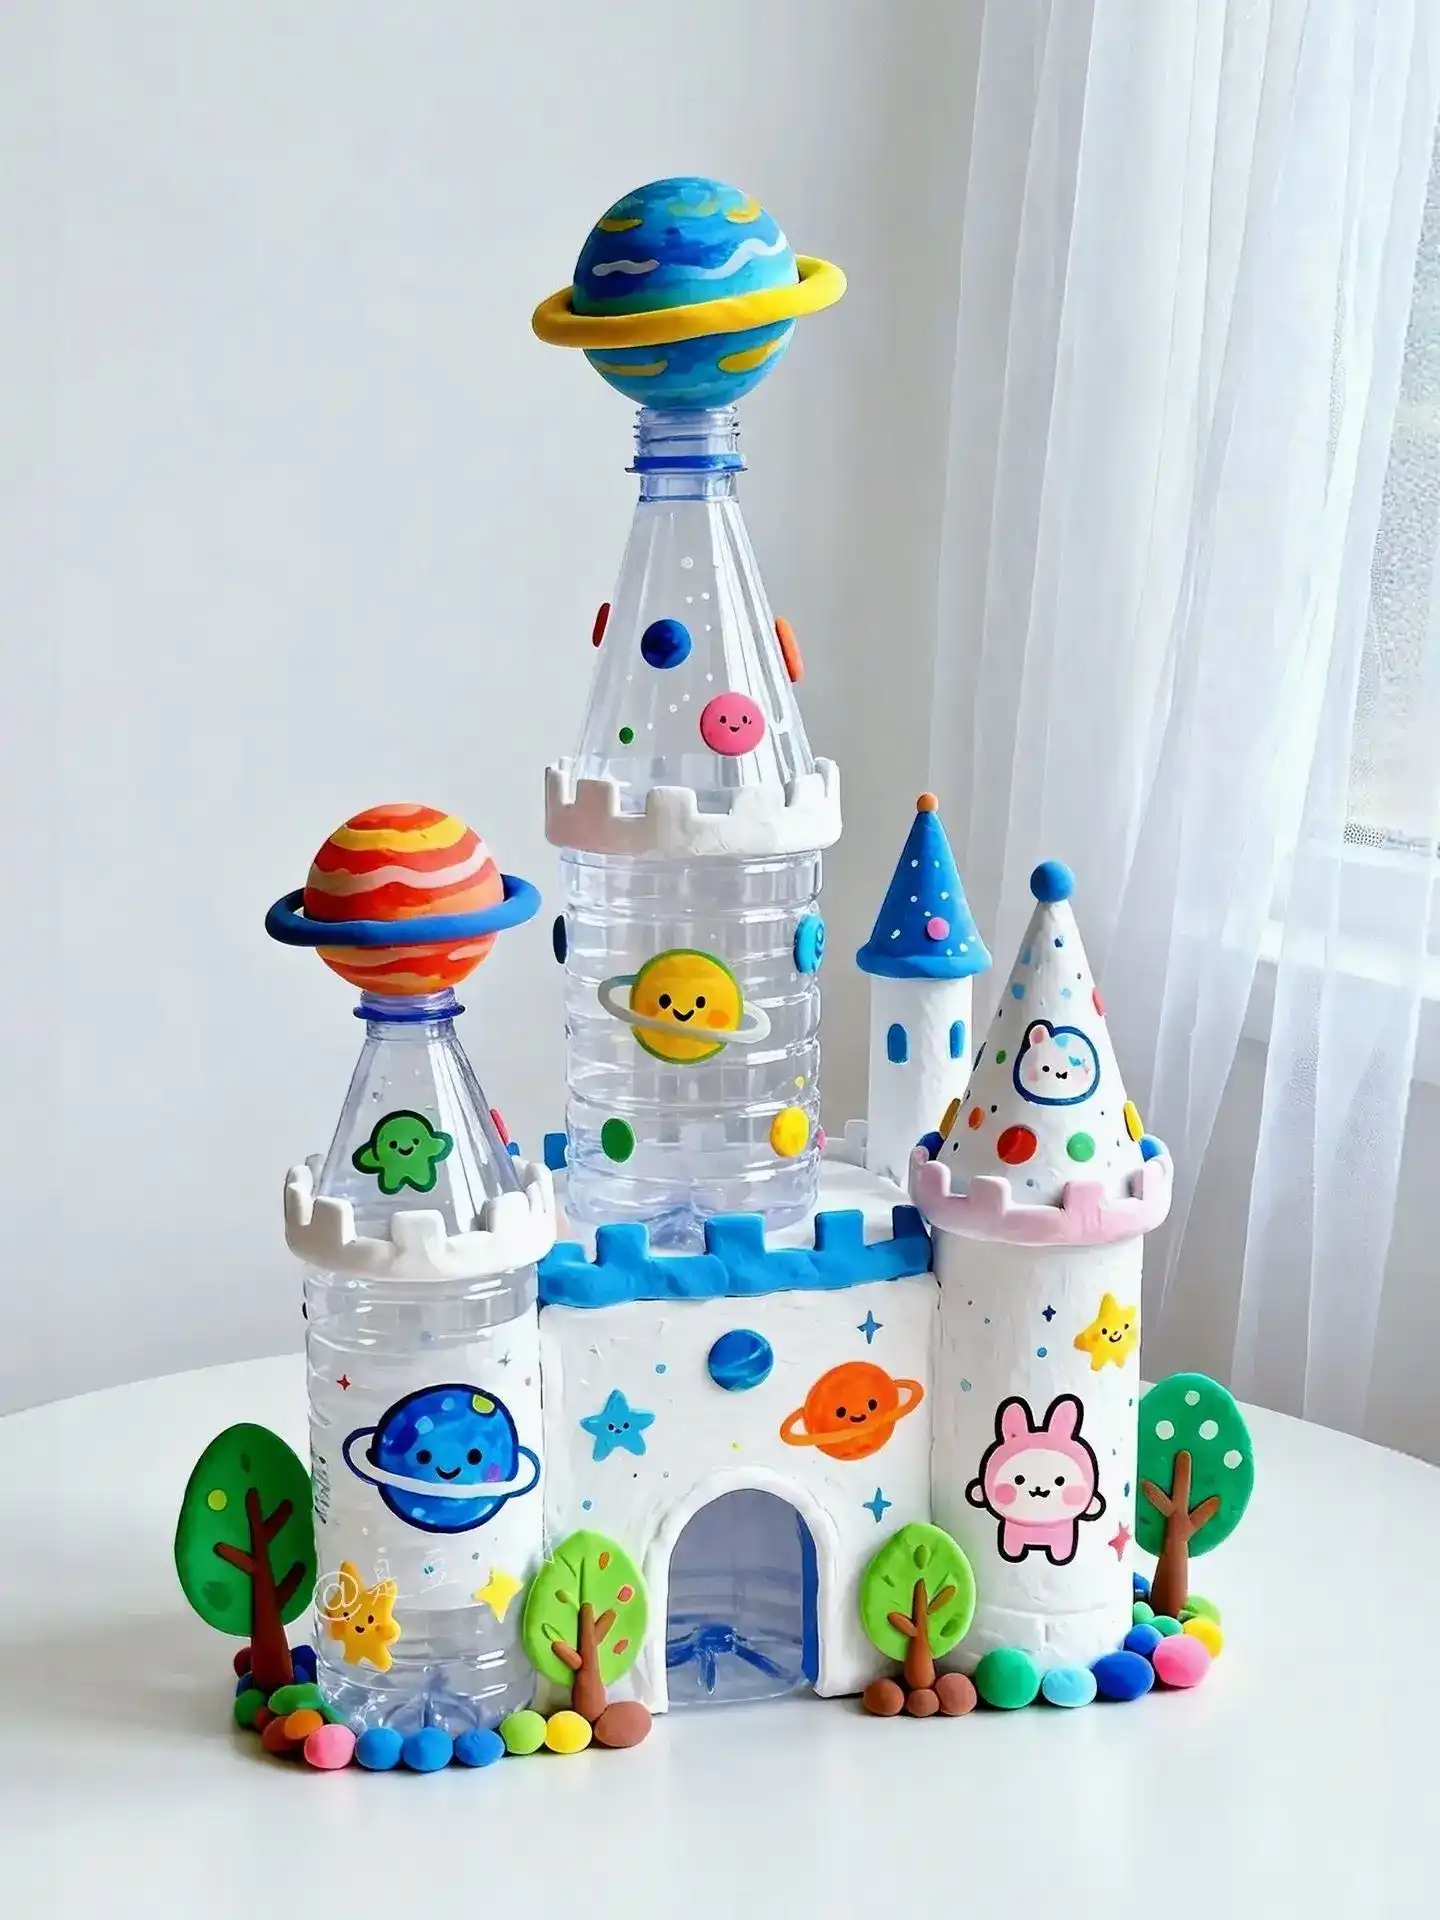
Save every clear plastic bottle before it hits the recycling bin, because this is where they earn their keep.
Clean bottles become the castle towers here, standing at different heights so the skyline looks real instead of flat.
A thin coil of air-dry clay wraps the bottle rim to fake stone battlements, and a matching cone or a scalloped crown sits on top of each one.
Kids paint constellations, stars, and tiny cartoon planets straight onto the plastic with acrylic paint pens, so the clear bottle turns into a little window full of space.
Clay planets with painted rings perch on the two tallest towers like finials. Pom poms and small clay balls line the base for a pebble path, and simple clay trees fill in the yard.
This project works for a solar system unit, a fairy tale unit, or just a free build day, and it stretches four or five bottles into one project the whole class will want on display.
2. Save Bottle Caps for a Flying House Collage
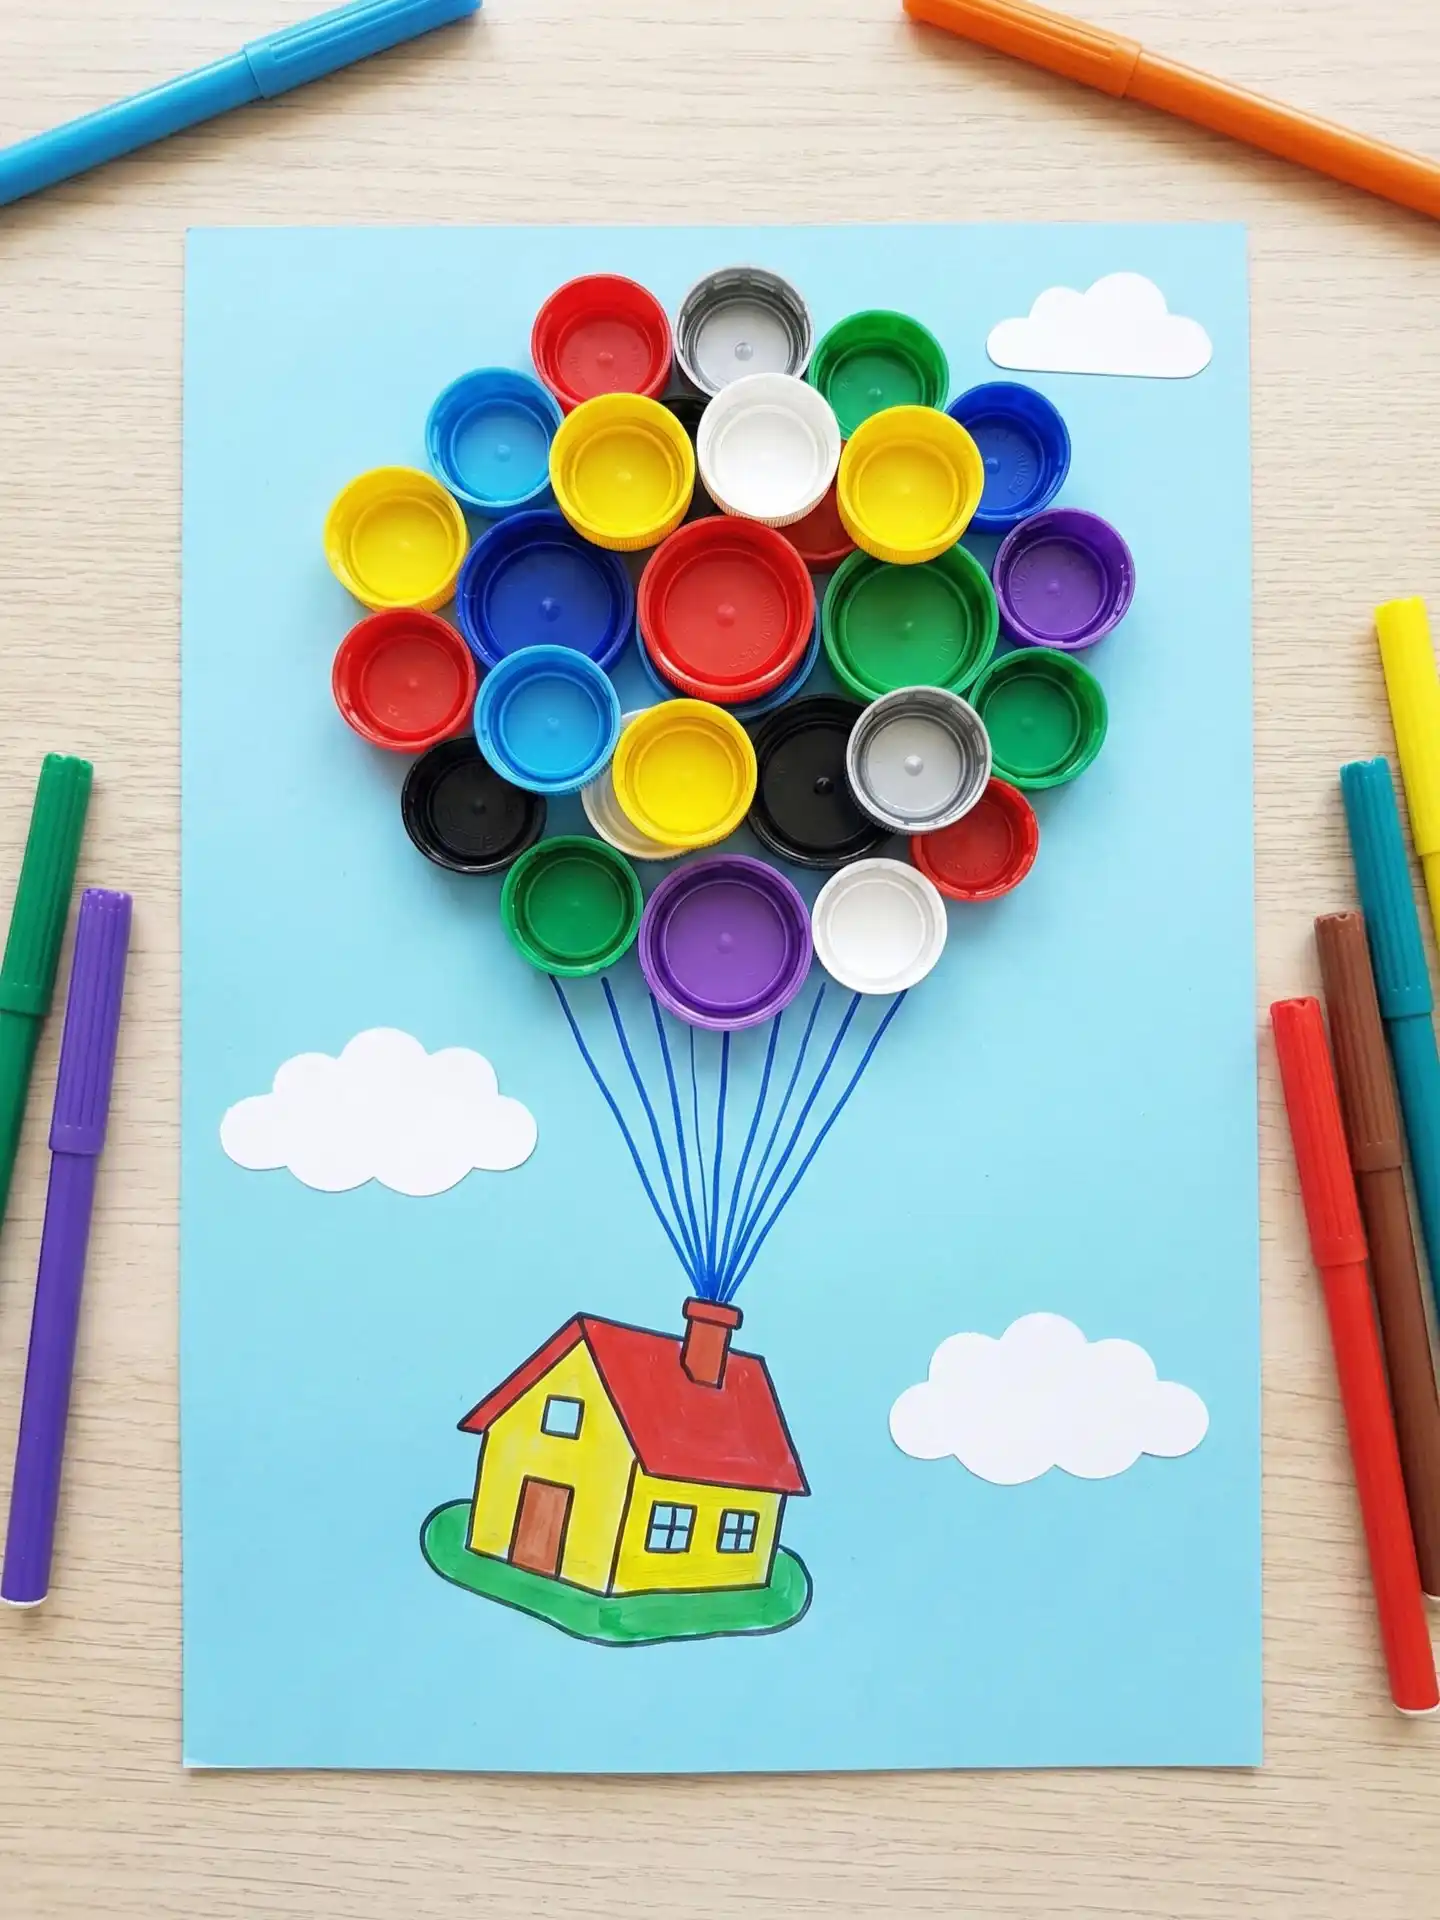
Bottle caps in ten different colors turn into a puffy hot air balloon bunch once they get glued onto poster board in a tight cluster.
This one leans on the classic flying house scene, with a hand drawn cottage on green paper grass and simple paper cloud cutouts scattered around a sky colored background.
Marker lines connect each cap down to the chimney like real balloon strings, which is the detail that sells the whole illusion.
How to recreate it in class:
- Sort bottle caps by color first so kids are not digging through a mixed pile mid project.
- Sketch or print a simple house outline and color it in before gluing anything.
- Glue caps in a rounded cluster above the house, packing them tight so no background shows through.
- Draw thin connecting lines from each cap down to the roof with a fine tip marker.
- Add paper cloud cutouts to fill empty sky space.
Sketch or print a simple cottage outline and color it in before adding any caps.
Pack the caps tightly above the house so no background paper peeks through.
Draw thin marker lines from each cap to the chimney, then fill in paper cloud cutouts.
3. Cut Apart an Egg Carton for a Chubby Painted Turtle
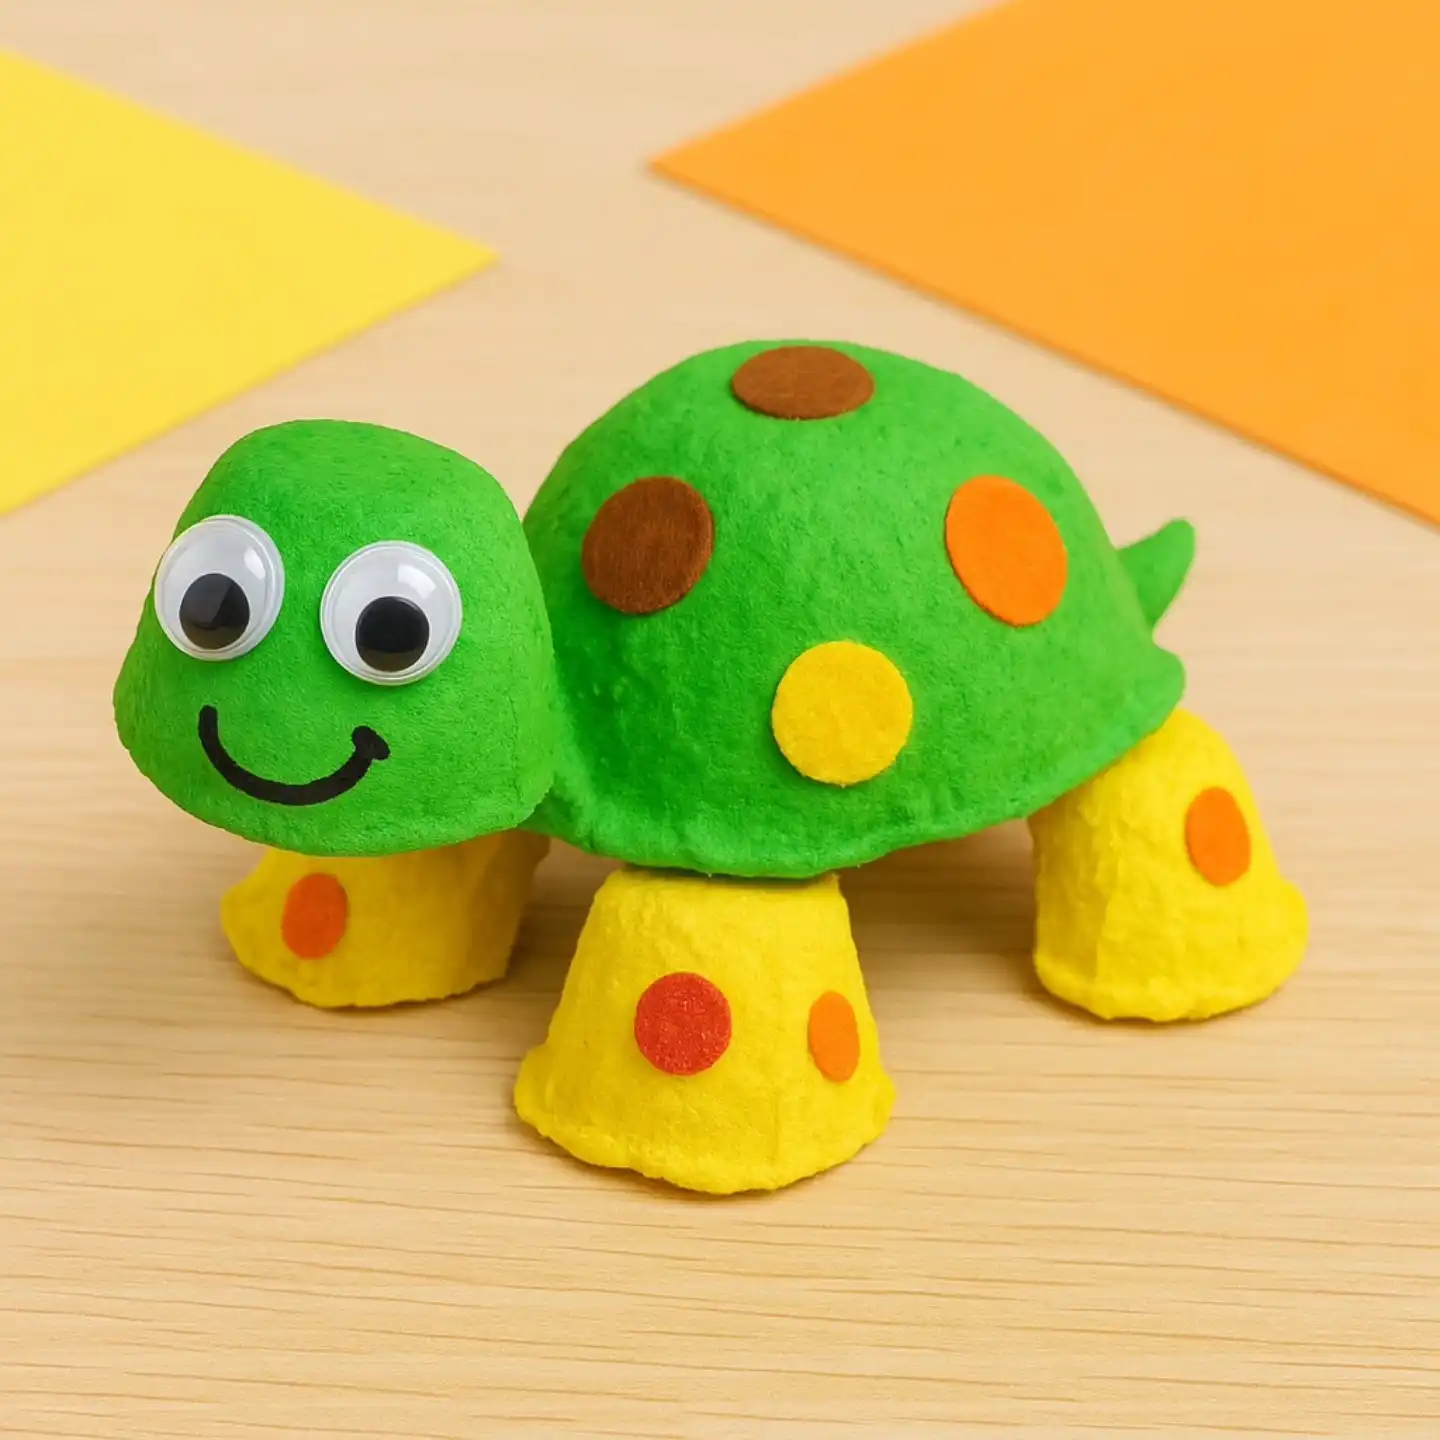
Egg cartons split apart cleanly into individual cups, and that shape alone is most of the work here.
Two cups become the shell and head, and four smaller cut down cups become stubby legs.
A coat of green paint over the shell and yellow over the legs gives it a solid base, and the slightly bumpy painted texture is really just the natural ridges of the cardboard showing through.
Felt circle dots in brown, orange, and yellow get glued on for a shell pattern, and a pair of googly eyes plus a marker smile turn the small front cup into a face instantly. A tiny folded triangle at the back becomes the tail.
4. Build a Standing Giraffe From a Cereal Box and Cardboard Tubes
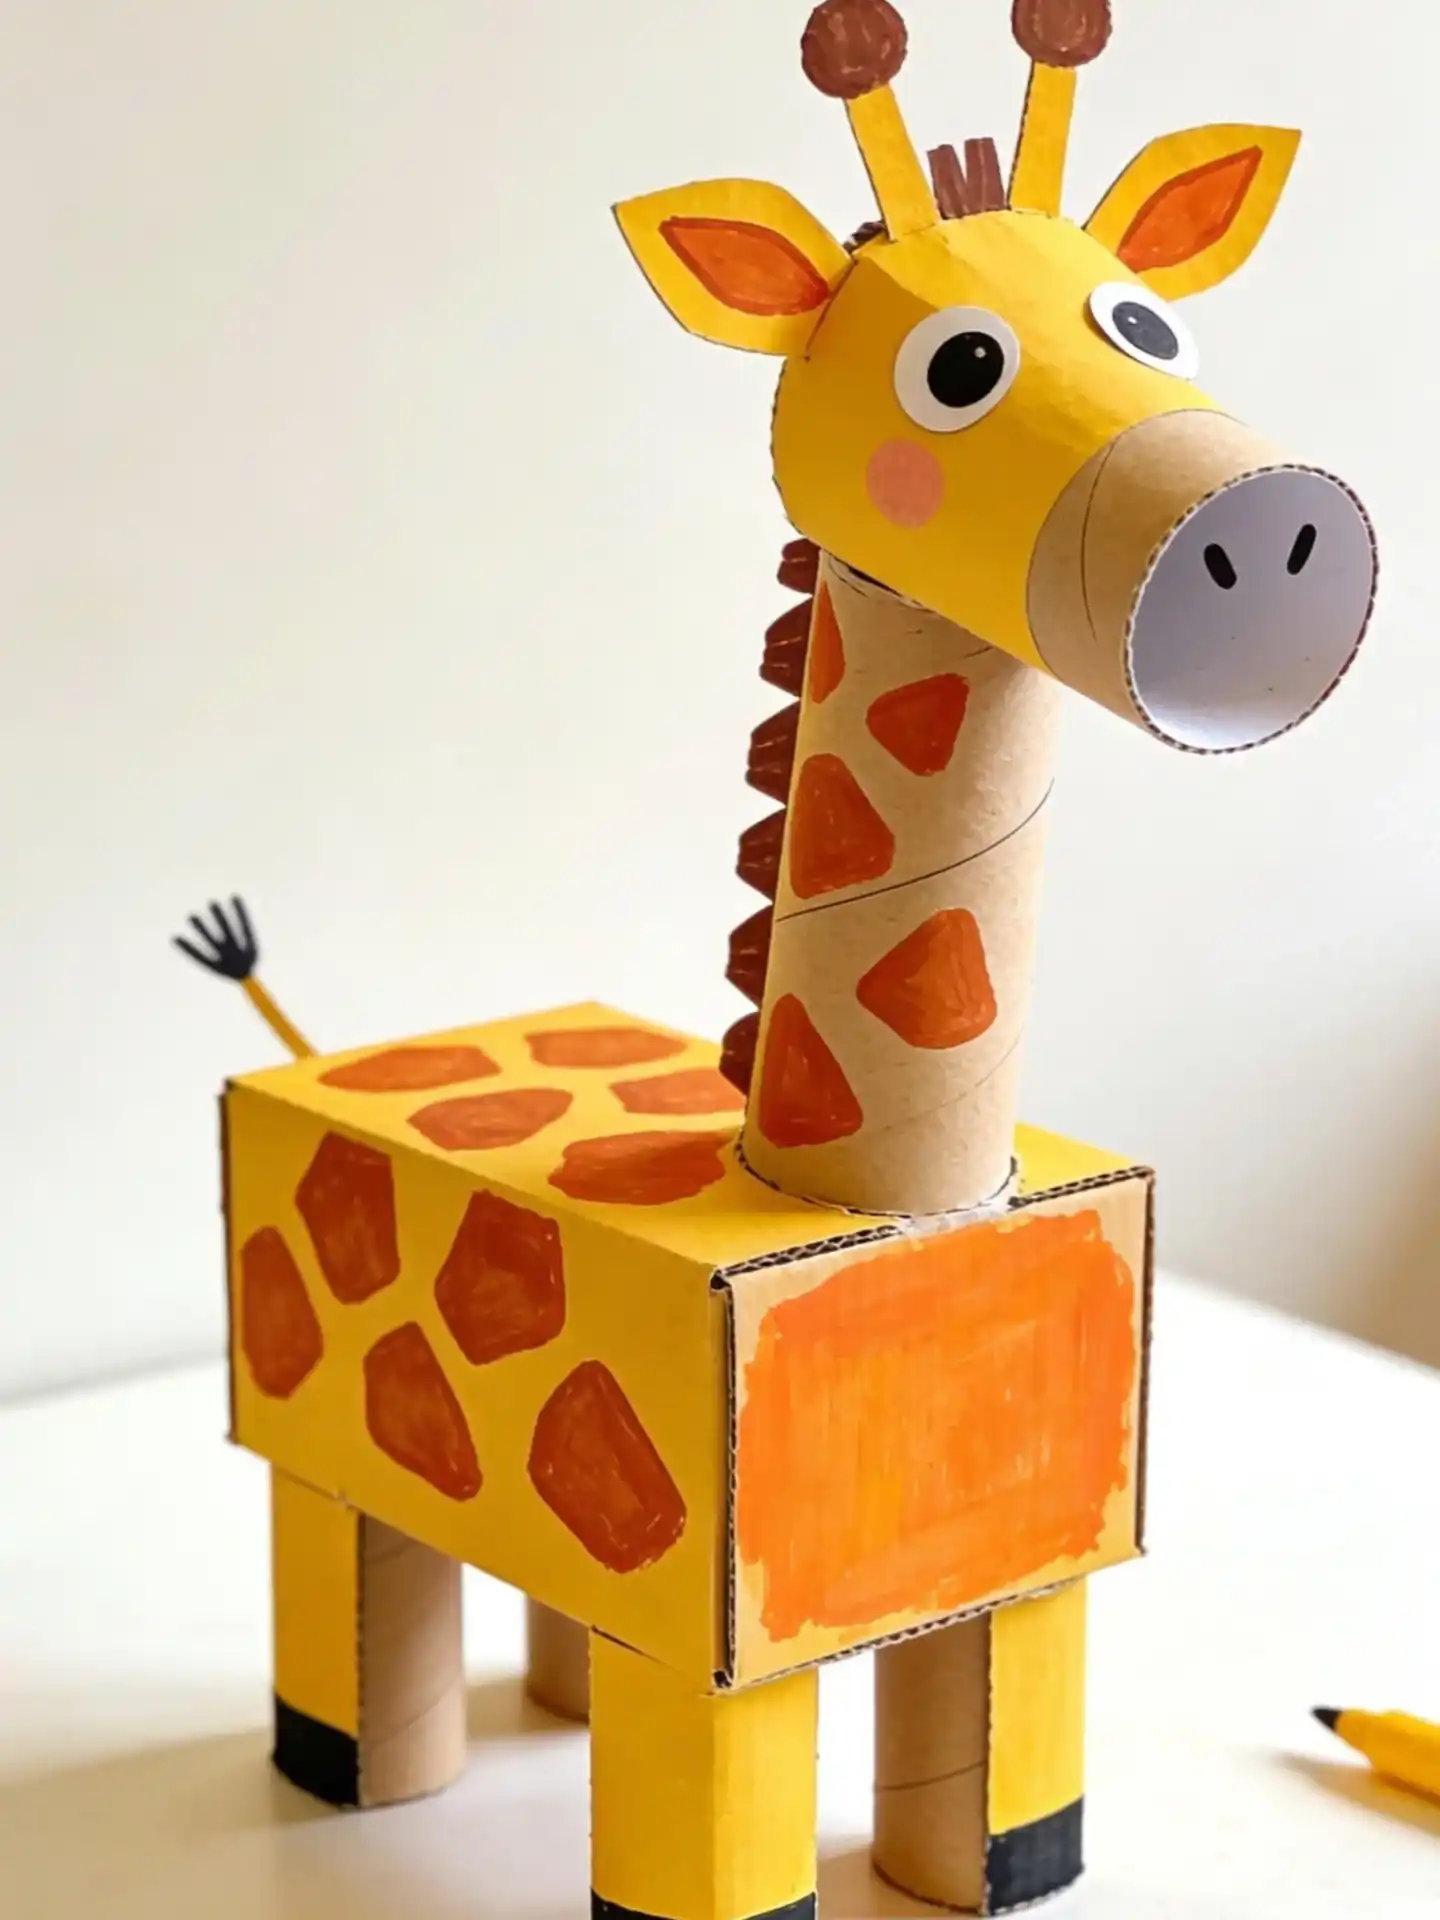
A cereal box becomes the giraffe’s body once it is sealed shut and painted a solid mustard yellow, and it works because the box shape already reads as a sturdy four legged animal from a distance.
A cardboard tube fixed upright through the top of the box makes the long neck, and a second, wider tube glued on at an angle becomes the snout, with a hole cut into the end so it looks like an open muzzle instead of a plugged tube.
What makes this one stand out from a flat paper animal:
- Marker-drawn patches in two shades of orange cover the box and neck for a real giraffe coat
- Folded paper ears and paper horns with rolled paper tips give the head real dimension
- Four short tube legs with a strip of black paper at the base fake little hooves
- A curled paper tail with a fringed tip finishes the back end
Gives the body enough structure to stand on its own once the legs are attached.
Subscribe to DIY Craft Bloom
Get updates on the latest posts and more from DIY Craft Bloom straight to your inbox.
A cut opening at the end turns a plain tube into a believable open muzzle.
Two shades of orange, drawn freehand, sell the giraffe pattern without any paint mixing.
5. Slice a Plastic Bottle Sideways for a Toy Sailboat Hull
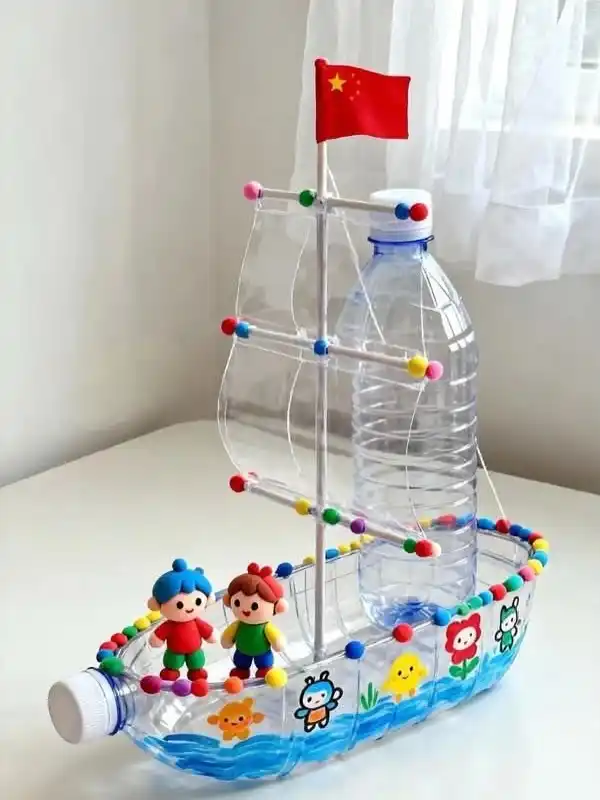
A bottle cut lengthwise and laid on its side turns into a boat hull almost instantly, curved bottom and all.
A second bottle stands upright in the middle as both a cabin and a built-in mast base, with a thin dowel or straw poking out the cap for the actual mast.
Sails are cut from stiff clear plastic and threaded onto crossbars made from skewers or coffee stirrers, dotted along the edges with tiny pom poms for trim.
Painted paper cutouts of a sun, a flower, and a small animal decorate the inside of the hull like a scene, and two small clay figures stand on deck to give the whole thing scale. A tiny flag on a stick finishes the mast.
| Hull and cabin | Mast and sails |
|---|---|
| One bottle sliced lengthwise for the boat body | A dowel or straw pushed through a second bottle cap |
| A second bottle upright in the center as the cabin | Clear plastic scraps cut into sail shapes |
| Painted paper scenes glued inside the hull | Pom poms strung along skewer crossbars for trim |
6. Turn Paper Tubes Into a Whole Foam Animal Family
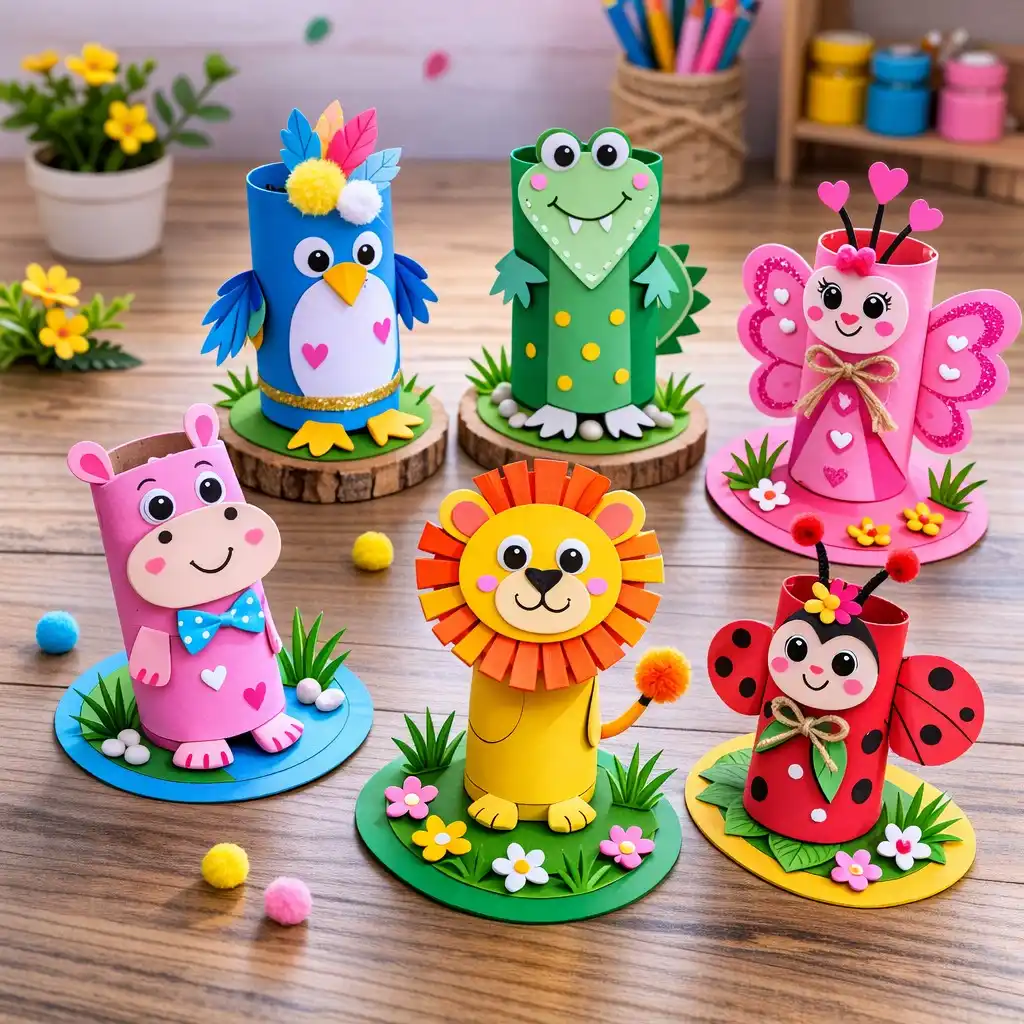
One paper tube, wrapped or painted, is the entire body for six different characters here: a parrot, a frog, a butterfly girl, a hippo, a lion, and a ladybug.
The trick that makes this project scale so well for a classroom is that every animal starts from the exact same cylinder base.
What changes each one is only the foam cutouts glued around it, so a teacher can hand every kid an identical tube and let them pick their own creature to build.
Each character sits on its own circle of colored card stock dressed up with paper grass, tiny flowers, and a couple pom poms scattered at the base like confetti.
Wiggle eyes and simple foam shapes carry most of the expression, from the lion’s spiky mane to the ladybug’s heart shaped antennae.
7. Build a Cardboard Cabin Car With a Bottle Nose
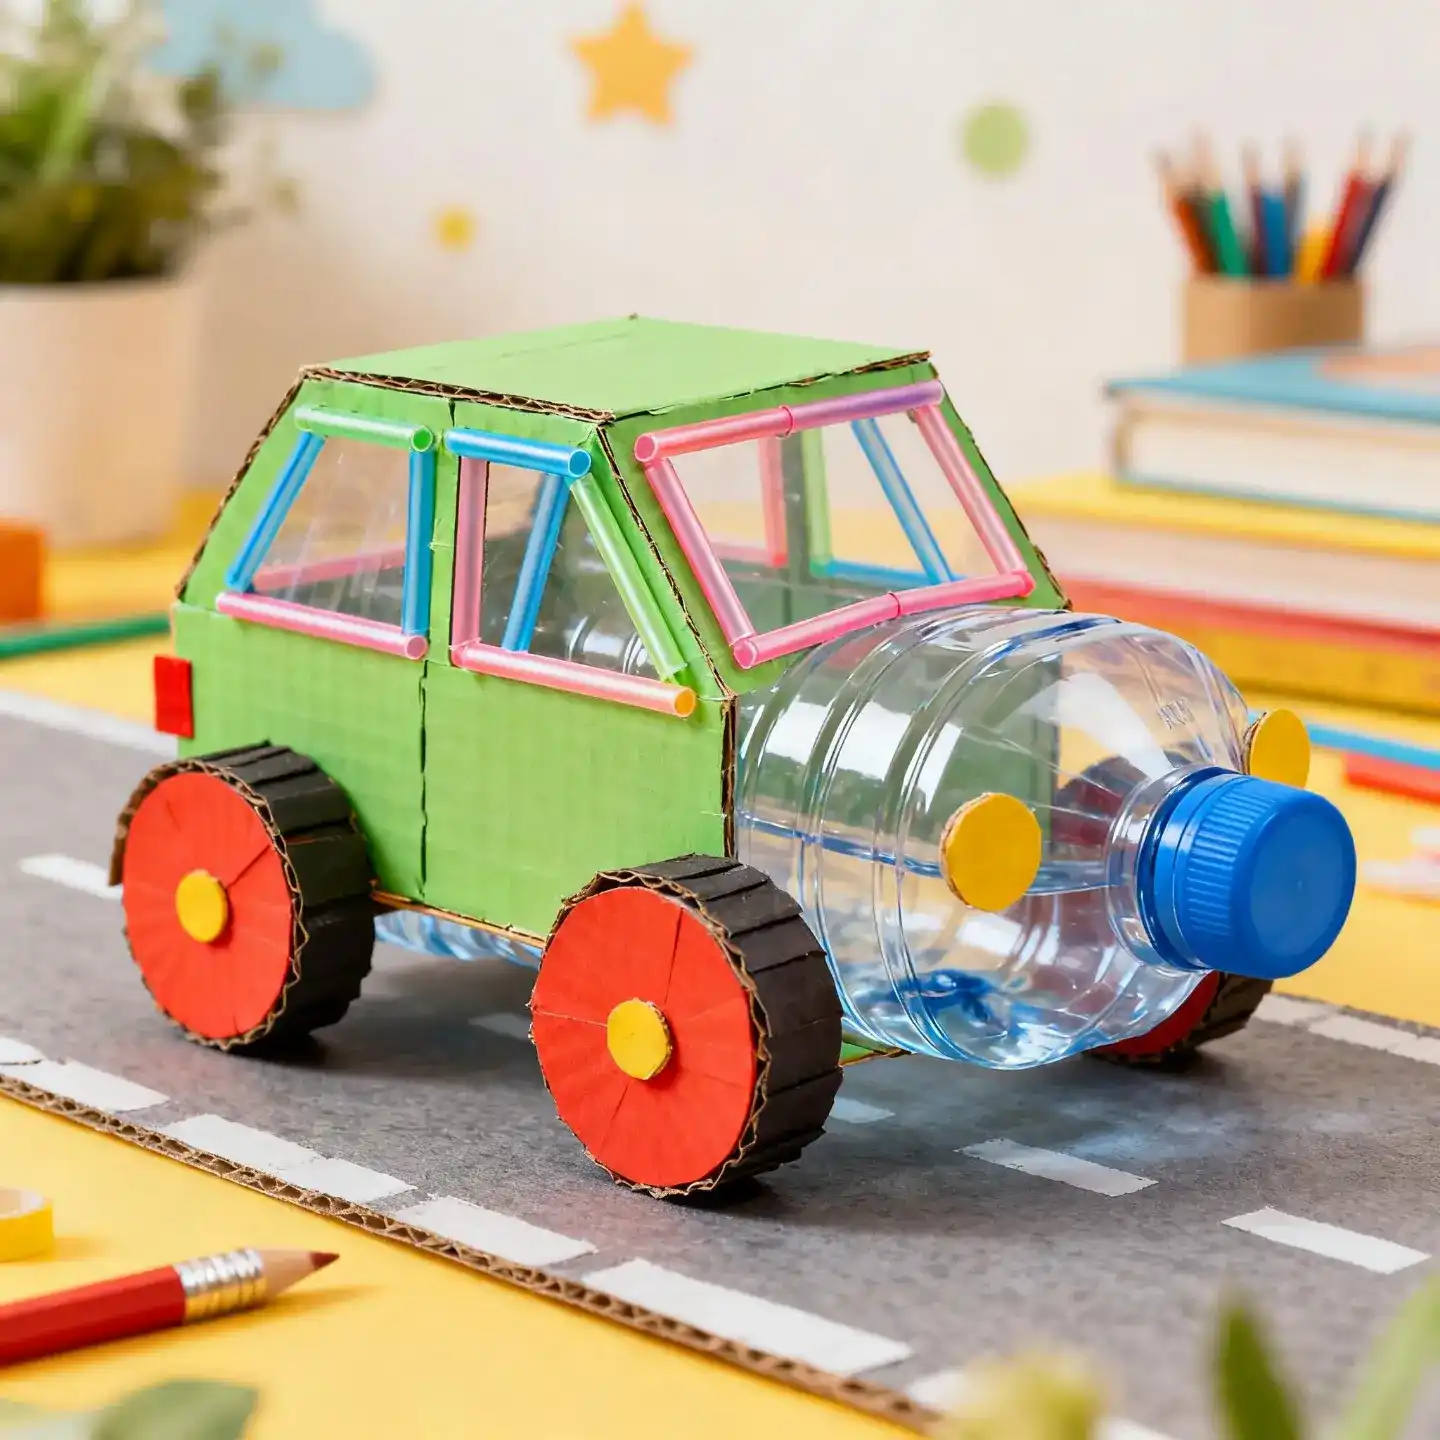
Cut and fold a cardboard box into a boxy cabin shape, paint it a bright green, then push a big plastic bottle into the front end to serve as the hood and engine block.
Drinking straws in three colors get snipped and glued into window frame shapes, standing in for the metal trim of a real car window without any actual glass needed.
Four sturdy cardboard discs, painted black with a red rim and a yellow center button, become wheels chunky enough to actually roll.
A pair of small yellow discs glued onto the bottle work as headlights, and a red paper scrap tucked near the rear door reads as a taillight.
Nothing here needs anything more advanced than scissors, glue, and a steady hand cutting straw segments to matching lengths.
8. Sew a Zipper Around a Cut Bottle for a Standing Pencil Case
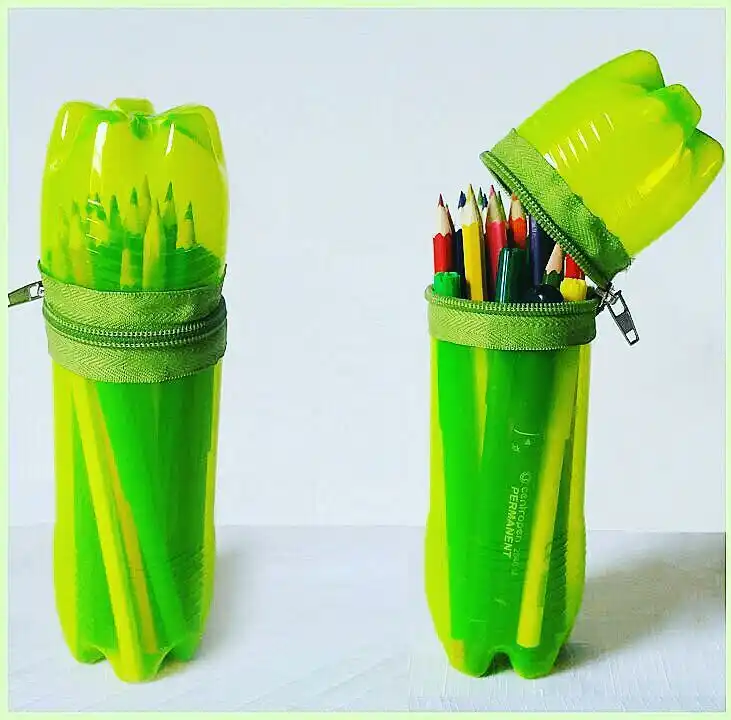
A bottle cut straight across the middle and rejoined with a sewn-in zipper turns into a pencil case that actually opens and closes, top popping back like a little lid.
Spray paint in a bright lime green coats the plastic but leaves it slightly see-through in spots, so you still catch a hint of the bottle underneath the color.
The natural ridged bottom of the bottle becomes the base, giving it enough weight to stand upright on a desk instead of tipping over.
This is one of the more useful projects on this list since kids actually get to keep using it after the project is graded, not just display it once and forget it.
A plain empty bottle, cut cleanly in half around the middle.
A zip-close pencil case, spray painted and ready for daily use.
9. Group Painted Tin Cans Into a Whole Desk Organizer
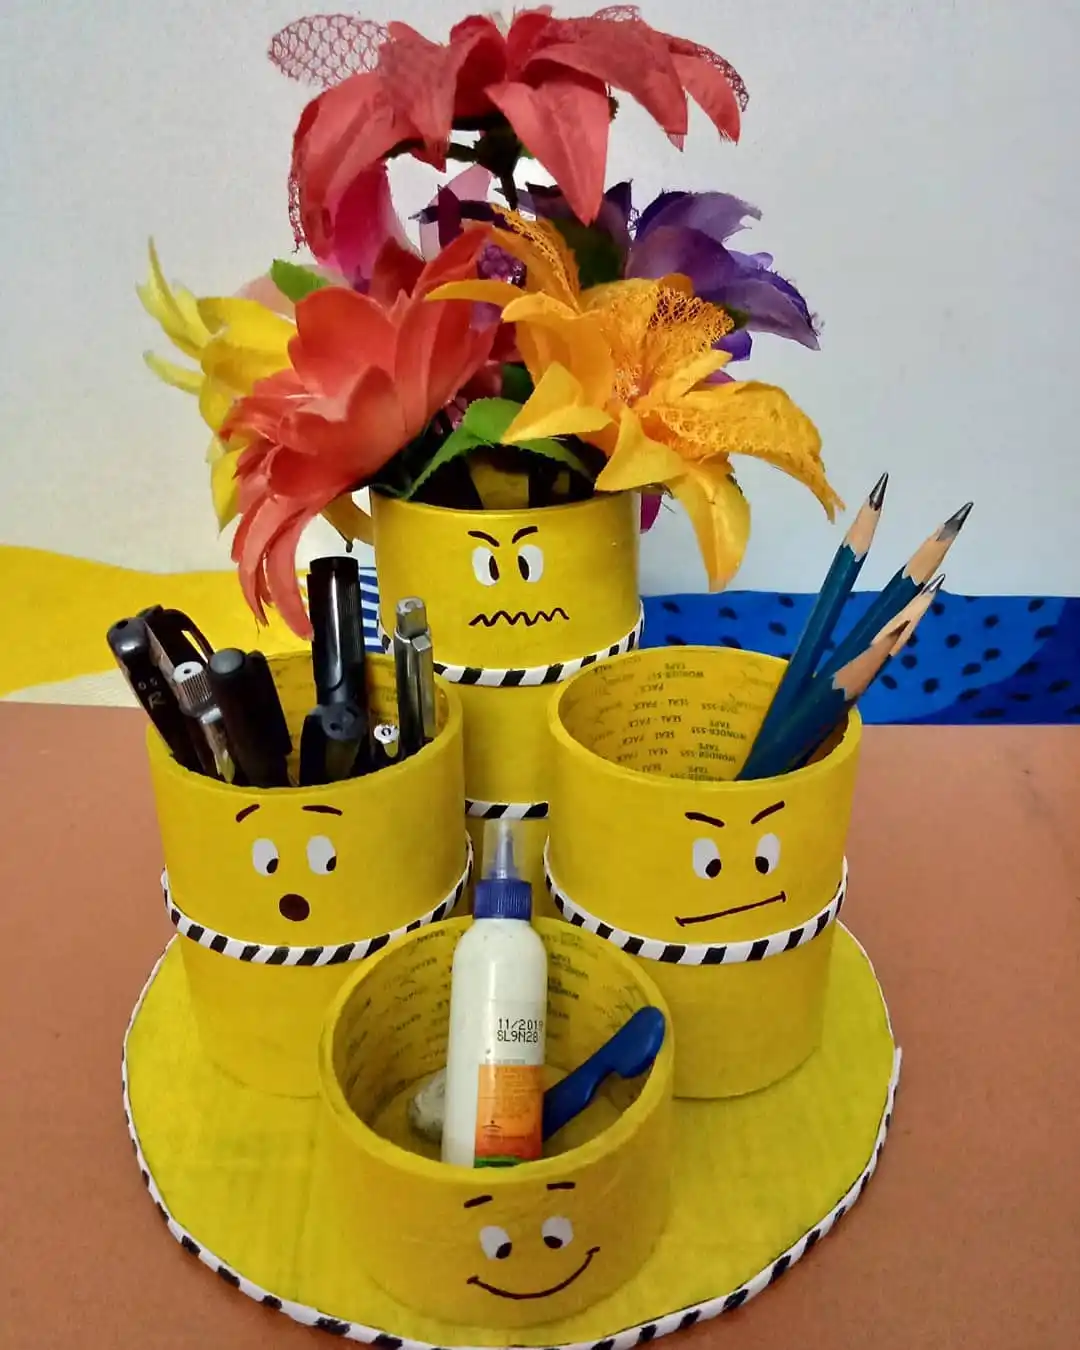
Four empty tin cans, each wrapped in yellow paint and a strip of striped tape like a little belt, cluster together on one round base cut from cardboard or foam board.
Every can gets its own hand drawn face in permanent marker, and letting each one have a different expression is what turns four plain cylinders into a set of characters instead of just containers.
One shocked can holds pens, a stern faced can holds pencils, a calm one holds a glue bottle and a small tool, and the tallest one up top holds a bunch of silk flowers instead of supplies.
Building it as one connected base rather than separate cups is the real trick, since it keeps everything from sliding around a busy desk and turns a boring supply caddy into something a kid actually wants sitting in view.
Subscribe to DIY Craft Bloom
Get updates on the latest posts and more from DIY Craft Bloom straight to your inbox.
10. Clay Over a Bottle’s Head and Tail for a Toothy Shark
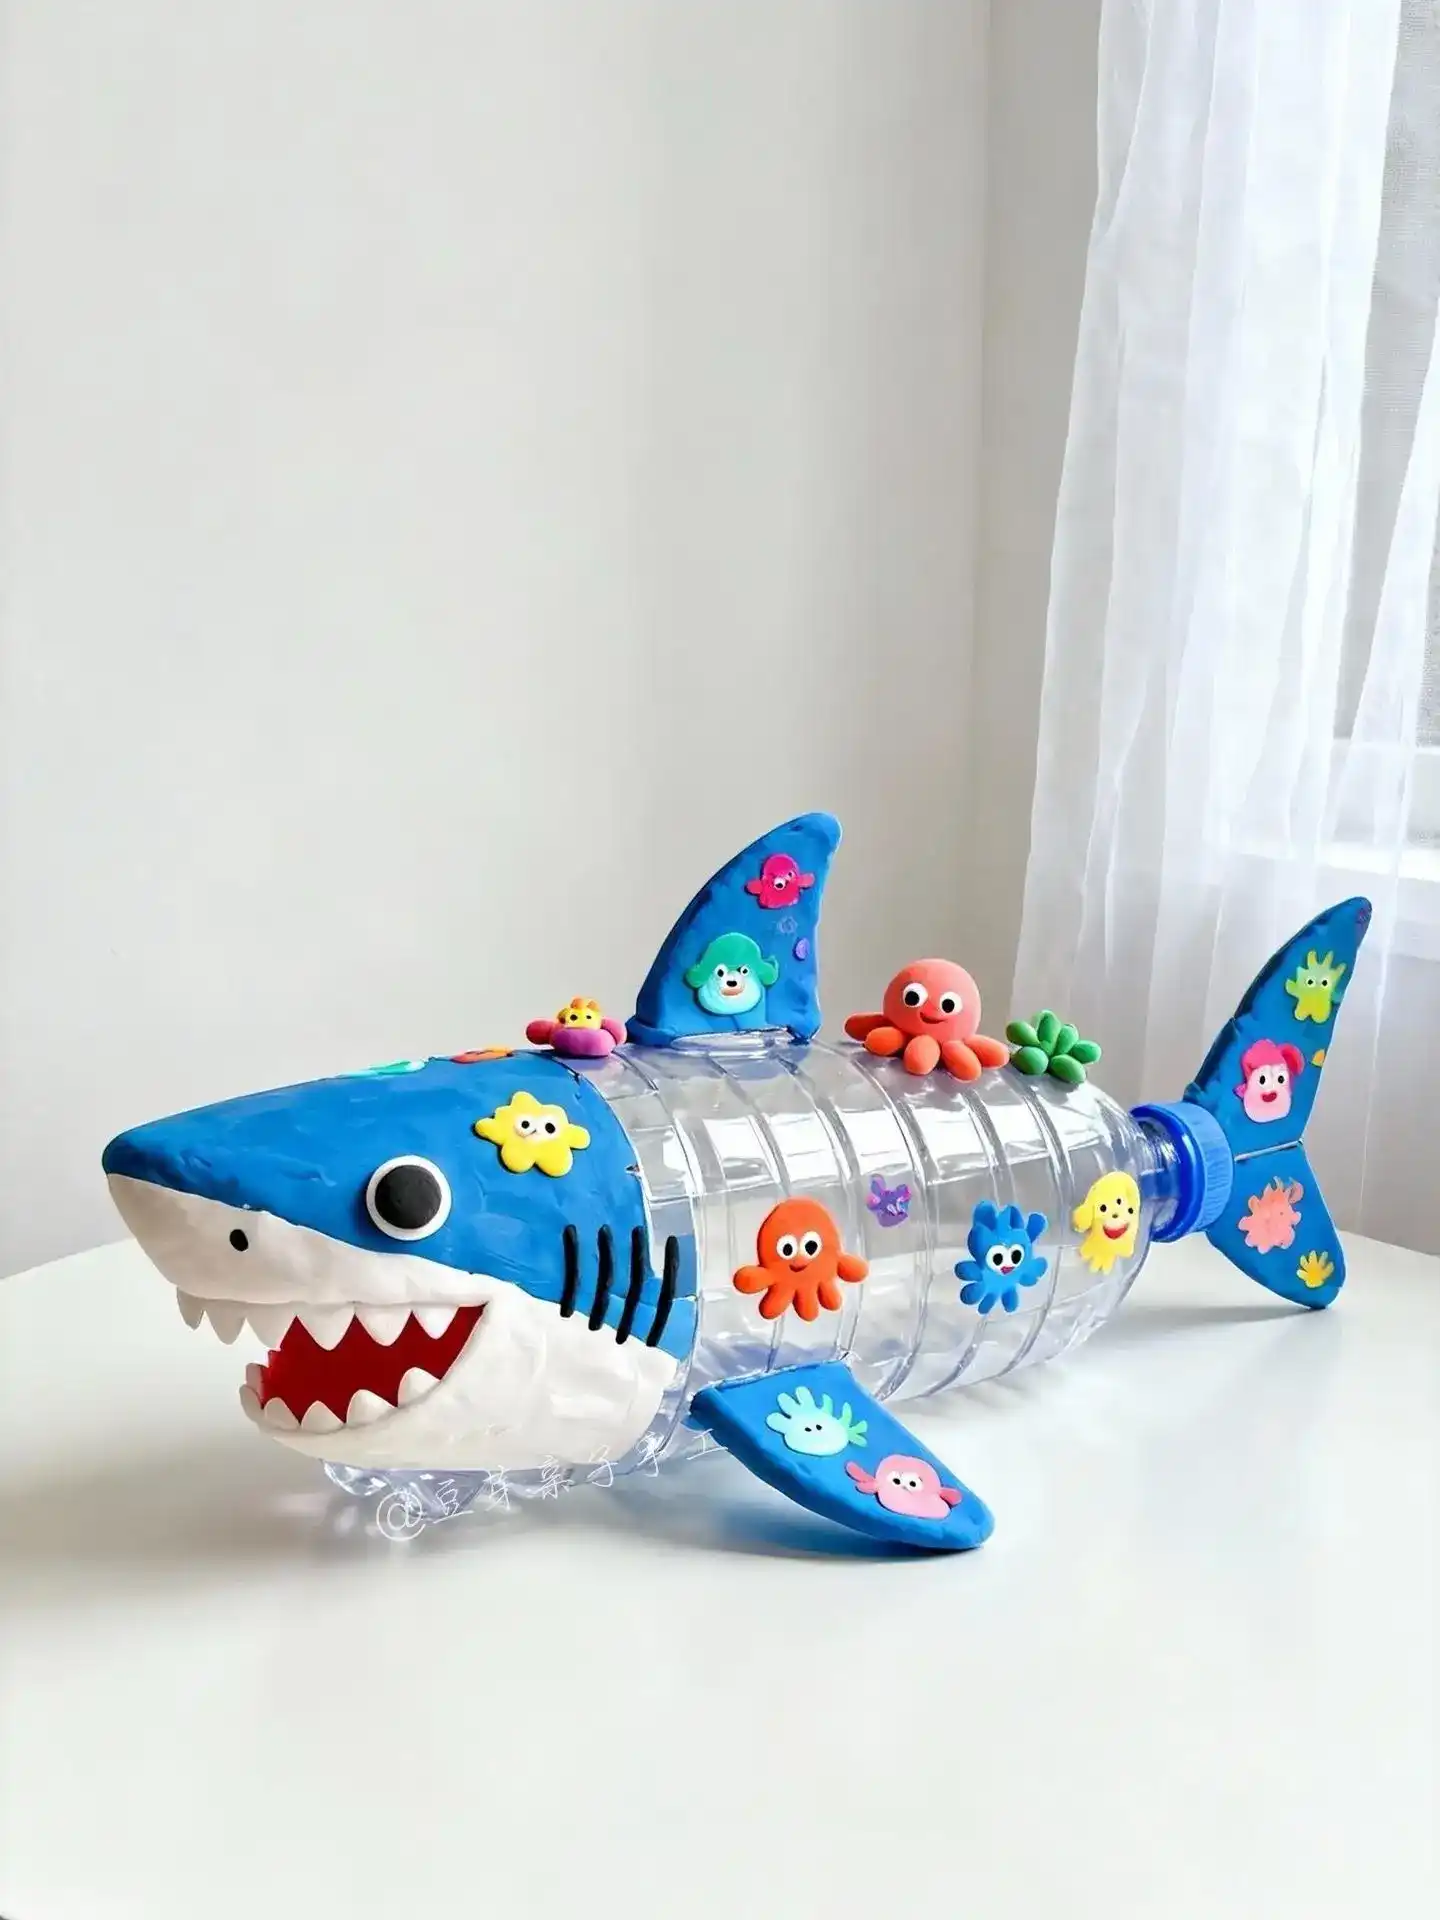
The bottle keeps its shape completely on this one and does double duty as the shark’s ribbed midsection, letting light pass straight through it like a little aquarium window.
Air-dry clay covers just the head, dorsal fin, tail fin, and two side fins, so most of the sculpting effort goes into the handful of parts that actually need shape instead of the whole body.
A oversized red felt mouth with pointed white felt teeth is glued under the clay head, wide enough to look like a proper predator instead of a gentle cartoon fish.
Tiny clay sea creatures, an octopus, a starfish, a few blobby coral shapes, get stuck along the top and sides like passengers riding along for the swim.
Leaving the bottle clear turns the shark’s body into a see-through display case for tiny sea creatures.
11. Flip a Bottle Base Upside Down for a Sleepy Faced Pencil Cup
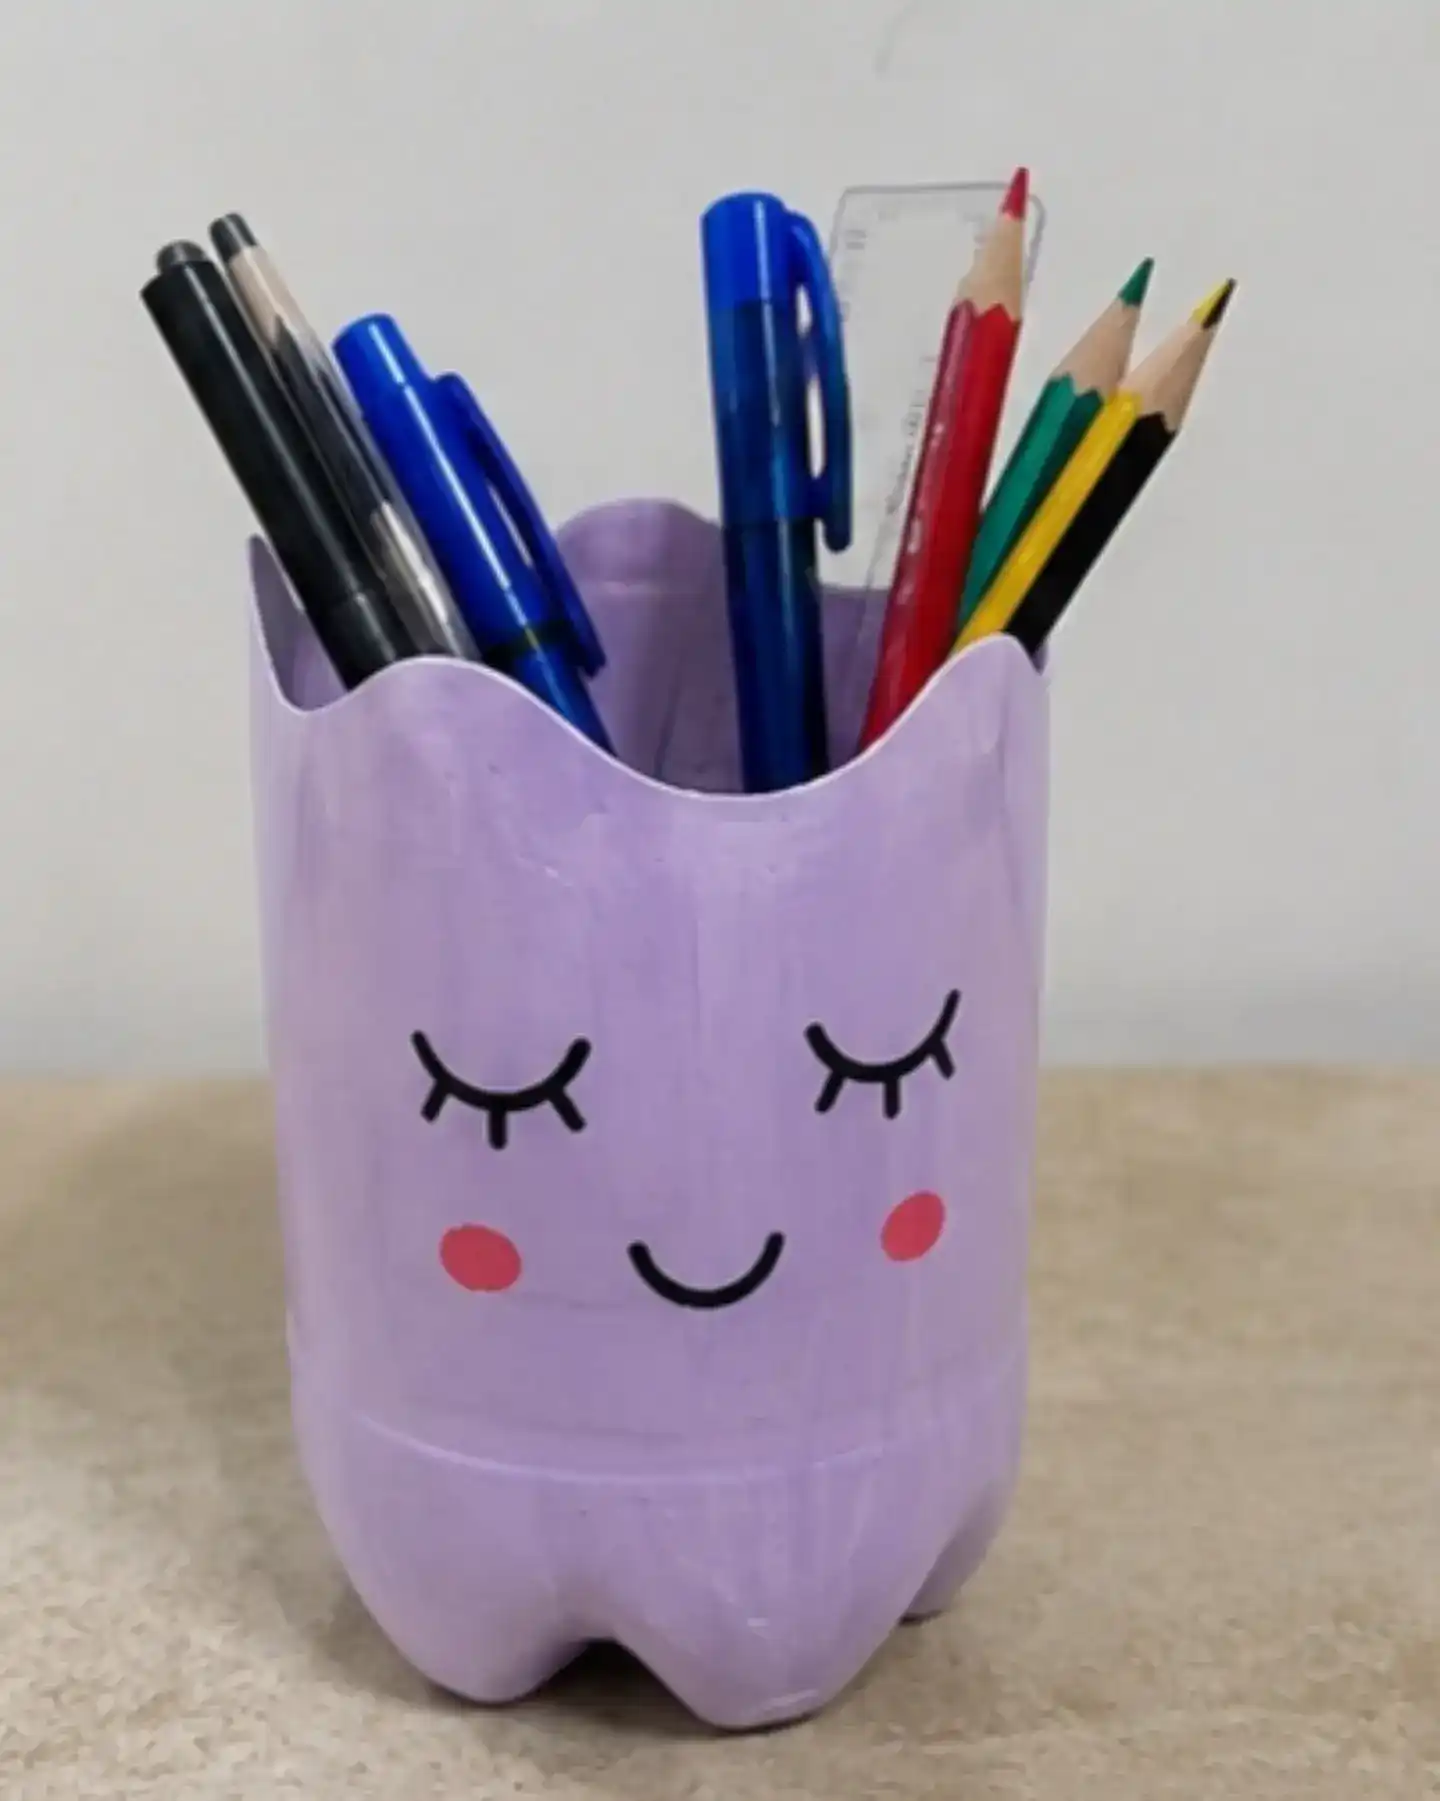
The scalloped bottom of a plastic bottle is doing all the shape work here, since that natural wavy edge already looks like it was designed to hold pencils.
One coat of lavender paint covers the whole thing, and a simple sleeping face drawn in black marker with two pink circle cheeks gives it personality without needing any glued-on pieces at all.
Nothing about this build is fussy. Cut the bottle at the shoulder, paint, let dry, and draw the face once the paint is fully set so the marker doesn’t smear.
It holds pens, pencils, and even a small ruler standing upright, and it looks just as good on a teacher’s desk as it does in a kid’s backpack corner.
12. Snap Bottle Caps Together for a Jointed Blue Robot
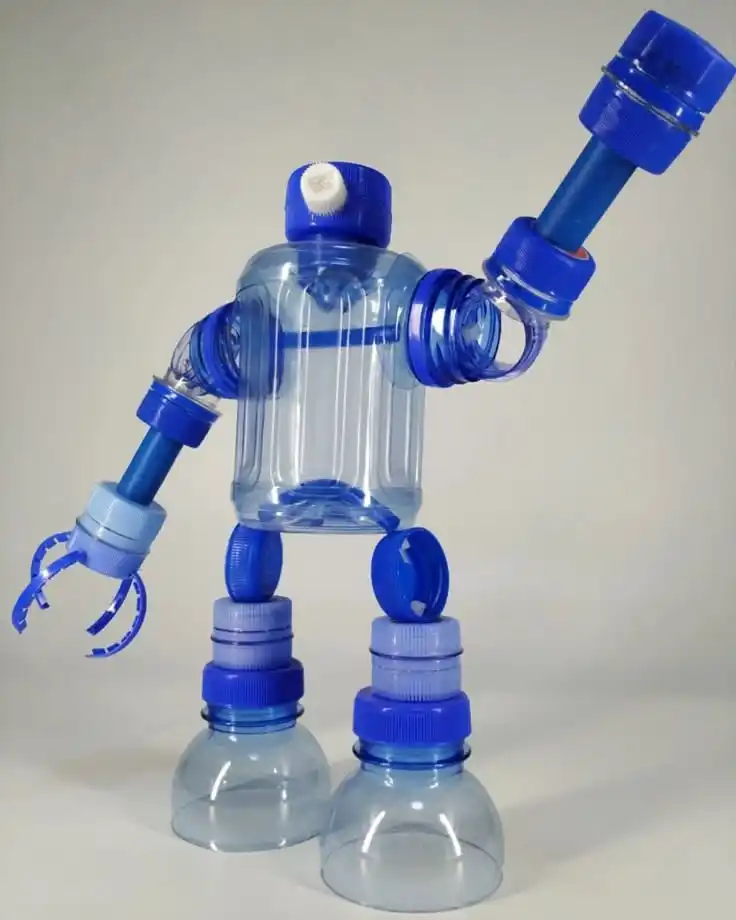
Skip paint entirely on this one and let the natural blue tint of the plastic do the work.
A single mid-size bottle forms the torso, and every joint, shoulder, elbow, hip, is built from two caps of different sizes nested inside each other so the limb can actually pivot at that spot.
Two small bottles stand upright as sturdy robot feet, giving the whole figure enough of a base to balance on a shelf without tipping.
One hand gets left open with curled strips of cut plastic bottle for spiky robot fingers, while the other ends in a solid oversized cap that reads as a fist raised mid-punch.
The cool, see-through blue across every piece is what makes it look like one matched robot kit instead of a pile of random caps glued together.
Two different sized caps fitted together let the arms and legs actually pivot.
Leaving every piece its natural blue tint keeps the robot looking like a matched set.
Standing upright, they give the figure a wide enough base to actually balance.
13. Stack Bottle Caps Into Tiny Painter Robots
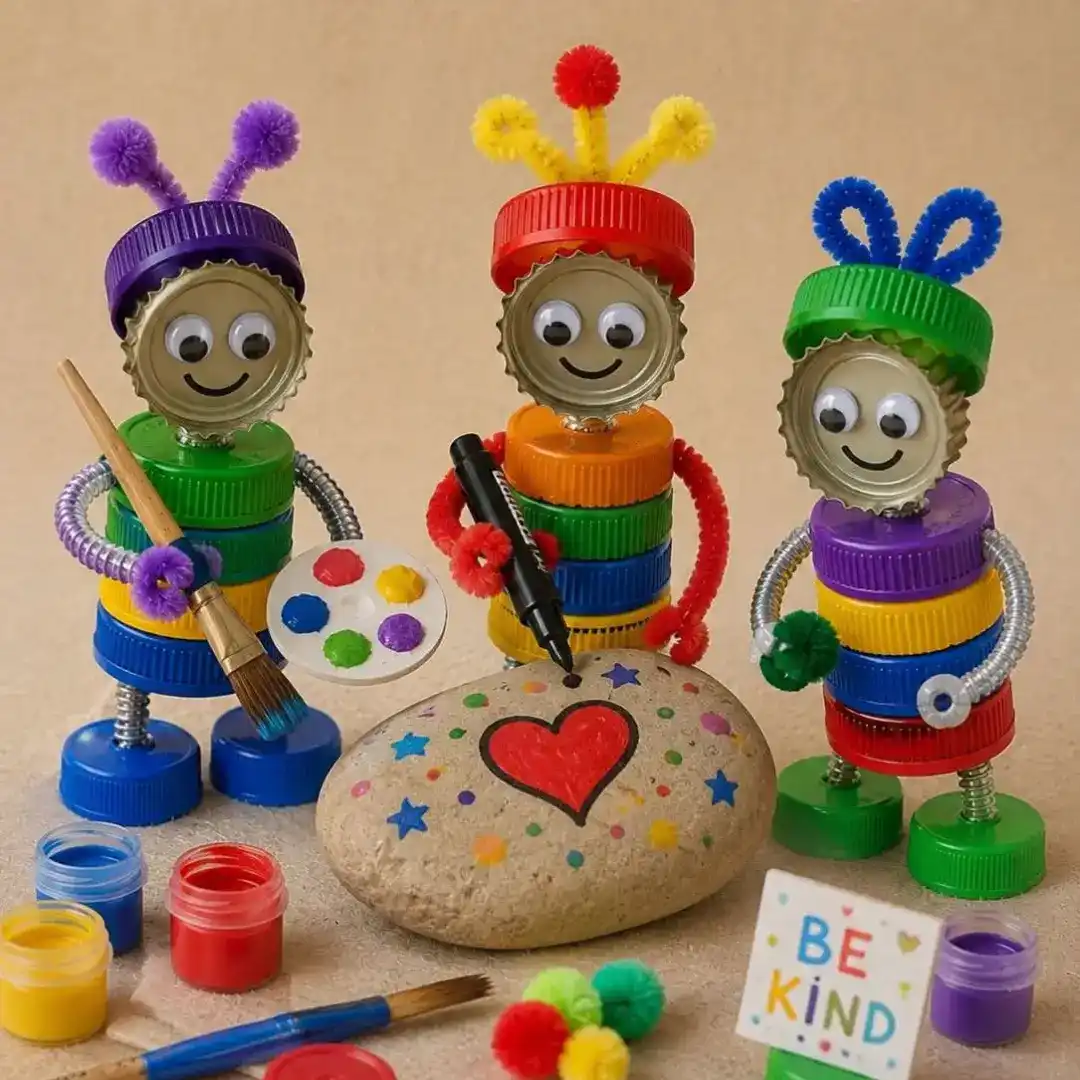
Bottle caps stacked in a rainbow column and topped with a soda cap face solve the body shape and the head at the same time, no cutting required beyond popping caps off their bottles.
Pipe cleaners twisted into loops, spikes, or bunny ears become each robot’s hairstyle, and a short coil of pipe cleaner wrapped around a pencil makes the springy accordion arms that let each figure hold something.
Googly eyes glued straight onto the flat top of a bottle cap give an instant face, and a marker smile finishes it in one stroke.
Handing each robot a tiny prop, a paintbrush, a marker, a pompom, turns three identical builds into three distinct characters with their own little job.
14. Build a Whole Diorama House From a Cereal Box Roof
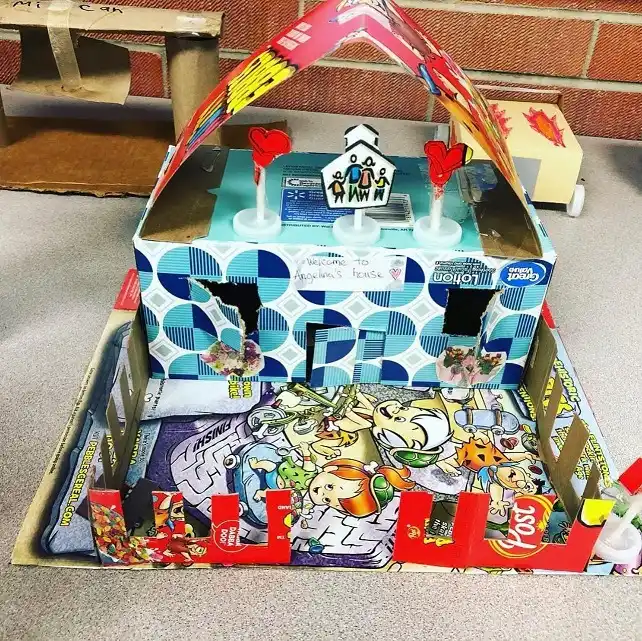
A cereal box gets flattened and folded into a peaked roof shape, then wrapped around a smaller box base covered in patterned gift paper for the walls.
Windows and a front door are simply cut straight through the cardboard, and a tiny printed sign glued to the roof peak turns the whole thing into a named building instead of a generic box house.
Small plastic bottle caps stacked as porch columns hold up the roofline in front, and a few red paper hearts on sticks decorate the entrance like little garden stakes.
The base gets covered in comic strip pages instead of plain paper, which turns the yard into something fun to actually look at instead of just a blank cardboard floor.
conclusion
Any one of these fourteen ideas turns a bag of recycling into something a kid is proud to bring home, and that is really the whole point of a good waste material craft.
Start with whatever you already have the most of, whether that is bottle caps, cereal boxes, or a pile of clean plastic bottles, and let the material pick the project for you.
Save this for the next time a school project sneaks up on you.