18 Easy Toilet Paper Roll Crafts for Kids to Make at Home Using Simple Supplies


Empty toilet paper rolls pile up fast in most homes. Instead of tossing them, you can turn them into something your kids will love making.
These little cardboard tubes are free, sturdy, and easy for small hands to cut, paint, and glue. A rainy afternoon becomes a craft session with almost no prep.
This list of easy toilet paper roll crafts for kids uses supplies you probably already have, like paint, markers, glue, yarn, and paper scraps.
Some projects take ten minutes. Others make a fun weekend activity. Each idea builds fine motor skills and creativity, and every finished piece costs next to nothing.
1. Painted Sea Creature Collection
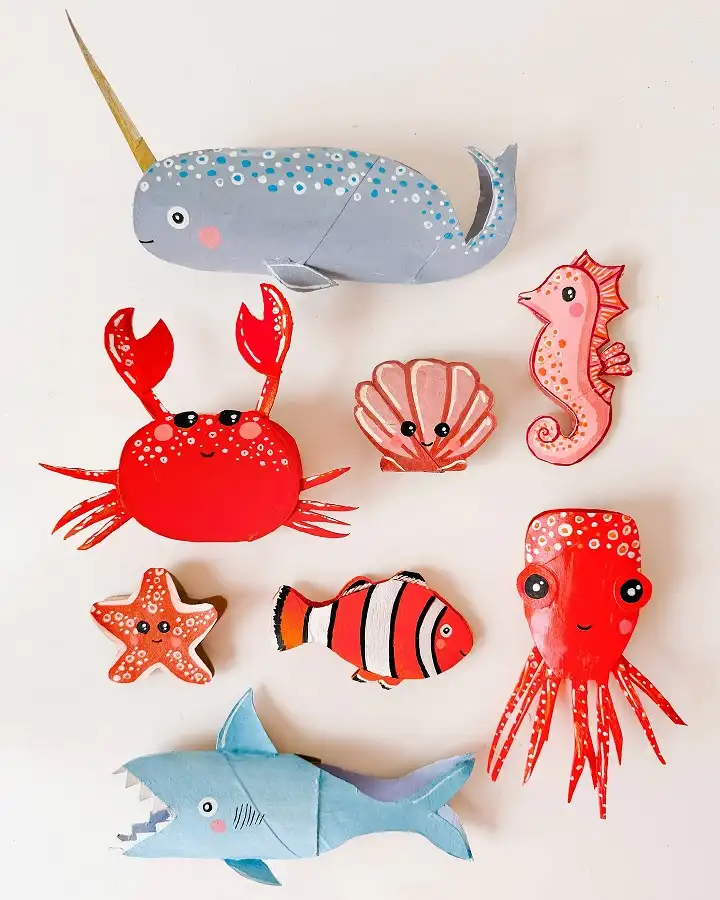
Eight ocean friends share one table here: a narwhal with a gold tusk, a red crab, a pink scallop shell, a seahorse, a starfish, a clownfish, an octopus, and a pale blue shark.
Every body appears to start as a tube that was flattened, shaped, and cut. Smooth matte paint hides every trace of brown cardboard.
Faces tie the whole set together. Small round eyes, rosy cheeks, and a tiny smile show up on nearly every piece, so the group reads like one family. Dots in white, blue, and pink add pattern to the crab, octopus, and narwhal.
Older kids can cut claws, tentacles, and fins from the flattened tube itself. Younger makers do better painting while an adult handles the scissors.
Try making one creature a day for a week. By Sunday, your child has a full aquarium to line up on a windowsill.
2. Dotted Sea Turtles

- Materials: One tube, green paint, white paint, and scrap paper for flippers.
- Make: Paint dark hexagons on a lighter green tube, then outline each with white dots.
- Finish: Cut a head, four flippers, and a tail point, then glue them under the shell.
- Display: Set them on a dark tray or mat so the teal pops.
Look closely at the shell. Those dotted hexagons copy the real plates on a turtle’s back, which sneaks in a little science lesson.
The head and flippers have a soft, mottled finish, likely from sponge painting or watercolor on plain paper.
Make it easier: Skip the fine white dots for toddlers. Hand them a cotton swab dipped in white paint and let them stamp spots anywhere on the shell. It still reads as a turtle, and small fingers get great grip practice.
3. Pull String Flapping Butterflies
Best for: Spring afternoons and kids who love toys that move.
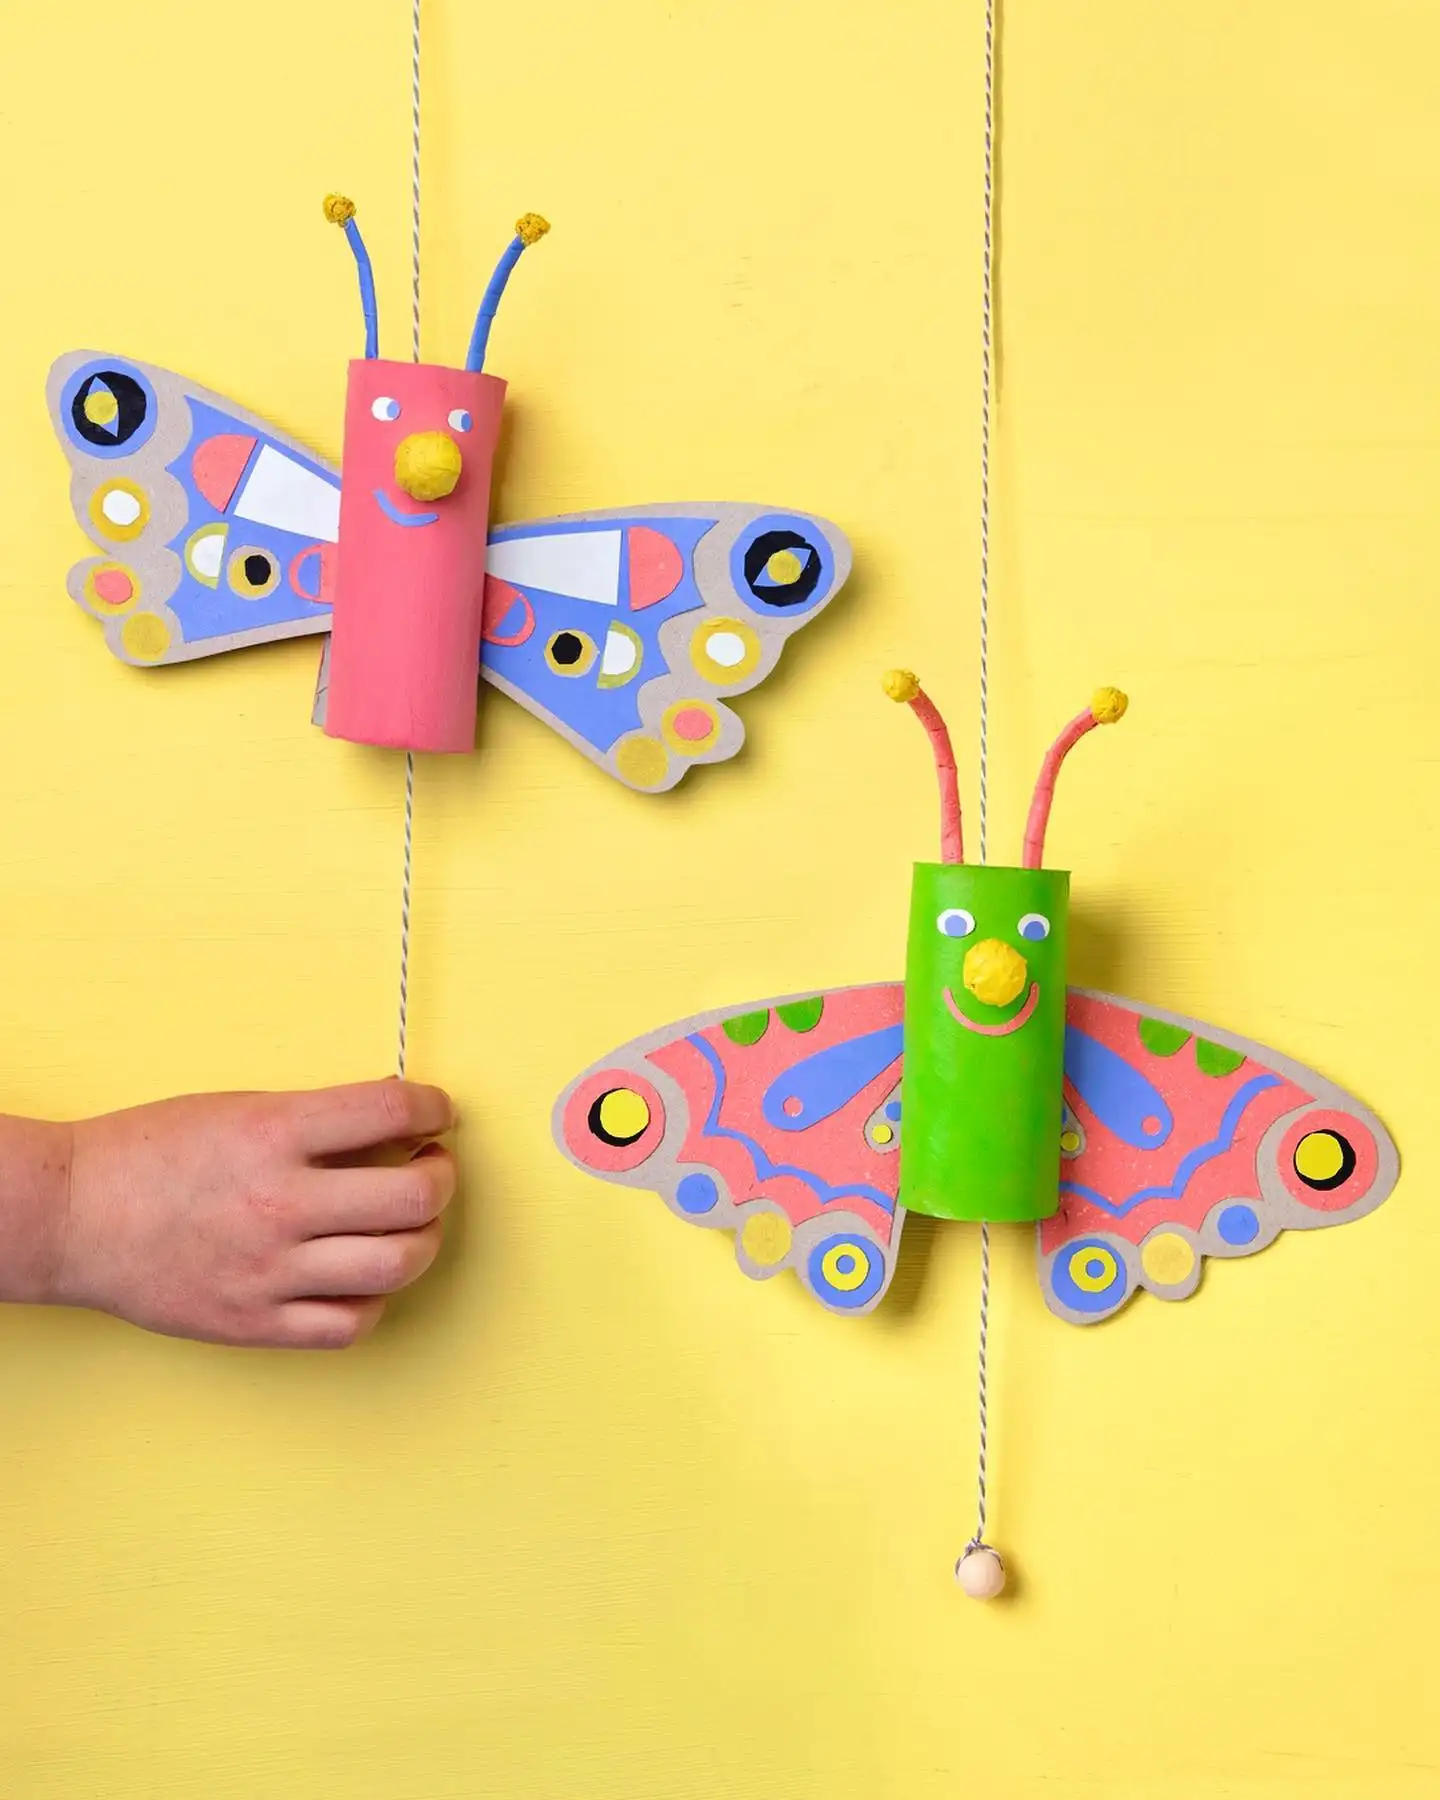
Bright pink and green tubes form the bodies, and wide wings cut from gray cardboard sit behind them. Paper circles, half moons, and teardrops in blue, coral, yellow, and black cover the wings.
A crumpled ball of yellow paper makes each nose, and two more top the rolled paper antennae.
Twisted string runs straight through each tube and ends in a small wooden bead. One child is tugging the string in the photo, so this craft seems built to move.
That play factor keeps kids busy long after the glue dries. Among toilet paper roll crafts for kids, few get played with this much.
Budget swap: Cut the wing shapes from a cereal box if you have no gray chipboard. Flip it so the plain side faces out, and the collage pieces will hide any leftover print.
4. Natural Cardboard Flower

You’ll need: A few plain tubes, sharp scissors, and clear glue.
Nothing here is painted. Each petal looks like a looped strip of tube, pinched to a point and gathered into a neat fan.
A thin cardboard strip wraps the base where the petals meet the stem. Two narrow strips curl into spirals that read like vine tendrils.
Bare kraft brown gives this piece a calm, grown up look that suits a bedroom shelf or a gift wrap topper. Kids around eight and older can handle the cutting.
Little ones can curl the tendril strips around a pencil, which is the most fun step anyway.
Texture note: Run each strip over a table edge before curling. That small bend softens the fibers so the spiral holds its shape instead of cracking.
5. Crayon Race Car with Bottle Cap Wheels

Crayon or oil pastel scribbles in red, yellow, blue, and pink cover a white tube, with a black windshield and a blue side window drawn on top.
Metal bottle caps form the wheels, and strips of corrugated cardboard wrap around them as tires. A cardboard spoiler, colored orange and red, sits on two little posts at the back.
Why it works:
- Kids draw the car design themselves, so no two racers match.
- Bottle caps give real weight and shine to the wheels.
- Box scraps become a spoiler that makes a plain tube read as a race car.
Outdoor option: Chalk a racetrack on the driveway like the one in the photo and push the cars along it. Wheels glued flat to the sides won’t spin, so expect a push toy unless you add a straw axle.
6. Tube Tower Castle

Plain gray tubes become seven towers, each standing at a different height behind a corrugated cardboard wall. Black marker windows and a cut archway add detail without any paint.
Subscribe to DIY Craft Bloom
Get updates on the latest posts and more from DIY Craft Bloom straight to your inbox.
The tallest tower wears an orange paper cone, topped by a pipe cleaner pole and a purple ribbon flag. Building this castle takes a stack of toilet paper rolls and one shipping box.
Scale note: Set a short tube in front of a taller one, like the side towers here, so the castle gains depth.
Kid friendly: Snip square notches into tube tops for battlements. Most five year olds can manage two short cuts and a fold.
Display idea: Keep it on a low shelf beside small toy figures so it stays a play set instead of a dust collector.
7. Christmas Tree Advent Calendar
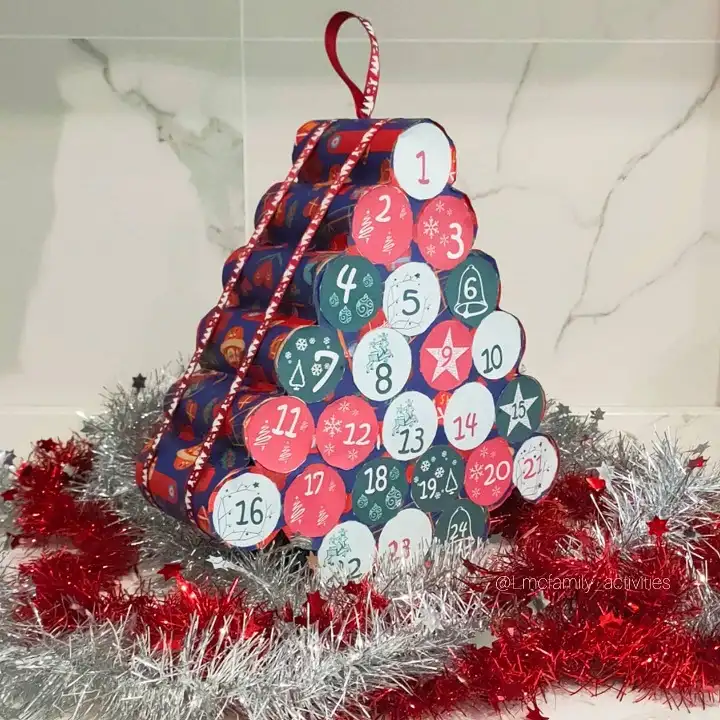
- Materials: Twenty four tubes, holiday wrapping paper, colored card, and ribbon.
- Make: Stack the tubes in rows that grow wider toward the bottom, gluing each layer.
- Finish: Cap every opening with a numbered paper circle in red, green, or white.
- Display: Rest it on a tinsel garland, then hang it by the ribbon loop.
Blue wrapping paper with a red holiday print covers the sides, while the front shows twenty four round doors.
Each circle carries a hand drawn number and a tiny doodle, like a bell, star, snowflake, or reindeer. A red and white ribbon runs over the top and doubles as a hanger.
Holiday twist: Fill each tube with a folded note instead of candy. Write a small family activity on every slip, such as baking cookies or reading by the tree, so the countdown builds memories.
8. Layered Autumn Leaf Wreath

Best for: Fall front doors and Thanksgiving tables.
Dozens of painted cardboard leaves overlap around a ring, with oak, maple, and slim pointed shapes all mixed in. Orange, gold, rust, and soft pink tones sit beside teal berry stems.
Two pumpkins anchor the bottom, while white spotted red mushrooms and acorns peek out along the sides.
Thin painted veins run through every leaf, which gives the flat pieces real depth. Tube cardboard holds a slight curve, so the leaves lift off the base on their own.
Among cardboard tube crafts for kids, this one takes the longest, so spread it across two or three sessions. Paint the leaves on day one, then arrange the wreath together the next afternoon.
Seasonal swap: Trade the pumpkins and mushrooms for paper pinecones and holly in December. The same layered base carries into winter with a switch to deep greens and reds.
9. White Rocket with Opening Door
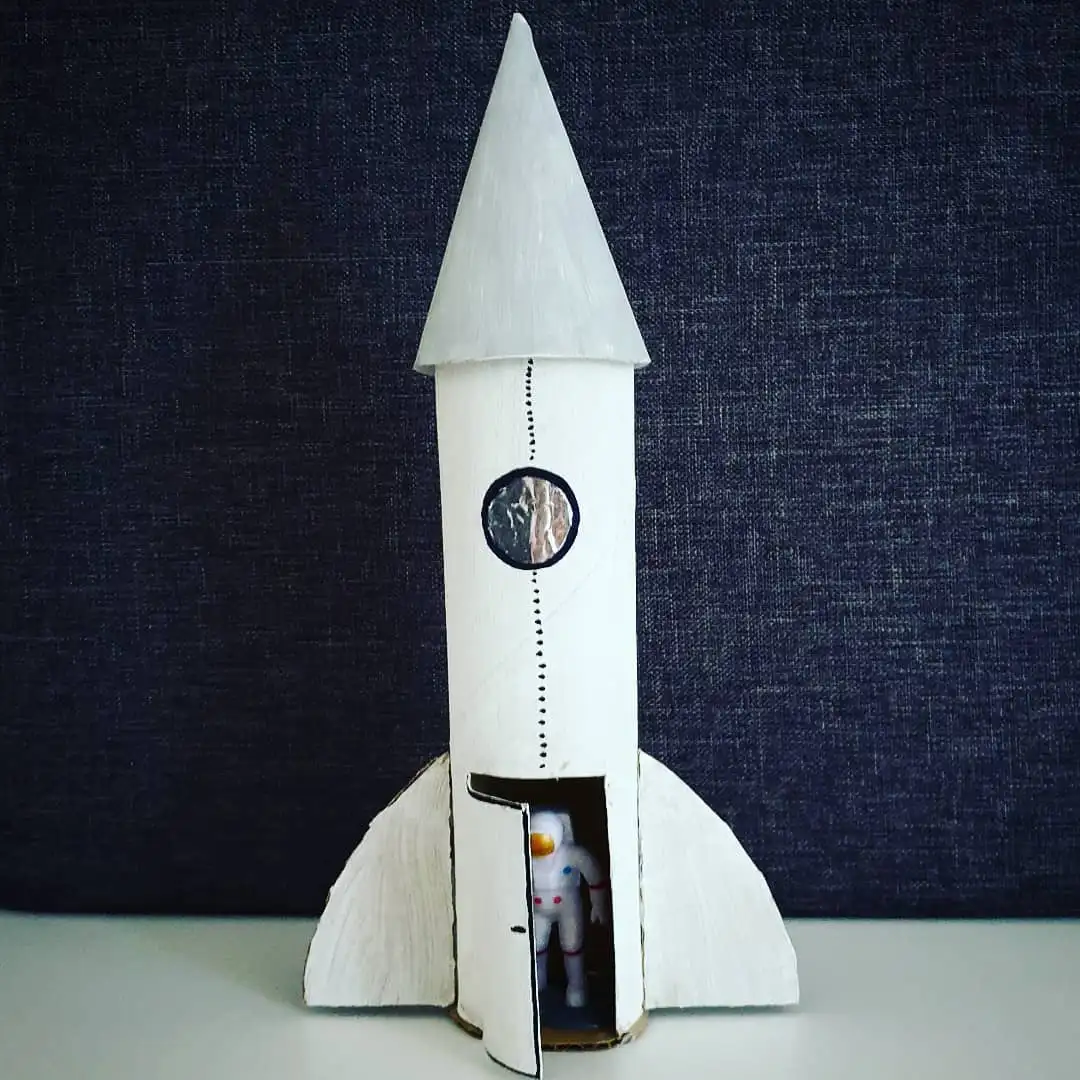
Brushy white paint covers a tall tube, and a pale gray paper cone sits on top as the nose. A round window made from crinkled foil, ringed in black marker, catches the light. Two curved cardboard fins hold the rocket upright.
Here comes the clever part. One small door, which looks cut on three sides, swings open near the base to reveal a toy astronaut. Your child gets a craft and a hiding game in one.
Height matters for this build, so a paper towel tube may suit it better than a short roll.
An adult can start the door with a craft knife, then little hands can draw the dotted line and press on the foil. Preschoolers will open and close that door for days.
10. Purple Unicorn on Craft Stick Legs
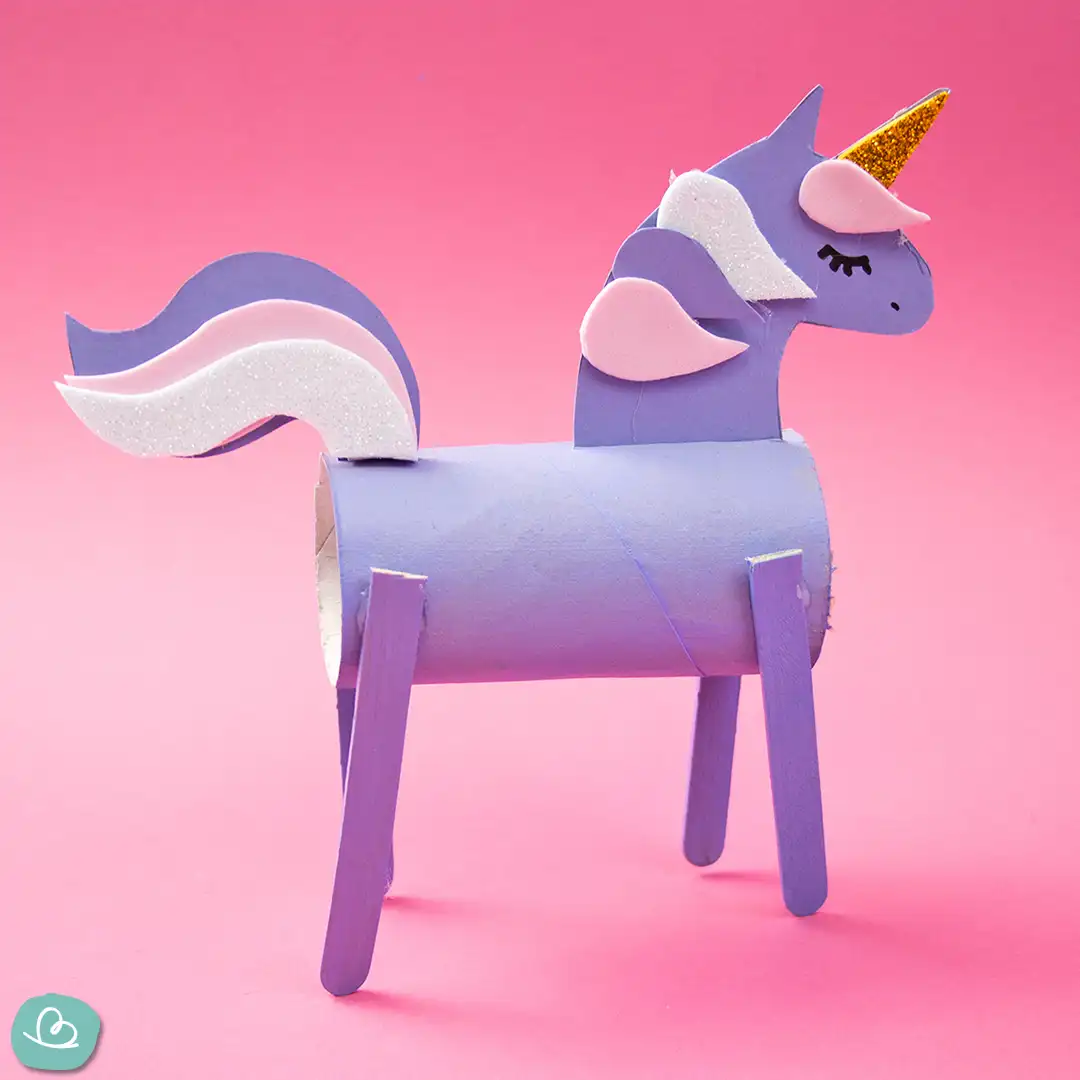
Lavender paint coats a tube that lies on its side, and four painted craft sticks stand in as legs. A purple card head rises from one end, with a sleepy closed eye and drawn lashes.
Layers of purple card, pink foam, and white glitter foam make the swishy mane and tail, while a gold glitter horn sits on top.
Why kids love it:
- The tube lying flat becomes a body that can actually stand.
- Glitter foam sheets cut easily and need no paint or drying time.
- Stacked mane layers show kids how depth comes from simple overlap.
Glue tip: Hot glue holds the craft stick legs best, so an adult should handle that step. School glue works fine for the foam pieces and the head.
11. Propeller Plane Mobile

A magenta tube hangs from clear thread in what looks like a busy classroom. Two yellow craft sticks cross at the front to form a propeller, pinned at the center with a small white bead.
More yellow sticks reach out as wings, and a green piece caps the tail. Simple cardboard tube crafts for kids like this one make great ceiling mobiles.
Placement tip: Hang a whole fleet at different heights near a window so they turn in moving air.
Paint tip: Color the craft sticks before gluing. Wet paint on assembled sticks can drip into joints and weaken the hold.
Try instead: Push a brass paper fastener through the stick center so the propeller spins by hand.
12. Printable Paper Dinosaur

Grab these: One tube, a printed dinosaur template, scissors, and a glue stick.
Soft green paper with a speckled print wraps the whole tube. Behind it, a long neck and head rise on one side, and a spiked tail stretches out on the other.
Yellow spikes and toes, a pink cheek, and a small smile keep the look gentle and friendly.
Subscribe to DIY Craft Bloom
Get updates on the latest posts and more from DIY Craft Bloom straight to your inbox.
Clean lines and matching colors suggest the pieces came from a printable template.
That makes this a strong pick for very young kids or a classroom full of makers. Children only need to cut along the outline and wrap one sheet around the roll.
Beginner shortcut: Print the body wrap on regular paper. Thin sheets bend around the curve without popping loose, while the head and tail can go on heavier card so they stand tall.
13. Toothy Ombre Shark

Best for: Ocean themed lessons and kids who like their crafts a bit fierce.
Several toilet paper rolls join end to end to make one long shark body. Deep blue paint on top fades into aqua and mint underneath, much like the shading on real sharks. A single googly eye sits above the open mouth.
Jagged white teeth are cut straight into the front tube, and red paint inside makes the bite look wild.
Blue cardboard fins stick out from the sides and back. Shark fans will gladly spend an hour on this project, mostly on the teeth.
Accent upgrade: Dab the dark blue on with a dry sponge while the lighter base is still tacky. Colors blend at the edges and create that soft fade with no careful brushwork.
14. Clothespin Ladybug

Just two items go into this bug: one tube and one wooden clothespin. The photo shows them side by side, with arrows pointing to the finished ladybug.
Two round wings, painted red with black dots in mixed sizes, spread wide from a black body.
Curly antennae and a tiny face with white eyes sit at the top. Everything seems cut from the tube itself, since the cardboard keeps a gentle curve. That curve makes the wings cup slightly, much like a real beetle shell.
Because the base is a clothespin, this ladybug can clip onto backpacks, curtains, or a lunch bag. Make a whole row and use them as bookmarks or note clips on a corkboard.
15. Bumblebee Flower Garden

- Materials: Three tubes, colored paper, striped paper straws, pipe cleaners, and green play dough.
- Make: Color the tubes yellow, then draw thick black stripes and happy faces.
- Finish: Glue each bee onto a big dotted flower and push a straw stem below.
- Display: Press every stem into a mound of play dough lined with paper grass.
Pink, green, and purple flowers sit behind each bee like oversized wings. Smaller blooms in blue, orange, yellow, and white fill the space below, each on its own straw.
Fuzzy black pipe cleaners poke out of every toilet paper roll bee as antennae.
Time needed: Plan about an hour, plus drying time if you paint the tubes. Making the small flowers while the bees dry keeps restless hands busy.
16. Easter Bunny Family
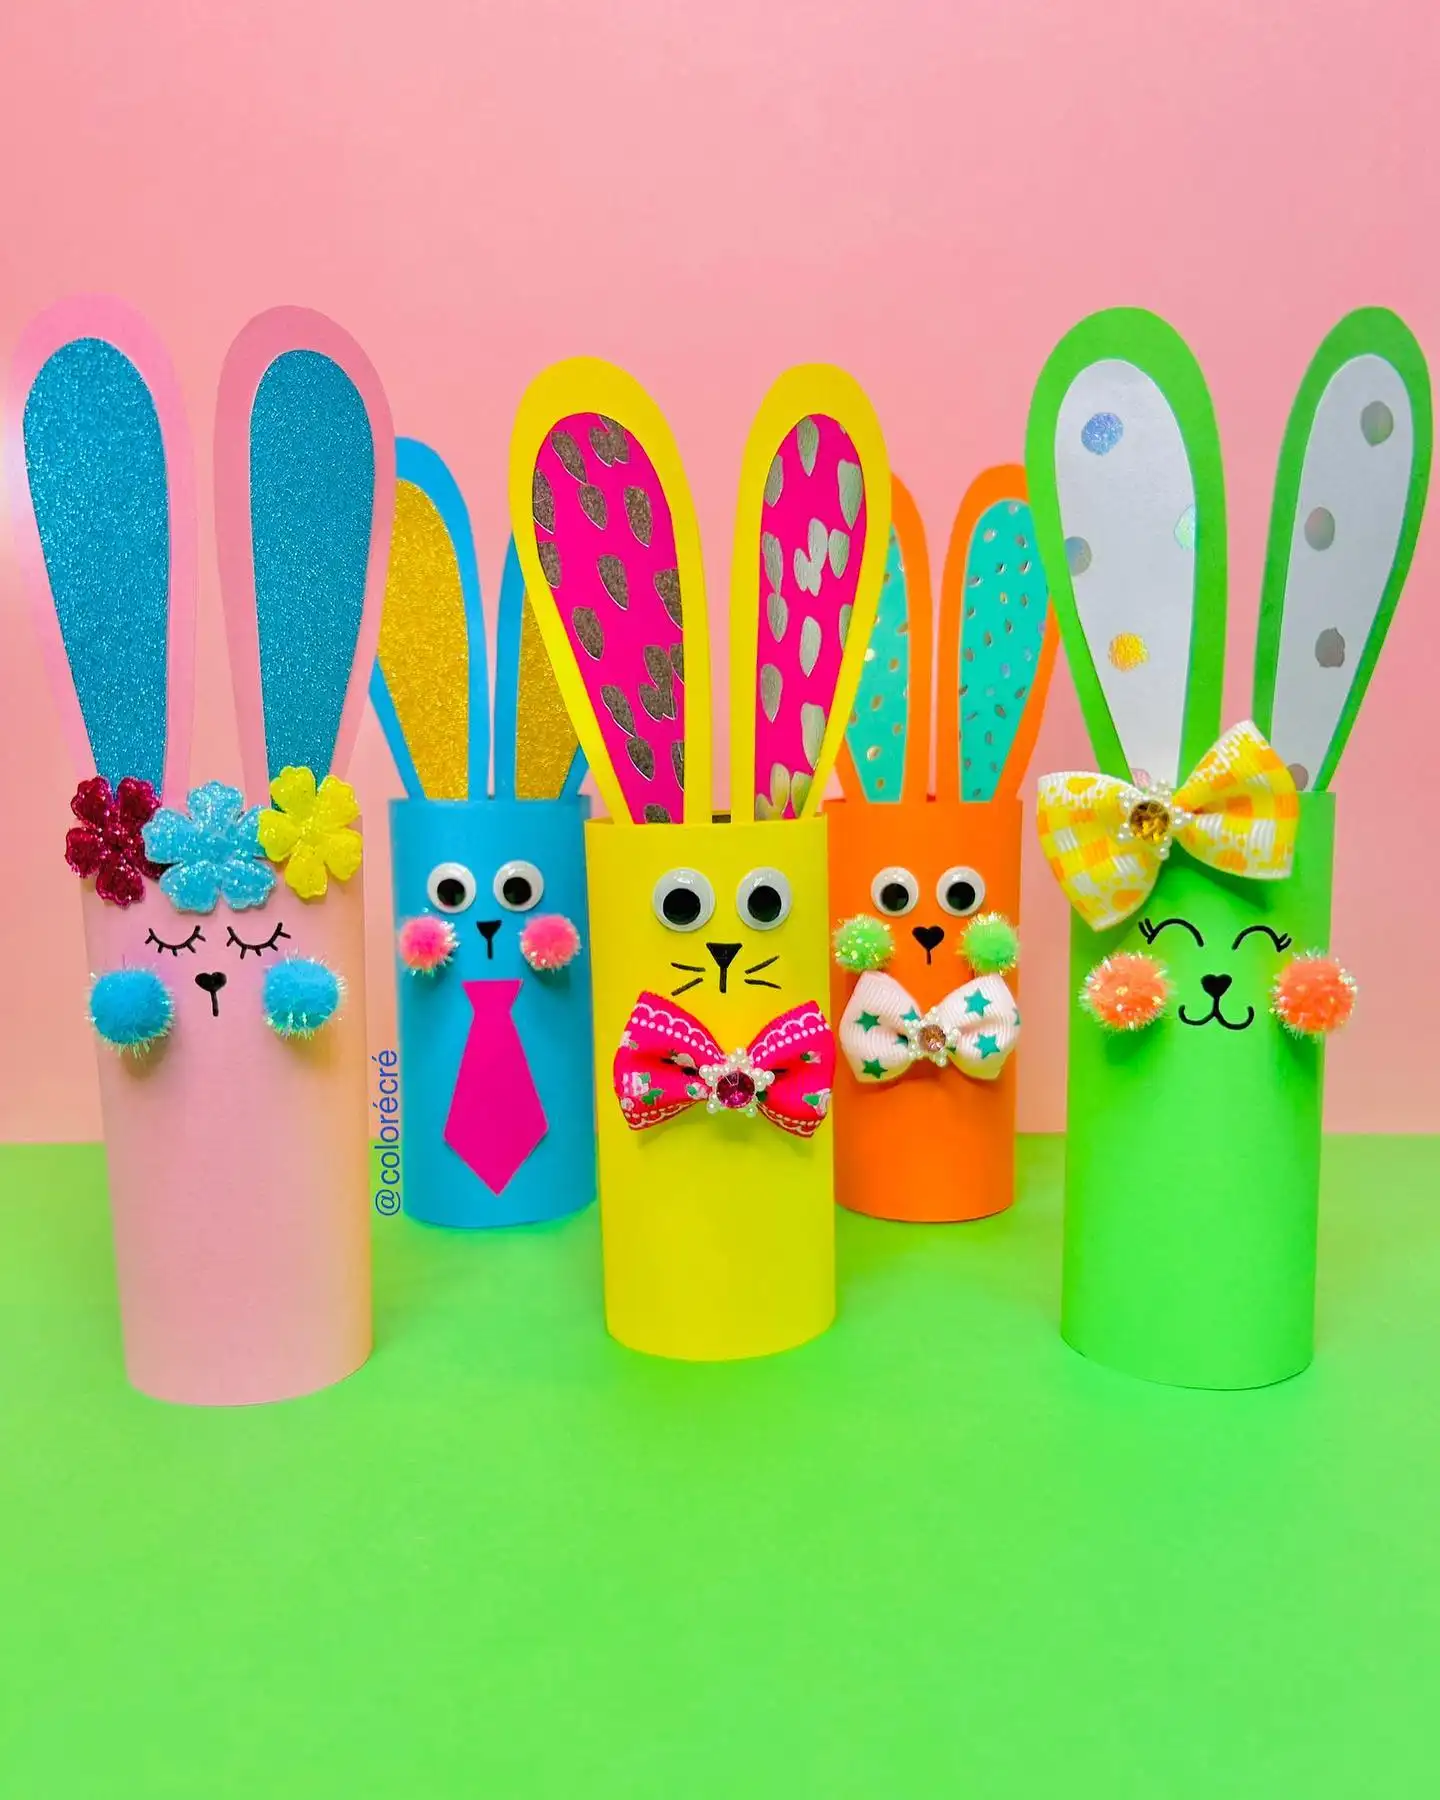
Five bunnies line up in pale pink, sky blue, yellow, orange, and lime green paper. Tall ears carry inner panels of glitter foam or patterned card, from blue sparkle to silver dots.
Each face gets its own personality through googly eyes or drawn lashes, sparkly pom pom cheeks, and an accessory like a ribbon bow, a paper tie, or a flower crown.
Style note: Give every bunny one distinct accessory. Siblings can then each claim a favorite, since every bunny reads as its own character.
Dollar store swap: Ready made hair bows and sticker flowers from the party aisle save cutting time.
Upcycle idea: Glue a cardboard circle to the bottom, then tuck in paper grass and small treats for Easter baskets.
17. Fox Desk Organizer
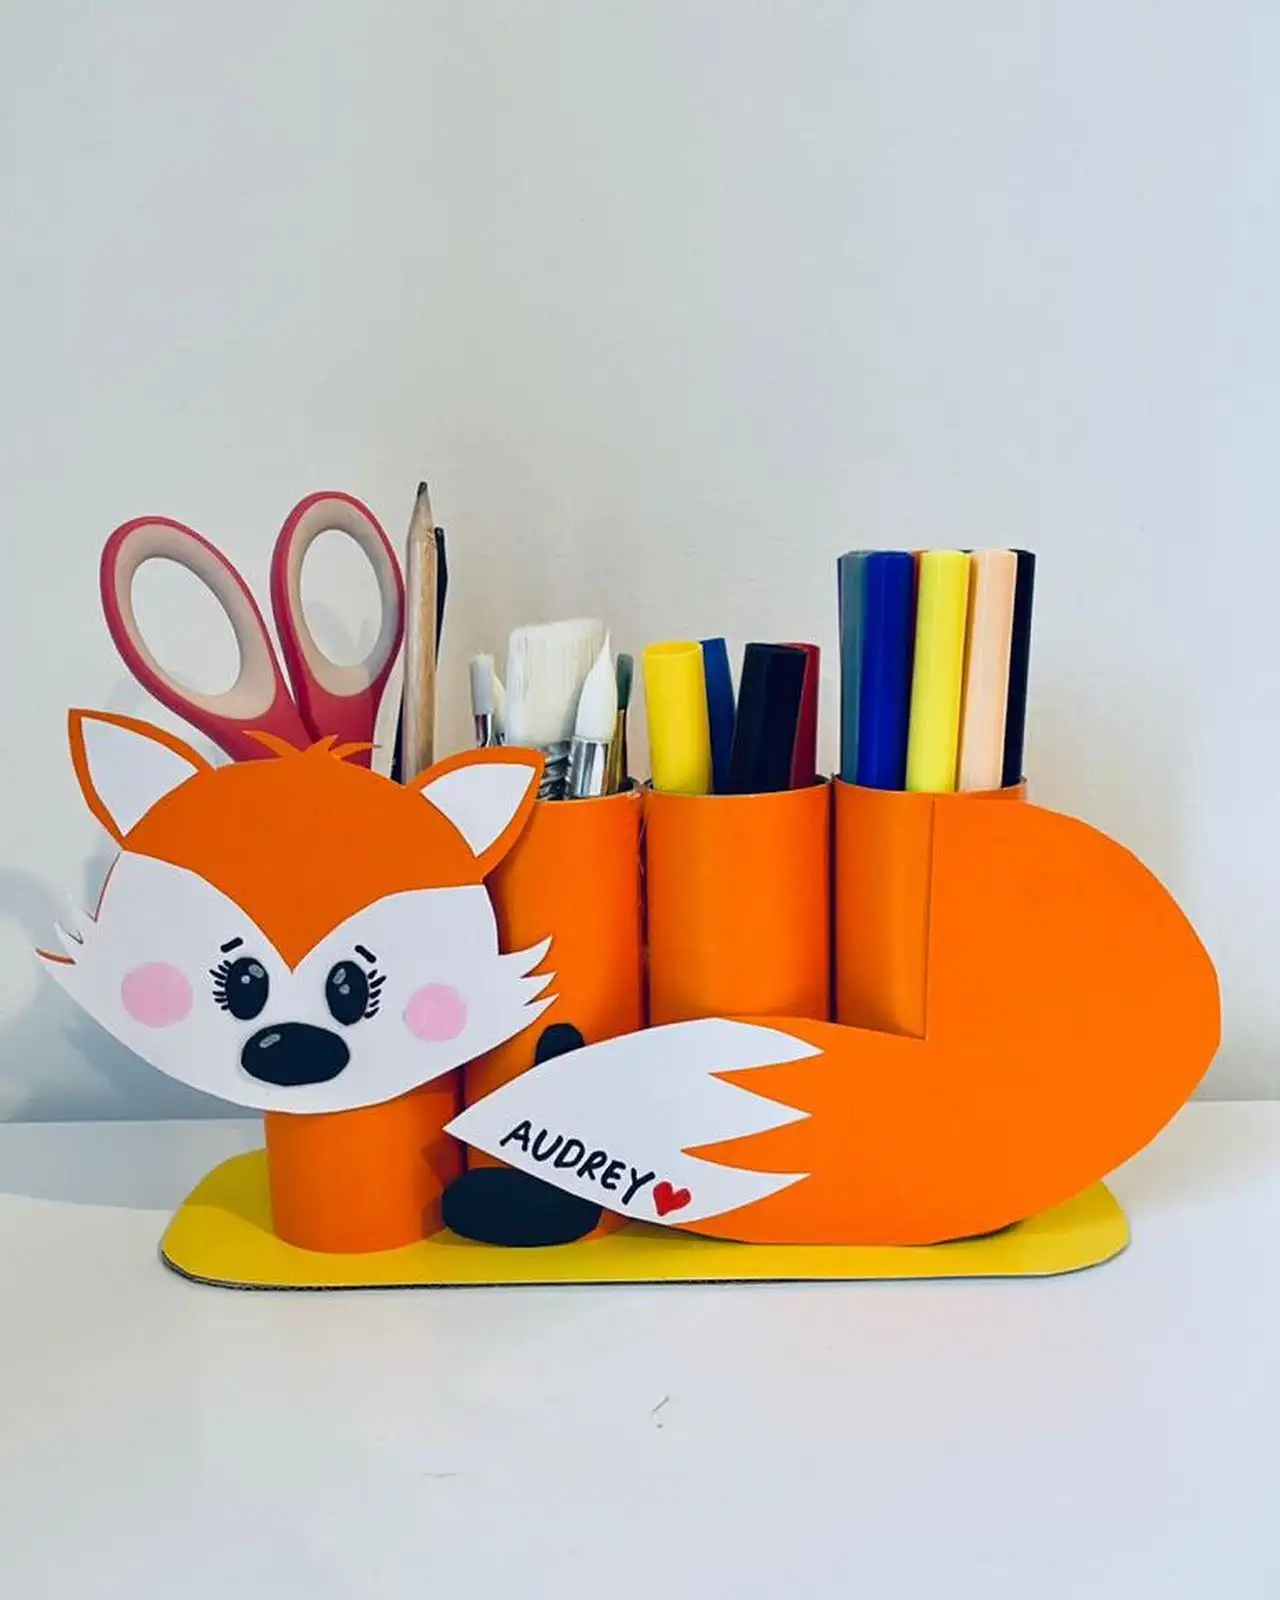
You’ll need: Four tubes, orange, white, and black paper, a strip of sturdy cardboard, and glue.
Orange paper wraps each tube, with a short one up front and taller ones lined up behind on a yellow cardboard base. Pencils, paintbrushes, markers, and even scissors slot inside.
A paper fox face with long lashes and pink cheeks hugs the front tube, while a big curled tail wraps around the back.
Check the white tail tip. Someone wrote a name there in marker with a small red heart, which turns the organizer into a sweet gift.
Practical toilet paper roll crafts like this one get used every day, and that makes kids proud.
Proportion note: Put the shortest tube under the face and the tallest at the back. Tall tools then stay visible without hiding the fox.
18. Safari Animal Friends
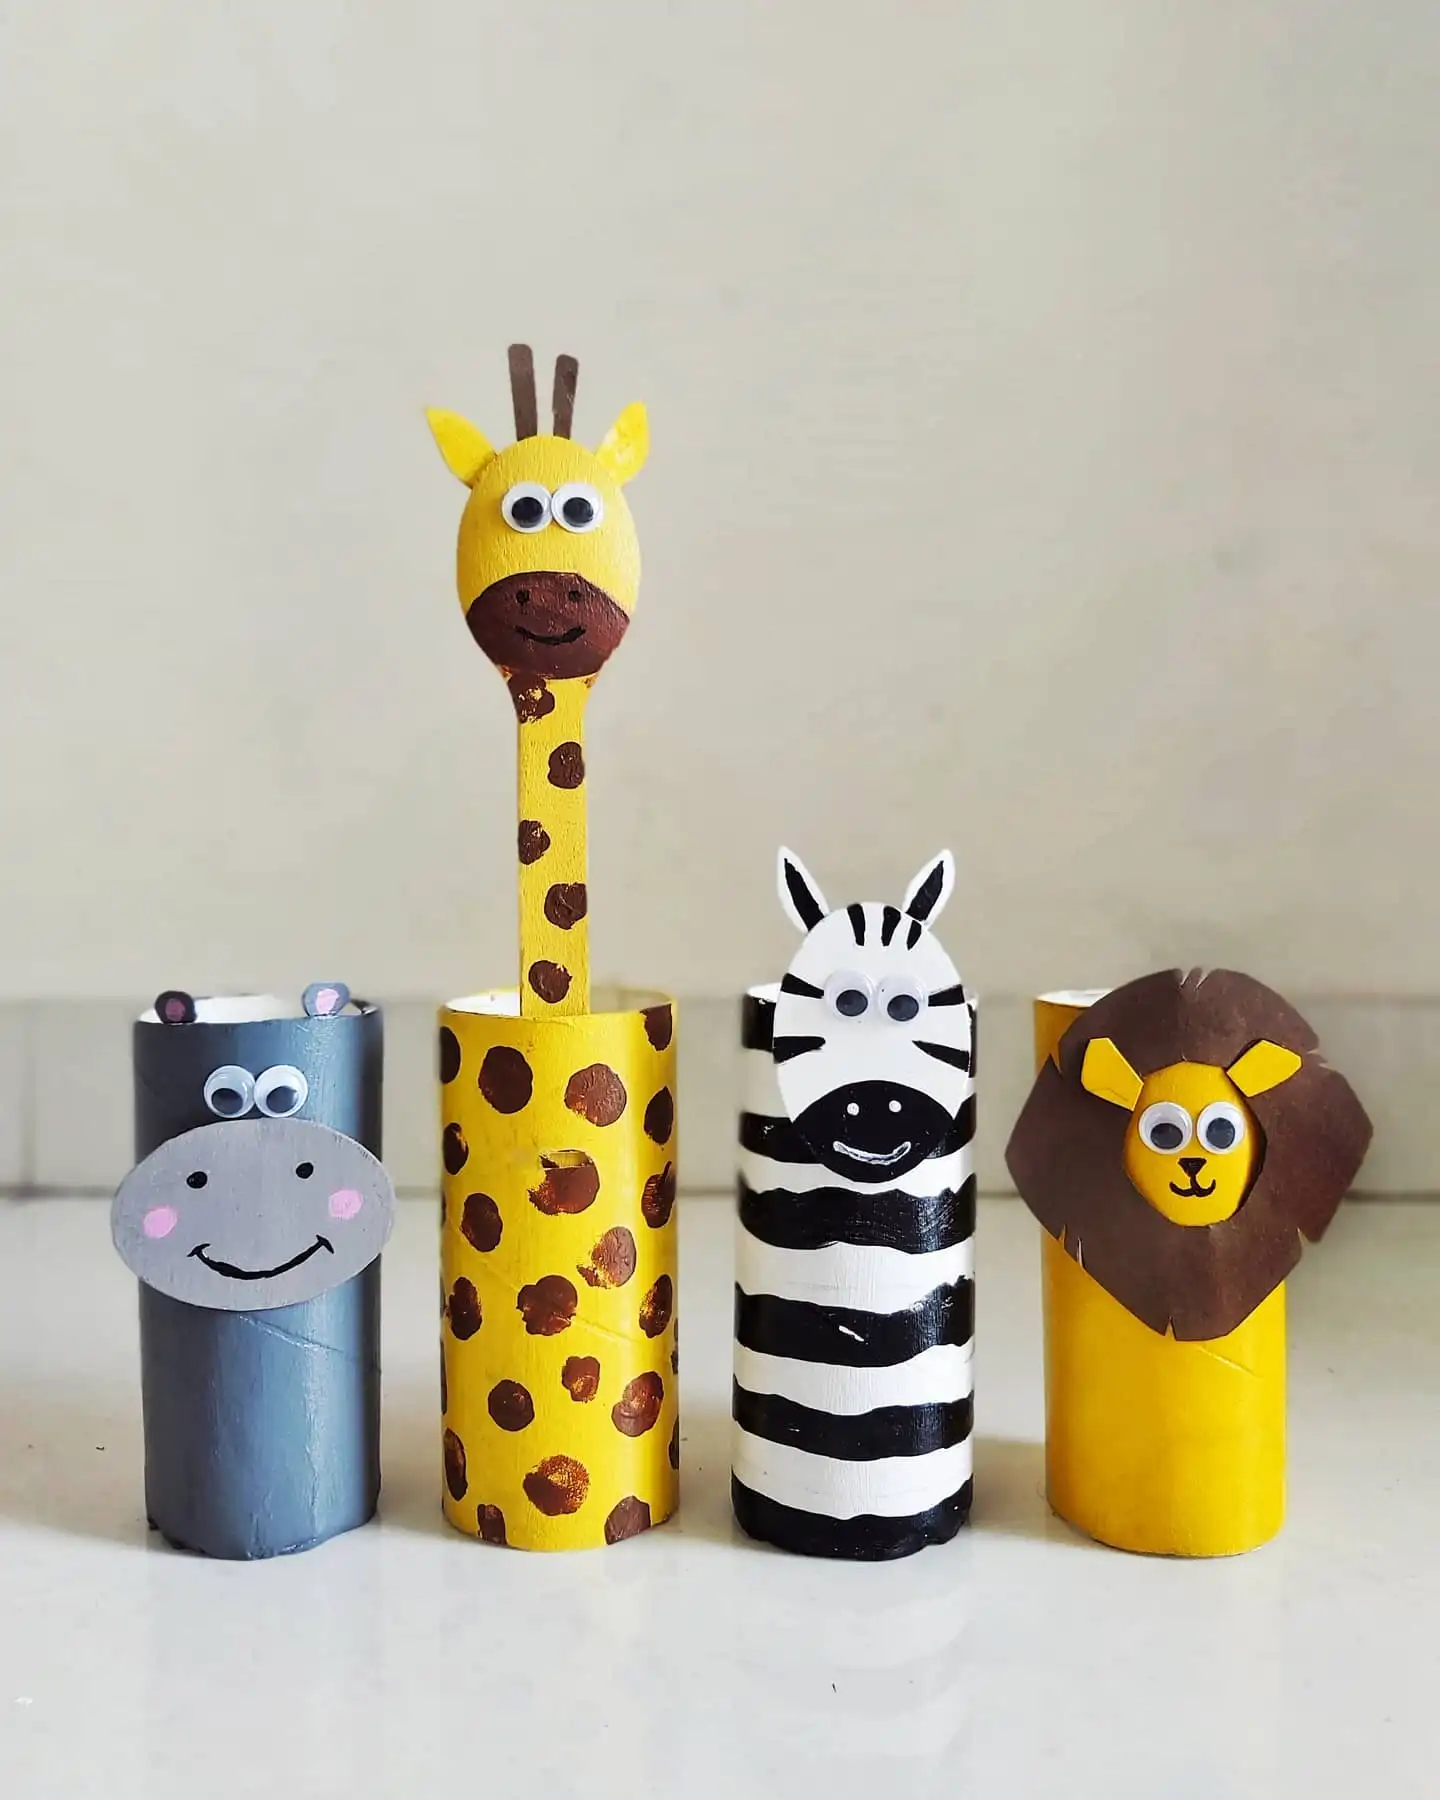
Four safari animals stand in a row: a gray hippo, a spotted giraffe, a striped zebra, and a yellow lion.
Paint in each animal’s coat covers the tubes, and card faces with googly eyes sit near the top. The giraffe steals the show, with a painted wooden spoon poking up as a long neck and head.
Why it works:
- Painting the coat first teaches kids each animal’s real pattern.
- Googly eyes on every face tie the four pieces into one matching set.
- A wooden spoon adds height without any extra cutting or building.
Skill level: Preschoolers can manage this with help on the paper faces. Fingertip dabs make great giraffe spots, so let little ones press brown paint on by hand.