How to Run a Craft Group for Adults with Disabilities


You want to start a craft group where every person feels welcome. Maybe you work at a day program, or a parent asked if your library could host something. This guide shows you how to run a craft group for adults with disabilities, from the first chat with each member to the notes you write after everyone heads home.
Most new leaders worry about picking the right craft. That is the small part. A group works when you know your people, set up before they walk in, and hold back when you want to help too much.
You will get a sample session schedule, projects that bend to fit different abilities, and cheap swaps for pricey adaptive tools. Plan on about 2 to 3 hours of prep before your first session. After that, setup takes around 30 minutes a week.
Get to Know Each Member’s Needs and Interests

A good craft plan starts with people, not supplies. Sit down with each member for 15 to 20 minutes before the group begins. Invite a family member or support worker if the member wants one there, but talk to the member first, even if someone else answers faster.
Ask about:
- Crafts they have tried, loved, or hated
- How they hold a pen, brush, or cup
- Sounds, smells, or textures that bother them
- How they like help: words, pictures, or being shown
- Allergies, seizure plans, or other medical needs
Write the answers on one page per person. You will check it every week.
Choose a Space Everyone Can Get Into and Move Around

A room can look great online and still shut out a member at the front door. Check for a step-free entrance and doorways at least 32 inches wide. Leave 36 inches between tables so a wheelchair can pass without bumping chairs.
At least one table should raise and lower, like the kind with a hand crank, or sit 28 to 34 inches high with knee room underneath. Ask for an accessible restroom close by and a quiet corner with a soft chair for anyone who needs a break.
Map Out How to Run a Craft Group for Adults with Disabilities, Session by Session

Six to eight members is a good size for a first group. Plan on at least one helper for every three or four members, and more if someone needs one-on-one support. Sessions of 60 to 90 minutes work for most groups.
Meet on the same day, at the same time, in the same order. Routine lowers worry for many members. Pin picture cards on a cork board: a paintbrush for making, a teacup for break, a broom for clean-up, and a star for show-and-tell. A sand timer helps people see time passing.
Here is a sample 90-minute session you can copy and adjust.
Pick Projects With More Than One Way to Finish

What counts as done? If only one result is right, somebody will feel they failed. Choose projects where any finish looks good.
Subscribe to DIY Craft Bloom
Get updates on the latest posts and more from DIY Craft Bloom straight to your inbox.
Small terracotta pots are a great start. One member dots white polka dots on hot pink, another paints soft pastel stripes, and another swirls blue and yellow all the way around. Pop a succulent in each and they all look like gifts.
These projects give every member a way to succeed.
Gather Adaptive Tools and Budget-Friendly Supplies

If a member has a weak grip, a tremor, or sore joints, the right tool decides whether they make art or watch others do it. Brushes with thick foam handles take less squeezing. Spring-loaded scissors pop open on their own after each cut.
Washable paint in red, yellow, and blue squeeze bottles is fast to portion and comes out of clothes. Bright felt sheets don’t tear and can be pre-cut at home. Look for non-toxic labels on everything, since some members may put fingers or brushes near their mouths.
Use this list to match tools to needs, with a cheap swap for each one.
Set Up Every Workstation Before People Arrive

Waiting is where a group starts to drift. Arrive 30 minutes early and put a rimmed tray at every seat. (No trays? A baking sheet works.) Each tray gets:
- A paper plate with 5 or 6 small dabs of paint
- Pre-cut felt flowers and leaves
- 1 glue stick
- A folded canvas apron
The raised edge keeps felt and glue sticks from rolling onto the floor. Members can start the moment they sit down.
Demonstrate Each Step With a Finished Sample

People follow what they can see far better than what they hear. Make your sample at home the week before, like a small yellow sunflower on a pale blue canvas. Hold it up high so the whole room knows where the project is headed.
Show one step at a time and name it in 5 to 7 words, like “Paint the whole sky blue.” Let everyone try it while you walk the room. When most people finish, show the next step.
Stacking two steps in one demo loses members who need more time, and they often stop trying.
Offer Help Without Taking Over the Project
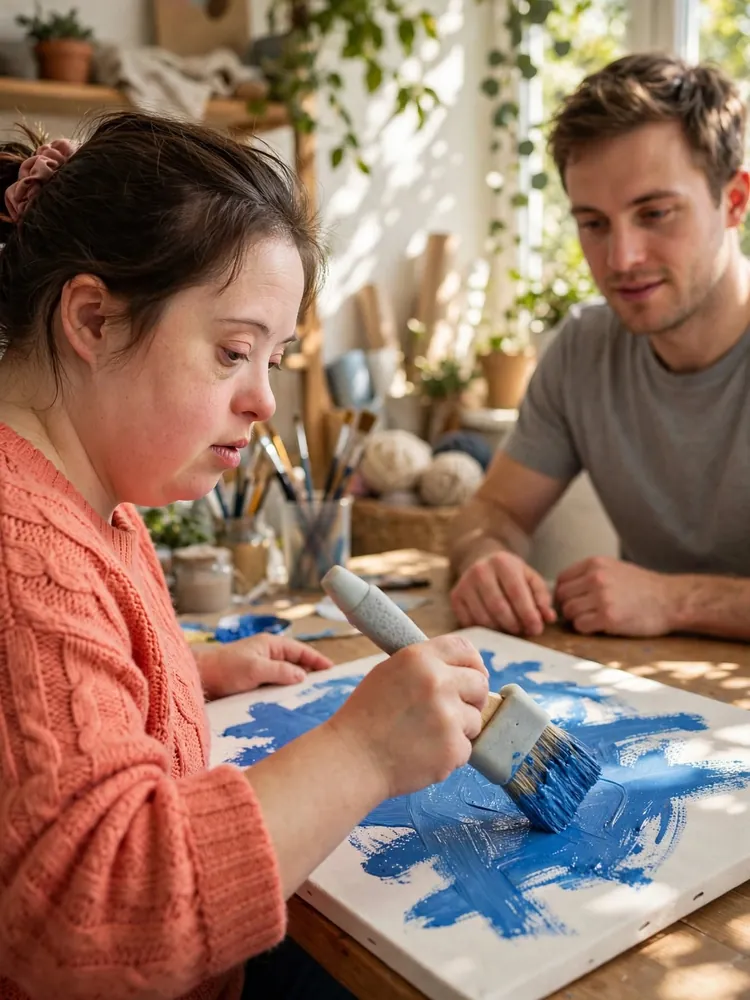
If you catch yourself reaching for someone’s brush, pause. The project belongs to the member, even when the blue paint goes past the edges. Sit beside them and use the least help that works, in this order:
- Wait 10 seconds and watch
- Give a short spoken hint
- Point or gesture
- Show the move on your own sample
- Offer hand-under-hand help, only after a yes
Let members pick the colors, decide where things go, and say when the piece is finished.
Subscribe to DIY Craft Bloom
Get updates on the latest posts and more from DIY Craft Bloom straight to your inbox.
Close Each Session With a Show-and-Tell

Fifteen minutes at the end can be the best part of the week. String twine along a wall about 4 feet high, so seated members can see too, and clip finished pieces up with wooden clothespins. Wet paintings can dry there while people look.
Let each member share in the way that works for them. Some will talk about their colors. Some will point and smile. Some want a helper to say a line for them, and some would rather skip. All of those count.
Clap for every person, every time, so the session ends on a high note.
Review What Worked and Adjust Next Week

Which project did people reach for first, and which one sat untouched? Spend 10 minutes after clean-up writing it down while it is fresh. Add to the same one-page notes you started for each member, and keep a pad of sticky notes nearby for quick ideas.
Write what each person enjoyed, where they needed help, and anything that upset them, like a noisy room or sticky glue. Ask members too. A thumbs-up and thumbs-down card works for people who don’t speak. Change one thing at a time so you can tell what helped.
Your First Session Will Be a Little Messy, and That’s Okay
Paint will land on a sleeve. Someone will leave early. One project will flop.
None of that means the group failed. If members ask when the next session is, you did it right.
Your next step: book your room and schedule your member chats this week. Save this pin so the session plan and tool swaps are close by when you start planning.
Frequently Asked Questions
Do I need special training to learn how to run a craft group for adults with disabilities?
You don’t need a license in most places, but some training helps a lot. Look for free or low-cost first aid, seizure response, and person-centered support classes through local disability groups. Check with your venue or agency in case they have their own rules.
How much does it cost to run a craft group?
Many groups spend about $2 to $5 per person each session using dollar-store supplies. Ask craft stores and garden centers to donate felt, paint, or clay pots.
What if a member doesn’t want to craft that day?
Let them sit in, watch, or hand out supplies. Being in the room still counts, and many people join in once they feel settled.
Do I need insurance for a craft group?
Ask your venue first. Many community centers and churches ask groups to carry liability coverage, and some include outside groups under their own policy.
Where do I find members for a new group?
Contact day programs, group homes, independent living centers, and local disability nonprofits. Libraries and community centers will often post your flyer for free.