13 Craft Activities for Adult Day Programs That Work for Every Pair of Hands

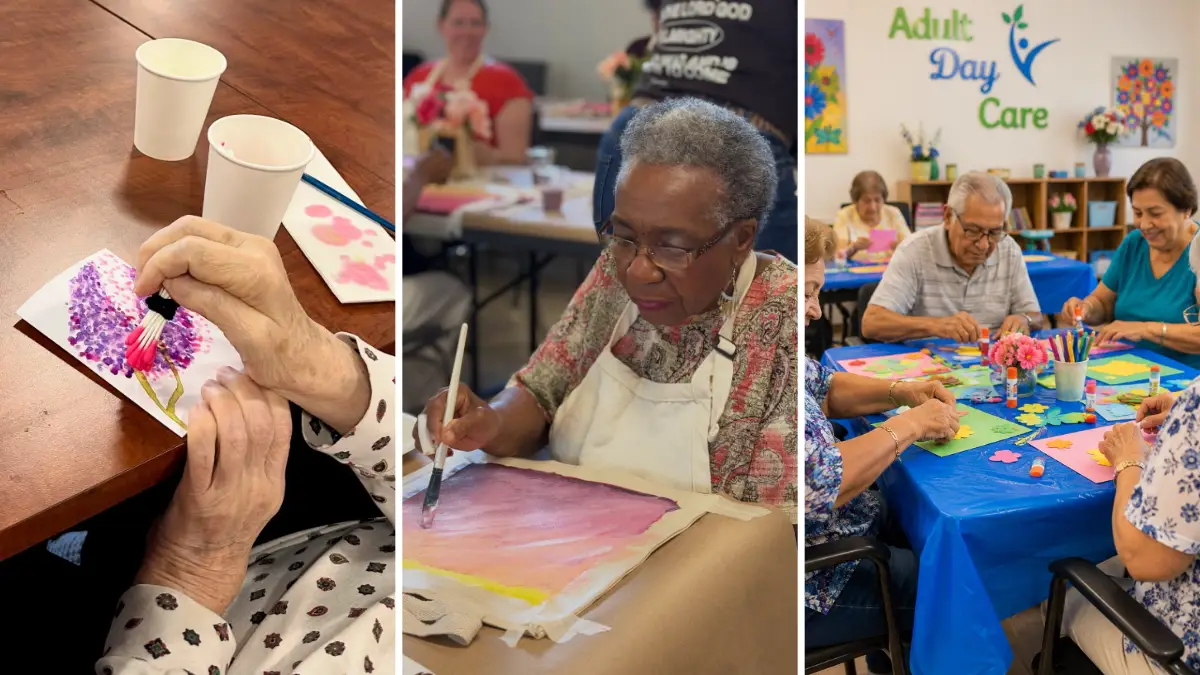
Ask a room of adults to “do a craft” and you’ll probably see a few eye rolls. Hand someone a cup of tissue paper, a puzzle piece pumpkin, or a paper star as wide as their shoulders, and the eye rolls turn into “Can I take this home?”
That moment is what every activity director is chasing. You need projects that feel grown up and never like a kids’ table. They have to work for stiff fingers, tired eyes, and memory loss, often at the same table on the same morning. And they can’t eat your whole supply budget.
The craft activities for adult day programs below come from real centers and craft studios. Each one shows the actual project, what makes it work, and how to adapt it for your group. You’ll find no-skill projects for busy days, calm detail work for focused crafters, and seasonal pieces people love to give to family.
Most use supplies you already keep in the closet, like paper, glue, and paint. A few need one special item. None of them need anyone to be “artsy.”
First, a little setup that makes every project on this list go smoother.
How to Set Up a Craft Session Everyone Can Join
Crafts That Feel Grown-Up
Projects that never feel like the kids’ table, built for stiff fingers, tired eyes, and memory loss, often all at the same table.
- 13 projects from real centers
- Mostly closet supplies
- No “artsy” skills needed
- 01 · Setup
Prep the Day Before
Cut shapes, sort colors, and pre-paint pieces so people start making right away instead of waiting. Grout, foam cutting, and anything sharp stay staff-only.
- 02 · Access
Go Big, Bold & Easy to Grip
Large paper, chunky puzzle pieces, and a cotton-swab bundle brush are kinder to stiff fingers and tired eyes. Dabbing and scrunching are forgiving: there’s no wrong place for a dot.
- 03 · Inclusion
Give Every Hand a Job
Someone who can’t glue can sort tiles, hold strips, or press the stapler with a partner. Mosaics suit focused crafters, while tissue scrunch art works for anyone, including people living with dementia.
- 04 · Purpose
Make It Worth Taking Home
Paper stars, woven corn, and puzzle-piece pumpkins become gifts for family at pickup time. Praise the choices, never the result.
Start this week: pair tissue scrunch art with puzzle-piece pumpkins. They’re two easy wins for a mixed table, using supplies already in the closet.
A good craft session starts before anyone sits down. The setup decides whether people feel capable or frustrated in the first few minutes. A little prep the day before saves a lot of stress at the table.
- Prep ahead. Cut shapes, sort colors, and pre-paint pieces so people start making things right away instead of waiting.
- Go big and bold. Larger paper, chunky pieces, and thick brushes are easier to see and easier to grip.
- Offer more than one job. Someone who can’t glue can still sort colors, choose paper, or hold strips for a partner.
- Cover the table. A plastic or paper cover makes cleanup fast and lets people relax about spills.
- Praise the choices, not the result. Talk about colors and ideas. There is no wrong way to finish.
1. Paper Flower Collage Cards at a Shared Table

Bright paper, a glue stick, and a pile of precut flowers is all it takes to get a whole table talking.
In this photo, four people work side by side on sheets of pink, green, and blue construction paper. Little flower and leaf shapes are spread across the middle so everyone can reach them. A plastic tablecloth covers the table, and a cup of markers sits next to a small vase of real pink flowers.
Here’s why it works so well for a group:
- Precut shapes let people with shaky hands or low vision skip the scissors and go straight to arranging.
- Glue sticks are easy to hold and far less messy than liquid glue.
- The real flowers give people something to copy and something to chat about.
- Each person picks their own background color. That small choice matters more than you’d think.
Finished pages make sweet cards for family visits, or you can tape them up as a spring wall display.
2. Cotton Swab Blossom Cards
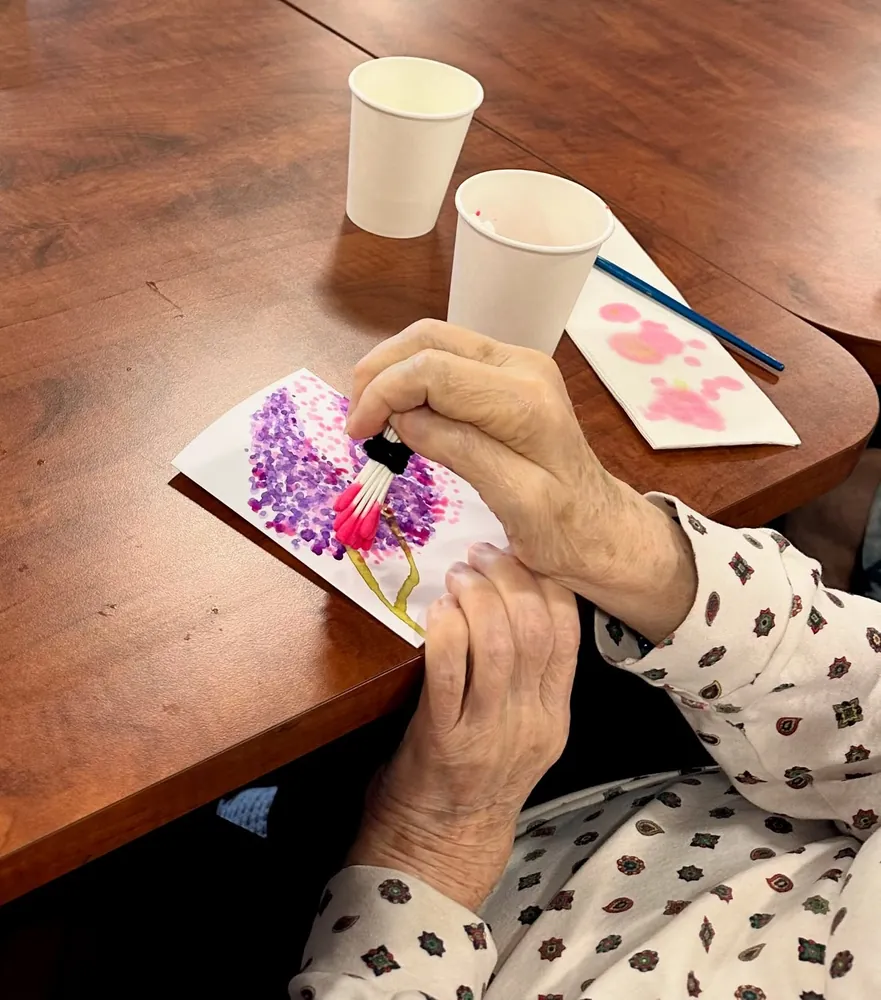
Look closely at the “brush” in this photo. It’s a bundle of cotton swabs held together with a band, and every tap leaves a whole cluster of dots at once.
That one trick turns a plain white card into a tree full of blossoms. A simple branch is painted first. Then purple and pink dots fill in the top until it looks like a lilac in full bloom. The bundle is thick and round, so it’s much easier to hold than a skinny paintbrush. That makes a real difference for anyone with arthritis or a weak grip.
Dabbing is also very forgiving. There’s no wrong place for a dot, and the tree only looks fuller with every tap. Paper cups hold the paint and rinse water, so cleanup takes a few minutes.
Make a few at once. People love having a little stack of handmade cards ready for birthdays and thank you notes.
Gather a small handful of cotton swabs and wrap a rubber band or tape near the top so the tips stay together.
Use a regular brush and brown or olive paint to make a simple Y shape. Staff can do this part ahead of time if needed.
Dip the bundle in purple, tap above the branch, then add pink on top so the colors layer and look full.
3. Lemon Mosaic Trivets with Pre-Sorted Tiles

Mosaics feel like real art, and they reward slow, steady work.
The round piece here is made of small square tiles in cream, two shades of green, and a warm yellow. A ring of brown tiles frames the edge, and a few shimmery tiles catch the light. Look a little closer and the yellow shapes read as lemons tucked between leaves.
For a day program, keep the thinking part off the table. Sort tiles by color into small bowls before anyone sits down. Sketch the lemon and leaf shapes on the base in pencil, so people only have to fill in shapes instead of planning a design.
Setting tiles is calm, repeat-the-motion work, and it suits people who like to focus. Someone who would rather chat can sort colors for the whole table. That job still counts.
Leave grouting to staff on a separate day. It’s messy and takes more hand strength than most people want to spend.
Buy tiles that are already cut to size, and use a sturdy round base with thick craft glue.
Offer larger tiles or foam tiles for anyone with low vision or shaky hands.
Subscribe to DIY Craft Bloom
Get updates on the latest posts and more from DIY Craft Bloom straight to your inbox.
Tile nippers and cutting at the table. Glass chips fly and edges are sharp.
Mixing all the colors in one big bowl. Searching for the right tile gets tiring fast.
4. Tissue Paper Scrunch Art on Coloring Pages

Some crafts need a plan. This one only needs fingers.
Here, a woman rolls small squares of yellow tissue paper into little balls and presses them onto a flower drawn on a coloring page. A bottle of white school glue sits close by. Yellow and blue tissue squares wait in their own cups, so nothing drifts across the table.
Setting it up takes four steps:
- Tear or cut tissue paper into squares before the session.
- Put each color in its own cup.
- Squeeze a few dots of glue inside one petal at a time.
- Scrunch, press, and repeat.
The rolling motion is good exercise for the fingers, and the outline does all the design work. It works well for people living with dementia because every step is the same as the last, and the page fills up in a way anyone can see.
Pick pages with big, bold shapes. Tiny details just disappear under the tissue.
5. Giant 3D Paper Snowflake Stars

The smile in this photo says everything. She’s holding up a 3D paper star almost as wide as her shoulders.
It’s made from strips of paper, some plain white and some printed with an autumn leaf pattern. The strips curl and loop into points, and the sections are joined into one big star. The stapler sitting on the table tells you how it’s held together. No glue, and no waiting for anything to dry.
Staff can cut the strips ahead of time with a paper cutter. Then pair people up. One person holds the strips in place while the other staples. That teamwork is half the fun, and it gives people with less hand strength an important role.
Pick a stapler that squeezes easily, or lay it flat on the table so people can press down with the palm of the hand instead of pinching.
Change the paper with the season. Fall prints now, plain white or silver later. Hang a few finished stars from the ceiling and the whole room feels different.
6. Fabric-Wrapped Jar Vases with Fresh Flowers
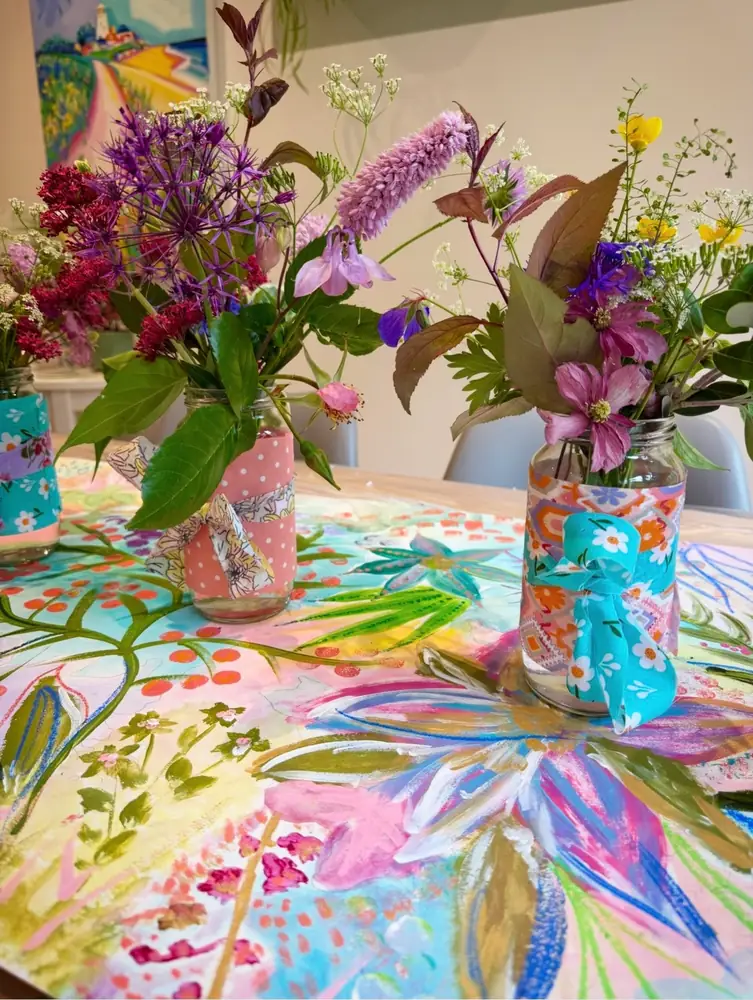
Two crafts in one session: dress up a jar, then fill it with flowers.
The jars in this photo are wrapped in patterned fabric. One is pink with white polka dots, and another is a bright floral print finished with a turquoise fabric bow. Garden flowers in purple, pink, and deep red spill out the top.
Split it into two easy jobs:
- The wrap. A strip of fabric around the middle of the jar, held in place with craft glue or double-sided tape, then tied with a bow.
- The flowers. Trim the stems and tuck them in one at a time. There are no rules about where they go.
Flower arranging is gentle and full of senses. People can touch the petals, smell the stems, and talk about the gardens they used to keep. Grocery store bunches work fine. Pull them apart so each person gets a few stems of every kind.
Swap in clean plastic jars for anyone who might drop glass.
7. Painted Decorative Bowls with Bold Patterns

Every bowl in this group photo looks different, and that’s exactly the point.
The bowls have wavy, scalloped edges and are painted in bright colors with dots, leaf shapes, and loose swirls. Some fade like a sunset in pink and orange. Others are packed with spots and stripes. A few have a different color painted on the rim, which makes the whole bowl look finished.
Patterns that work for any hand:
- Dots made with the back end of a paintbrush or a pencil eraser
- Simple leaves, which are just two curved lines
- One solid base color with a contrasting rim
Plan it over two sessions. Paint the base color first and let it dry. Add the patterns the next time you meet, so colors stay bright instead of turning muddy.
The finished bowls are useful, too. People keep them by the bed for glasses, rings, or a few wrapped candies.
8. Simple Origami with Bold Patterned Paper

Swirls, checkerboards, rainbow prints, and a few calm solid colors cover this table before anyone makes a single fold.
That pile of paper does a lot of work. Choosing a favorite sheet gets people talking right away. A few hands are already folding, and a finished piece sits at the far end of the table so everyone can see where they’re headed.
Origami can feel tricky, so stick with models that need only a handful of folds. Hold up a big sheet and show each fold slowly to the whole table. Then walk around and help people one at a time.
Folding is great practice for the hands. It also asks for focus, so it suits people who enjoy a quiet, calm task.
Skip the tiny squares. Larger paper is easier to line up and much kinder to stiff fingers.
| Easy fold | Why it works for groups |
|---|---|
| Paper cup | Few folds, and it ends up as something people can hold. |
| Tulip | Flower and stem are two small pieces, so it’s easy to pause. |
| Folded heart | Quick to finish and easy to glue onto a card. |
9. Woven Paper Corn in a Mini Flower Pot

Paper weaving is an old school skill, and plenty of people will remember doing it in grade school.
In this cheerful fall project, the corn cob is a woven square of yellow paper with pink and patterned strips mixed in, trimmed into a cob shape. Two green paper husks hug the sides. The cob stands on a stick in a small clay pot filled with moss and tied with a gingham ribbon. A bit of dried grass pokes out the top like corn silk.
To keep it simple for a group:
Subscribe to DIY Craft Bloom
Get updates on the latest posts and more from DIY Craft Bloom straight to your inbox.
- Cut slits into the yellow paper base ahead of time.
- Let people weave colored strips over and under.
- Trim the woven square into a cob shape and glue on the husks.
The over, under rhythm is soothing, and it’s easy to pick back up after a break.
Because it stands on its own, it looks great on a windowsill. It also makes a sweet harvest gift for a family member at pickup time.
10. Pop-Up Cup Flower Pot Collage

Half a cup is the secret to this one.
A foam cup is cut in half and glued flat against white paper, so the pot sticks out from the page. It’s painted in soft pastel stripes and dusted with silver glitter. Green paper strips rise from the pot as stems, topped with circles of orange, blue, yellow, and pink paper. Each circle is folded down the middle, so the petals lift up too. Green marker grass runs along the bottom.
What makes it easy for a group:
- Circles can be traced around a cup or punched with a large craft punch.
- The fold in each circle gives a 3D look with zero skill needed.
- Glitter glue is much cleaner than loose glitter on a shared table.
Let staff do the cutting. Foam slices easily, but a craft knife has no place in the middle of a group table.
A plain foam cup, a few paper scraps, and a blank white sheet.
A sparkly pot that pops off the page, with four bright flowers whose petals lift up.
11. Pressed Flower Glass Jars

Tweezers, thin brushes, and a long wooden tray full of pressed flowers set the scene here.
Each person holds a clear glass and places flat, dried flowers onto it one by one. A small brush smooths glue over each bloom to seal it down. Little white tubs hold the glue, and scissors sit nearby for trimming stems. The flowers come in blue, pink, purple, white, and green, so there’s plenty to choose from.
Pressed flowers are fragile, so this craft rewards patience. It’s a good pick for the quieter, detail-loving people in your group.
For older hands, let people use their fingers instead of tweezers, and choose bigger, flatter blooms. A foam brush is also easier to hold than a thin paintbrush.
Pop a battery tea light inside the finished jar. Real flames and dried petals don’t belong together.
Everything is laid out flat, so people can browse and pick favorites without digging through bags.
A thin layer below each flower and another on top keeps the edges from lifting.
Shared glue tubs and scissors mean fewer supplies to buy and more reasons to pass things and chat.
12. Puzzle Piece Pumpkin Art

Got an old jigsaw puzzle with missing pieces? Don’t toss it.
In this photo, puzzle pieces that appear painted orange are layered into a round pumpkin on cream cardstock. A small twig makes the stem, and a twine bow sits right at the top. Her name is written in the corner, a small touch that makes it feel like real art for the wall.
How to run it:
- Paint the pieces a day early so they’re dry and ready to go.
- Draw a circle on the card as a simple guide.
- Glue one flat layer first, then stack a few more pieces on top for depth.
Puzzle pieces are chunky and easy to pick up, which beats tiny beads or sequins every time.
Paint the pieces red and green instead, and the same idea becomes a holiday wreath in December.
13. Watercolor Sunset Washes with Taped Edges

No drawing skills needed. That’s what makes a sunset wash such a good fit for a mixed group.
She’s sweeping a wide, flat brush across paper taped down to a board. The color starts deep pink at the top and fades lighter as it moves down, with a strip of yellow near the bottom like the sun sinking low. Brown paper covers the table, and she’s wearing an apron, so nobody has to worry about drips.
The tape is the quiet hero here. It holds the paper flat and leaves a clean white border. Peeling it off at the end is everyone’s favorite part, because the painting suddenly looks framed.
Wet paper lets the colors blend on their own, so even shaky strokes come out soft and pretty.
Once it’s dry, people can add a simple dark line for hills or a single tree. Or leave it just as it is.
Pick One and Start This Week
The best craft session isn’t the fanciest one. It’s the one where someone who barely spoke all morning holds up a paper star and grins.
Start with one or two projects that match your group’s hands and energy. Tissue paper art and puzzle piece pumpkins are easy wins for a mixed table. Mosaics and pressed flowers suit the people who love slow, careful work. Keep the seasonal ones, like the woven corn and paper stars, ready for holidays and family days.
Save this list for the next time you need fresh craft activities for adult day programs.