20 Cute Heart Crafts for Kids That Make Sweet Gifts All Year


Hand a kid a pencil, and sooner or later a heart shows up. It lands in the corner of their homework, in the fog on the car window, on the back of your grocery list. Kids already love drawing this shape, which is exactly why heart crafts are so easy to get them excited about.
The hard part is finding something new. The folded red paper heart gets old fast, especially when you need a class set of Valentines in February and something sweet for Mom again in May.
This list of heart crafts for kids goes well past construction paper. You’ll find flamingos with bow tie pasta feathers, hearts made by blowing paint through a straw, seed paper hearts you can plant, thumbprint clay ornaments and beaded hearts that stand up on a desk. Some are simple enough for a two-year-old with a sheet of foam stickers. Others, like push pin string art, will keep older kids busy all afternoon.
Every idea comes with a photo, simple how-to notes and a tip to help it go smoothly at your kitchen table.
How to Set Up a Heart Craft Session That Doesn’t End in Tears
A good craft session is mostly decided before anyone opens the glue. A few minutes of setup means fewer meltdowns, less cleanup, and kids doing more of the work on their own.
- Match the craft to the hands. Toddlers do best with sticky foam, tissue paper balls and fingerprints. Scissors, lacing and pony beads suit preschoolers and up. Push pins and wire are for school-age kids with a grown-up close by.
- Prep the fiddly parts ahead. Cut heart templates, poke lacing holes and paint the pasta the night before, so kids can jump straight to the fun part.
- Pick the right glue. Use a glue stick for paper, white school glue for pasta and nature bits, and thick tacky glue for pom-poms.
- Plan for the mess and the drying. An old tablecloth saves the table, and a clear shelf for wet projects keeps them from getting smudged.
- Keep small parts on your side. Googly eyes, beads and glass gems are choking hazards for kids under three.
1. “You Tickle Me Pink” Pasta Flamingo Valentine
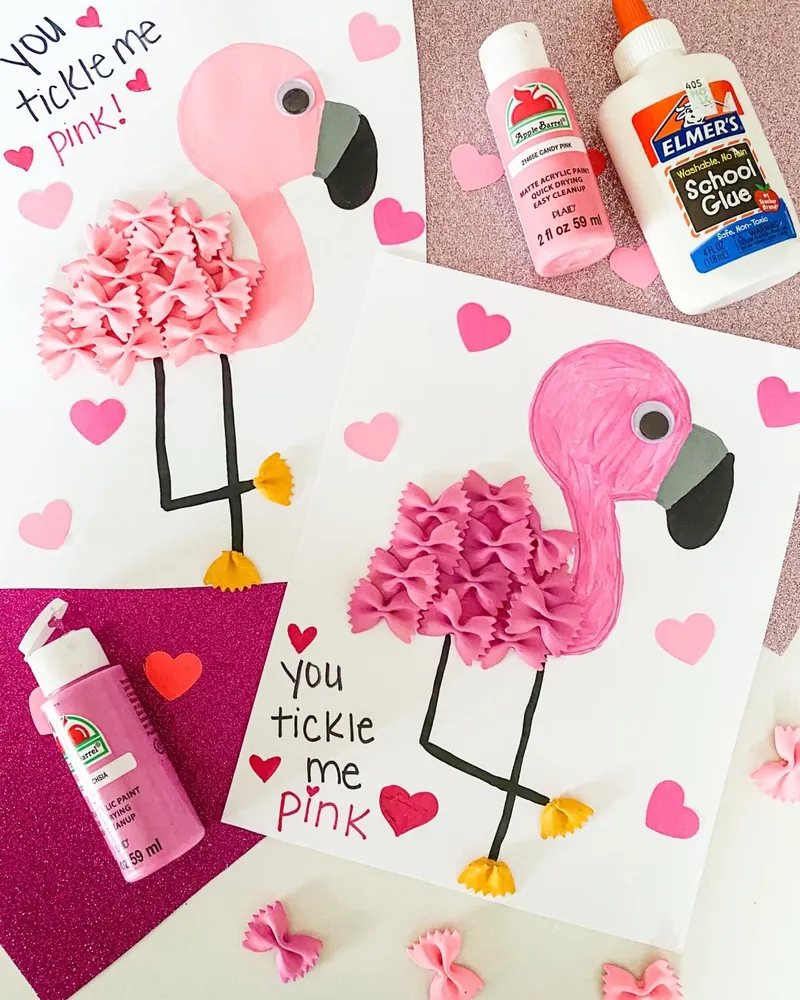
Bow tie pasta turns into ruffled flamingo feathers once it gets a coat of pink paint. Kids laugh at the pun, and the little paper hearts scattered around the page turn it into a real Valentine.
- Paint a handful of bow tie pasta pink, plus two pieces yellow for the feet. Let them dry on wax paper.
- Draw a round body and a long curved neck on white cardstock, then paint or color it pink.
- Glue the pink pasta in overlapping rows across the body so it looks like a feathery wing.
- Add a googly eye, a gray and black beak, and two skinny black legs. Bend one leg so the bird stands like a real flamingo.
- Write “You tickle me pink” in a corner and stick on a few paper hearts.
Shortcut for the pasta: shake it in a zip bag with a squirt of paint. Every piece gets coated and little fingers stay clean.
2. Glitter-Outlined Collage Heart Grid From Painted Paper

Twelve hearts, twelve different papers, and one silver line of glitter glue around each to pull them together. No two hearts match, yet the sheet still looks planned because they sit in a neat grid, three across and four down.
Before anyone cuts, gather paper with lots going on:
- old paintings kids are done with
- stamped or stenciled scrap paper
- bubble wrap prints, dot prints or leaf prints
- pages covered in marker scribbles and patterns
Paint the background sheet with a loose wash of white, pale pink and soft blue so the bright hearts stand out. Save the glitter glue for last, once everything is dry.
It also makes a lovely class project. Each child makes one heart, and they all go on one big sheet together.
The hearts are full of pattern and the background is soft and pale, so the eye goes straight to the hearts.
Glitter glue traced around each heart hides wobbly scissor edges and makes every shape pop off the page.
Lining the hearts up in even rows turns a pile of scraps into something that looks framed and finished.
3. Googly-Eyed Foam Heart People for Toddlers
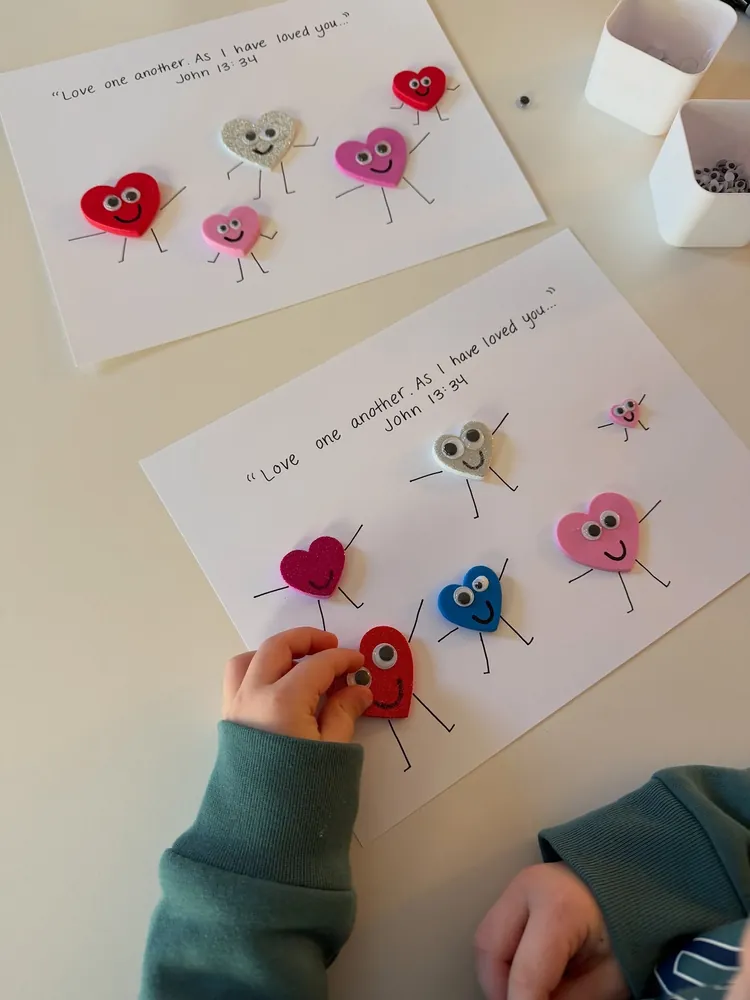
Sticky foam hearts and a pile of googly eyes. That is the whole supply list, and it holds a toddler’s attention longer than you would expect.
The kid part: peel the backs off the foam hearts and press them anywhere on the page. Then add eyes. In the photo, one heart got a single giant eye and another got two tiny ones, which is half the fun.
The grown-up part: draw a smile, stick arms and stick legs on each heart with a black marker. Bend a few arms up so the hearts look like they are waving or dancing.
The page in the photo has a Bible verse printed across the top. A family saying, a grandparent’s name or a child’s own words work just as well.
Tiny googly eyes are easy to pop into a mouth, so keep the container on your side of the table.
4. Rainbow Pom-Pom Heart Hanger With a Sleepy Smile
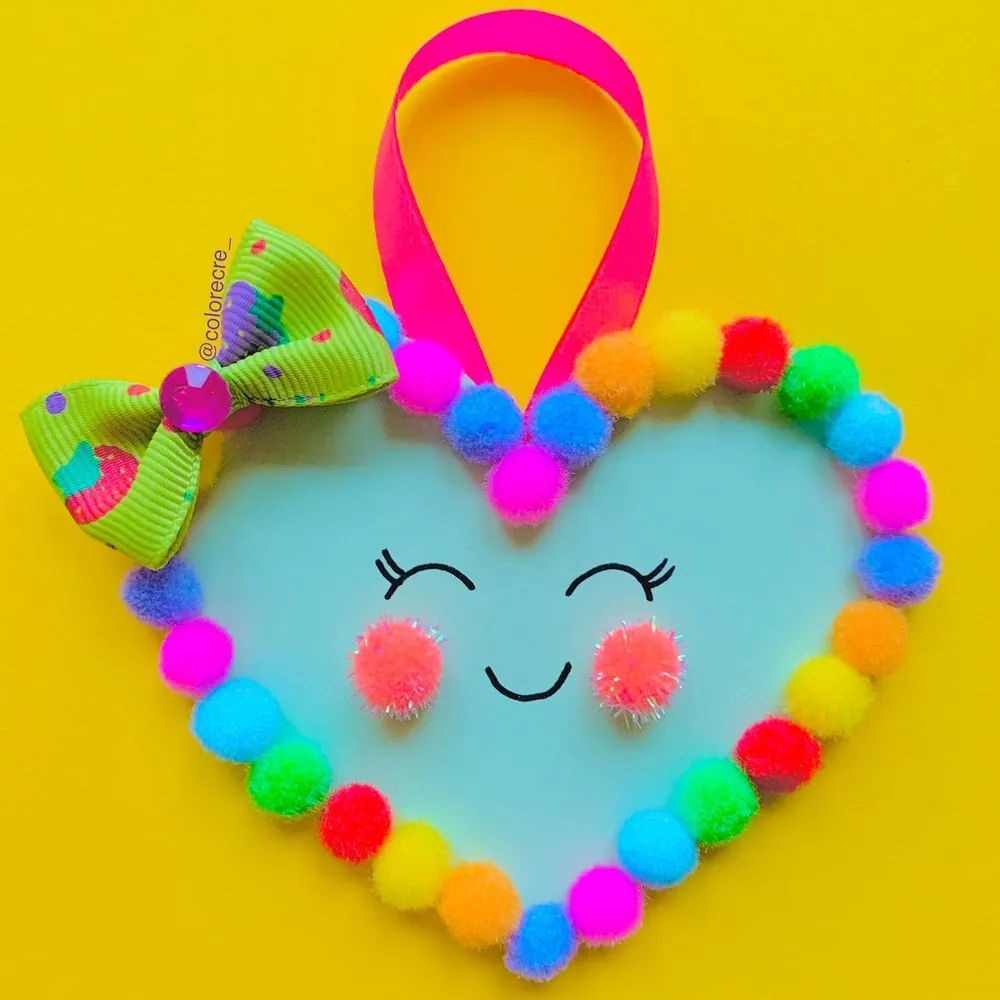
Mini pom-poms lined up around the edge turn a plain paper heart into something soft and squishy that kids want to hang on their bedroom door.
The border. Pom-poms in every color of the rainbow run all the way around the heart. Kids can follow a color order or mix them up however they like.
The face. Two curved lines with tiny lashes make closed, happy eyes. A sparkly pom-pom on each cheek gives it a rosy blush.
The extras. A bright ribbon loop glued to the back makes it a hanger, and a small hair bow tucked in one corner adds a sweet detail.
Pale aqua cardstock keeps the bright pom-poms from fighting with the background. Thick tacky glue works better than school glue here, because pom-poms slide around in runny glue.
5. Stick and Yarn Heart Mobile With Tiny Kawaii Faces
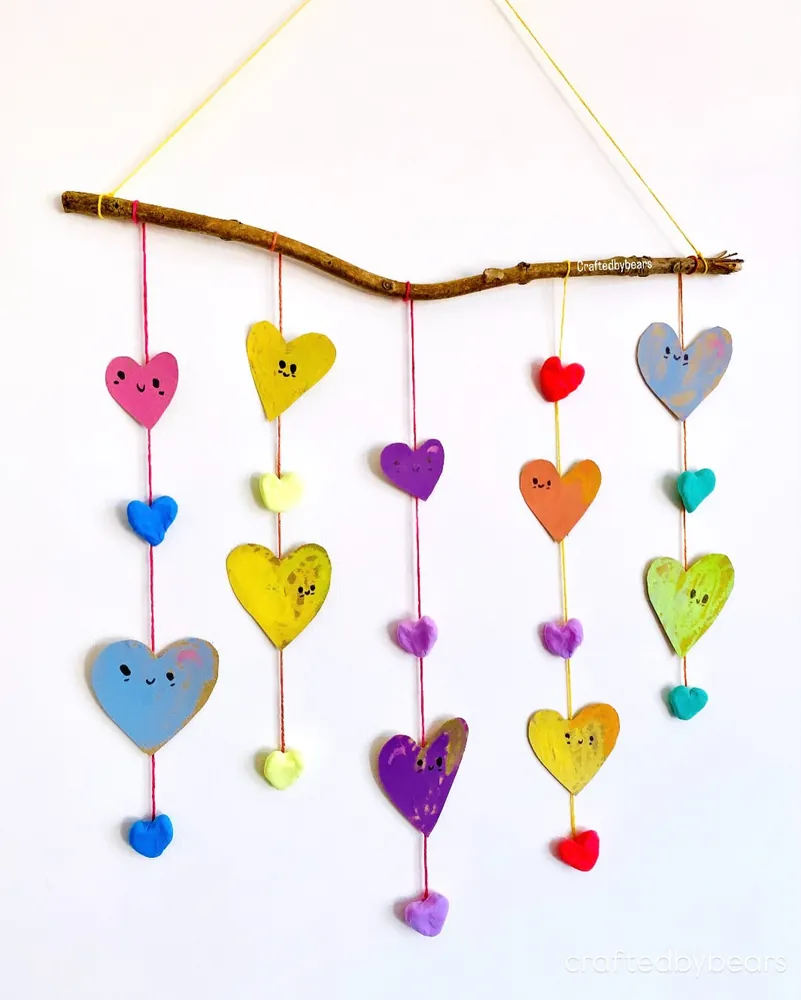
A bent stick from the backyard, some yarn and a stack of painted hearts make a wall hanging that looks like it came from a gift shop. Big cardboard hearts get sweet little faces, and small clay hearts sit between them like beads.
- Cut hearts from a cereal box and paint each one a different color. Streaky, sponged paint looks lovely here.
- Draw faces with a fine black marker: two dots, a tiny smile and rosy cheeks.
- Shape small hearts from modeling clay or air-dry clay and poke a hole through each one with a skewer while soft.
- Thread yarn through the clay hearts and tape the paper hearts to the back of the yarn.
- Tie five strands along the stick, then add one long loop of yarn across the top for hanging.
6. Straw-Blown Rainbow Heart Silhouettes
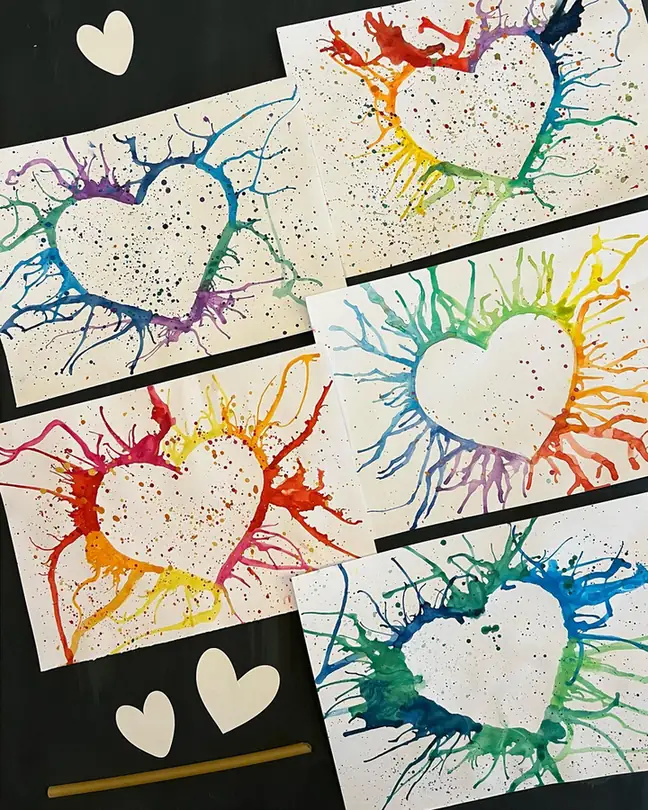
Kids blow paint through a straw, and a clean white heart appears in the middle of the mess.
Here is how the version in the photo comes together:
- Cut a heart from scrap paper and lay it on a white sheet with a loop of tape underneath.
- Drop runny paint or liquid watercolor all around the edge of the heart.
- Blow the drops outward with a straw so they spread into wiggly lines.
- Flick a paintbrush over the page for tiny speckles, then lift the paper heart away.
Every sheet turns out different, even with the same colors. Watery paint is the key. Thick paint just sits there no matter how hard kids blow.
Remind little ones to blow out, never sip in, and to take a break if they feel dizzy.
Subscribe to DIY Craft Bloom
Get updates on the latest posts and more from DIY Craft Bloom straight to your inbox.
| Color set | How it looks | Good for |
|---|---|---|
| Full rainbow | Bright and cheerful | Valentine’s cards |
| Reds, oranges, yellows | Warm, like fireworks | Valentine’s Day |
| Blues and purples | Cool and calm | Winter displays |
| Greens and blues | Fresh and leafy | Spring or Earth Day |
7. Thumbprint Heart Clay Ornaments to Keep for Years
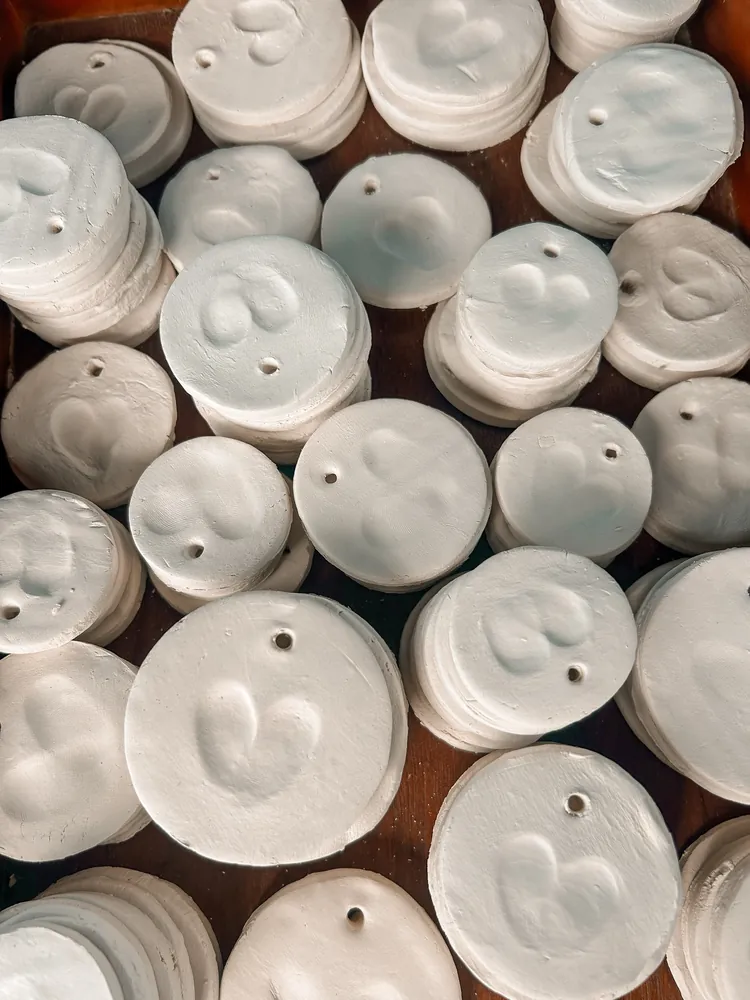
Two little thumbs pressed into soft clay at an angle leave a heart-shaped dent. Once the clay dries, that tiny print stays put for good, which is why these end up on grandparents’ trees year after year.
Roll out white air-dry clay or salt dough, cut circles with a cookie cutter or the rim of a cup, and help your child press both thumbs in a V shape. Poke a hanging hole near the top with a drinking straw before the clay firms up.
The photo shows a whole tray of them, all plain white. That simple look lets the print be the star. Once they are dry, write the child’s name and the year on the back with a fine marker.
Make a big batch while the clay is out. Gifts for every grandparent, aunt and teacher get crossed off in one afternoon.
8. Bendy Wax Yarn Heart Cards With No Glue at All
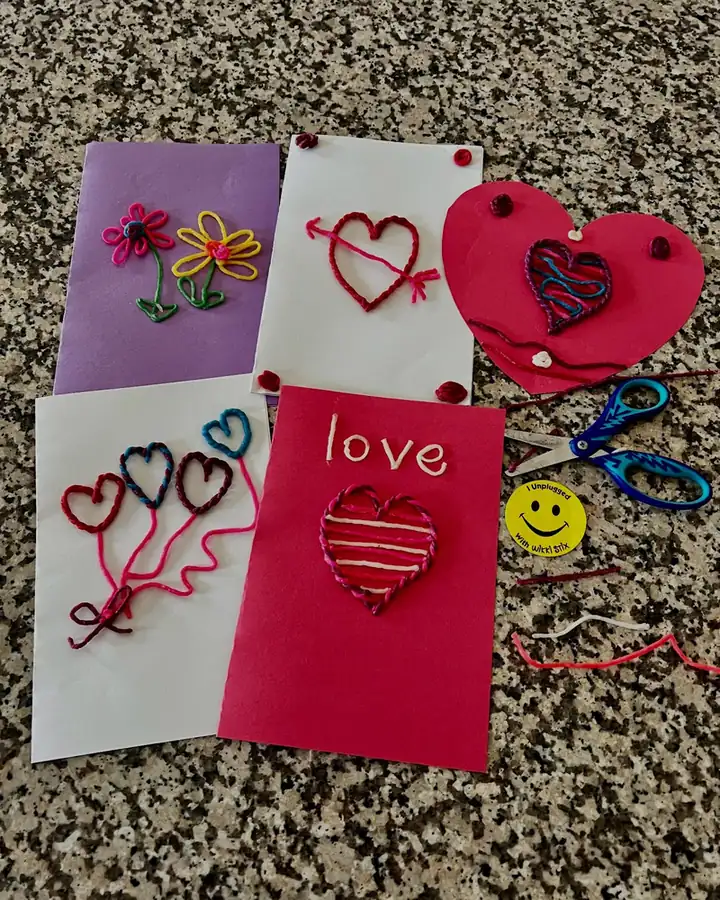
No glue, no drying time, no sticky fingers.
Wax-coated yarn sticks bend like pipe cleaners and stay put when pressed onto paper. In the photo, kids twisted two colors together for a candy cane look, bent them into hearts and pressed them onto folded construction paper cards.
Card ideas from this set:
- a heart with an arrow shot through it
- a bunch of heart balloons tied with a little bow
- a striped heart under the word “love”
- flowers with twisted green stems for a spring version
The sticks peel off and press back on, so kids can redo a wobbly heart as many times as they need.
Press each piece down firmly with a flat hand.
Use construction paper or cardstock so the card stays flat.
Leaving cards in a hot car or a sunny window. The wax softens.
Stacking cards face to face. Pieces can pull off onto the other card.
9. Pony Bead Heart Stands That Say “I Love Mom”
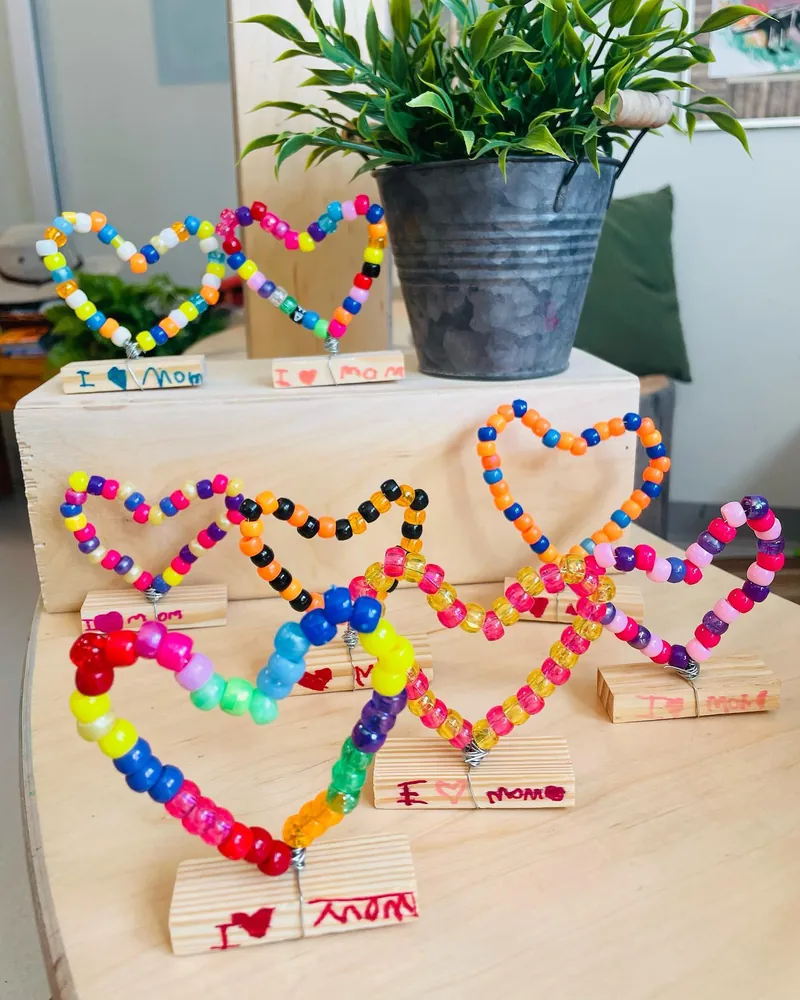
Pony beads on wire, bent into a heart and pushed into a little wood block. It stands on a desk or windowsill all by itself, and the handwritten “I ♥ Mom” on the base is the part moms keep forever.
- Cut a length of sturdy craft wire and fold a small loop at one end so beads can’t slide off.
- Let your child thread pony beads until the wire is full. Patterns and random colors both look great.
- Bend the beaded wire into a heart and twist the two ends together at the bottom point.
- Push the twisted end into a small hole drilled in a scrap of wood, or into a lump of air-dry clay for a no-drill base.
- Write a message on the front of the block with a marker.
For younger kids, a pipe cleaner is easier to thread than wire and has no sharp ends.
10. Rainbow Fingerprint Heart Card for Mother’s Day
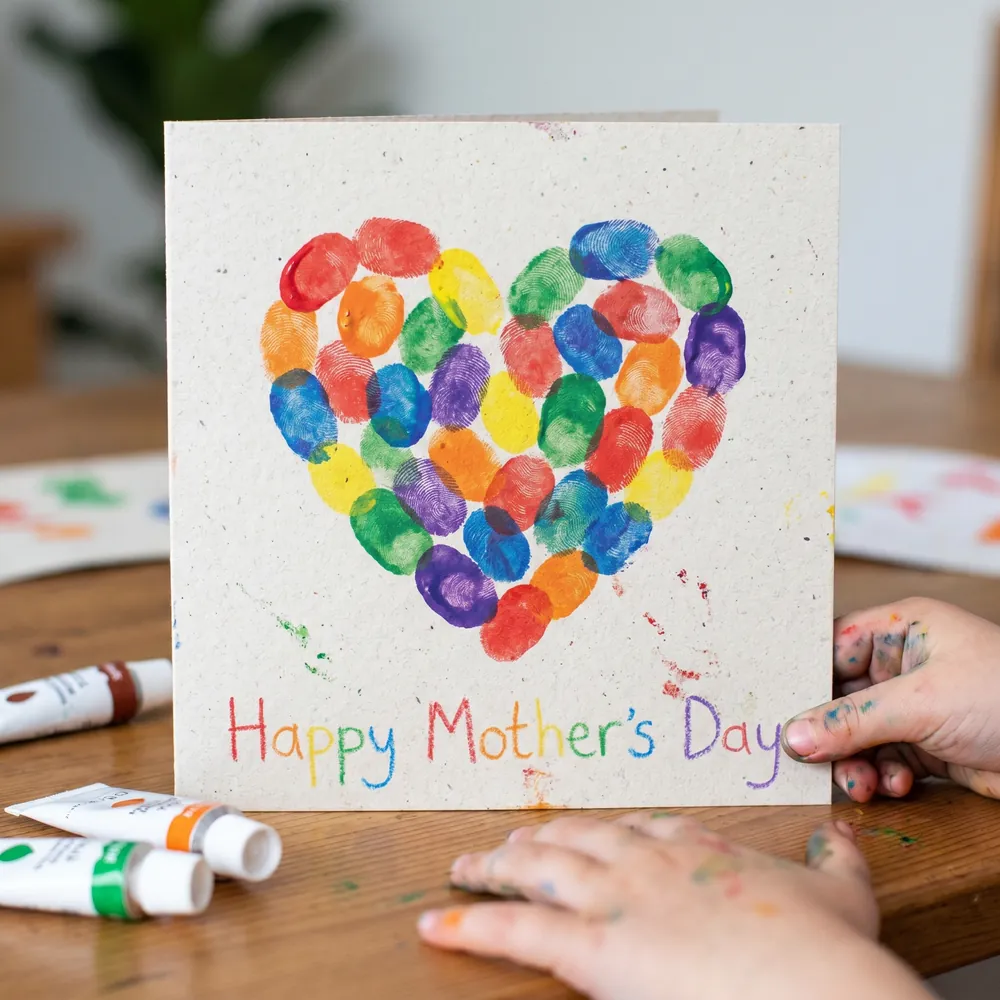
A heart made of tiny fingerprints is about as personal as a card gets.
- Sketch first. Draw a light pencil heart on a folded card so kids have a shape to fill.
- Go in rainbow order. The card in the photo cycles through red, orange, yellow, green, blue and purple, then starts again.
- Let prints overlap. Slightly squished, overlapping prints read as one solid heart from across the room.
- Match the words. “Happy Mother’s Day” is written letter by letter in the same rainbow colors with colored pencils.
Speckled recycled card gives it a soft, handmade feel. Swap the message for “Be Mine” and it works in February too.
A few stray paint smudges on the edge are fine. They prove a real kid made it.
Squeeze each color onto its own paper plate and keep a damp cloth on the table. Wiping the finger between colors keeps the rainbow from turning brown.
11. Ruler-Line Stained Glass Hearts on Black Paper
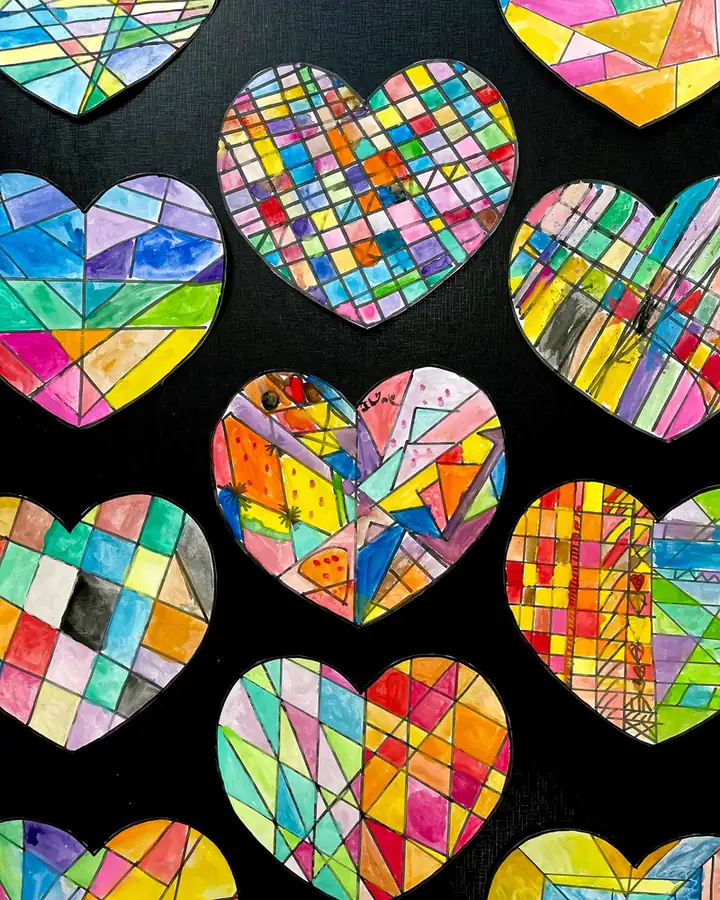
Ruler, black marker and a box of watercolors. That is all it takes to make paper hearts that glow like little church windows. Each heart in the photo has its own line pattern. Some are neat grids, some are crisscross diagonals, and a few look like broken glass.
- Draw a heart on white paper and cut it out.
- Lay a ruler across it and draw straight lines all the way across. More lines make smaller “panes.”
- Trace every line in black marker.
- Fill each section with a different watercolor or marker color.
- Glue the finished hearts onto black paper.
Older kids can spend a whole afternoon on one heart. Younger kids do well with just four or five lines.
A colorful heart glued onto white paper. The colors look fine, but the edges blend into the page.
The same heart on black paper. The dark background makes every color look brighter, like light shining through glass.
12. Plantable Seed Paper Heart in a Doodled Pot
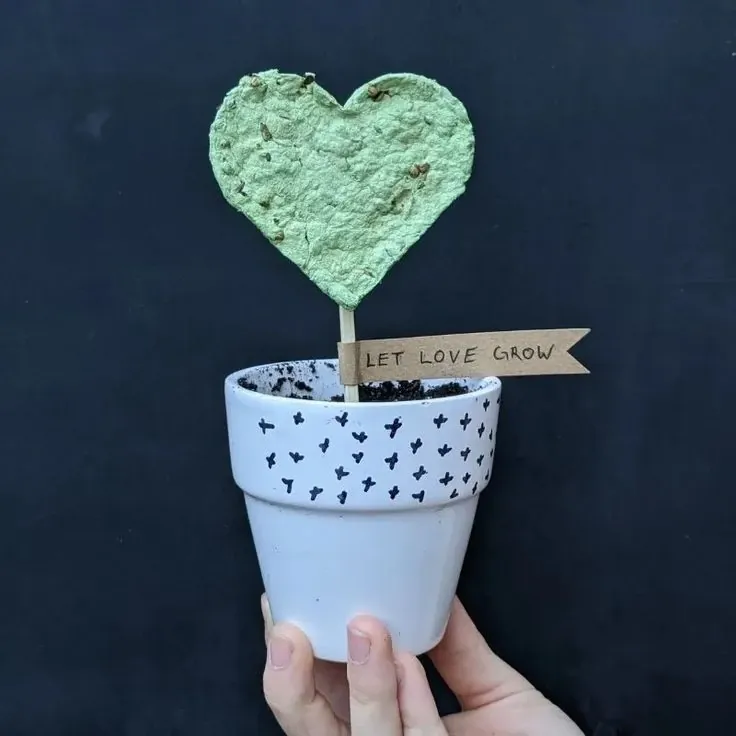
Scrap paper gets blended into pulp, mixed with seeds and pressed into a heart. Once it is planted, the paper breaks down and little sprouts come up. Kids get a craft and a science lesson in one project.
The one in the photo sits on a wooden stick in a small white pot covered in hand-drawn black marks, with a kraft paper flag that reads “Let Love Grow.”
Ways to share them:
- tucked into Valentine’s cards for classmates
- as teacher gifts with a little pot of soil
- as Mother’s Day or Earth Day gifts in spring
Small seeds work best, like wildflowers or herbs. Big seeds poke holes in the paper.
Tear scrap paper into small bits and soak it in warm water overnight. A little green paper mixed in tints the pulp.
A grown-up blends the soggy paper with water into a thick pulp.
Stir a spoonful of small seeds into the pulp by hand.
Subscribe to DIY Craft Bloom
Get updates on the latest posts and more from DIY Craft Bloom straight to your inbox.
Spoon pulp into a heart cookie cutter on a towel and press out the water with a sponge.
Let it dry flat for a day or two, then glue it to a craft stick.
13. Raised Glue Line Gem Hearts on Kraft Paper
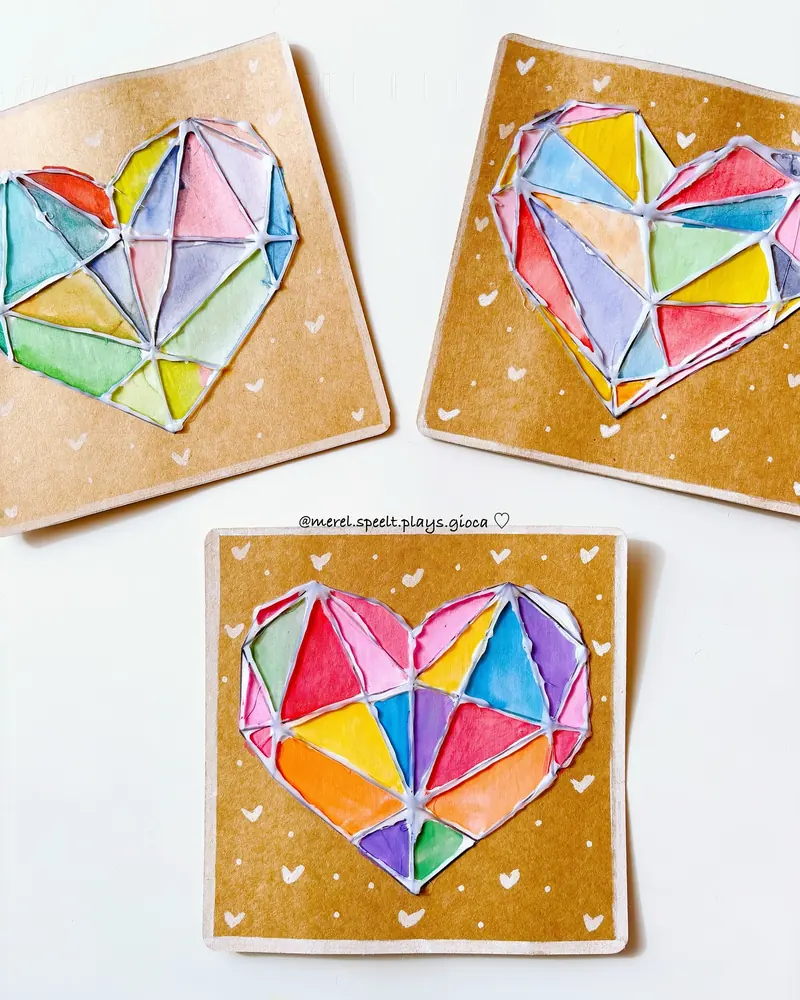
Lines of glue dry into raised ridges, and those ridges work like little walls between colors.
These hearts look cut like a gemstone, with straight lines meeting at points across the shape. Kraft paper, plus white doodled hearts and dots around the edge, gives the cards a cozy handmade look.
- Draw a heart in pencil on kraft card, then add straight lines that connect points around the edge.
- Trace every line with white glue or white puffy paint in a slow, steady squeeze.
- Let it dry overnight so the lines are firm.
- Paint each section a different soft color.
- Add tiny white hearts and dots with a paint pen.
Brown paper dulls thin watercolor, so mix a dab of white paint into each color to keep it bright.
The raised lines keep wet colors from running into each other, so even little kids get clean, sharp sections.
14. Washi Tape Sunburst and Rainbow Stripe Hearts
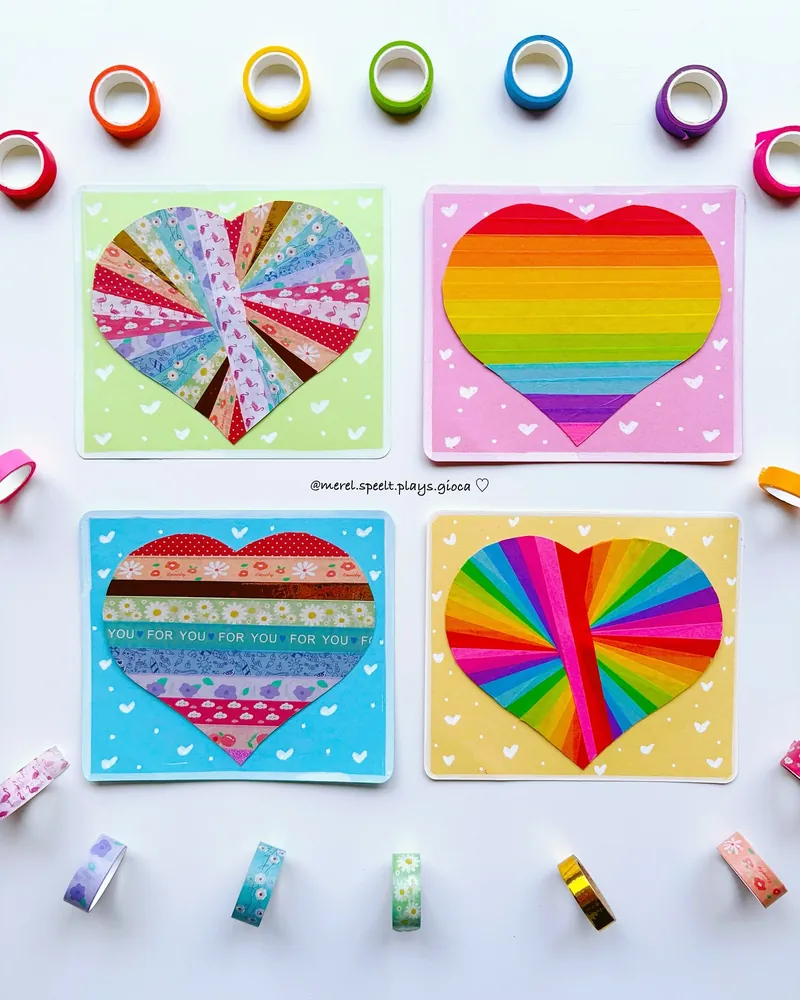
Rolls of washi tape and a cardstock heart. Kids stick strips across the heart, flip it over and trim the extra tape along the edge. That’s it.
The photo shows two ways to lay the tape:
- Sunburst. Every strip crosses one point near the middle, so the colors fan out like rays.
- Stripes. Strips run side to side in rows. Going in rainbow order gives the bold version on the pink card.
Each heart then gets glued onto a pastel card with white hearts and dots doodled around it. Patterned tapes with flowers, dots and little words make every heart look different, even in a big class set.
Washi tears by hand, so kids who struggle with scissors can still do most of the work.
| Sunburst | Stripes | |
|---|---|---|
| Best tapes | Patterned, mixed rolls | Solid rainbow colors |
| Skill | A bit trickier, strips meet in the middle | Easiest, just line them up |
| Looks like | Rays or a pinwheel | A bold rainbow |
15. Hole-Punched Heart Lacing Cards
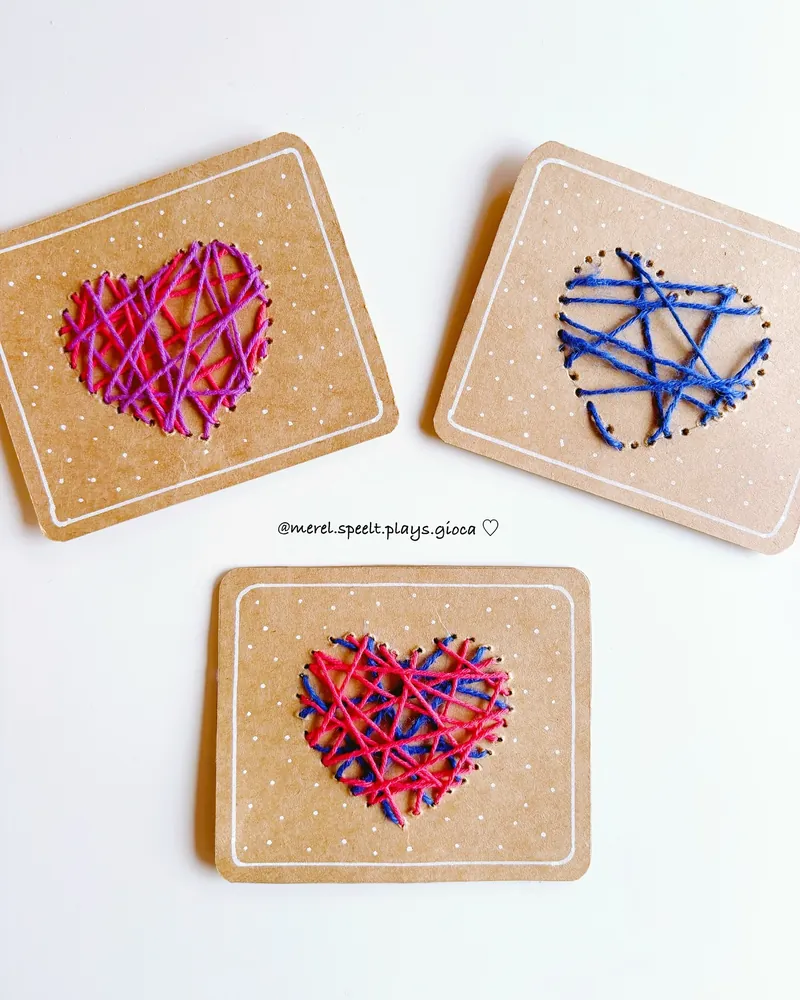
Holes poked around a heart outline turn a scrap of kraft card into a lacing card. Kids weave yarn back and forth across the heart in any direction they like. The messy crisscross look is the whole charm, and no two cards come out alike.
- Draw a heart on kraft cardstock and poke holes around the outline with an awl or thick needle. This part is a grown-up job.
- Wrap tape tightly around one end of the yarn to make a stiff tip, or use a plastic kids’ needle.
- Tape the other end to the back and let kids lace across the heart.
- Tape the last end down on the back.
A white paint pen border and a sprinkle of white dots finish it off. Lacing two colors, like pink with purple or red with blue, adds depth. It’s also great practice for small finger muscles.
16. Scrunched Tissue Paper Heart Mosaic
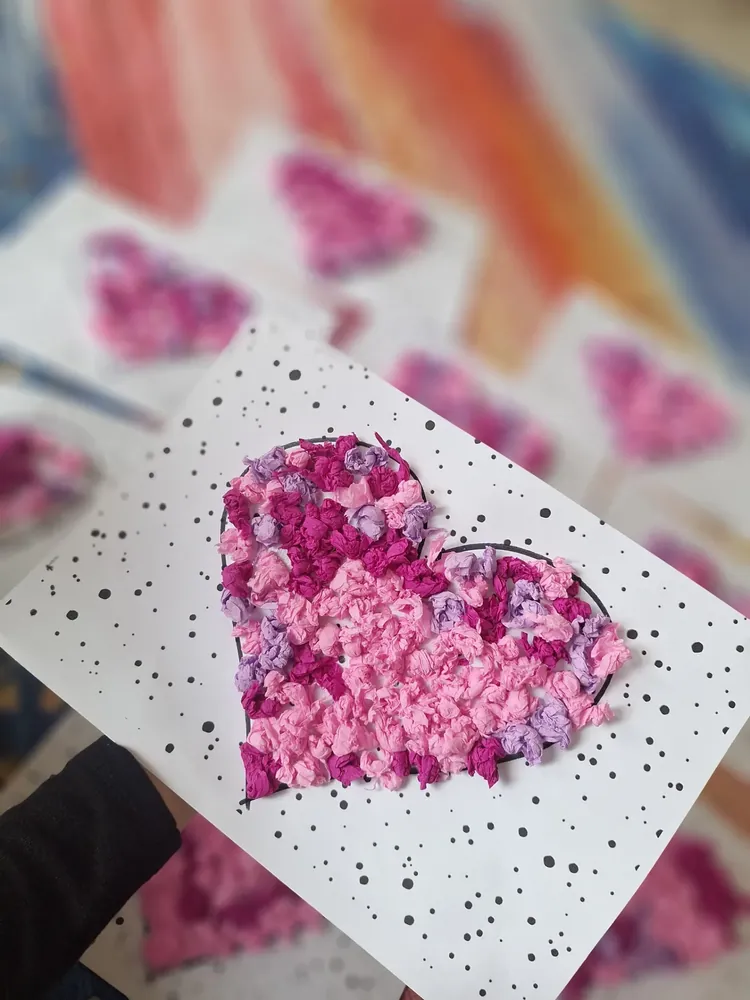
Scrunching tissue paper into tiny balls is oddly satisfying for little kids, and it works their hand muscles at the same time.
- Cut tissue paper in pink, magenta and lavender into small squares.
- Show kids how to roll each square between their fingertips into a ball.
- Draw a heart outline in black marker and fill it with balls packed close together.
- Dot black paint or marker around the page for the speckled background in the photo.
Mixing three or four shades is what makes it look rich. All one pink can look flat.
The photo shows a whole class making these at once. It’s a calm, sit-down project that fills a good stretch of time.
17. Nature Walk Collage Hearts on Cardboard
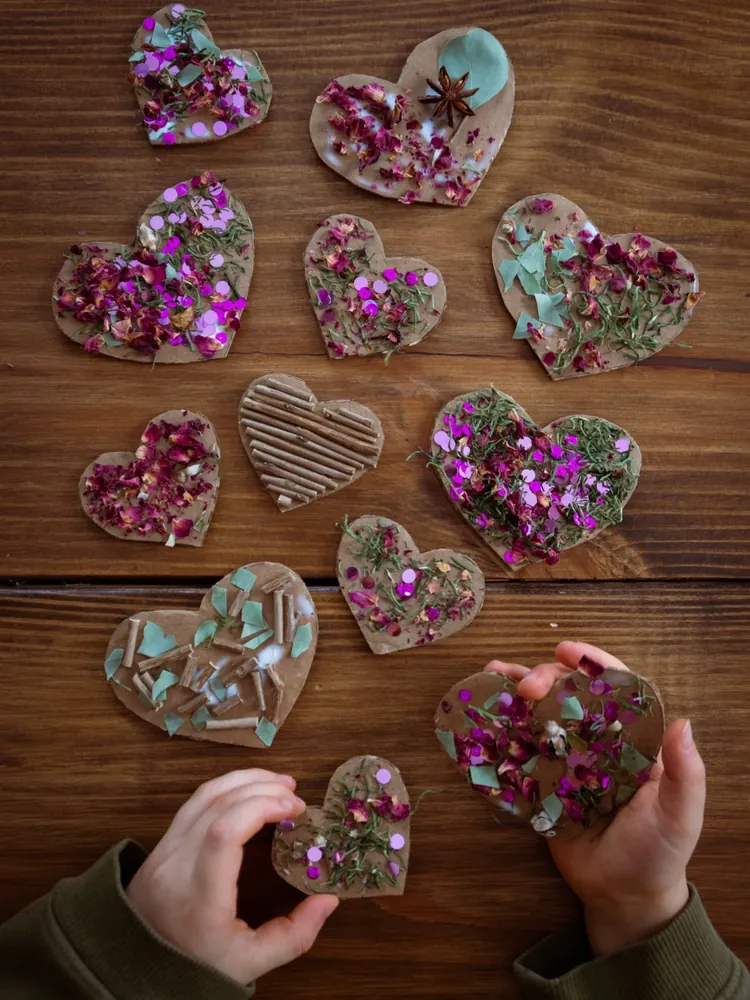
Take a walk first, then craft. Dried rose petals, pine needles, slivers of leaves, small twigs and even a star anise pod end up glued onto plain cardboard hearts. A sprinkle of purple sequins keeps them looking festive.
Cut hearts from a shipping box, spread on a thick layer of white glue, and let kids press their finds into it. Some hearts in the photo are packed full and wild. One has small twigs laid side by side in neat rows, almost like a tiny raft. Both styles look lovely next to each other.
Let them dry flat overnight before anyone picks them up. Heavier pieces like twigs need the full drying time to stick.
18. Push Pin String Art Hearts on Cork Coasters
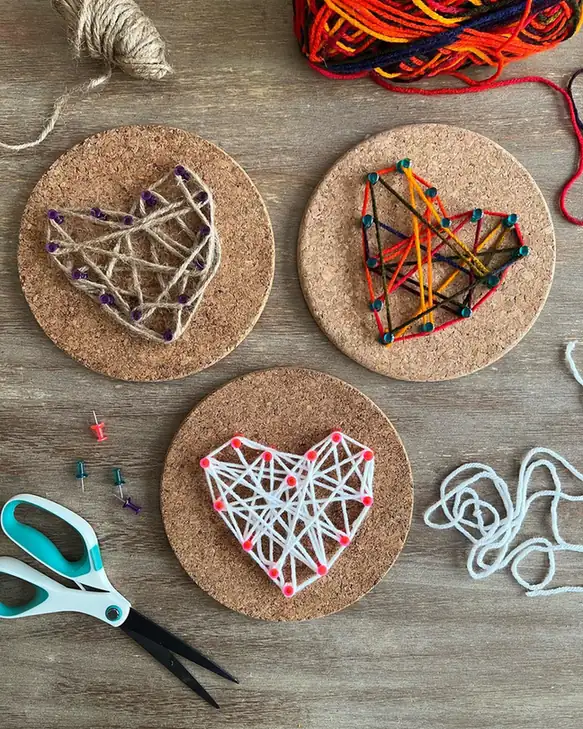
Round cork coasters make a ready-made base for string art. Push pins go in around a heart shape, and kids wrap yarn around the pins until the heart fills in with crisscross lines.
- Draw a heart on the coaster in pencil.
- Press push pins along the line, about a finger width apart.
- Tie yarn to one pin and wrap it around the others in any order.
- Tie off the end and trim.
The photo shows three looks: natural twine with purple pins, mixed bright yarn with green pins, and white yarn with red pins. Pins in a contrasting color make the heart’s outline easy to spot.
Finished coasters can hang on a wall or sit on a shelf. They are a little too bumpy to hold a cup.
Push pins are sharp and easy to lose. Have a grown-up press them in, save this one for school-age kids, and count the pins before and after.
19. Thumbprint Heart Glass Gem Pocket Hugs
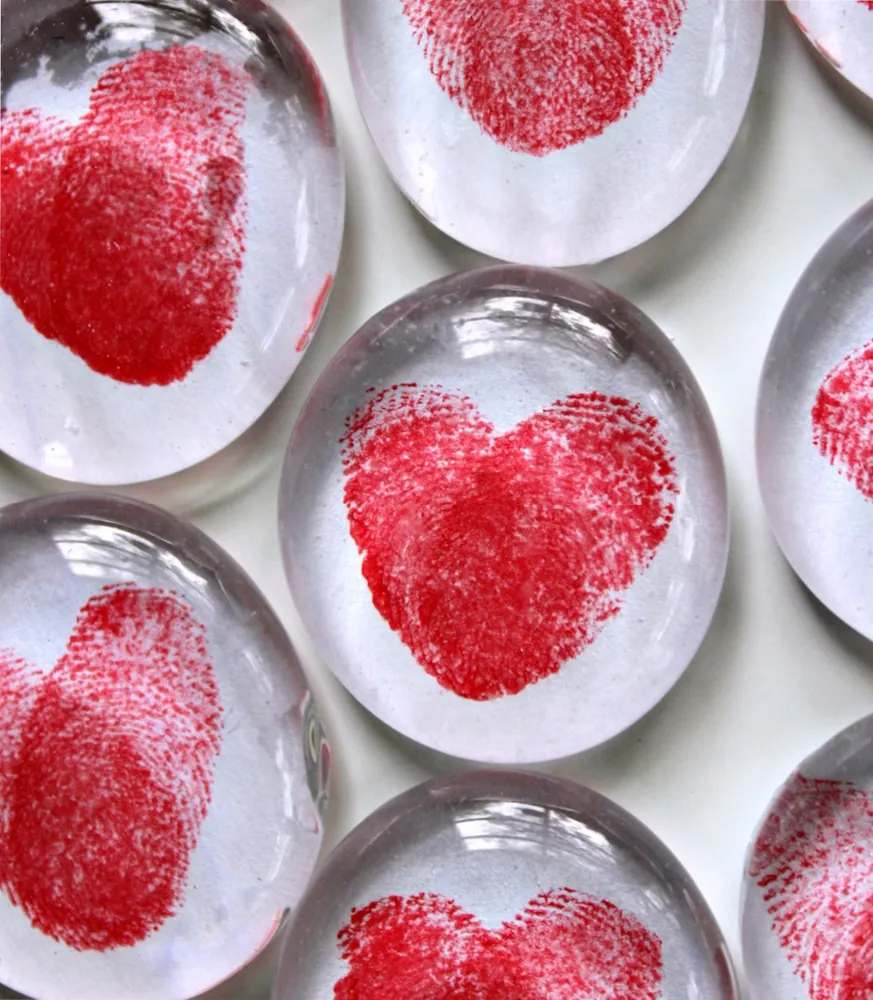
Clear glass gems magnify whatever sits under them. Put a red thumbprint heart underneath and you get a tiny keepsake a child can slip into a parent’s pocket or lunch bag.
Press a thumb onto a red ink pad, stamp it twice on white paper in a V shape, and let it dry. Glue a flat-backed glass gem on top with clear-drying glue, then trim the paper around the edge.
Ways to use them:
- a “pocket hug” for a parent’s coat on a busy day
- a fridge magnet with a small magnet glued to the back
- a little gift for a grandparent who lives far away
Glass gems are small enough to swallow, so keep them away from babies and toddlers.
Let the ink dry all the way before glue touches it. Wet ink smears into a pink blob under the glass.
20. “I Love You to Pieces” Paper Square Heart
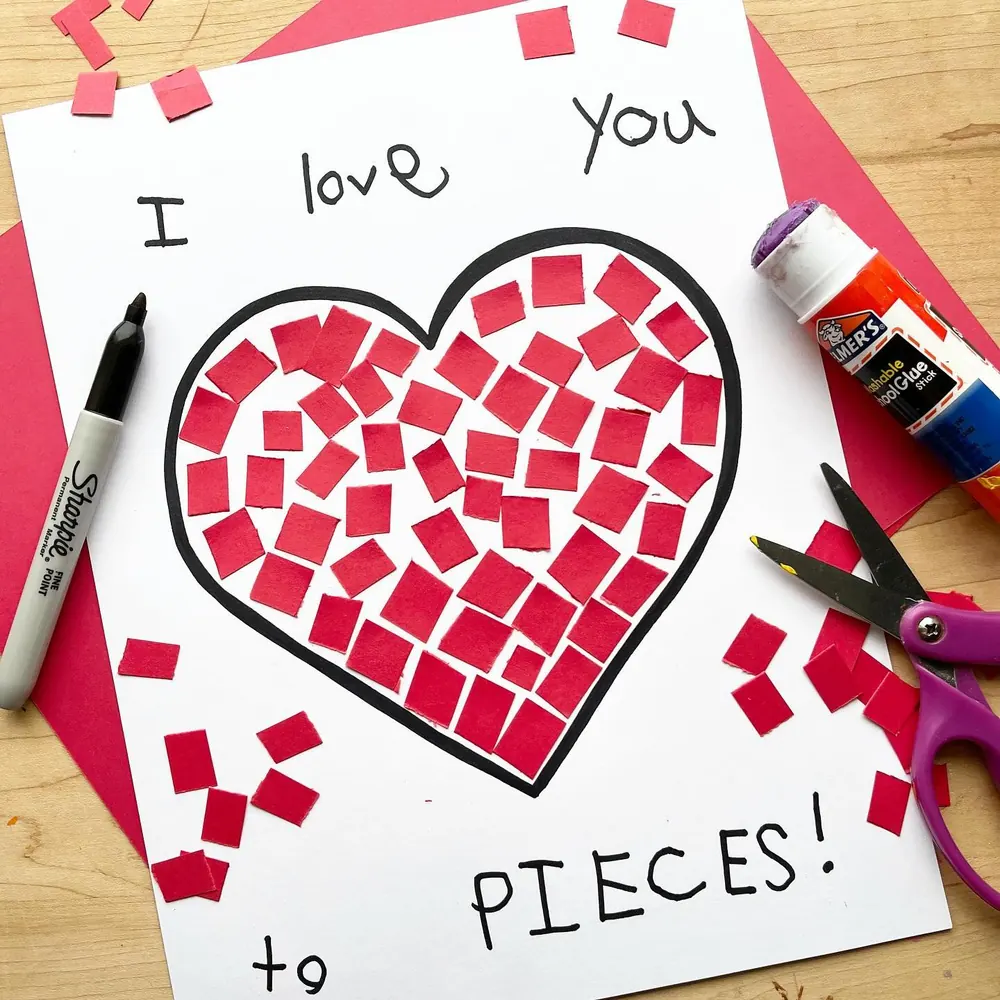
A sweet pun and a little scissor practice on one page.
- Cut red construction paper into strips about as wide as a child’s finger.
- Snip each strip into small squares. One snip makes one square, which feels good for beginners.
- Draw a big heart outline in black marker on white paper.
- Rub a glue stick inside part of the heart and press squares on. Keep going until it’s full.
- Write “I love you to pieces!” around the heart.
The squares in the photo sit a little crooked, and that’s what makes it work. Little gaps of white between pieces keep it looking like a real mosaic. Leftover squares scattered around the page make a fun border too.