15 DIY Charm Necklace Ideas to Gift


Charm necklaces are having a real moment again, but the best ones on Pinterest right now go way past a single dangling pendant.
After going through fifteen real charm necklaces piece by piece, a pattern showed up fast: the most interesting ones aren’t following a rulebook.
Some lean maximalist with a dozen mismatched charms crowded onto one chain. Others strip everything down to a single prong-set stone or one crescent moon and let restraint do the talking.
In between, there’s room for personalized initials, bezel-set gemstones, resin pendants with pressed flowers sealed inside, and vacation-themed clusters that read like a scrapbook you can wear.
Whether you’re new to jewelry making or just looking for fresh diy charm necklace ideas to try this weekend, this list covers a real range: chain styles, charm materials, color palettes, and a few construction tricks worth stealing, like swapping jump rings for huggie hoops so charms come on and off in seconds. Scroll through all fifteen and pull whichever pieces fit the necklace you’re picturing.
15 DIY Charm Necklace Ideas
1. Go Maximalist With a Mismatched Charm Cluster
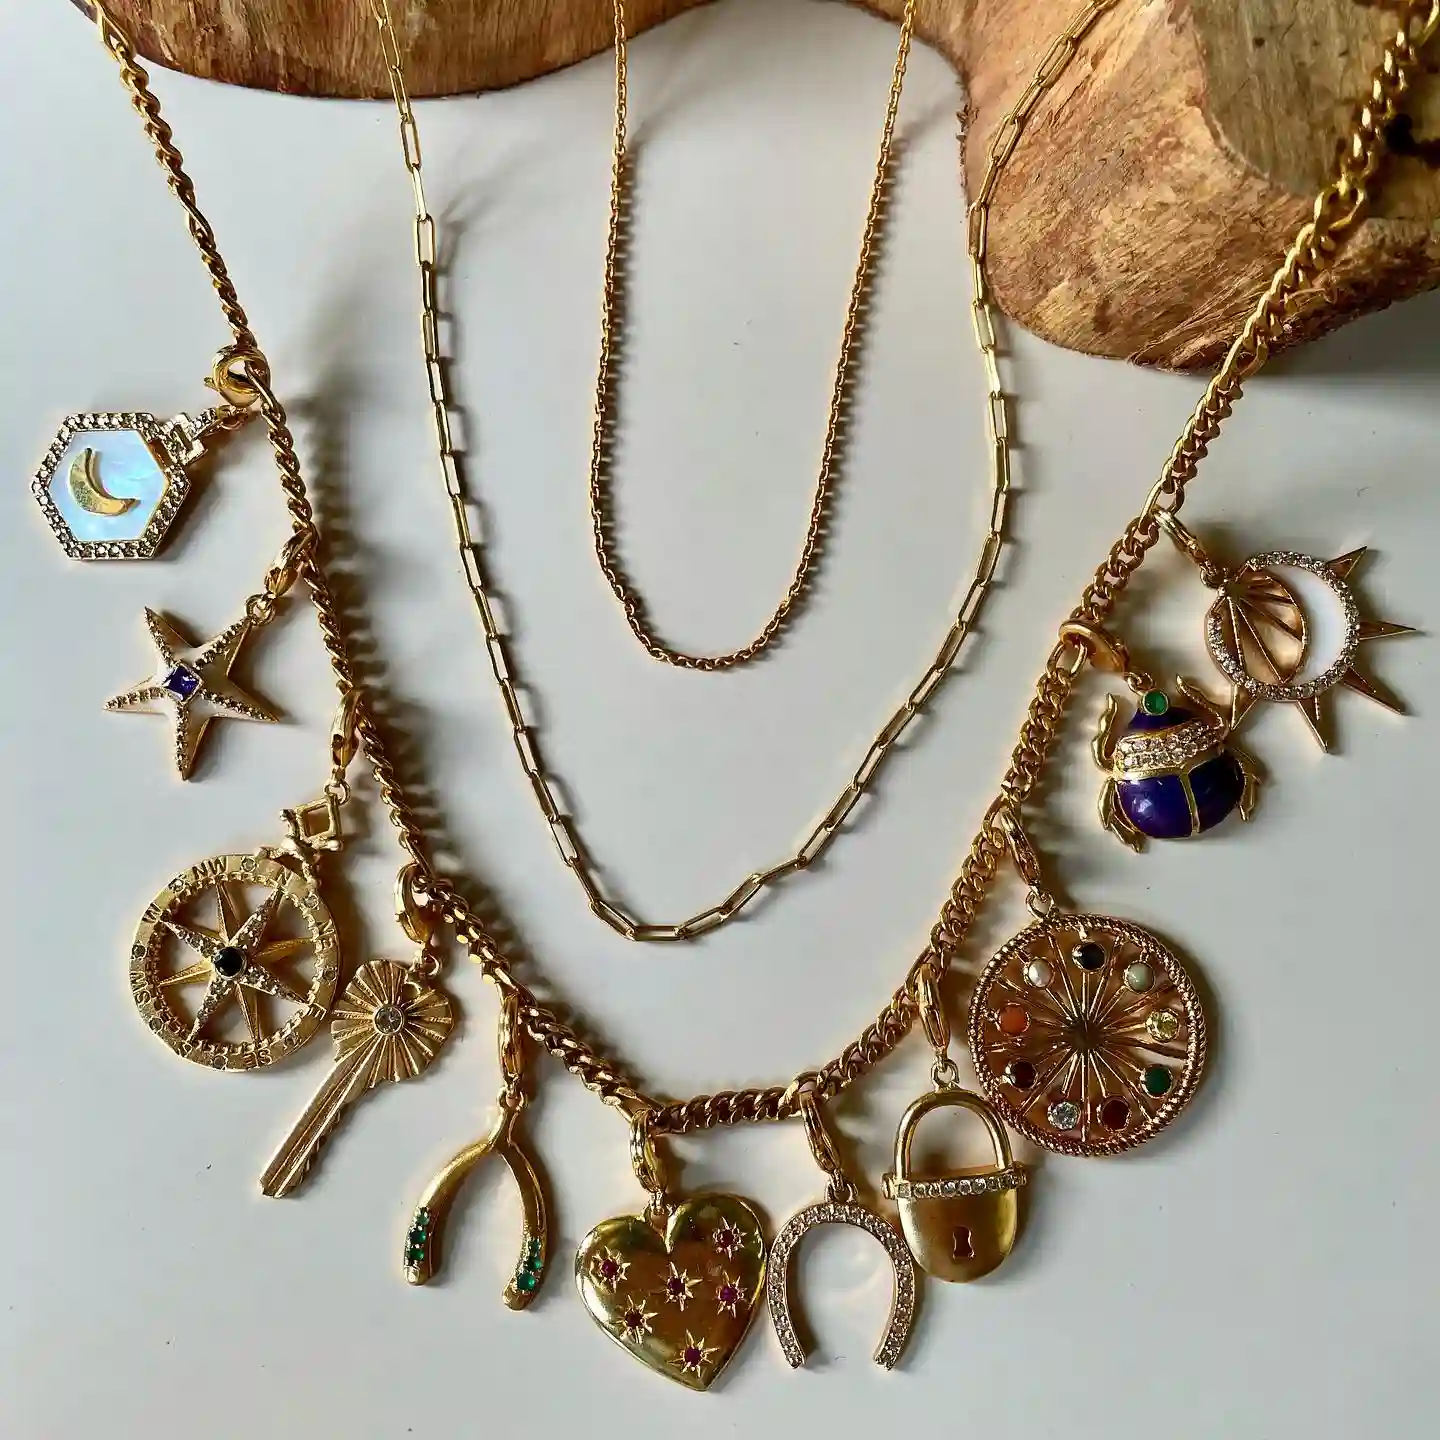
One chain, more than a dozen charms, zero matching required. That’s the whole trick behind this look.
Instead of picking one theme, the charms here span lucky symbols, celestial shapes, and everyday keepsakes, all strung close together so the chain almost disappears under the gold.
The heart charm with tiny star details sits near the center as the visual anchor, while the horseshoe and wishbone lean into a luck theme on one side.
A compass and key nod to travel and discovery, and a moonstone hexagon paired with a star adds a celestial note that softens all the metal.
Layer two or three plain chains behind the cluster first, since that extra length is what keeps a dozen charms from looking crowded instead of collected.
2. Make It Personal With a Tiny Initial Charm
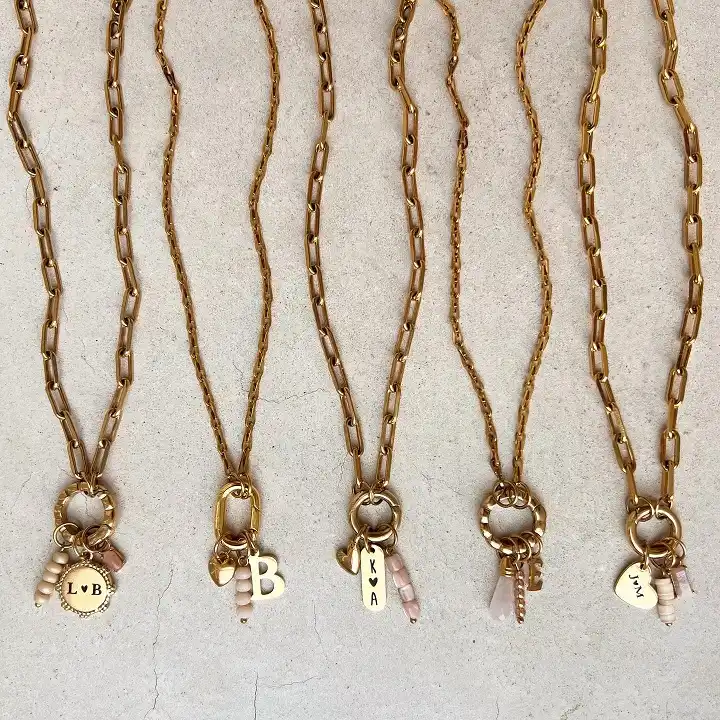
Five necklaces, five sets of initials, same simple formula. Each one pairs a bold paperclip chain with a small stack near the clasp: a letter tag, a tiny gemstone bead, and sometimes a heart stamped with two initials joined by a small heart symbol.
It reads personal without looking fussy, and it’s an easy first project if you’ve never wired a charm before.
The chain does most of the heavy lifting here, so the tiny charms never feel lost against it.
Swapping the letter for a new one, or adding a second initial when a relationship changes, takes a single jump ring instead of restringing anything.
A thick paperclip or curb chain gives small charms something sturdy to hang from.
A single letter tag, a monogram disc, or two initials joined by a heart all work well.
A faceted bead, tiny heart, or chip stone keeps the small cluster from looking flat.
Skip the glue so you can swap charms later without redoing the whole piece.
3. Try a Double-Strand Chain With Clover Charms
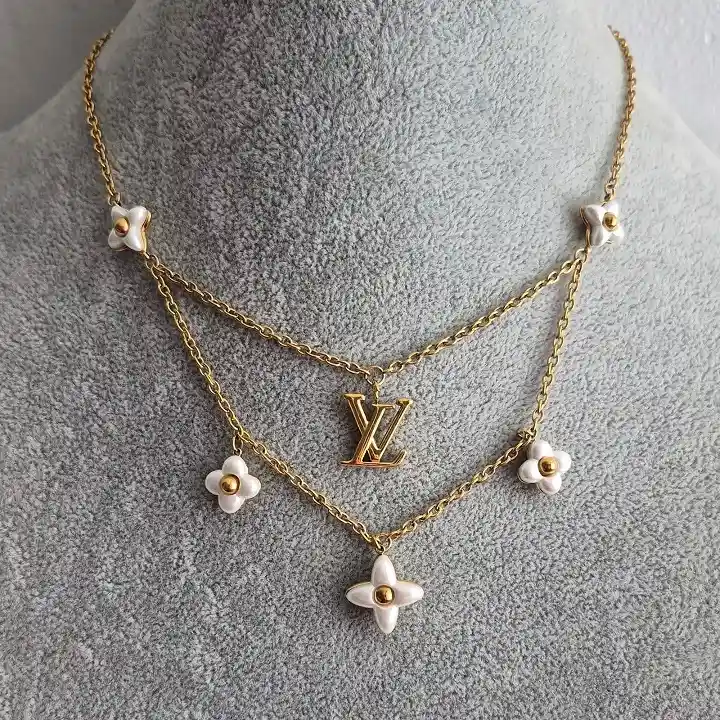
This one plays with layering built right into a single clasp. Two chains of slightly different lengths sit one behind the other, so the shorter chain frames the collarbone while the longer one drapes just below it.
Four small enamel clover charms are spaced evenly across both strands, with one pendant charm resting at the front where the two chains meet.
A few things make this design worth copying:
- The built-in double strand skips the hassle of layering two separate necklaces that twist and tangle
- Evenly spaced charms on both chains keep the eye moving instead of clustering everything at the center
- A single front pendant anchors the design without competing with the clover charms
Space your charms before you close a single jump ring. Lay the chain flat and mark where each one lands so the spacing matches on both sides.
4. Swap the Chain for a Beaded Strand
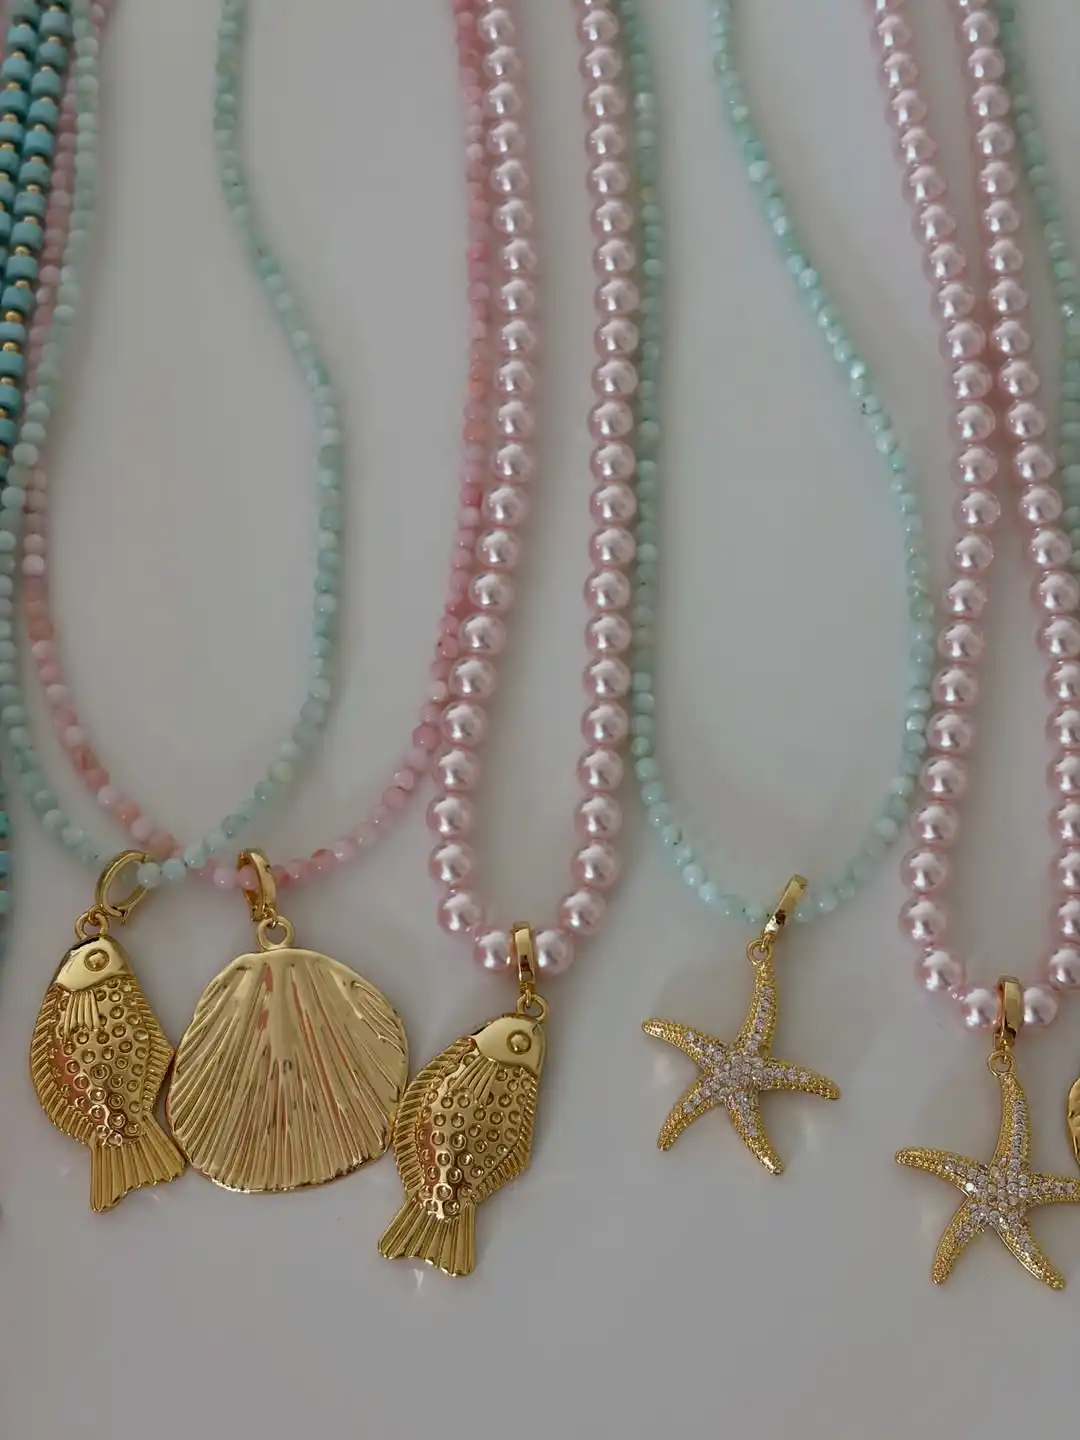
Trade metal chain for a strand of tiny beads and the whole necklace shifts mood, from edgy to soft and beachy.
These pair pastel beadwork, in shades of pink, mint, and creamy pearl, with oversized gold charms shaped like sea creatures.
The scale contrast is the trick: dainty beads up top, then one bold charm doing all the visual work at the bottom.
The charm choice changes the whole story here. A scalloped shell reads classic and simple.
A textured fish adds a little whimsy. A pave starfish dresses the same base necklace up for evening.
| Pearl Strand | Glass Bead Strand |
|---|---|
| Reads classic and a little dressy. | Reads soft and casual in pastel tones. |
| Pairs best with a polished gold shell or fish charm. | Pairs well with a pave starfish for extra sparkle. |
| Feels right for a nicer daytime look. | Feels right for everyday layering. |
5. Center the Design Around a Puffy Heart Bead

Six necklaces, one repeating move: a smooth gold puffy heart sits right at the front of the strand like a focal bead rather than a dangling charm.
Around it, the beadwork changes completely, freshwater pearls and gold nuggets on one, moody purple pearls on another, a mix of amazonite and citrine chips on a third.
Subscribe to DIY Craft Bloom
Get updates on the latest posts and more from DIY Craft Bloom straight to your inbox.
One strand skips the puffy heart entirely for an open heart outline charm instead, proving the shape itself can flex.
The reason this reads intentional instead of random: the heart always sits at the same spot, roughly two thirds down from the clasp, so your eye lands there first no matter what beads surround it.
6. Attach Charms to Huggie Hoops Instead of Jump Rings
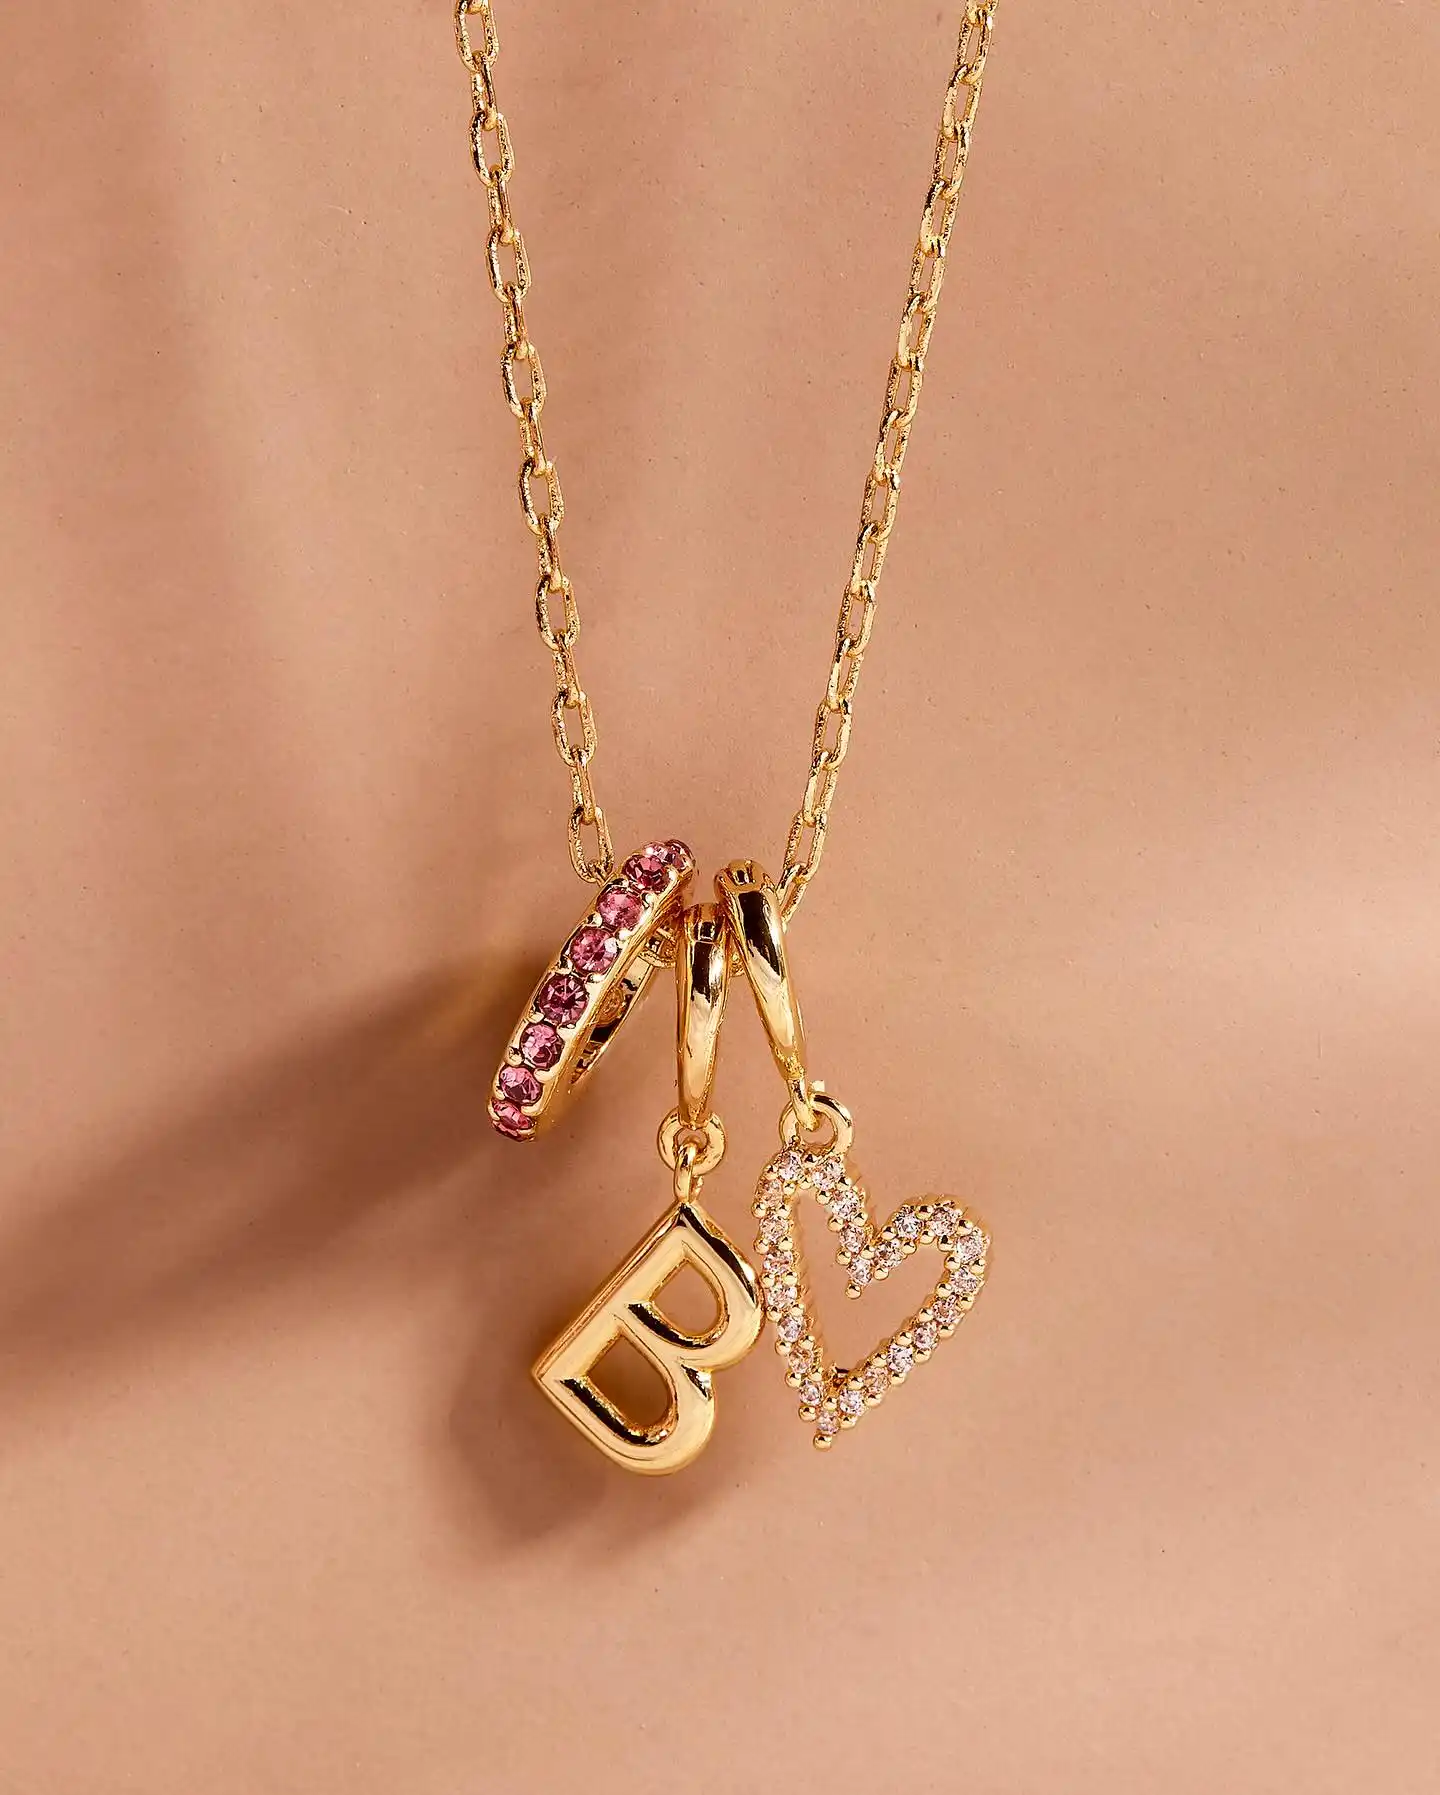
Zoom in on the top of this necklace and the trick becomes obvious. Instead of jump rings, three small huggie hoops clip onto the main chain, and each one holds its own charm: a pave pink hoop on its own, a plain gold hoop with a bold letter charm, another gold hoop with an open heart outline.
The hoops themselves become part of the design instead of disappearing behind the charms.
This swap solves two problems at once. Huggies open and close like tiny earrings, so charms go on and off in seconds.
And because each hoop can carry its own finish, you get texture variety, smooth gold next to pave stones, without adding more chain.
Save leftover single earrings for this. A missing-mate huggie hoop makes a perfect charm connector that opens and closes like a tiny clasp.
7. Let Playful Charms Take Over a Chip Bead Strand
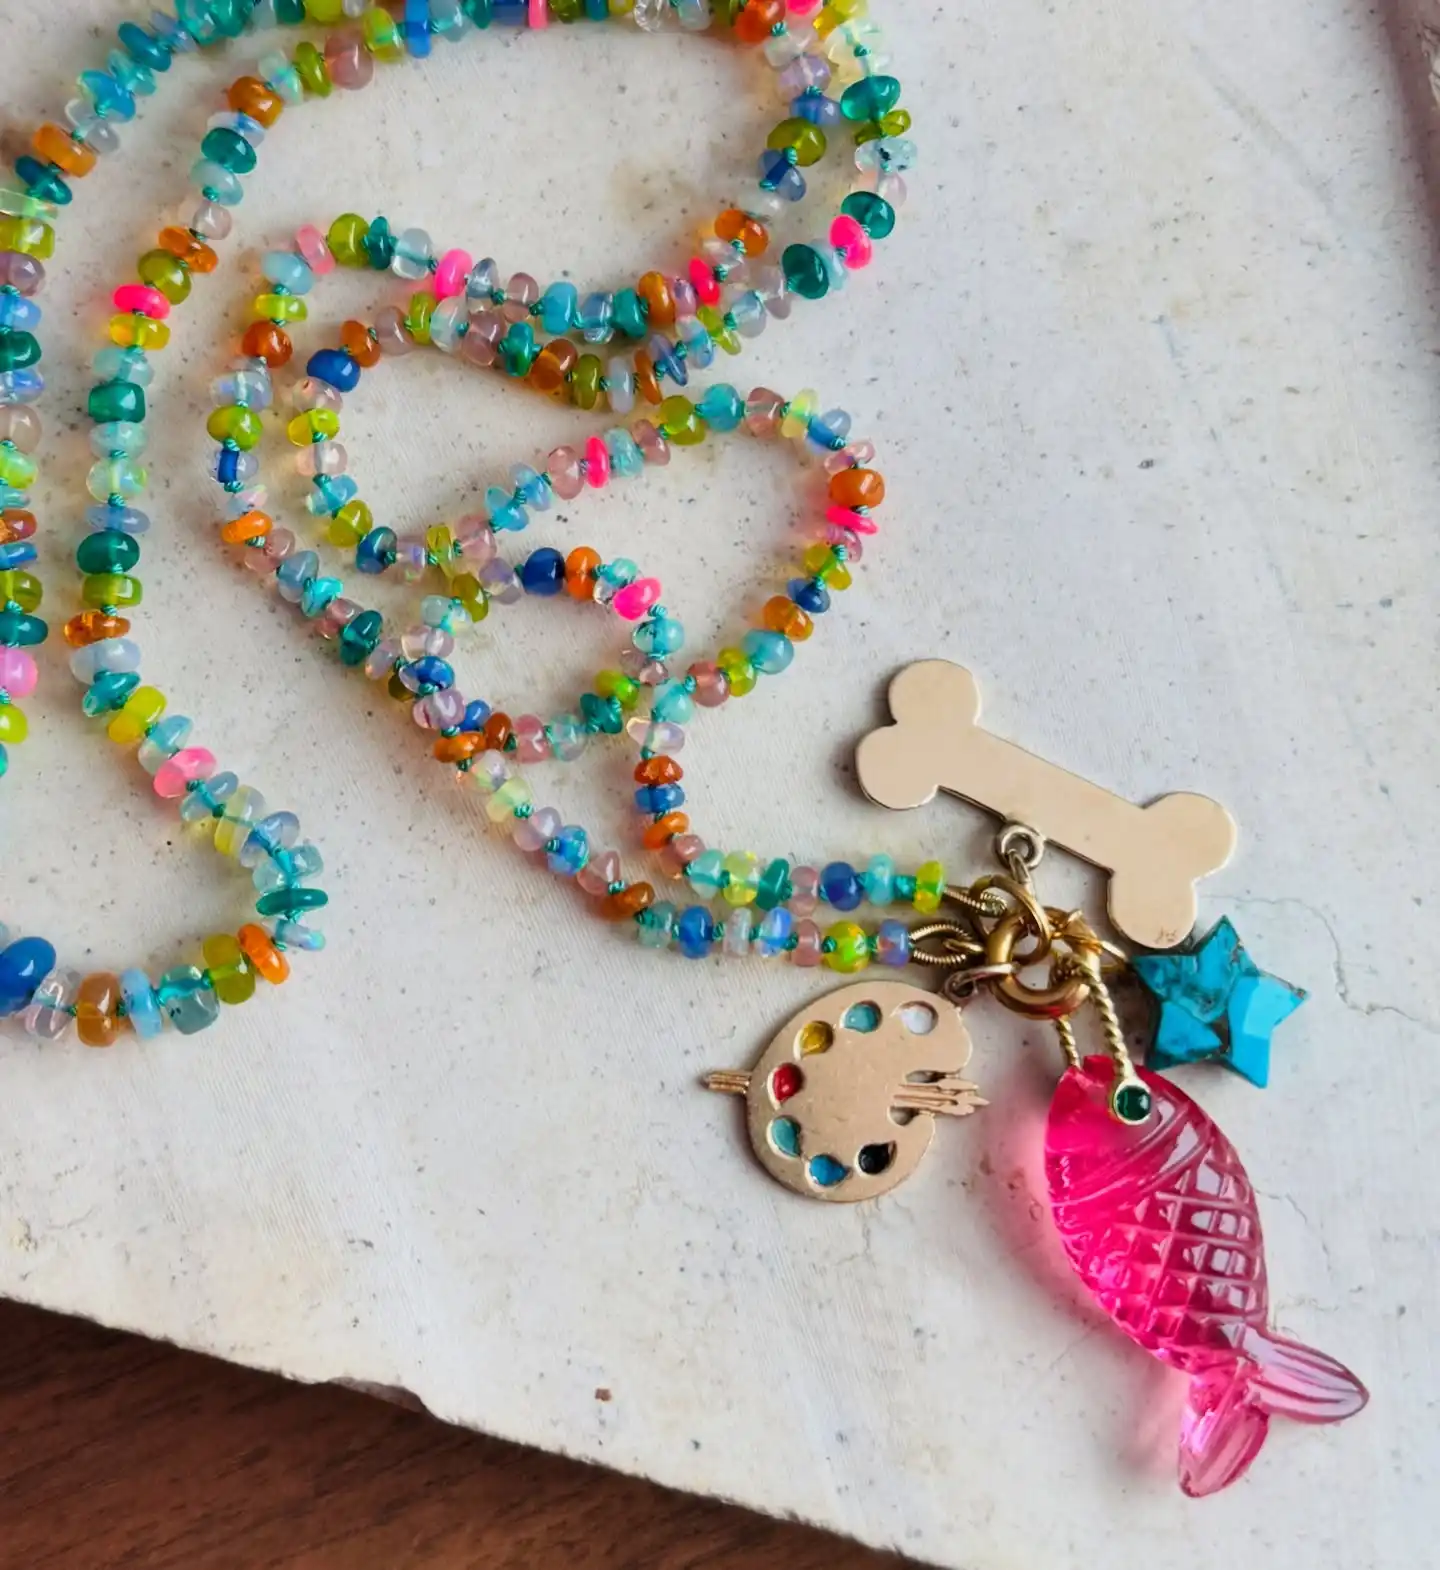
No two beads match on this one, and that’s exactly the point. A single strand of mismatched stone chips in teal, orange, lavender, and hot pink acts as the base, then four wildly different charms take over: a carved pink fish, a turquoise star, a tiny paint palette, and an enamel dog bone.
Nothing here coordinates in the traditional sense, but the randomness feels collected rather than accidental.
Each charm points to a different interest or memory instead of following one theme, which is what keeps the whole thing from reading as random junk on a chain.
Clustering all four charms tight near the clasp, rather than spacing them along the strand, is what lets the busy beadwork stay the quiet background instead of competing for attention.
8. Bezel-Set Each Charm in Its Own Gemstone

Three tonal beaded chains, but the real story happens in the charms hanging off each one.
Instead of plain metal shapes, every charm on this stack is bezel-set with an actual stone: turquoise, blue topaz, citrine, and pale aquamarine march across the middle necklace like a rainbow.
The bottom strand goes bolder, an emerald-cut amethyst and a gold letter charm inlaid with tiny gems instead of left plain.
What separates this from a basic charm necklace:
- Bezel settings turn each charm into a tiny gem rather than a flat metal shape
- A gold letter charm gets inlaid stones instead of a plain finish, so even the initial reads special
- A baroque pearl breaks up the gemstone lineup with organic shape and texture
- Charms are hung close together in a single row so the color story reads at a glance
Each gem sits in its own metal frame instead of hanging loose, so charms look polished and finished.
Tiny stones set right into the initial make it feel like a real piece of jewelry, not a keychain tag.
A baroque pearl among the faceted stones keeps the row from looking too uniform.
9. Go Minimal With a Single Prong-Set Stone
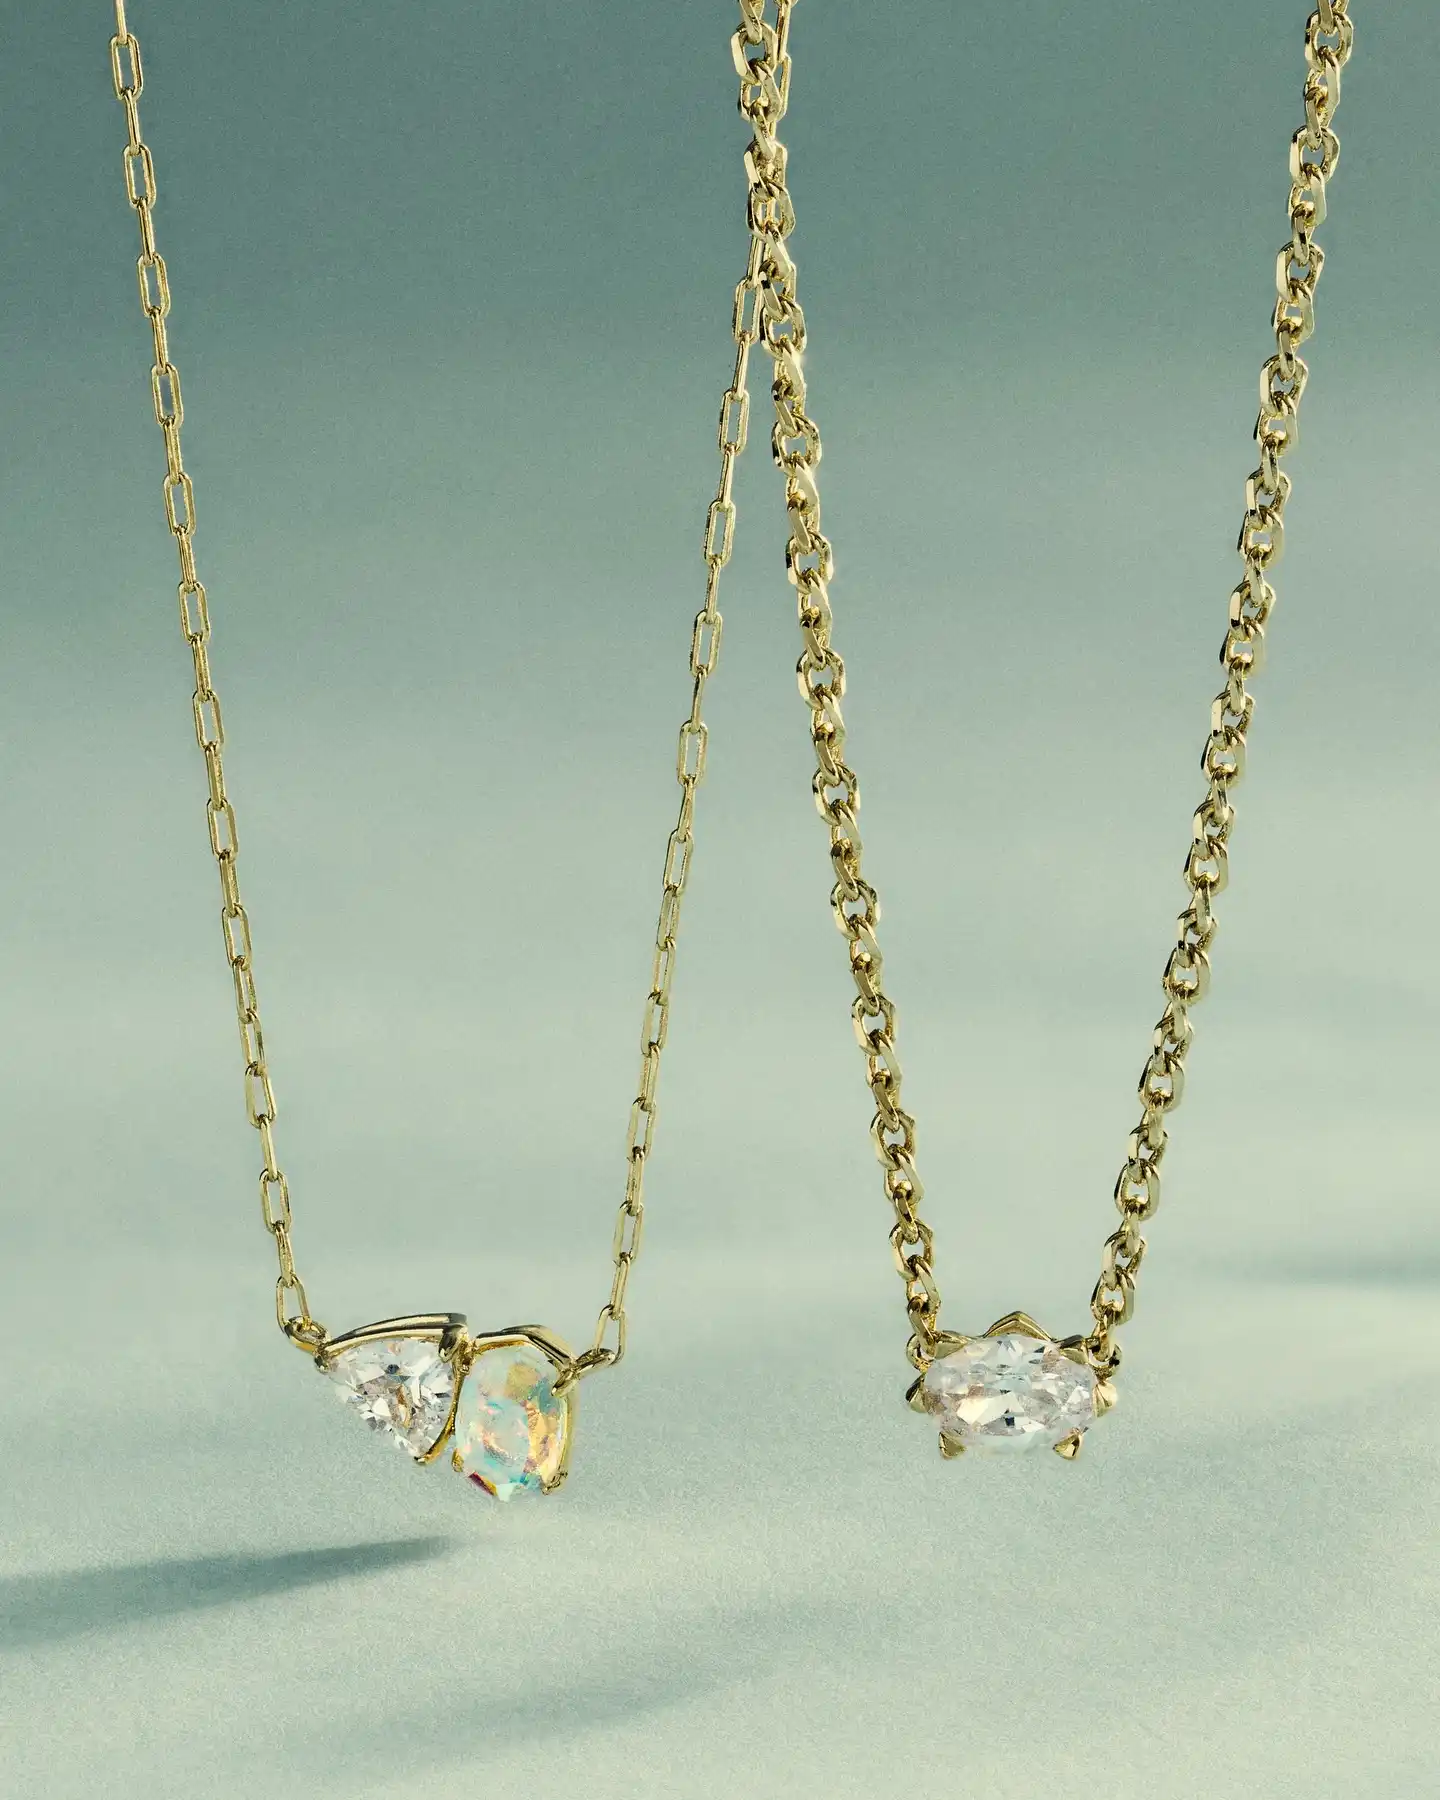
Not every charm needs to be literal. These two necklaces strip the idea down to its simplest form, one clear stone and one iridescent stone set side by side on a paperclip chain, and a single oval stone held in place by delicate prongs on a curb chain.
No dangling shapes, no enamel, no symbols. Just light catching a facet at the front of the neck.
The two chains here do different jobs. The paperclip chain, thinner and more open, lets the two-stone pendant sit slightly forward and swing a little.
The curb chain, denser and more substantial, holds the single oval stone tighter to the throat so it barely moves.
If you’re new to stone setting, start with a single prong-set stone before attempting a two-stone cluster.
One stone means one setting to get right, and it still reads as a finished, intentional necklace on its own.
A single well-set stone can carry a necklace just as well as a dozen charms.
10. Give Each Charm a Coin-Edge Silhouette

Five zodiac coins, five different symbols, one shared shape: a scalloped, coin-like edge with a tiny star stamped somewhere on the face.
Scales for Libra, a crab for Cancer, a bow and arrow for Sagittarius. Even without knowing the sign, the fluted border reads as “old coin” or “medallion” rather than a generic circle punch, which is what gives the whole set its collected, vintage feel.
Each pendant hangs from its own plain chain rather than clustering together, so a single coin can be worn alone or layered with a friend’s when you’re both wearing your signs.
The engraving stays shallow enough to read at a glance but deep enough to catch a shadow, which is part of what makes it feel like a found object instead of a mass-produced charm.
Subscribe to DIY Craft Bloom
Get updates on the latest posts and more from DIY Craft Bloom straight to your inbox.
11. Pick One Butterfly Color and Let It Be the Whole Design
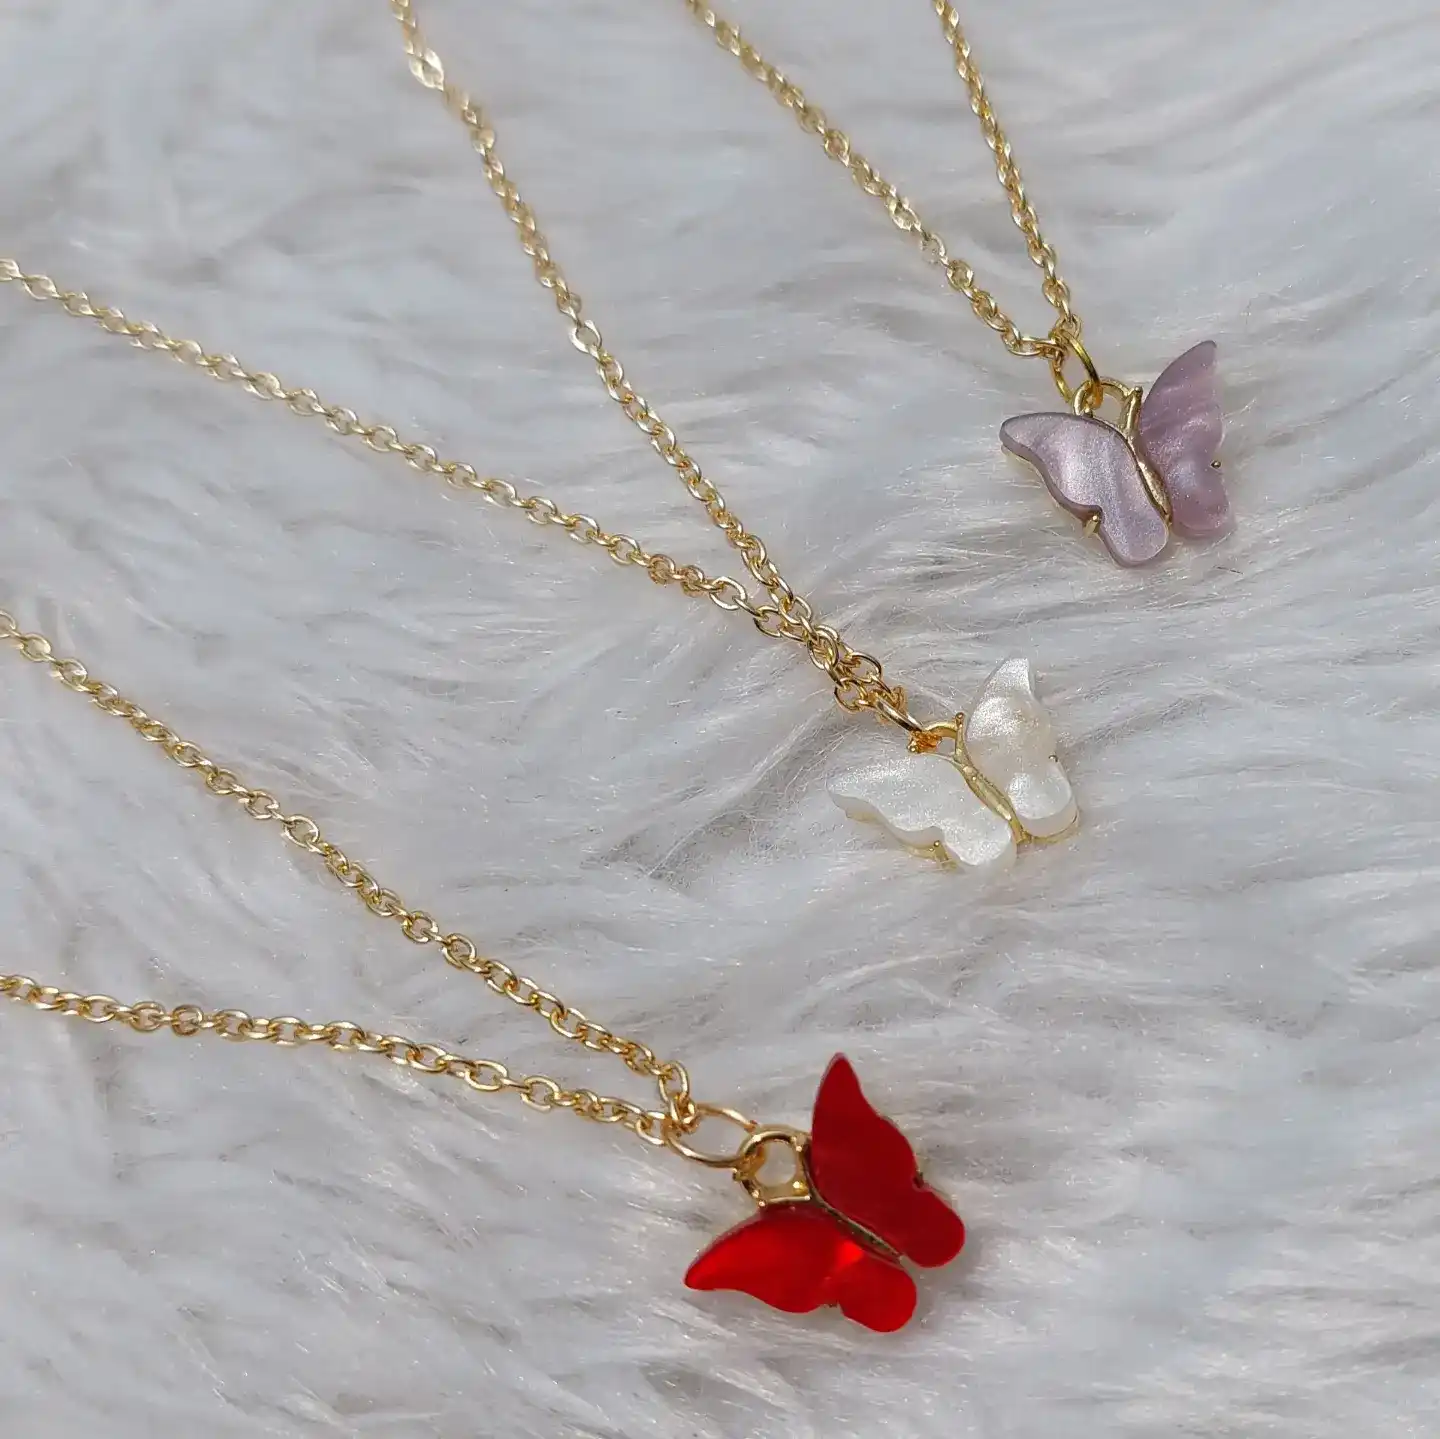
Three necklaces, three butterflies, one shape repeated in lilac shell, white pearl shell, and translucent red resin. Nothing else changes.
The chain stays a plain gold cable link, the wingspan stays small and delicate, and the only decision that matters is which color butterfly to reach for. It’s proof that a single well-chosen charm doesn’t need backup.
The wing material does a lot of the work. The lilac and white versions have that soft, iridescent shimmer typical of dyed shell, catching light in a way flat enamel never does.
The red one swaps that for glassy resin, which reads bolder and a little more graphic against the same gold chain.
Hang the butterfly off-center from one jump ring so the wings tilt naturally.
Keep it to one butterfly per chain.
Mixing shell and resin butterflies on the same necklace.
A thick chain that overpowers the delicate charm.
12. Switch to Silver for a Completely Different Mood
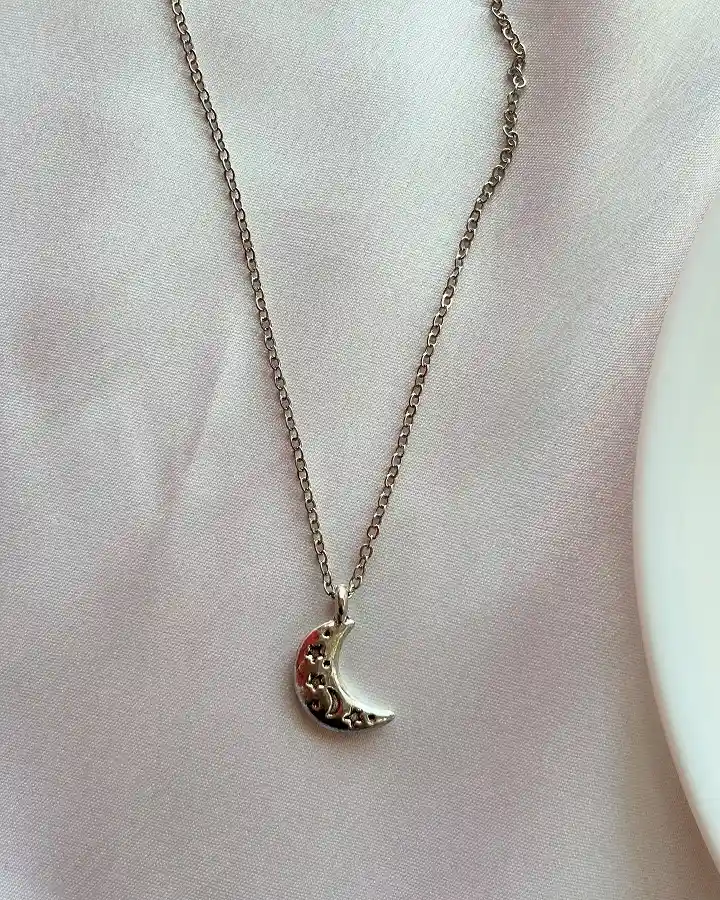
Every necklace so far has leaned gold. This one flips that with a bright silver crescent moon on a simple silver cable chain, and the shift changes the entire personality of the piece.
Where gold reads warm and vintage, silver reads cool and a little more modern. The moon itself carries small engraved stars and dot details across its surface, so even a solid metal shape has something to catch the eye up close.
This is about as pared down as a charm necklace gets: one metal, one shape, one chain style.
If you’re working with limited supplies, this is the easiest necklace on the whole list to recreate, since it only asks for a single charm and a length of chain.
Match your metal to your mood: gold feels warm, silver feels cool and modern.
13. Mix Glossy Cabochon Domes With Sculptural Enamel Shapes
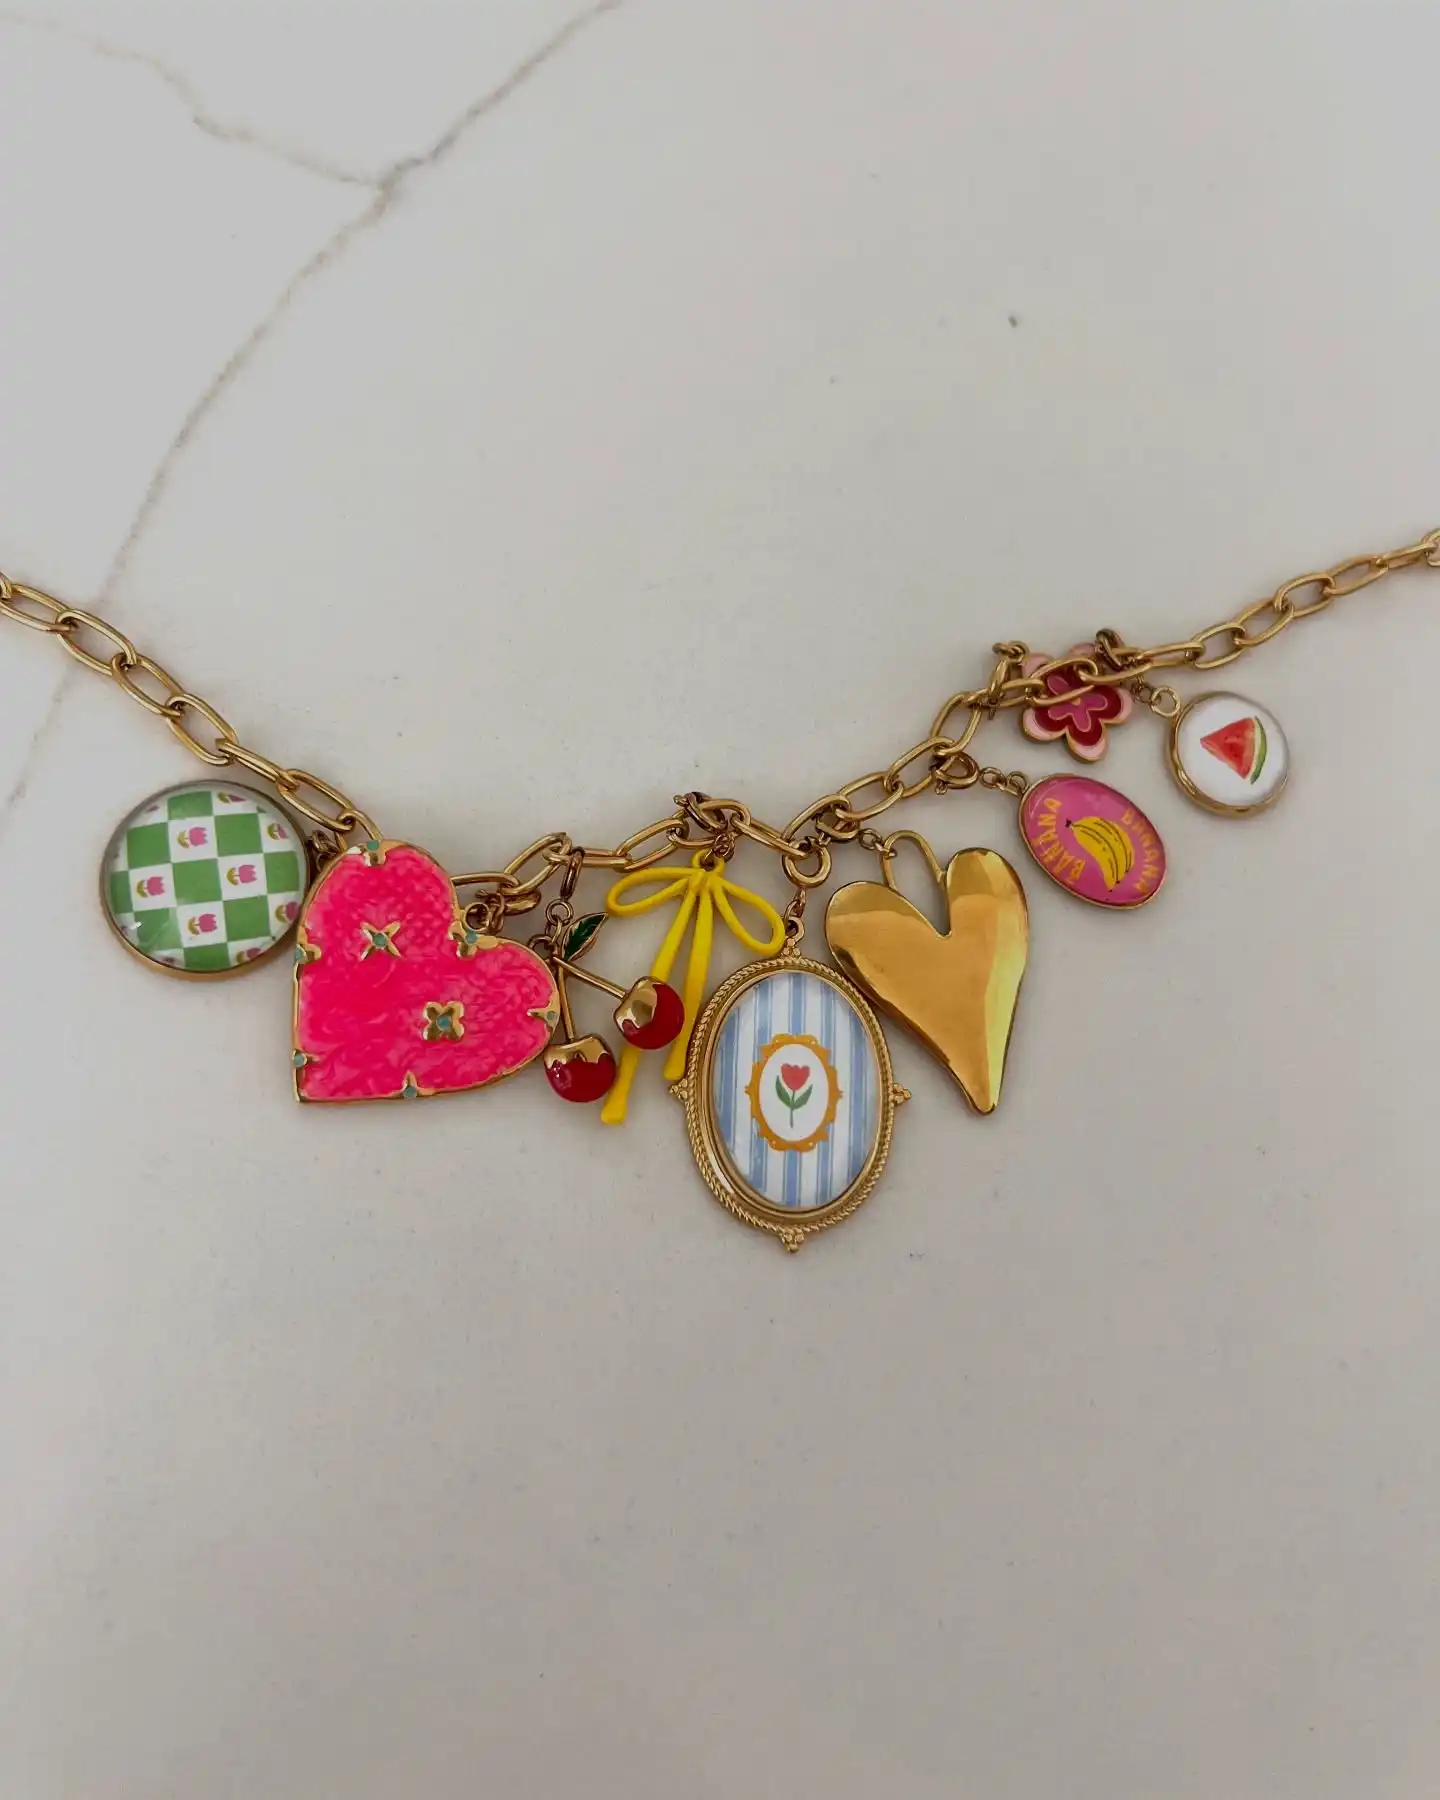
Nine charms crowd this chain, and no two share a finish. Glass-domed cabochons sit next to a puffy enamel heart, a mini gilt frame, a solid gold heart charm, and a cluster of glossy cherries.
It’s the busiest necklace in this whole roundup, and it works because the charms sit dense and low, right at the front curve of the chain, leaving the rest of the chain totally bare.
A few specifics worth copying:
- Glass cabochon charms (the checkerboard tulip print, the watermelon slice, the banana print) give a glossy, magnified look that flat enamel can’t match
- A tiny gilt picture frame with a printed flower inside adds an unexpected miniature moment
- One solid gold heart with no pattern gives the eye a place to rest among all the busy prints
- Charm density matters more than charm count here, everything sits within a few inches of chain instead of spreading out
14. Pour Resin Around a Gold Leaf Tree Silhouette
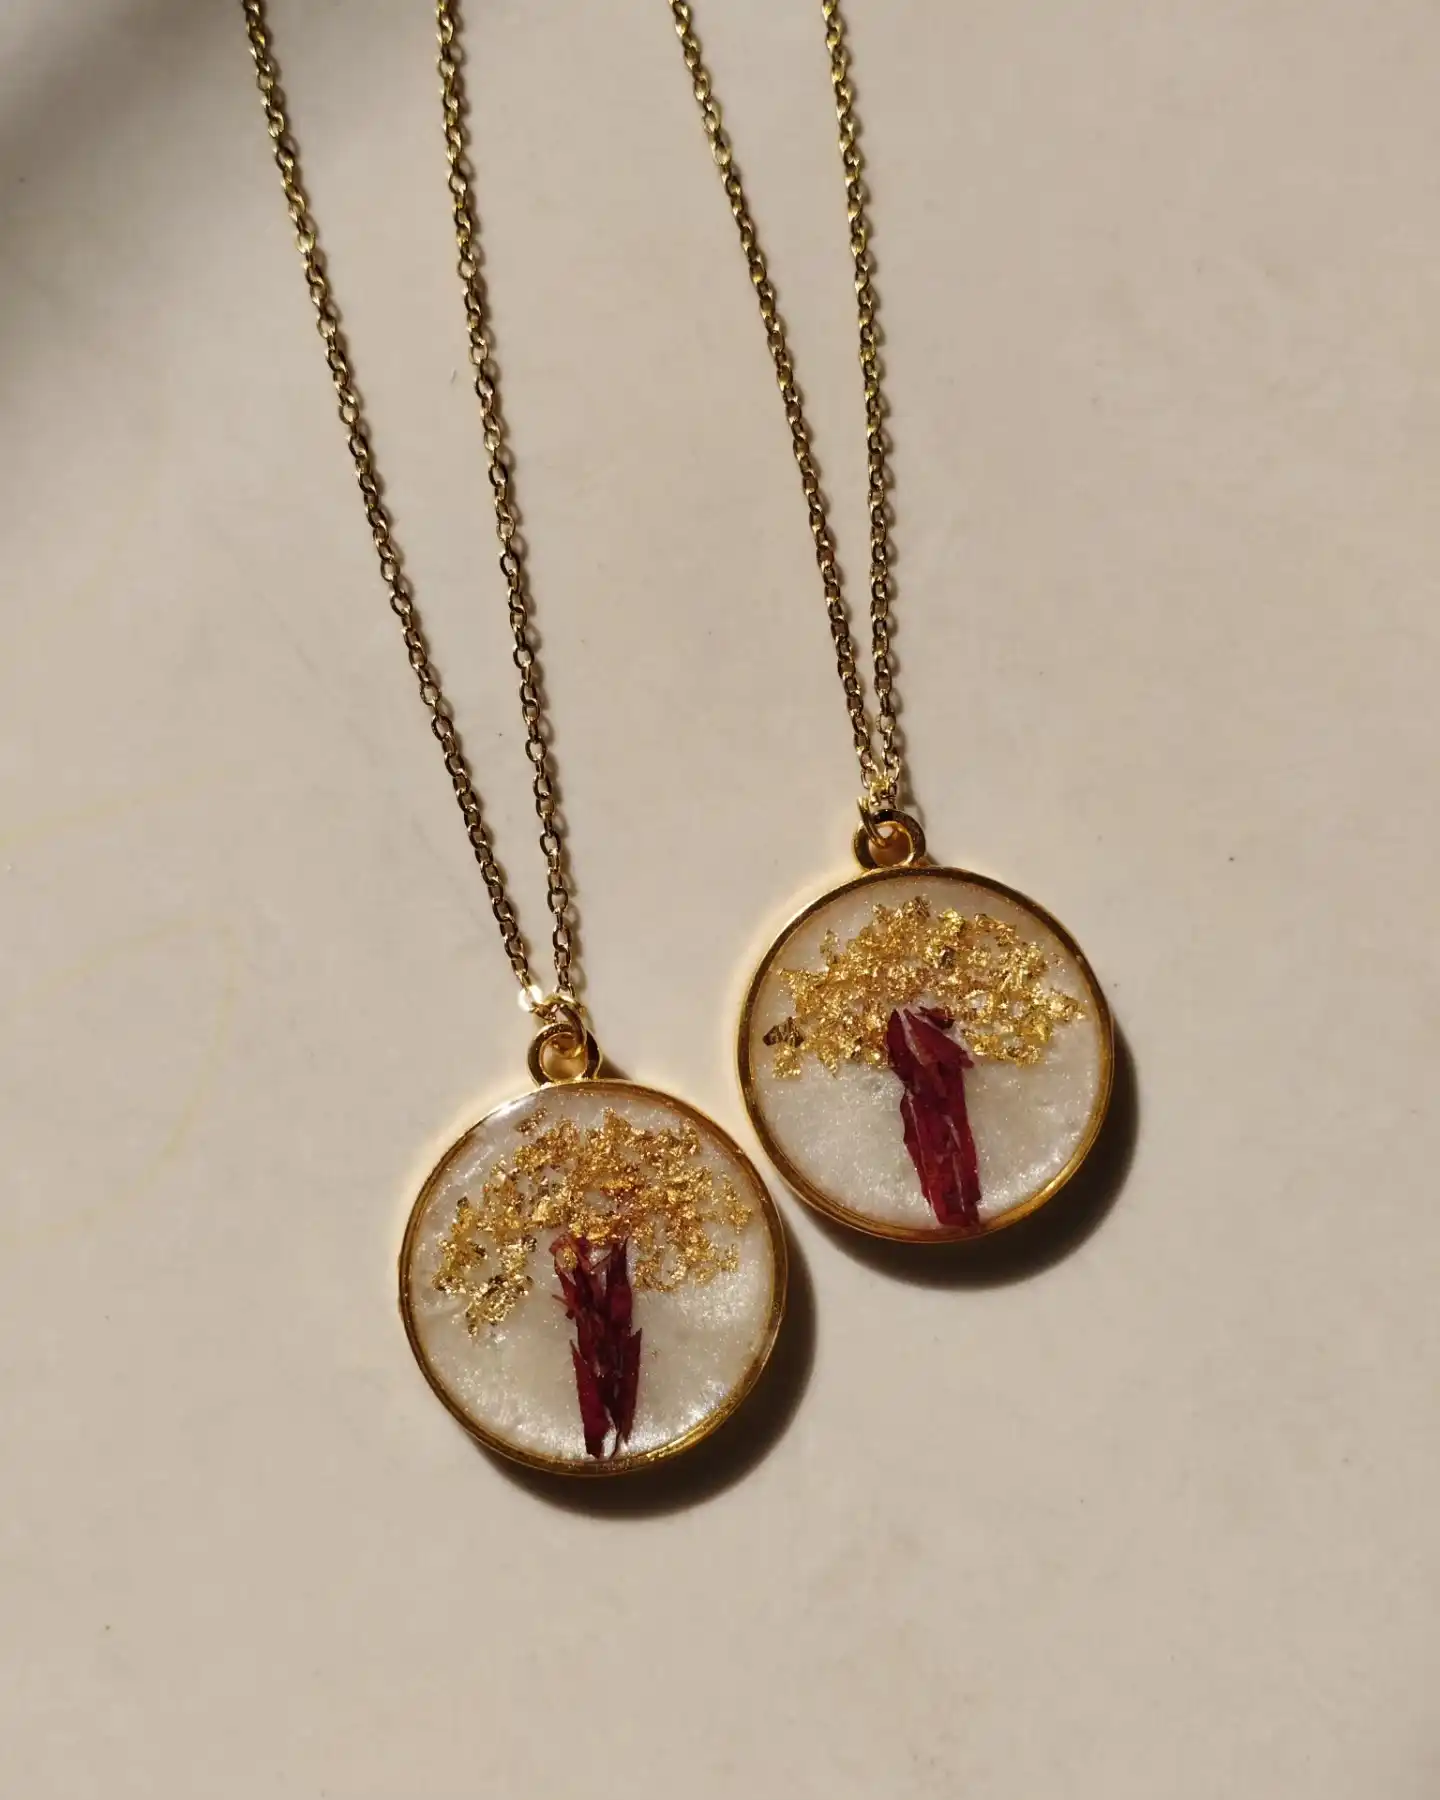
These two pendants use the same tiny scene, a bare tree shape in gold leaf flakes with a dried burgundy flower standing in for the trunk, suspended in clear resin with a shimmer of mica powder.
The larger pendant gives the tree room to spread its branches, while the smaller one compresses the same design into a tighter, denser circle.
Both float the tree slightly off-center so it feels planted rather than centered like a logo.
The white base coat underneath the resin is what makes the gold flakes pop instead of sinking into a clear background, so don’t skip that layer even though it’s hidden once the piece is finished.
Because no two pours land the same way, every pendant made this way turns out slightly different, which is part of the appeal for anyone making one as a keepsake.
15. Build a Vacation-Themed Cluster With Sculpted Miniatures
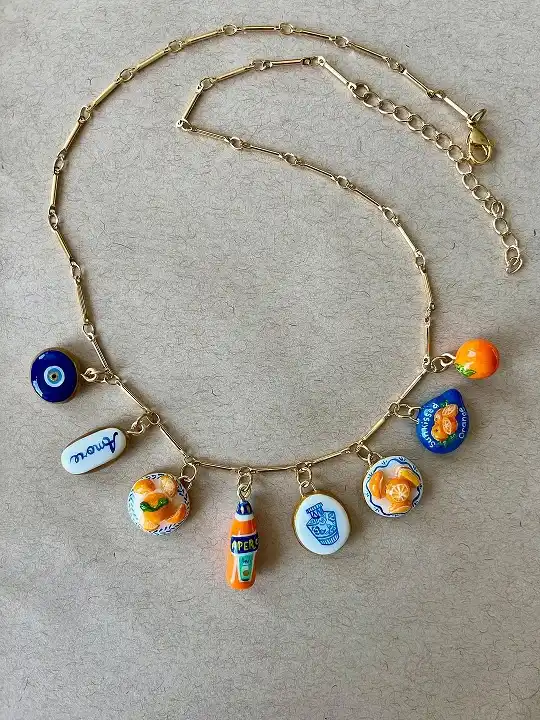
This one tells a whole story: an evil eye bead, an “amore” pebble, a bottle of Aperol, a lemon slice, blue and white pottery discs, and a plump orange charm all cluster along a bar-link chain like souvenirs from the same trip.
Every charm is hand-painted and slightly dimensional rather than flat, which is what makes a bottle charm actually look like a bottle instead of a printed silhouette.
The charms don’t need to come from an actual trip to work, since the same effect comes from picking a place, a color palette, and a handful of small symbols tied to it.
What holds a mismatched set like this together isn’t the subject matter, it’s the repeated blue, orange, and white running through every single piece, which keeps the eye reading it as one collection instead of a random grab bag.
Final Thought
Fifteen necklaces, fifteen completely different moods, and not one of them needed more than a chain, a handful of charms, and some patience with jump rings.
The real takeaway across all of them is that a charm necklace works best when it reflects something specific, a color you keep reaching for, a trip you don’t want to forget, a shape that just makes you happy to look at.
Start with one or two charms you already love, build the chain around them, and let the rest come together slowly instead of all at once.
Save this for the next time you want fresh diy charm necklace ideas to come back to.