19 Festive Christmas Tree Crafts for Kids Using Simple Supplies

Christmas break can feel long when little hands get restless. A pile of paper, glue, and a few buttons can fix that fast. These festive Christmas tree crafts for kids use simple supplies you probably already own.
Most take under an hour. Some need only scissors and a glue stick. Others turn cardboard rolls, craft sticks, or felt scraps into tiny trees worth hanging on the fridge.
Kids get to cut, stack, and decorate. You get a calm afternoon and a few handmade keepsakes.
Each idea below comes with material swaps, time notes, and tips to keep the mess under control.
1. Cardboard Roll Stamped Christmas Tree

- Materials: Cardboard tube, foam daubers, kitchen sponge, paint, white paper
- Make: Dip the tube rim in green paint and stamp rings in a rough triangle
- Finish: Dab red, blue, and yellow dots on top, then sponge a brown trunk
- Display: Glue a gold tinsel pom pom at the peak and tape it to a window
Overlapping green circles build the branches here, and that loopy texture hides wobbly stamping.
A green painted rim on the tube in the photo points to the tool used. Foam daubers on the table suggest how the round ornaments went on.
Let the green dry for a few minutes first so the ornament colors stay bright instead of turning muddy.
Make it easier: Sketch a light pencil triangle before kids start. Little ones can stamp inside the lines and still feel free to fill it their own way.
2. Popsicle Stick Triangle Trees Six Ways
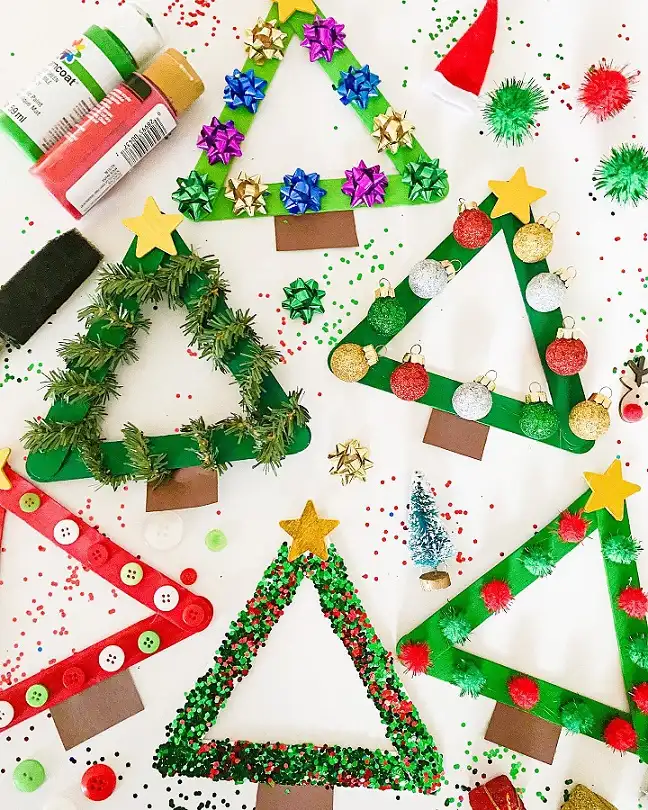
This kids Christmas tree craft starts with three craft sticks glued into a sturdy triangle.
Six versions share the table: gift bows, faux pine garland, mini glitter baubles, buttons on red sticks, chunky glitter, and tinsel pom poms.
Every tree gets a yellow star and a brown paper trunk.
Why it works:
- One base shape lets siblings of different ages craft side by side
- Kids pick their own trim, so each tree looks like its maker
- Leftover bows and buttons from gift wrap get a second use
Glue tip: Paint the sticks green and let them dry before gluing the triangle. Heavy trims like mini baubles need thick craft glue or a grown up with a low temp glue gun.
3. Torn Paper Collage Trees with Gold Splatter

Bright scraps of painted paper pile up into tall, narrow trees on white card. Pink, violet, teal, lime, and orange pieces overlap with no fixed pattern.
Gold dots and a fine gold splatter sit over everything like party confetti. These look like a classroom batch, so the method suits a group. Kids can paint big sheets one day and let them dry.
On day two they tear the sheets into small bits and glue them inside a pencil triangle, starting wide at the bottom.
Tearing beats cutting for small hands because ragged edges look natural here. Flick gold paint off a stiff brush for the splatter, and do it outside or over newspaper.
Save every leftover scrap in a zip bag for next year’s cards.
4. Egg Carton Fringe Tree Forest
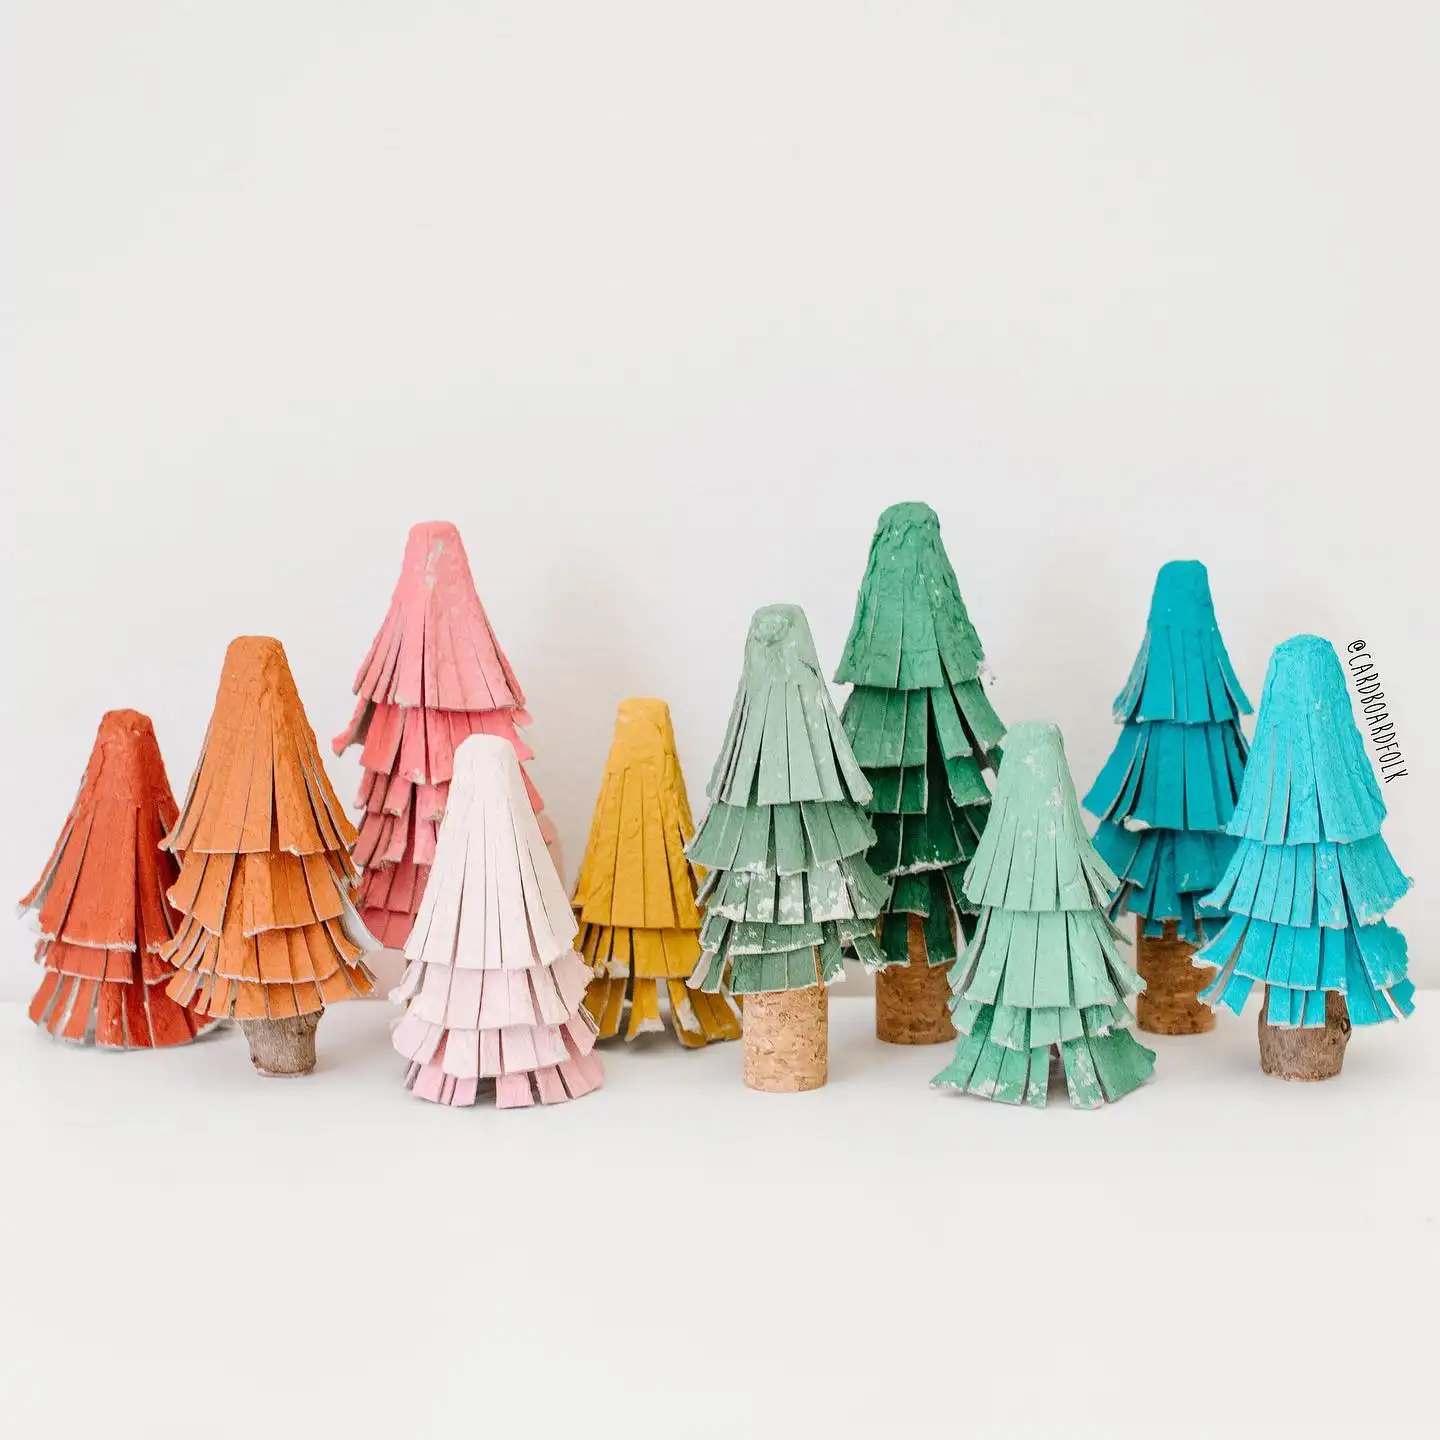
Best for: A shelf or mantel display that kids help style
Pointed center cones from a cardboard egg carton stack into these soft little trees. Each cone has narrow fringe cuts around the rim.
Painted layers sit one on top of another in rust, coral, pink, mustard, sage, and teal, and some trees stand on wine corks or short twig pieces.
Cutting the fringe takes sharp scissors and patience, so older kids handle that part best. Younger helpers can paint the cones with chunky brushes.
Matte craft paint covers the gray pulp well, though a few pale specks still show and add charm.
Accent upgrade: Line the trees from warm to cool shades, as the photo does, for a rainbow forest. Swap in all greens with a white dry brush on the tips for a snowy look.
5. Handprint Tree with Glitter Pom Pom Ornaments
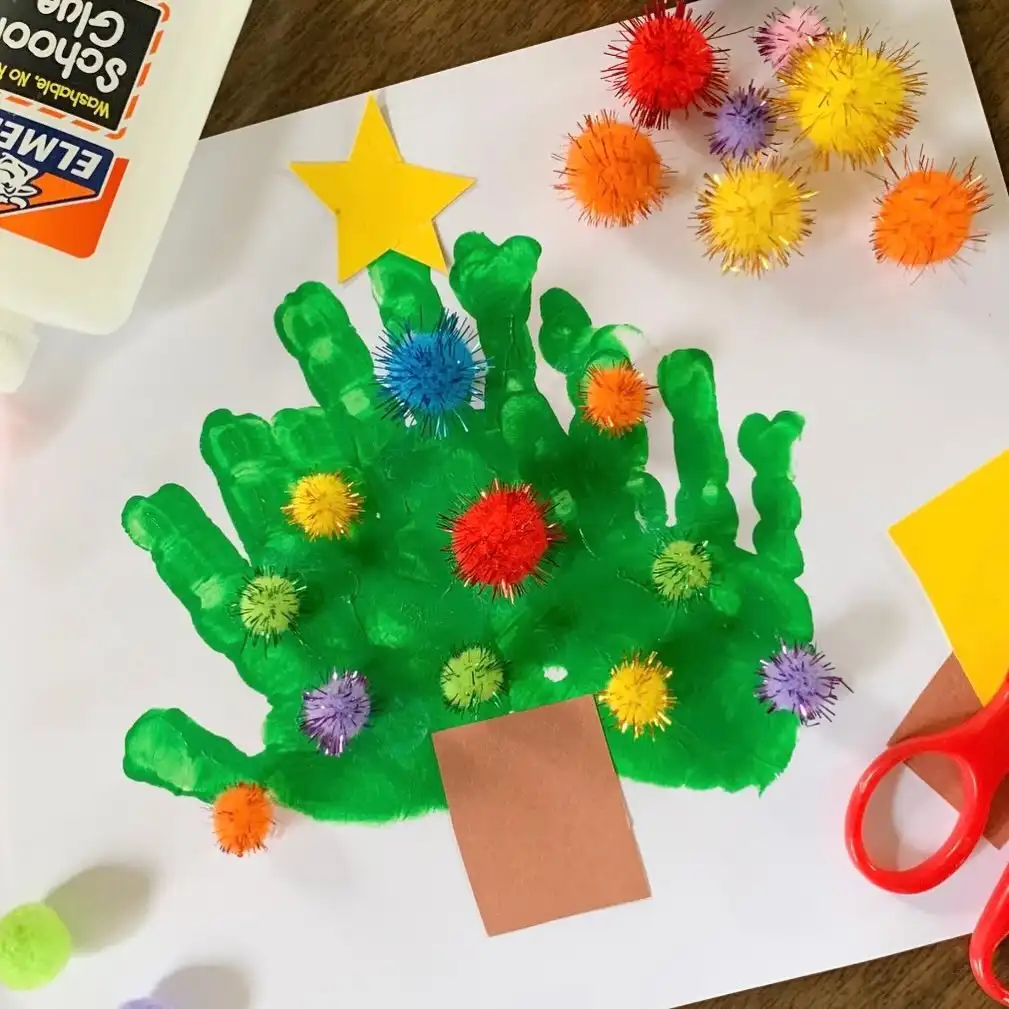
You’ll need: Green paint, white paper, glitter pom poms, a yellow foam star, brown paper, school glue
Small green handprints stack into a bushy tree, fingers pointing up like branches. Two or three prints overlap here, so the shape spreads wide at the base.
Sparkly pom poms in red, blue, yellow, orange, purple, and lime dot the paint like lights.
Paint the palm with a foam brush instead of dipping it in a tray. That gives a cleaner print with fewer smudges.
Wait until the paint dries before kids glue on the pom poms and tuck a brown paper trunk under the bottom edge.
Keepsake idea: Write the child’s name and the year on the back. Handprint Christmas tree crafts for kids make sweet gifts for grandparents, and they show how much little hands grow each December.
6. Pipe Cleaner Button Tree Under a Paper Star
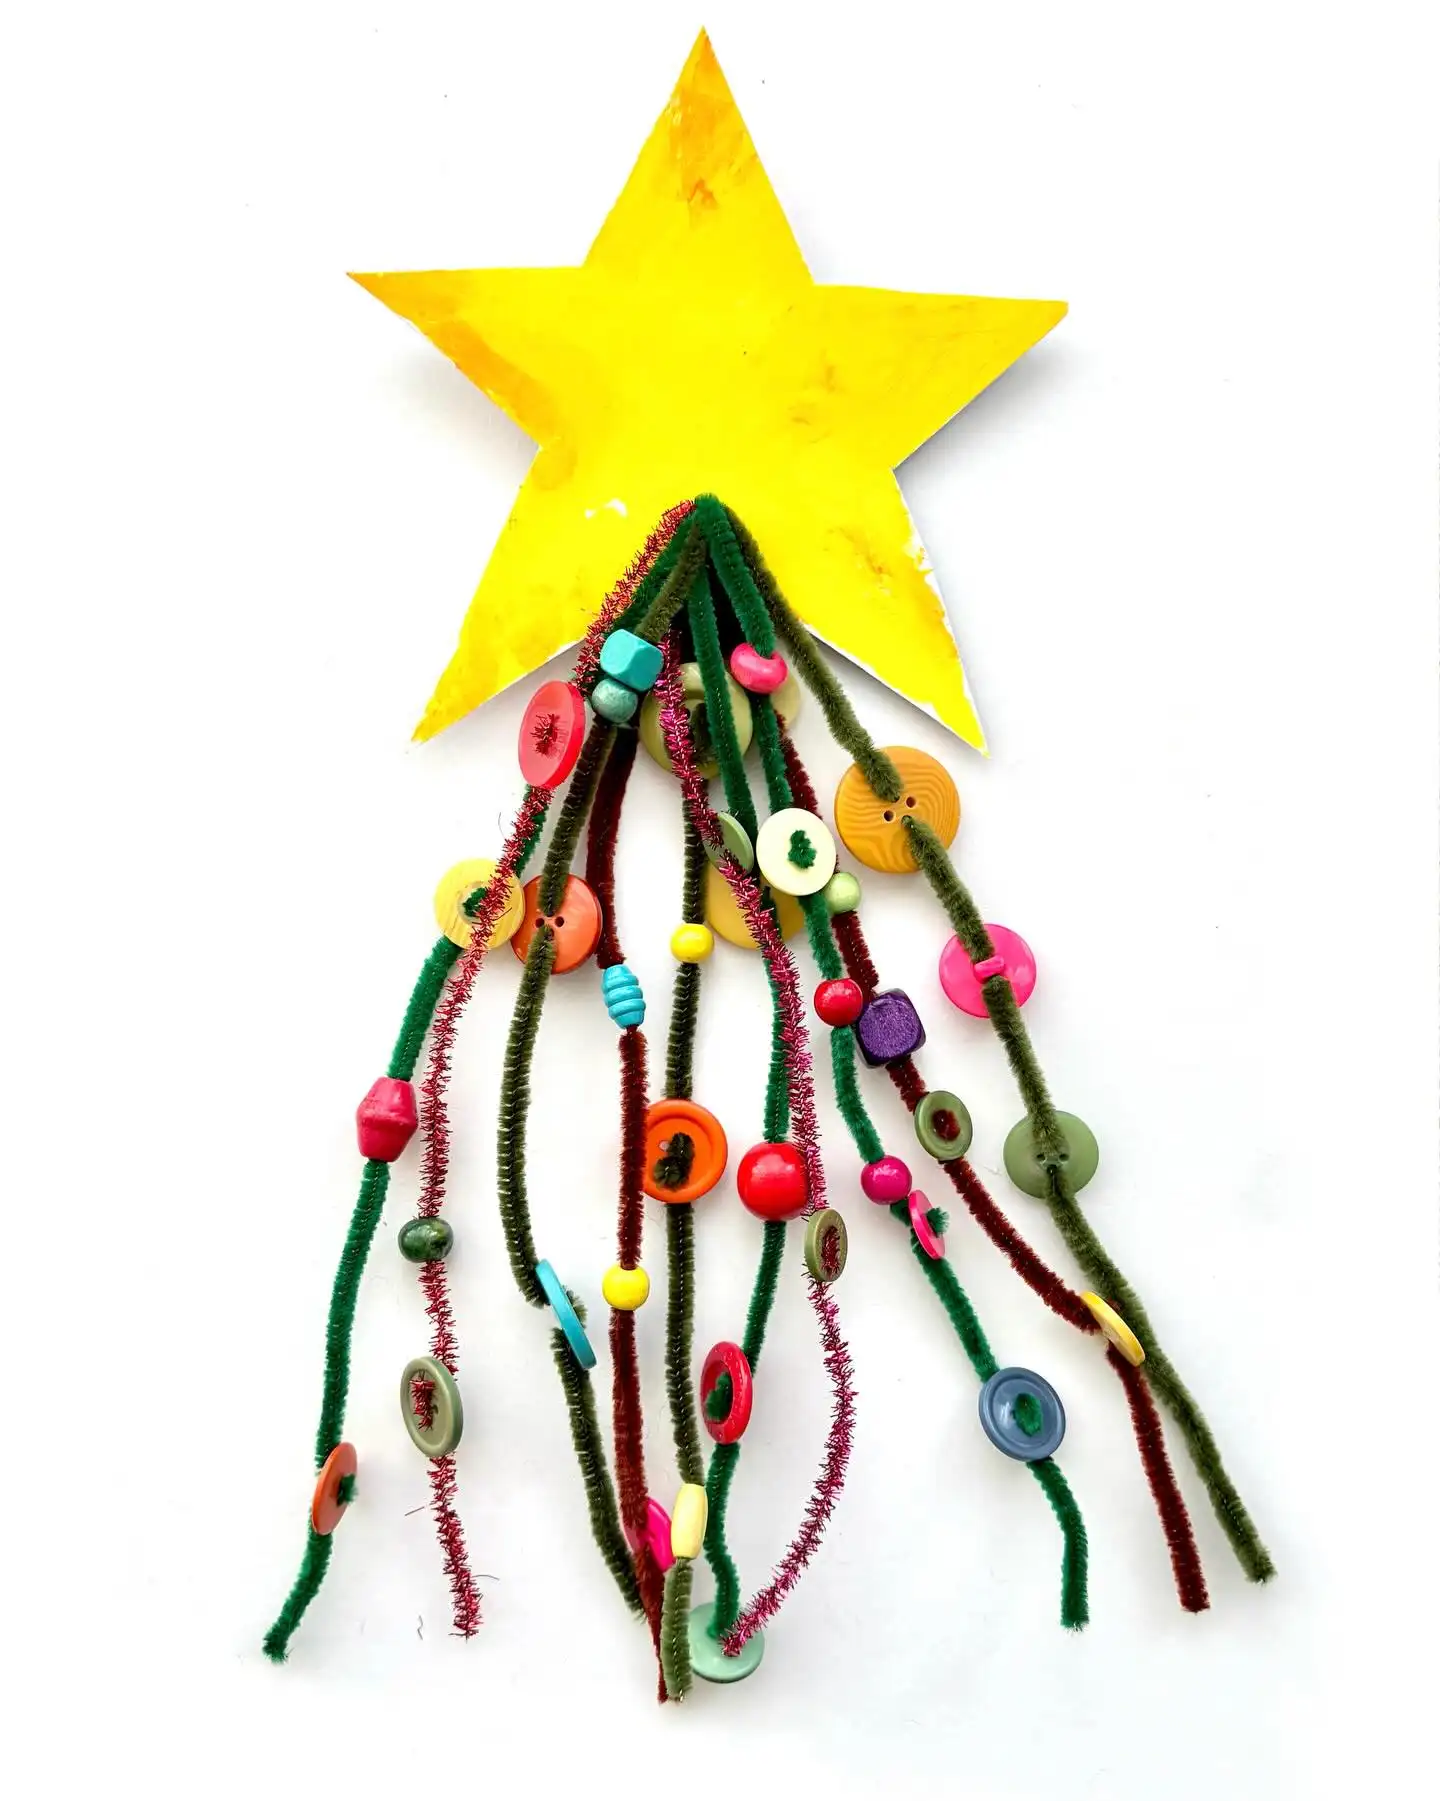
Green, olive, and maroon pipe cleaners fan out below a painted yellow star in long strands. Pink tinsel stems weave between them.
Colorful buttons and wooden beads are threaded onto each strand, so the whole piece reads as a tree made of hanging garlands.
Subscribe to DIY Craft Bloom
Get updates on the latest posts and more from DIY Craft Bloom straight to your inbox.
Fine motor note: Threading buttons onto pipe cleaners trains small fingers. Fuzzy stems grip each button, so nothing slides off while kids work.
Display idea: Tape the star to a door or wall and let the strands hang free. Tuck the stem tops behind the star with strong tape so they stay put.
Safety note: Buttons and beads are choking hazards. Save this one for kids past the mouthing stage, and sort the pieces into a muffin tin to keep them contained.
7. Giant Cardboard Box Tree with Fairy Lights
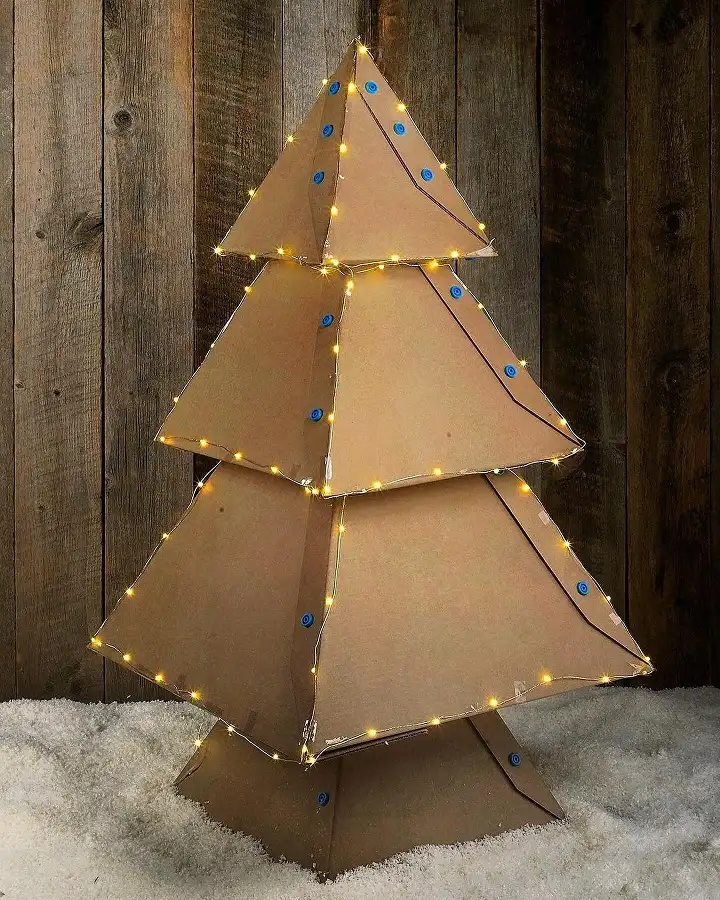
- Materials: Large cardboard boxes, plastic screw fasteners, tape, warm white fairy lights
- Make: Cut tapered panels and join them into hollow pyramid tiers
- Finish: Stack the tiers from widest to smallest on a square base
- Display: Wrap fairy lights along every edge and set it on faux snow
Plain brown cardboard stacks into a tree almost as tall as a young child. Four pyramid tiers sit on a square base, and small blue plastic fasteners hold the panels together.
Thin wire fairy lights trace each edge, which gives the tree its warm glow against the rustic wood wall.
Skill level: This build needs a grown up for the cutting. Kids can twist in the fasteners, peel tape, and drape the lights. Battery lights keep cords off the floor.
8. Yarn Wrapped Cardboard Tree Ornaments

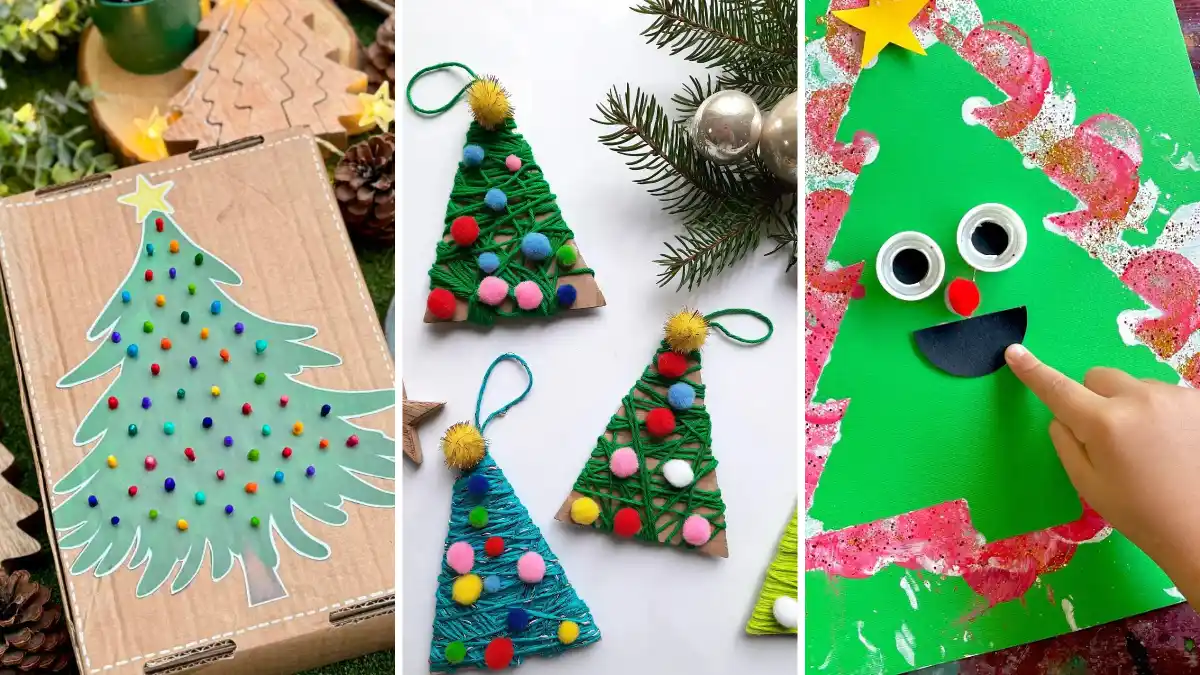
Cardboard triangles get wrapped round and round with yarn in green, teal, or lime. Crisscross strands leave bits of brown card peeking through, which keeps the look loose and handmade. Mini pom poms in pink, red, blue, yellow, and white sit on top as ornaments.
A gold tinsel pom pom caps each tree, and a yarn loop makes it ready to hang. Cut small notches along the triangle edges to stop the yarn from slipping.
Kids can then wrap at their own pace and tuck the loose end under a strand with a dab of glue.
Cereal boxes and shipping boxes both work as the base. One skein of yarn covers a whole batch of these simple Christmas tree crafts. Hang them on the real tree, or tie one to a gift as a name tag.
9. Smiling Painted Paper Trees with Star Stickers
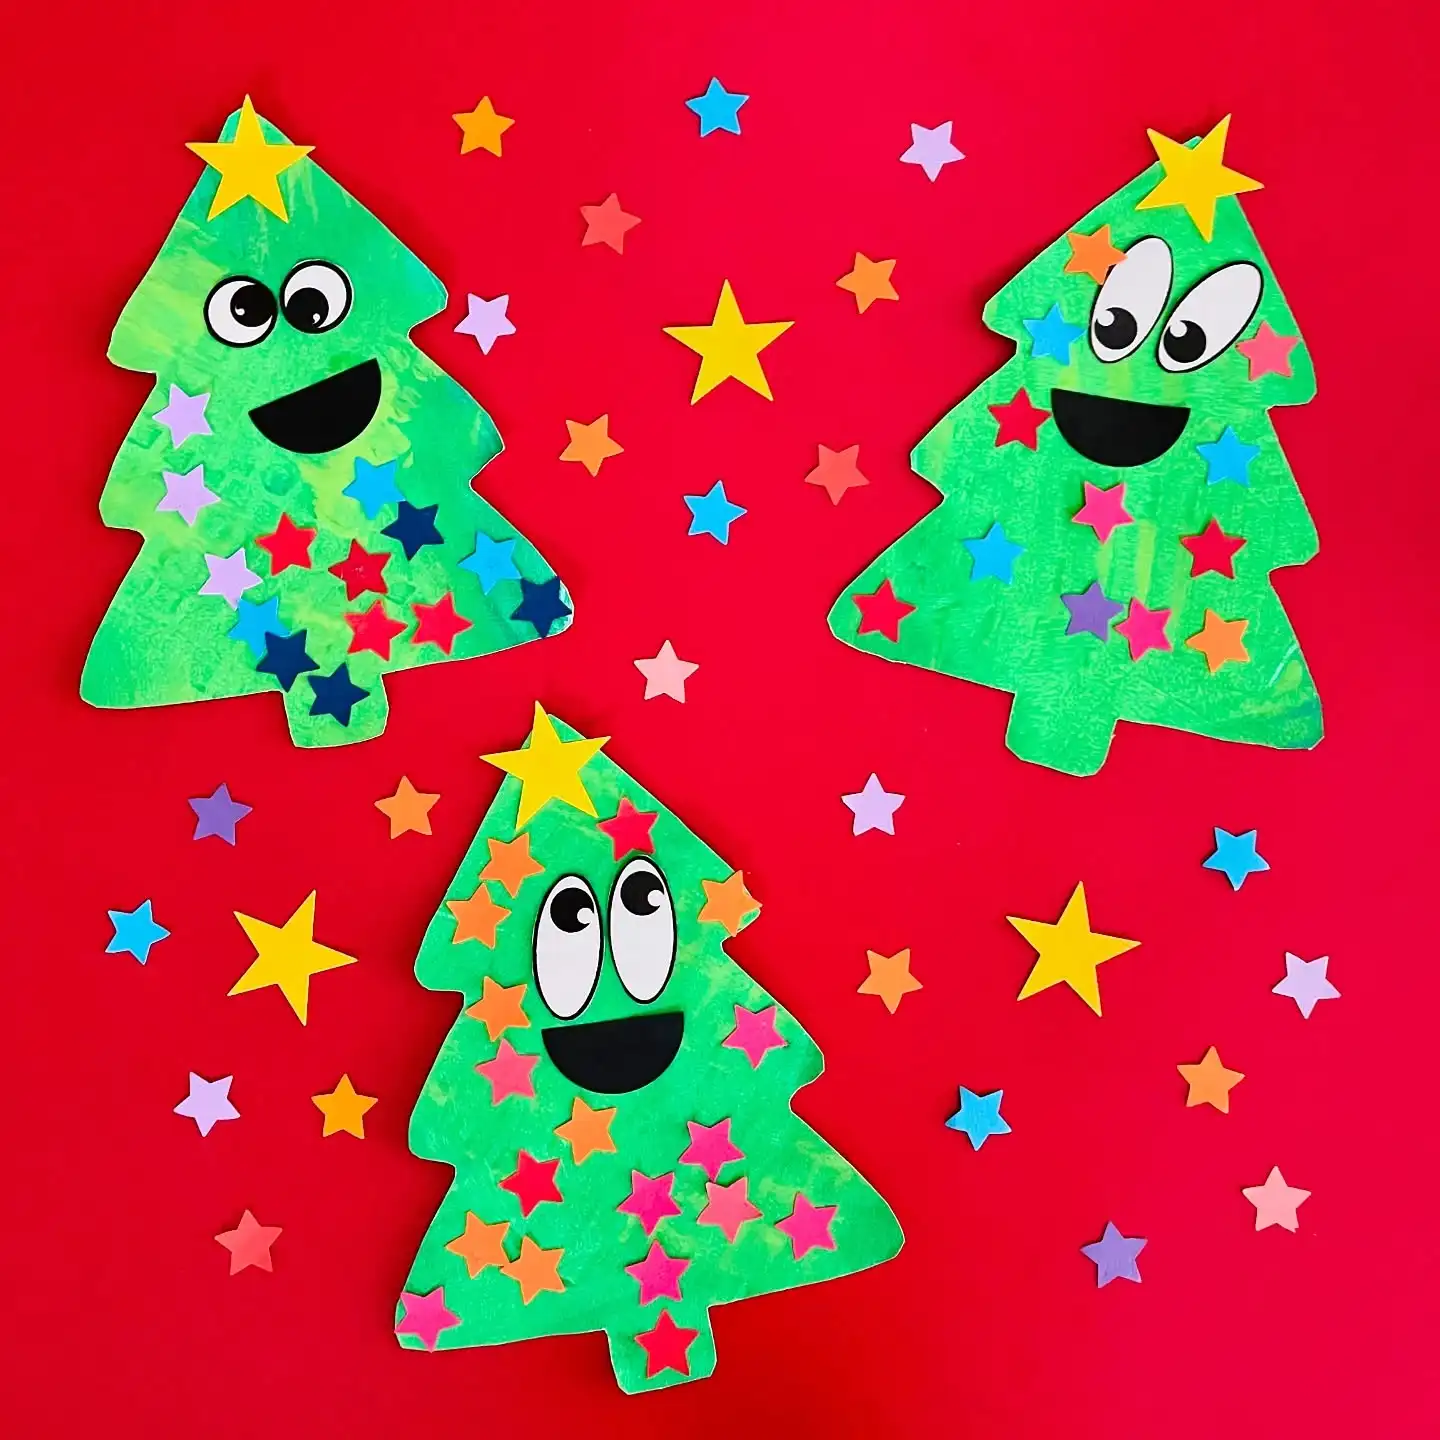
Three cheerful trees grin up from a red paper background. Each green cutout has brushy, streaky paint, wide paper eyes with black pupils, and a black half moon mouth.
Tiny paper stars in red, pink, orange, blue, and lilac cover the branches, and a yellow star crowns each top.
Why it works:
- Two shades of green paint give the trees depth with no extra work
- Big paper eyes looking in different directions give each tree a mood
- Sticking stars is easy practice for toddlers learning to peel and press
Budget swap: A star shaped paper punch turns scrap card into dozens of stars in minutes. Foil star stickers from the dollar store work too.
10. Sequin Trees on Cardboard Roll Stands
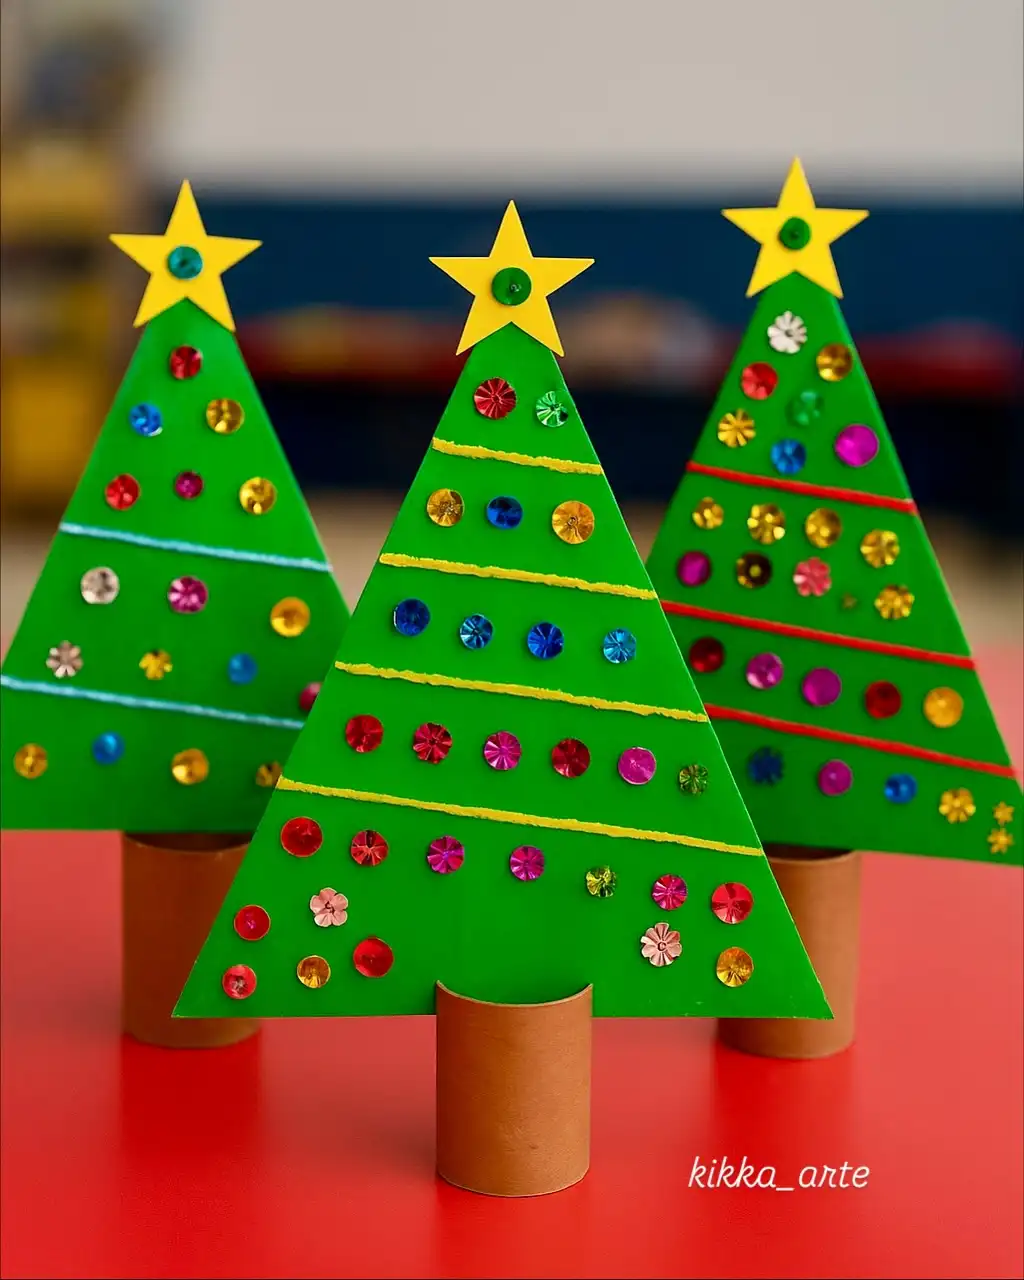
Best for: A kids’ table centerpiece or a classroom windowsill
Green card triangles stand upright on short brown cardboard rolls, so these trees sit on a table without help. Shiny sequins in red, blue, gold, and pink line up in rows like strings of lights.
Raised lines of yellow, red, or pale blue run between the rows, and each yellow star has a green sequin center.
The raised lines look like glitter glue or puffy paint, though the photo does not confirm which.
Cut two short slits in the top of each roll so the triangle slides in snug. Older kids can count sequins per row and turn it into a pattern game.
Seasonal swap: Paint the rolls white or wrap them in washi tape to match your table. Flat sequins hold glue better than round beads, so stick with them for younger crafters.
11. Paper Straw Tree on a Craft Stick
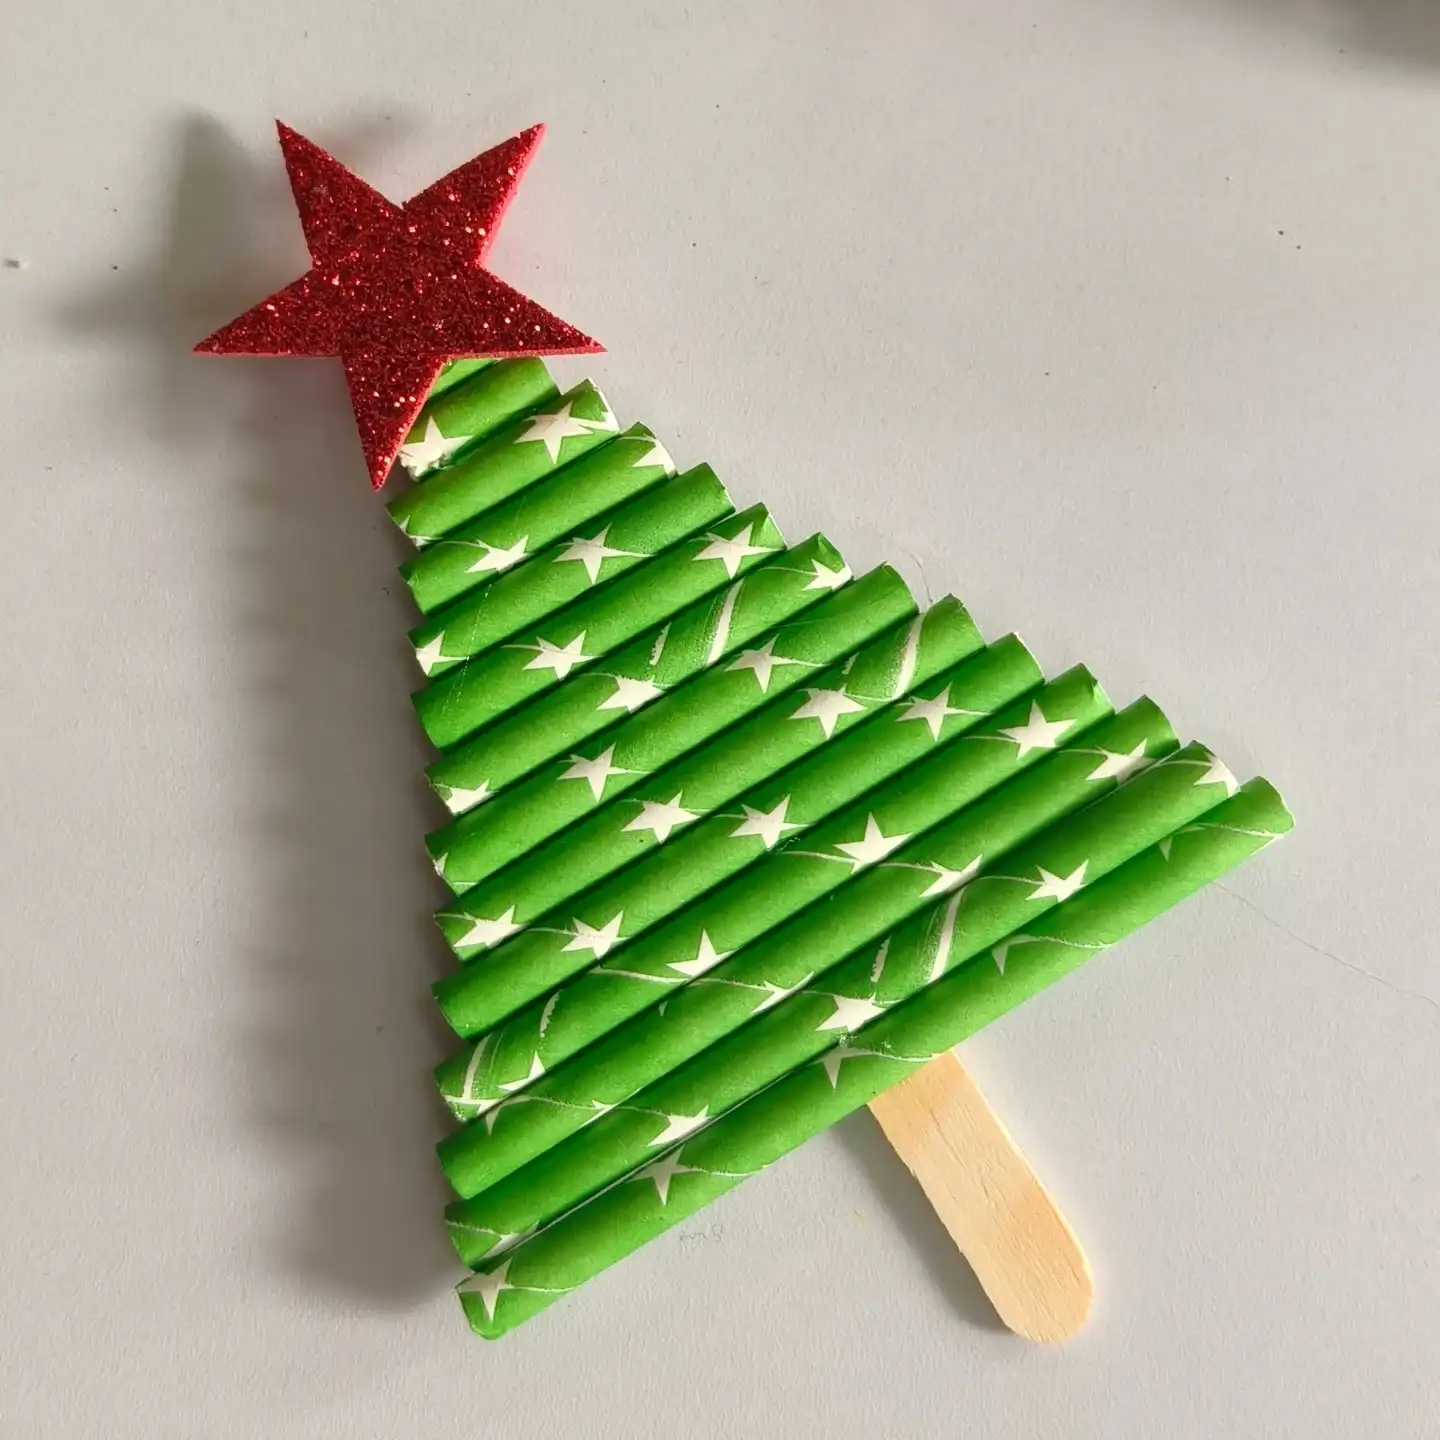
What you’ll need: Green paper straws with white stars, a craft stick, a red glitter foam star, scissors, glue
Green paper straws printed with white stars line up in rows, each one a bit shorter than the one below.
They sit at a slight angle on a plain wooden craft stick, which also forms the trunk. A red glitter foam star finishes the top.
Cut the first straw long, then trim each new one shorter as you go. Kids can lay the pieces out on the table to check the shape before any glue goes on.
This easy Christmas tree craft for kids needs only one pack of straws for a few trees.
Time needed: Around twenty to thirty minutes, plus drying time. Add a magnet strip to the back and it becomes a fridge decoration.
12. Standing 3D Paper Trees with Collage Dots

A whole forest of bright paper trees fills this art room. Two triangles slot together through the middle, so each tree stands on four fins.
Neon pink, red, yellow, and lime card hold painted paper circles and shapes, and every peak wears a tinsel pom pom.
Quick build: Cut two matching triangles. Slit one from the top down to the center and the other from the bottom up, then slide them together.
Upcycle idea: Use leftover painted paper from other projects for the dots. Tracing around a bottle cap gives kids neat circles without a punch.
Grouping tip: Cluster tall and short trees together on a tray. A crowd of mixed heights looks fuller than a single row.
13. Layered Handprint Tree with a Silly Face

Lots of cut out green handprints overlap here into one big, shaggy tree. Each print keeps a thin white paper border, which makes the fingers stand apart.
Subscribe to DIY Craft Bloom
Get updates on the latest posts and more from DIY Craft Bloom straight to your inbox.
Googly eyes and a black paper smile turn it into a friendly character. Paper dots in yellow, blue, pink, and purple act as ornaments.
The scraps on the table have round holes, so a hole punch probably made these dots. A yellow paper star sits at the top, and a brown rectangle forms the trunk.
Print hands on several sheets over a few days, then cut them out with a small border. Siblings can each add prints for a family tree.
Glue the biggest hands at the bottom and the smallest near the top for a natural taper.
14. Paper Strip Tree on Red Card
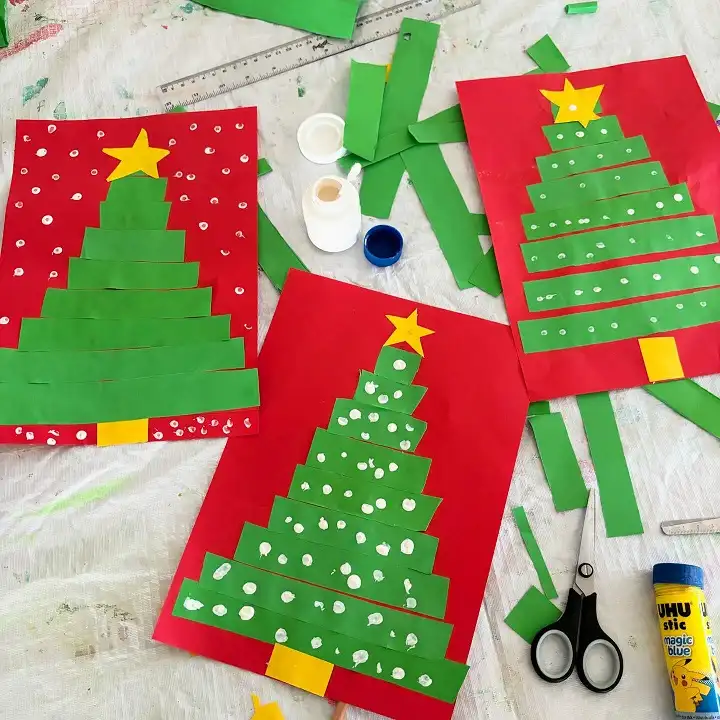
- Materials: Red card, green paper strips, yellow paper, white paint, glue stick
- Make: Glue strips from longest at the bottom to shortest at the top
- Finish: Add a yellow star and trunk, then dot white paint over the tree
- Display: Hang the trio in a row on a bedroom door
Three versions share one idea but end up different. One has white dots only on the red background, while the other two spread dots across the branches.
Paper strip Christmas tree crafts for kids also sneak in a quiet lesson on size order.
Kid friendly: A ruler helps older kids cut even strips, like the one on the table. Preschoolers can tear strips instead, and a cotton swab makes neat dots without a brush.
15. Stenciled Tree with Bottle Cap Eyes
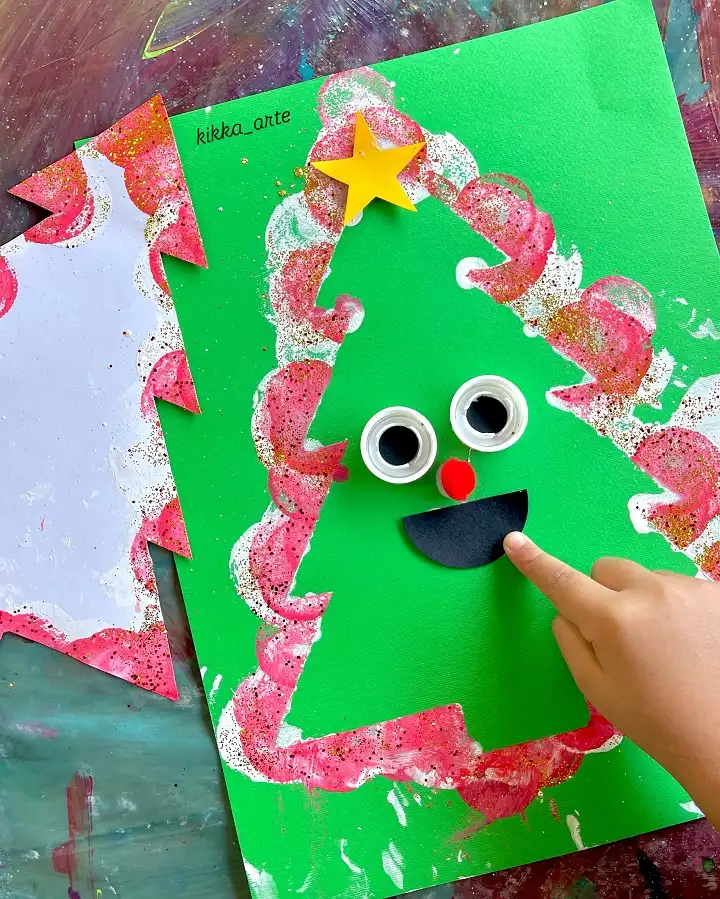
Pink and white paint went around the edge of a paper tree stencil on green card. Lifting the stencil left a crisp green tree inside a puffy border flecked with gold glitter.
White caps with black centers form the eyes, with a red pom pom nose, a black paper mouth, and a yellow star.
Why it works for little hands:
- Kids can dab paint as messy as they like and the tree still comes out clean
- Reused lids and spare pom poms keep costs close to nothing
- Adding a face at the end gives impatient crafters a fun payoff
Paint tip: Tape the stencil down with a few small loops of tape so it does not shift. Mix glitter into the paint before dabbing rather than sprinkling it after.
16. Accordion Fold Paper Trees with a Straw Trunk
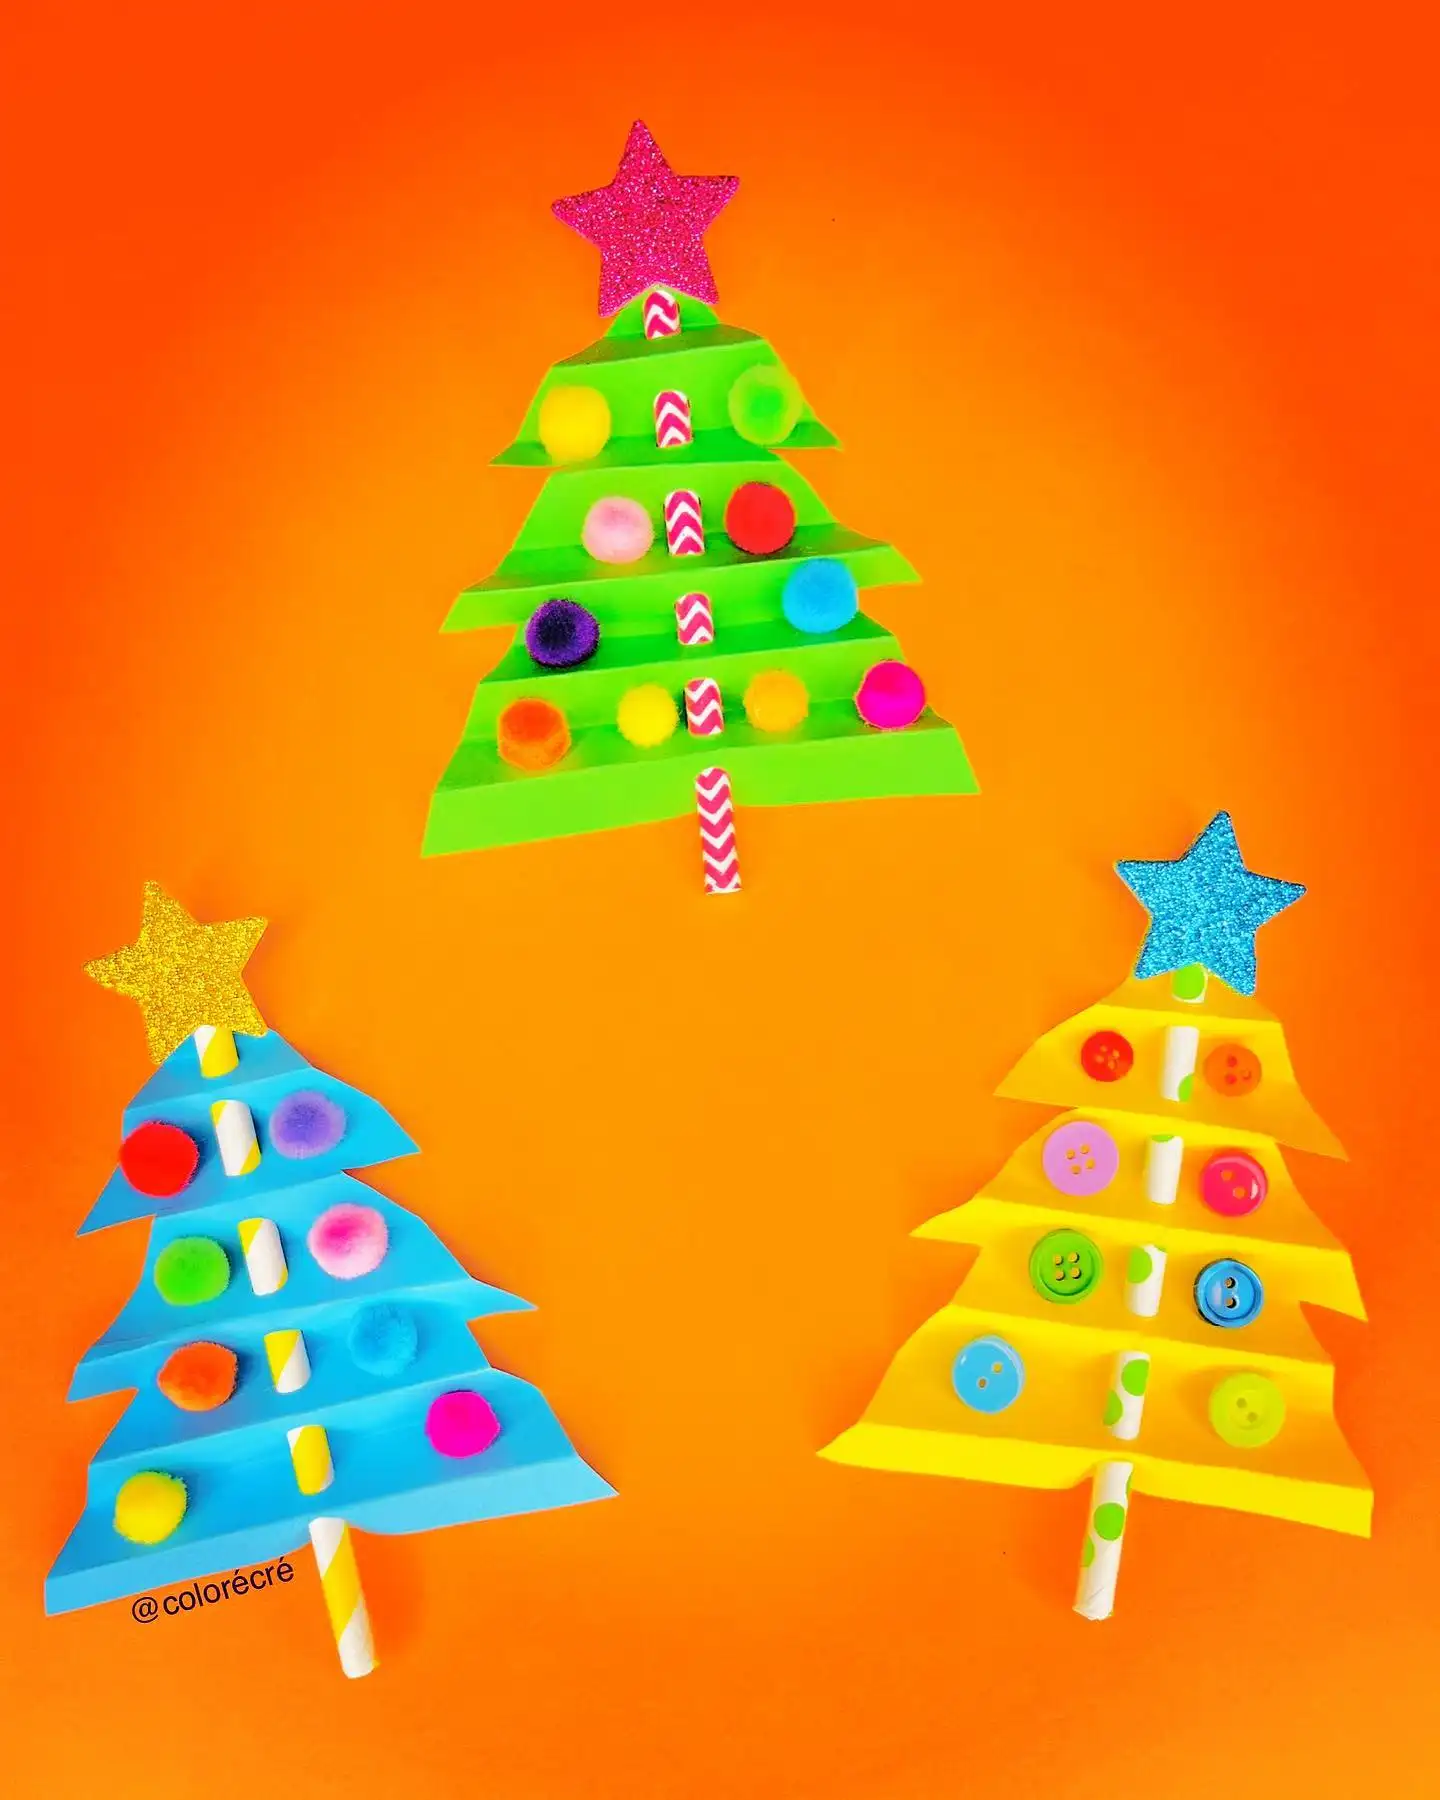
Best for: Holiday cards, school bulletin boards, or a playroom wall
Green, sky blue, and sunny yellow paper fold back and forth into ridged trees with wavy branch edges.
A patterned paper straw runs up the center as the trunk and peeks out between folds. Pom poms dot two trees, while the yellow one carries bright buttons.
One way to build it: cut a tree shape, fan fold it, then snip small slits down the center so the straw can weave through.
Glitter foam stars in pink, gold, and blue cap each top. Folding paper like a fan is a new skill kids can reuse in other crafts.
Color note: Skipping traditional green, as two of these do, makes the trees pop against a bold orange background. Let kids pick a shade that matches their room.
17. Poke and Decorate Cardboard Box Tree

Toddlers get a busy board out of this Christmas tree activity for kids. A printed green tree covers the lid of a brown cardboard box, with a dashed white line around the edge.
Small holes dot the tree, and short sticks with colorful tips sit in each one like tiny lights.
Copy this setup: Poke holes with a skewer, then let little ones push the colored sticks in and pull them back out. The box stays useful all through December.
Styling tip: Set the box in a basket with pine cones, wooden trees, and star string lights, as shown, for an inviting play station.
Safety note: The spare sticks in the gray dish look like trimmed cotton swabs with painted ends. Supervise closely and count sticks at cleanup, since small pieces are a choking risk.
18. Tinsel Pipe Cleaner Ornaments with Pony Beads
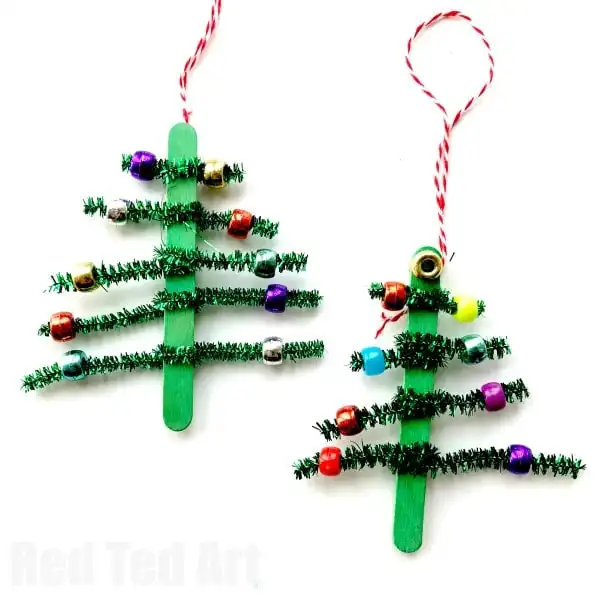
You’ll need: Green craft sticks, green tinsel pipe cleaners, pony beads, red and white baker’s twine
A green painted craft stick runs down the middle as the trunk. Tinsel pipe cleaners wrap around it in rows, shorter near the top and longer at the bottom. Shiny pony beads in purple, gold, silver, red, and teal sit on the branch tips.
Twist each pipe cleaner once around the stick, then slide a bead onto each end. Bending the tip slightly keeps the bead from falling off. A loop of red and white twine at the top makes it ready for the tree.
Beginner shortcut: Precut the pipe cleaners into graded lengths so kids only twist and bead. Plain green pipe cleaners work fine if the tinsel ones run out.
19. Red and White Craft Stick Triangle Ornaments
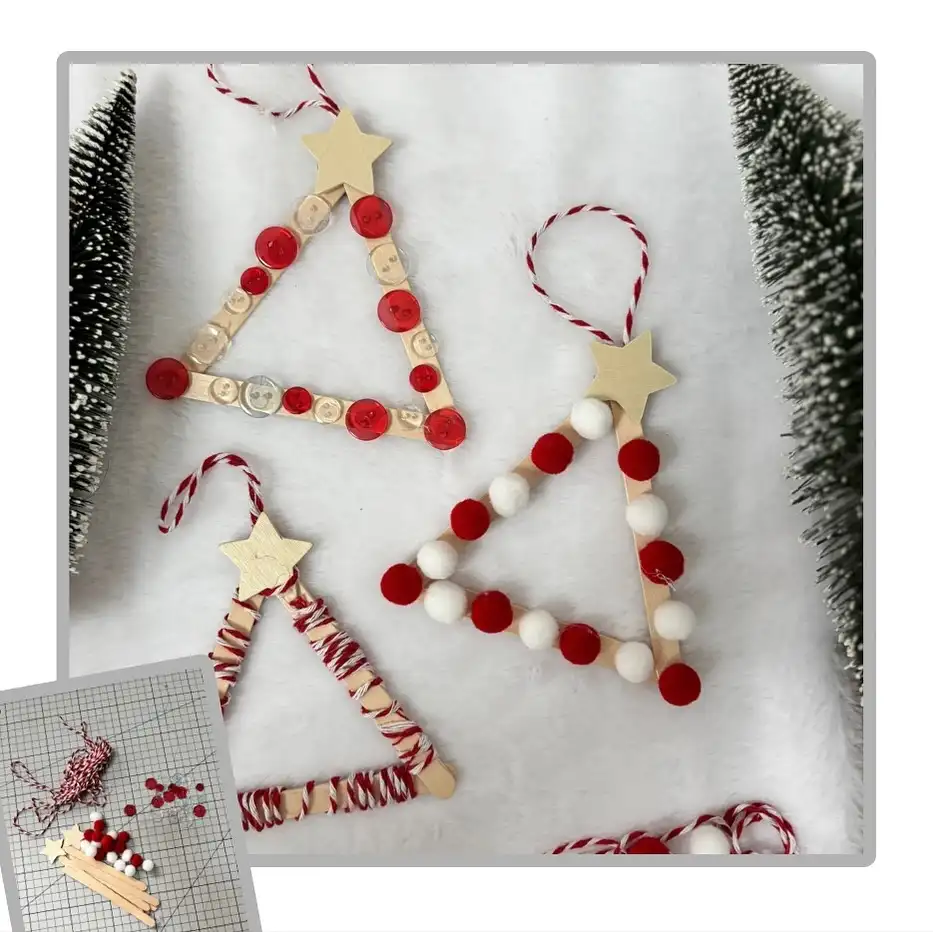
Natural wood craft sticks form three simple triangles in a red and white theme. One carries red and clear buttons.
Another alternates red and white pom poms, and the third is wrapped in red and white twine.
Small unfinished wooden stars sit at each peak, with twine loops for hanging. Bottle brush trees and white faux fur behind them set a cozy Scandinavian mood. The inset photo shows all the supplies fit on one small cutting mat.
Sticking to two colors keeps a mixed batch looking tidy on the tree. These Christmas tree crafts for kids also make thoughtful gifts for teachers.
Wrap the twine snugly and tuck the end under with a dot of glue so it does not unravel.