12 Wire Wrapped Ring Ideas for Beginners


Wire wrapping looks intimidating until you realize almost every ring on Pinterest comes down to a handful of repeatable moves: a knot, a coil, a cage, a spiral, a row of beads.
Once you can do those, you can make dozens of different rings without learning a single new skill.
This list pulls together real photos of finished pieces, from a two-tone knot ring to a full spiral of stacked, multicolor stone rings, and breaks down what actually makes each one work.
If you are just starting out with wire wrapped rings diy style, the order here roughly follows a beginner path.
The early ideas, like a loose knot or a single bead in a coil, only ask for one wire and a few wraps.
The later ones, full bead wraps around the entire band or a woven herringbone texture, take more patience but build directly on skills you already picked up.
Nothing here needs soldering, and most of it needs less wire than you would guess.
Save this list and work through it a ring at a time. Every idea below is doable on a kitchen table with a spool of wire and some patience.
12 Wire Wrapped Ring Ideas for Beginners
1. The Two-Tone Knot Ring
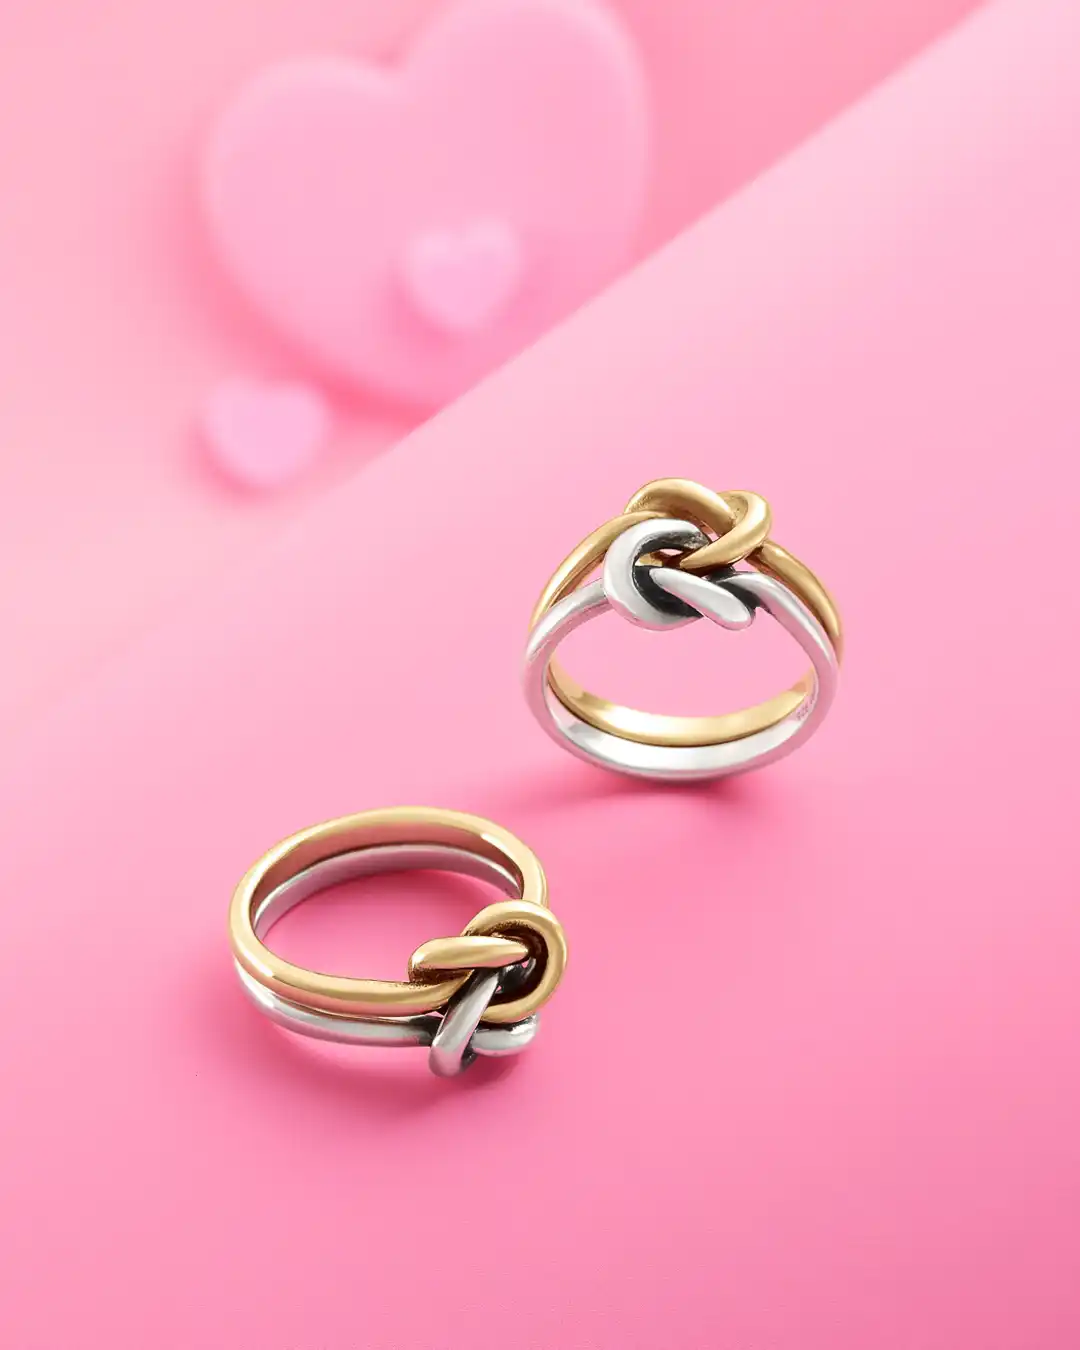
A single loose knot in mixed metal is one of the easiest wire shapes to master, and it reads a lot fancier than the technique actually is.
What makes this one work:
- Gold wire and silver wire twisted together before the knot, not two separate rings
- The knot sits slightly off-center instead of dead in the middle, which keeps it looking hand tied rather than stamped
- Wire gauge is thick enough to hold its loop without extra soldering
For beginners, start with one gold and one silver wire in the same gauge, around 18 to 20 gauge for a first try.
Tie the loose overhand knot before you shape the band, then wrap the tails around your ring mandrel to size.
The mixed metal is what sells this piece, so don’t skip that part even if a single color feels safer.
2. The Woven Herringbone Band
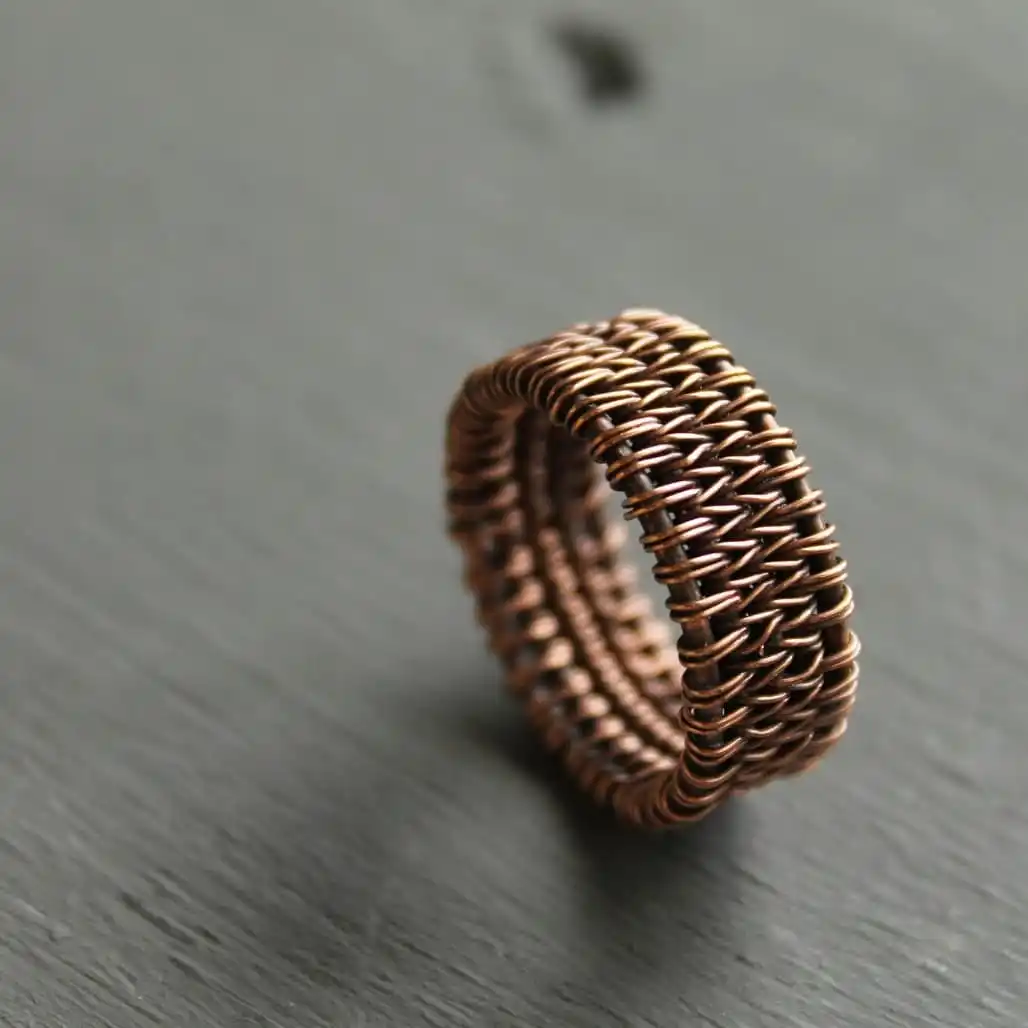
Thick, textured, and clearly made from dozens of small crossings, this ring shows what patience with plain wire can build.
It’s the technique most people picture when they hear wire wrapped jewelry, even though it takes more reps than the average beginner project.
The structure comes from two parts working together:
- Several straight core wires laid side by side to set the width of the band
- One long weaving wire crossing back and forth over those cores in a herringbone pattern
Getting this look takes some patience. Lay three to five core wires across your mandrel first and hold them in place with tape or a clamp.
Then take a separate length of thinner wire and weave it over one core, under the next, working your way down the row and back, packing each pass close to the last one so no gaps show.
Copper is the forgiving choice here since it work hardens as you weave, which helps the whole band hold its shape once you slide it off the mandrel.
3. Two Beginner Techniques Side by Side
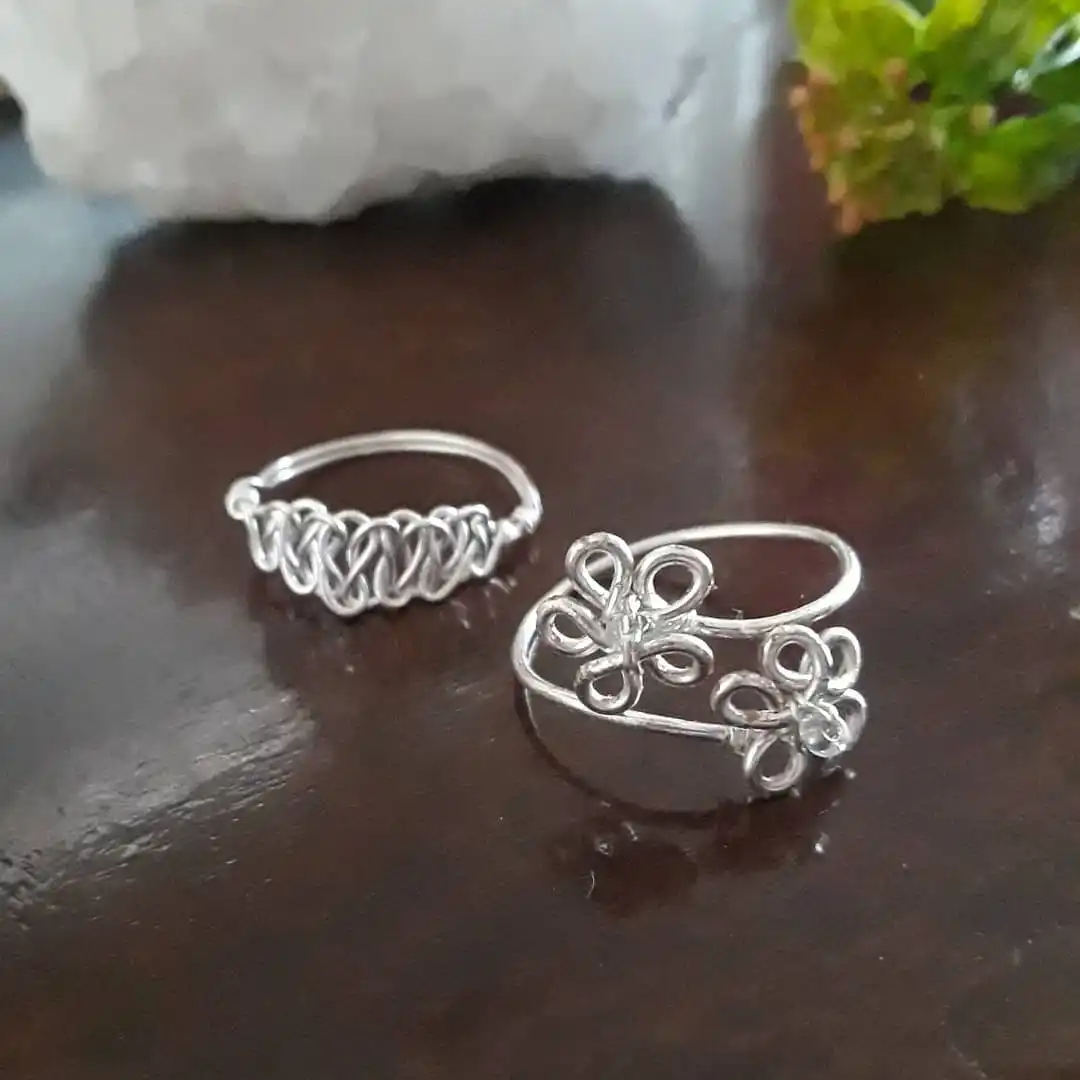
This shot pairs a crisscross wrapped band with a wire flower ring, and together they make a good side by side lesson since both start from the same plain wire but land in completely different places.
Crisscross band, left:
- Wire loops back and forth across itself in an X pattern
- Sits on a plain wire shank underneath for support
- Reads texture heavy from a distance, geometric up close
Wire flower ring, right:
Subscribe to DIY Craft Bloom
Get updates on the latest posts and more from DIY Craft Bloom straight to your inbox.
- Small teardrop loops pinched and twisted to form petals
- Two flowers set at slightly different heights along the band
- Open, airy look since most of the design is negative space
If you are choosing your first project, the crisscross band is more forgiving because a slightly uneven X still looks intentional.
The flower ring asks for more consistency, since one lopsided petal stands out against the others.
| Crisscross band | Wire flower |
|---|---|
| Wire crosses itself in an X over a shank. | Small loops pinched into petal shapes. |
| Forgives uneven spacing. | Needs even, matching petals. |
| Dense, textured look. | Open, airy look. |
4. The Marquise Frame with Floating Beads
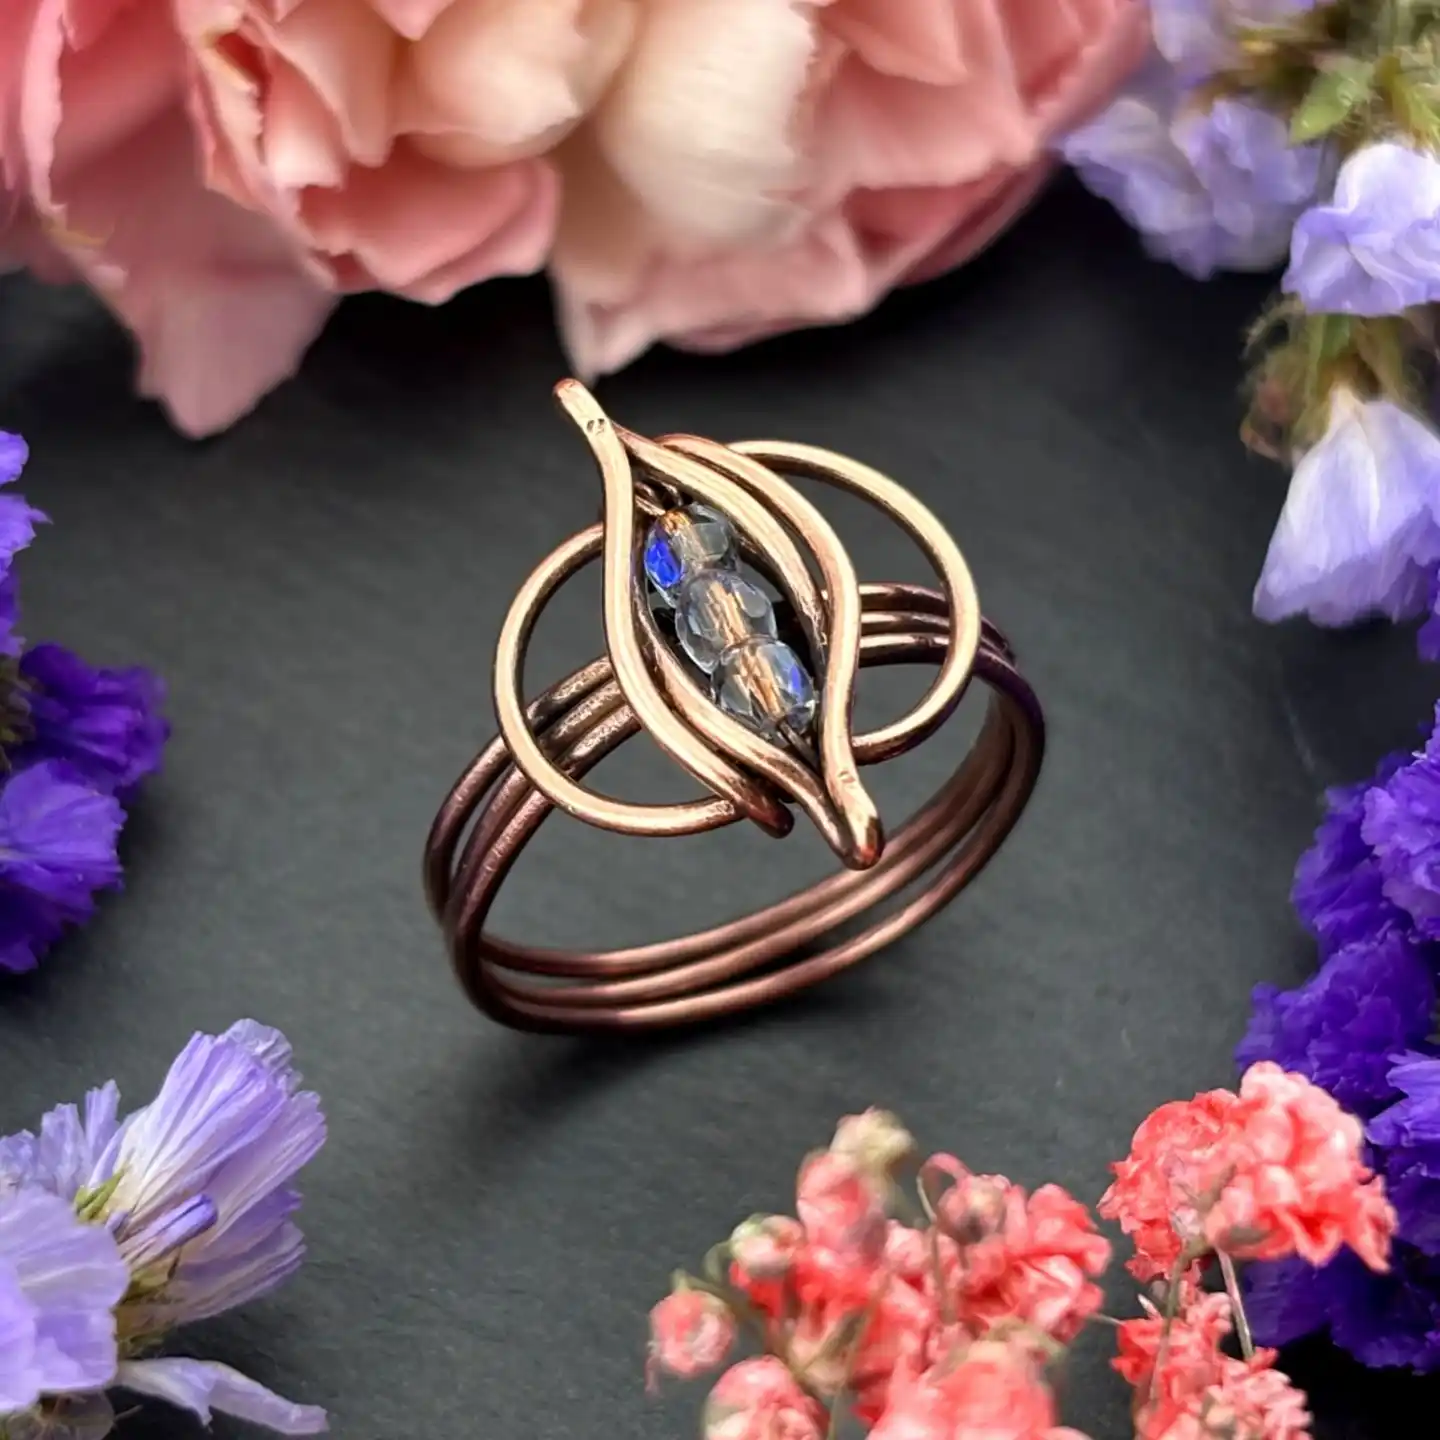
A curved wire outline shapes an eye or leaf silhouette, and small beads sit strung along the center rather than bezel set, which is a completely different way to add color than anything covered so far.
Building the frame is the real skill here. Bend a single wire into the pointed oval outline first, leaving a small opening at the top.
Slide your beads onto a separate short wire, then thread that beaded piece across the open frame and secure both ends by wrapping them around the outer wire.
The layered loops behind the frame are just extra bent wire tucked underneath for depth, so don’t overthink that part.
Save this shape for after you’ve built a plain wrapped band or two, since keeping the marquise symmetrical while the beads sit centered takes a steady hand.
5. The Raw Stone Wrap
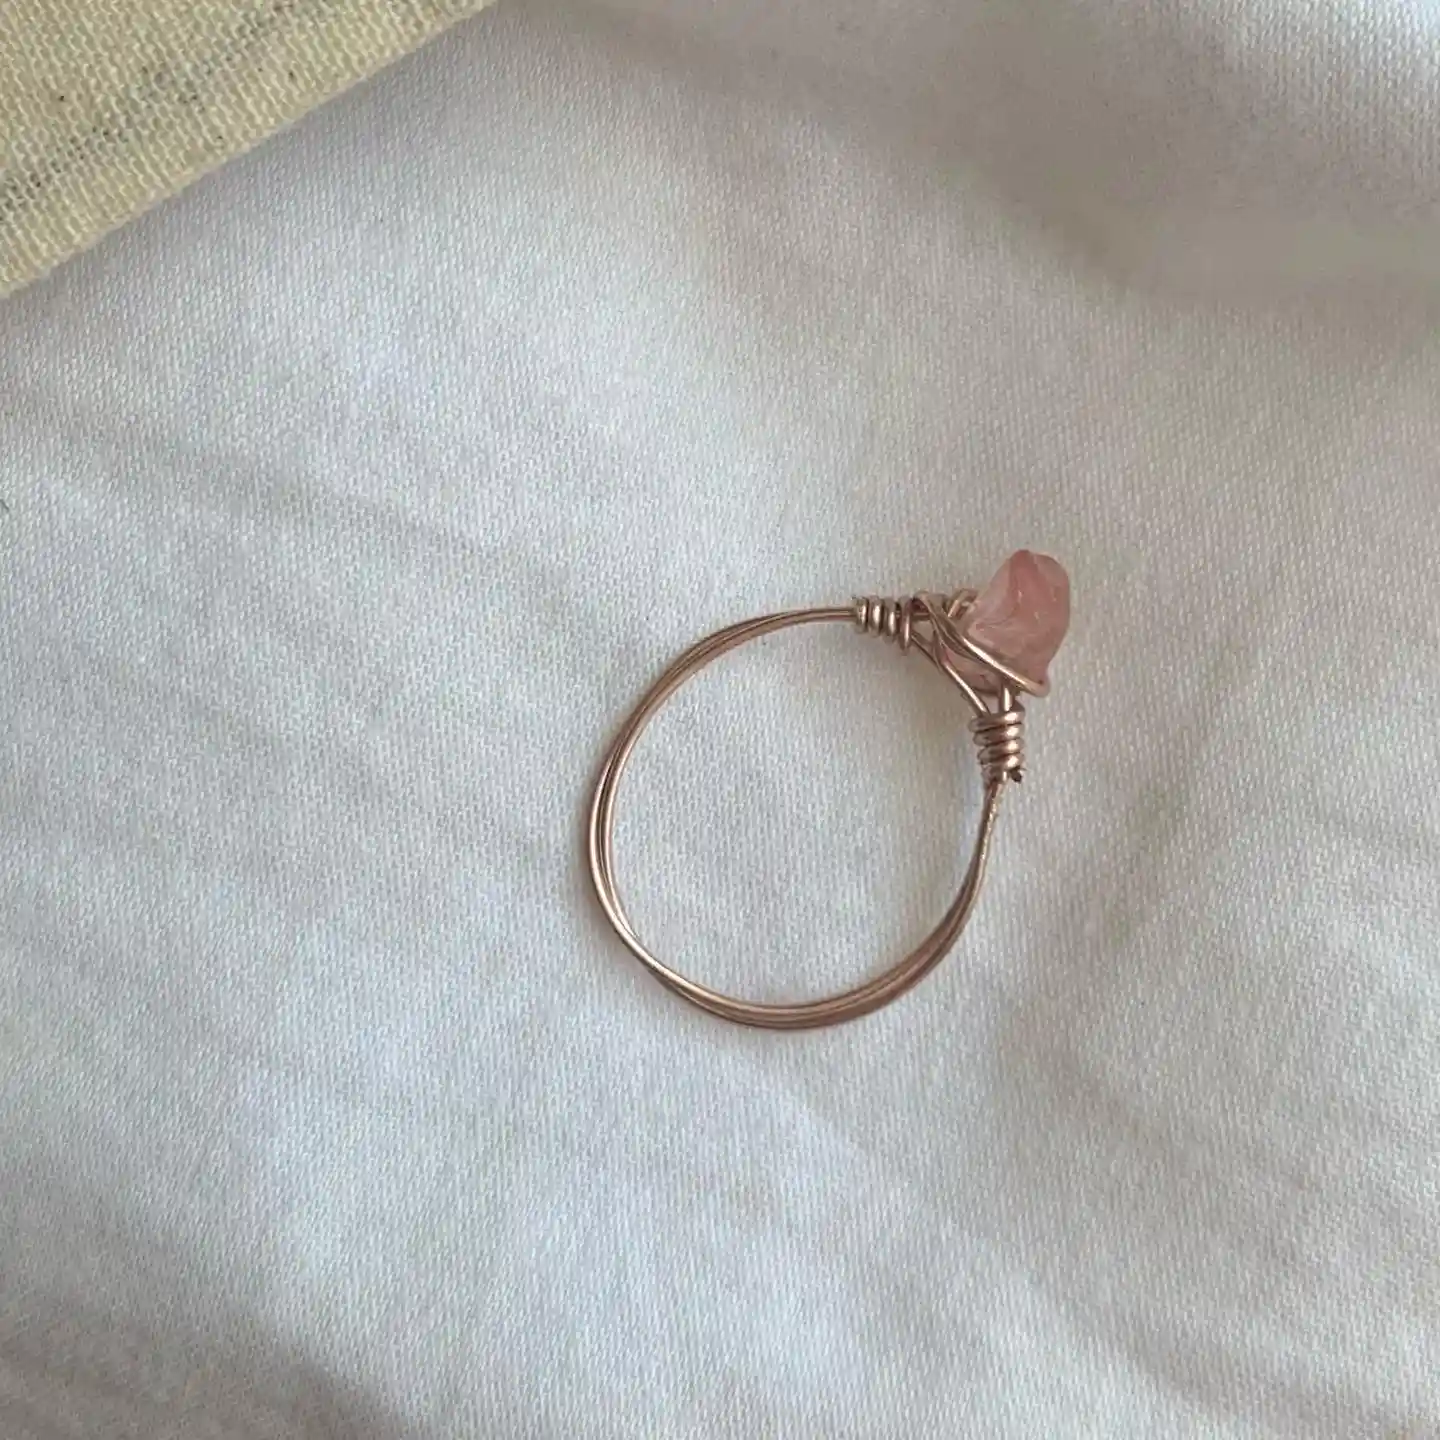
Raw stone rings are one of the most forgiving beginner projects because the stone itself does not need to be a perfect shape, just tucked in tight enough that it cannot spin or slip out.
This piece keeps things simple on purpose. The band is a plain double or triple wire loop, and all the effort goes into one spot: a tight coil that climbs up and captures the raw chip at an angle rather than centered flat.
That angled placement is what makes a raw stone look chosen instead of just stuck on.
Coil your wire around the base of the stone at least four or five times before pulling it snug. Fewer wraps and raw stones tend to work loose within a few wears.
6. The Trio of Beaded Wire Rings
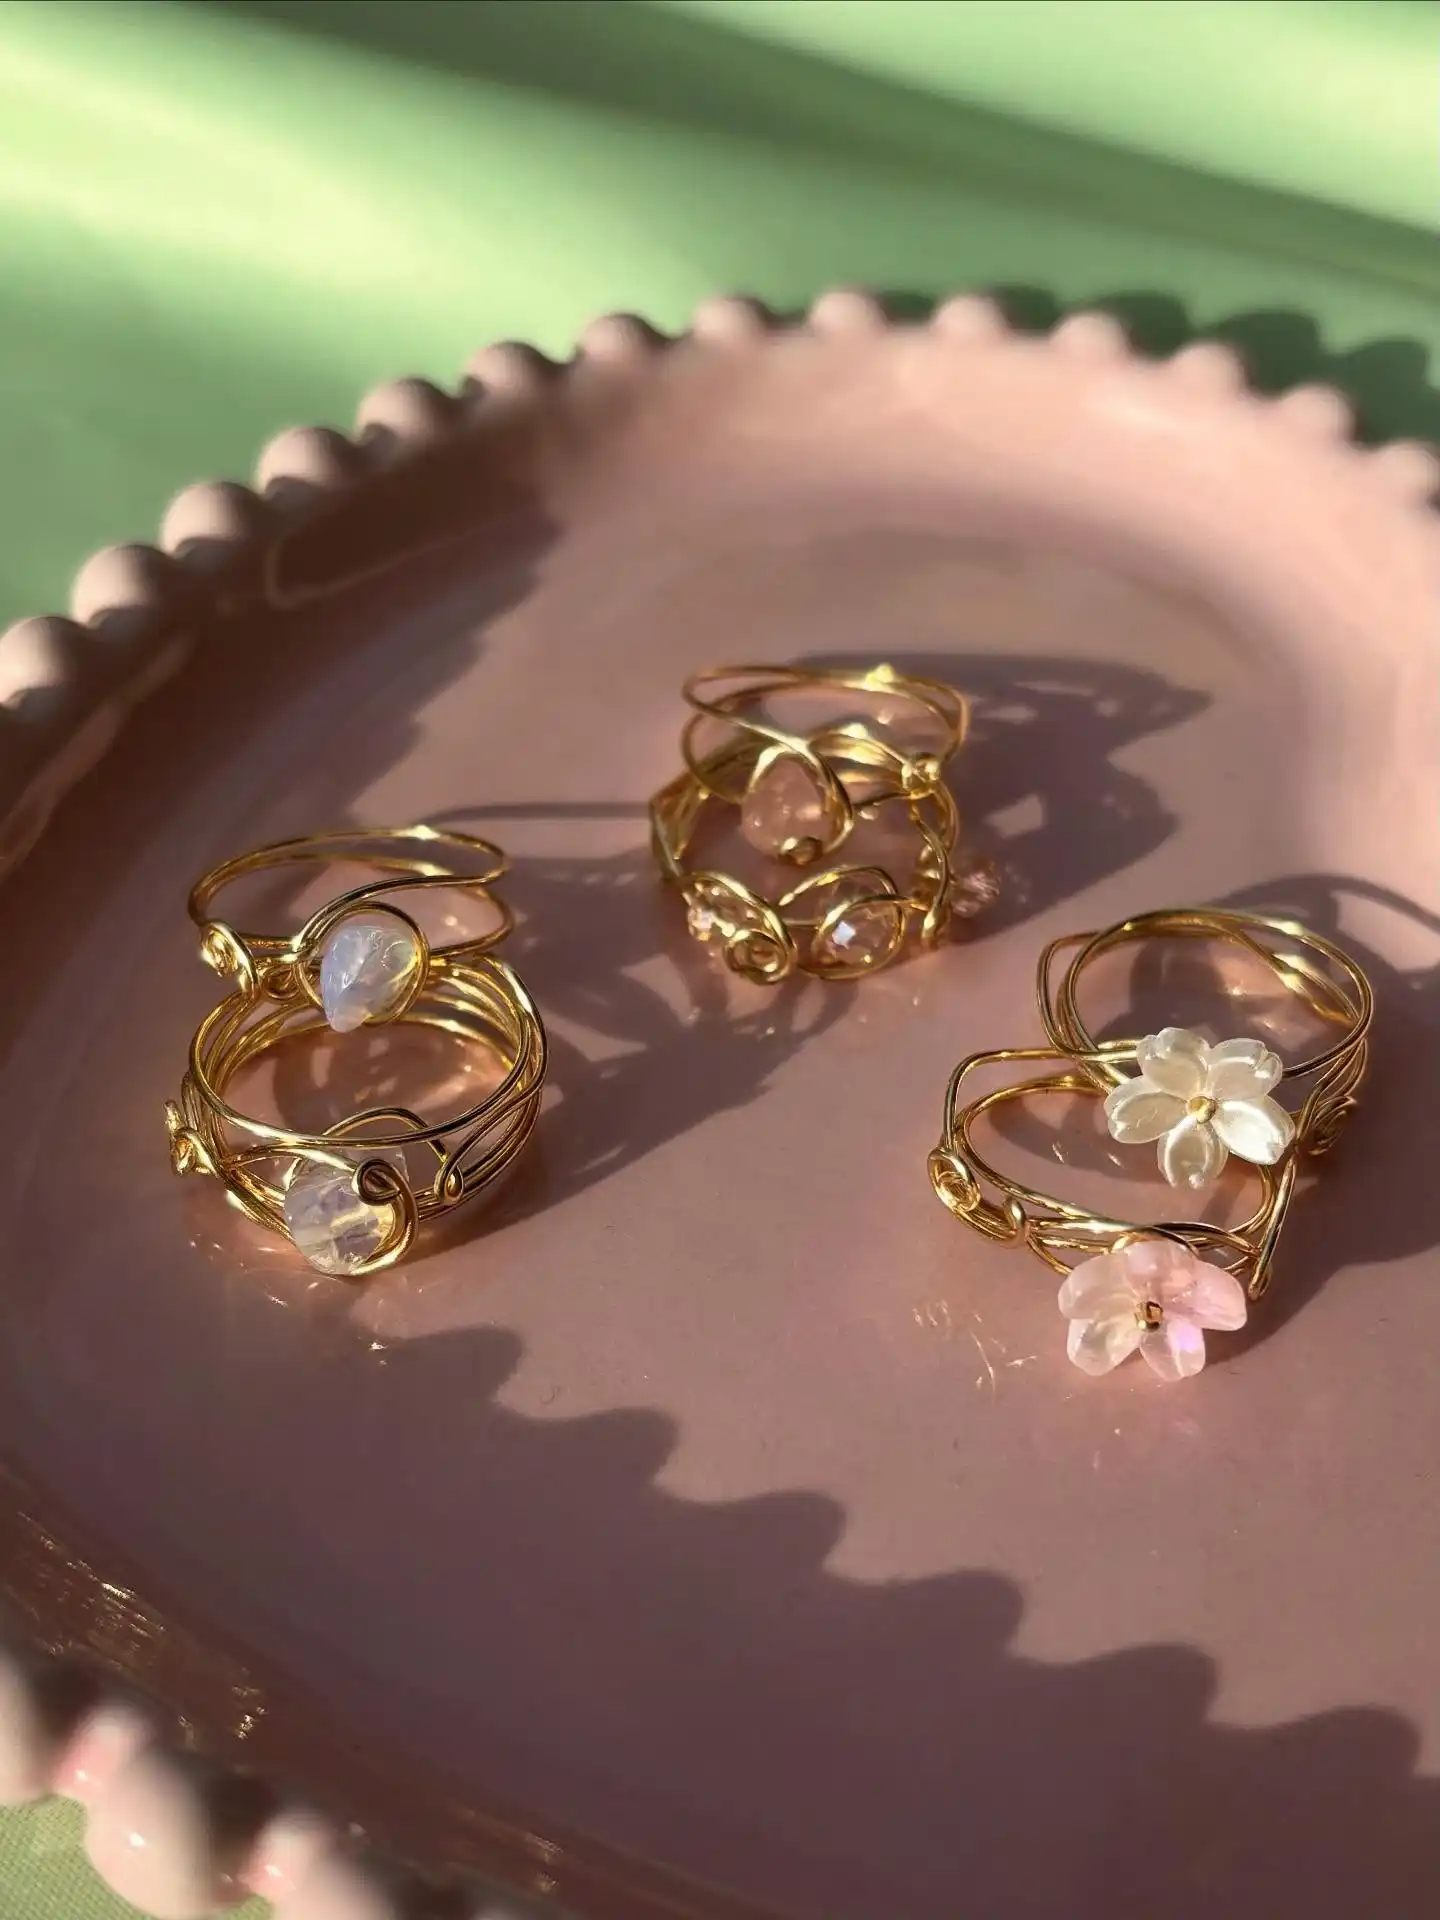
Three different wire rings sit together here, each built the same basic way but finished with a different bead: a round moonstone-style stone, a cluster of small crystal beads, and a flower shaped bead.
All three share the same loose, swirled wire frame, which is what makes them look like a matching set rather than three random pieces.
- The base structure on every ring is the same swirled wire loops, just wrapped tighter or looser depending on the bead
- Swapping the bead type is what changes the whole personality of the ring, not the wire technique
- Gold wire ties the set together visually even though the beads are all different colors
This is a good project once you’ve got one swirl frame down. Build your first ring, then repeat the same wire pattern two more times and swap in a different bead each round.
Keeping the frame consistent across all three is what makes them read as a set instead of three unrelated experiments.
7. The Coiled Cage with Round Bead
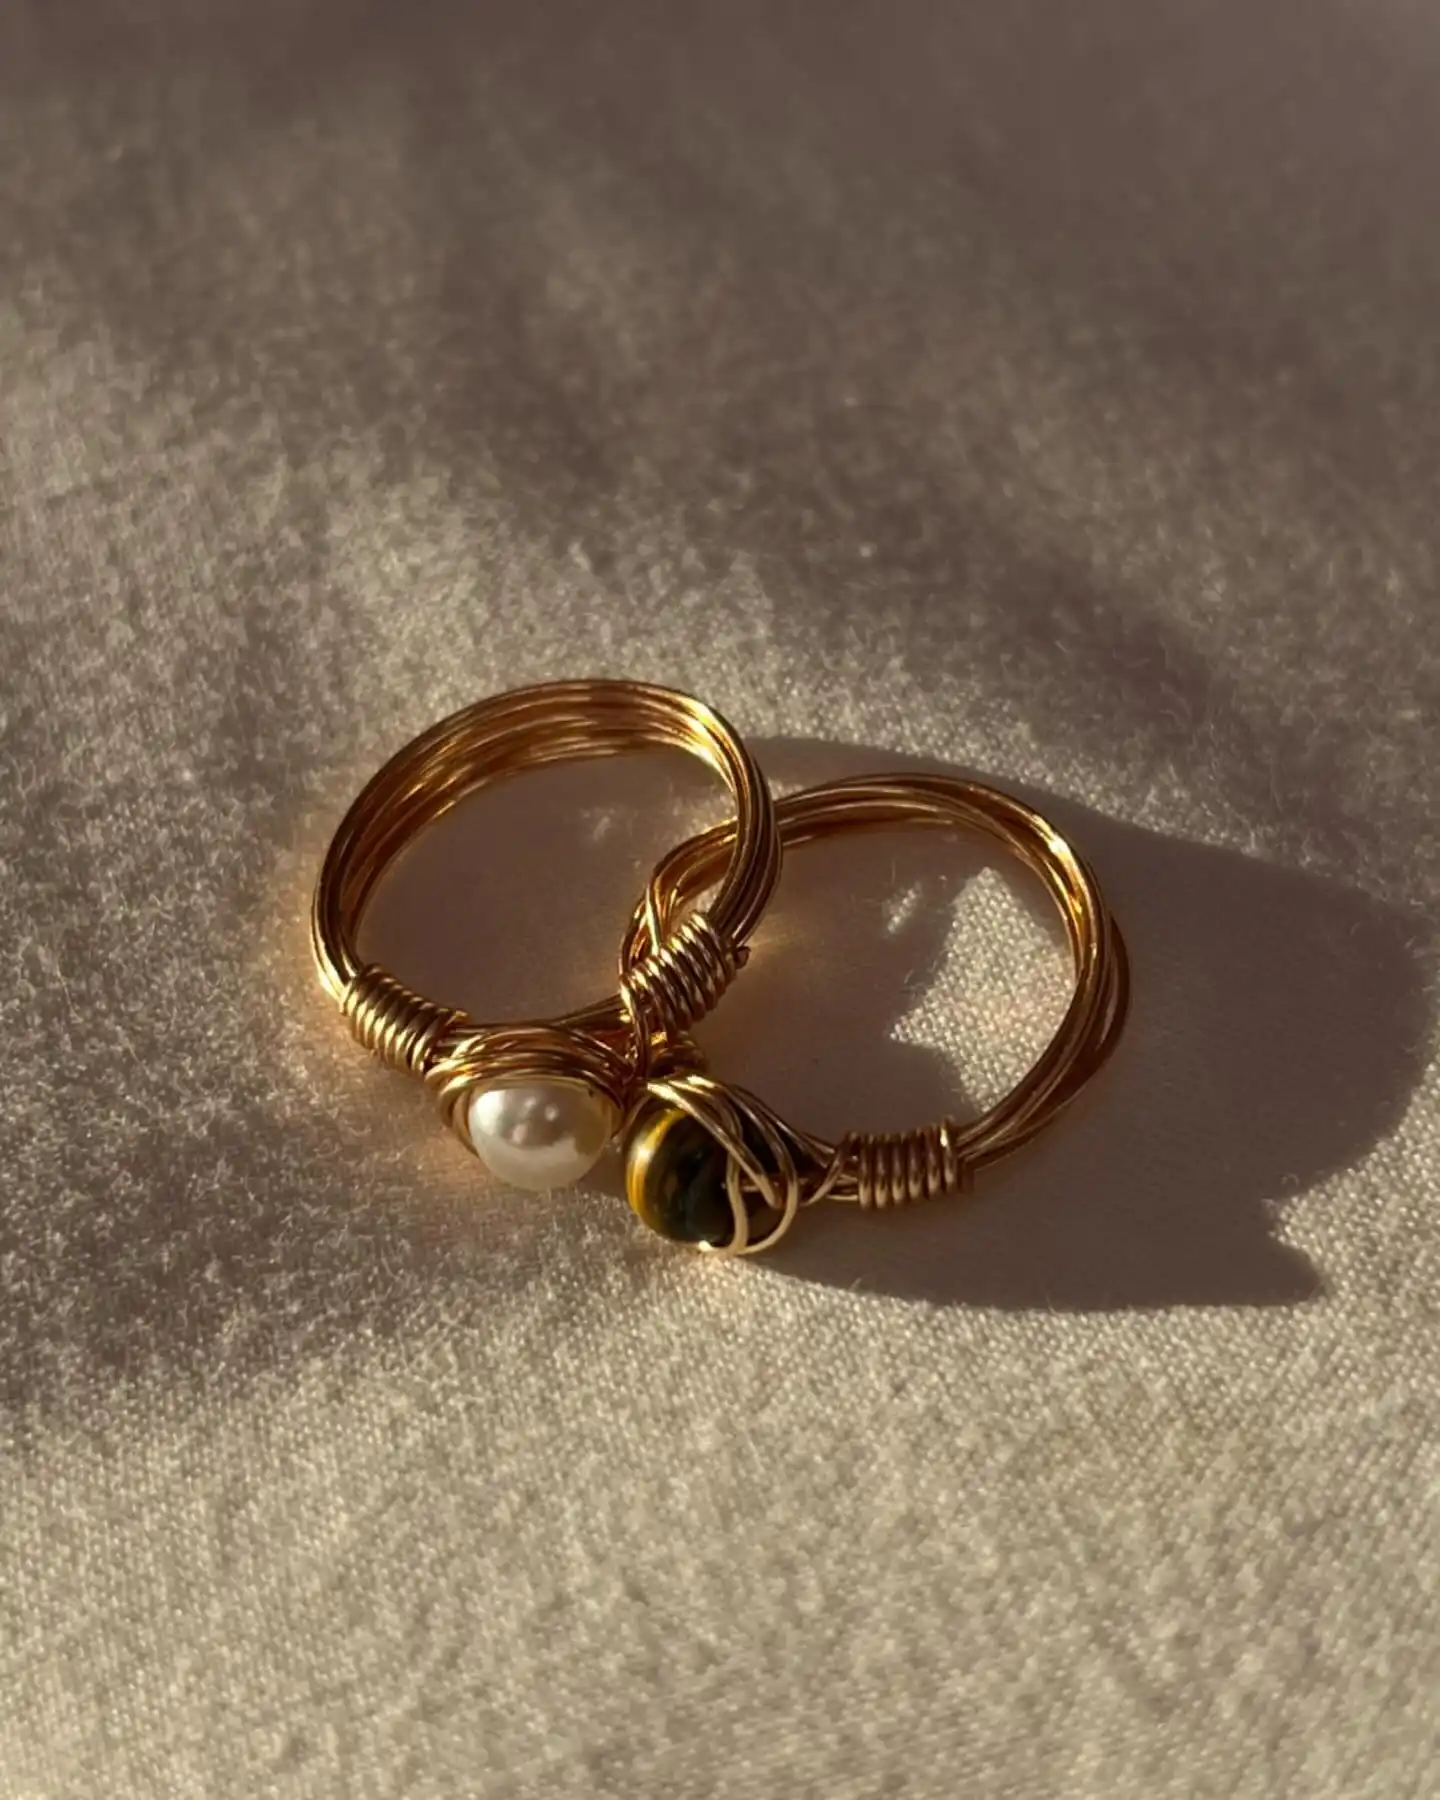
This is the classic single round bead in a wire cage, and it is probably the single most useful skill to nail before trying anything more complicated on this list. Get this coil tight and even, and every fancier project gets easier.
The build breaks into two clear parts:
- A thick, multi-strand band, several wires bundled together rather than one thin loop
- A dense coil of thinner wire climbing up from the band to cradle the bead on both sides
Wrap your coiling wire tight enough that you cannot see the band wire underneath it. That density is what separates a clean bead cage from a loose one that lets the bead wobble.
Try this same build twice, once with a pearl and once with a stone bead like tiger’s eye, and you will notice the coil needs to sit slightly tighter around a smaller pearl than around a rounder stone.
If you can still see the band wire under your coil, keep wrapping.
8. The Row-of-Beads Trio
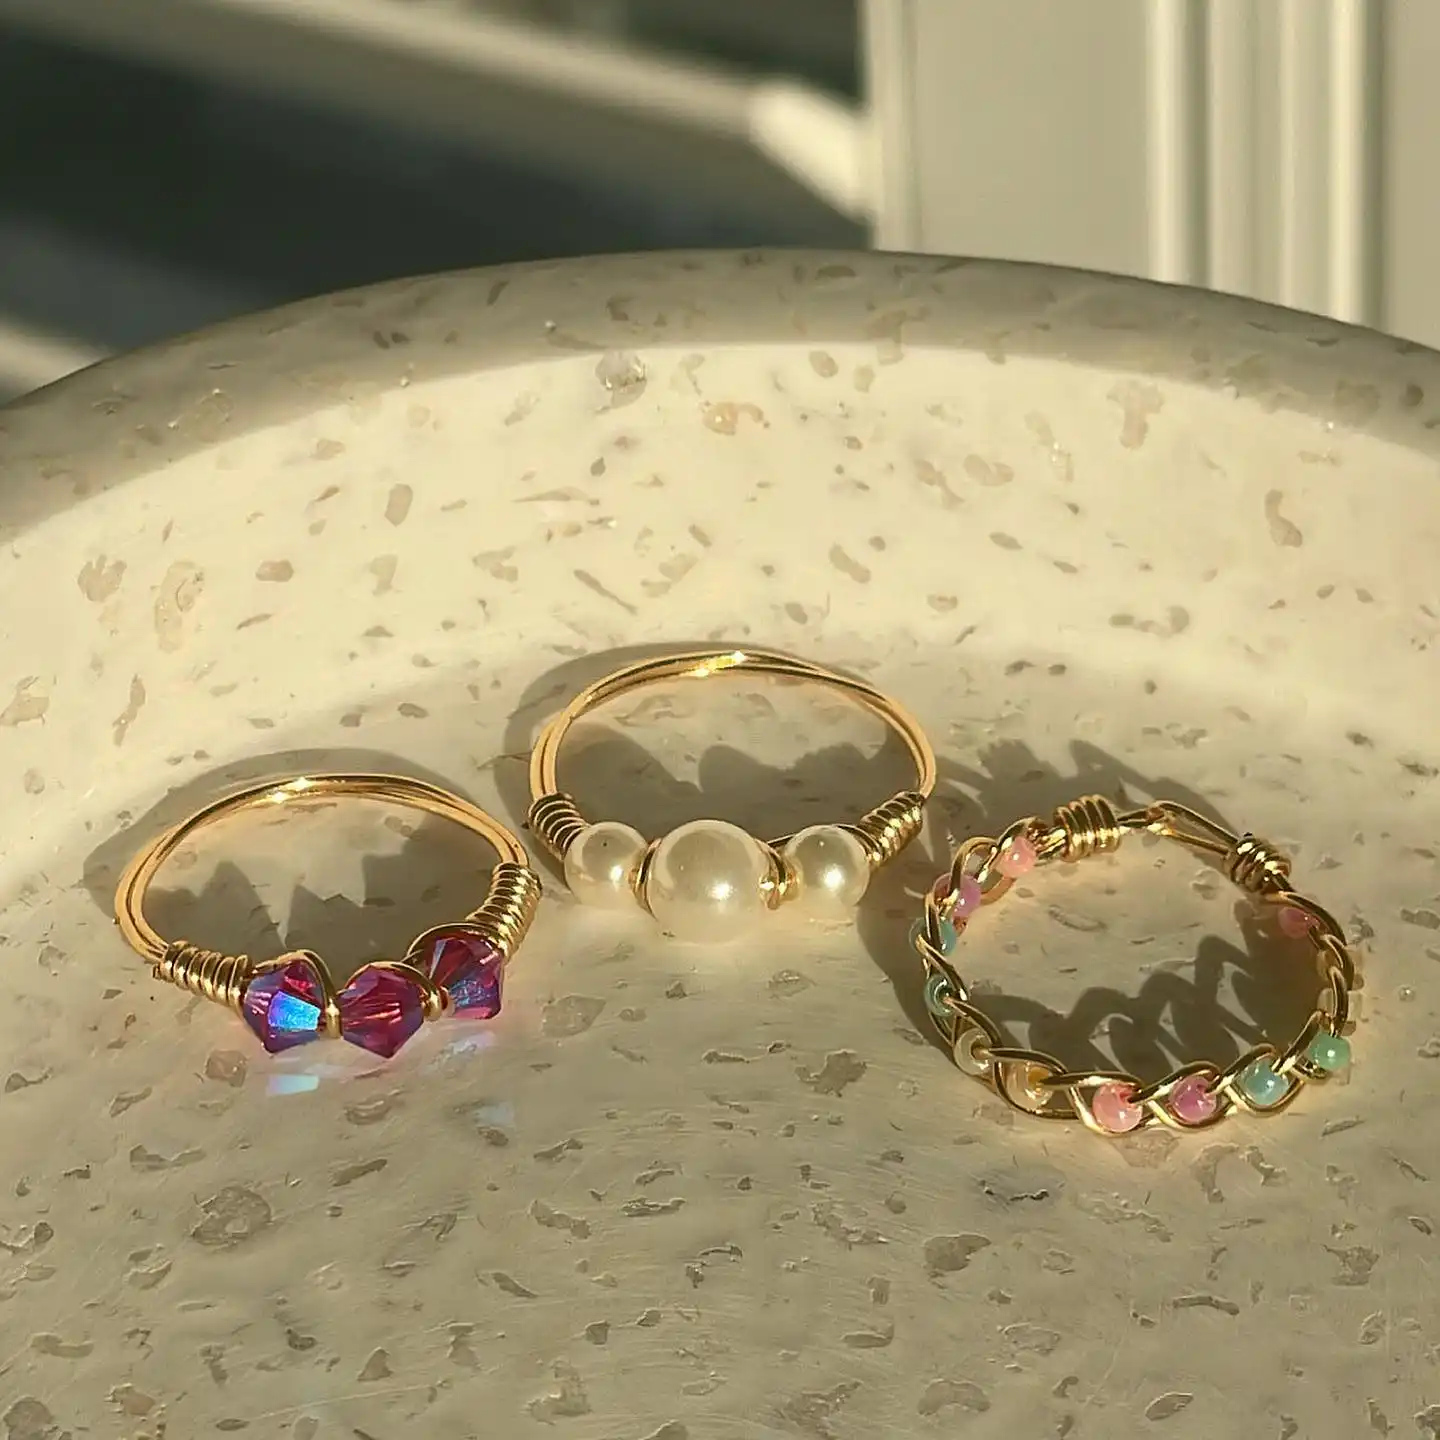
Three rings, each lined with a row of beads across the front rather than a single bead or cluster: three faceted pink crystals, three graduated pearls, and a chain of small mixed color beads.
Lining beads up in a row instead of grouping them turns a basic wire ring into something closer to a beaded bracelet look.
Subscribe to DIY Craft Bloom
Get updates on the latest posts and more from DIY Craft Bloom straight to your inbox.
- The crystal ring and pearl ring both use the same tight coil anchors on either side of the row, just with different bead shapes
- The pearl row is graduated, biggest bead in the center, which takes more planning than beads of matching size
- The third ring swaps a plain band for a twisted chain of wire, with tiny beads caught inside each link
The pearl row is the one to attempt first since matching pearls are already uniform in size, so you are only solving for placement, not for sorting mismatched beads.
Save the twisted chain link version for later, since keeping the wire twists even while catching a bead in each one takes more coordination than a straight row.
| Ring | Row detail |
|---|---|
| Crystal row | Three faceted beads, even size, coiled anchors |
| Pearl row | Graduated sizing, largest pearl centered |
| Twisted chain | Small beads caught inside each wire link |
9. The Full-Circle Beaded Wrap
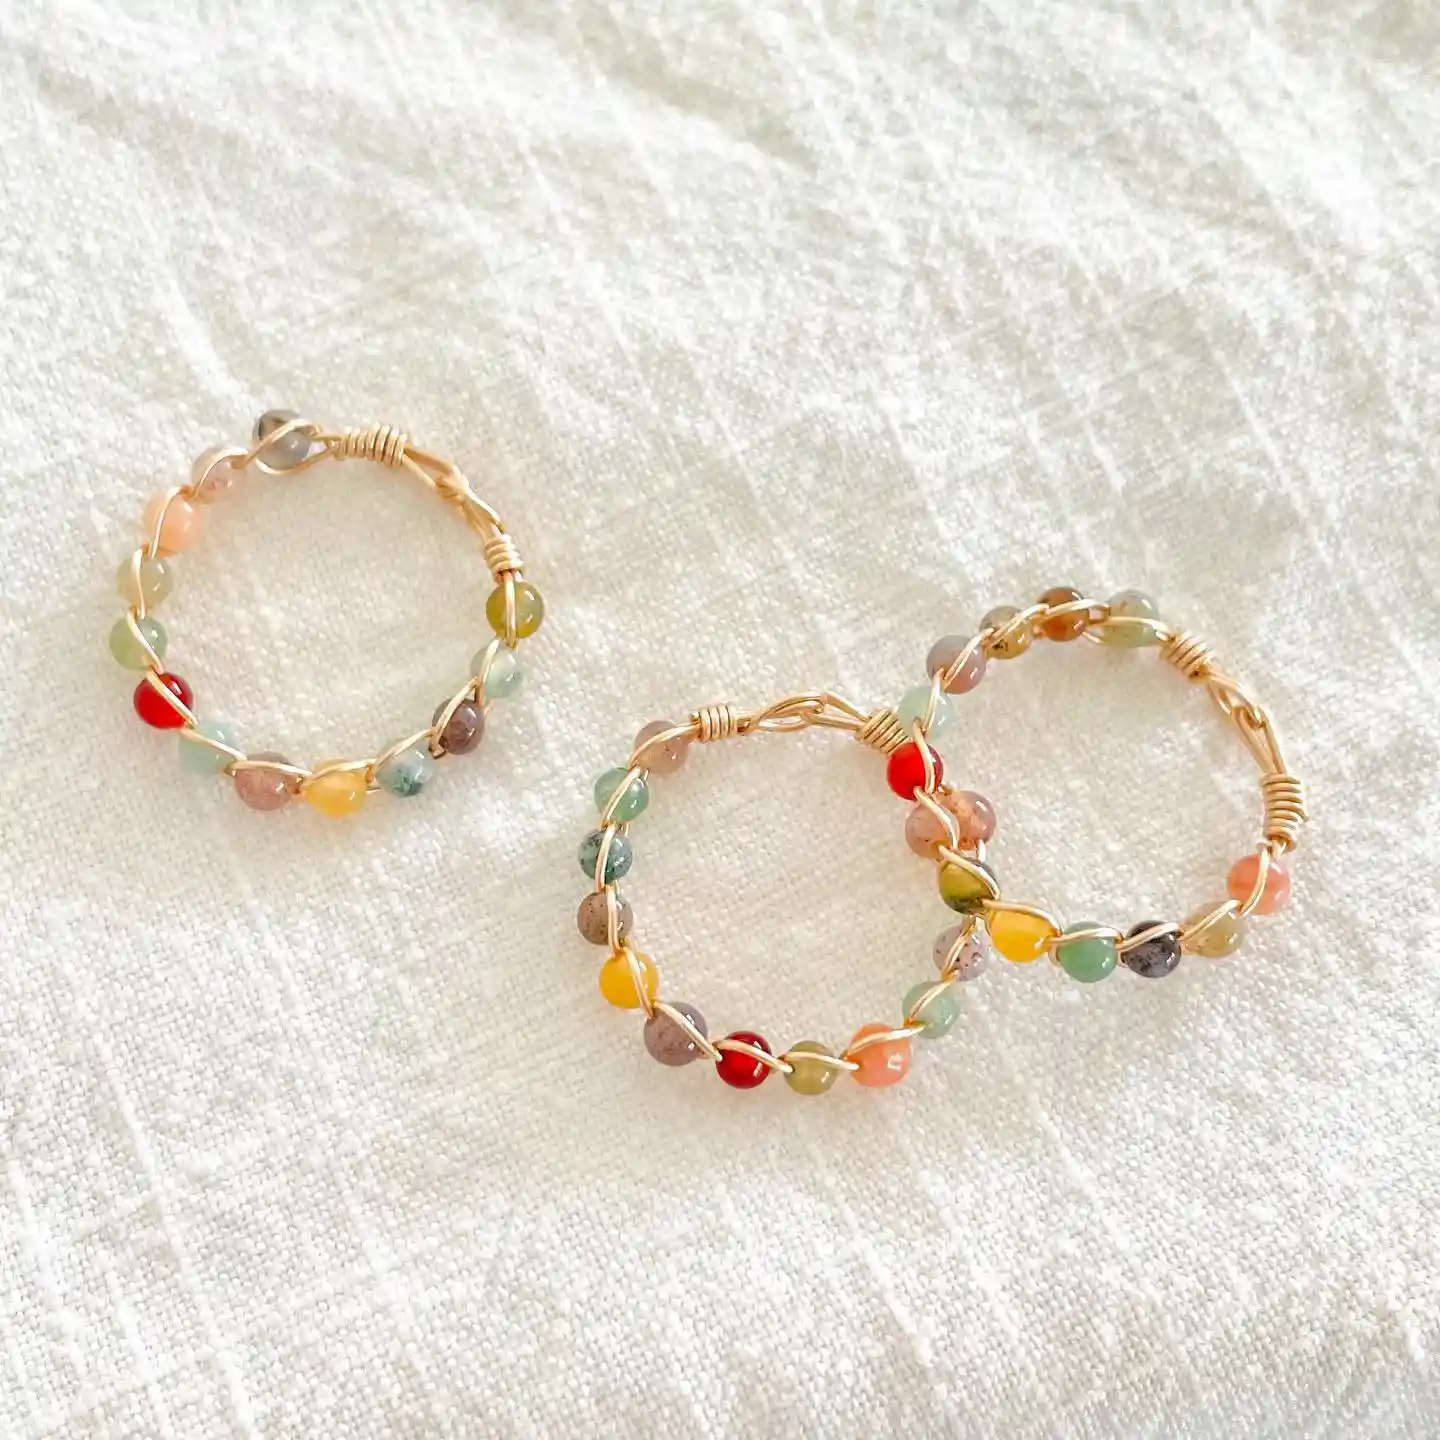
Unlike a row of beads sitting only across the front, this technique wraps small stone beads around the entire band, so there’s no plain wire showing anywhere.
Three rings shown here all use the same build, just with a different mix of colors in the bead lineup.
- Wire crosses in a zigzag around the full circle, catching one bead in each crossing point
- Mixed earthy tones, terracotta, sage, mustard, gray, keep the colors from feeling random despite so many at once
- A single coiled join near the top closes the ring and tidies the wire ends
Because beads run the entire way around, this project uses more beads than any other technique on this list, usually somewhere between twelve and eighteen depending on ring size.
Lay your beads out in the order you want before you start wrapping. Once the zigzag begins it is hard to swap a bead’s position without undoing several crossings.
10. The Single-Stone Full Wrap

Same all-the-way-around bead technique as the mixed color version, but this one sticks to a single stone type, moonstone-look beads in a soft milky white.
Sticking to one color changes the whole feel, this reads polished and cohesive instead of playful and mixed.
- Every bead matches in size and color, so the wire crossing pattern is the only visual texture
- A visible hook and coil closure sits at the top rather than being hidden, which gives the ring a bracelet-like clasp look
- The single color palette makes this the easier entry point into full wrap beading, since you are not managing bead order at all
Because every bead looks the same, mismatched bead sizes will show up immediately here in a way they would not in a mixed color ring.
Sort your beads by size before you start and set aside any that look even slightly bigger or smaller than the rest. Consistency is the whole point of this version, so it is worth the extra sorting time.
11. The Starter Set of Single-Bead Rings
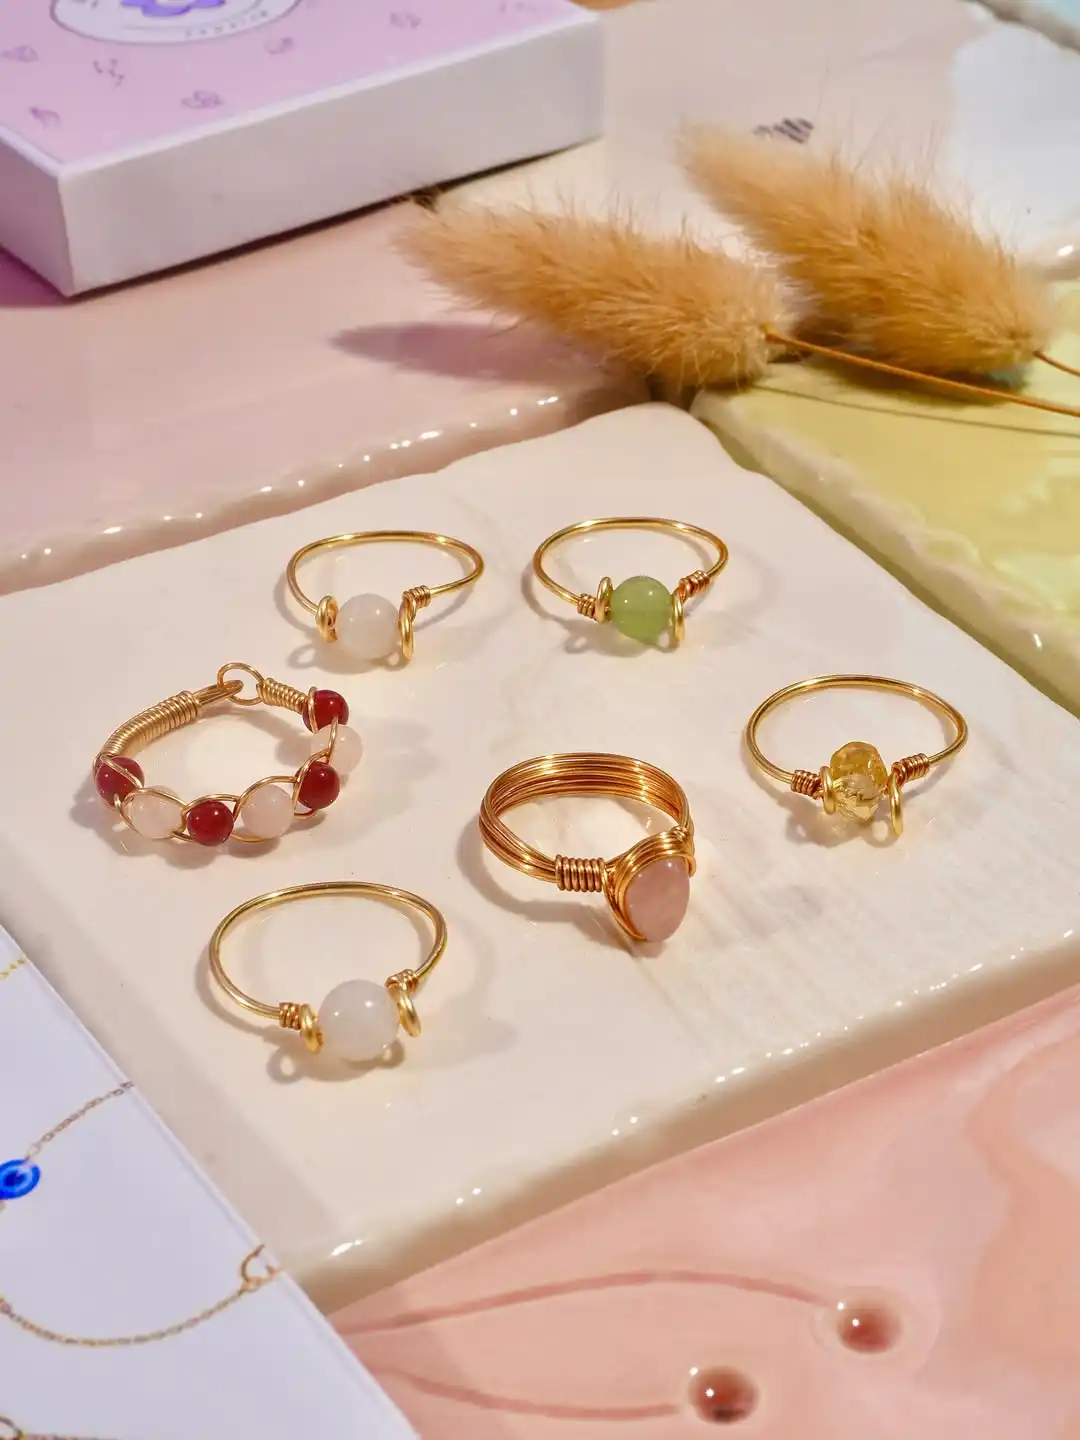
Six rings shown together, and almost every one uses the same core idea: a thin band with one bead caught by a small coil.
Seeing them side by side makes it obvious how much range that one basic technique covers just by changing the bead, the wire thickness, or the coil placement.
- Most bands stay thin and simple, letting the single bead be the only focal point
- One ring uses a thicker, multi-wrap band with a bigger coil, giving it more visual weight than the others
- The bracelet-style bead ring in the back left breaks the pattern entirely, proving the same coiling skill scales up into a different piece altogether
If you are working through this list in order, this image is basically a practice sheet. Make the same thin-band, single-bead ring five or six times using different beads each round, and you will notice small improvements in your coil tension and bead placement without ever changing the actual technique.
One good coil, repeated with different beads, is a whole starter collection.
12. The Spiral Anchor with Cluster Beads
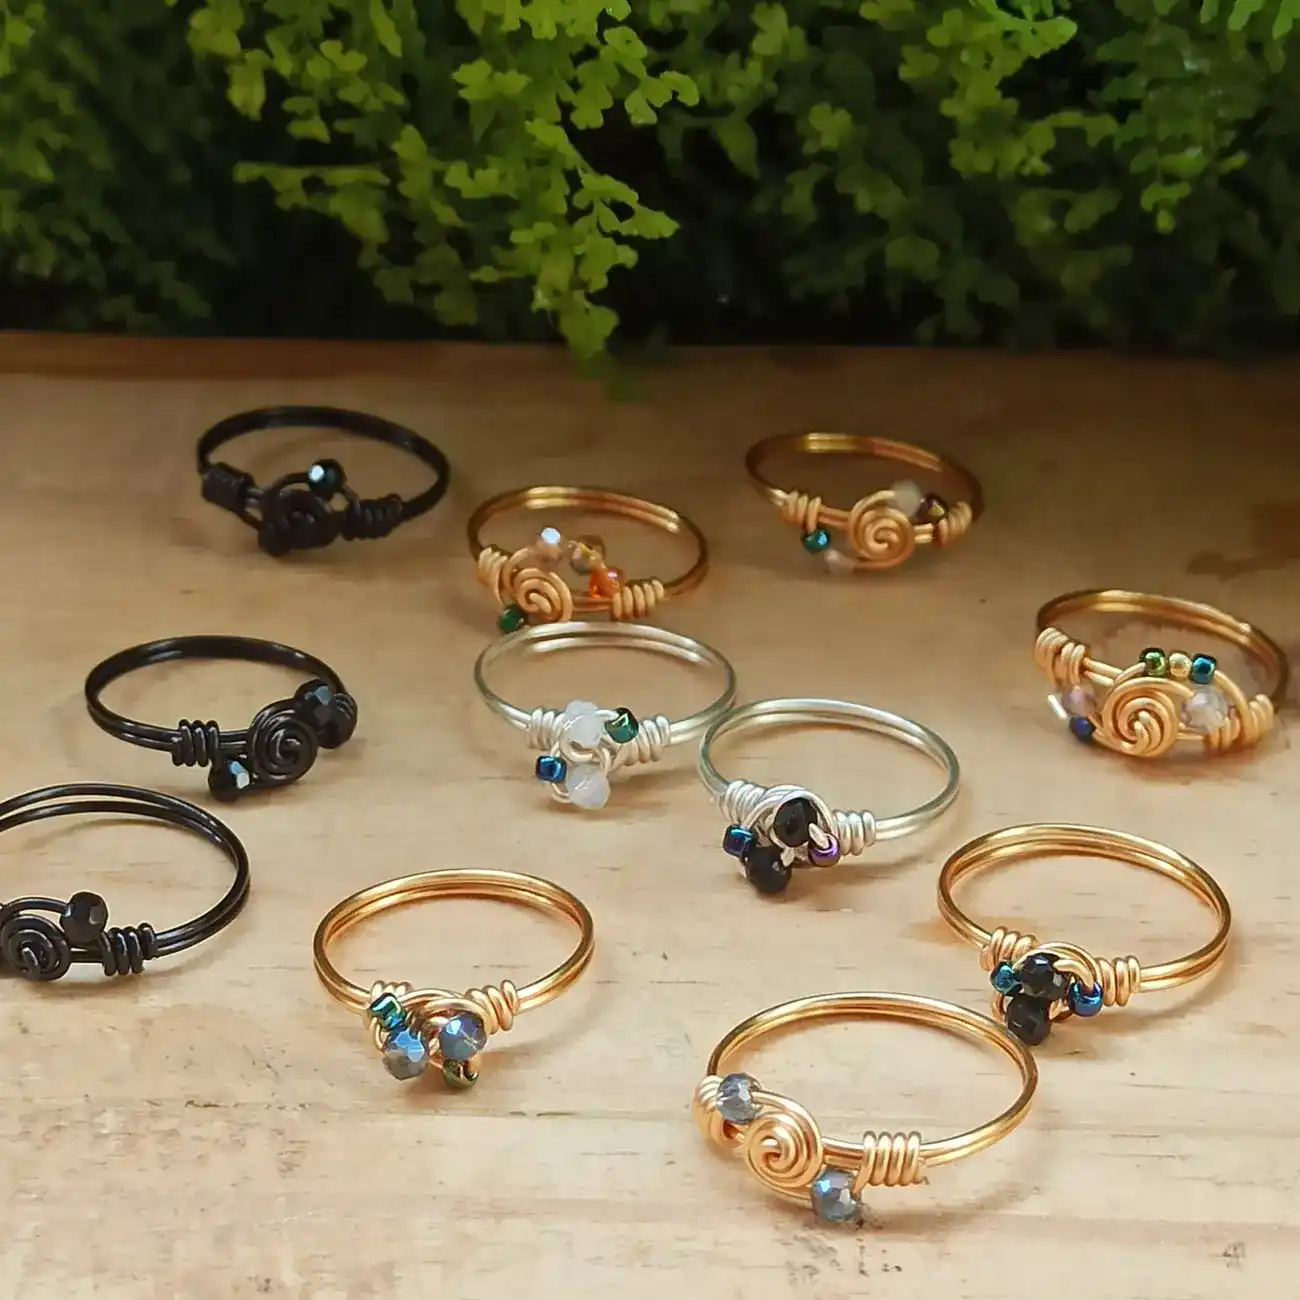
A whole spread of rings here, but they all share one signature move: a flat coiled spiral off to one side of the band, anchoring a small cluster of tiny faceted beads.
It is a different anchor shape than the round coil cages covered earlier, and the flat spiral is what gives every ring in this set its slightly retro, curled look.
- The spiral sits flat against the band instead of wrapping around a bead, more decorative hook than cage
- Beads cluster loosely next to the spiral rather than being fully caged by it
- Wire color varies a lot across the set, black, gold, and silver, which shows this technique works in any wire finish
The spiral is simpler than it looks. Coil the wire tightly around itself in a flat circle first, like a tiny cinnamon roll, then anchor that spiral to your band with a few wraps before adding beads on the tail end.
Because the beads hang loose next to the spiral rather than locked inside it, this style tends to shift a little with wear, so keep your anchoring wraps extra snug if you want the beads to stay put.
Conclusion
Wire wrapping rewards repetition more than talent, so the more of these twelve you actually make, the faster your hands figure out tension, spacing, and how tight a coil really needs to be.
Every technique on this list traces back to just a few core moves, a knot, a coil, a cage, a spiral, so once one ring clicks, the rest come easier than you’d expect.
Start with whichever one caught your eye first, and don’t worry about getting it perfect on the first try.
Save this for the next time you want fresh ring ideas to try, whether that’s this weekend or a slow afternoon a few months from now.