Food Themed Birthday Card Ideas – 10 Fun Designs for Food Lovers

Food-themed birthday cards have become such a fun trend lately, and honestly, it’s easy to see why. Traditional birthday cards are sweet, but adding playful food-inspired designs instantly makes them feel more personal and memorable.

Whether it’s a pizza slice with a cheesy pun, a cute cupcake illustration, or a taco card that says “Let’s Taco ‘Bout Your Birthday,” these cards bring humor and personality into gift-giving.
They’re especially perfect for foodies, bakers, coffee lovers, or anyone who enjoys quirky little details.
Another reason people love food-themed birthday cards is how versatile they are. You can go cute and colorful, elegant and artistic, or even funny and sarcastic depending on the person you’re celebrating.
Plus, pairing a themed card with a matching treat or homemade gift makes the whole birthday feel extra thoughtful.
If you’re searching for creative inspiration, you’re in the right place. In this article, we’ve rounded up 10 food-themed birthday card ideas that are fun, charming, and guaranteed to make someone smile.
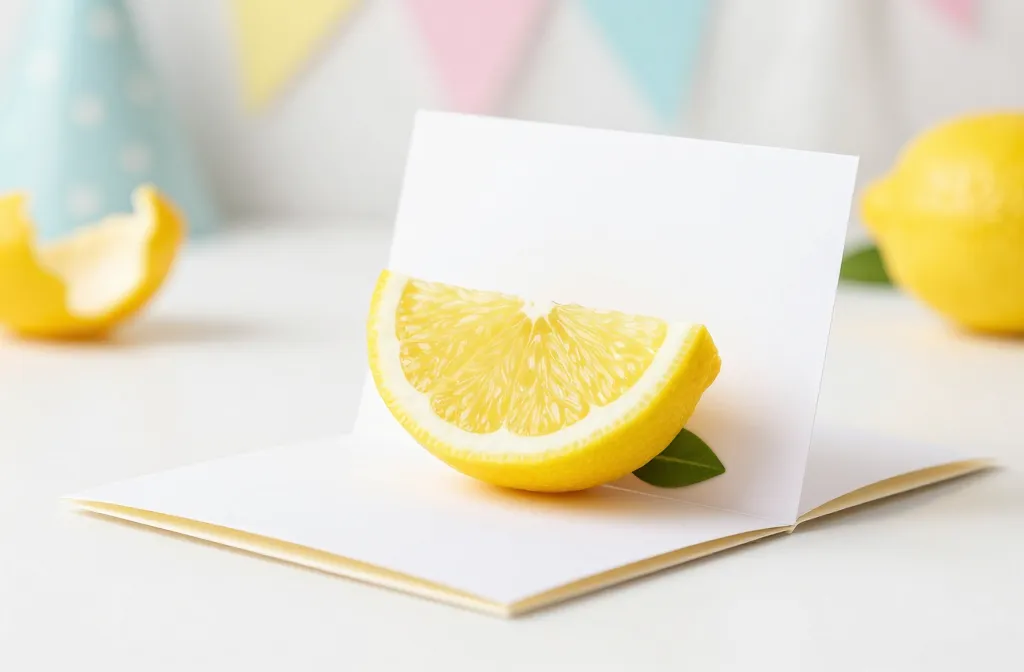
1. Lemon Slice Pop-Up Card

Imagine peeling back the edge of a bright lemon wedge to reveal a sunny, pop-up message inside. This card is zesty, fresh, and instantly shareable at any citrus-loving party.
Materials Needed
- Bright yellow cardstock
- Scalloped edge scissors or decorative punch
- White or black ink for lettering
- Red or green for leaf accents
- Double-sided tape
How to Make It
- Fold a yellow cardstock panel in half as the card base.
- Cut a lemon wedge shape from a slightly lighter yellow; score a light fold to allow the wedge to pop forward when opened.
- Create a tiny green leaf and a white inner panel with a playful birthday message that peeks when the wedge pops.
- Attach the wedge with a small hinge so it pops when the card opens.
Pro Tips / Styling Ideas
- Line the inside with a doodled lemon rind pattern for extra zing.
- Pair with a citrus-scented sticker or a tiny ribbon as a finishing touch.
Who would love this? Fans of bright, sunny days and fresh flavors—perfect for someone who brightens your life like a summer squeeze.
2. Donut Bakery Gift Card Card

Two little donuts, a pretend bakery, and a heartfelt message—this card screams “sweet friend” in the cutest way. It’s playful, adorable, and perfect for gifting a small treat along with a note.
Materials Needed
- Mocha or pastel card stock
- Colored markers or gel pens
- Mini donut stickers or cut-out shapes
- Glue dot or double-sided tape
- Ribbon bow (optional)
How to Make It
- Cut a rectangle card base and a smaller top-fold panel for a layered look.
- Draw two cute donuts with frosting and sprinkles on the top panel, or attach mini donut stickers.
- Write a sweet birthday message between the donuts and add a tiny “cruller” pun on the inside.
Pro Tips / Styling Ideas
- Add a faux glaze effect with a glossy enamel accent for shine.
- Stick a tiny, edible-scented sticker to evoke that bakery vibe (if you’re giving with a treat).
Who would love this? Baker friends, sweet-toothed pals, or anyone who appreciates a little whimsy in their mail.
3. Candy Conversation Hearts Card
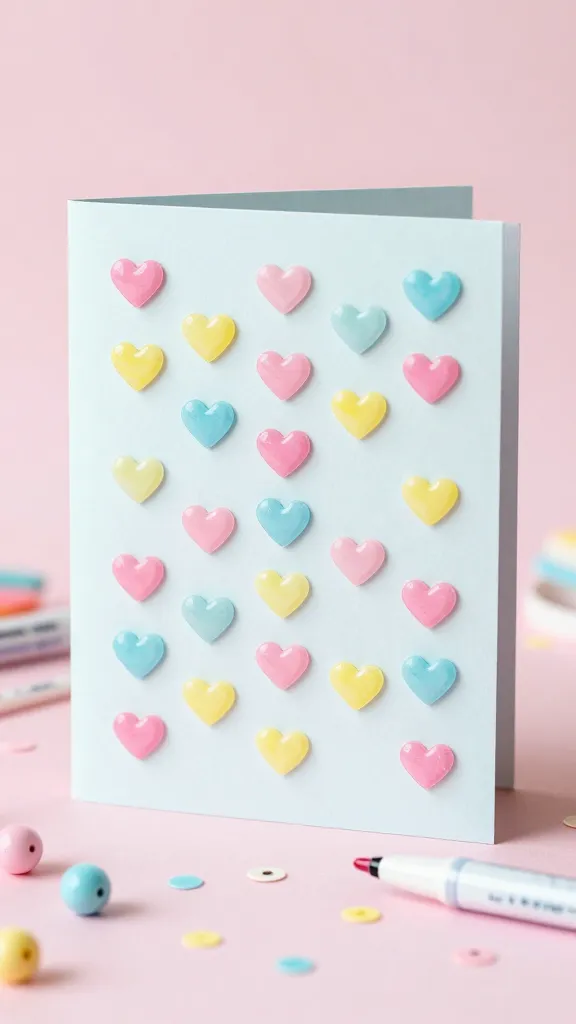
Turn a classic candy favorite into a heartfelt birthday greeting. This card trades phrases for personalized messages that sparkle with color and nostalgia.
Materials Needed
- Colored cardstock in pastel pinks, blues, and yellows
- Flat-backed plastic beads or epoxy heart stickers
- Fine-tip markers
- Double-sided tape or glue dots
How to Make It
Subscribe to DIY Craft Bloom
Get updates on the latest posts and more from DIY Craft Bloom straight to your inbox.
- Cut a card base and a slightly smaller front panel.
- Arrange tiny epoxy hearts across the front with short, sweet phrases like “yay you!” or “sweet friend.”
- Inside, write a custom message that fits the theme of the hearts.
Pro Tips / Styling Ideas
- Leave a few hearts slightly raised to create texture.
- Seal with a light gloss spray for a candy-coated look (optional but cute).
Who would love this? Anyone who loves retro candy vibes or a playful, punny note.
4. Avocado Toast Celebration Card
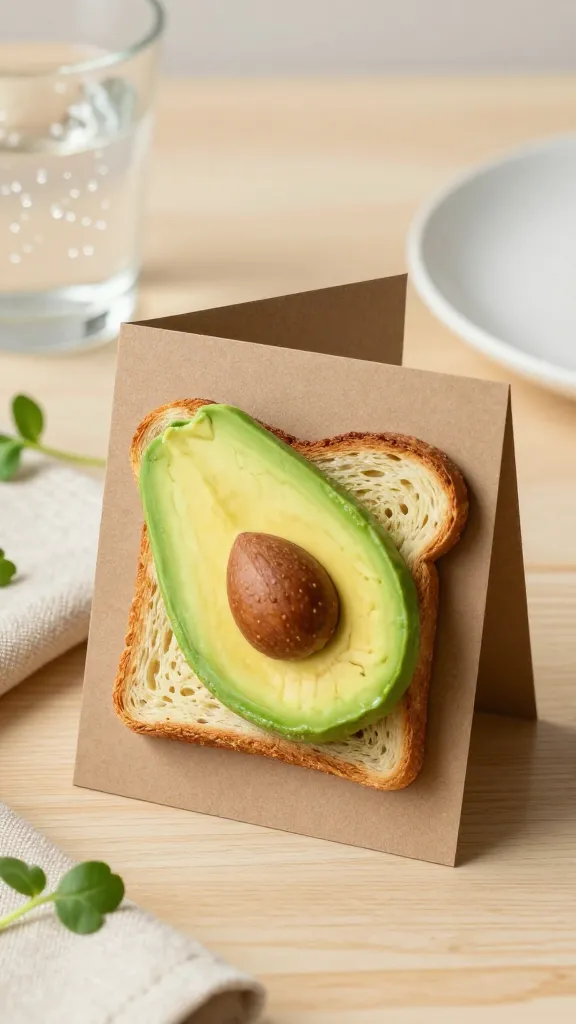
Turn brunch buzz into a birthday wish with a faux avocado toast that’s all eyes and smiles. This is chic, modern, and absolutely Instagram-ready.
Materials Needed
- Brown craft paper for toast base
- Green craft foam or paper for avocado
- Small seed bead or brown foam for the pit
- Black pen for seeds and toast details
- Glue
How to Make It
- Cut a toast-shaped panel from the brown base and a curved green “avocado” slice layered on top.
- Place a round seed bead in the center to mimic the pit, or create a small brown circle with paper.
- Decorate the outside with tiny seeds, or write a witty birthday line on the toast edge.
Pro Tips / Styling Ideas
- Use kraft paper to give a rustic brunch vibe.
- Pair with a gift card tucked under the avocado layer for a cute reveal.
Who would love this? Brunch lovers, minimalists, anyone who loves stylish food-inspired crafts.
5. Watercolor Cupcake Card With Texture

Softer tones and fluffy texture create a tactile delight. A watercolor cupcake with a puffed frosting effect makes the card look sweet enough to eat.
Materials Needed
- Watercolor paper card stock
- Watercolor paints (pinks, lavender, light blues)
- Texture paste or white gel pen for frosting highlight
- Foam tape for dimension
How to Make It
- Paint a simple cupcake silhouette using soft watercolor washes.
- Add a generous layer of white texture paste or gel pen to mimic whipped frosting, letting it dry to a puffy finish.
- Write a cheerful birthday message across the base of the cupcake or inside the card.
Pro Tips / Styling Ideas
- Sprinkle tiny dots of metallic paint for a sprinkle effect.
- Use a pastel palette to keep it gentle and chic.
Who would love this? Fans of watercolor art, soft decor, and edible aesthetics.
6. Sushi Roll Surprise Card

Roll out a playful surprise with a sushi-inspired card that unrolls to reveal a birthday message. It’s quirky, tactile, and genuinely fun to open.
Materials Needed
- White card stock for roll layers
- Colored paper or felt for the sushi fillings
- Bracelet-like elastic or ribbon for the rolling effect
- Glue and scissors
How to Make It
- Cut two white paper sheets to form a “sushi roll” outer layers.
- Decorate the inner layers with colorful fillings (pink fish, avocado green, cucumber).
- Attach a ribbon so the inner piece can roll out when pulled.
Pro Tips / Styling Ideas
- Make the outer roll resemble a bamboo sushi mat texture with light brown shading.
- Write the birthday message in the inner section as the roll unravels.
Who would love this? Sushi lovers, pun fans, and anyone who enjoys playful card mechanics.
7. Pizza Slice Card With Pepperoni Dots
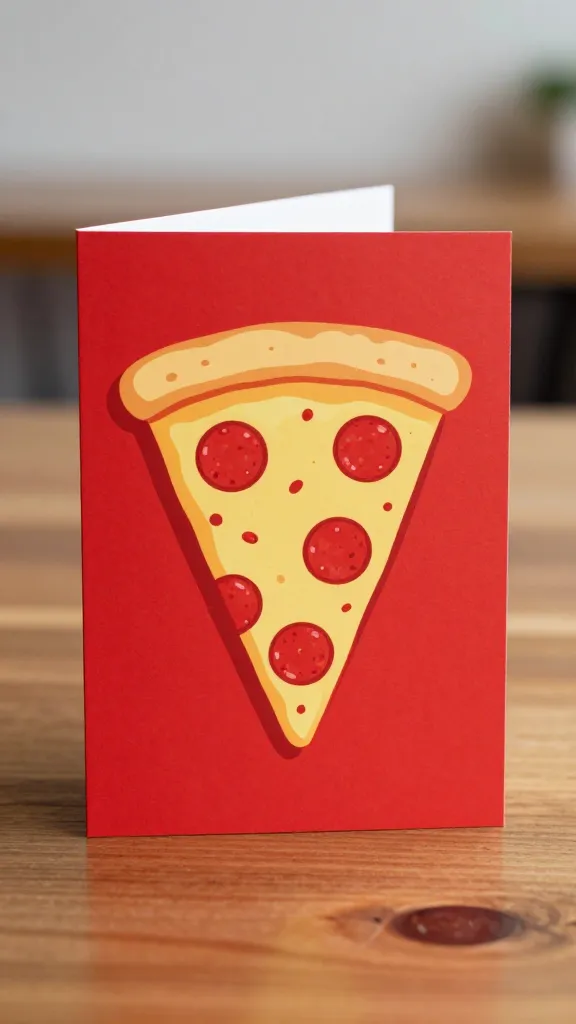
A cheesy, smiley slice that doubles as a décor piece. This card radiates cozy vibes and is instantly giftable with a tiny pizza-shaped present sticker inside.
Subscribe to DIY Craft Bloom
Get updates on the latest posts and more from DIY Craft Bloom straight to your inbox.
Materials Needed
- Red cardstock for the pizza base
- Yellow for crust accents
- Round red dots for pepperoni
- Glue and a short birthday message inside
How to Make It
- Cut a triangular slice with a curved crust line from the red card stock.
- Add a crust edge in pale yellow and arrange pepperoni dots across the slice.
- Write a warm birthday message on the crust edge or inside the slice.
Pro Tips / Styling Ideas
- Seal the pepperoni with a light gloss for a glossy pepperoni look.
- Pair with a tiny gift card perched in the “cheese” layer for extra delight.
Who would love this? Pizza lovers, cozy-home friends, anyone who cheers for comfort food.
8. Tea Cup Greeting Card

A tiny teacup holding a bloom of birthday wishes—this card blends charm with a touch of whimsy. It’s perfect for a friend who loves a quiet moment and a warm cuppa.
Materials Needed
- Pastel card stock
- Colored pencils or markers
- Thin twine for a tea bag string look
- Button or small bead accent
How to Make It
- Draw a delicate teacup on the front, then add a small floral arrangement rising from the cup.
- Attach a thread to imitate a tea bag tag with a birthday message on the tag.
Pro Tips / Styling Ideas
- Use soft, muted tones for a calming, cozy aesthetic.
- Attach a tiny fabric tea bag element as a playful 3D flourish.
Who would love this? Tea lovers, book friends, and anyone who enjoys a serene, chic vibe.
9. Ice Cream Cone Card With Melted Message

Sweet, playful, and totally cute—the melted message side adds a cheeky twist. It’s a perfect summer birthday card that screams fun.
Materials Needed
- Tan or light brown card stock for the cone
- Pastel pinks and blues for the ice cream scoops
- Clear glue or glossy accents for “melting” shine
- Markers for detailing
How to Make It
- Cut a classic ice cream cone shape and layer with two scoop pieces.
- Write the birthday note on the melted drips under the scoops so it shows as the card opens.
Pro Tips / Styling Ideas
- Use a tiny rhinestone for a cherry on top—bonus cuteness.
- Place the cone on a folded panel to give it a playful 3D peek when opened.
Who would love this? Anyone who adores bright, summery vibes and a touch of humor.
10. Cupcake Tier Card With Festive Ribbon

Three pastel cupcakes stacked into a sweet little tower, tied with a ribbon. This card is a showstopper that doubles as a keepsake decoration.
Materials Needed
- Pastel cardstock for base and cupcakes
- Tiny pom-poms or beads for sprinkles
- Thin ribbon to wrap around the stack
- Double-sided tape
How to Make It
- Cut three cupcake shapes in varying sizes and stack them with small spacer pieces to create dimension.
- Add sprinkles with tiny beads or pom-poms along the frosting edges.
- Tie a ribbon around the stack and attach a short birthday message to the back.
Pro Tips / Styling Ideas
- Use metallic pencils to highlight the frosting edges for a festive look.
- Attach a tiny faux candle on the top cupcake for extra whimsy.
Who would love this? Friends who love multi-layered, cute stationery and giftable cards.
Conclusion
Ready to try one (or all) of these food-themed birthday cards? Each idea is designed to be quick, beginner-friendly, and visually irresistible.
Save, pin, and craft your way to more joyful mail—and watch birthday smiles multiply as soon as your envelopes hit the mailbox.