14 Friendship Bracelet Ideas You Need to Try


Every friend group hits the same wall. You want bracelets that clearly go together, but one of you likes chunky gold, one of you never takes off her silver rings, and one of you would rather make something by hand than buy it.
Matching sets solve the first problem and create three more.
The friendship bracelet ideas below work around that. Some are styling tricks pulled from real wrists, like keeping one shared metal while everyone picks her own weight, or swapping a single charm color so nobody mixes up whose is whose.
Others are projects you can sit down and make in an evening, from a five minute braided floss band to resin charms with dried flowers set inside them.
There is a mix on purpose. A few take one afternoon and cost almost nothing. A few are worth saving for a birthday or a graduation.
All fourteen give you something you can actually wear past the first week, which is the part most matching bracelet plans forget.
1. Match the Metal, Not the Design
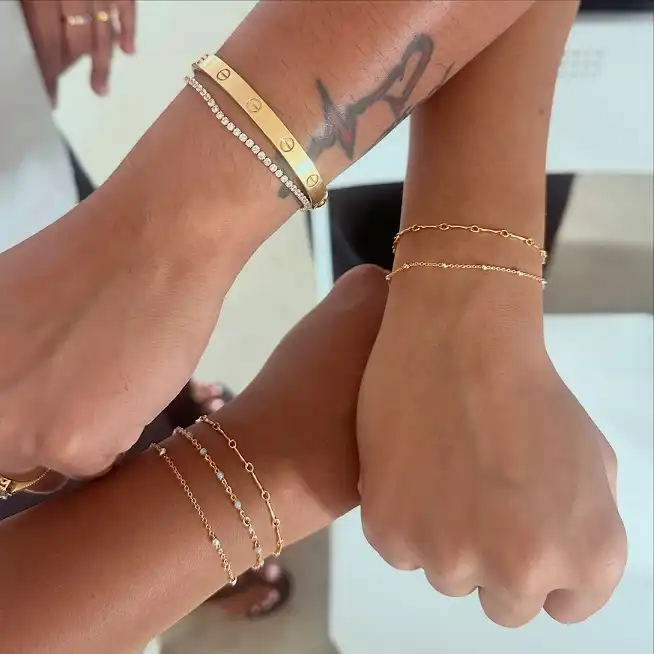
Two wrists here are wearing completely different things. One has a wide gold cuff with a diamond line next to it.
The other has two fine chains, one with tiny stations, one plain. They still read as a pair because every piece is the same warm gold.
This solves the most common friendship bracelet problem: your friend loves chunky pieces, you like barely-there ones, and identical bracelets end up looking wrong on one of you.
So pick a shared metal first and let each person choose her own weight. A thin wrist can carry two delicate chains without swimming in them. A larger wrist gets the cuff and does not feel squeezed.
One more thing worth copying: the cuff sits high on the arm, the chains sit low near the hand. That spacing keeps the photo from looking crowded.
2. Build the Stack Around One Letter Tile Bracelet
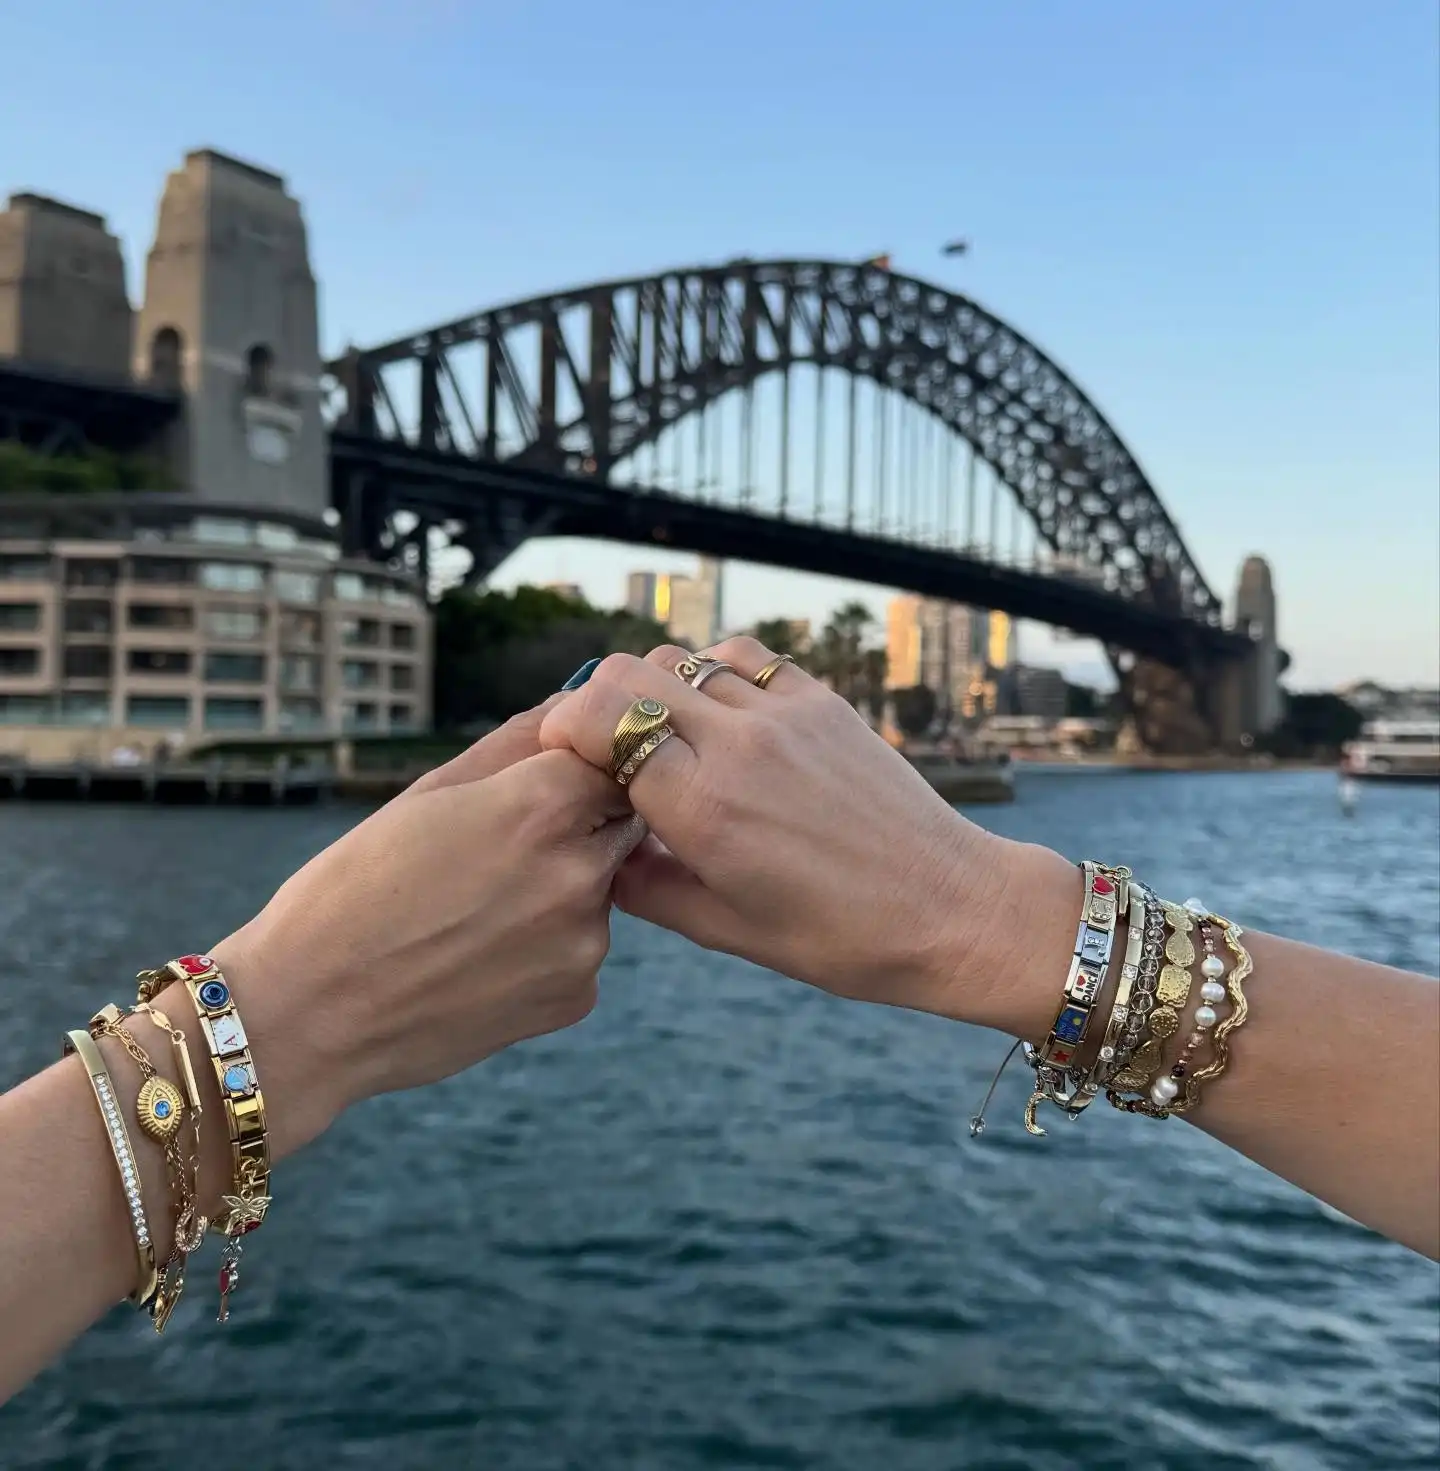
The wrist on the left is doing something clever inside a very full stack. A row of square link tiles holds letters and small enamel pictures, and the flat tiles sit still while the chains around them move.
That flat surface is the trick. Round beads and slippery chains spin all day, so your initial ends up facing the floor by lunchtime. Square tiles have a top and a bottom, and they keep it.
What works here
The tiles carry the meaning, so the rest of the stack can be plain. Two enamel colors repeat across both wrists, which ties the friends together without matching bracelet for bracelet.
An adjustable slider cord on the right wrist takes up slack, so nothing slides over the hand.
Spell a short shared word across the tiles instead of a full name. Short words stay flat on a small wrist.
Letters stay upright all day because a square link cannot roll.
The same red and blue show up on both wrists, so the pair reads as a set.
One adjustable piece pulls the whole stack snug and stops it sliding off.
3. Same Bead Bracelet, One Different Charm Each
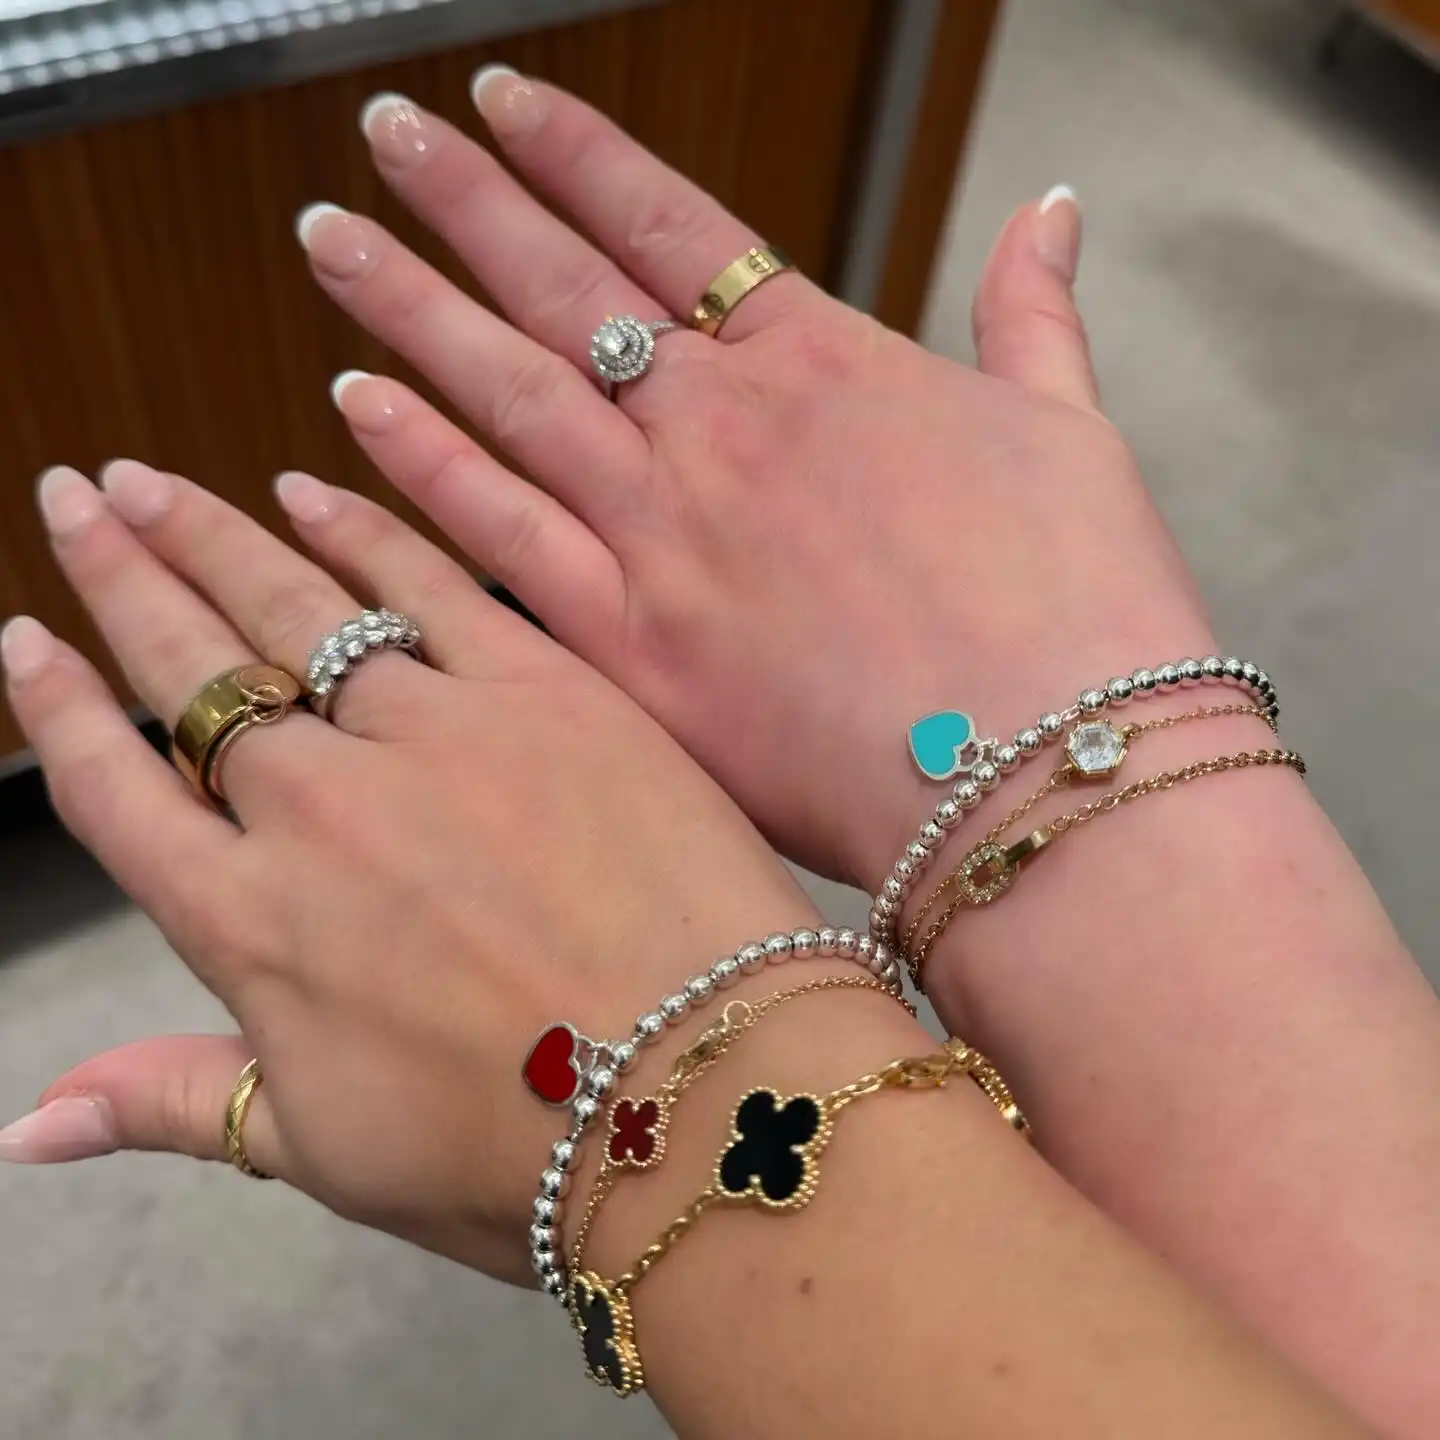
Look at the two silver bead strands. They are the same beads, the same size, the same finish.
The only difference is the tiny enamel heart hanging off each one, turquoise on one wrist and red on the other.
That one small change fixes something annoying about matching bracelets.
When everyone owns the identical piece, they get mixed up on a sleepover table, and nobody feels like theirs is really hers.
Give the group one base recipe and let each person pick her charm color. It costs almost nothing extra and every bracelet becomes findable at a glance.
Bead strands like these usually sit on stretch cord, which is the part that fails first. Thicker cord and a few extra beads of slack will outlast a tight fit.
Knot the stretch cord twice, add a drop of glue, then hide the knot inside the widest bead. That hidden knot is why some bead bracelets last years and others snap in a month.
4. Split the Metals, Keep the Shapes
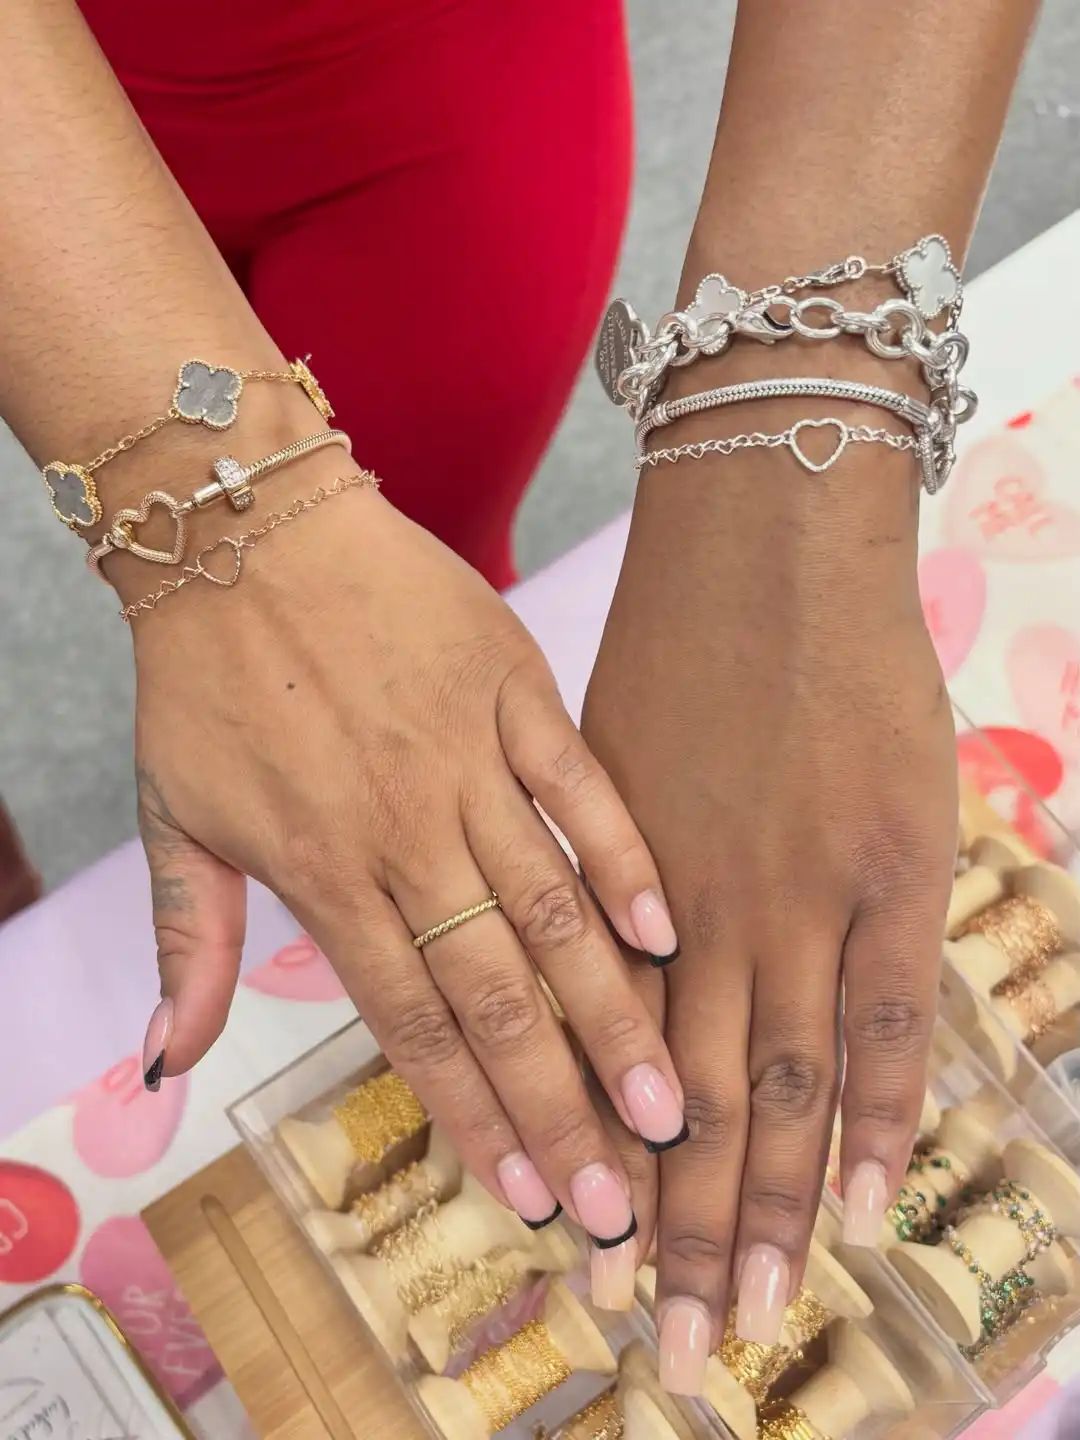
Here is a pair that solves the gold or silver argument. One friend wears rose and yellow gold, the other wears all silver, and both wrists carry the same three shapes: a clover station bracelet, a smooth snake chain, and an open heart link.
Subscribe to DIY Craft Bloom
Get updates on the latest posts and more from DIY Craft Bloom straight to your inbox.
Nobody has to wear a metal she dislikes or that clashes with the rings she never takes off. The shapes do the matching instead.
Copy it by choosing your three shapes first and buying each one twice, once in each metal. Shape memory is stronger than color memory in a photo, so the set still reads instantly.
The chunky silver curb chain on the right also does quiet work. One heavier piece in a stack of thin ones keeps the whole thing from looking flimsy.
| Gold wrist | Silver wrist |
|---|---|
| Clover stations in warm gold | The same clover stations in silver |
| Smooth snake chain, thin | Smooth snake chain, slightly wider |
| Open heart on a fine rose chain | Open heart on a fine silver chain |
5. Give Each Friend Her Own Word
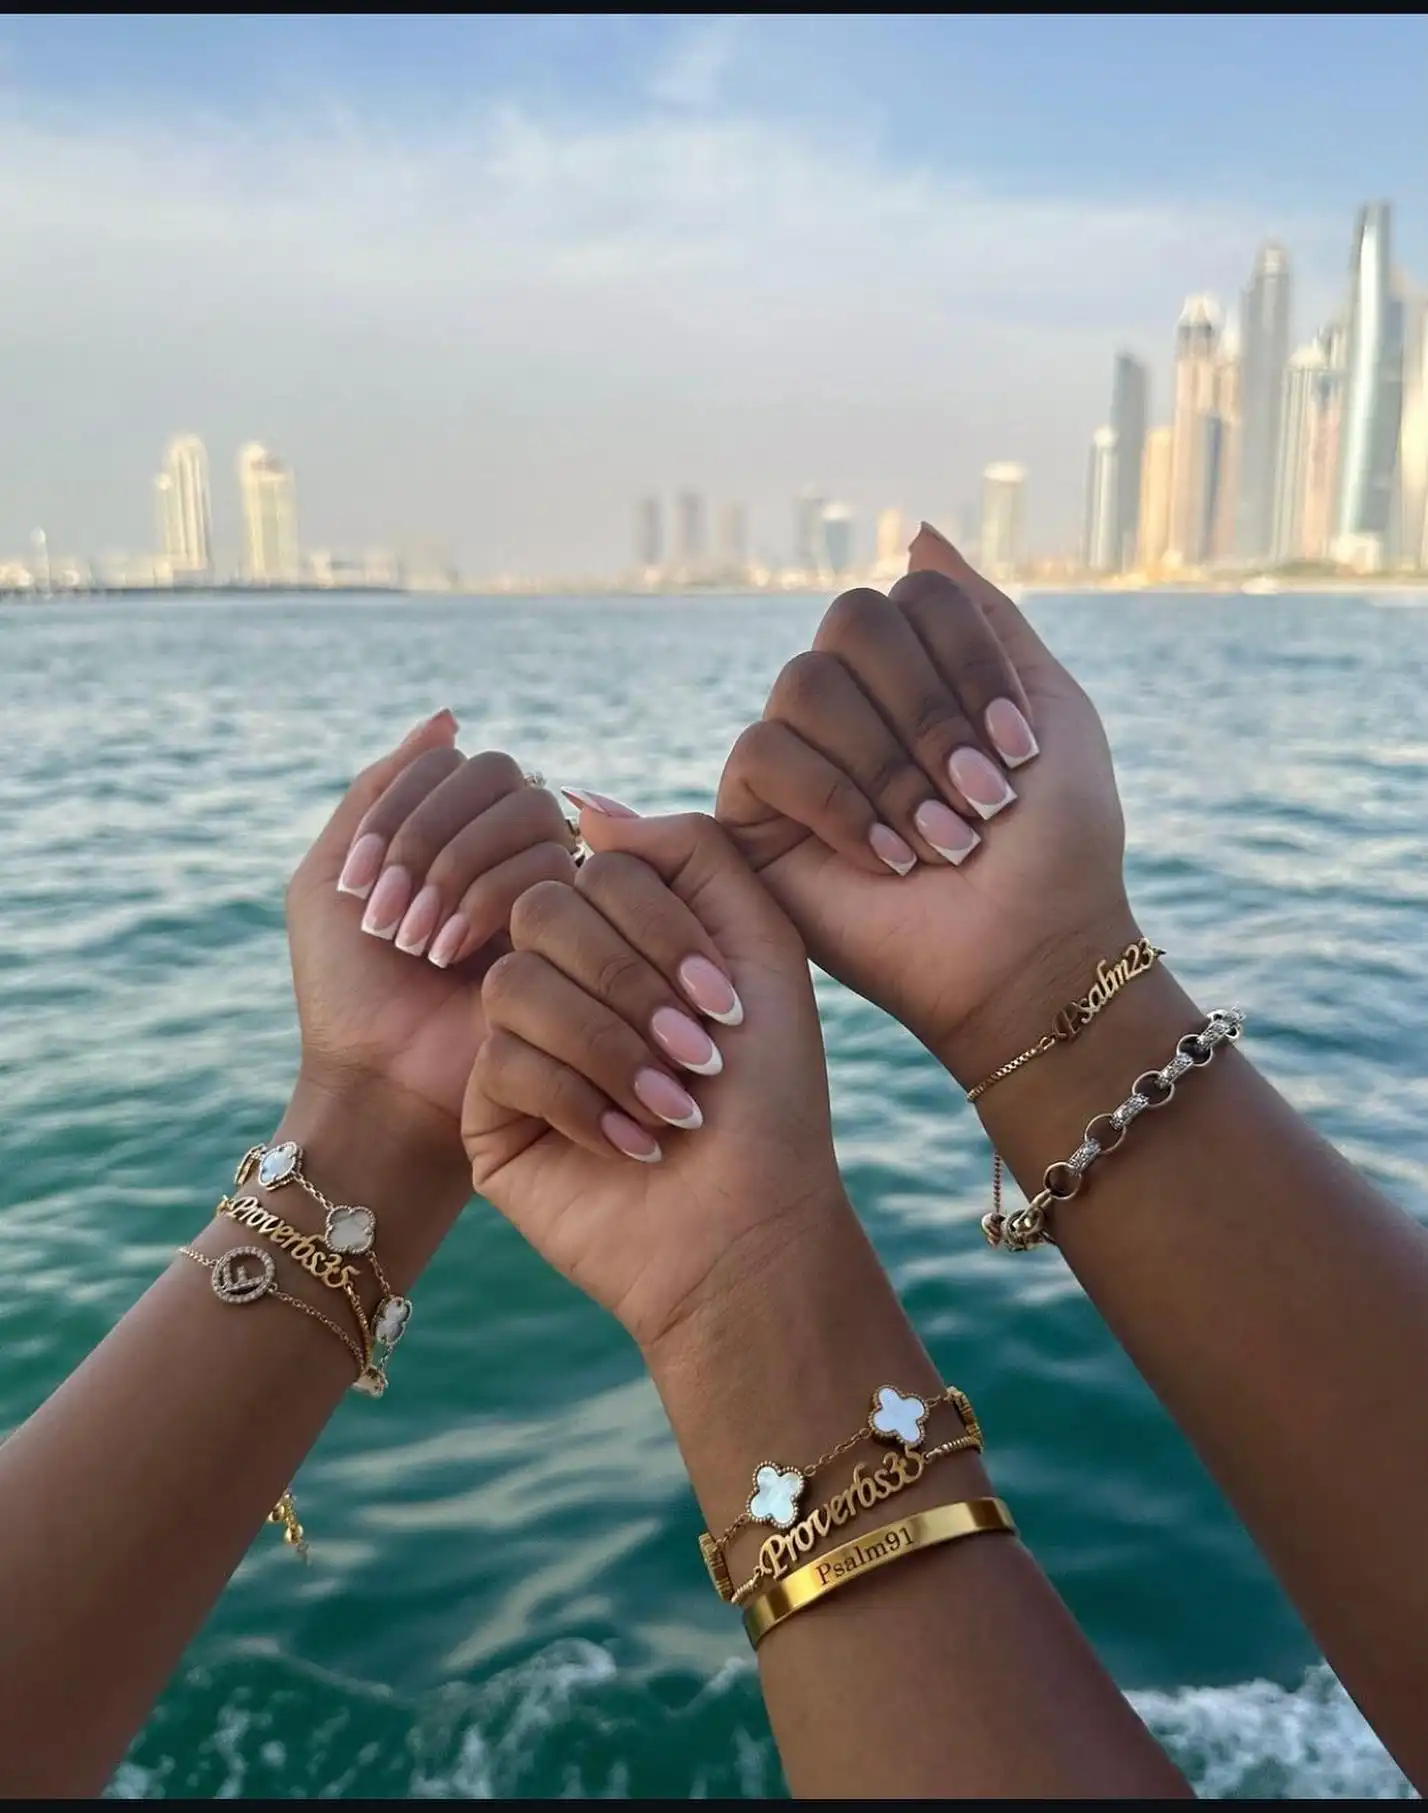
Three wrists, three different phrases in the same script lettering, all in the same gold. One reads Proverbs 31, one reads Psalm 23, and a flat cuff underneath is stamped Psalm 91.
Matching bracelets can feel generic, like something bought in a three pack. Personal words fix that without breaking the set, because the font and the finish are doing the matching job.
Pick text that is short. Cursive nameplates get fragile as they get longer, and a long word on a small wrist curves away from the skin and catches on sleeves.
The engraved cuff is the sturdier choice of the two styles shown. Flat metal with the words cut into it has nothing to snag, so it suits anyone who is rough on jewelry.
6. One Recipe, Six Wrists, Six Colors
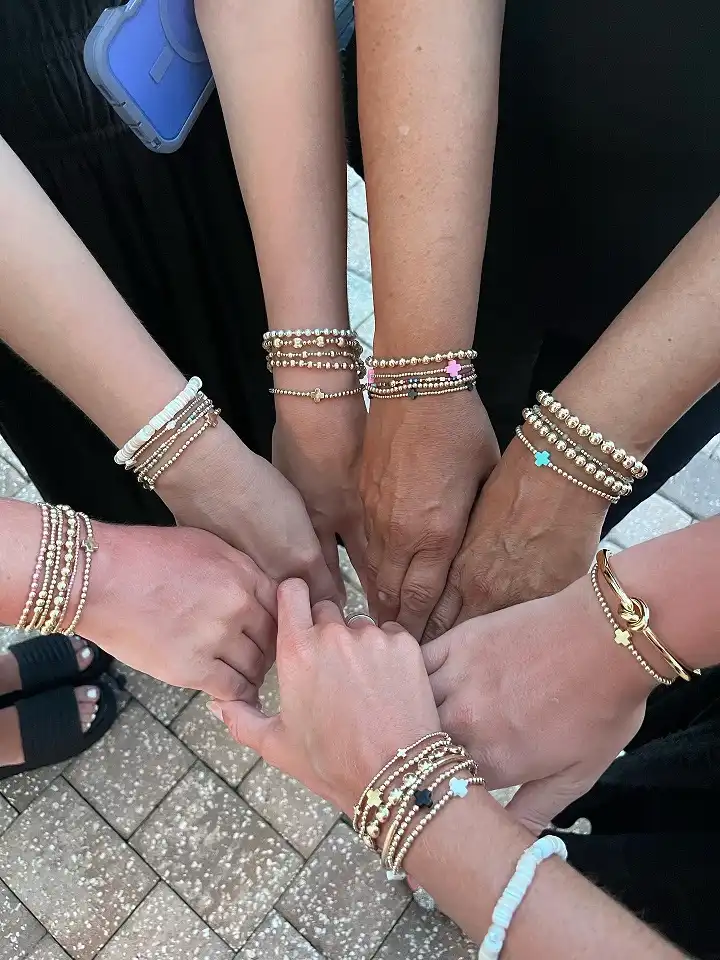
Six people are wearing the same idea in this circle, and it still does not look like a uniform.
Every stack is built from small gold beads, and every stack has one little cross charm in a different color: pink on one wrist, teal on another, black and white on the others. A few people added a strand of flat clay disc beads.
That repeatable base is what makes big group bracelets possible. Making six one of a kind designs takes a whole weekend.
Making one design six times takes an evening, and the color swap does the personalizing for you.
Buy the beads in a single bulk bag rather than six small packs. It is the cheapest part of the project and the part people always under buy.
7. Layer Fine Chains Without the Tangle
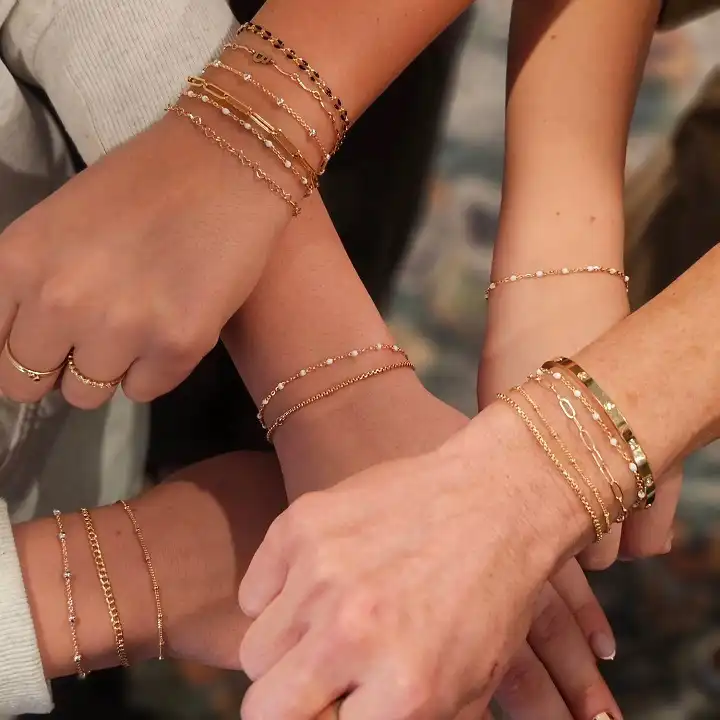
Four wrists here are stacked with very thin gold chains, and almost nothing is knotted together. That is not luck.
The chains in each stack are different link types, so they slide past each other instead of gripping.
Watch the wrist on the right. A solid bangle sits at the bottom of the pile and holds the chains apart like a spacer. The left wrist does something similar with a flat bar bracelet.
Three habits keep fine chains alive:
Mix link sizes, since two identical fine cables will braid themselves together within an hour.
Put one rigid piece in every stack so the softest chains have something to rest against. Store them clasped, not loose in a bowl.
Beaded station chains, the ones with a tiny stone every centimeter, tangle the least of anything shown here. Start there if you have never layered before.
8. Resin & Dried Flower Charm Bracelet
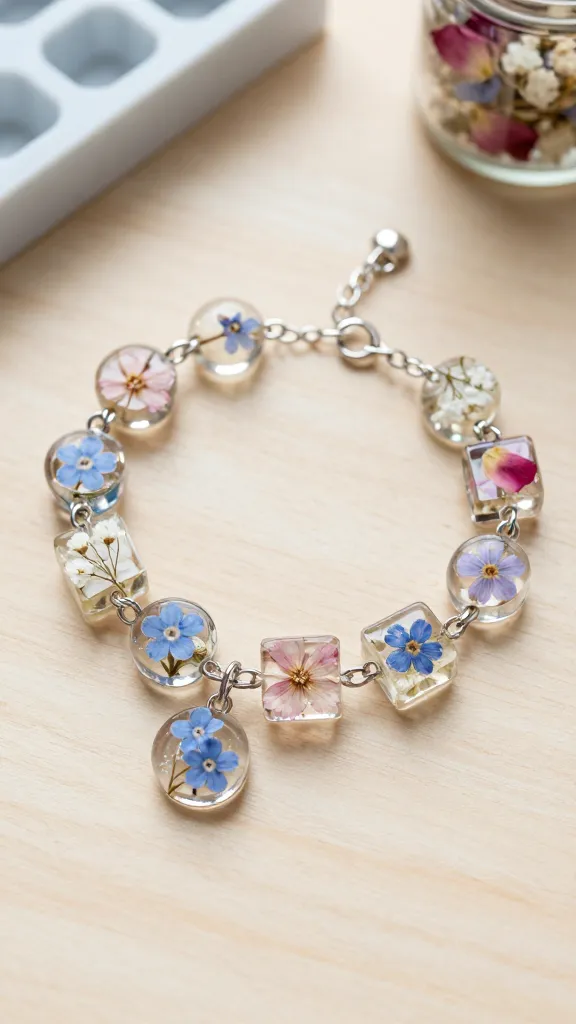
For something truly unique and utterly enchanting, why not create a resin and dried flower charm bracelet?
This project allows you to encapsulate tiny bits of nature (or glitter!) into clear, durable resin charms, which are then assembled into a beautiful bracelet.
It’s a magical way to preserve memories or just create something stunningly beautiful.
This project is perfect for the friend who loves nature, unique jewelry, and appreciates a truly bespoke, artistic gift. It’s a showstopper, seriously!
9. The Classic Braided Embroidery Floss Bracelet
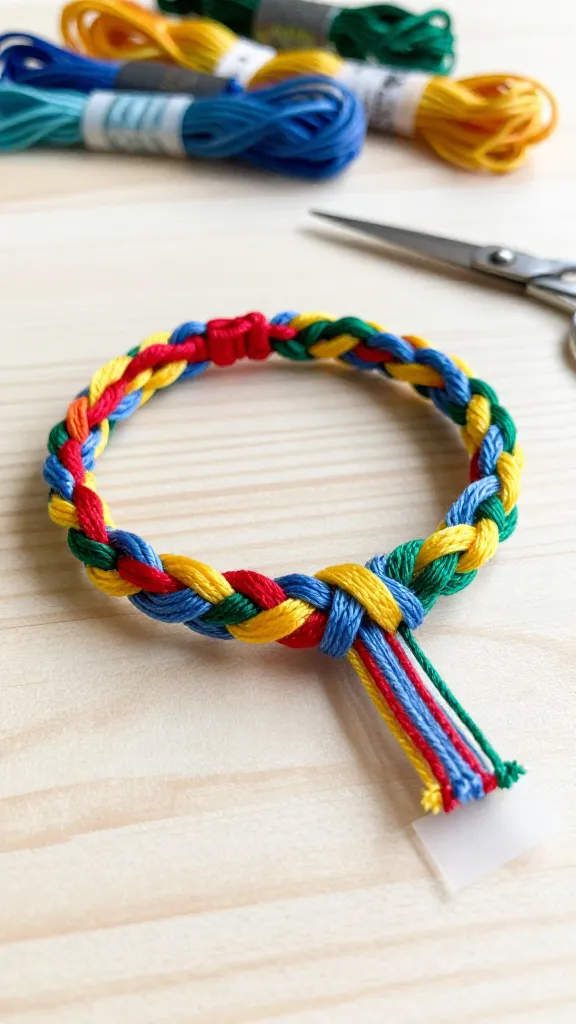
Let’s kick things off with a beloved classic that never goes out of style: the simple braided embroidery floss bracelet! This project is pure nostalgia, bringing back memories of carefree days and endless creativity.
The beauty lies in its simplicity and the vibrant pop of color it adds to any wrist, making it a perfect everyday accessory or a stackable staple.
This is the perfect starter project for anyone new to bracelet making and an absolute must for a relaxed crafting session with friends.
Subscribe to DIY Craft Bloom
Get updates on the latest posts and more from DIY Craft Bloom straight to your inbox.
10. Macrame Knot Bracelet with a Focal Bead
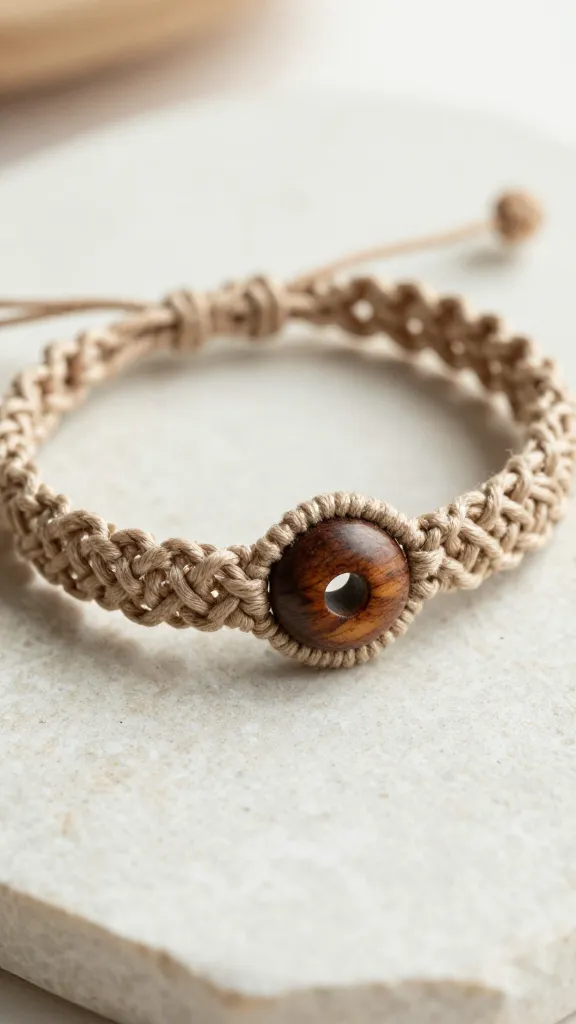
Elevate your knotting game with a chic macrame bracelet featuring a stunning focal bead! This design looks intricate and sophisticated, but trust me, it’s much simpler than it appears.
The combination of sturdy square knots and a beautiful central bead creates a piece that feels both earthy and elegant, perfect for gifting to someone with a bohemian spirit.
Anyone who appreciates a bit more detail in their accessories will adore this macrame masterpiece. It’s a fantastic way to level up your bracelet-making skills!
11. Woven Seed Bead Friendship Band
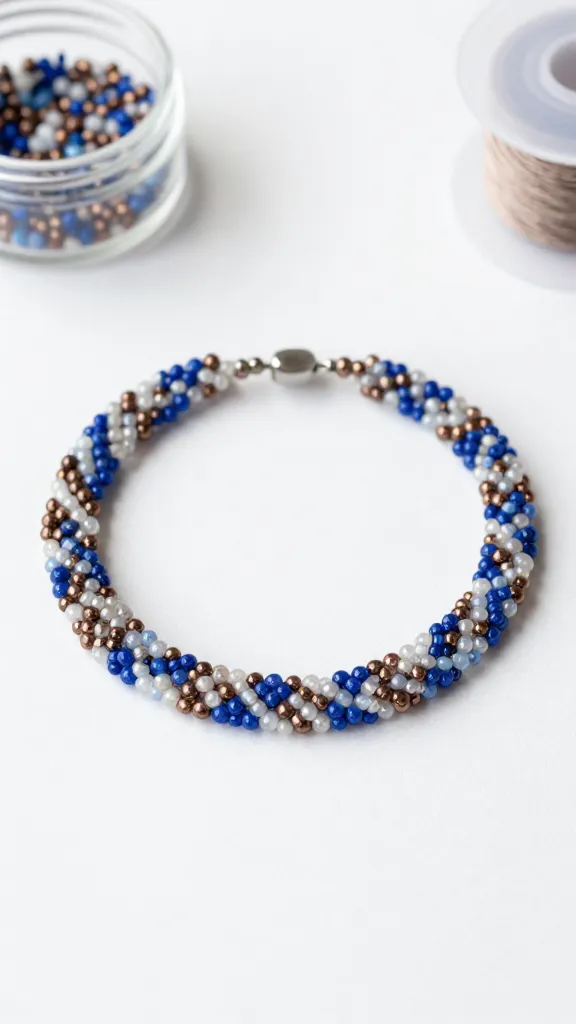
Step into the world of tiny treasures with a beautifully intricate woven seed bead friendship band. This project yields a flat, delicate bracelet that shines with subtle sparkle and endless customization possibilities.
It’s a departure from knotting, offering a completely different aesthetic that feels refined and artistic.
This delicate bracelet is perfect for stacking with other thin pieces or wearing solo for a minimalist statement. FYI, it’s incredibly satisfying to watch your pattern emerge!
This project is perfect for the detail-oriented crafter who loves working with tiny, colorful beads to create something truly unique and personal.
12. Personalized Charm Bracelet with Chain
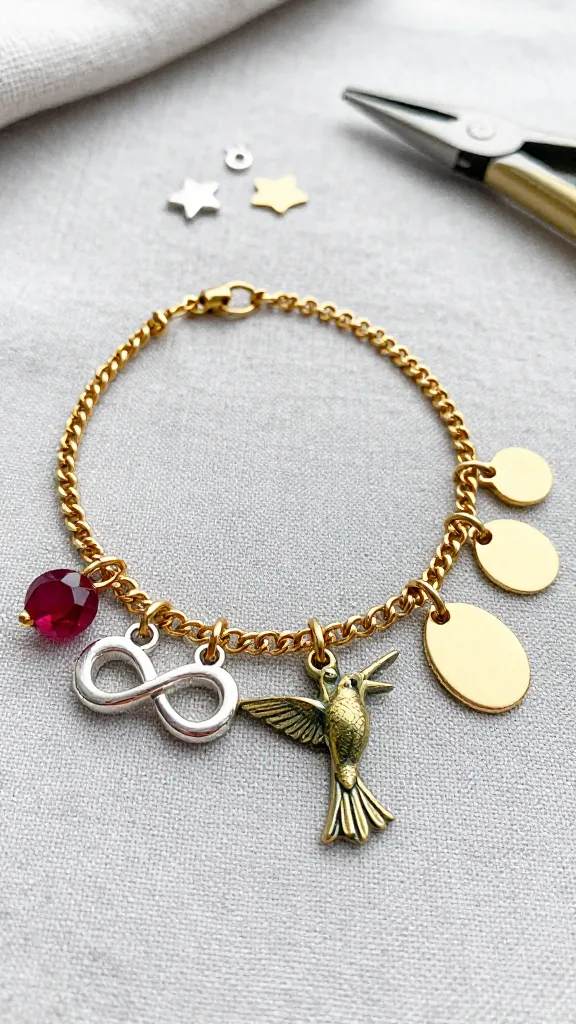
Forget the traditional string, let’s make a charm bracelet that tells a story! This project is all about assembly, personalization, and creating a piece that’s as unique as your friendship.
It’s less about knotting and more about curating, resulting in a beautiful, jingly keepsake.
This bracelet is fantastic for celebrating milestones or inside jokes, making it a truly meaningful gift. It’s a wonderful way to tell a friend’s story through wearable art.
This is ideal for friends who love collecting trinkets and appreciate a piece of jewelry with deep personal meaning. It’s a fantastic creative outlet!
13. Rustic Leather Cord & Slider Bead Bracelet
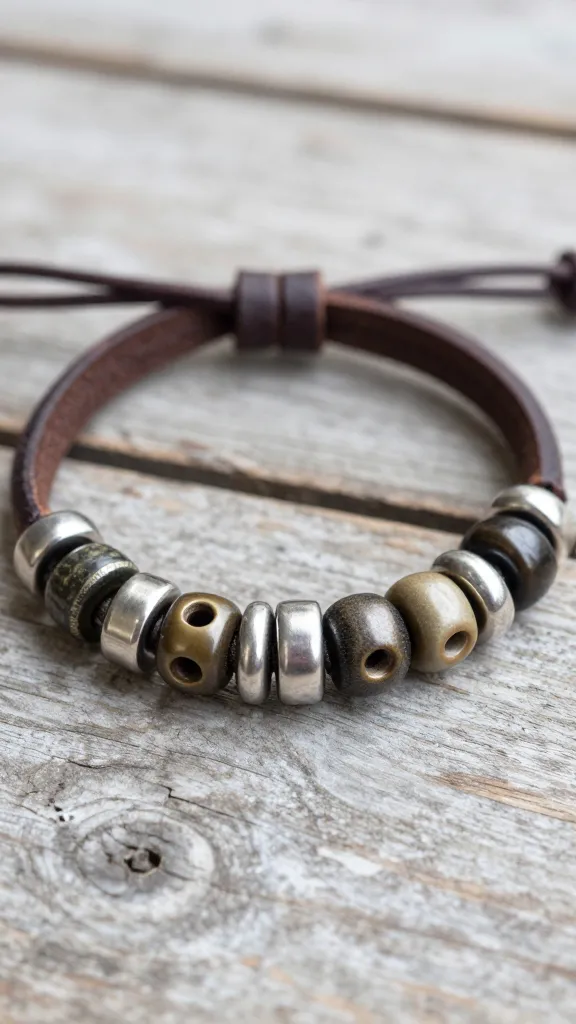
For friends who prefer a more rugged, earthy, or minimalist aesthetic, the leather cord and slider bead bracelet is an absolute winner.
This project combines the natural beauty of leather with modern metallic or ceramic slider beads, resulting in a stylish and substantial piece that’s super easy to make.
It offers a completely different texture and feel compared to delicate string bracelets.
This bracelet is perfect for the friend who loves natural materials, clean lines, and a touch of understated cool. It’s a quick project with a high-end feel.
14. Kumihimo Braided Friendship Cord
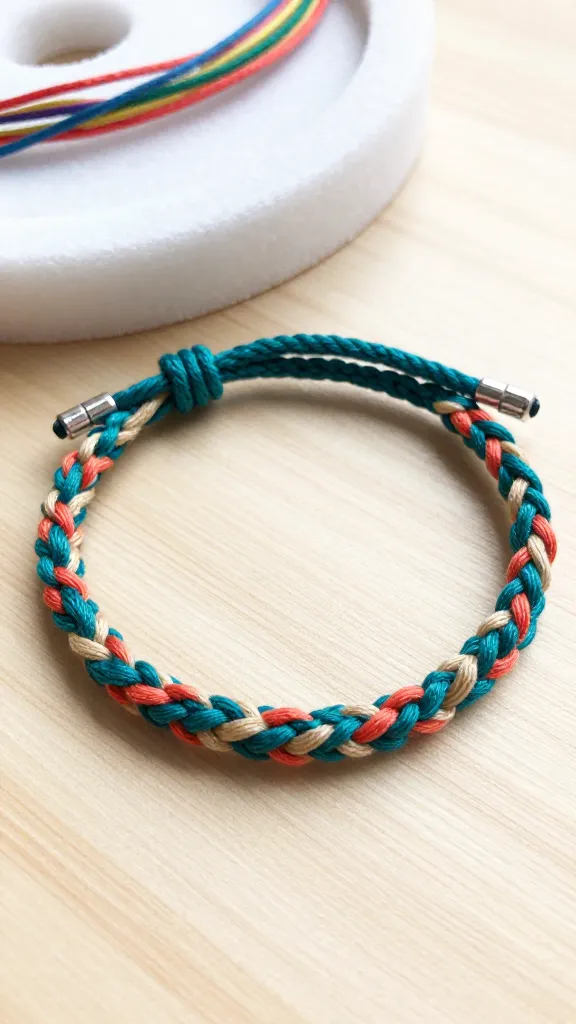
Ready to try a unique braiding technique that creates a beautiful, round, and sturdy cord?
Kumihimo, a traditional Japanese braiding art, will open up a whole new world of bracelet making!
This project uses a special disc to create stunning patterns and textures that are distinct from simple flat braids.
This is for the friend who loves learning new crafts and appreciates unique, handcrafted items with a global flair. It’s a truly rewarding project!
Conclusion
The best sets are usually the loosest ones. Pick the thing that stays the same, a metal, a bead, a word style, a knot, then let everyone change one detail so her bracelet feels like hers.
That single rule covers both halves of this list, the stacks you buy and the ones you tie yourself.
If you are starting from zero, make the braided floss band first and see who in the group actually enjoys it. That tells you whether to go bigger next time.
Save this for the next time you want fresh friendship bracelet ideas, and come back to it when the group is ready to make round two.