14 Aesthetic Craft Ideas Easy Enough for a Beginner (No Fancy Tools)

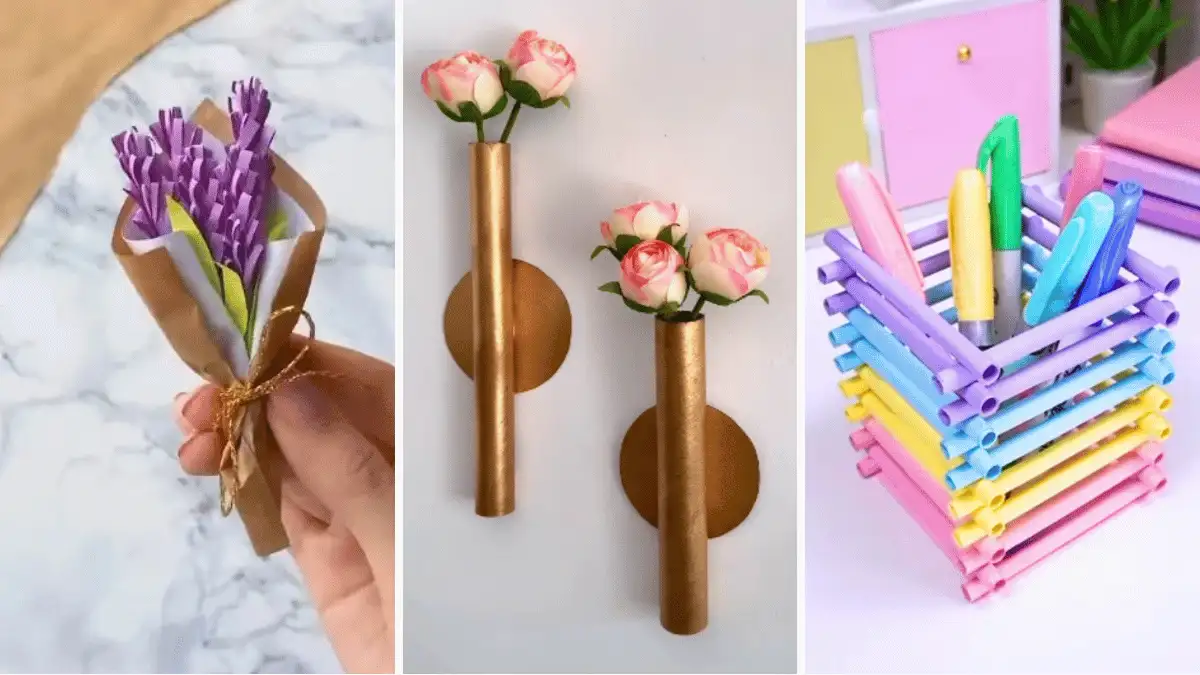
Half the crafts that go viral need a tool nobody has in the house. A heat gun, a die cutter, a resin kit that costs more than the finished thing. That is why so many saved pins never get made.
Everything below is the opposite. The list runs on paper, cardboard, empty snack cans, old newspaper, air dry clay, and a few flowers you already walked past this week. Some take an afternoon. A couple take twenty minutes and a glue stick.
What ties these aesthetic craft ideas easy enough for a first timer together is not the difficulty level, it is the finish. Rolled paper looks like a woven basket once the colors climb in order.
Corrugated cardboard looks like ceramic under flat white paint. An old picture frame turns into wall art the moment you leave the top half empty.
You will find storage, wall pieces, small gifts, and a few things that just make a desk or shelf look better. Start with whichever photo made you stop scrolling, and work down from there.
1. Mini Paper Lavender Bouquet You Can Finish in One Sitting
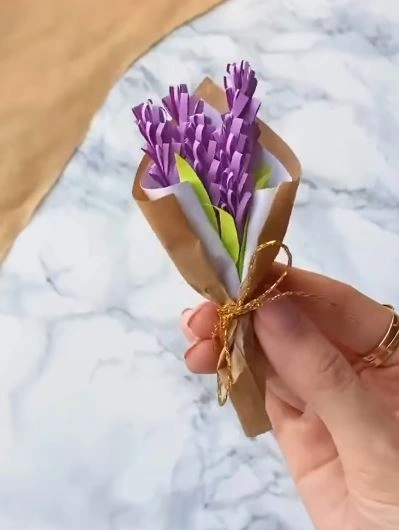
Fringed purple paper does all the heavy lifting here. Each stem is a strip snipped into a comb along one edge, then rolled tight around a green wire or paper stalk so the cut ends flare open like real lavender buds.
Wrap three or four stems in a scrap of kraft paper, tie a thin gold cord at the base, and it looks like something from a flower stall.
What makes this one worth trying first: nothing has to be even. Uneven fringe reads as texture, not as a mistake. Cut the strips a little wider than you think you need, since thin fringe curls and hides.
It sits nicely on a shelf, tucks into a gift, or works as a place setting at a table.
2. Rolled Paper Pen Holder in Soft Pastel Stripes
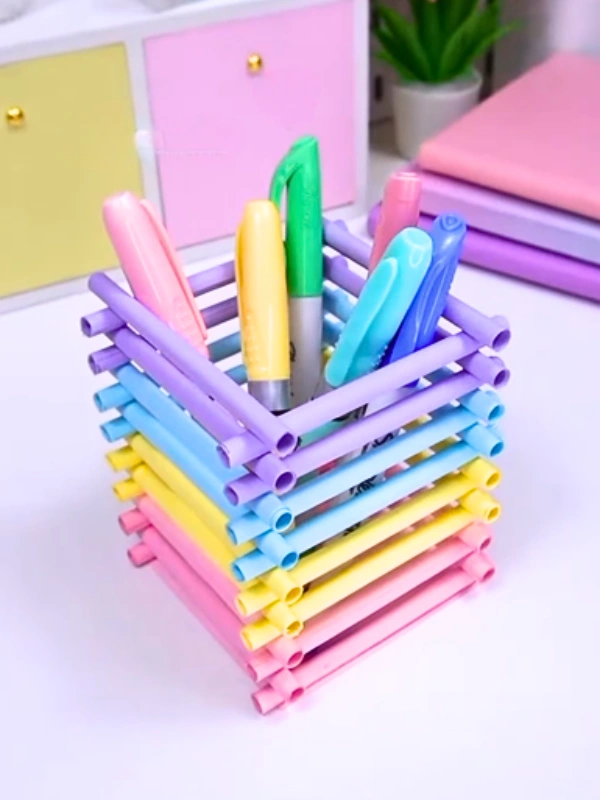
Every piece in this desk cup started as a flat sheet of colored paper. Roll each sheet tightly around a pencil, slide the pencil out, and you get a firm little tube.
Make a stack of them in pink, yellow, blue, and purple, then glue them in crossing pairs, log cabin style, until the walls are tall enough to hold markers.
Two details are carrying the look. The tubes are rolled tight enough to stay round instead of flattening, and the colors climb in order so the finished holder fades from warm at the base to cool at the top.
Roll a few extra tubes at the start. The first ones are always looser than the rest, and you will want to swap them out.
Same width every time, so the rolled tubes end up the same thickness.
Two tubes one way, two across the ends, repeating up the walls.
A few rows per shade turns the stack into a soft gradient.
3. Scalloped Stripe Envelopes That Turn Plain Paper Into a Gift
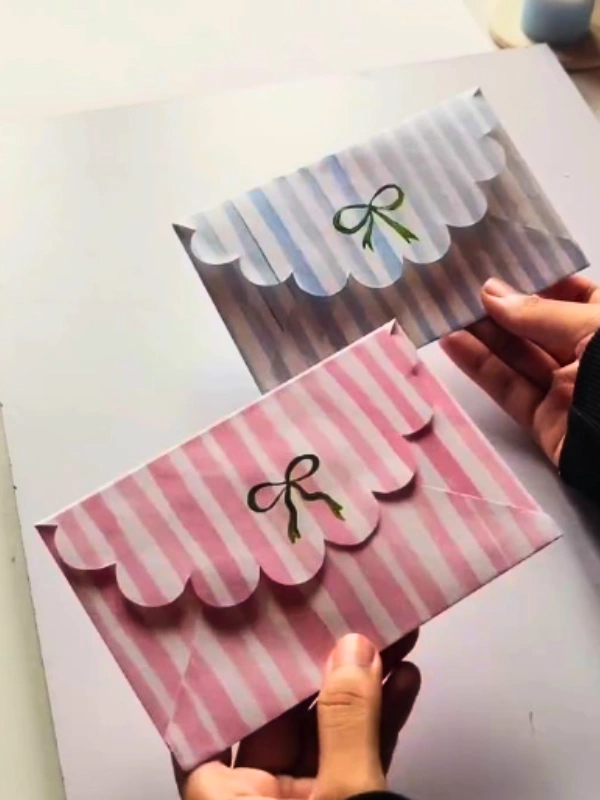
Two small choices separate these from a folded sheet of printer paper. The flap is cut in soft scallops instead of the usual triangle, and the stripes are set at a slight diagonal so the pattern never looks flat.
A single hand drawn bow sits in the center where a seal would normally go.
The pink version and the blue version share one pattern, which is the trick worth stealing.
Print or paint the same stripe in two colors and you have a matching set for two people without designing anything twice.
Trace a coin along the flap edge to get even scallops, then cut just outside your pencil line.
Rounded edges soften the whole envelope and hide small cutting wobbles.
Tilting the lines keeps the paper from reading as plain gift wrap.
A single small drawing does more than scattered decoration would.
Subscribe to DIY Craft Bloom
Get updates on the latest posts and more from DIY Craft Bloom straight to your inbox.
4. Gold Tube Wall Vases Made From Cardboard Rolls
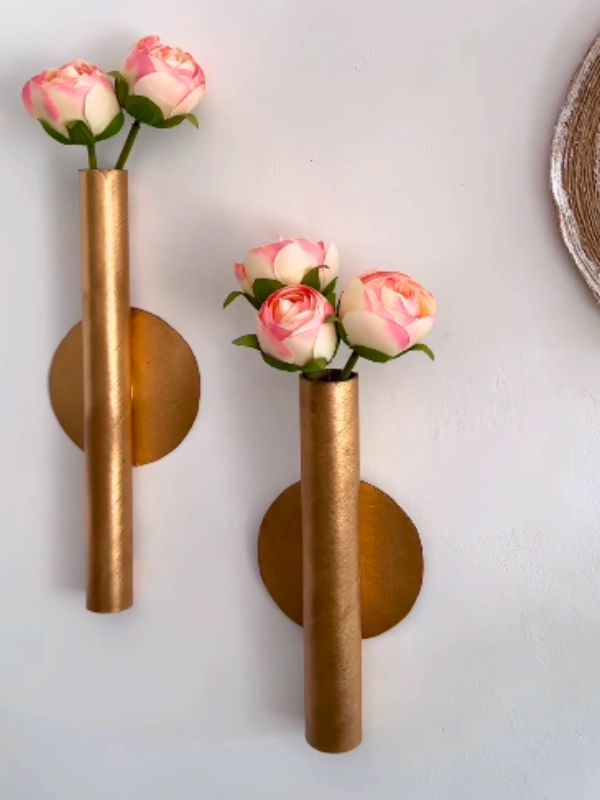
Cardboard tubes, painted gold, mounted over a plain gold circle.
Behind that simple description is the reason these look expensive: the flat disc sits behind the round tube, so light hits two different shapes and the piece reads as metal instead of paper.
A few things that matter in the photo:
- The pair is hung offset, one higher than the other, not side by side at the same height
- Only two or three faux roses go in each tube, so the flowers do not swallow the shape
- The gold has a slightly brushed, uneven finish rather than a flat spray coat
Line the inside with a small plastic tube if you ever want real stems. Otherwise keep it dry and the cardboard lasts for years.
5. Four Cup Caddy Cut From Empty Snack Cans
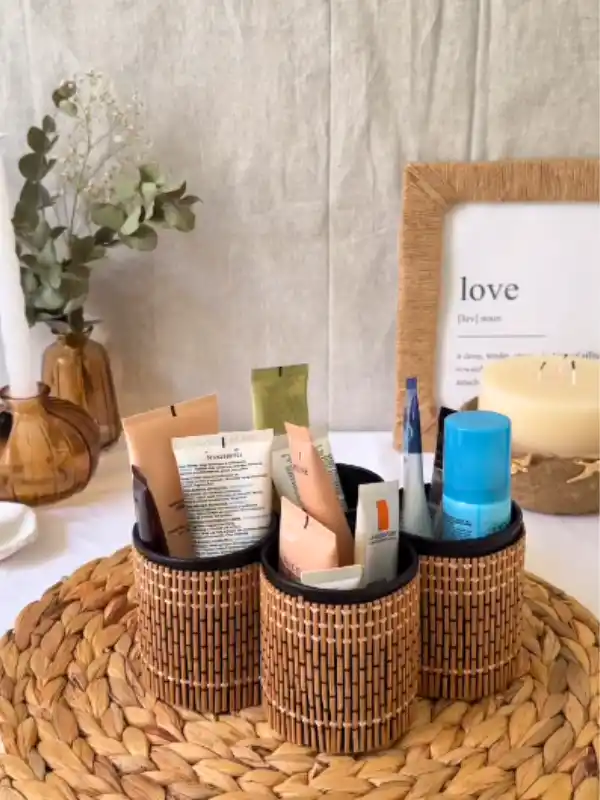
Nobody guesses this started as two cardboard snack cans.
They were cut down into four short cylinders of matching height, wrapped in a fine bamboo style mat, and glued shoulder to shoulder so they stand as one piece.
The dark metal rims of the original cans were kept as is, which is what gives the top edge a finished look instead of a raw cardboard one.
Height is the quiet decision here. Cutting them short lets the products lean out and stay visible, so it works as storage and as decor at the same time.
Sort by category, not by size. One cup for skincare, one for tools, one for daily grabs.
Keep the original metal rim, cover the cardboard, and a snack can stops looking like trash and starts looking like a bought organizer.
6. Cottagecore Pressed Flower Bookmarks
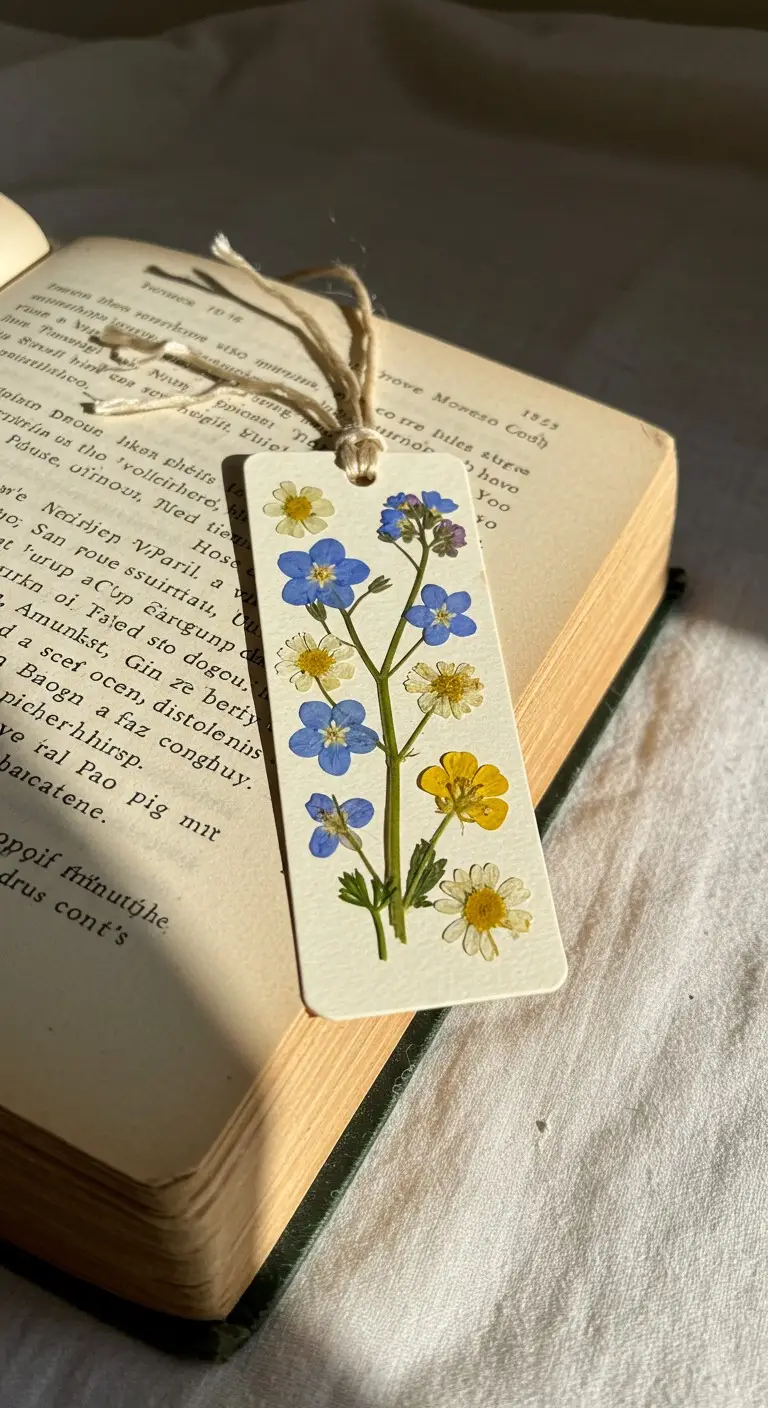
Add a touch of nature and nostalgia to your reading routine with handmade pressed flower bookmarks.
How to Make It:
- Collect small flowers and press them inside a heavy book for a week.
- Cut cardstock or laminate sheets into bookmark-sized pieces.
- Arrange the dried flowers on the bookmark and seal with Mod Podge or laminate them.
- Punch a hole at the top and tie a ribbon or twine for an extra decorative touch.
Tips for the Best Results:
- Choose flat, colorful flowers like daisies, pansies, or ferns for the best effect.
- Use gold or white ink to add handwritten quotes for a personalized touch.
Picture This: A delicate handmade bookmark with pressed wildflowers, resting between the pages of a well-loved novel.
7. Minimalist Clay Trinket Dish
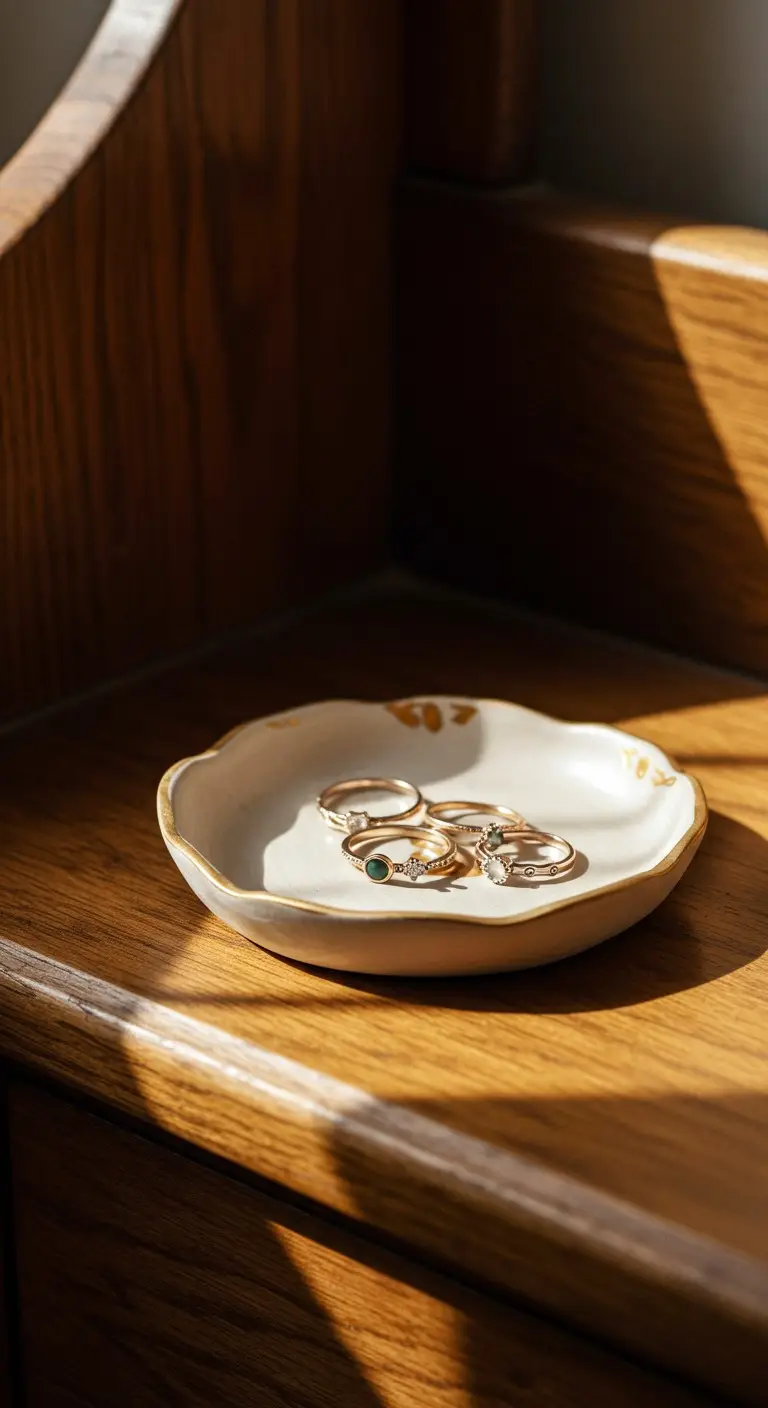
A simple air-dry clay dish is both practical and effortlessly elegant, perfect for holding jewelry or small keepsakes.
How to Make It:
- Roll out air-dry clay to about ¼-inch thickness.
- Use a small bowl as a template to cut out a circle.
- Shape the edges slightly upward to form a dish.
- Let it dry completely, then paint it in neutral tones or with delicate gold accents.
- Seal with a clear varnish for durability.
Tips for the Best Results:
- For a marbled effect, mix white clay with a tiny amount of pastel paint before rolling.
- Keep the dish smooth by sanding rough edges before painting.
Picture This: A handmade ceramic-style dish, painted in soft beige with gold-trimmed edges, sitting on a wooden vanity holding delicate rings.
8. Rolled Newspaper Skyline Inside an Old Picture Frame
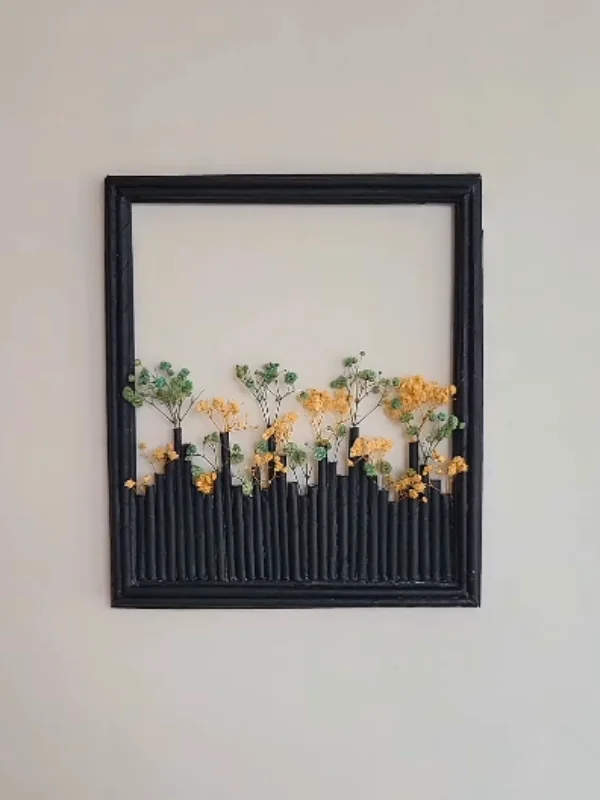
Old newspaper pages, rolled into thin tubes and painted matte black, fill the bottom half of an empty frame.
The tubes are cut at different heights so the top edge reads like a city skyline, and a few of the taller ones stay hollow to hold small dried stems.
The empty upper half is the part people skip, and it is the whole reason this looks intentional. Filling the frame edge to edge would have made it busy.
Leaving air above the tubes gives the dried yellow and green flowers somewhere to breathe.
Paint the tubes after gluing them in place, not before. One coat over the whole block hides every seam at once.
| Fill the whole frame | Fill the bottom third |
|---|---|
| Reads as a craft project. | Reads as wall art. |
| Flowers get lost in the pattern. | Flowers become the focal point. |
| Needs far more tubes and more time. | Fewer tubes, done in an evening. |
9. Aesthetic Polaroid Photo Garland
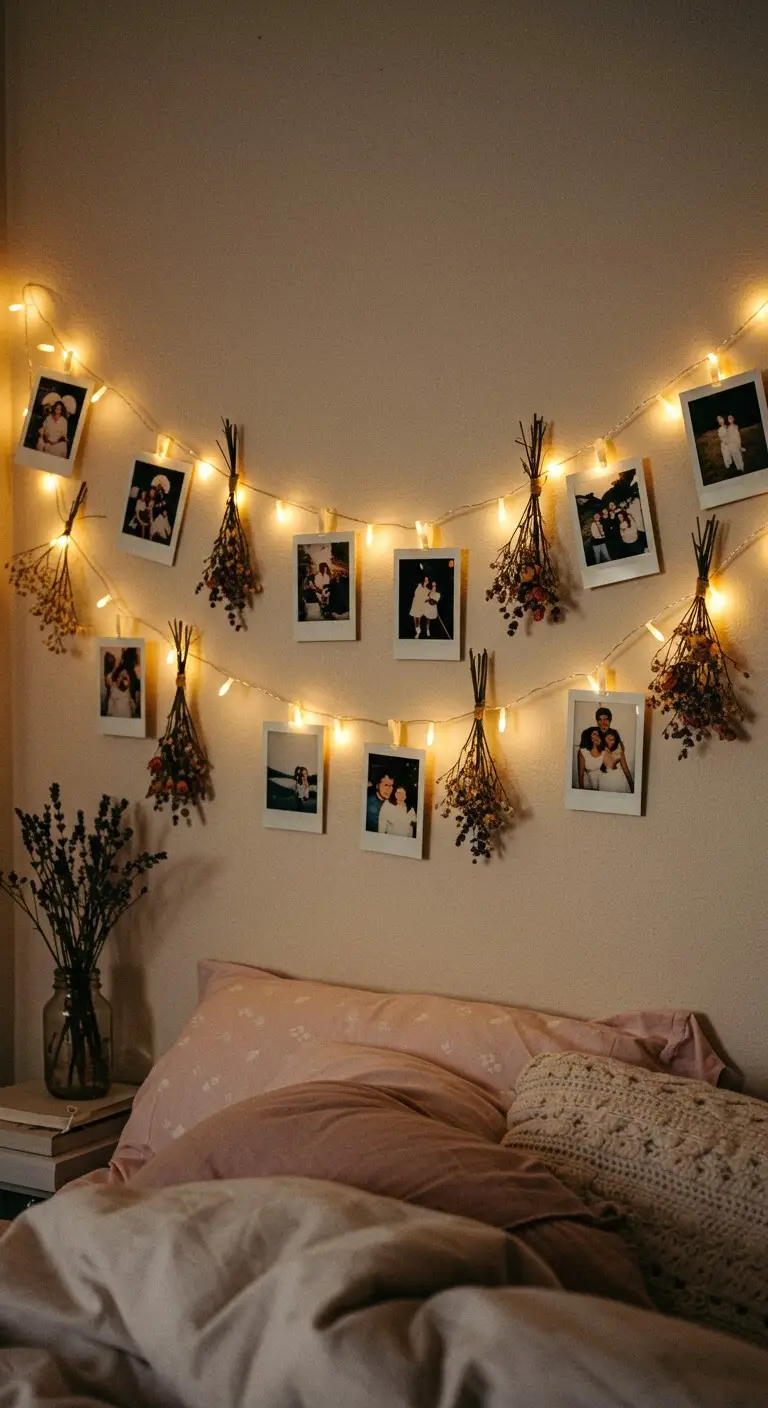
Create a charming DIY photo display with a simple garland made of Polaroid-style prints and fairy lights.
How to Make It:
Subscribe to DIY Craft Bloom
Get updates on the latest posts and more from DIY Craft Bloom straight to your inbox.
- Print small square photos with a white border to mimic Polaroids.
- Attach them to a piece of twine or fairy lights using mini clothespins.
- Hang the garland across a wall, above a desk, or around a mirror.
Tips for the Best Results:
- Keep the photo theme consistent with soft, muted tones or black-and-white filters.
- Add dried flowers or aesthetic stickers between the photos for extra charm.
Picture This: A cozy bedroom wall with a glowing fairy-light garland, featuring Polaroid photos of favorite memories, intertwined with delicate dried florals.
10. Ribbed White Vases From Cardboard and Snack Cans
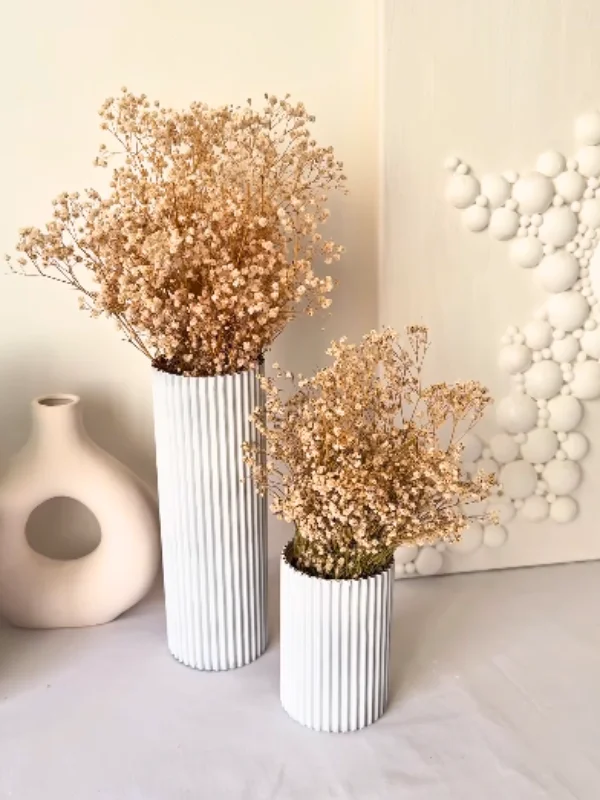
Corrugated cardboard wrapped around a snack can, painted white, and suddenly it belongs next to a store bought ceramic.
The ridges catch light down the whole side, which is why the surface looks carved rather than covered.
What makes the pair work:
- Two heights instead of one, a tall can and a short one, so they group like a real vase set
- Flat white paint, not glossy, since shine would show the cardboard texture underneath
- Dried baby’s breath spilling wide over a narrow base, which balances the straight ribs
Peel the smooth top layer off the corrugated cardboard first so the wavy ridges face out. That single step is the difference between ribbed and plain.
Keep these to dried stems only. Water will soften the cardboard from the inside and the ribs will sag within a day.
11. DIY Aesthetic Candles
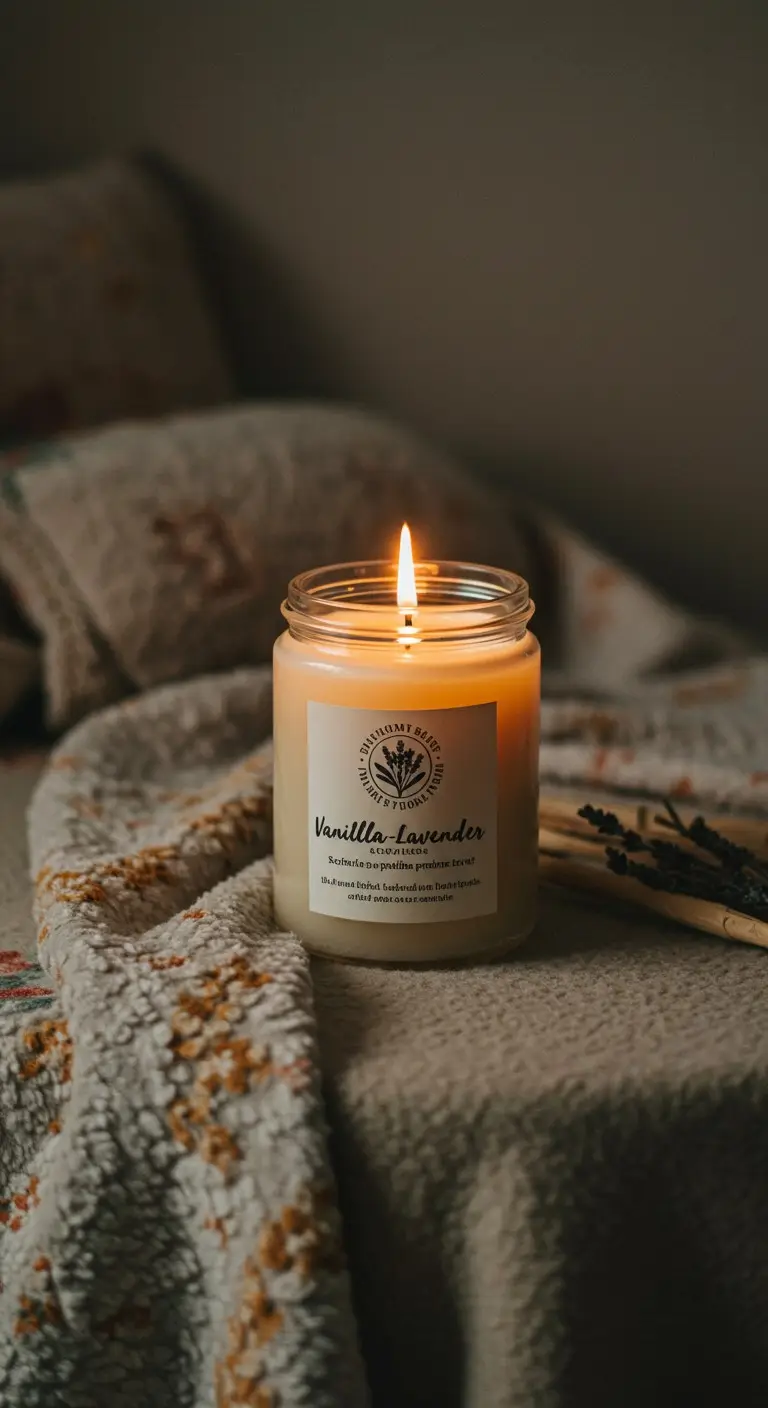
Handmade candles in dreamy pastel tones or minimalist designs can transform any room.
How to Make It:
- Melt soy wax flakes using a double boiler.
- Add essential oils for a natural fragrance.
- Pour the wax into a heat-safe glass or mold.
- Let it set, then trim the wick.
Tips for the Best Results:
- Use dried lavender or rose petals for an extra aesthetic touch.
- Choose subtle, neutral colors for a soft, elegant look.
Picture This: A flickering handmade candle casting a warm glow in a softly decorated space, filling the air with a gentle vanilla-lavender scent.
12. Decorative Glass Jar Lanterns
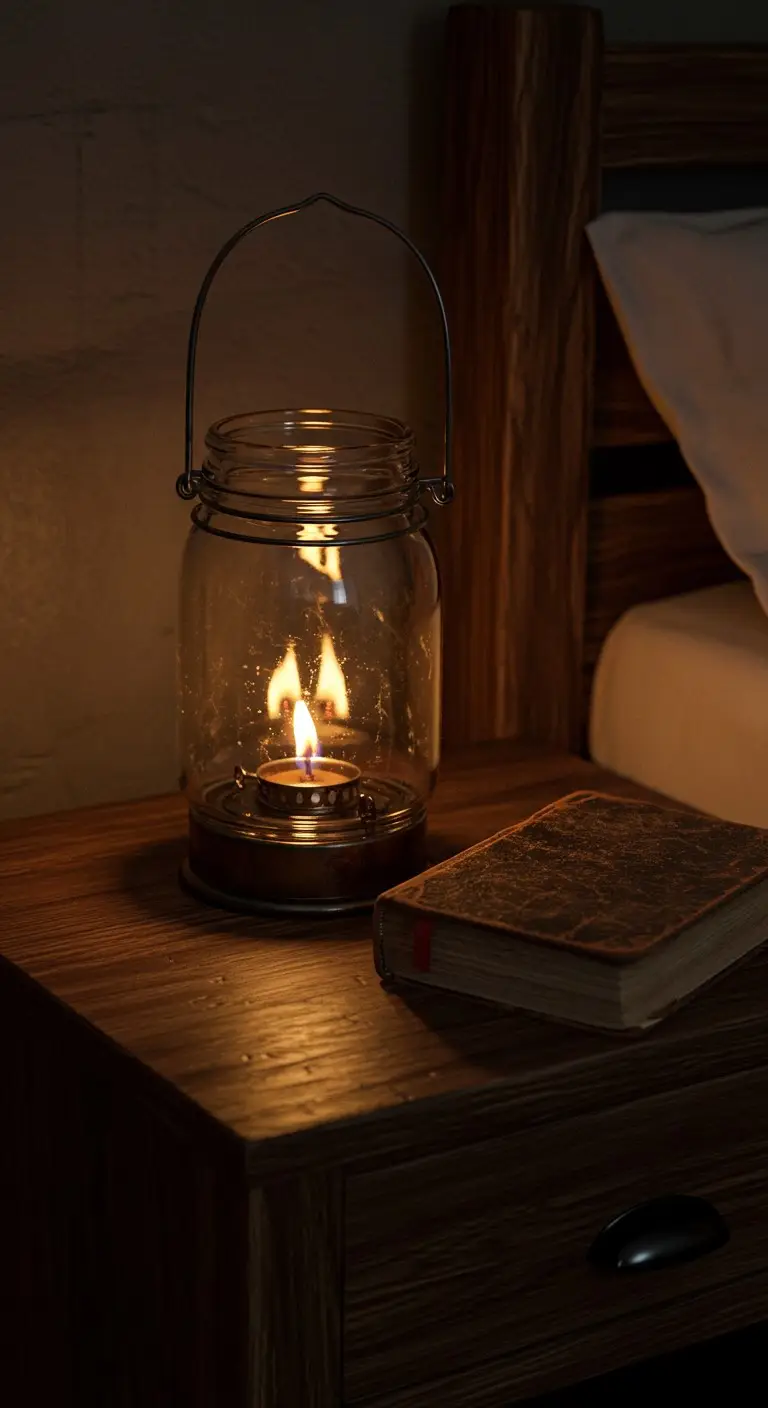
Transform plain glass jars into rustic, glowing lanterns with fairy lights and simple embellishments.
How to Make It:
- Clean and dry a glass jar.
- Wrap twine or lace around the neck for decoration.
- Place battery-operated fairy lights inside for a soft glow.
Tips for the Best Results:
- Use frosted glass spray for a dreamy, diffused light effect.
- Add pressed flowers or botanical decals for extra detail.
Picture This: A rustic glass jar lantern glowing softly, sitting on a wooden nightstand next to an open book.
13. Fabric-Covered Notebooks
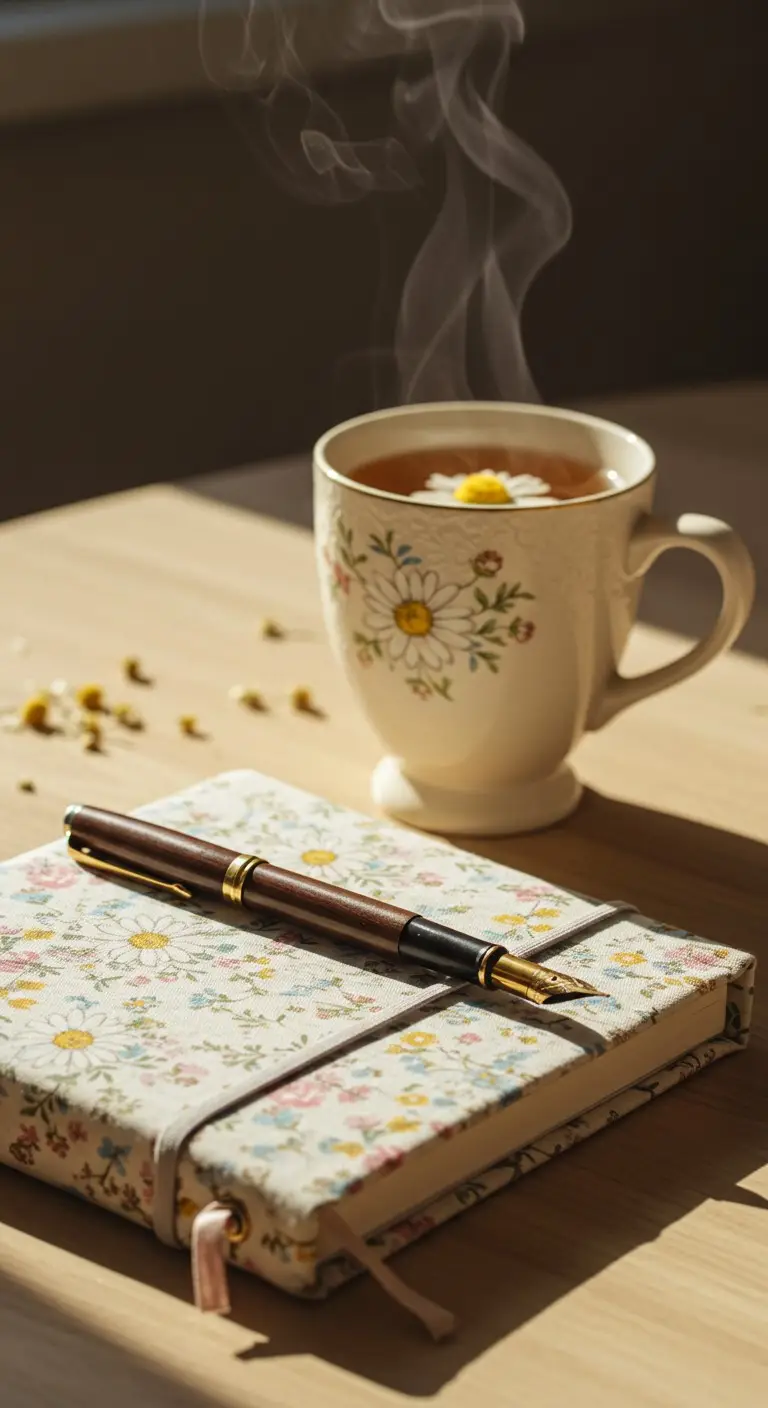
Personalize a journal by wrapping it in aesthetic fabric patterns for a vintage-inspired look.
How to Make It:
- Cut fabric slightly larger than your notebook cover.
- Apply Mod Podge to the notebook’s surface.
- Press the fabric onto it and smooth out any bubbles.
Tips for the Best Results:
- Use linen, floral, or vintage-style fabric for a cozy aesthetic.
- Add lace trim or small charms for extra detail.
Picture This: A fabric-covered notebook with delicate floral prints, placed beside a steaming cup of tea and a fountain pen.
14. Hand-Painted Terracotta Pots
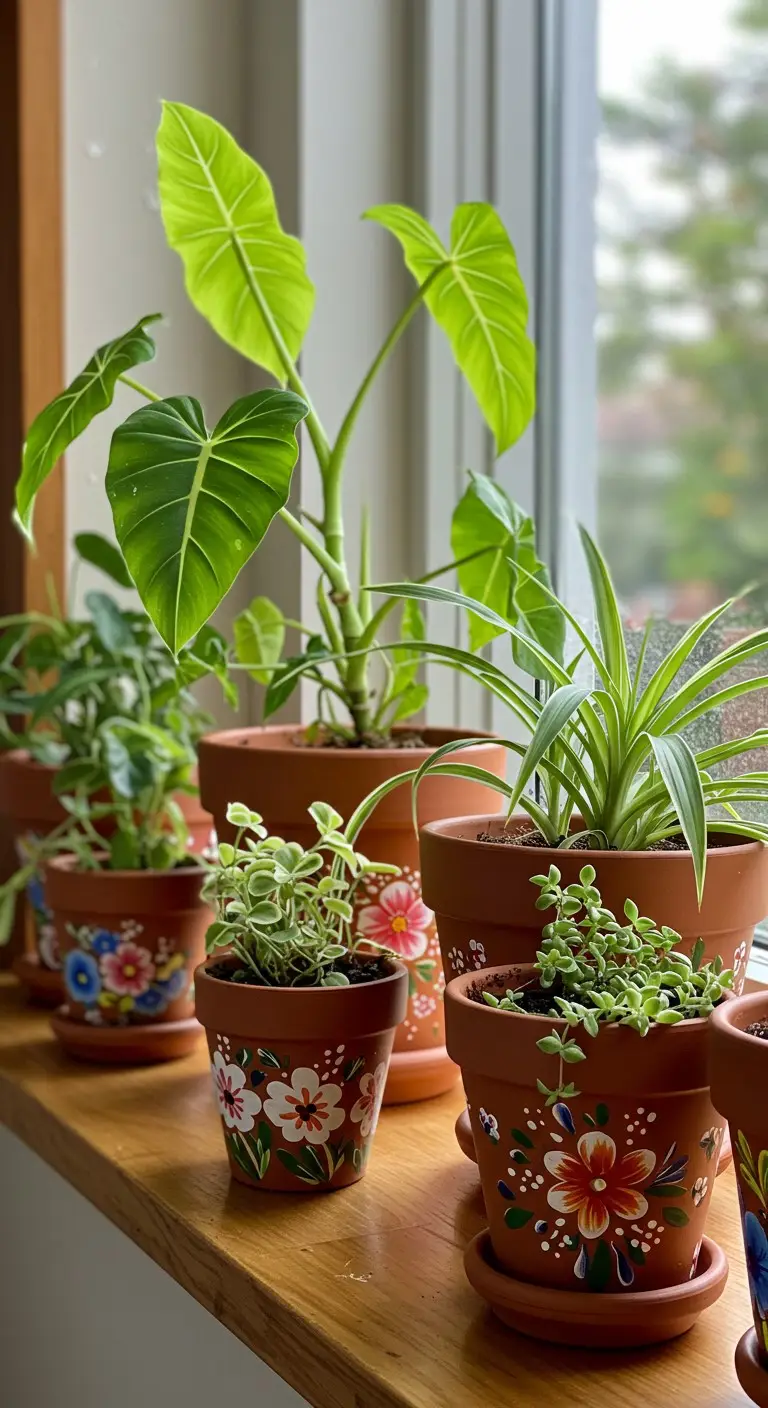
Upgrade plain plant pots with simple, aesthetic hand-painted designs.
How to Make It:
- Paint a base coat on a terracotta pot using acrylic paint.
- Add minimalist patterns, florals, or abstract shapes.
- Let it dry and seal with a waterproof varnish.
Tips for the Best Results:
- Use muted, earthy tones for a modern aesthetic.
- Experiment with geometric patterns using painter’s tape.
Picture This: A windowsill filled with beautifully hand-painted terracotta pots, each housing a thriving plant.
Conclusion
The best part of this whole list is how little you need to start. Grab whatever is closest, a stack of colored paper, an empty can from the recycling, a bag of dried stems, and pick the project that matches it. Skill catches up fast once the first one is sitting on your shelf.
If a project comes out lopsided, that is usually fine. Handmade things are supposed to look handmade, and the small wobbles are what stop these from looking mass produced.
Save this post for the next slow weekend, when you want fresh ideas and already have the supplies.