13 Simple Craft Ideas for Teachers Who Are Short on Time

The best classroom decorations are rarely the expensive ones. They are the small, handmade touches that took an evening and a few supplies from a drawer you forgot you had. This list is built entirely around that idea.
Thirteen craft projects, each one pulled from a real classroom, cover everything from desk organizers to a growth chart shaped like an oversized ruler.
A few solve genuine problems, like book bin labels that change as your reading levels shift throughout the year. Others are simply here to make the room feel less like a box with desks in it and more like a space kids want to walk into.
None of these need power tools, a big budget, or a free Saturday. Most come together with glue, paint, and whatever is already sitting in a craft bin.
Read through, bookmark a few, and start with whichever one solves the problem bothering you most right now.
1. Career Tree Bulletin Board for Teacher Appreciation
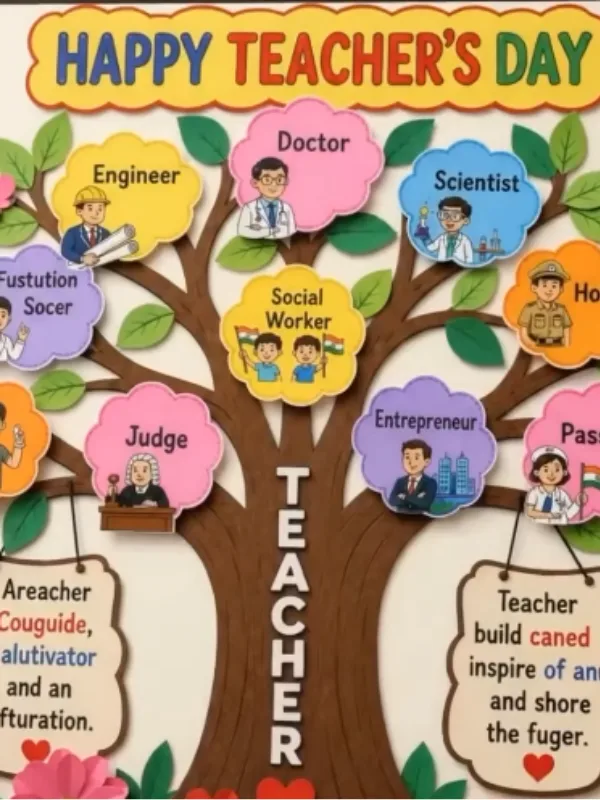
A bare bulletin board turns into a career tree once you add painted branches and a row of paper leaf bubbles, each one holding a small job title and a cartoon figure.
Engineer, doctor, scientist, and judge all sit on their own branch, with big block letters spelling TEACHER running down the trunk.
Two tag shaped notes hang at the bottom edge with a short message about the role teachers play in shaping those future careers.
Sketch the tree shape directly onto brown paper or foam board, then cut leaf clusters from green cardstock to fill in around the branches.
Print or draw small icons for each career, glue them onto colored paper bubbles, and space them evenly across the branches so the tree looks full without feeling crowded.
Add the trunk lettering last so it lines up with the rest of the design.
This works well for Teacher’s Day displays, career week bulletin boards, or a hallway piece during open house.
Students enjoy spotting a career that matches their own dream job, and the layout gives you an easy talking point during class discussions about what they want to be when they grow up.
2. Circle Wreath Name Display for Staff or Students
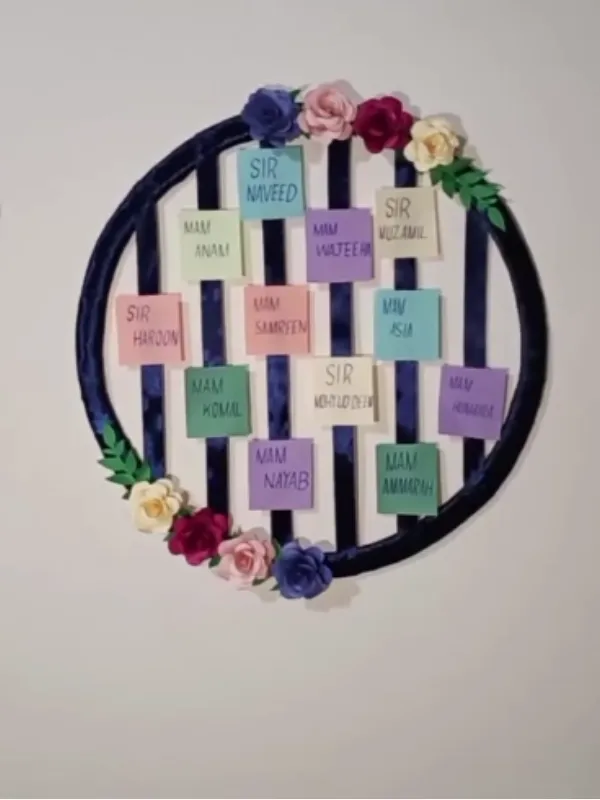
A round frame wrapped in dark fabric or ribbon becomes a name display once you glue vertical strips across the inside and clip sticky notes to each one.
Every note holds a single name, and the whole ring gets finished off with paper roses and greenery tucked around the outer edge. It reads like a wreath from a distance, but up close it works as a full roster.
Start with a plain wreath form or a bent wire ring, then wrap it in fabric or paint before letting it dry. Glue thin ribbon strips across the inside in even columns, spaced just wide enough for a sticky note to sit flat against each one.
Once the base is ready, write names on colored sticky notes and press them onto the strips in whatever order makes sense for your room.
Hang this near the classroom door as a welcome piece, or use it in a staff room to list everyone on a team.
Since the notes are not glued down, you can swap a name out in seconds when someone new joins, which makes it far more practical than a printed roster you would have to replace every time.
3. Colored Pencil Vase Centerpieces
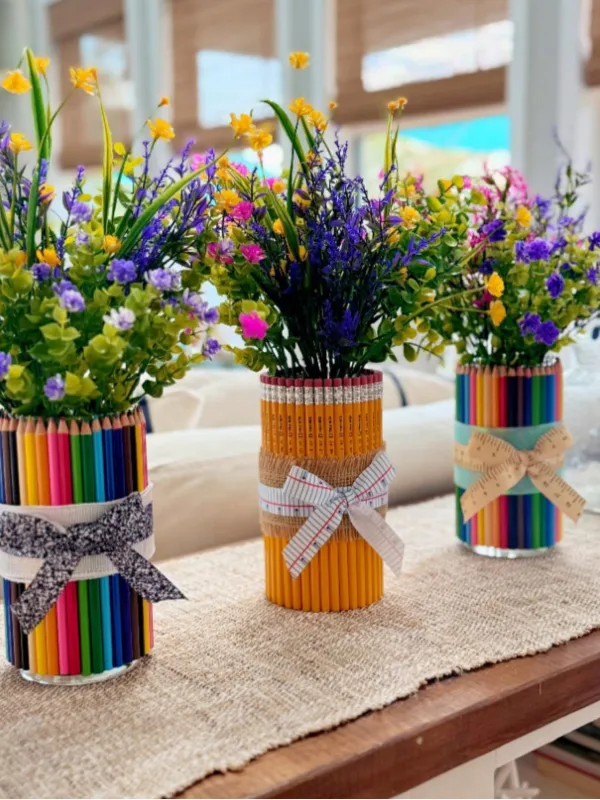
Glass jars wrapped in a tight band of colored pencils, erasers facing out, turn into vases with almost no extra effort.
A ribbon tied around the middle covers the rubber band holding the pencils in place, and a handful of faux wildflowers finishes the look. Grouped in a set of three, they make a simple centerpiece for a teacher’s desk or a welcome table.
Wrap a rubber band around an empty jar first, then slide pencils underneath it one at a time until the glass is fully covered.
Push the pencils close together so no gaps show through, then tie a ribbon over the rubber band to hide it completely. Fill the jar with water and arrange real or artificial stems once the wrap is secure.
This project reuses pencils that are too short to sharpen again, so it costs next to nothing if you already have a stash in a drawer.
Set a few out during open house, a teacher appreciation event, or just as a permanent piece on a desk that gets compliments all year.
4. Tiered Thank You Tag Stand
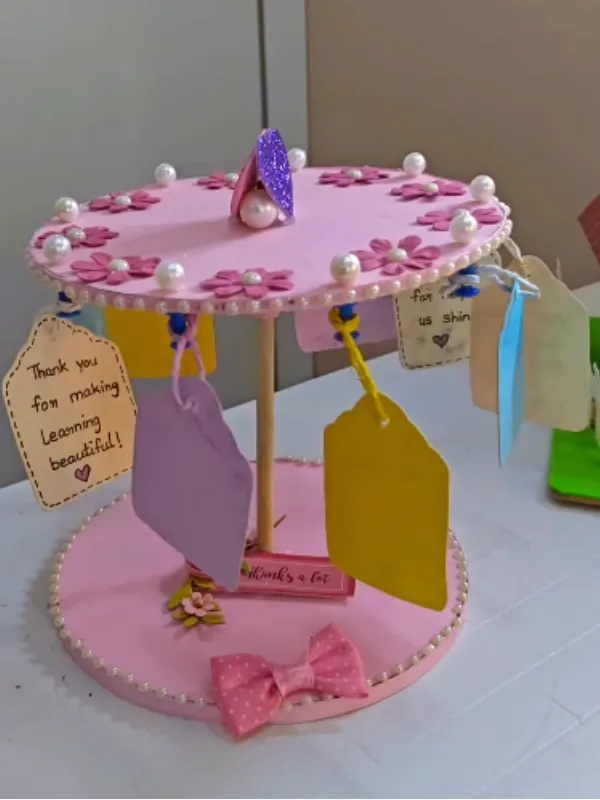
A small round base on a center post, dressed up with foam flowers and pearl trim, holds a set of hanging tags that each carry a short thank you message.
The stand looks like a mini cake platter, but instead of dessert it displays notes like “thank you for making learning beautiful.” A bow at the base and a cluster of flowers on top keep the whole piece feeling handmade.
Cut two matching circles from foam board for the top and bottom, then join them with a wooden dowel or skewer down the center.
Subscribe to DIY Craft Bloom
Get updates on the latest posts and more from DIY Craft Bloom straight to your inbox.
Glue paper flowers and pearl trim around the edges of both circles before attaching anything else, since it is easier to decorate the base while it still lies flat.
Punch holes around the top circle, thread ribbon or string through each one, and tie on tags with your message written by hand.
This makes a keepsake gift for a teacher appreciation event or a thoughtful send off for a student teacher finishing their placement.
Because the tags hang loose, you can pull one off and hand it to someone directly, or leave the whole stand on display as a centerpiece.
5. Mason Jar Desk Survival Kit
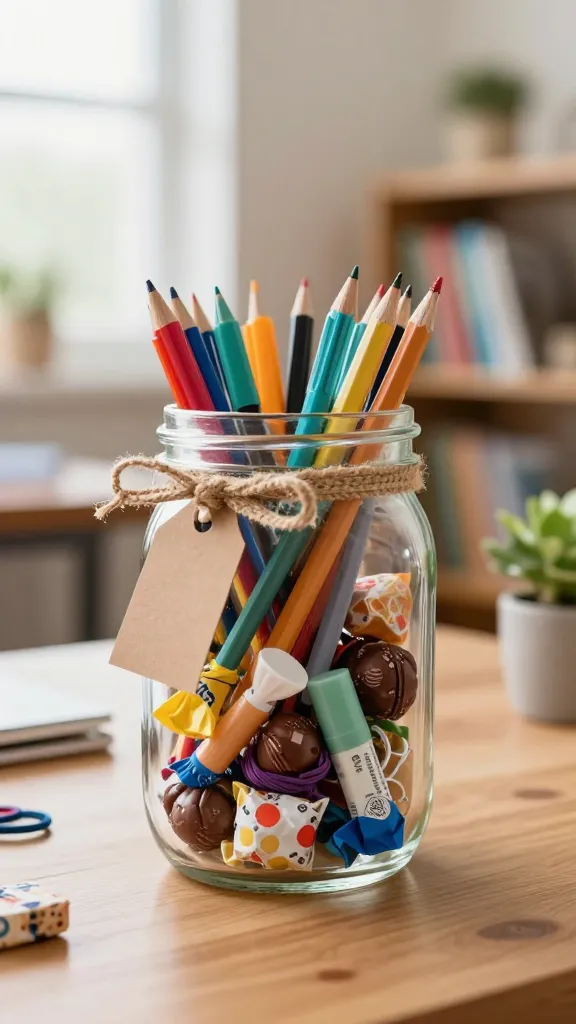
A mason jar filled with small essentials sits on a desk as both a decoration and a lifeline on a long day.
Mints, hand lotion, bandaids, and a stash of chocolate all fit inside one jar. Tie a ribbon around the neck and add a tag with a short note.
Layer the items so the most colorful packaging shows through the glass instead of getting buried at the bottom.
A strip of washi tape or a painted lid adds a little personality to the outside. Keep the contents practical rather than decorative so the jar actually gets used.
This makes a thoughtful gift for a new coworker or a welcome back present after a long summer.
Refill it throughout the year as items run low. Even a half full jar on a desk is a small reminder to take a break when the day gets long.
6. Wooden Growth Chart for the Classroom
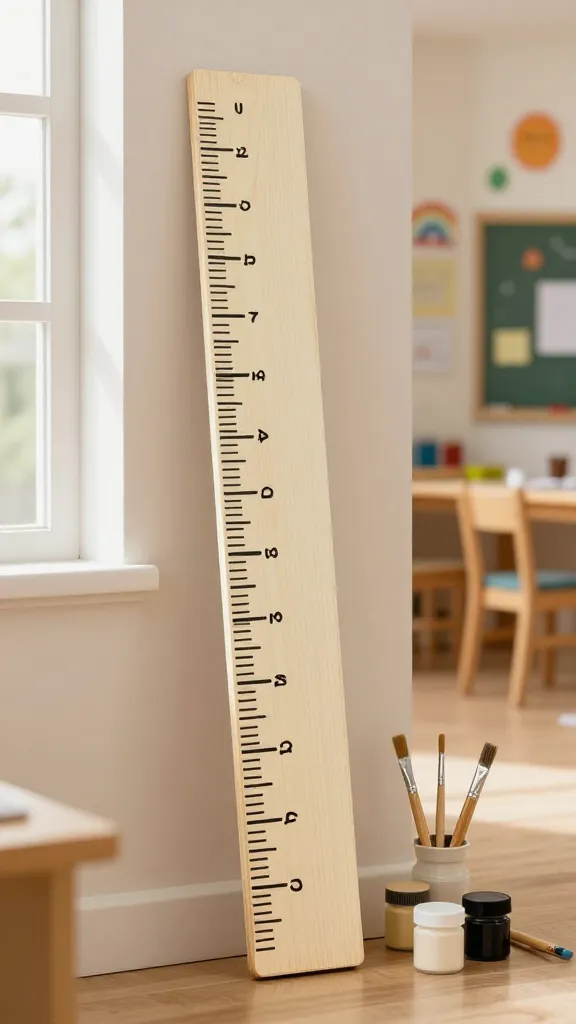
A long board painted to look like an oversized ruler turns into a growth chart students remember for years.
Mark inch and foot lines with a pencil first, then paint over them once the spacing looks right. Numbers at each foot mark help visitors read the chart at a glance.
Sand the edges lightly if a distressed look fits the room, or leave the wood smooth for something more modern.
Stencils keep the numbers even across a six foot board. Seal the finished piece so fingerprints and pencil marks wipe away without damaging the paint.
Lean the board against a wall near the door and measure students at the start and end of the year.
Photos next to the chart make a nice keepsake for report card conferences. It is a small tradition that gives a classroom personality beyond the usual decorations.
7. Popsicle Stick Name Plates for Desks
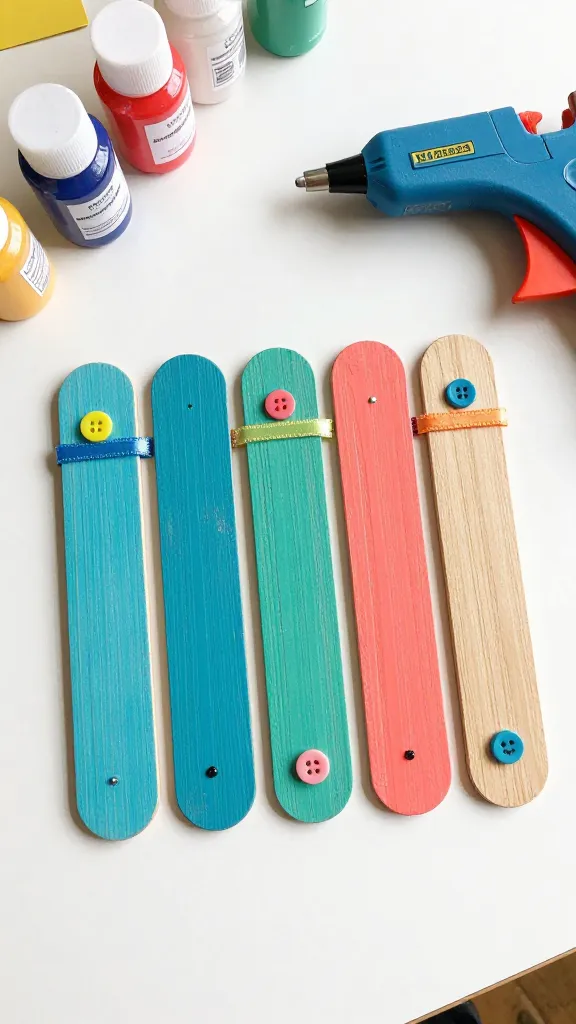
Jumbo popsicle sticks lined up side by side make a name plate sturdy enough to survive a full school year.
Glue two sticks across the back to hold the row together, then paint the front in a color that fits the room. A paint pen writes each name once the base coat dries.
Add a small decoration in the corner, like a star or a flower, so each plate still looks handmade rather than mass produced.
Mounting putty holds the finished plate to the edge of a desk without leaving marks. Five to seven sticks is usually enough width for a first name.
Set these out on the first day so students can find their seats without asking. They also travel well if desks get rearranged partway through the year, since the putty lifts off clean.
A batch of twenty five takes less than an hour once the paint has dried.
8. Wine Cork Whiteboard Erasers
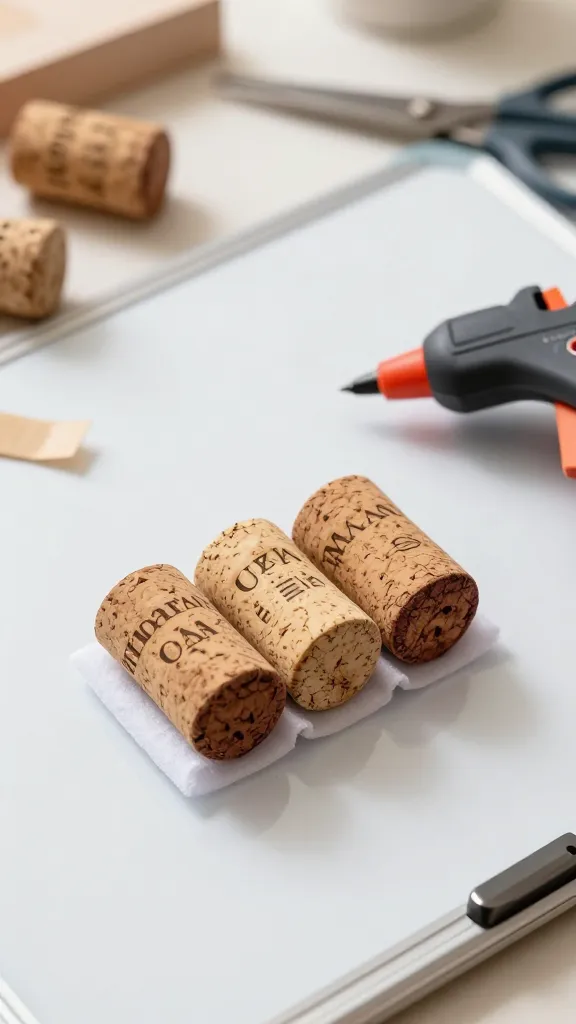
Wine corks glued together in a small block make an eraser that fits a hand better than the flat foam ones sold in stores.
Three to five corks side by side is enough for one eraser, with a square of felt glued to the bottom. The cork gives a grip that does not slip during a fast lesson.
Cut the felt slightly larger than the cork block so the edges catch stray marker lines.
A loop of ribbon glued across the top makes it easier to pick up between uses. Let the glue set fully before the first use so the felt does not peel away.
These work well for individual whiteboards during math centers or quick check ins. Keep a stack of finished erasers in a bin so students always have one within reach.
It is also a simple way to use up corks that would otherwise sit in a drawer.
Subscribe to DIY Craft Bloom
Get updates on the latest posts and more from DIY Craft Bloom straight to your inbox.
9. Fabric Scrap Bunting for Classroom Walls
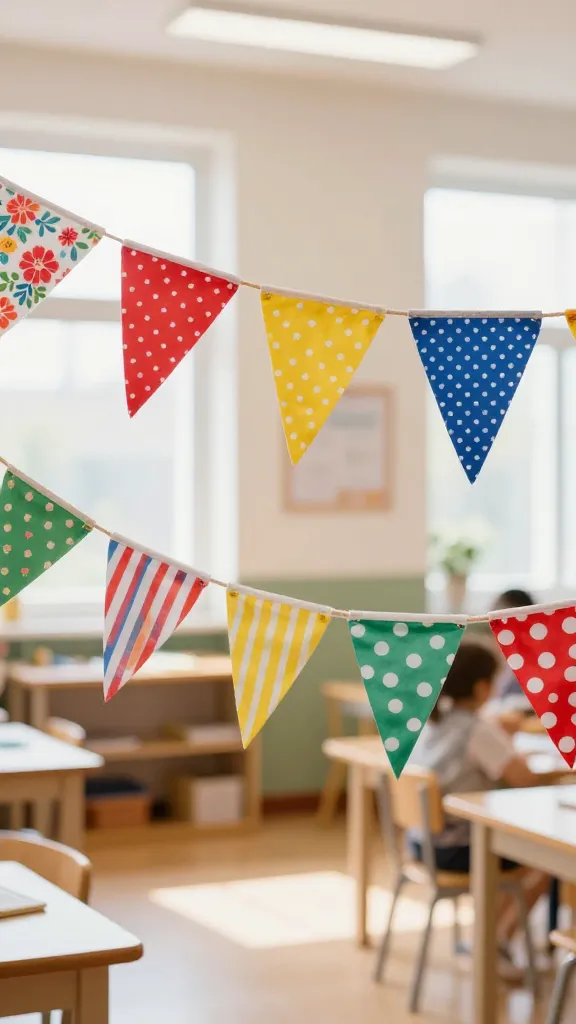
Small fabric triangles strung along a length of twine turn into bunting that adds color above a whiteboard or across a window.
Mixing patterns from different scraps gives the banner texture that paper versions never quite manage. Four to six inch triangles are an easy size to cut and to fold.
Fold the top edge of each triangle over the twine and secure it with a dab of hot glue or a quick stitch. Leave a little space between triangles so the banner has movement instead of looking packed.
Mixing solid colors with a few patterned scraps keeps the eye moving along the row.
Swap the banner out for the seasons, or keep one set as a permanent fixture in a reading corner.
Either way, it is a low cost way to bring in color from fabric that would otherwise go unused. Once it is hung, most banners stay up without maintenance for months at a time.
10. Clipboard Message Board With Washi Tape Borders
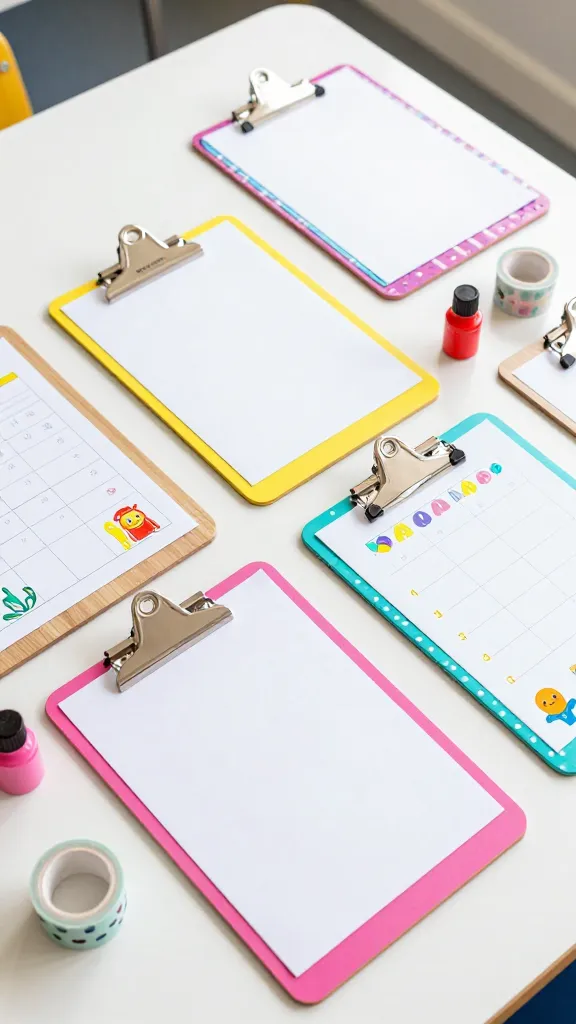
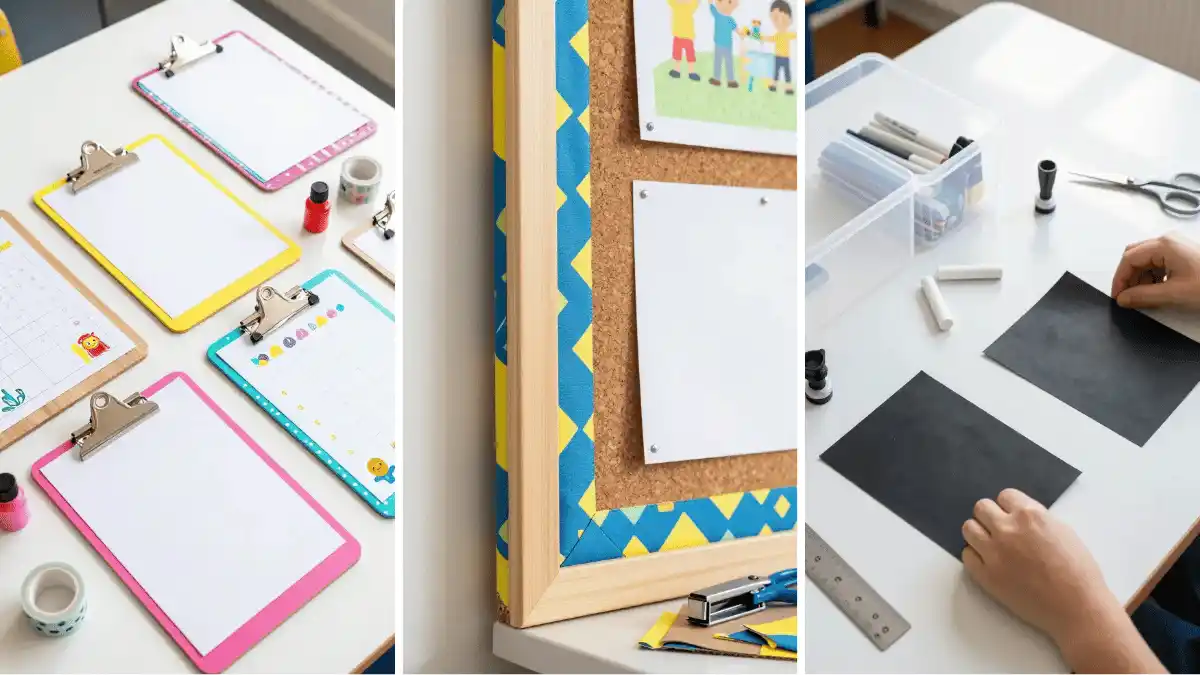
A row of clipboards turns into a message board the moment you wrap the edges in washi tape. Hang a few on cup hooks near your door and swap the papers as the week changes. Student work, a daily schedule, or a quick note to families all fit under the clip.
Pick tape patterns that match your room, then run a strip down each edge of the board before you clip anything on.
Two coats of pastel paint on the wood first gives the tape something soft to sit against. Screw a hook into the top or loop twine through the clip so it hangs flat on the wall.
This project costs almost nothing since craft stores sell washi tape in bulk rolls, and a set of clipboards works out to a few dollars each.
Swap the tape any time your color scheme changes, no repainting required. It is one of those crafts that looks like it took an afternoon of planning.
11. Painted Terracotta Pencil Holders
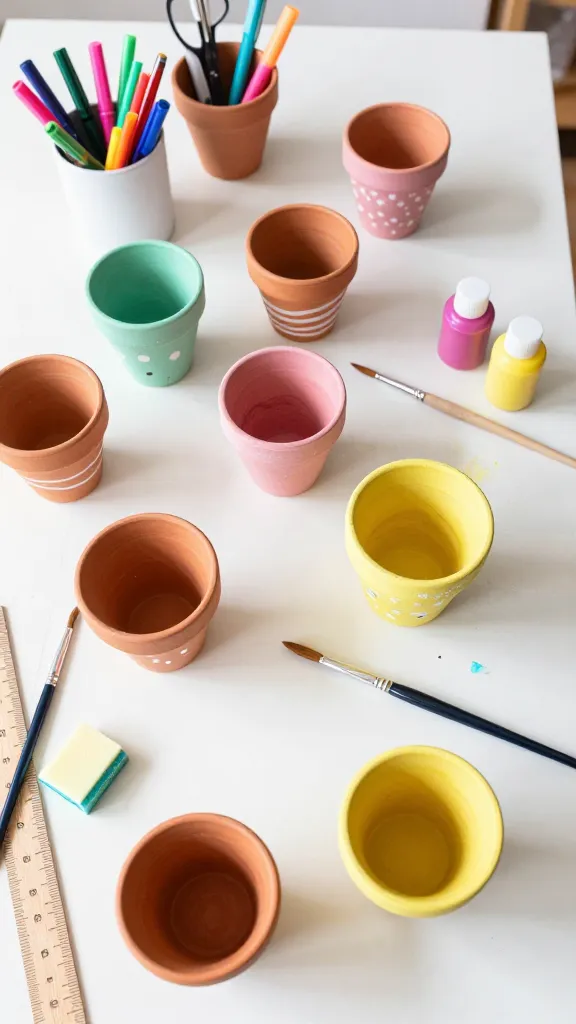
Small terracotta pots turn into desk organizers with two coats of craft paint and a coat of sealant.
Group three or four together and every marker, pair of scissors, and ruler finally has a home. The clay shape keeps things upright even on a busy desk.
Paint goes on smoother over a pot that has been wiped clean and left to dry overnight.
Try polka dots, stripes, or a simple fade from light to dark for a little variation between pots. Seal each one with a clear spray so marker smudges wipe off instead of soaking in.
Line a few up on a supply table and let students grab what they need without digging through a drawer. They also work as a small end of year gift, filled with a pencil and a note.
Either way, the drainage hole keeps water from pooling if a cup gets knocked over.
12. Fabric-Wrapped Bulletin Board Borders
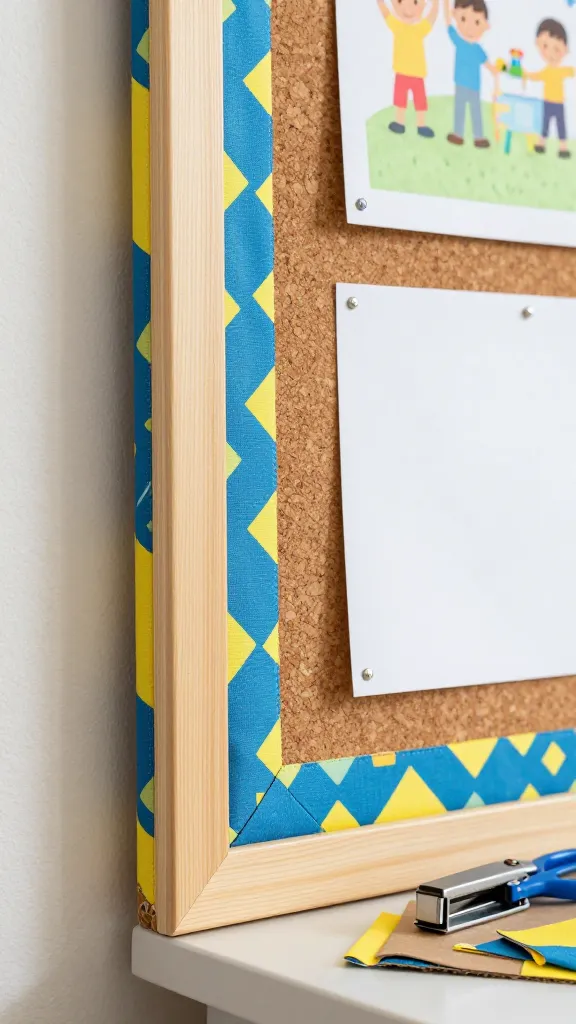
Plain cork boards look sharper once the edges get wrapped in fabric instead of left bare. Cut strips of foam core, cover them in fabric, and glue the edges down before stapling the strips around the board.
The fabric softens the look of the cork and ties the display into the rest of the room.
Choose a pattern that repeats often enough to hide the seams where strips meet at the corners.
Staple from the back of the board so nothing shows on the front. A hot glue gun holds the fabric to the foam core while the staples handle attaching it to the board.
Use this border above a whiteboard, around a reading corner, or on the board where student work goes up each week.
Parents notice small touches like this during conferences even if they cannot say exactly why the room feels warmer. It takes one afternoon and a yard or two of fabric.
13. Chalkboard Contact Paper Book Bin Labels
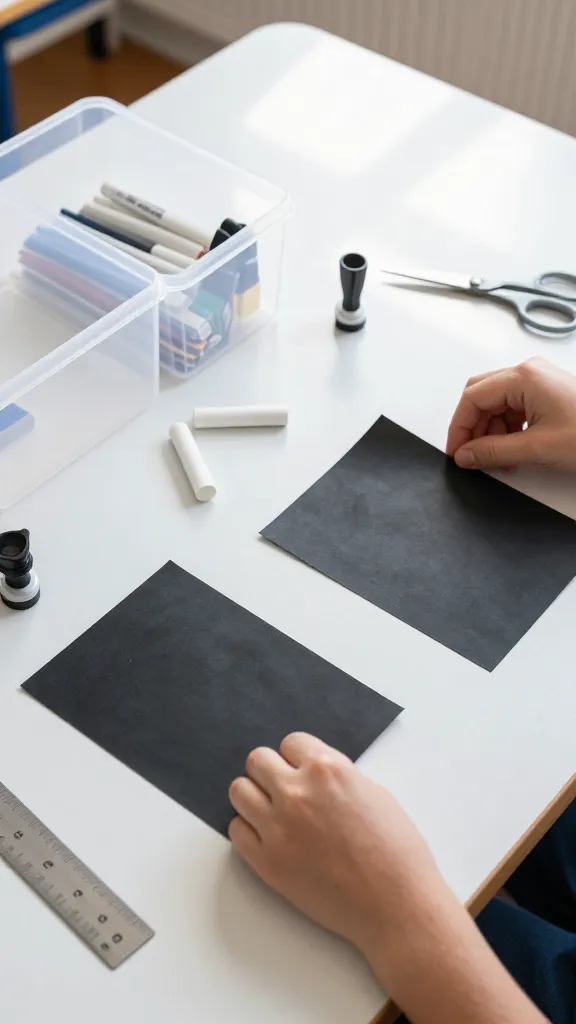
Chalkboard contact paper turns plastic book bins into labels you can change as often as your library grows.
Cut a rectangle or a simple banner shape, peel the backing, and press it onto the front of each bin. A chalk marker writes clean and wipes off just as easily when categories shift.
Smooth the paper down from the center out so no air bubbles form under the surface.
Round the corners with scissors for a softer look, or leave them square if that suits your bins better. Regular chalk works too, though a marker holds up longer against little hands.
Relabel bins by genre one month and by reading level the next without buying a single new sticker. The same trick works on supply drawers, manipulative bins, and cubbies.
It saves a trip to the laminator and looks tidy no matter how often the categories move.