17 Creative Bottle Craft Ideas to Turn Empty Bottles Into Real Decor

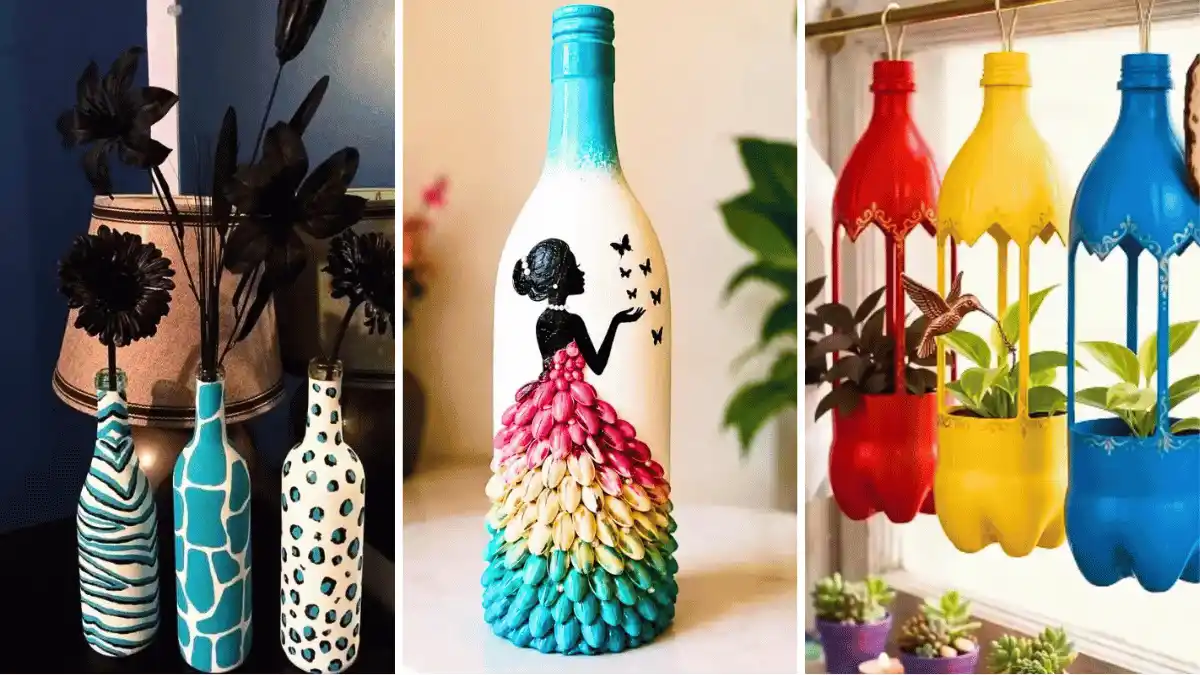
That glass wine bottle by the sink and the soda bottle in the recycling bin have more in it than you think. Most of us toss them without a second look.
A little paint, some twine, a handful of pistachio shells, and those same bottles turn into vases, lamps, planters, and candle holders you would actually set out on a shelf.
This roundup pulls together 17 creative bottle craft ideas for every skill level. Some take five minutes and no glue. Others give you a slow Sunday project with fairy lights and hand painted flowers.
A few use plastic soda bottles, a few use glass, and every one of them starts with something you were about to throw away.
You do not need fancy tools or a craft room. Basic acrylic paint, a hot glue gun, and things already in your kitchen cover most of these.
Scroll through, save the ones that fit your space, and pick a bottle to start with today.
1. Flared Plastic Bottle Petal Planter
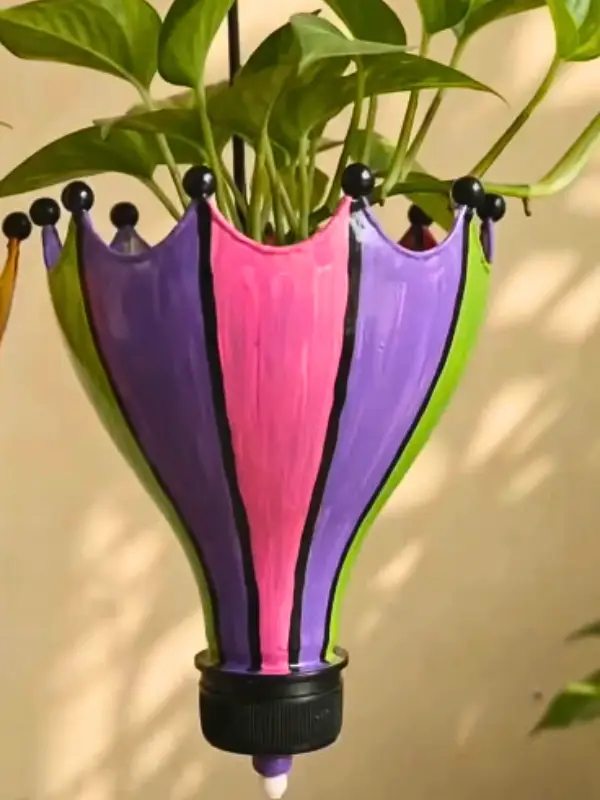
The build: one large plastic bottle, cut into tall petals, painted in color blocks, hung neck down with the cap left on.
Cut the bottle in half and keep the top piece. Slice long V shapes around the raw edge so the plastic opens outward into a skirt. Bend each petal back with your fingers until it holds its curve.
Paint every panel a different shade, then outline all the seams in black. Those black lines are what make the shape read as a flower instead of a cut bottle. Glue a small black bead onto each point to finish the crown.
The hanging hardware sits out of frame here, so plan on a wire loop or fishing line through the base before you plant it.
Supply note: wipe the plastic with rubbing alcohol and scuff it lightly before painting, or acrylic will peel off in sheets.
2. Soda Bottle Lantern Planters for a Window Rail
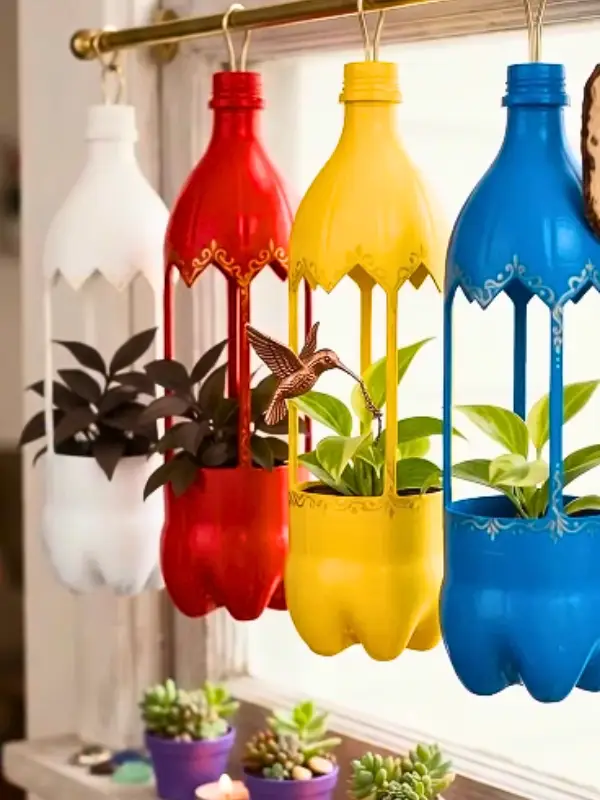
- Bottle: a two liter soda bottle with the label soaked off
- Shape: arched windows cut into the middle, leaving four straight legs
- Color: one flat coat of glossy spray paint, a different color per bottle
- Detail: thin gold scallops painted along every cut edge
Hang them from a curtain rod with hooks pushed through the cap. Soil stays down in the bottom well, and the leaves grow out through the arches. Four in a row across one window reads as a set, which is why this looks planned instead of thrifty.
Creative bottle craft ideas rarely get cheaper than this. Your only real cost is the paint.
Water note: no drain hole means no escape for extra water, so add a layer of pebbles under the soil and pour a small amount at a time.
3. Cat Face Bottle Bottoms for Tiny Succulents
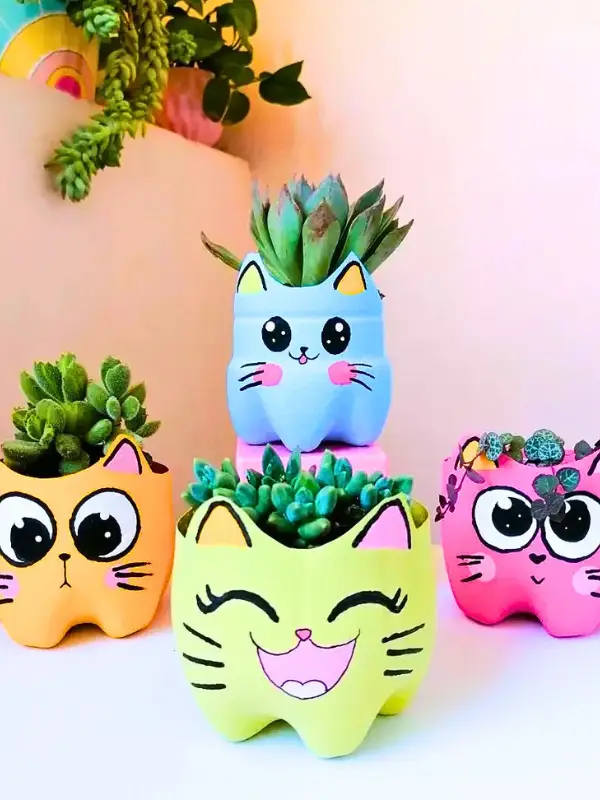
Soda bottle bases have four soft lobes at the bottom, and those lobes already look like paws.
Cut about four inches up, snip two triangles at the rim for ears, then round off the rest of the edge. Prime the outside, paint it a candy shade, and draw the face on with a paint pen once dry.
Why it works:
- Curved bottle bottoms hold their shape without any mold or support
- Solid pastel paint hides every ridge and seam in the plastic
- Simple dot eyes and whisker lines take under two minutes each
Kids can do the whole face step, which makes this a good rainy afternoon project. Give each cat a different expression so the group has personality.
Make it easier: practice the face on paper first, then copy it onto the bottle in pencil.
4. Pistachio Shell Gown on a Painted Glass Bottle
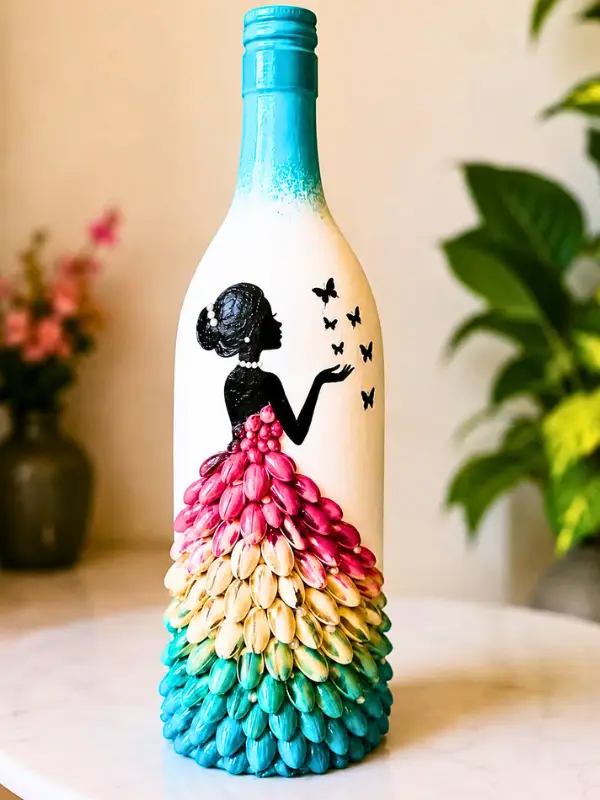
Pistachio shells become dress petals here, and that is the whole trick. Save shells from a few snack bags, wash them, and let them dry fully. Paint them in batches before gluing, not after.
Cover the bottle in white first so the colors stay bright. Glue the shells in rows from the bottom up, curved side out, each row overlapping the one below like roof tiles.
Work in color bands, teal at the hem, cream through the middle, pink near the waist, and the gown looks like it fades from one shade to the next.
Paint the upper body last. A black silhouette with a bun, a raised hand, and a few small butterflies is all the detail this needs.
Hot glue holds shells fine, though a thicker craft glue gives you a few seconds to straighten each one.
5. Matte Abstract Line Art Bottles for a Shelf
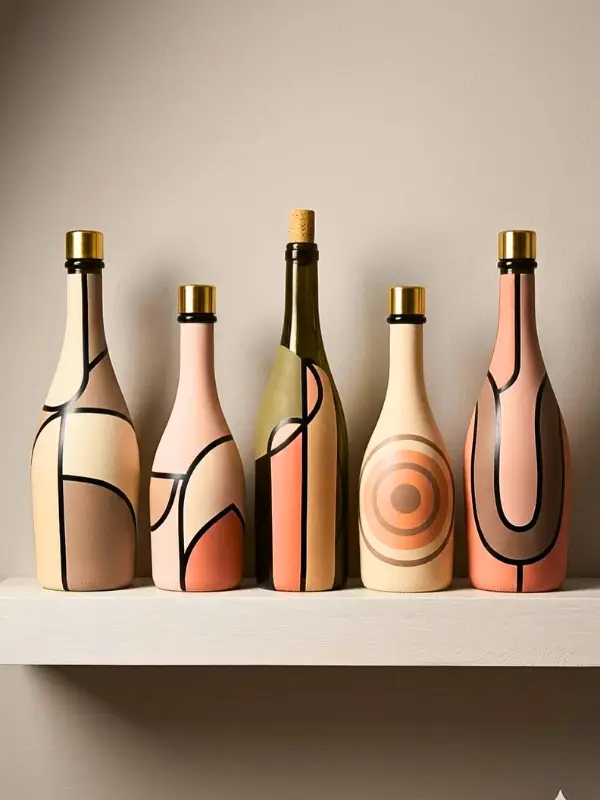
Best for: anyone who wants grown up decor rather than a craft project that looks like a craft project.
Five bottles of different heights sit together here in terracotta, blush, cream, and olive.
Each one wears one coat of flat paint and a few loose black lines that split the surface into shapes. No line needs to be straight, and no two bottles repeat the same pattern.
Subscribe to DIY Craft Bloom
Get updates on the latest posts and more from DIY Craft Bloom straight to your inbox.
Stick to four colors across the whole group, and let one bottle stay bare glass so the set has a break in it.
The small gold caps do the heavy lifting, tying five separate pieces into one collection. Chalk paint gives you that dead flat finish without primer.
Budget swap: gold nail polish on the caps reads the same as metallic paint from three feet away.
6. Animal Print Bud Vases in Two Colors
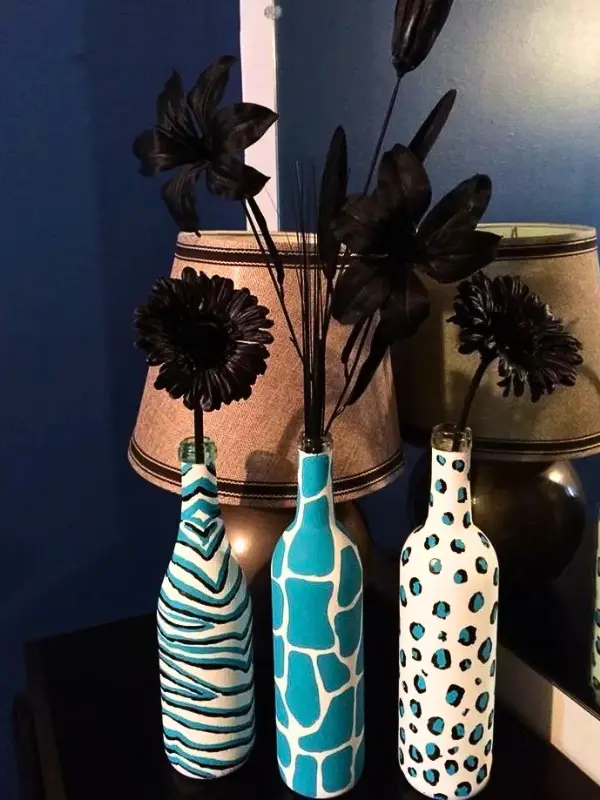
Zebra stripes, giraffe patches, and leopard spots share one palette here, teal over cream, and that restraint is what keeps three loud patterns from fighting. Base coat the bottles cream and let them cure overnight.
Draw the pattern in teal with a fine brush, filling shapes rather than outlining them. Each bottle holds one tall stem, so the neck stays visible and the pattern stays readable.
Paint note: giraffe is the forgiving one to start with, since uneven patches still look correct.
The detail to steal: dark stems against a pale bottle make the print pop harder than any extra color would.
7. Cobalt Glass Bottles Wrapped in Twine and Shells
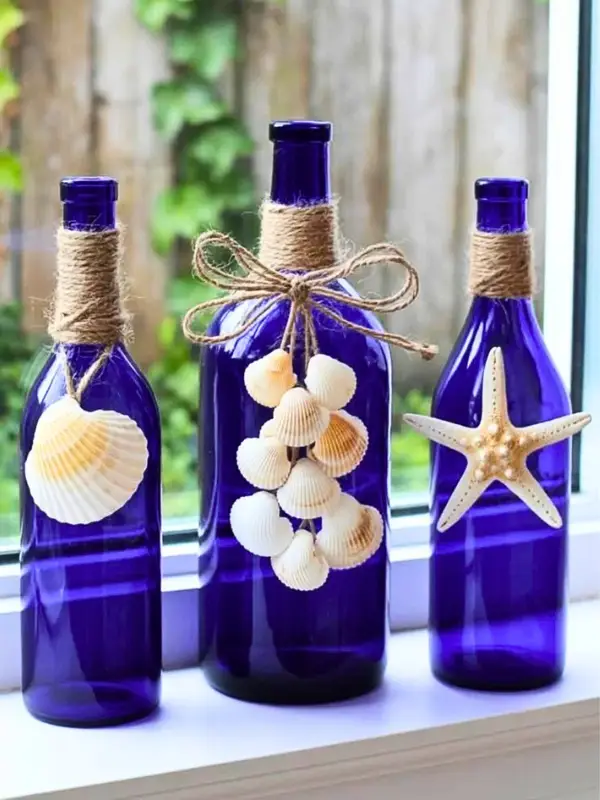
- Bottle: cobalt blue glass, labels removed, dried inside and out
- Neck wrap: jute twine coiled tight from the lip down, glued every few turns
- Accent: one scallop shell hung on a twine string, one shell garland, one starfish glued flat
- Placement: a bright windowsill, so light passes through the blue glass
Give each bottle only one accent. Crowding all three onto a single bottle would bury the color, and the blue is the reason this works.
Drill tiny holes in the shells with a pin if you want them to swing, or glue them straight to the glass for the fastest version.
Thrift swap: no blue bottles at home? A coat of glass paint on a clear wine bottle gets you close, though real colored glass holds the light better.
8. Fairy Light Bottle Lamp with Hand Painted Flowers
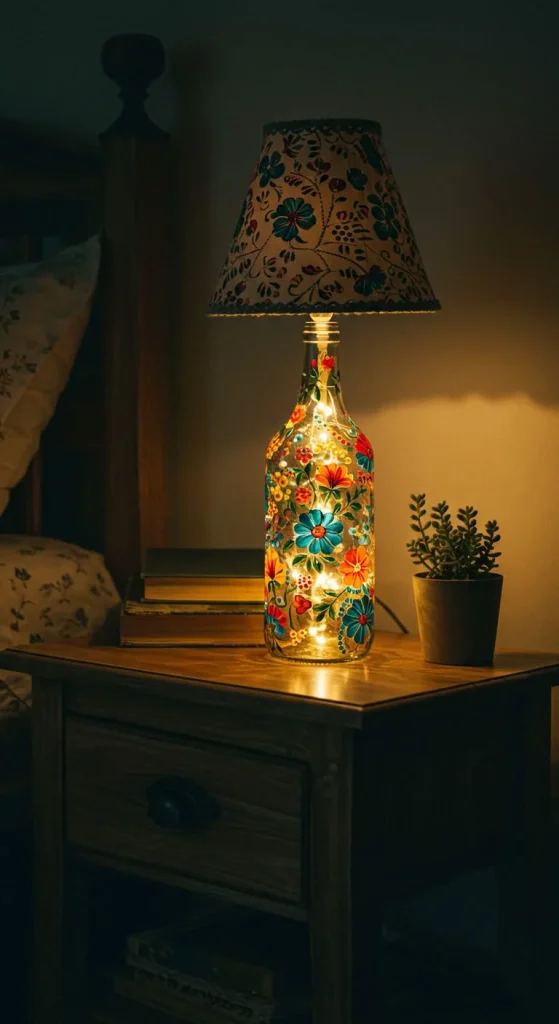
Simple version: clear glass bottle, a string of battery fairy lights inside, folk flowers painted outside, small lamp shade set on the neck.
Flowers go on first. Use glass paint or acrylic and keep the shapes chunky, big teal daisies, red petals, little yellow dots scattered between them.
Leave clear gaps all over the bottle, because those gaps are where the glow escapes. Bake or seal the paint once it dries so it survives dusting.
Feed a warm white light strand through the neck and push it down with a chopstick until the coils sit evenly. Battery packs tuck behind the bottle on a nightstand.
A small clip on shade in a matching floral print turns the whole thing into real furniture instead of a jar of lights, and it makes this one of the few bottle craft ideas that earns a spot beside your bed.
The shade fitting and cord are hidden in this photo, so buy a bottle lamp kit if you want a true wired socket rather than a battery version.
Wiring note: skip real bulbs unless you use a kit made for glass, since heat and thin bottle glass do not mix.
9. Chalky Sage Bottle Vase for Dried Lavender
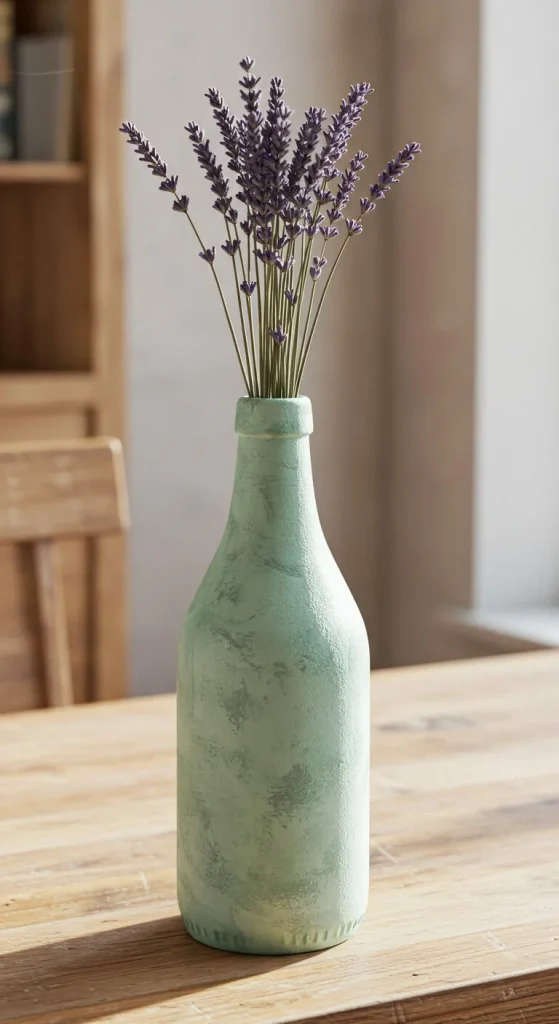
One coat of textured chalk paint in sage turns plain glass into a stoneware look, no glaze or primer needed.
Rough up the surface with a dry brush so some green shows through unevenly, like this one. Drop in a small bundle of dried lavender and let the stems fan out on their own.
Paint note: mix a little baking soda into the paint for that gritty texture.
Care tip: dried stems need zero water, so this vase stays mess free on a wood table.
10. Fully Twine Wrapped Bottle Nightlight
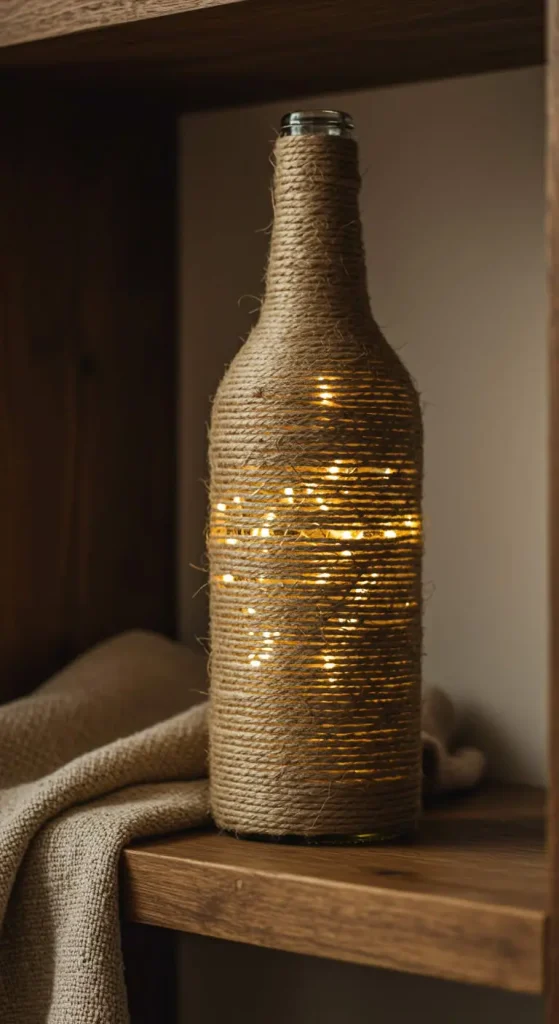
Skip the flowers and shells this time. Coat the whole bottle in glue and wrap jute twine tight from base to neck, row over row, until no glass shows.
Slide fairy lights inside before the last few wraps close the top, so the glow filters through the fiber instead of shining bare.
Texture note: leave the twine slightly loose near the shoulder so warm light still peeks through in stripes.
11. Decoupaged Floral Bottle with a Torn Paper Edge
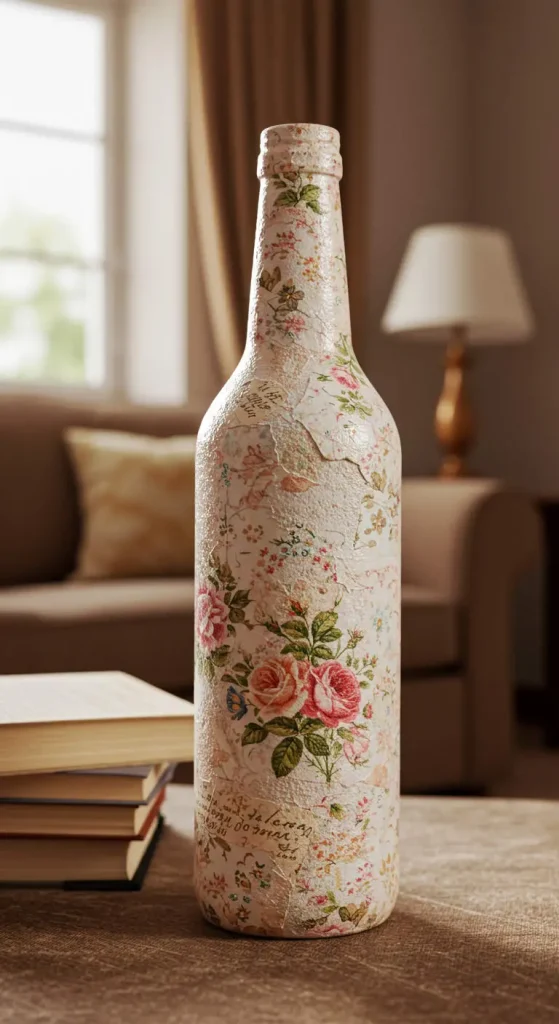
Vintage floral napkins or scrapbook paper, torn into pieces and sealed on with mod podge, give this bottle its aged look.
Layer torn strips so the edges overlap unevenly instead of lining up, that rough seam is what sells the antique feel. A few coats of matte sealer over the top protect the paper from fingerprints and dust.
Fabric note: napkins are thinner than scrapbook paper and wrap curves without wrinkling.
Subscribe to DIY Craft Bloom
Get updates on the latest posts and more from DIY Craft Bloom straight to your inbox.
12. Painted Glass Jar Pen Holder in Pastel Blobs
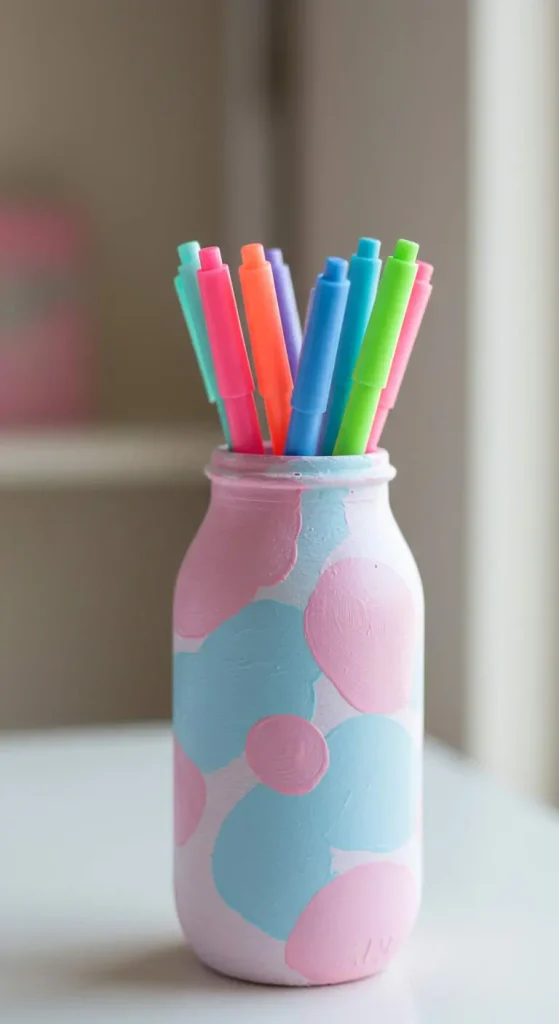
Freehand overlapping circles in two soft colors turn a plain jar into a desk accessory instead of trash.
Load a small brush with thick craft paint and dab loose blobs, some pink, some blue, letting them overlap where they touch.
No stencil needed, uneven edges actually look better here. Once dry, load it with pens or brushes by the handful.
Skip this: thin, watery paint, since it drips instead of sitting in a raised blob.
13. Puffy Paint Swirl Bottle Candle Holder
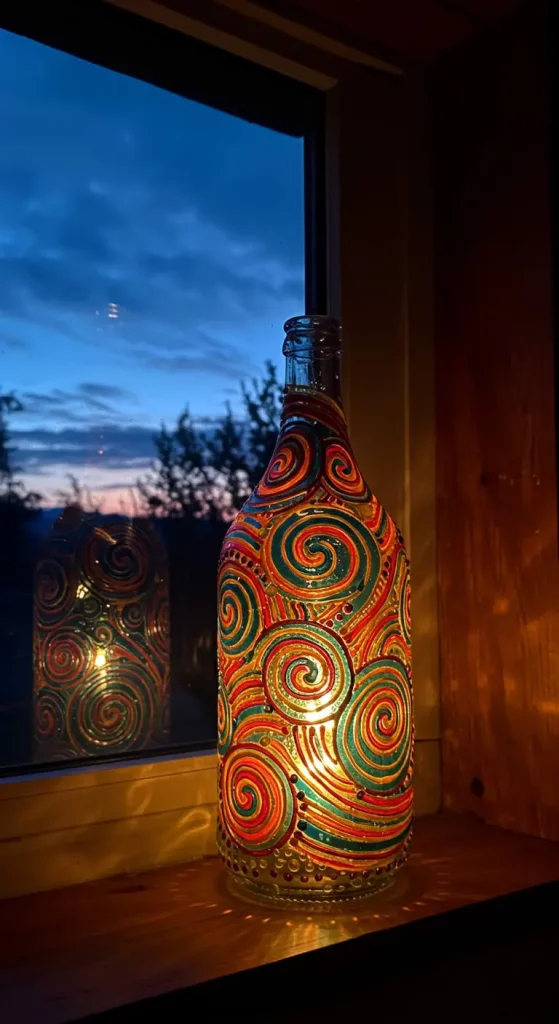
Squeeze dimensional fabric paint or puffy paint straight from the tip in spiral lines, working outward from a center point like a snail shell.
Fill in the gaps with a second and third color so no glass shows between the lines.
Once fully cured, drop a tealight inside. The raised paint catches light on its edges and throws colored shadows across the sill at night.
Drying time: give the paint a full 24 hours before you set anything hot near it.
14. Fully Glitter Dipped Bottles in Rose, Jewel, and Metallic Tones
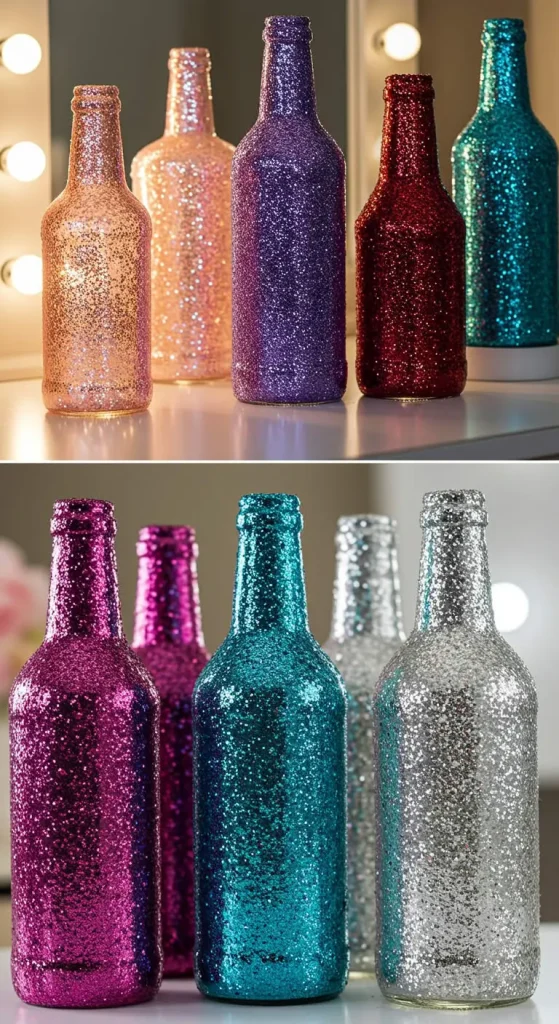
Coat each bottle in glue and dip it straight into a tray of loose glitter, turning it until no glass shows through.
Rose gold, blush, purple, red, and teal work as one soft set, while magenta, teal, and silver make a bolder second set.
Group four or five together on a lit counter or vanity shelf and the sparkle bounces from bottle to bottle. Seal with a light spray sealer once fully dry so the glitter stops shedding onto surfaces.
One small change: mix a finer glitter over the coarse layer for extra shine without extra cost.
15. Cut Out Flower Silhouette Lamp with Speckled Paint
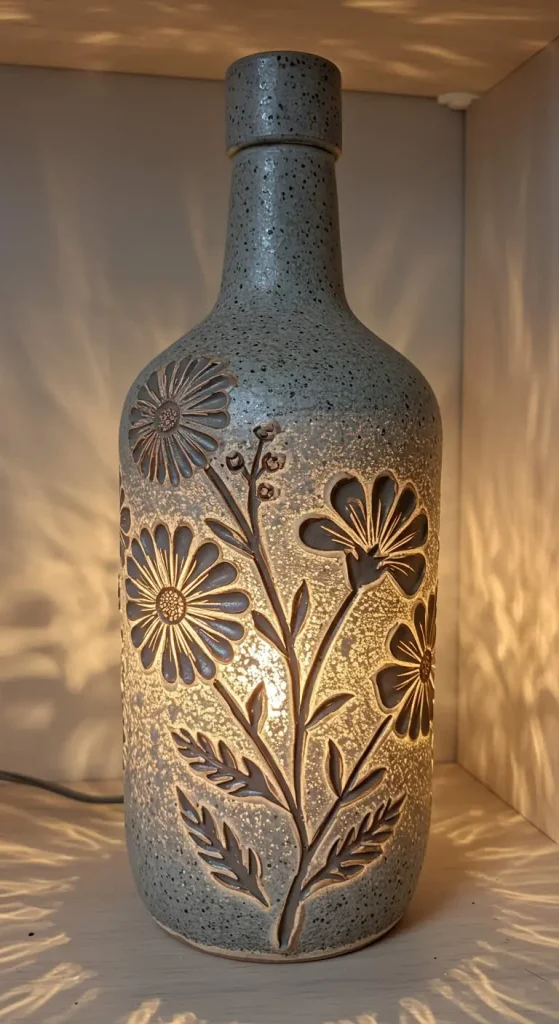
Speckled stone spray paint gives this bottle a ceramic look before any cutting starts.
Sketch a daisy stem climbing up one side, then carve or cut the petals and leaves out so light can pass straight through those shapes once a bulb sits inside.
Everything left uncut stays solid, so the flowers glow while the rest of the bottle reads as matte stone.
Skip this: a thin craft knife on glass, since a rotary tool with a fine bit gives cleaner petal edges.
16. Layered Colored Sand Bottles for a Sunny Sill
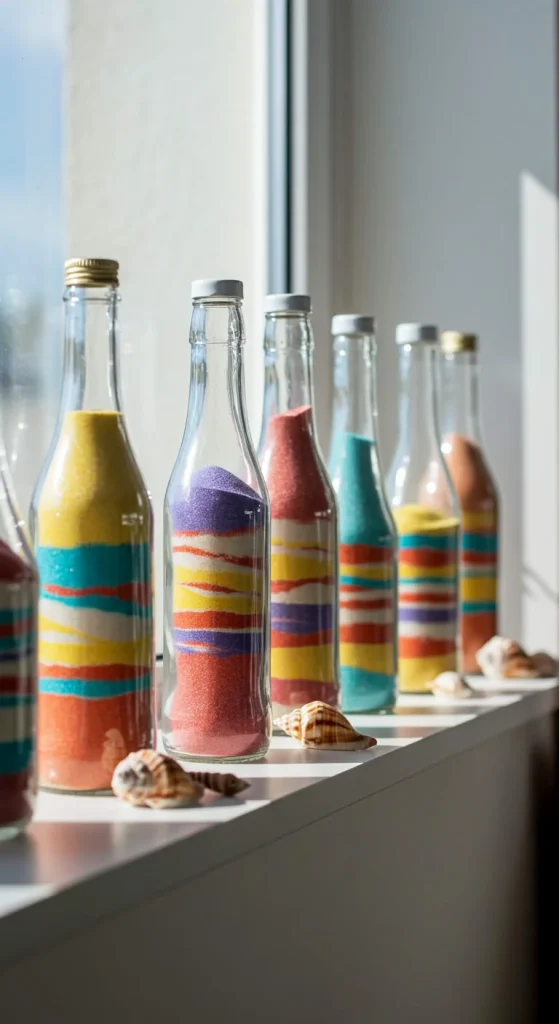
Best for: a no paint, no glue project that even young kids can do.
Pour colored craft sand into a clear bottle one shade at a time, tilting the bottle as you go so the layers land in wavy diagonal bands instead of flat lines.
Tap gently between colors to settle each layer. Cap it tight and line several up on a windowsill where sun lights the sand from behind.
Add a few real shells at the base and the whole row reads coastal.
Care tip: keep the cap sealed, since one bump on an open bottle mixes the layers for good.
17. Pastel Striped Bottle Vase for a Cutting

Paint horizontal bands of soft blue, lilac, and cream around a bottle, letting the brush strokes show for a hand done feel.
No tape needed, slightly wavy edges suit the relaxed look. Fill with water and it holds a pothos cutting or any single trailing stem while the roots grow in.
Color note: keep all three shades in the same pastel family so no single stripe jumps out.
Conclusion
The best part of bottle crafting is how forgiving it is. A wavy stripe, an uneven glitter edge, a shell glued slightly crooked, none of it hurts the finished look.
Mistakes read as handmade charm here, which makes these projects a good place to start if you are new to crafting.
Start with one bottle and one idea from this list. Once you see a plain bottle turn into a lamp or a vase, the recycling bin stops looking like trash and starts looking like supplies.
Save this post for the next time you want fresh ideas, and come back when you have a new bottle to play with.