17 Group Craft Ideas for Teen Boys That Actually Hold Their Attention

Ask a room of teenage boys to do a craft and watch how fast half of them find something else to look at. The problem usually isn’t the boys. It’s that most group crafts hand them a paper plate and a glue stick and expect enthusiasm.
The ideas below go a different direction. There’s wood to cut and sand, cord to knot around a steel core, clay to shape into whatever they want, metal lures to paint, and a few builds big enough that the whole group has to work on them together.
Some finish in twenty minutes. Some take a full afternoon and leave you with cornhole boards you’ll pull out for years.
Every one of these group craft ideas for teen boys is built for a room, not a single kid at a table. That means enough stations to keep everyone moving, supply lists you can buy in bulk, and prep notes so you’re not troubleshooting mid session.
Start wherever your budget and your space allow. A few of these cost almost nothing.
1. Paint Your Own Fishing Lures for an Outdoor Craft Day
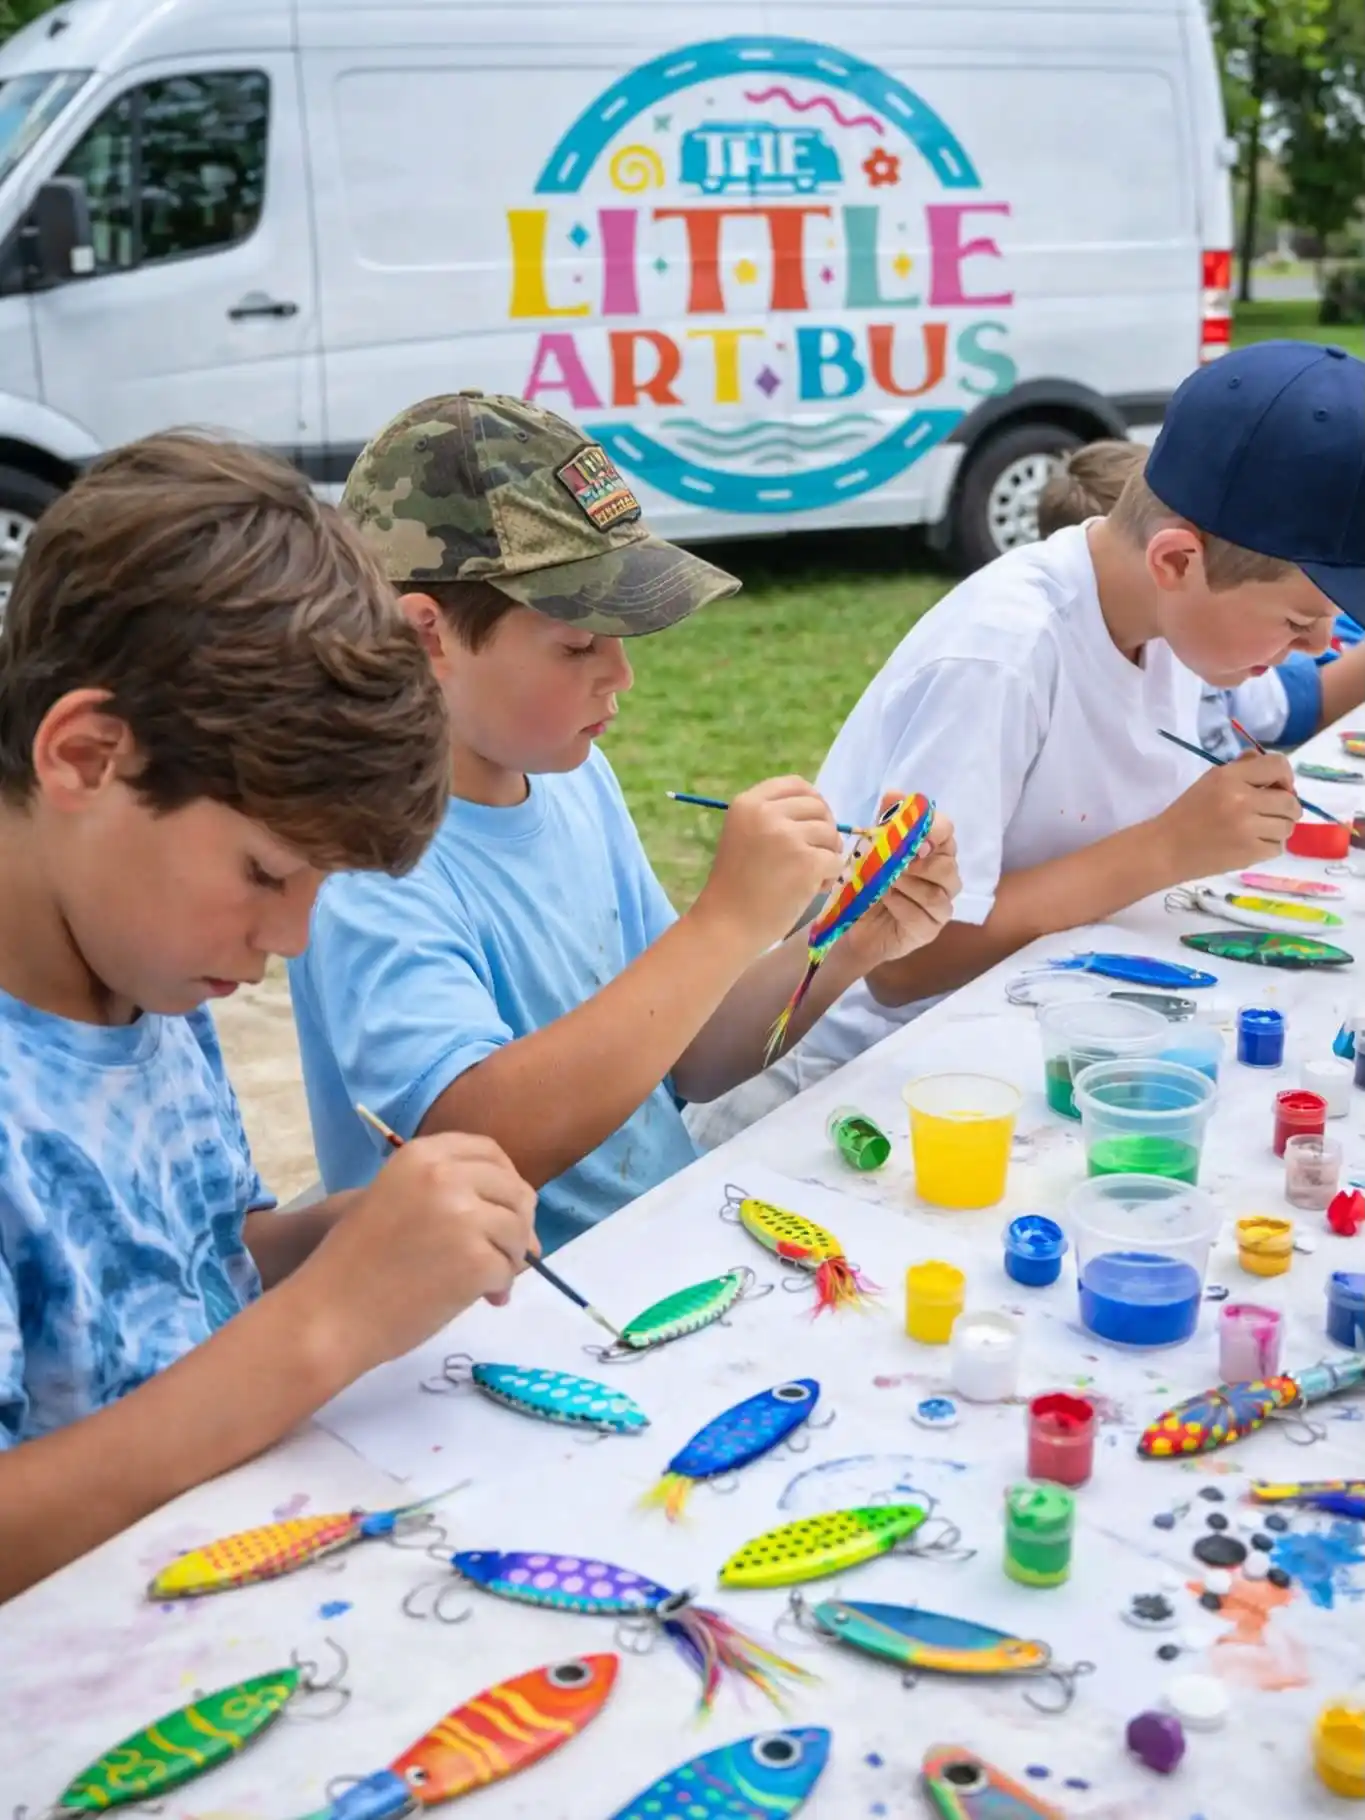
Little metal lure blanks turned into a full painting station under a shade tree.
Each boy picked a plain silver spoon shape and covered it in stripes, dots, or scales using small cups of acrylic paint lined up down the table.
The mess is part of the fun here. Paint splatters covered the tablecloth by the end, and nobody seemed to mind.
What makes this one work for teen boys:
- Real hooks and feather tails make it feel less like a craft project and more like gear they’ll actually use
- Small individual paint cups keep colors separate, so blending happens on the lure instead of in the cup
- A long shared table means boys naturally glance at each other’s designs and start swapping ideas
Bring extra newspaper or a vinyl cover for the table. Acrylic paint on metal dries fast once it’s on, but the small water and paint cups tip over easily outdoors, so weigh them down or use a tray.
2. Build a Giant Group Color Mural From Individual Panels
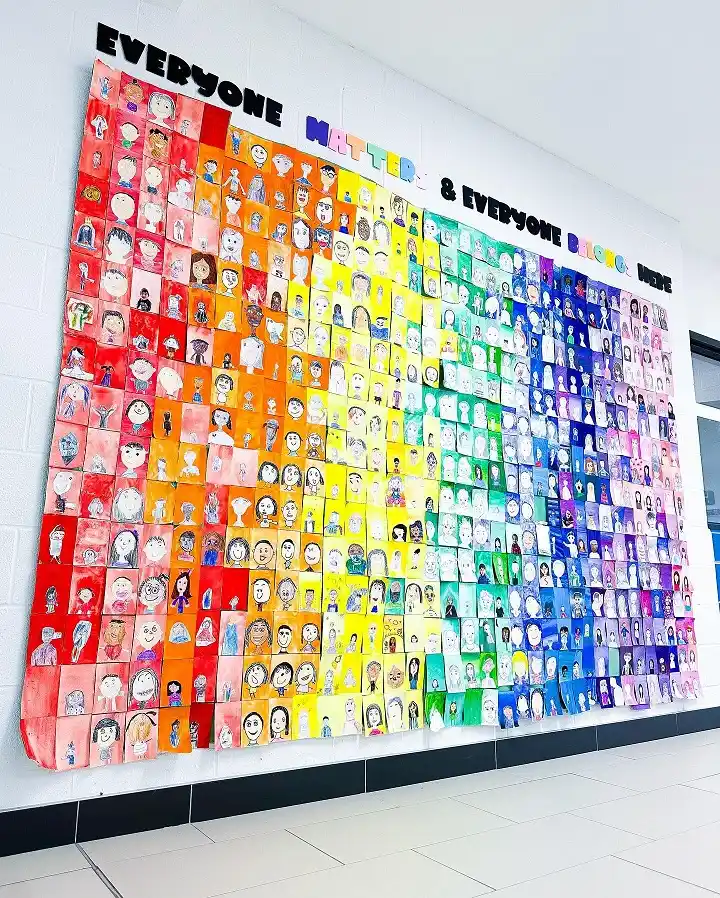
Every square in this hallway wall was painted separately, then lined up into one giant rainbow.
Each panel holds its own drawing or portrait, arranged left to right by color so the wall reads as a single gradient from red through orange, yellow, green, and into blue and purple.
Cut out letters across the top spell a short message, tying the whole wall to one idea instead of leaving it as scattered art.
Here is how to pull off a version of this with a youth group:
- Pick a message first, something short enough for cut out letters across a wall or hallway
- Assign each guy one blank square and one color from the gradient, so nobody is stuck guessing what to make
- Have them fill their square with a portrait, symbol, or design tied to the message, then hang every square in color order
The individual squares do not need to be perfect. From a few feet back, the color order does all the heavy lifting and the wall looks intentional either way.
3. Scrap Wood Headphone Stand That Lives on a Desk
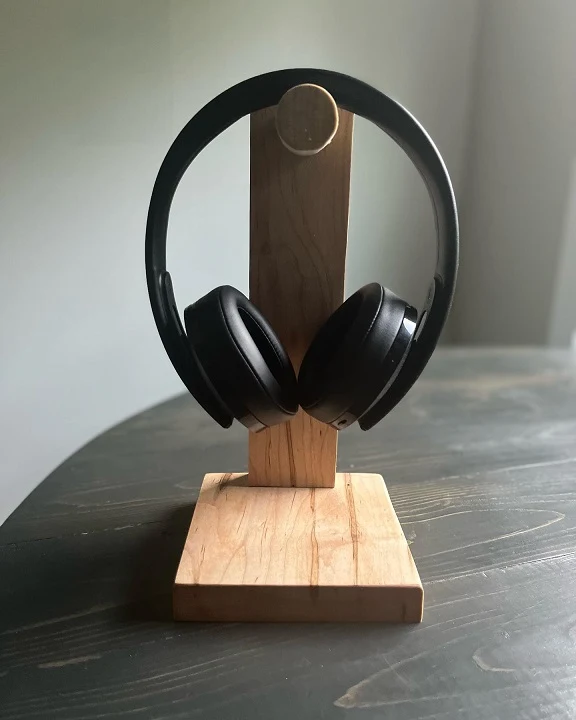
Two pieces of light cherry, one flat base and one upright post, plus a small round cap at the top to keep the headband from sliding off. That’s the whole build. The wood in this photo is left raw with the grain showing, which is why it looks finished instead of unfinished.
For a group, cut all the bases and posts ahead of time. The boys sand, glue, and mark their own. Sanding is the part that separates a stand that looks homemade from one that looks bought, so give it real time instead of rushing to the glue.
The dark table under it does a lot of work here. Pale wood against a dark surface is why the shape reads so cleanly, and that’s worth mentioning when someone photographs theirs.
4. Cut Your Own Phone Stand, Plain Shape or Character Shape
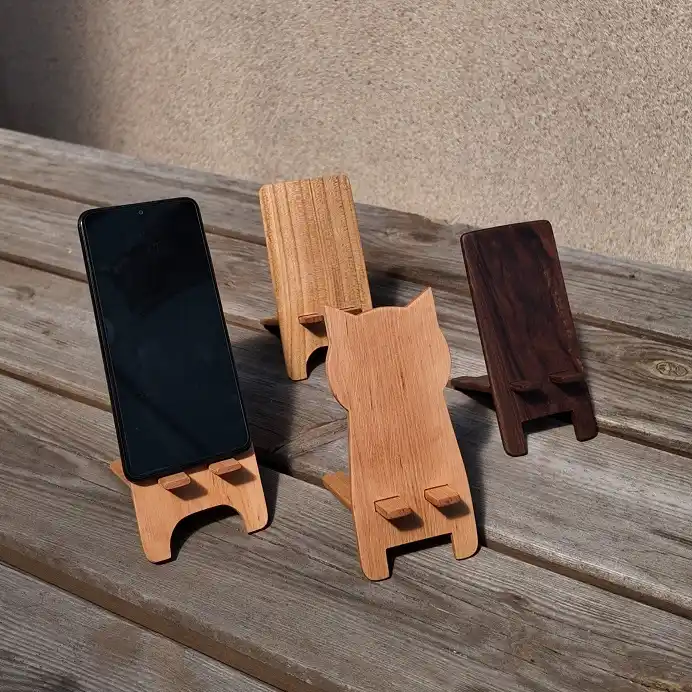
Four stands here and no two are alike. Three are simple rectangles with a notched ledge at the bottom, cut from three different woods, and one is a rounded silhouette with ears that reads like a small animal. Same build, same notch, completely different personality.
That split is the useful part for a youth group. Some guys want the clean rectangle. Some want to cut a shape. Give both options at the start and nobody feels stuck with the wrong project.
| Straight rectangle | Cut silhouette |
|---|---|
| Straight cuts only, so a first timer can finish it. | Needs a traced outline and a curved cut, best with help. |
| The wood tone carries the whole look, so pick a grain worth showing. | The outline carries it, so the wood can be plain. |
| Faster, which means time left for sanding it smooth. | Slower, and the inside curves take the most sanding. |
Whichever route they pick, the notch depth is the one measurement that matters. Too shallow and a phone in a thick case slides right out.
5. Monkey Fist Keychains Tied in Black Leather Cord
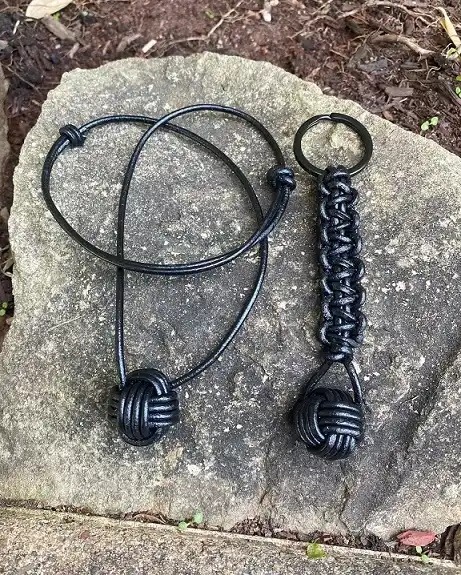
The monkey fist is a knot wrapped around a small ball core, and it’s the woven sphere hanging at the bottom of both pieces in this photo. On the right it sits under a column of square knots and clips to a key ring.
On the left the same knot hangs from a sliding cord as a necklace, which is a good backup for anyone who doesn’t want another thing on his keys.
Black leather is what keeps this from looking like camp crafts. The cord has a slight shine, the knot has real weight, and the finished piece reads more like gear than a project.
Wrapping is slow at first and then suddenly clicks. Expect a few boys to finish in twenty minutes and a few to need the whole hour.
A marble or a steel ball inside is what makes the knot hold a round shape instead of collapsing once it is tightened.
Three passes in three directions, all loose, then snug the whole thing up together. Pulling one wrap tight early is what makes a lumpy ball.
Stack square knots above the ball for a keychain, or run a plain sliding cord for a necklace. Same knot, two very different finishes.
Cut the cord longer than feels right. Running short three wraps in means starting the whole knot again.
6. Giant Accordion Fold Book Made From Everyone’s Panels
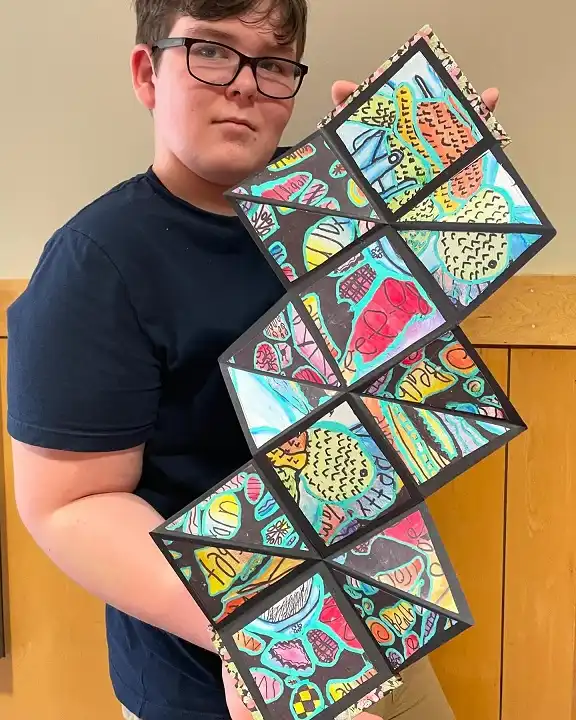
Look at the scale in this photo. The folded book unfolds to nearly the length of the kid holding it, built from a zigzag of black card with bright painted panels glued inside each fold.
Every panel is a different pattern: dots, stripes, blobs, scribbled letters, all in loud pinks, oranges, and turquoise against black.
This is the one to reach for when your group is big and your budget is small. Each boy fills one or two panels on his own, then the panels get mounted into a shared accordion spine.
Nobody has to be good at drawing, because the black borders and the repeated shapes pull mismatched work together into one piece.
Subscribe to DIY Craft Bloom
Get updates on the latest posts and more from DIY Craft Bloom straight to your inbox.
Score the fold lines before anyone starts painting. Folding stiff card by eye after the fact wrecks the crisp zigzag that makes the finished piece stand up.
7. Polymer Clay Keychain Bar Where They Pick the Charm
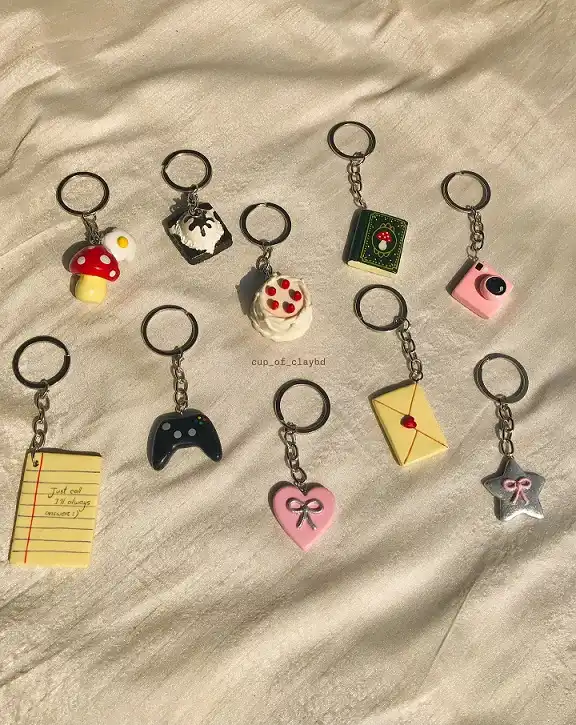
Ten small clay charms on a tray, each one on a chain and ring: a game controller, a lined notepad with writing on it, a camera, a sealed envelope, a mushroom, a star, a slice of cake.
Some are cute, some are not, and that’s the point. The shape is entirely up to whoever is making it.
Run this as a bar. Put out white, black, red, yellow, and blue clay, a few tools, and the rings and chains in a bowl. Say nothing about what they should make.
The controller and the notepad in this photo tell you what happens when you let boys choose.
Bake, cool, screw in the eye pin, clip the chain. Done in one session.
Keep the charms small. Big ones crack in the oven and feel like a rock in a pocket.
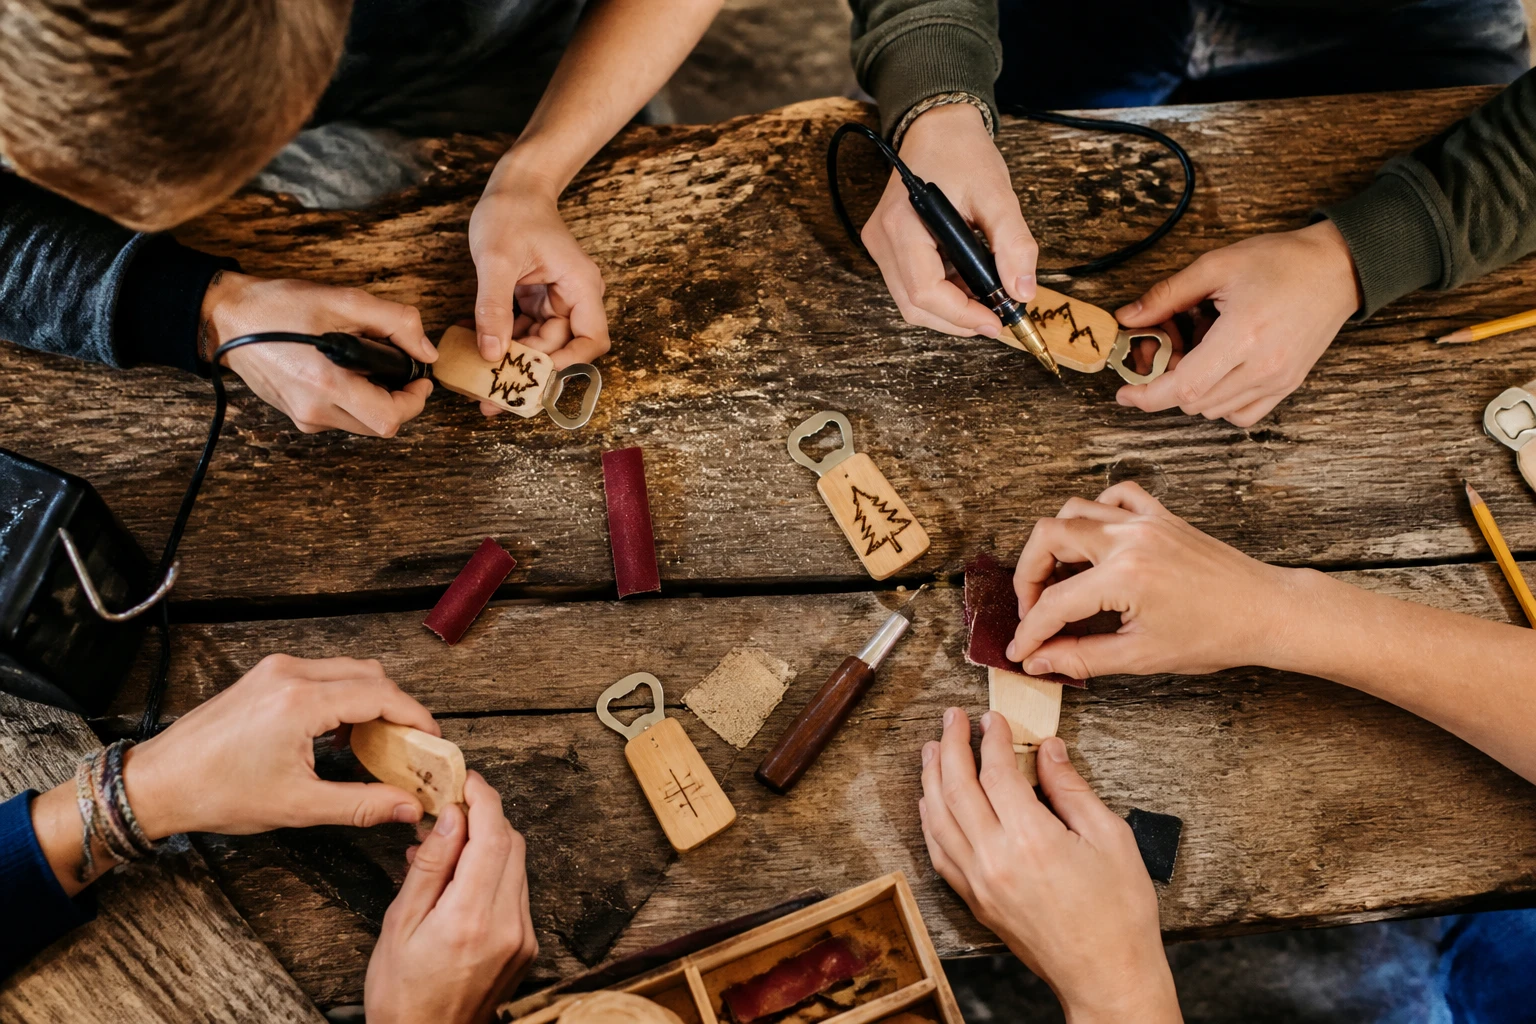
8. Wood Burned Bottle Opener Keychains
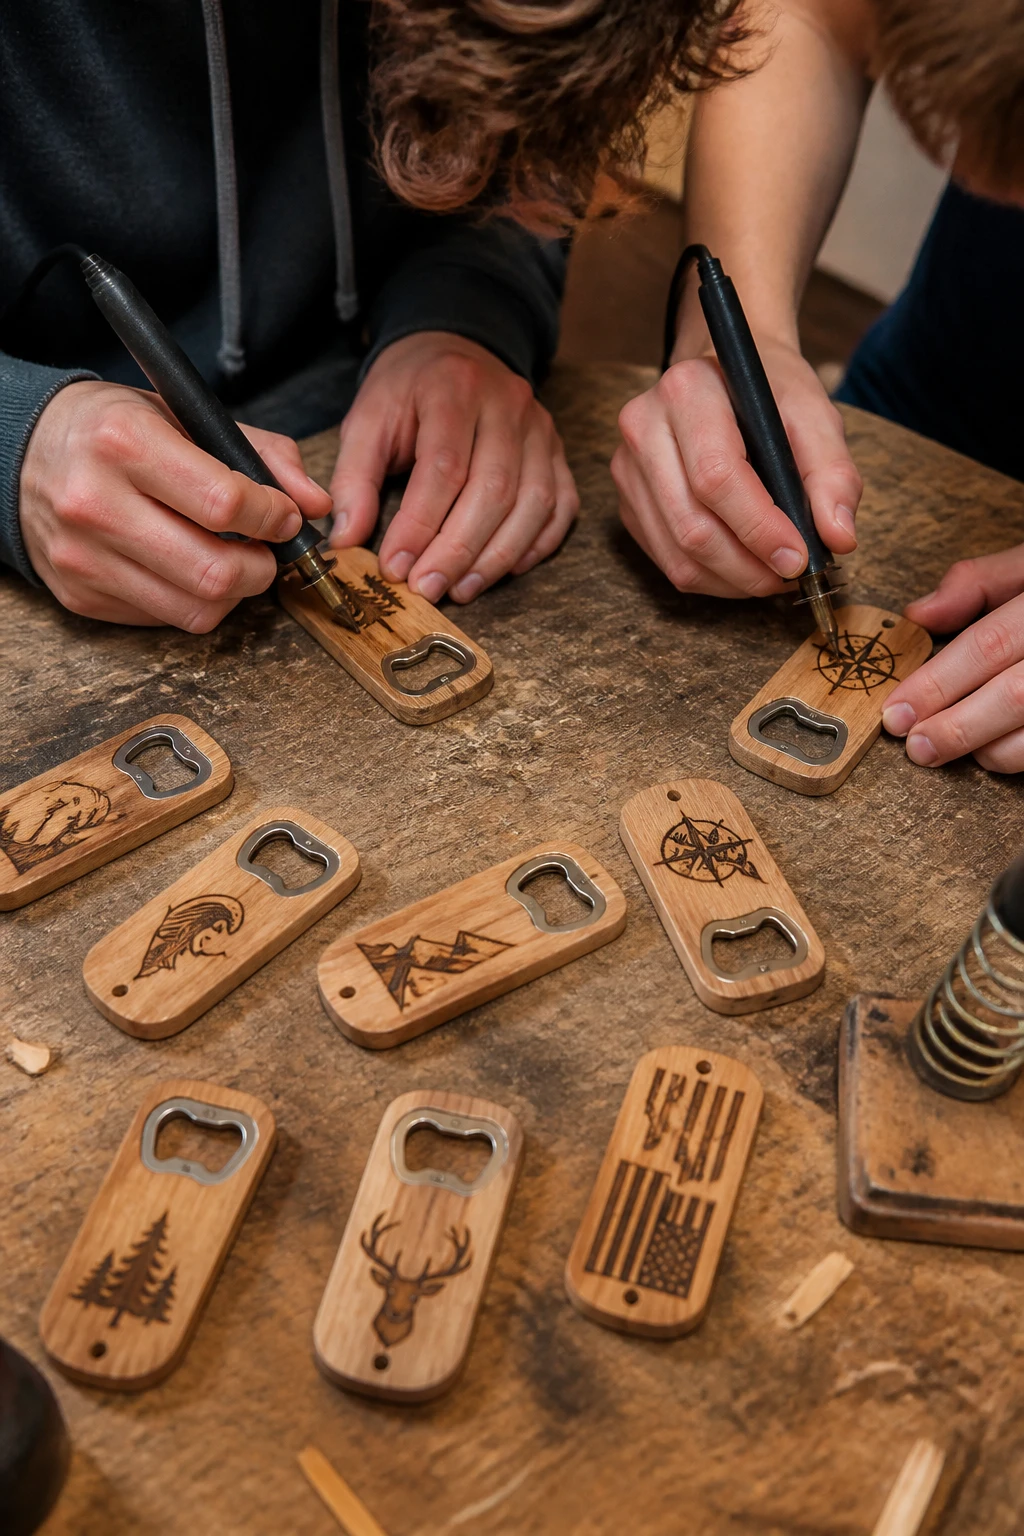
Sand, burn, oil, clip. Four steps, and the middle one is the reason this lands with teenagers who normally check out during craft night.
Wooden opener blanks come in bulk packs with the metal opener already set into the wood, so nobody is drilling anything. The boys sand theirs smooth, then burn initials, a symbol, or whatever inside joke the group is running that month.
Three or four wood burning tools cover a room if you set them up as a station and rotate. The tips get hot enough to blister, so that station needs an adult sitting at it the whole time, not just nearby.
Finish with mineral oil. It darkens the burn lines and makes the grain pop, which is the difference between a keychain that stays on his keys and one that ends up in a drawer.
Order extra blanks. The fast finishers will want a second one for a dad or a brother.
9. Turn Recycled Bottle Caps Into Googly Eyed Creatures
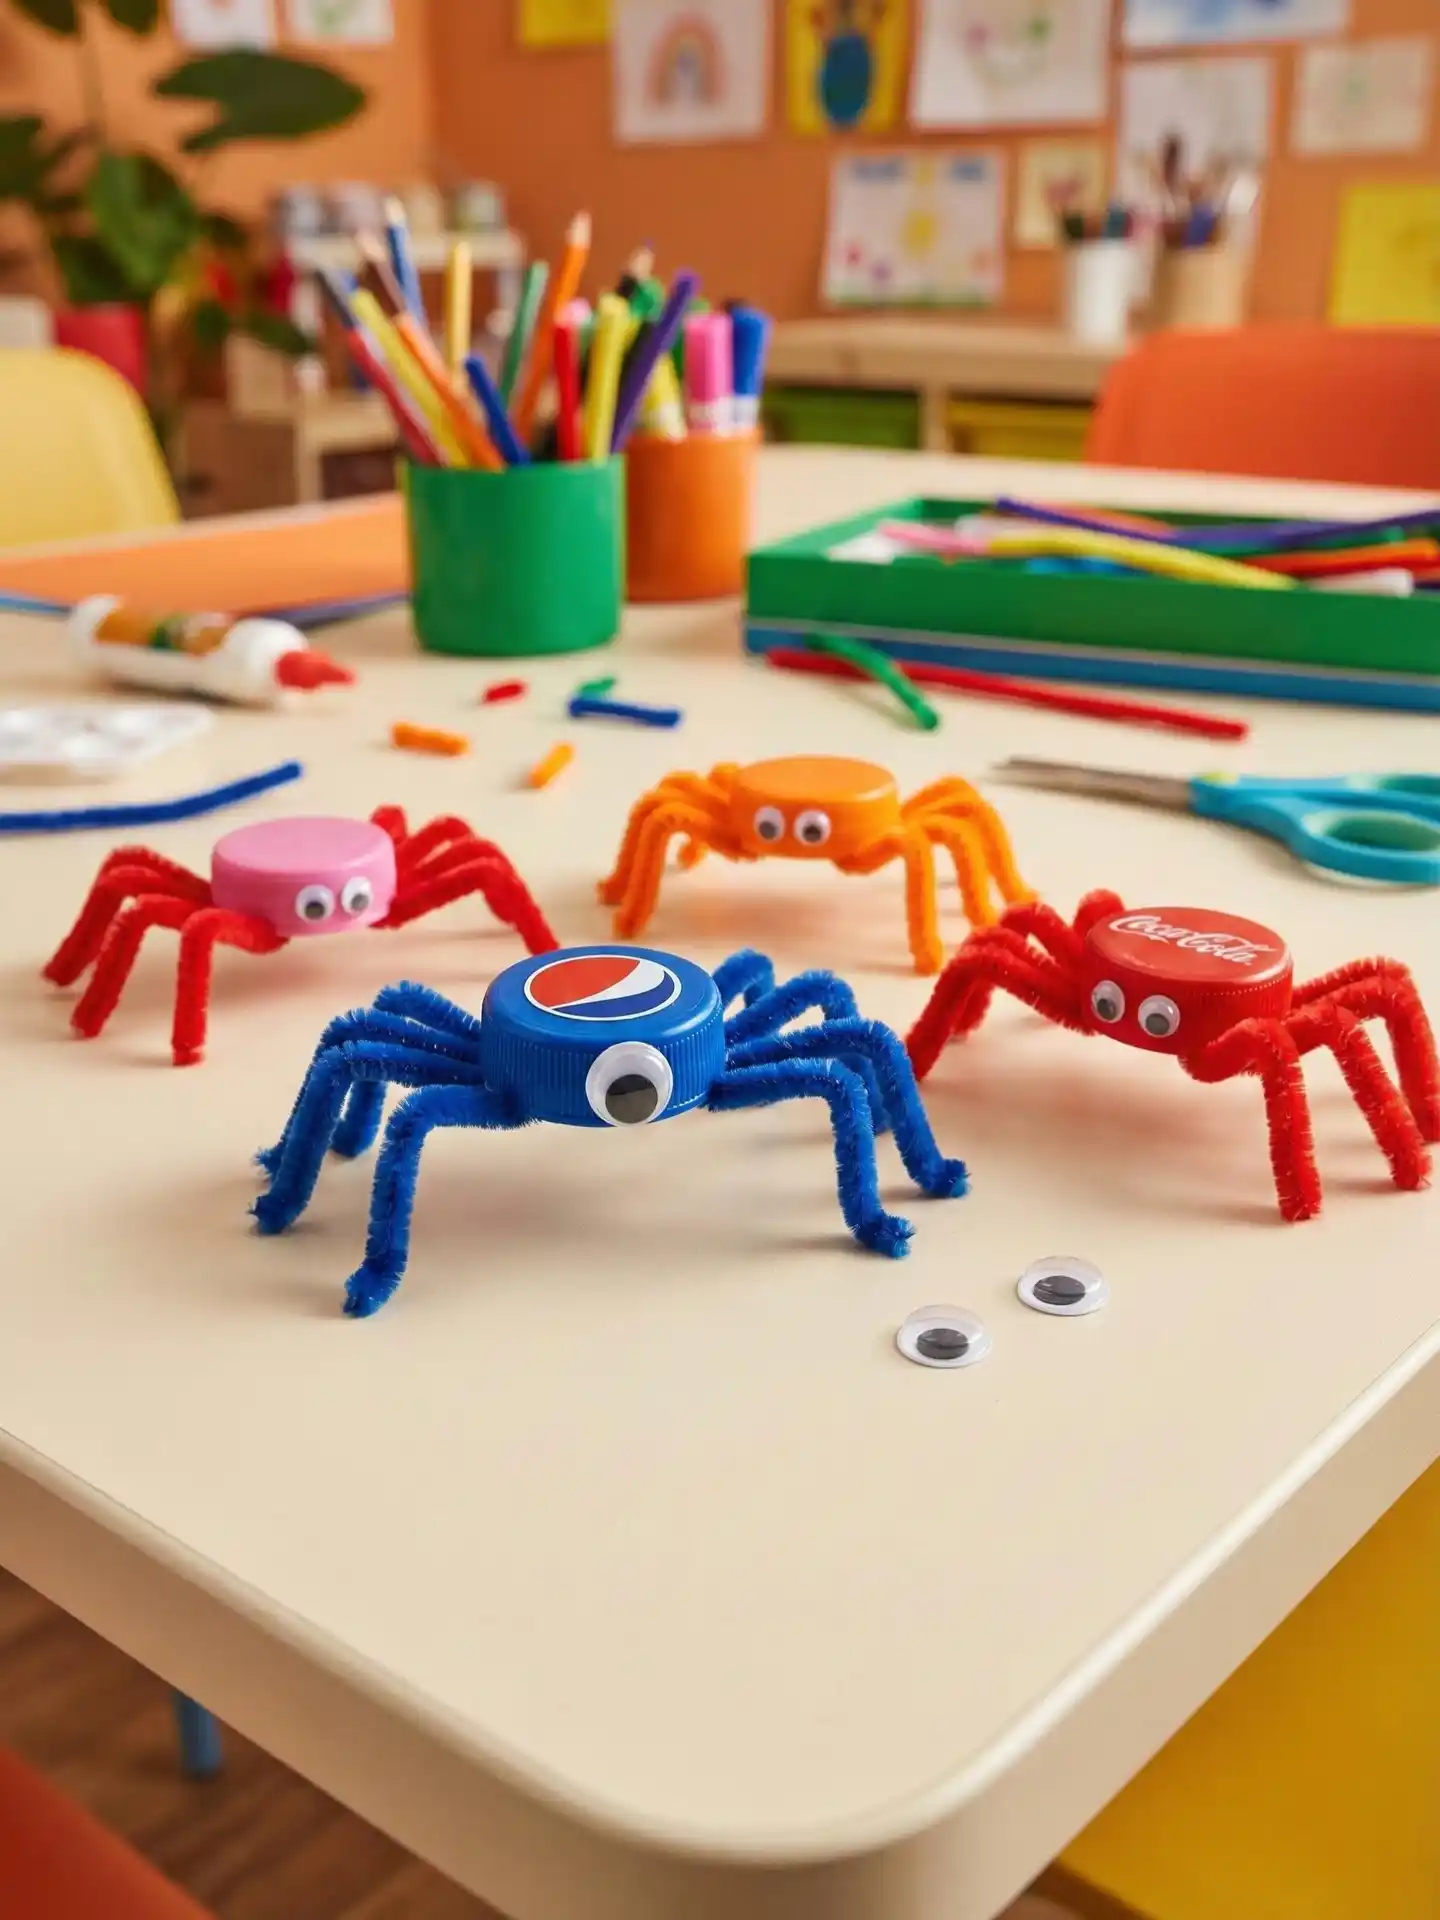
Pipe cleaner legs, bent and twisted around a plastic bottle cap, are the whole trick behind this one.
Four pipe cleaners folded in half and wrapped around the cap rim give eight legs automatically, no measuring required.
A pair of googly eyes glued to the top finishes the creature in under five minutes per bug.
A few things that make this a strong pick for a big group:
- Cheap enough to make for a whole youth group without a real budget, since bottle caps are usually just sitting in a recycling bin
- Fast setup means guys who finish quickly can start a second or third one instead of waiting around
- Easy to turn competitive by asking for the weirdest bug, the most legs, or a monster instead of a spider
Skip the classic spider look if you want it to land better with teen boys. Call it a bug building contest, hand out a pile of caps and pipe cleaners, and let them build whatever crawls out of their head.
10. Paracord Survival Bracelets in Their Own Color Combos
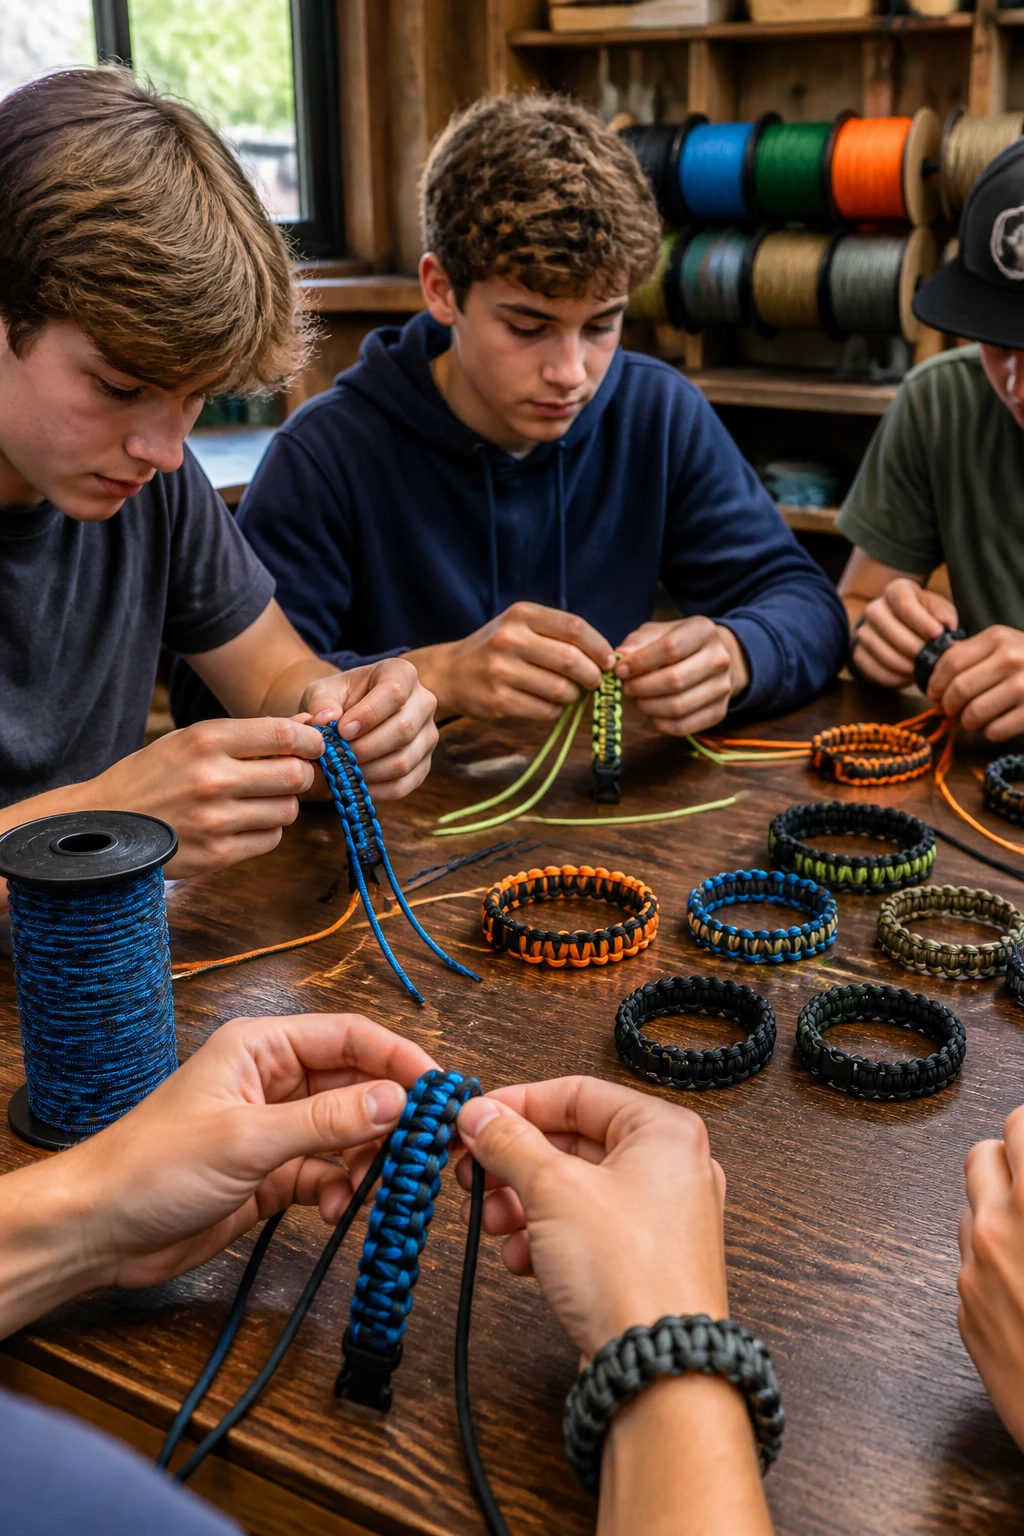
Ask a teenage boy to wear a bracelet and you might get a shrug. Tell him it unravels into ten feet of cord rated to hold hundreds of pounds and the shrug usually goes away.
The cobra weave is the one to teach. It’s two moves repeated, left over right and right over left around a buckle, and most guys have the rhythm inside ten minutes.
Once the room quiets down, that repetition is what keeps them working and talking at the same time.
Buy the cord in bulk in five or six colors and let everyone pick two. That single choice is what makes a room of identical bracelets feel like nobody’s copying anyone.
Wrap the tape and add about an inch for the weave. Guessing here is the main reason a finished bracelet gets left on the table.
Same pull on every knot, snug but not strangled. Uneven tension is what makes one side of the bracelet bulge.
Cut close, melt the tip with a lighter, press it flat against the weave with the metal side of the scissors. Adults handle this step.
Have a second pattern ready, like the fishtail or the king cobra, for whoever finishes in twenty minutes and starts looking around the room.
11. Paint a Mini Sports Court Plaque on Stained Wood
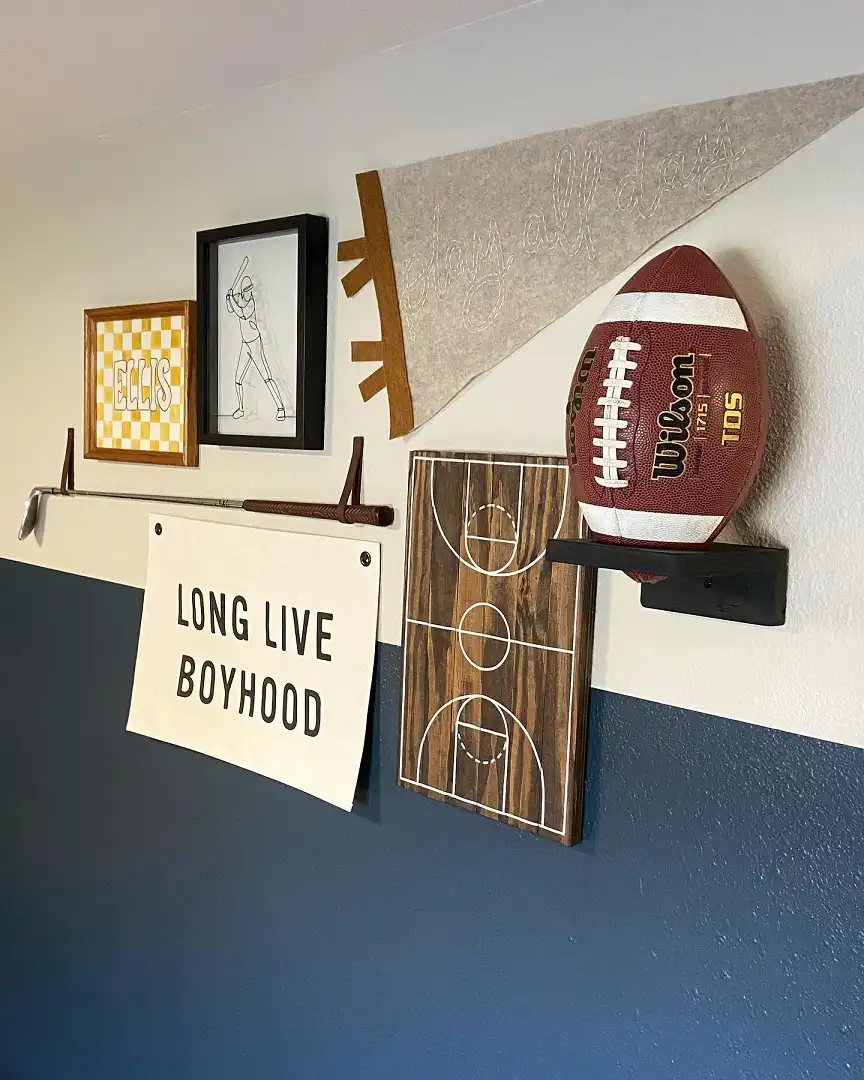
A basketball court doesn’t need a full mural to hang on a wall. This one is a single stained wood plank with the court lines painted on in white, narrow enough to slot next to a shelf or a game ball display.
It reads like intentional wall art instead of a school project, which matters if this is going in a teen’s actual room and not just a display table.
The trick is in the setup, not the painting itself:
Tip: stain the wood first and let it fully dry before adding any lines. Painting over wet stain drags color into the white and ruins the crisp edge.
Use painter’s tape to mark straight lines and the free throw circle before picking up a brush.
A paint pen works better than a brush for thin lines and takes less steadying hand than most guys have on the first try.
Tape off lines before painting, remove tape while the paint is still slightly wet.
Let stain dry fully, overnight if possible, before any white goes on.
Subscribe to DIY Craft Bloom
Get updates on the latest posts and more from DIY Craft Bloom straight to your inbox.
Thin craft wood, it splits when the tape gets pulled off.
Freehanding the circles without any guide or stencil.
12. Spray Paint and Stencil Canvas Panels
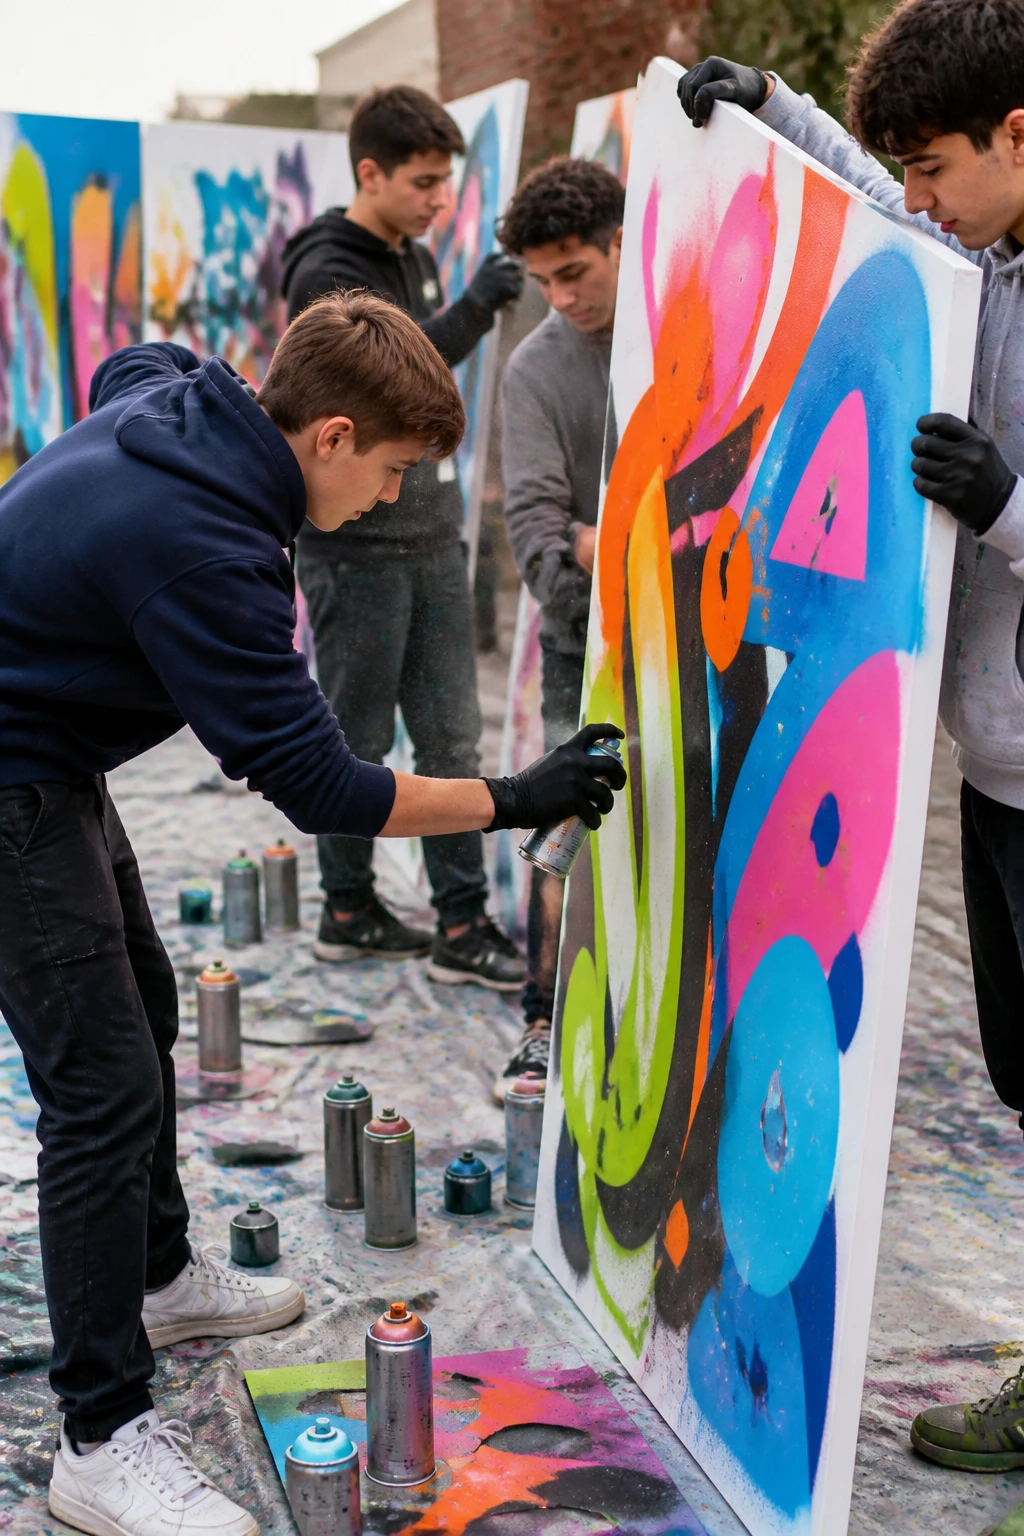
Set this one up outside before anything else gets decided. Spray paint in a fellowship hall is a bad night, and no amount of open windows fixes it.
Once you’re outdoors with drop cloths down, the project runs itself. Cardboard stencils, painter’s tape for hard geometric edges, and a few cans of matte spray in colors that actually work together. Matte reads more like street art than gloss does.
The rule that matters is light coats. Thin passes, let each one flash off, build the color up in layers. One heavy pass and the paint runs down the canvas in streaks.
Everyone works at the same time with no waiting for a tool, which is why this holds a big group better than most painting projects.
Outdoors only, gloves on, and masks for anyone spraying more than a few minutes. Check the wind direction before you set the tables, or the panels downwind pick up someone else’s overspray.
If you want a group piece out of it, hand out canvases in a set order and have each guy carry one color across into the next panel. Line them up on the wall afterward and the whole row connects.
13. Wooden Desk Organizers With a Built In Charging Slot
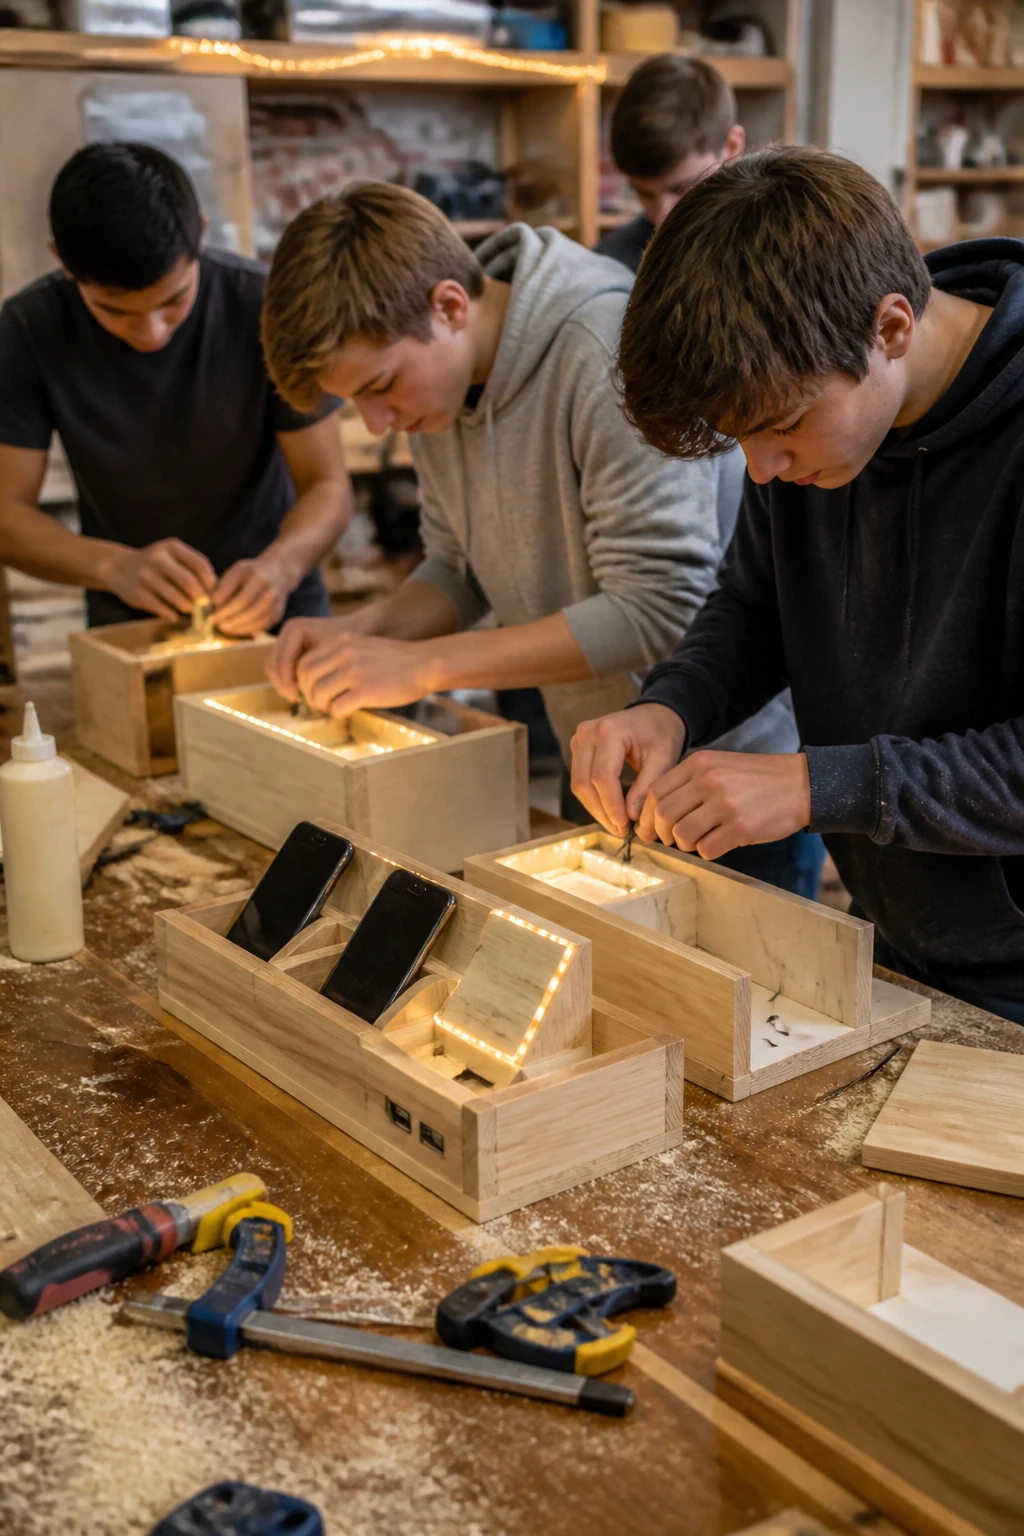
Pine boards, wood glue, and a battery LED strip. That’s a shop project and a tech project in the same hour, and the finished thing sits on a desk instead of in a closet.
Pre-cut the pieces to size before anyone arrives. That keeps the saw out of a room full of teenagers and puts the session’s time into assembly, drilling the cable hole, staining, and layout.
The layout is where they make it theirs. Some want a wide slot for a phone in a case, some want pen storage, some just want a tray for earbuds and a charger. Give them the same pieces and let the compartments land where they want.
Route the cable hole out the back, low and near a corner. Drilled through the middle of a side panel it looks like a mistake instead of a feature.
14. Screen Printed Shirts From a Design the Group Argues Over
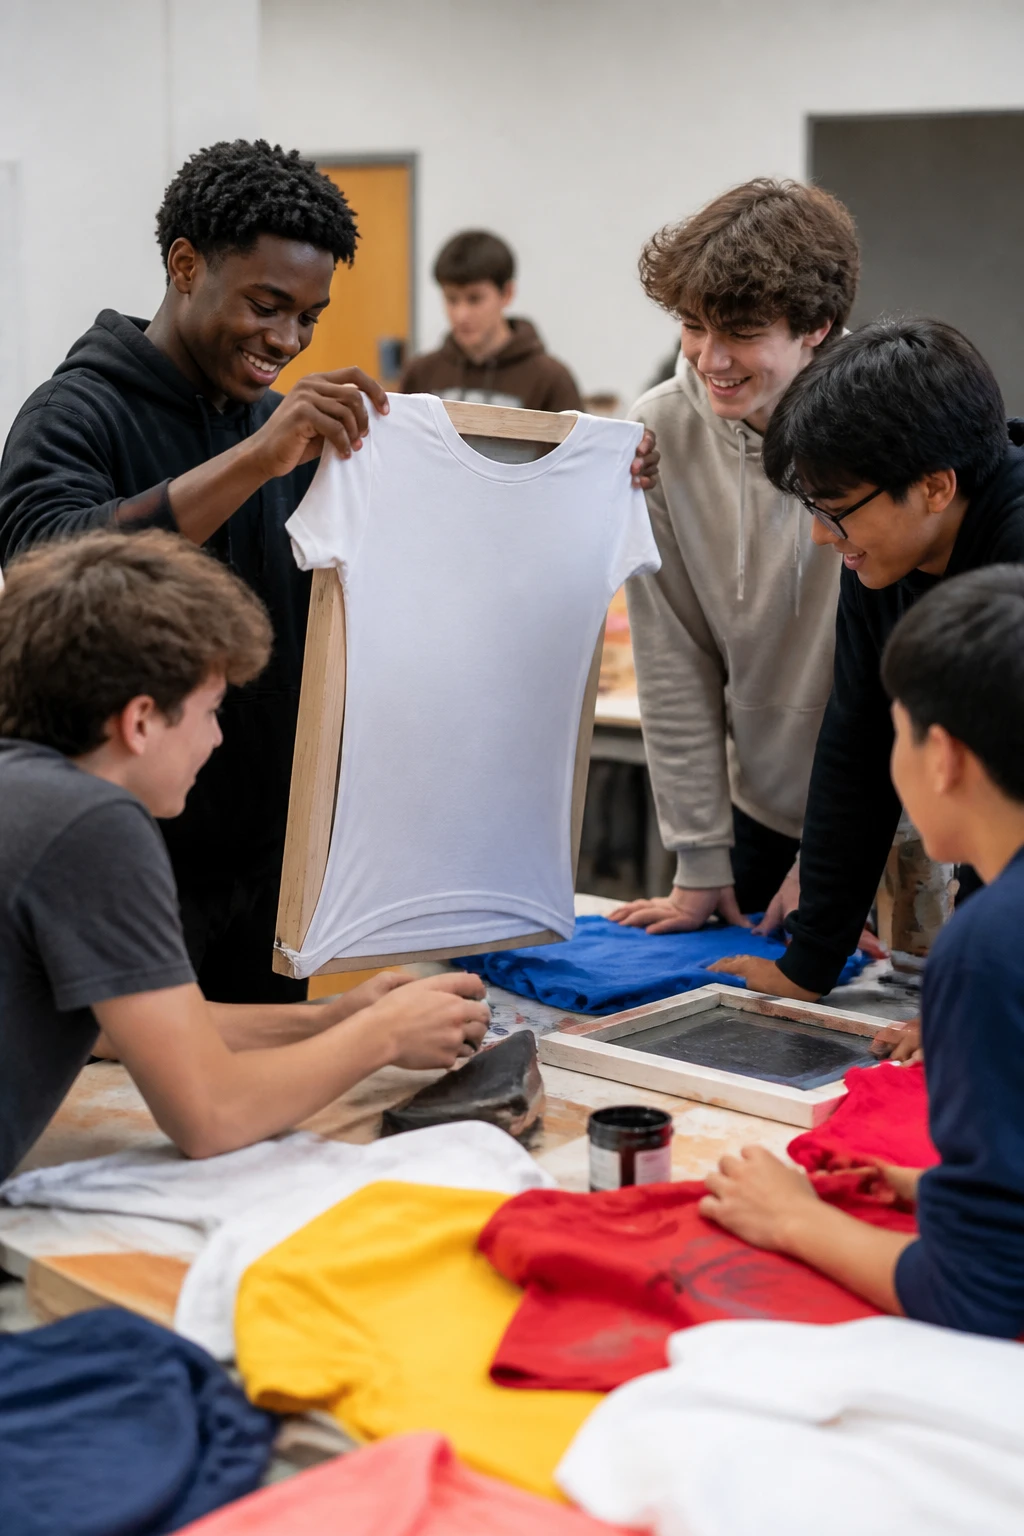
The design meeting is where this one actually starts, and it’s usually the loudest twenty minutes of the night. Let them pitch, vote, and land on one thing that means something to your specific group.
Then run it like a line. One station preps shirts and slides cardboard inside so ink doesn’t bleed through. One cuts the stencil from contact paper and sticks it to the screen. One pulls the ink across with a squeegee. One sets the print with heat.
Keep the design simple. Big shapes and thick letters print clean. Fine detail clogs, smears, and disappears in the wash.
Print two or three test shirts before you touch the good stock. The first pull is almost always too much ink.
15. Concrete Fire Bowls for the Outdoor Space
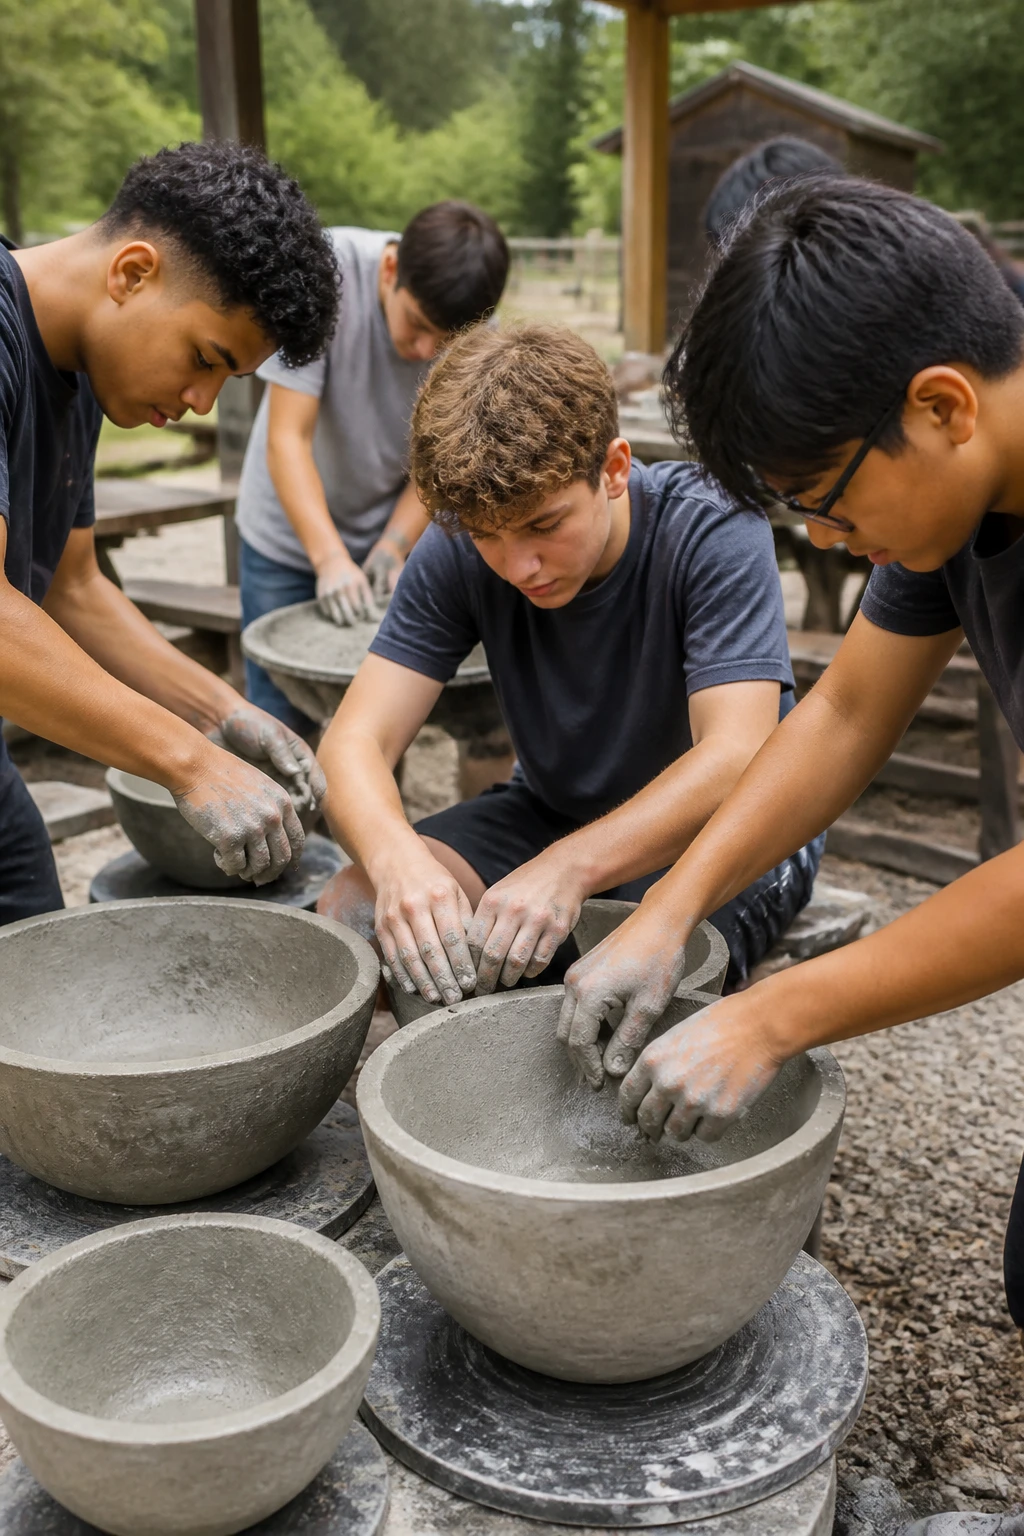
Two mixing bowls, one nested inside the other, are the entire mold. Concrete goes into the big one, the greased smaller one presses down into the middle, and the gap between them becomes the bowl wall.
Use a heat rated mix. A standard bag will crack the first time a flame sits in it.
The teamwork part is real here. Someone has to hold the inner bowl steady and level while the concrete sets up, and someone has to weigh it down so it doesn’t float back up. That job needs two guys and about fifteen minutes of not letting go.
Then everyone waits. Curing takes a day or two, so demolding and sanding become a second, shorter session.
Grease the inner bowl heavily. Skimping there is how a finished bowl comes out in pieces.
16. Cornhole Boards the Group Builds and Then Fights Over
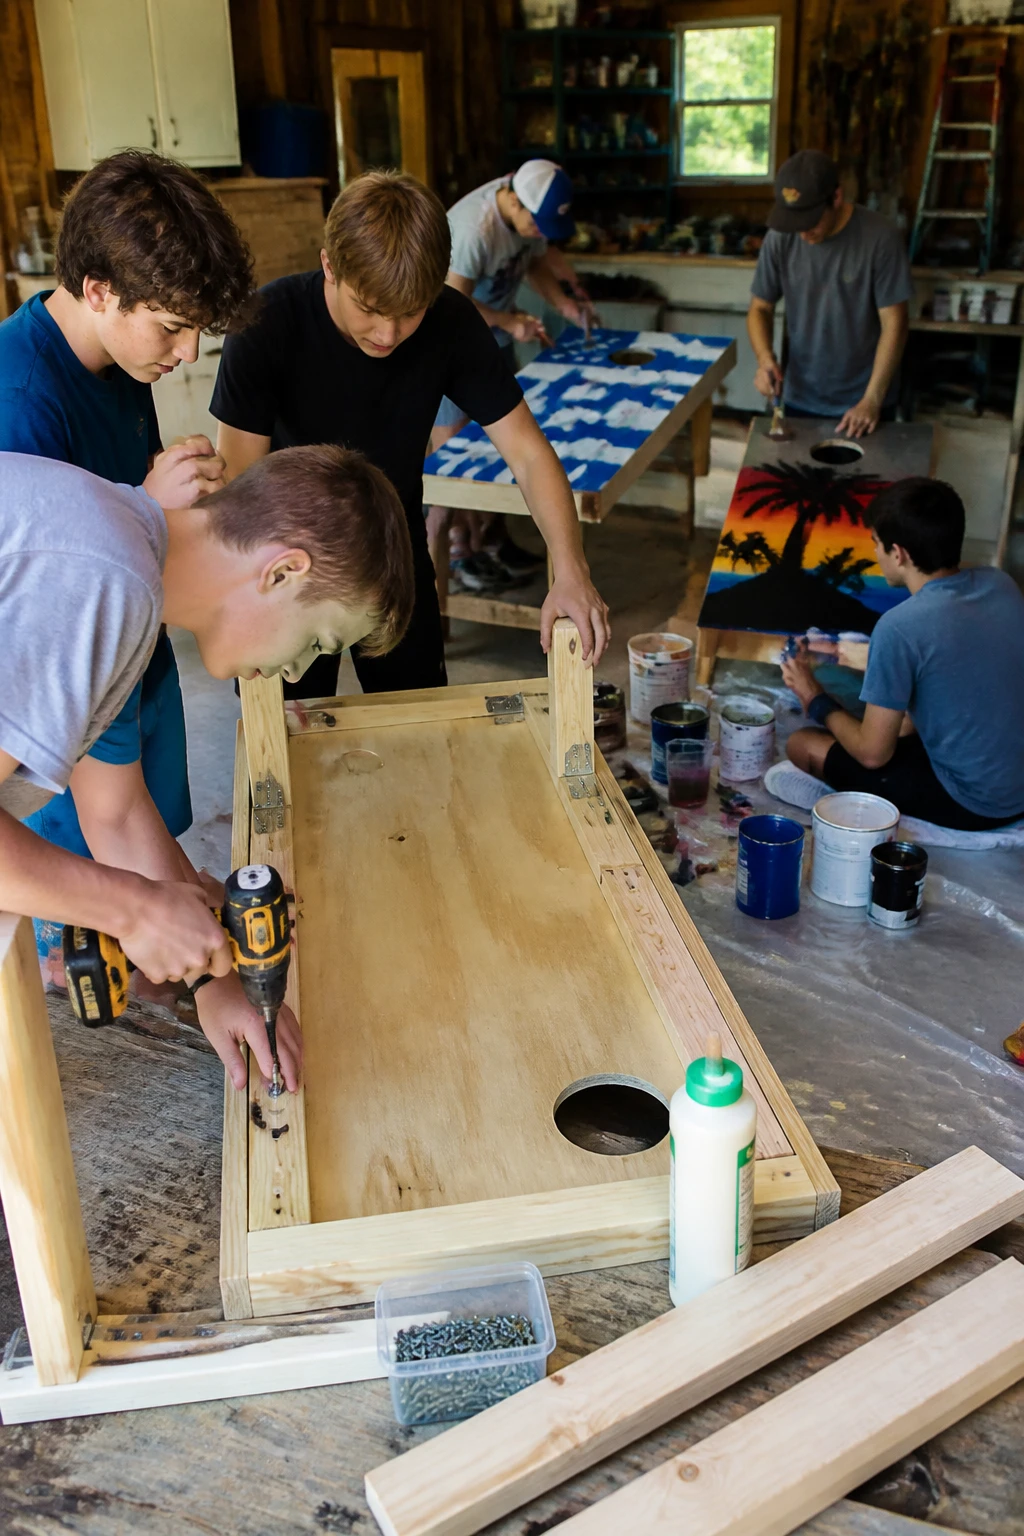
Split the room into two teams and build one board each. That’s the shape of this project, and the rivalry starts before the first screw goes in.
Standard dimensions matter if you want the set to feel real, so print them out and tape them to the table. Two by four frames, a plywood top, a six inch hole centered near the back, folding legs on hinges.
Painting is the second half of the night. School colors, a group name, two designs that clearly belong to two different teams. Tape gives clean lines to anyone who can’t paint a straight edge, which is most of them.
Break them in with a tournament the same night if the paint is dry enough to touch.
| Cut it all yourself | Pre-cut before they arrive |
|---|---|
| They learn to measure, mark, and cut a real project. | They skip the saw and go straight to assembly. |
| Needs a supervised saw station and steady adult eyes on it. | No power tools in the room except the drill. |
| Two sessions, realistically. | One session, painting included. |
These stay in the church closet for years, and every guy who built one will point it out to somebody.
17. Leather and Cord Handle Wraps for a Multi Tool
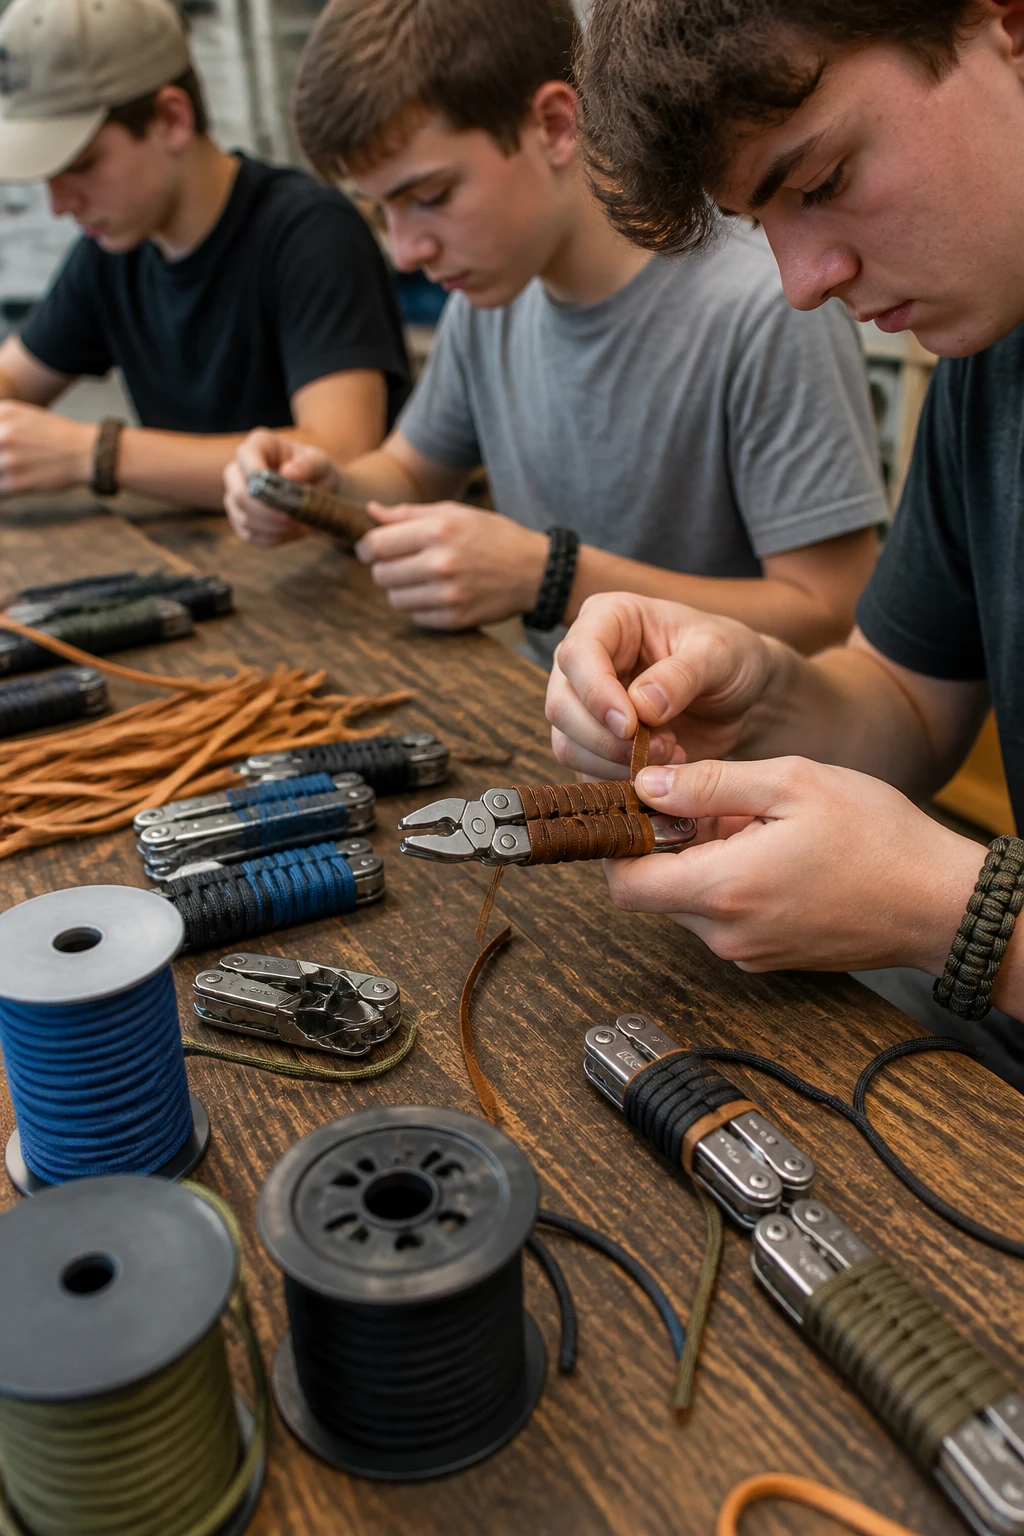
A bare metal handle gets slippery, gets cold, and looks like every other one in the pack. Wrapping it in leather lacing or paracord fixes all three at once.
The work is quiet and focused, which makes it a good pick for a night where you want conversation happening alongside the craft. Pull up a tutorial, let everyone watch it once, then hand out the materials and let them find their own pattern.
Some go clean leather. Some go tight paracord in two colors. Some do a leather base with a cord accent over the top.
Bare metal handle. Cold in the hand, slick when it is wet, identical to the other eleven on the table.
Wrapped grip with real texture, a color combination he picked, and a handle that stays put in a wet hand.
Keep the wrap clear of any hinge or lock. A gorgeous wrap that stops the pliers from folding is a tool nobody carries.