13 Easy Fall Craft Ideas For School Age Kids To Try This Season

Fall shows up on the calendar and suddenly every parent and teacher needs a fresh project for a table full of kids.
Pinterest boards fill up fast with pretty photos, but half of them call for materials nobody keeps in a craft drawer or skills a six year old cannot manage alone. This list solves that problem.
Real classrooms and real kitchen tables tested every idea here, from pinecones and pressed leaves collected on a walk to plain paper plates and a box of googly eyes.
Each project uses supplies most homes and classrooms already have, so nobody needs a special trip to the store before craft time starts. Younger kids get big simple shapes to glue and paint.
Older kids get more to cut, plan, and build on their own. Together these fall craft ideas for school age kids cover leaf art, paper scarecrows, painted pumpkins, and a few natural pieces made from things found outside.
Scroll through, pick two or three that fit your group this week, and save the rest for the next rainy afternoon.
1. Fork Painted Hedgehog With Pom Pom Nose
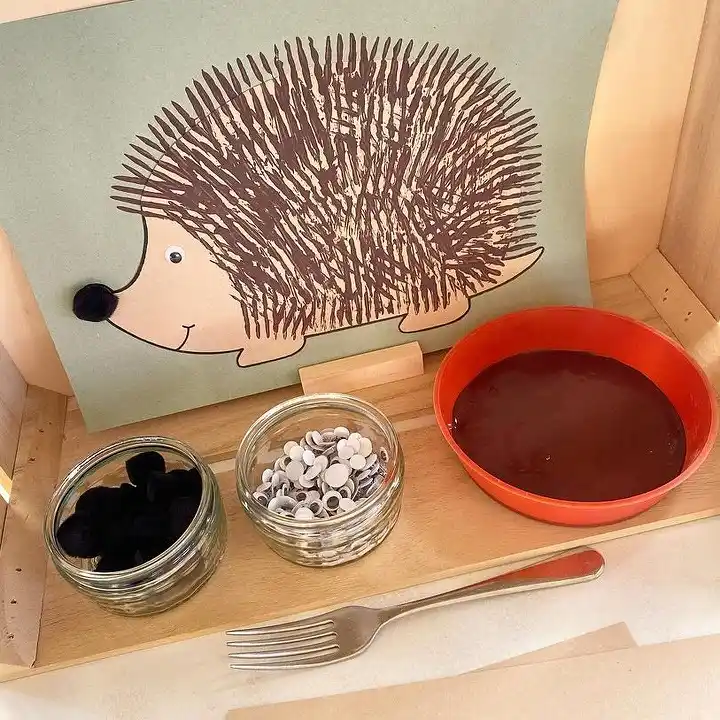
Simple version: print a hedgehog outline, dip a fork in brown paint, and stamp the tines across the back to build up spikes.
The shape does the hard work here. Kids only need a bowl of brown paint, a plain fork, and a steady hand to fill in the spiky half with quick jabbing strokes.
A black pom pom glued on for the nose and one googly eye finish the face in under a minute.
This works well for school age kids because the fork trick keeps the texture messy but controlled.
Little hands get a repetitive motion instead of a fussy detail to trace, and the paint covers any stray marks outside the lines.
Supply note: keep a damp rag by the paint bowl so fork prongs stay clean between dips.
2. Pressed Leaf Frames Kids Can Hang In A Window
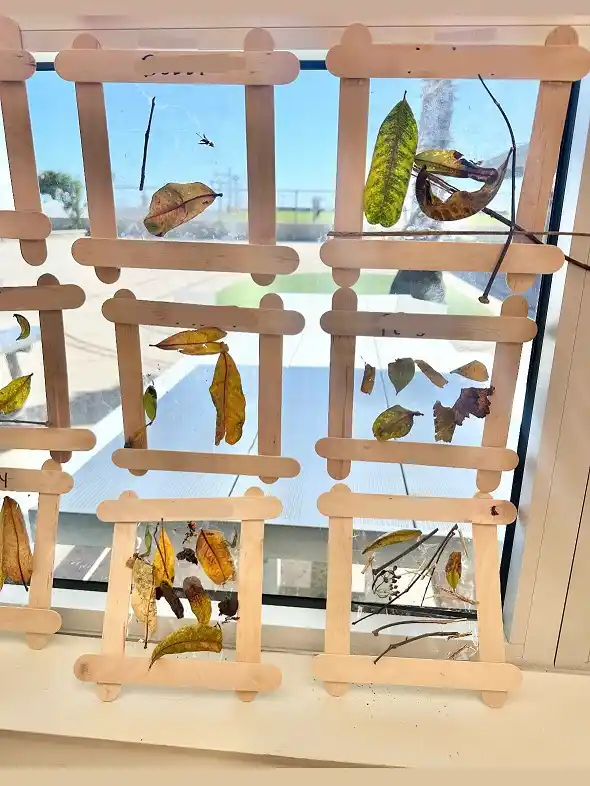
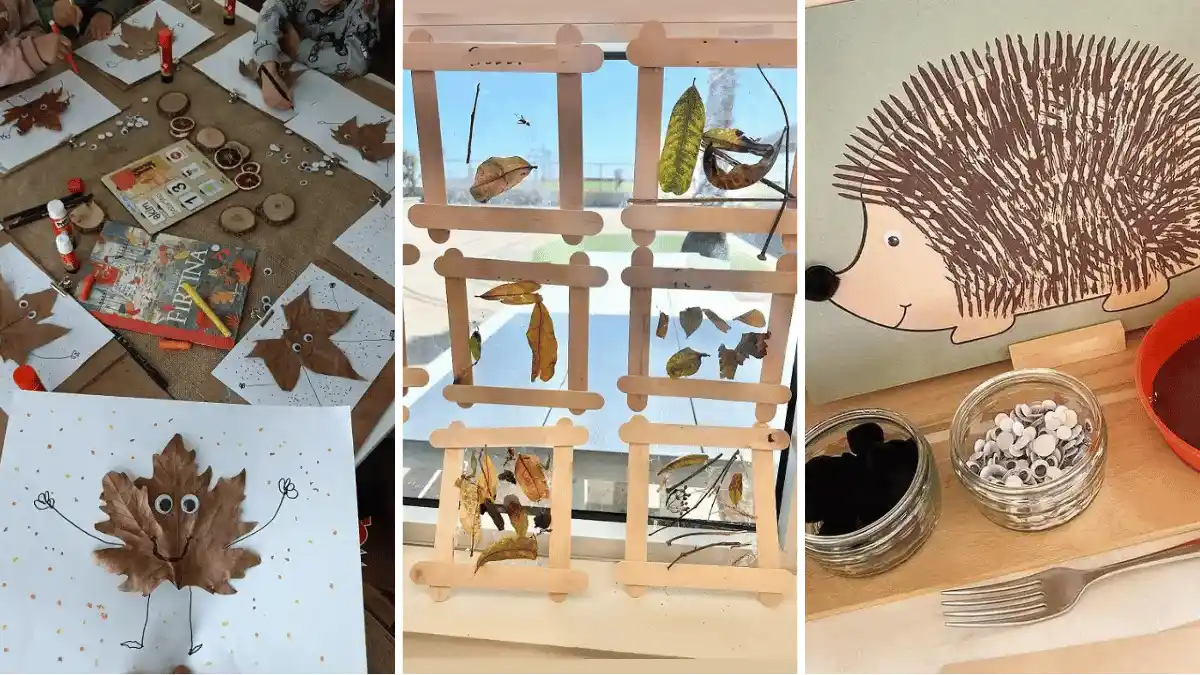
Craft sticks glued into small squares make an easy frame for whatever leaves and twigs a kid collects on a fall walk.
Here rows of tiny wood frames sit right on the glass, and the sun behind them turns every leaf see through, showing off the veins.
Why it works: Grouping several small frames together looks fuller than one large collage. Sunlight through the window does the display work without extra effort. A twig glued across the frame gives the leaf something to rest against.
Line up the finished frames on a shelf or windowsill so the light keeps working after the glue dries.
3. Googly Eyed Maple Leaf Buddy With Stick Arms And Legs
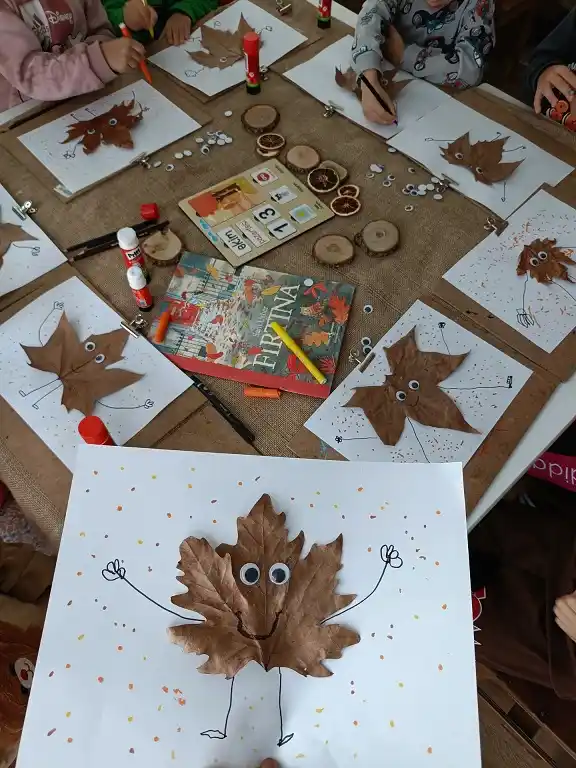
A big dried maple leaf becomes a little character once two googly eyes and a marker smile go on.
Around the table, kids draw stick arms and legs reaching out from the leaf body, then dot the page with an orange marker so it looks like leaves are blowing past.
Style note: pick the widest, flattest leaf in the pile so there is room for a full face.
Beginner version: skip the drawn limbs and just glue the eyes on for a quicker leaf face.
The detail to steal: the scattered dots around the leaf turn a plain sheet of paper into a little scene.
4. Rainbow Ombre Mini Pumpkin Wreath
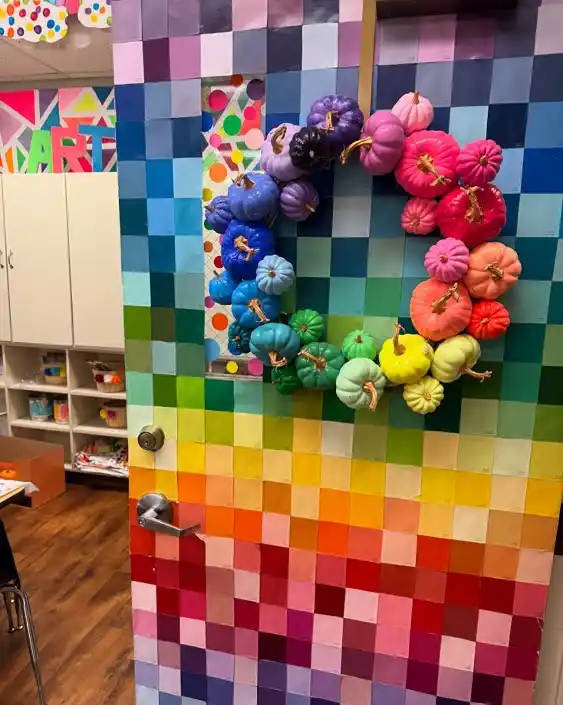
Copy the look: Base: a curved wire or foam ring wrapped in tape to hold pumpkins in place Color path: purple into blue, green, yellow, and pink into red, arranged in one steady line
Main piece: a row of small real pumpkins, glued or wired on close together Finishing touch: stems painted gold so every pumpkin ties back to one metallic color
Subscribe to DIY Craft Bloom
Get updates on the latest posts and more from DIY Craft Bloom straight to your inbox.
Older kids can plan the color order first, laying pumpkins out on a table before any glue comes out, so the gradient reads clearly once it hangs.
Younger kids do better picking three or four pumpkins each and slotting them into the spot an adult marks for that color.
Paint note: let the pumpkins dry fully on a flat surface before gluing them to the ring, or wet paint smears onto the next pumpkin.
5. Paper Plate Scarecrow With Felt Sunflower
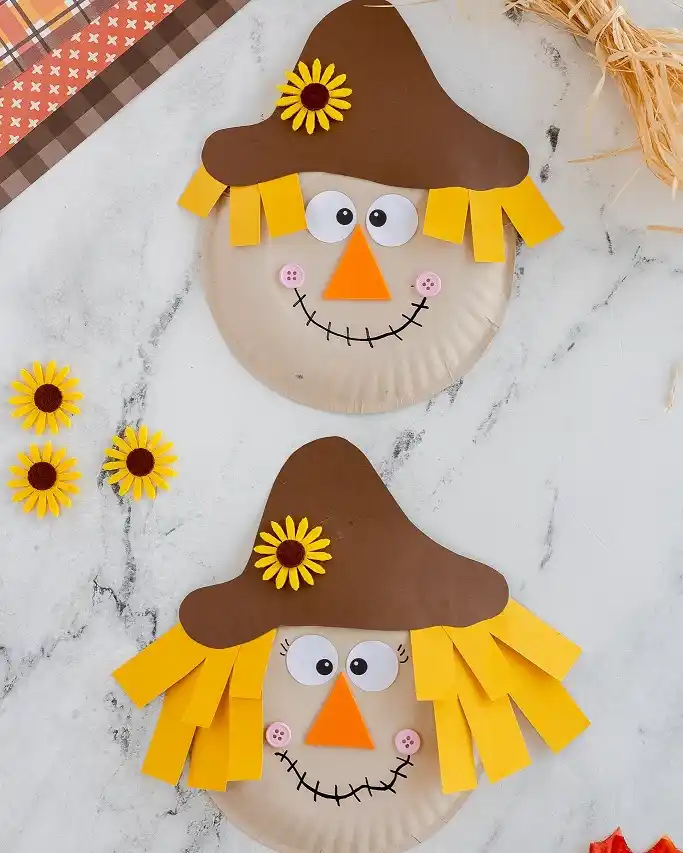
Best for: a first paper plate craft that only needs cutting straight strips and gluing flat shapes.
Tan paint covers the plate first, then an orange triangle nose, two round eyes, and pink button cheeks glue straight on top.
Yellow paper fringe cut into short strips glues around the plate edge for hair, and a brown paper hat shape covers the top third to hide the fringe ends.
The stitched smile comes from a few short marker lines instead of anything cut out, which keeps this piece inside a single sitting for younger kids.
A felt sunflower tucked into the hat brim adds the one small extra step that makes it look finished.
Budget swap: use a paper sunflower cut from yellow and brown scraps if felt is not on hand.
6. Construction Paper Strip Scarecrow Face
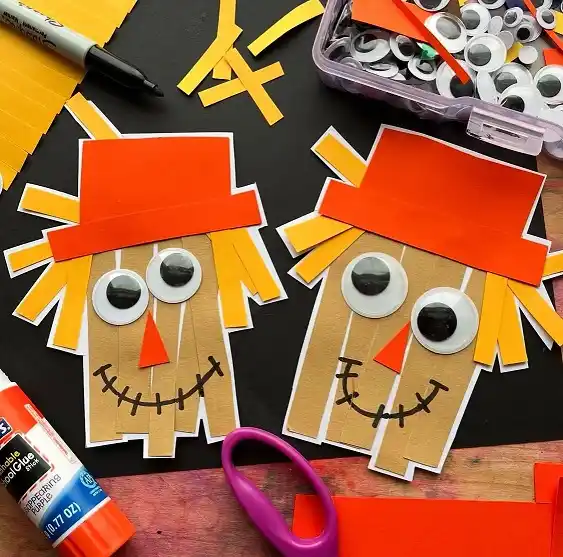
Strips of yellow paper glued side by side make the whole scarecrow body here, no plate or precut shape needed.
A wide orange rectangle folds over the top for the hat, and two mismatched googly eyes give the face its lopsided charm.
Kids who struggle with scissors still succeed at this one because every strip only needs a straight cut.
The orange triangle nose is the single shape that takes any real trimming, and even that can come precut for a faster session.
Black marker stitches drawn in a zigzag across the mouth finish the face without a single extra material.
Two scarecrows fit easily on one sheet of black paper, so the project doubles as a quick lesson in fitting shapes onto a page.
7. Paper Leaf And Honeycomb Ball Tree Display
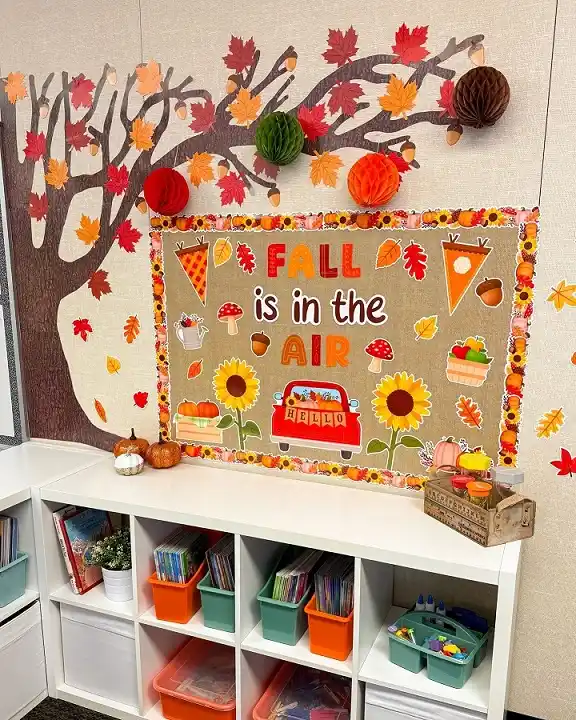
Kids can cut their own paper leaves in red, orange, and yellow to pin onto a bare branch shape taped along the wall, turning a plain corner into a full fall tree by the end of one class.
Tissue paper honeycomb balls, hung a few inches out from the branches, give the flat leaves some depth.
Why it works: Layering leaf sizes and colors close together reads as a full tree even with simple flat shapes.
Honeycomb balls add roundness without any extra painting or shading. A bulletin board underneath gives the finished leaves somewhere to lead the eye.
Placement note: leave gaps between leaf clusters so the branch lines underneath still show through.
8. Sorted Leaf Tray Paired With A Leaf Story For Leaf Faces
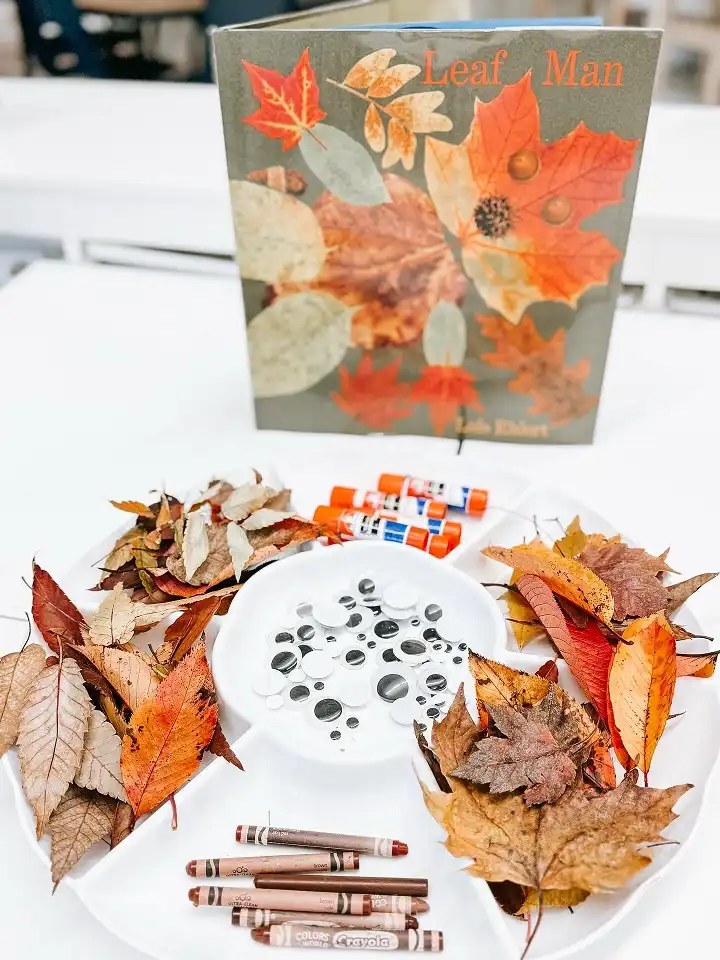
Reading a leaf themed picture book before the glue comes out gives kids a picture in their head of what a leaf creature could look like.
The divided tray keeps dried leaves sorted by size on either side, with a dish of googly eyes and short glue sticks sitting in the middle so kids reach for one thing at a time.
Brown crayons work better than markers for adding stick arms or a mouth straight onto a leaf, since the waxy tip grips the leaf surface instead of skidding off it.
Subscribe to DIY Craft Bloom
Get updates on the latest posts and more from DIY Craft Bloom straight to your inbox.
Picking through a real leaf pile also turns into a quiet sorting task before the gluing starts, since kids naturally group leaves by color or shape while they search for the right one.
Pair this with a few minutes of story time if the class has room for it. It gives the craft a reason beyond just gluing eyes onto a leaf, and keeps the book open on the table as a reference for what shapes to try.
9. Pipe Cleaner Apple Garland For A Window Or Shelf
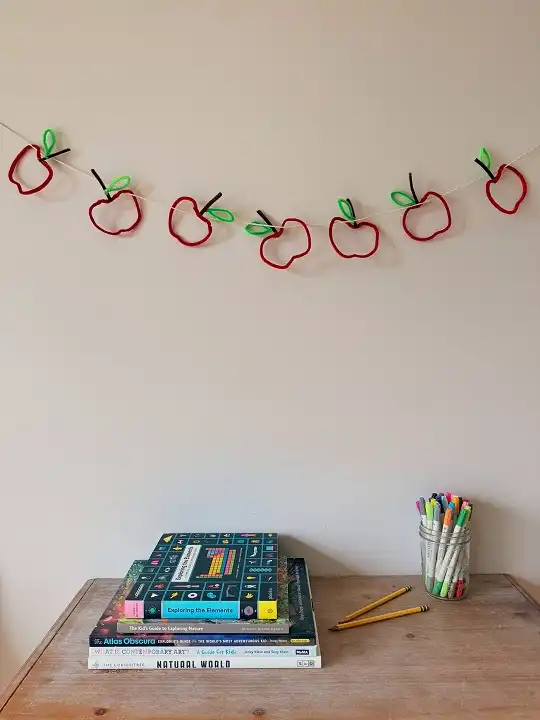
Copy the look: Base: a red pipe cleaner bent into a rounded apple outline Main piece: a short brown pipe cleaner twisted at the top for the stem
Color: a small loop of green pipe cleaner tucked beside the stem for a leaf Finishing touch: finished apples threaded onto plain string, spaced evenly apart
Bending a pipe cleaner into an apple shape takes only two curves and a twist to close the loop, which makes this a fast project for kids still building fine motor control.
Threading the shapes onto string turns single crafts into one long garland, giving the whole class something to hang together instead of sending home separate pieces.
Display idea: loop the string over a curtain rod or the top of a window frame so the apples hang loose enough to twist and catch the light.
10. Pinecone Owls With Felt Wings And Wood Slice Base
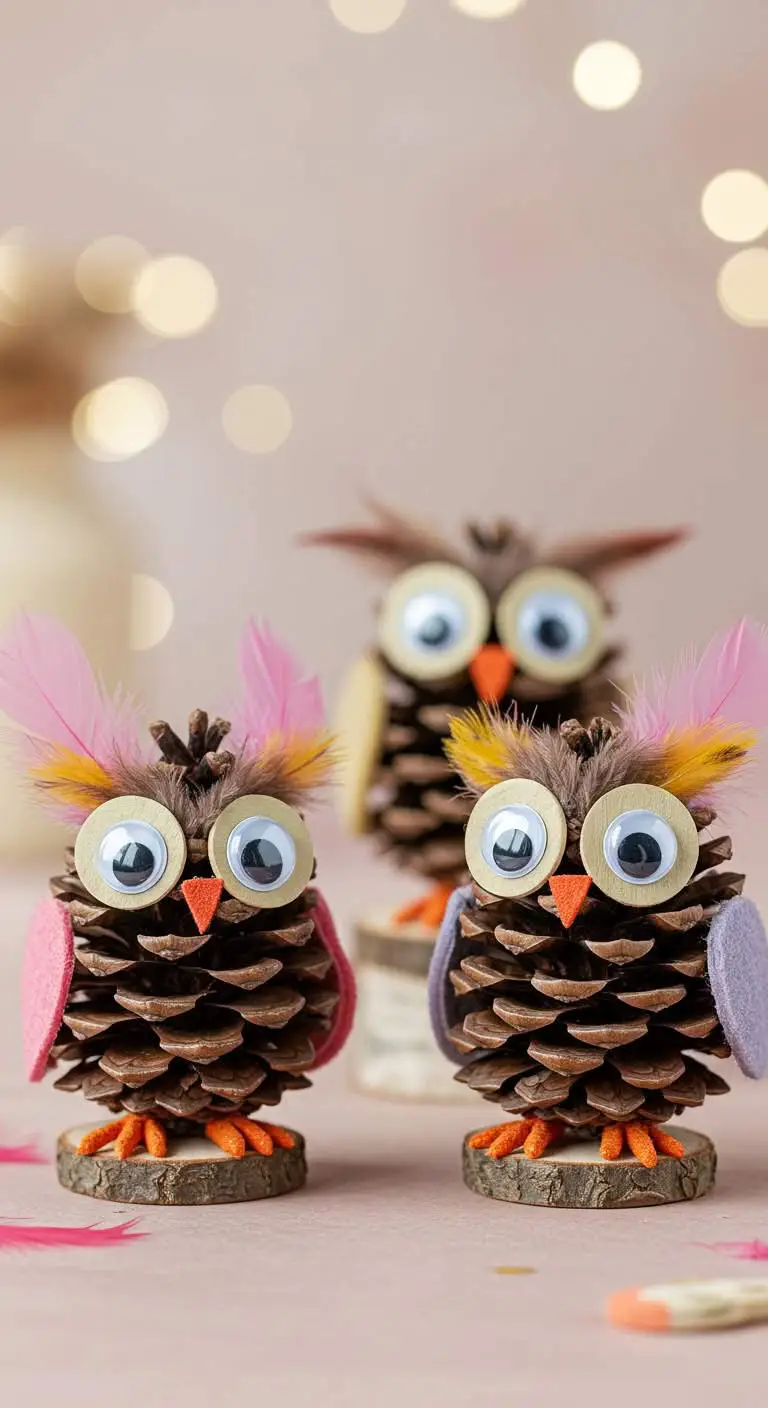
Build: glue two felt circles topped with googly eyes onto the wide end of a pinecone, add a small orange felt triangle below for a beak, then tuck a felt wing shape into each side before setting the pinecone upright on a wood slice base.
Pinecone scales already look like layered feathers, so kids get a full textured owl body without painting a single line.
A few loose feathers pushed into the top scales work as ear tufts and add a wild flyaway look that a flat craft piece could never match.
Supply note: open pinecones grip glue far better than tightly closed ones, so set any closed cones near a warm spot for a day before starting.
11. Leaf Suncatchers Hung In A Window
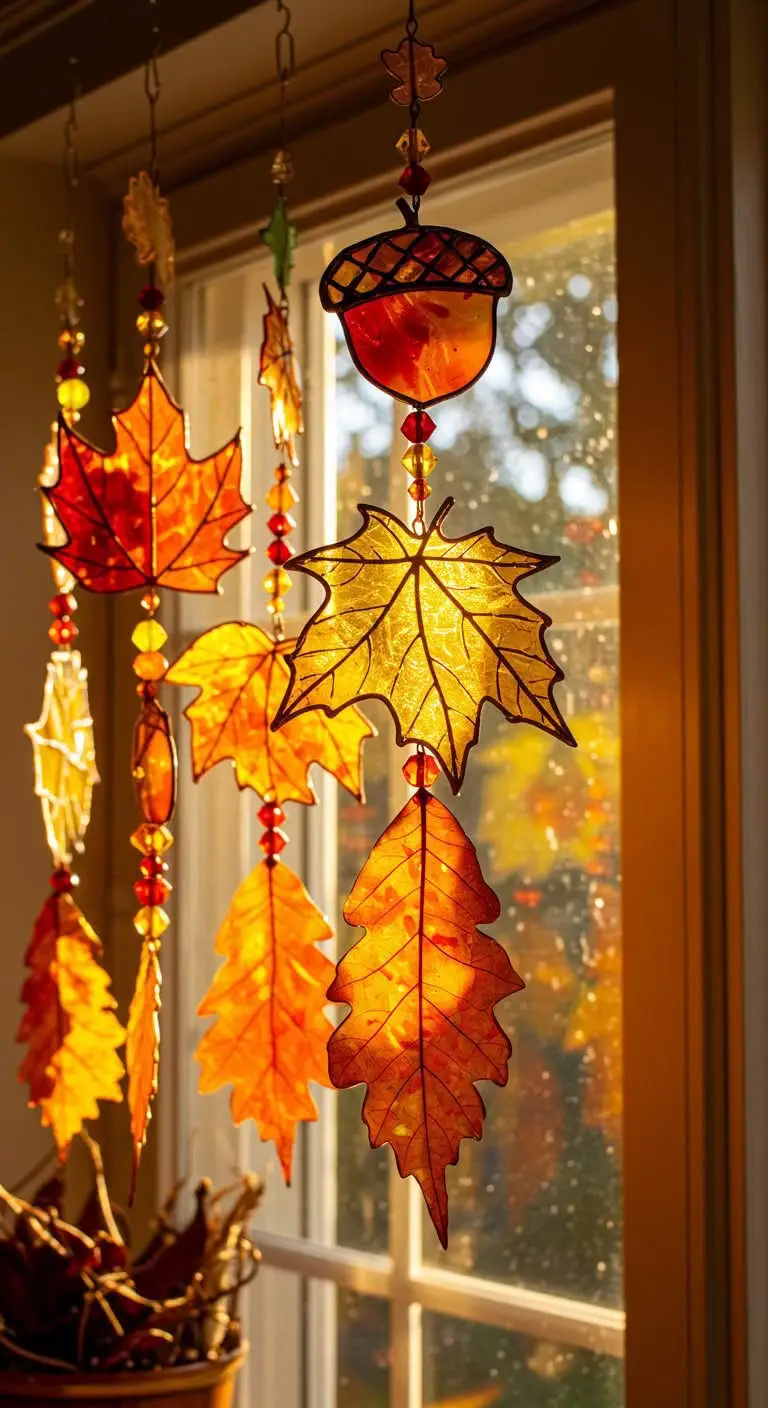
Best for: a classroom display idea more than a student craft, since these glossy leaf shapes look like stained glass work with wire and beads a young kid would not manage alone.
The finished result knows how to catch light, though, and that part is worth borrowing.
Hanging any translucent shape near glass lets the sun move through it and throw color across a wall or windowsill, which is the actual trick behind why this display works so well.
Kids can get the same glow with wax paper and crayon shavings ironed between two sheets, then cut into a leaf outline and strung on plain thread.
Tape or an adult run with an iron replaces the wire and glass here, dropping the skill level from adult craft show to normal school afternoon.
Try instead: laminate pressed leaves and punch a hole through the stem end for a simpler no melt version.
12. Handprint Fall Tree Made From Small Painted Hands
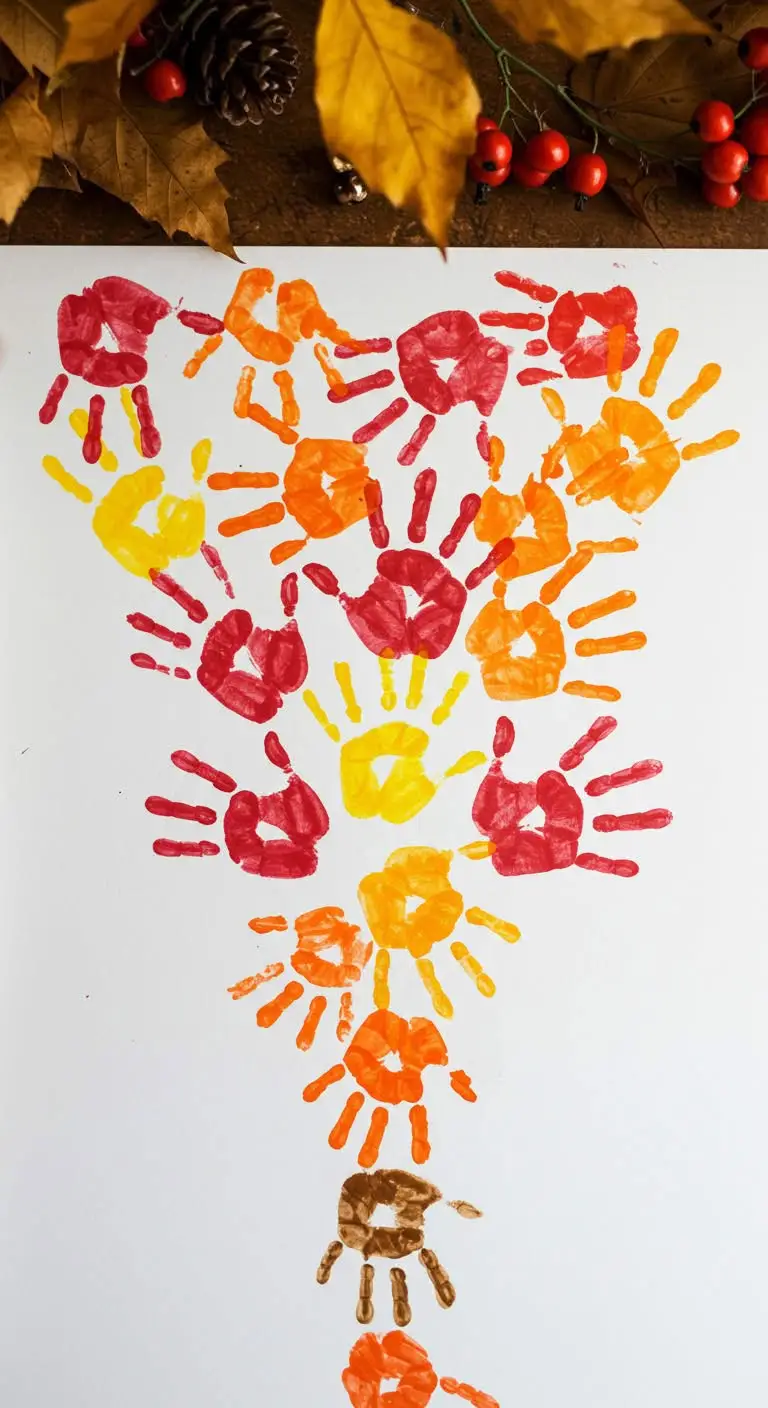
- Base: a large sheet of paper or poster board laid flat on a table
- Main piece: rows of handprints pressed close together to build a full canopy
- Color: red, orange and yellow prints mixed through the top, with one brown print lower down
- Finishing touch: a single brown handprint angled below the canopy to read as the trunk
Each kid presses one hand into paint and stamps it onto the paper, working from the top down so the canopy fills in before the trunk goes on.
Overlapping the prints tightly at the top makes the shape read as a solid treetop instead of a scatter of separate hands, and swapping colors every print or two keeps the canopy from looking flat.
Paint note: wipe excess paint off little palms with a damp cloth between colors, or the next print picks up a muddy mix instead of a clean shade.
13. Acorn Pendants On Ribbon
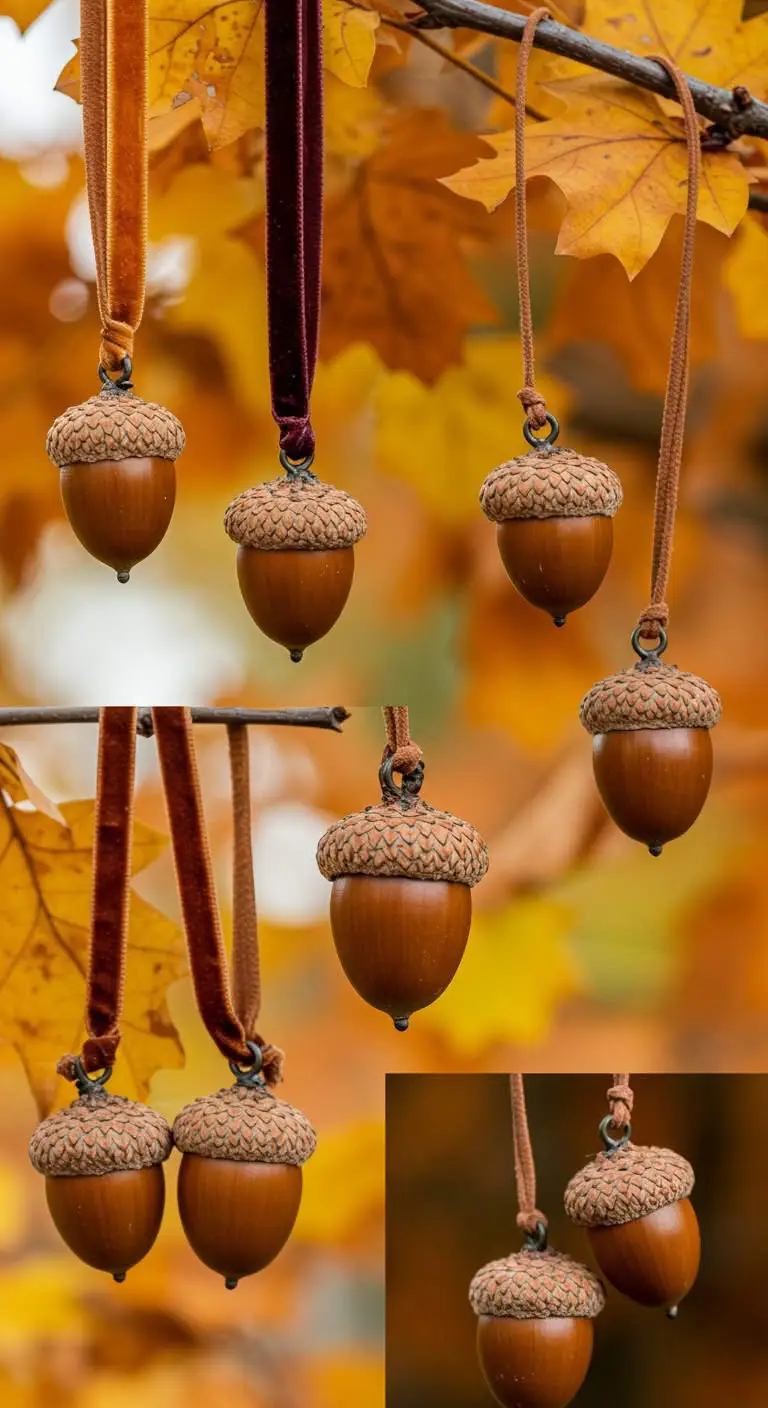
The acorns here hang from velvet ribbon and thin cord through a small metal loop screwed into the top, which puts this squarely in adult jewelry territory rather than a school age project.
One thing still works for a classroom version: the pairing of one shiny acorn against a soft ribbon color, since that contrast is what makes each piece worth looking at twice.
- Beginner version: skip the metal hardware and glue a loop of yarn straight onto the acorn cap instead, then knot it to hang.
- Care tip: real acorns dry out and crack over a few weeks, so seal them with a thin coat of clear glue if the piece needs to last through the season.
- What to avoid: skip using an actual pin or screw hardware with young kids, since the metal loop needs an adult to twist it into the cap.